Join Holly and Ashleigh this Thursday at 7pm (EST) for the 3rd lecture in the Cecil Striker Webinar series, Off the Shelf and into the Lab: Medical History, Preservation, & the University of Cincinnati Libraries’ Adopt-A-Book Program.
Ashleigh and Holly will talk about the work we do in the Lab and UC Libraries’ Adopt-A-Book program.
We’ve reached the end of Preservation Week and what better way to celebrate than with a fun how-to video on our Lab’s YouTube channel?!
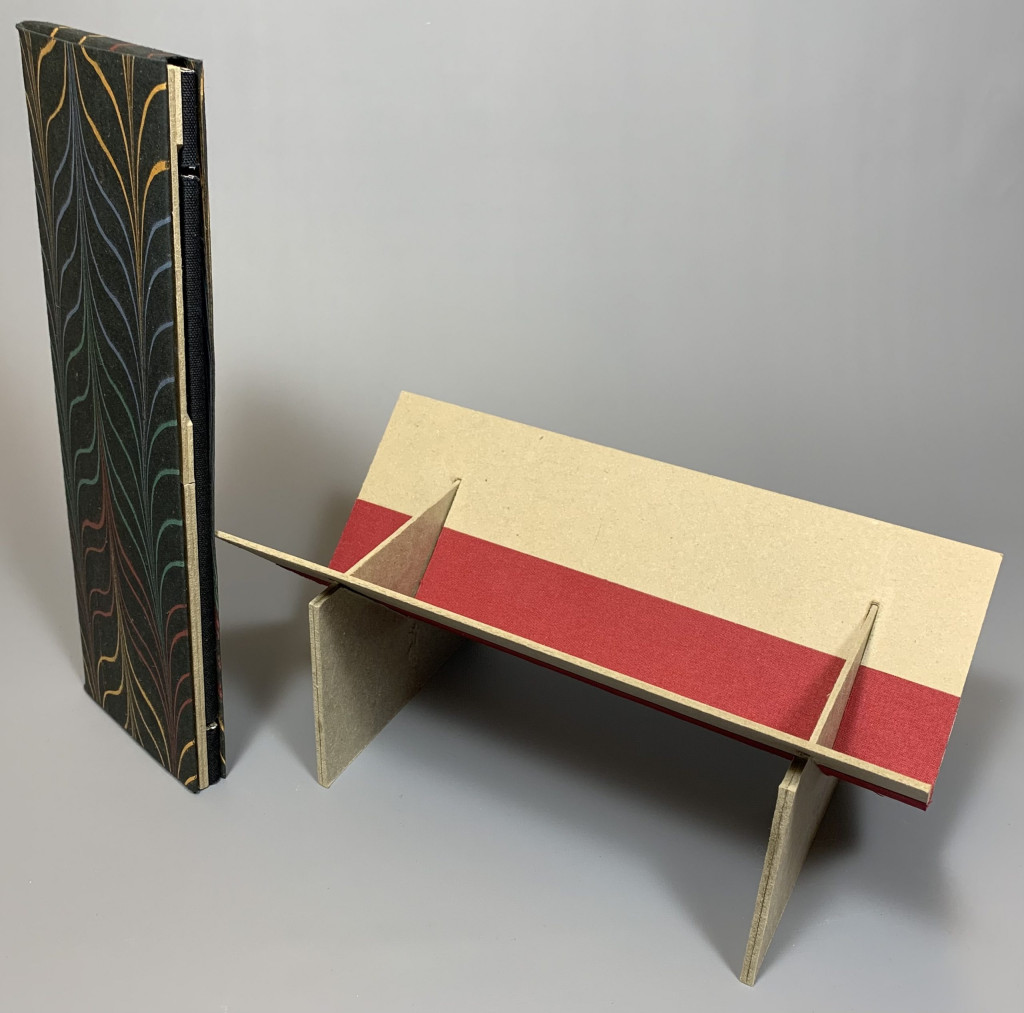
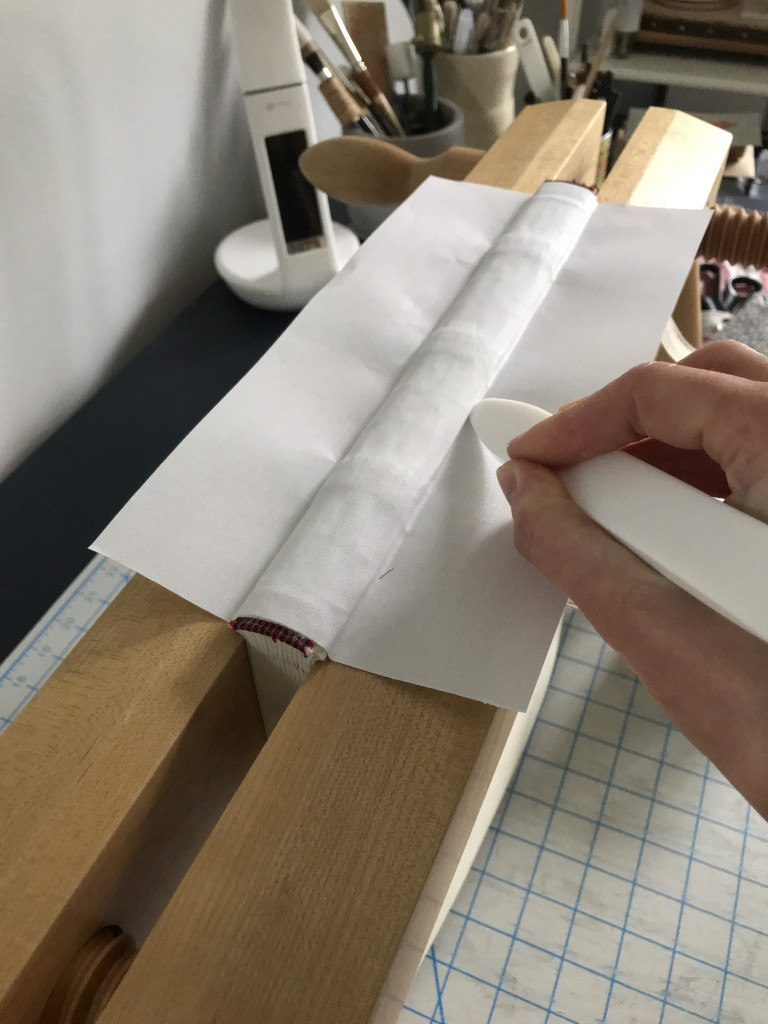
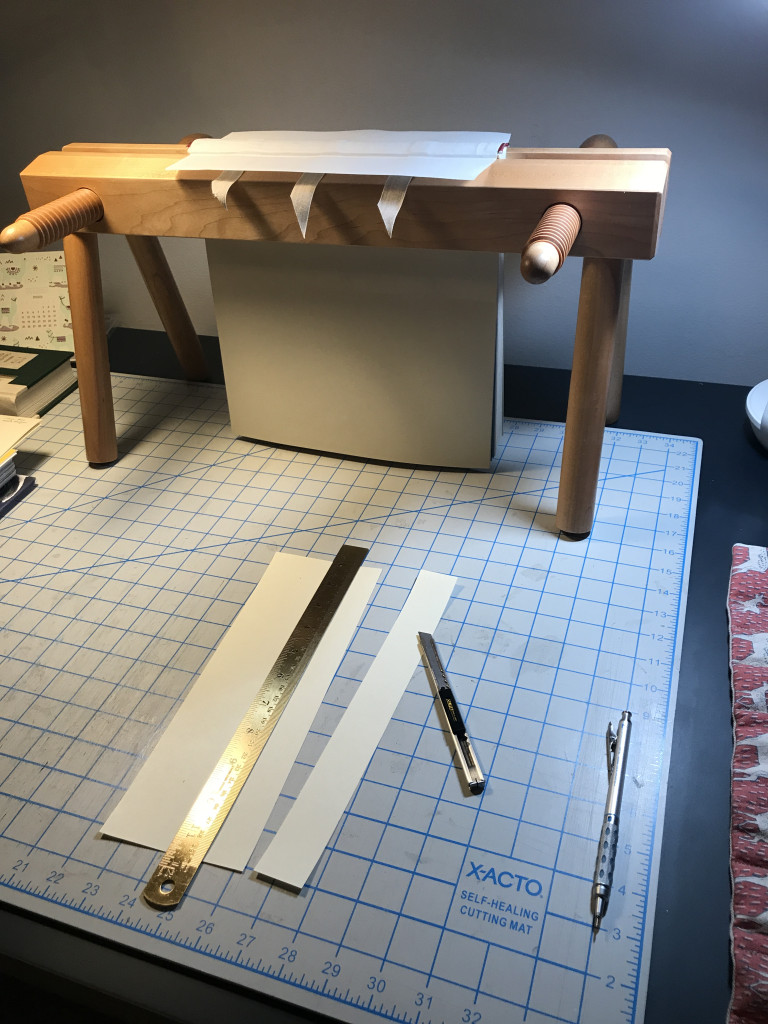
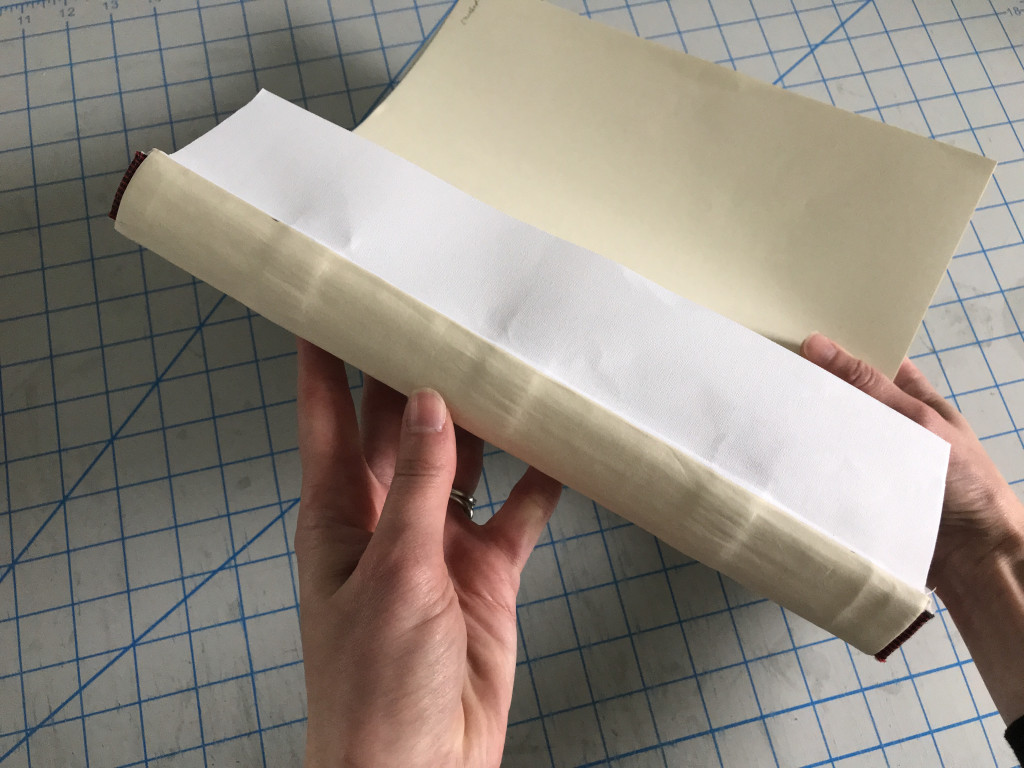
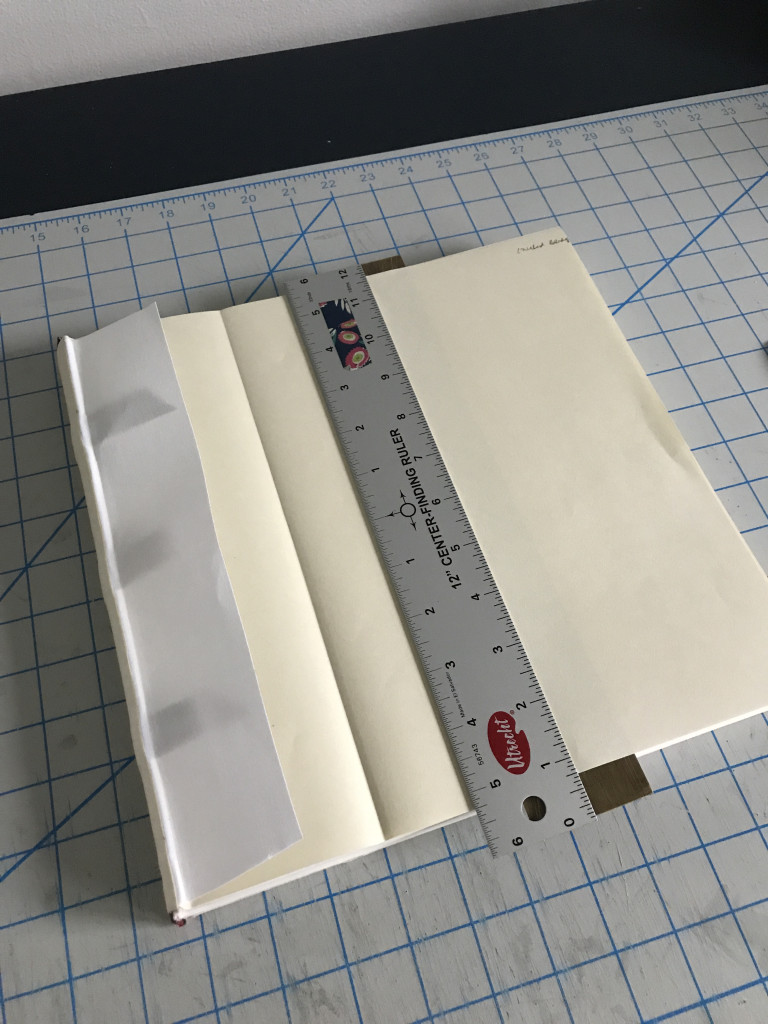
This video goes over how to make a collapsible punching cradle, step-by-step. Punching cradles are a useful bookbinding tool to have on hand in your toolbox. They allow you to create uniform sewing stations in your signatures or gatherings when you are preparing to sew a textblock. Best of all, this type of punching cradle is fully collapsible and easy to store while not in use; especially when you make one of these simple slipcases to hold all the pieces.
Here you can see a collapsed punching cradle stored in a paper slipcase made with marbled paper (left) and a punching cradle assembled and ready for use (right).
Don’t forget to “like” our video and subscribe to our YouTube channel to stay in the loop when we post new videos to the channel. If you decide to make your own punching cradle, we’d love to know what you thought of the video or, even better, tag us in a photo of it on Instagram (@thepreservationlab).
We hope you’ve enjoyed celebrating Preservation Week 2021 with us! We look forward to celebrating our 11th annual Preservation Week next year…maybe even in person this time?!
To celebrate nationalPreservation Week (April 25 – May1, 2021), staff at the Preservation Lab are sharing the following answers to the question below as they reflect upon the wealth of library resources located in the Cincinnati community:
What is your favorite treatment or project that you have worked on in the Lab?
Jessica Ebert:
Learning a new photographic imaging technique, RTI
In April of 2017 I had the amazing opportunity of attending a 4-day workshop at Yale University to learn Reflectance Transformation Imaging (RTI) from the experts at Cultural Heritage Imaging. It was one of the most exciting experiences of my career, and when I came back to the Lab to show the staff what I had learned, Aller Bucher Und Schrifften volume from Martin Luther was one of the first items we captured with RTI. I remember that moment when Catarina and I completed the capture and processed the images – we were just in awe of everything we could see with RTI that we couldn’t under normal illumination. Since then, we’ve made changes to our equipment and our workflow, so now the results are even better than they were back then…but this will always be my favorite.
Of all the projects I have worked on at the Preservation Lab, this item is by far one of my ultimate favorite treatments I was able to perform. This book was brought to the Preservation Lab in poor condition. The book had no binding, the text block was split in multiple areas, the sewing was broken, and several pages of the text block where either torn or had extensive loss. In addition, most of the text block showed signs of water damage. Since this book was in such poor condition and the curator of the collection wanted the book to be handled by scholars and the public, it was necessary to do a full conservation treatment.
I was thrilled when I got assigned to this book treatment. I love to work on any book, but the more complicated or involved treatments the better and this was definitely the case. In this treatment, I was able to repair the text block, reduce some of the tideline staining, fill losses and resew the entire text block, while also creating a new binding (called a split board binding) that is strong and flexible to allow such a heavy book to be read.
Before Treatment – Initial condition of the book when it was received by the Preservation Lab. The text block was split, the sewing was broken, and several pages were torn or had paper loss.
After Treatment – Conservation treatment complete. After the text block was repaired and resewn, the book received a new split board binding that allowed the heavy book to be read while mitigating further damage.
After Treatment – The new split board binding provided the book a more flexible opening.
This treatment took a long time to complete, and to this day it is still one of the projects that I have enjoyed the most. Click here to see the complete treatment report and all the photographic documentation. To learn more about conservation split board bindings, check out the Preservation Lab blog post by Kasie and Jessica.
Kasie Janssen:
Iron gall ink treatment of the CHPL Jones Account Book
Washing and rebinding treatments are always a favorite when they come across my bench, as they allow a highly damaged item to become usable and accessible once again. An account book of Jones and Rammelsberg offered one such treatment as it came to the lab with a myriad of issues: a damaged book block without a binding, corroding iron gall ink, previous mold damage, and a shocking amount of pest evidence. The treatment is incredibly memorable because to tackle the issues of aging iron gall ink I was able wash the pages of the book block using a calcium phytate bath to stabilize the manuscript. Once the washing was complete, I was able to resew and rebind the book block, making it whole, functional, and protected once again. It is rare and special to have done such an involved treatment, but in this case the in-depth steps allowed previous damage to be treated and helped remedy the inherent vice of aging materials.
The book block before treatment was highly damaged, so much so, that it was difficult for library patrons and staff to access and use the item without a cover.
Handling the book, you’d never know the hours of labor that went into the treatment (including learning!), but its functional form makes it ready for use once again.
Creating the Italian ledger binding for our teaching model collection
The lab creates a lot of models. Many of these models are made in preparation for treatments. However, some models are created with instruction or engagement in mind. These models, such as the Italian stationery binding (laminated archival bind) I created, help illustrate the history of the book as its form and manufacturing process change over time. Check out the model at the blog entry where you can see a video of the binding being handled. Follow the instructions on the blog make you very own, and in the future, come see it for yourself when our in-person open houses resume in the future.
View of the cover fully opened that shows the overband lacing pattern, the front fore edge flap, and the buckle clasp.
Ashleigh Ferguson Schieszer:
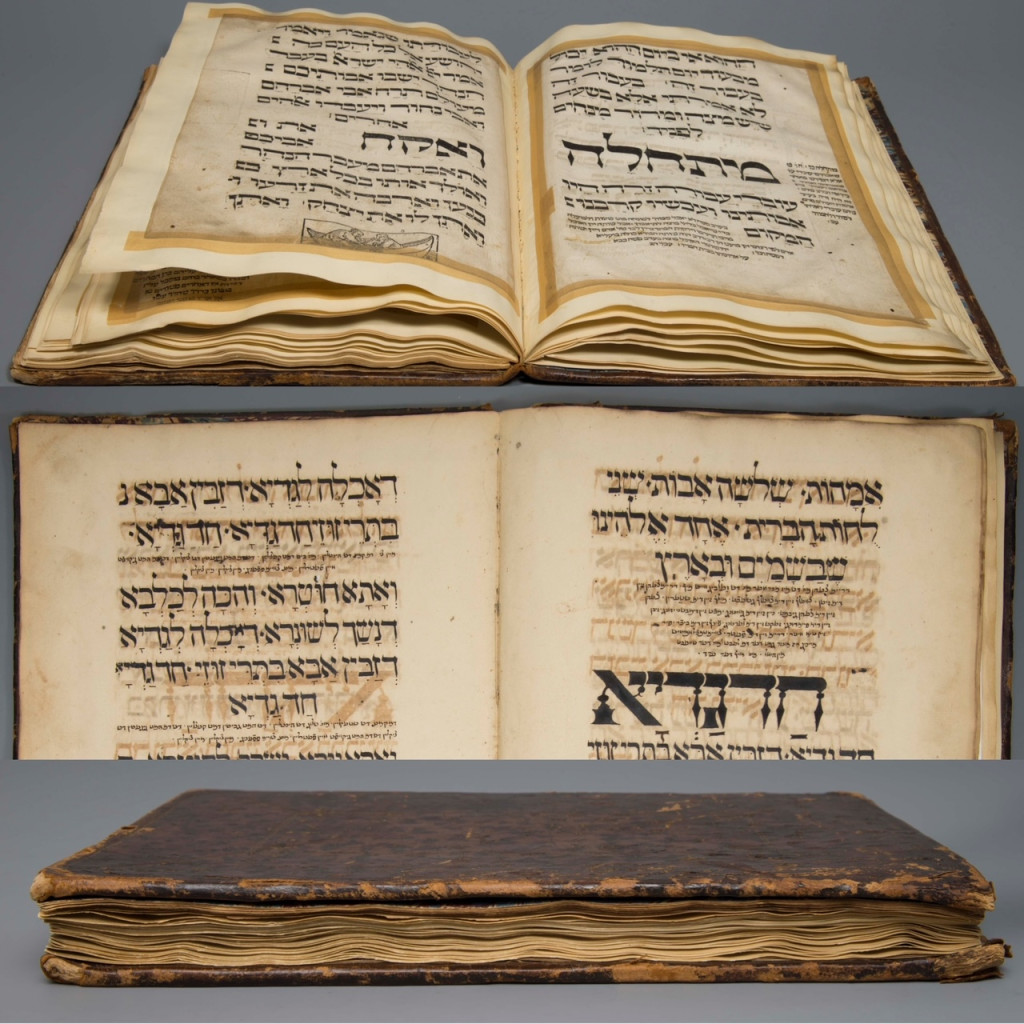
Treatment of a Haggadahowned by Hebrew Union College
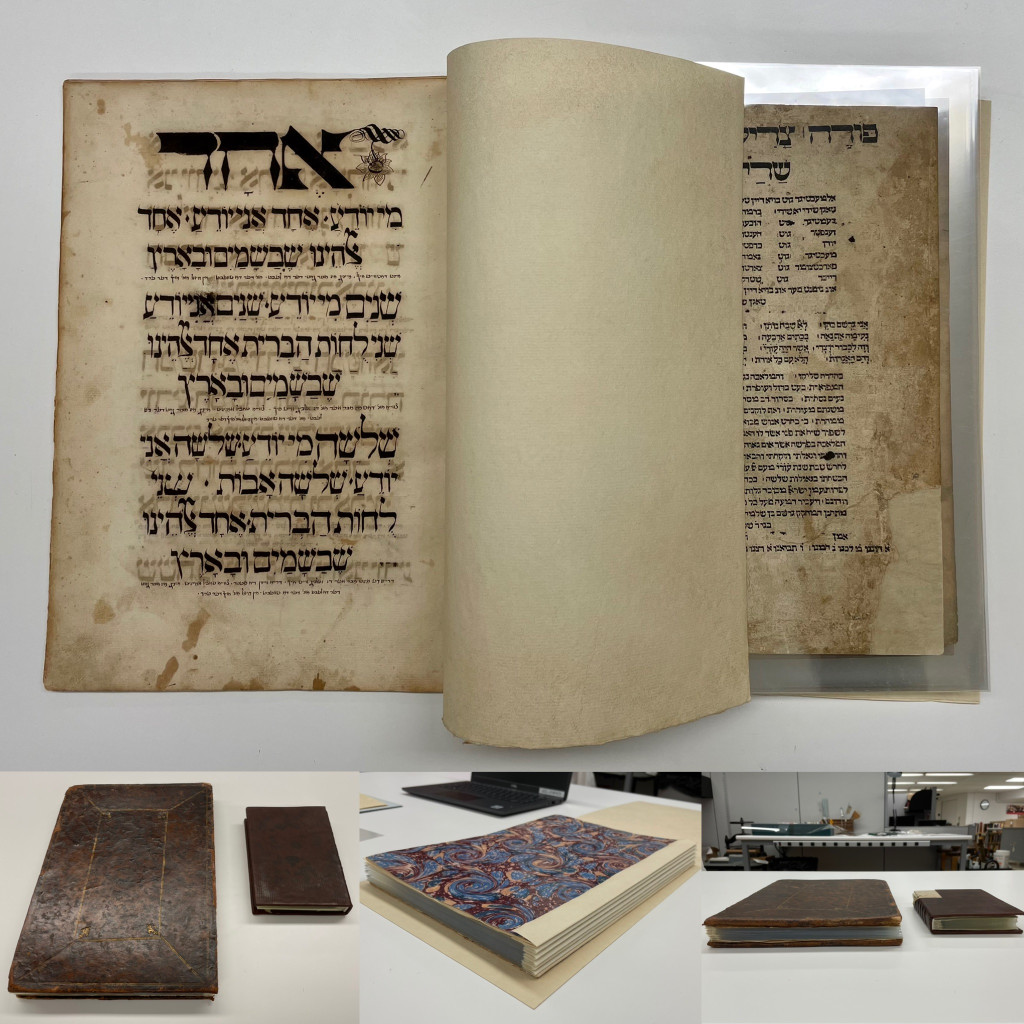
I particularly enjoy the problem solving nature of special collection treatments and thus, my “favorite” treatment is usually the one I’m working on. Currently, I’m treating a Haggadah owned by Hebrew Union College that dates to 1526 or 1527. While I’ve treated other haggadahs from HUC, including this one, this project involved iron gall ink treatment AND rebinding a textblock with two different sized leaves, or pages, into its original historic leather cover. Because the binding had been previously treated and reformatted with materials that did not age well, collaboration with the librarians at HUC required exploration into whether we wanted to re-create the past reformatting option with longer lasting materials, or perhaps, explore a new option altogether. Before we committed to a solution, I created a model to test out a new option since unanticipated questions or outcomes often arise during experimental pursuits. For that reason, it’s better to problem solve on a model, rather than on an actual special collection material. In the end, the librarians and I were happy with the results of the new option, and I’m currently at the stage where I’m ready to start rebinding the pages of the actual object.
The top image shows the book open to smaller sized printed leaves before treatment. Leaves are previously reformatted with yellowed tape along the edges, attached to larger paper frames. Paper frames are cockled and distorted. The middle image shows a detail of untrimmed, full-size manuscript leaves. The bottom image shows the fore edge of the binding before treatment.
These images show the model that explores a solution to encapsulate the smaller pages into polyester sleeves that could be sewn into the binding next to the larger pages. This required staff to weld polyester sleeves with paper hinges that could be sewn through like a gathering.
The image shows the binding ready for resewing with its new encapsulated leaves, or pages, next to the created model.
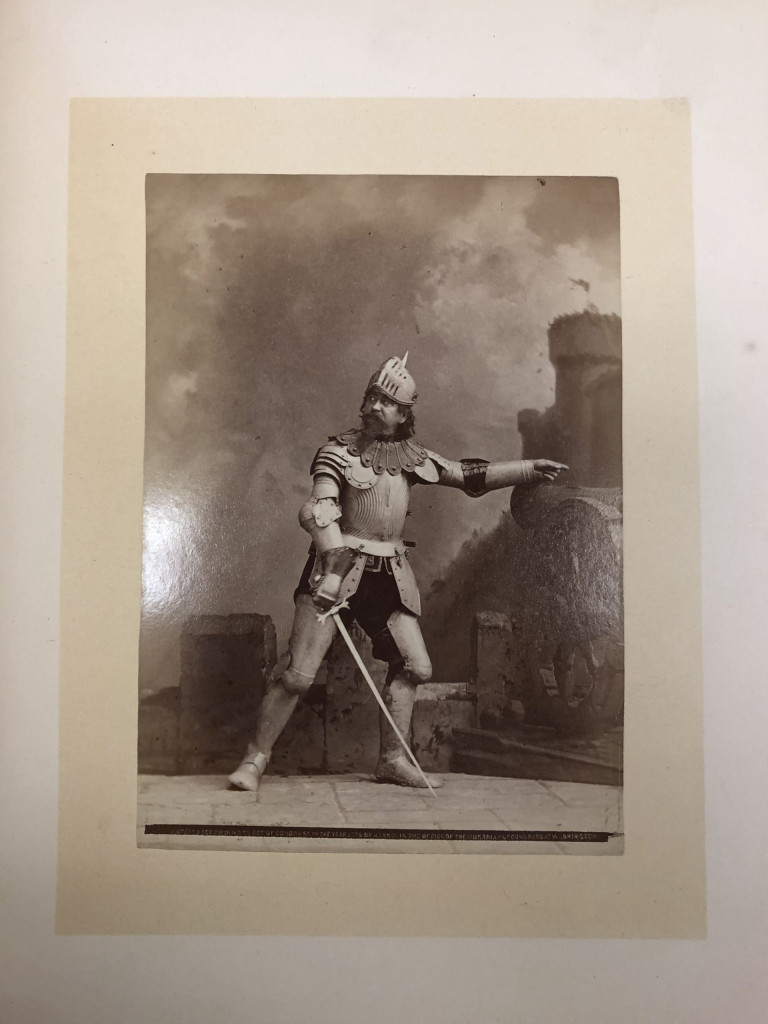
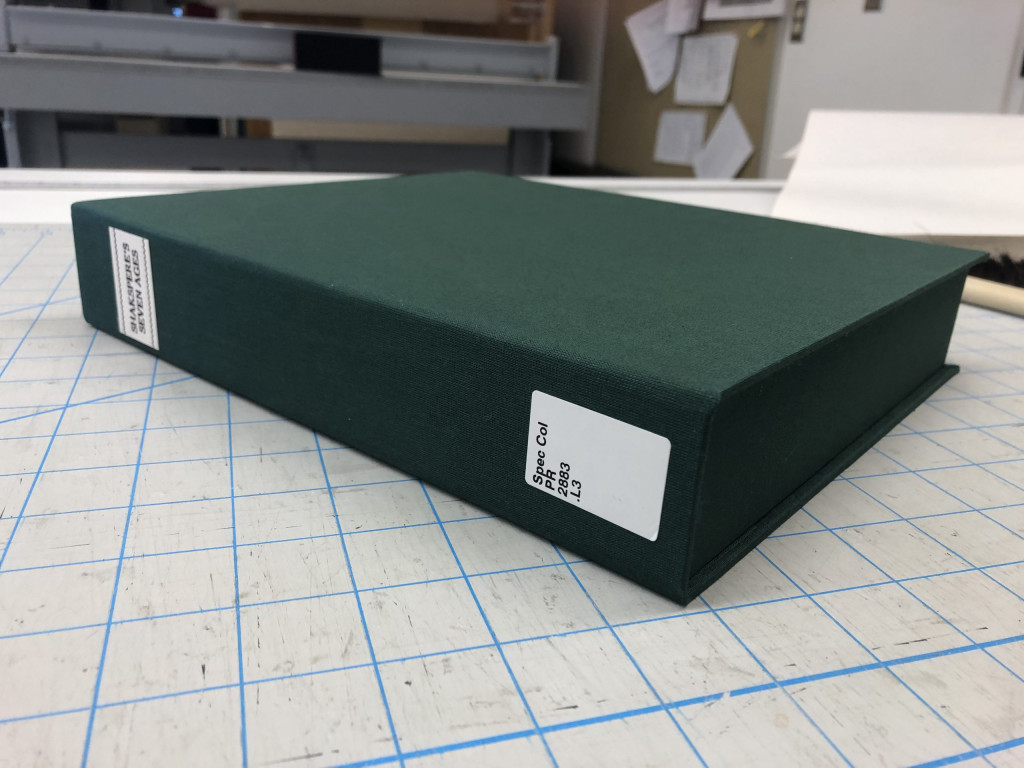
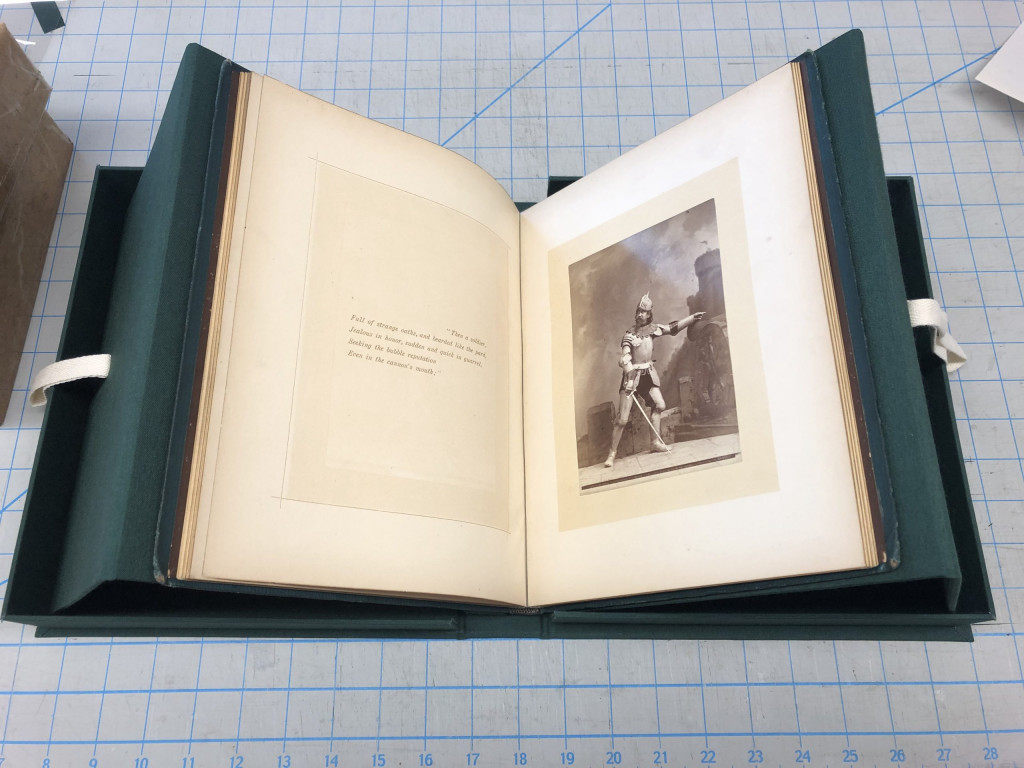
Not only was this piece based on a favorite subject of mine (I love Shakespeare!), this was a historic photograph treatment I was able to handle with just a little guidance. I was able to properly identify the photographic elements on the first try, performed a surface cleaning on the piece, and created my very first cloth-covered clamshell and cradle to house it. It was such a wealth of learning experiences within one project, which is the best part of my work!
Before cleaning; albumen card (note the finger prints in the upper right corner). The image depicts the photographer as a soldier.
Cloth-covered clamshell exterior.
Cloth-covered clamshell interior, with piece opened to surface cleaned soldier image in integrated cradle.
Chris Voynovich:
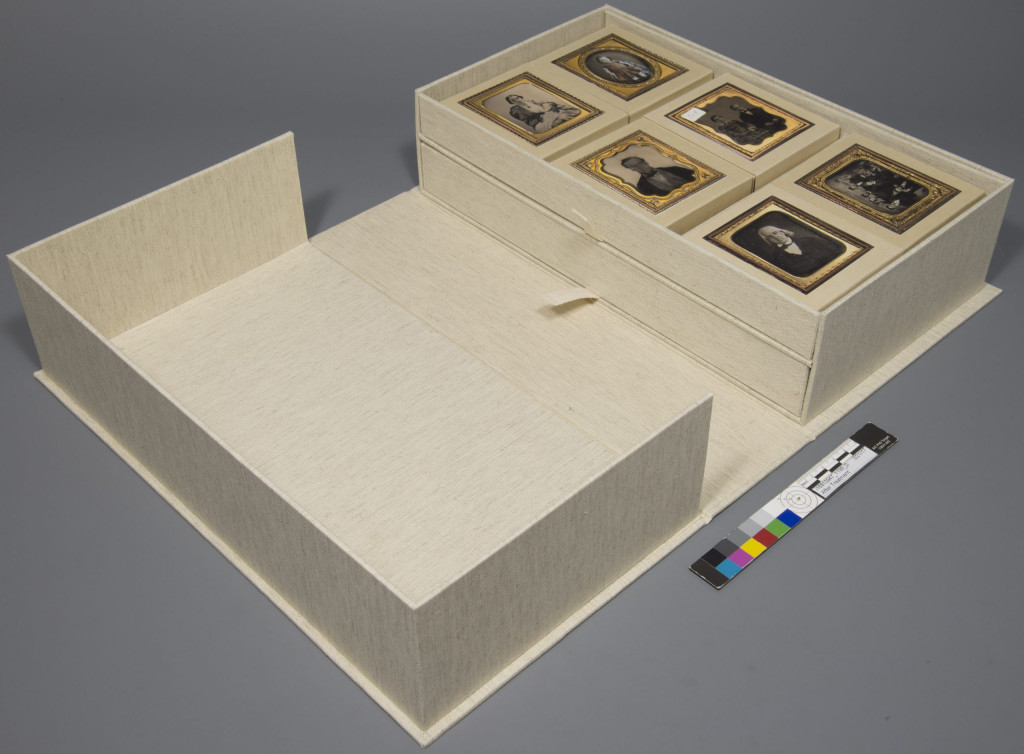
Constructing a custom cloth-covered enclosure to house the Public Library’s William S. Porter Collection of photographs
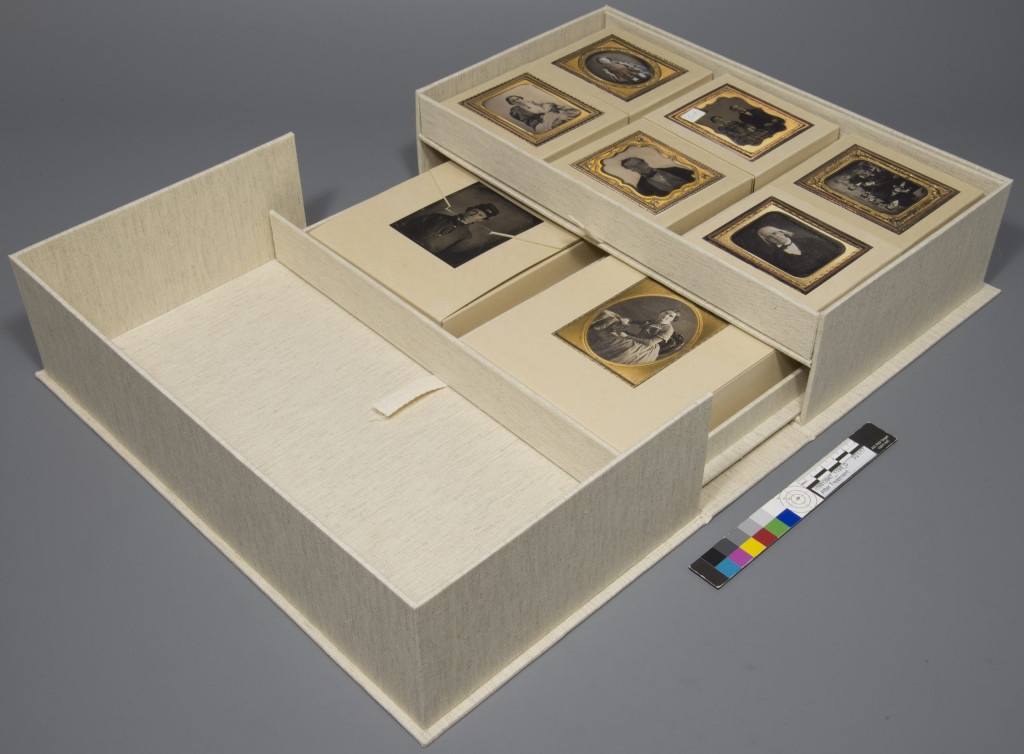
One of my favorite aspects of the job here, in the lab, is designing and creating custom enclosures. This collection of rare daguerreotypes, ambrotypes, and tintypes is an example of adapting a standard cloth covered clamshell to accommodate a collection. I created two trays with pull tabs that are removable for easy access and display. Each photograph has its own tuxedo box and is set in polyethylene foam (Volara) for protection. The tuxedo box enclosures are identical in size to reduce confusion while repacking. Check out this blog created by Jessica that shows a gif of the enclosure opening and closing, and this blog post showing a similar enclosure I created for a dairy collection.
View of the opened cloth-covered clamshell with the two removeable trays in place. The trays contain the collection of cased photographs in tuxedo boxes with labels for easy identification.
This image shows the bottom tray partially pulled out, displaying the two larger cased photographs.
Today at 3pm (EST) join Jessica and Catarina on the Preservation Lab’s Instagram (@thepreservationlab) for a quick, informal Instagram Live.
Then tomorrow, make sure to tune into the Public Library’s Instagram (@cincylibrary) at 12pm (EST) for an in-depth Instagram Live event where Catarina and Jessica will be sharing treatments they are currently working on; giving you a behind-the-scenes look and answering all your questions “Live in the Lab”.
Wednesday 28th – We’ll be sharing our “Favorite Treatments/Projects” right here on our blog.
Thursday 29th – Catarina and Jessica will be “Live in the Lab” at 12pm for an Instagram Live event hosted by @cincylibrary
Friday 30th – We will have a new video up on our YouTube channel – “How to Create Your Own Collapsible Punching Cradle”.
We hope that you can join us for all the activities we have in store for Preservation Week 2021. If you can’t wait for the celebration to begin, then check out our past Preservation Week activities!
Previously, we talked just a little bit about halides, and how they fit into the formation of silver gelatin-based images. Today, we’re going to take a closer look at part of the “how.”
Let’s begin with a brief overview of the darkroom process. As a reminder, the mechanics of creating a black and white print generally include the following steps:
A paper is pre-coated with a halide salt and silver nitrate that are mixed in a binder such as gelatin.
An image is first generated by projecting a source of illumination (like the sun or a lamp) through film onto a coated piece of paper.
Next, the paper or film is developed in a bath of chemicals. This is the part of the process the image seems to “magically” appear!
The image developing chemical reaction is stopped in a “stop bath.”
The paper or film is moved to a second bath to “fix” the image in a fixative bath.
The photograph is rinsed and hung to dry – ready to safely see the light of day.
Now, let’s delve a little deeper into the chemical reaction described in step two, beginning with a bit of a thought experiment. If I say to you, “semiconductor,” what springs to mind? Something involving electronics, perhaps? Maybe chips, lots of little circuits and tiny wires? Maybe, if you’re more photography-minded, a digital camera? All excellent things to think of! With this in mind, what if I told you that our silver gelatin emulsion is also a semiconductor, one that converts light into latent images instead of electricity?
Well, that is what we’re going to explore today, the basics of the mechanism by which light gets our emulsion ready to record latent images. The light shines on an atom (in this case, our silver halide ion), energy is transferred to an electron, and the electron moves to an excited state and is ready to make chemical magic.
If you refer back to your basic chemistry, atoms are composed of three parts: protons, neutrons, and electrons. Protons are positively charged and reside in the nucleus (center) of an atom with chargeless neutrons. Negatively charged electrons orbit the nucleus in bands. When all things are equal, an atom has the same number of protons as electrons, leaving the atom neutral. There aren’t a lot of atoms that are naturally like this, however; an atom will often have too many or too few electrons in orbit. This is a good thing, as it not only makes them stable, it makes them available for bonding with other atoms and creating chemical reactions.
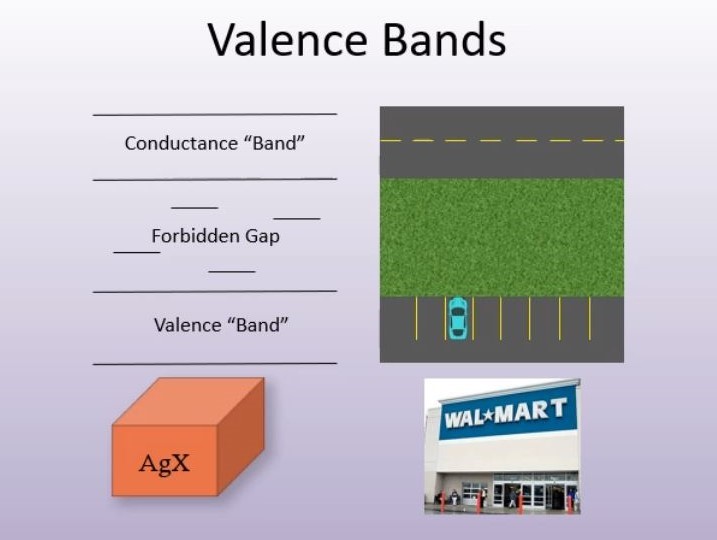
Now let’s apply some of that to our silver halide. The electrons near the nucleus of our ion are in the “ground” state. They’re unexcited. The nucleus has them firmly gripped in its gravitational pull and they’re uninterested in going anywhere. This area of grounded electrons is known as the valence band. In order for them to be available for any sort of exchange, they’ll need to get farther away from that nucleus, and out into an outer band of the ion, conveniently known as the conductance band.
How does this all relate to the parking lots I mentioned in the title? I’m glad you asked. The parking lot analogy is a fantastic illustration of the process by which light interacts with matter. Let’s think of it this way: the nucleus of the silver halide ion is your typical Big Box Store. Directly outside of the store is the valence band parking lot, full of electron cars, all off, all waiting in the ground state. Beyond the parking lot is a strip of grass, which we’ll get to shortly, and beyond that is the conductance band (i.e, the road), where the cars are all in motion, on their way to any number of places.
The parking lot analogy, illustrated, from AIC’s Photographic Chemistry for Preservation, unit 2, “The Latent Image.”
In order for the cars to get out of the valence band, they’re going to need some energy. For our electrons, the needed energy is light. Once they get light to get the engines going, they can pull out of the parking lot and onto the road and drive off to chemical reactions.
Now let’s detour briefly to that grassy strip that I mentioned earlier. It’s known as the forbidden gap. Ideally, this area is empty. However, due to defects such as insufficient energy, an electron may not be able to completely cross to the conductance band, and may be temporarily stuck in this gap. Even here they can be useful as stepping stones for other electrons that need to cross over. Stuck electrons will either receive more energy to get them to the outer bands, or they’ll lose energy and be pulled back to the valence band.
I’ll note here that this structure is characteristic of all semiconductors, including digital camera sensors. In silver halide grains, this excitement of electrons will always happen when it comes into contact with light, as silver halide has a light sensitivity of 100%. No matter what, when a grain of silver halide is exposed to light, it will always liberate an electron. You also needn’t think of it as just one electron at a time being excited in this fashion. The grain can have so much energy that its valence band is completely empty, and vice versa.
What happens after this? Well, that’s an exploration for next time.
Hyacinth Tucker (UCL) — Bindery and Conservation Technician
About two years ago, I set upon a mission to gain expertise in the area of identification and treatment of photographic materials. Under the guidance of our conservator, Ashleigh, I developed an education plan that was split between the theory of learning the ins and outs of photograph identification, and the hands-on work of treating pieces that came into the Lab. Of course, these two things go hand in hand. If you can’t identify a piece, you can’t treat it correctly, right?
Fast forward to last year. With the start of the pandemic and the transition to working from home, my education plan changed radically. If I’m not in the Lab, I can’t spend much time on treatment, so I had to get a little creative and work on other ways to learn more.
I am about halfway through the series; a triumph for me, as I have never been one for the study of chemistry. I will say that while it is still very technical, I’ve had a lot of good pegs to hang the information on, owing both to my earlier studies in photograph conservation and my personal history with film photography. It’s been a tremendous thing, viewing things that I learned as a photography student from a different angle. So far, it’s been a great journey.
In this series, I will share with you some of the most fascinating things that I’ve learned so far. My aim will be to keep the technical as simple as possible, for those of you who are like me, still coming to terms with the deeper science. The small bites help it all make sense, I promise. Hopefully, you’ll find it all as interesting as I have.
Before we can understand anything else, we need to talk about halides. What are those and why are they used in photography? Good questions! Halide salts are derived from halogens, which occupy group 7A (column 17) of the Periodic Table of Elements (see below.) Halide salts are used in photographic emulsions that are spread over a substrate (such as paper or film) before the substrate is exposed to light. The silver halides react to the light to form an image when developed.
I should note here that silver gelatin prints, albumen, and collodion photographs all utilize silver halides in their chemical composition. However, silver gelatin is unique among the three in that it is the only one that uses a true emulsion; in albumen and collodion coatings, the halides rest on the surface.
Photograph – silver gelatin process
Photograph – albumin process
Photograph – collodion process
In forming the silver gelatin emulsion, halide salts are combined with silver nitrate and water to form silver halides, the compound at the core of silver gelatin photography. Silver nitrate is pretty much universally used regardless of halide salt, as it is water soluble (it dissolves) but not too much so. The freed silver will look for a bond partner, and the halides in halide salt fits the bill. As a result, silver nitrate, when combined with a halide salt in water, will result in silver halide and a left over salt.
This reaction, which seems like a lot, I know, is referred to for our purposes as “The Emulsification Equation.” To refresh our memories a bit, an emulsification is a liquid (here, gelatin) that contains fine particles of another liquid (the silver halide) without fully combining. Think mayonnaise, or butter. (This isn’t perfectly analogous, as silver halides are crystalline solids and not liquid fats, but the basic idea is the same.)
Chemically speaking, that reaction looks like this:
Equation for emulsification
As a quick reminder, Ag = silver, N = Nitrogen, O = Oxygen, K = Potassium, and Cl = Chlorine.
Now, if you’ll look at the image of the halogen column of the table below, you’ll see a number of options for salts to combine with silver nitrate. Older emulsions involved bromine or iodine; more modern emulsions tend toward chlorine. Crystals formed from silver chloride salts are much more uniform in structure, which makes its use outcomes much more predictable.
Salts that will combine with silver nitrate
I’m sure you’ve noticed that we’ve got a couple of halogens unaccounted for, namely fluorine and astatine. Neither of these are used for this kind of work, and for good reason. Fluorine, for its part, is very water soluble. Very water soluble. To put it in perspective, sodium chloride (regular table salt) is about 35% water soluble. I’m sure that in the course of cooking, we’ve all dissolved salt in water, and you can recall how relatively simple that is to do, though not without some small effort. Well, fluorine salts are about 172% water soluble! You could use it for your emulsion, but moments after developing an image in a water-based solution, you’d see it dissolve before your eyes.
I’ll note here very briefly that chlorine, bromine, and iodine are also more soluble than table salt, but not nearly as much as fluorine, making them perfect partners for our silver ions.
Meanwhile, astatine is…well, it’s radioactive. I think you can see the problem with this one.
And there you have it, a short and hopefully painless explanation of the humble halide in silver-based photography. In the coming months, we’ll be looking at other fascinating aspects of halides and our Emulsification Equation.
Hyacinth Tucker (UCL) —- Bindery and Conservation Technician
One of our most recent additions to our channel is the recording of our Virtual Lab Tour and Live Q&A, hosted by the Cincinnati & Hamilton County Public Library, which took place on Tuesday. If you weren’t able to join us live, please take a look; it was a very fun event and we had so many great questions from our live viewers.
Make sure to subscribe to our channel so that you can stay up to date on any new videos we add! And don’t forget to like videos, and we’d love to hear about what you’d like to see more of from us in the future.
The Lab will be offering a virtual lab tour on Tuesday, January 26th at noon (EST). The Facebook Live event will be hosted on the Cincinnati & Hamilton County Public Library’s Facebook page. Staff will give a tour of all of our most used and loved areas of the lab and will highlight how we use the spaces and the equipment, tools, and supplies stored in each space. Following the tour, we will be doing a live Q&A where you can ask us any questions you might have.
We hope you can join us for our first Virtual Tour, but don’t worry if you can’t, a recording of the tour will be available after the event so that you may view it at your leisure.
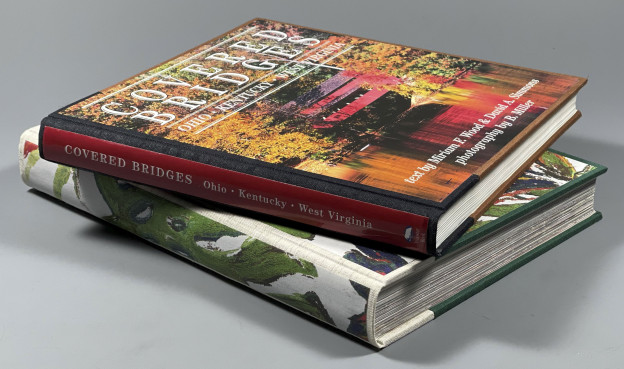
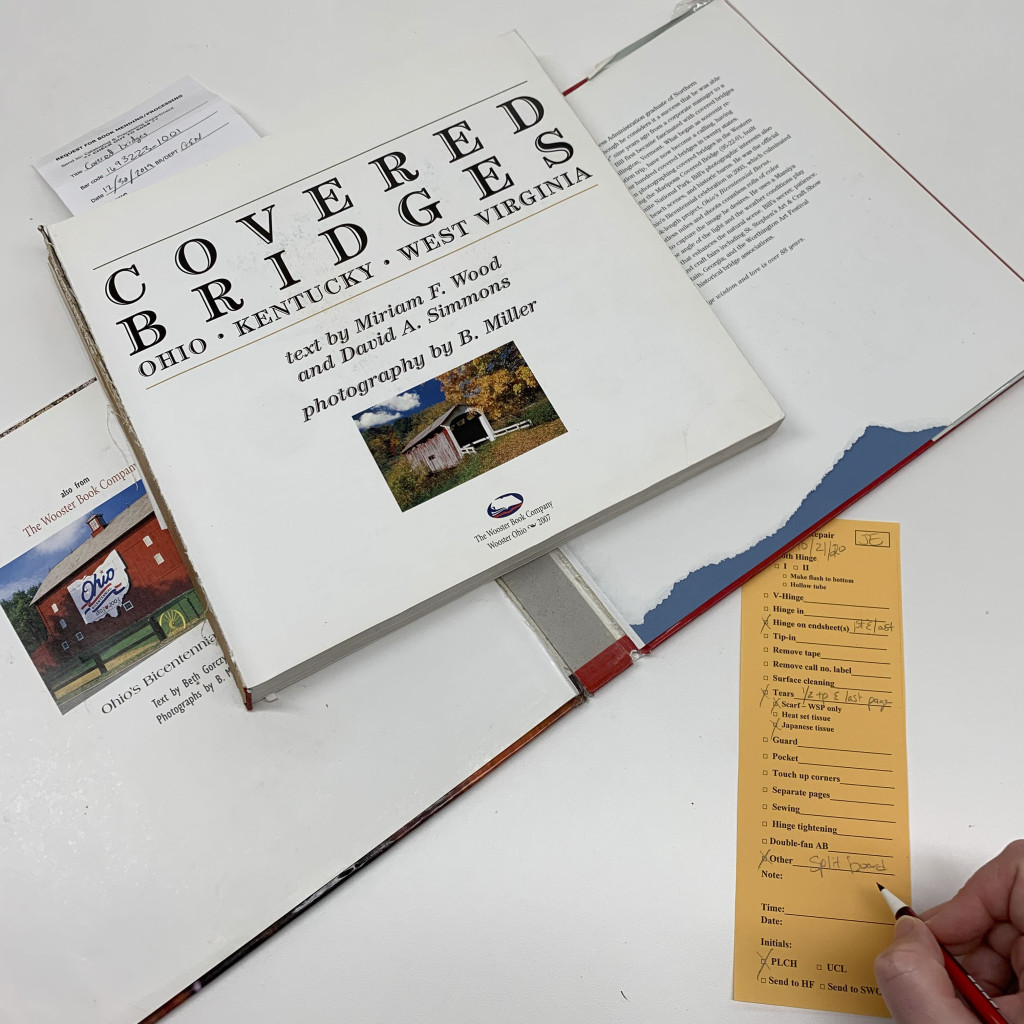
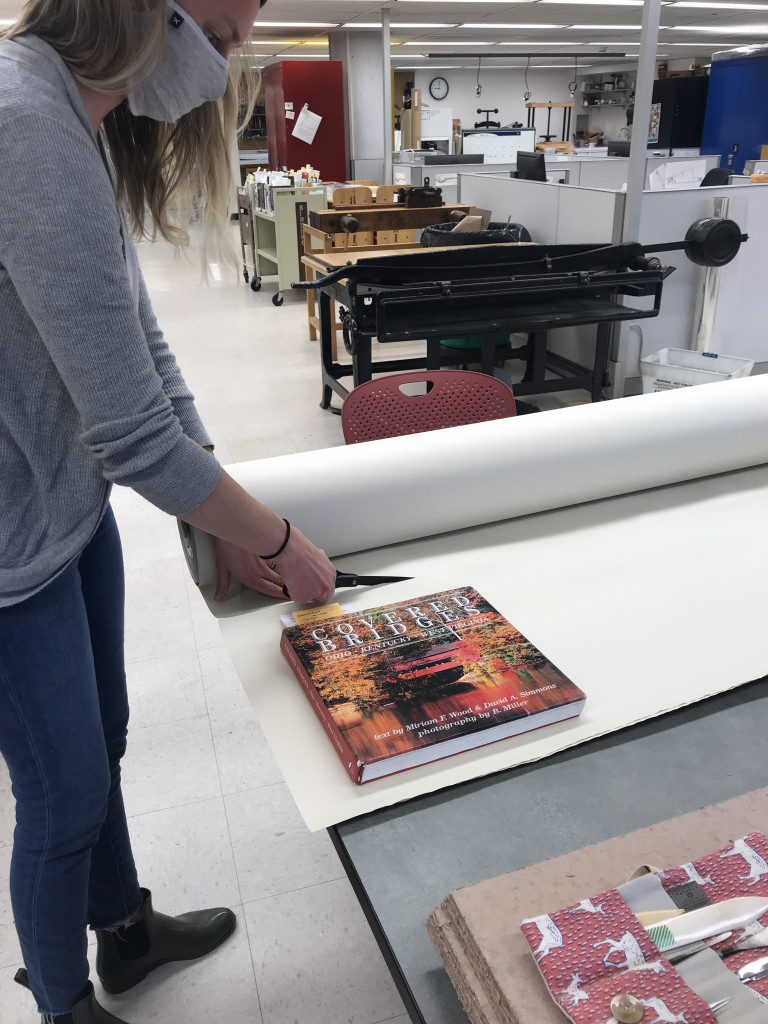
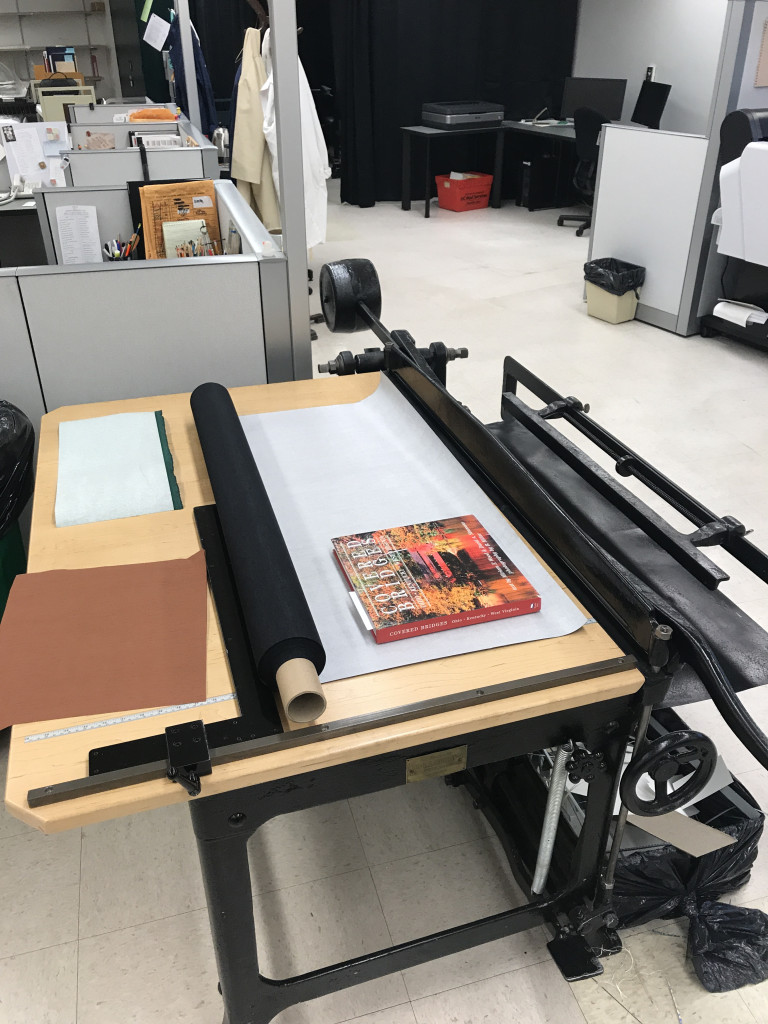
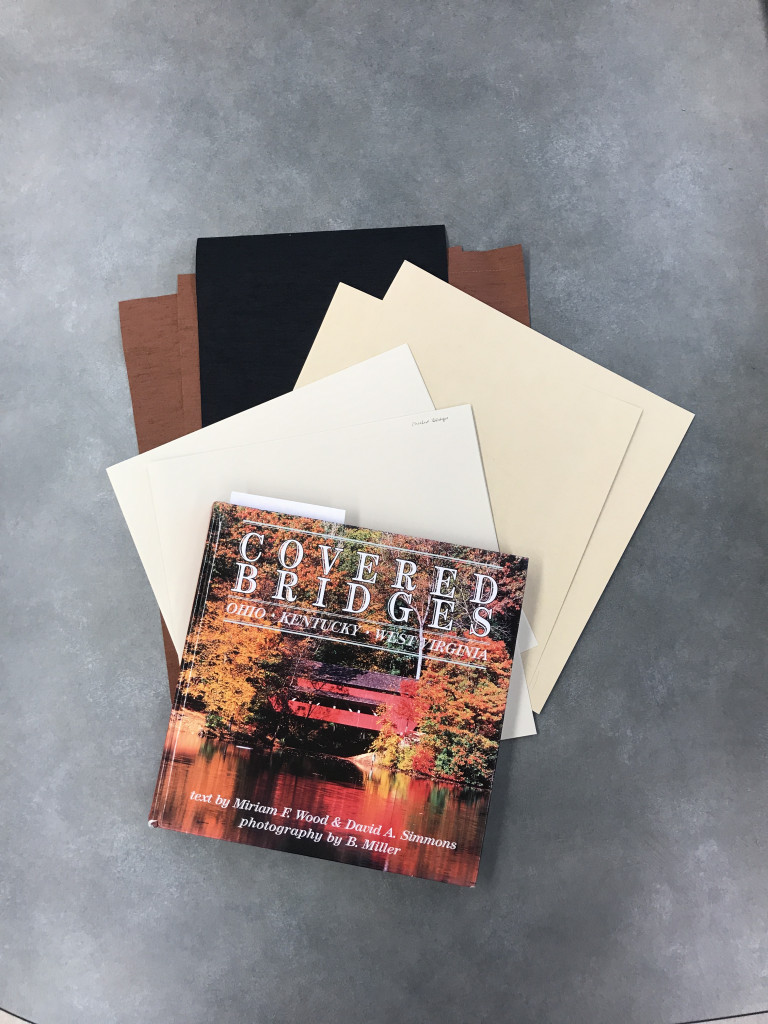
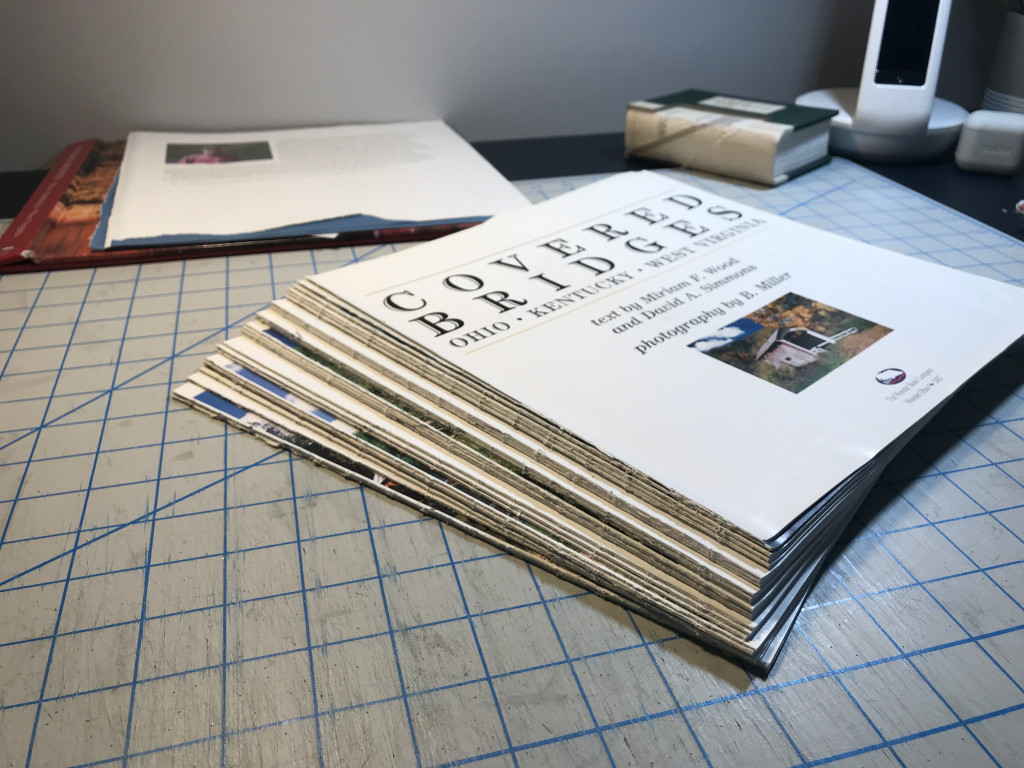
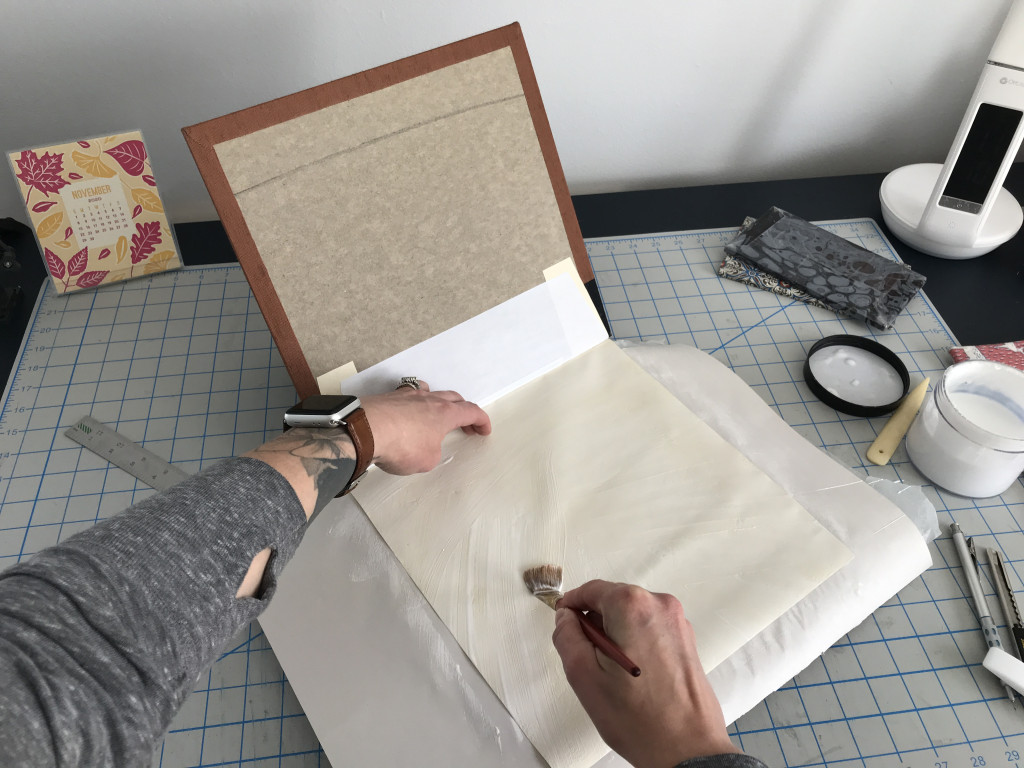
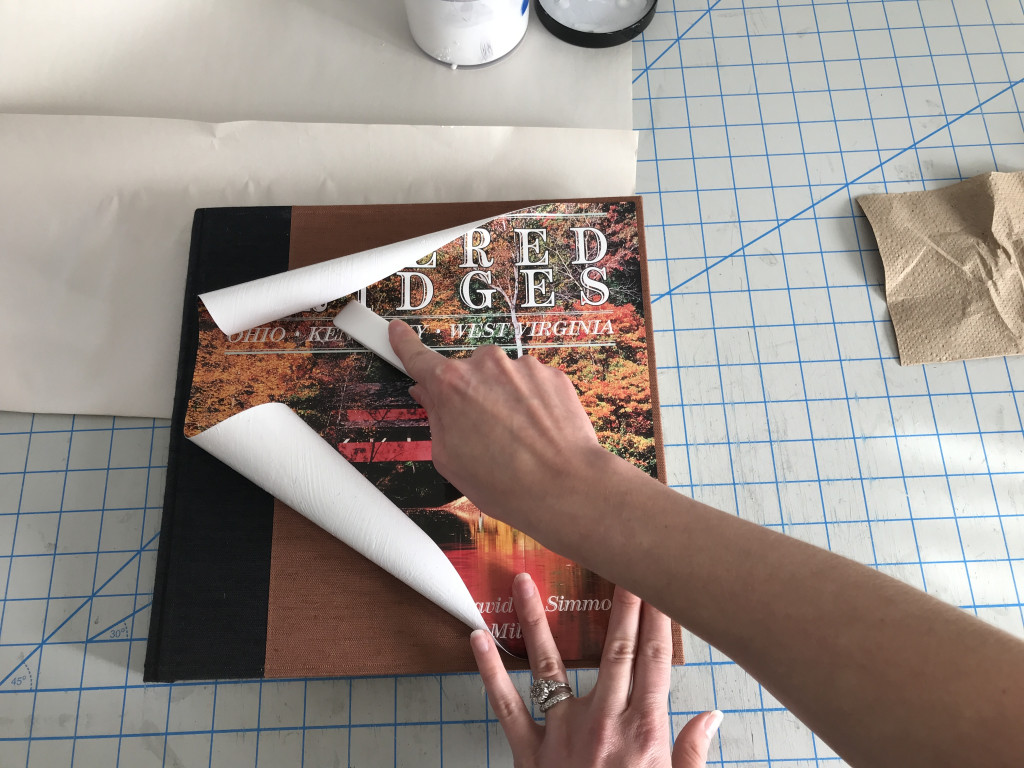
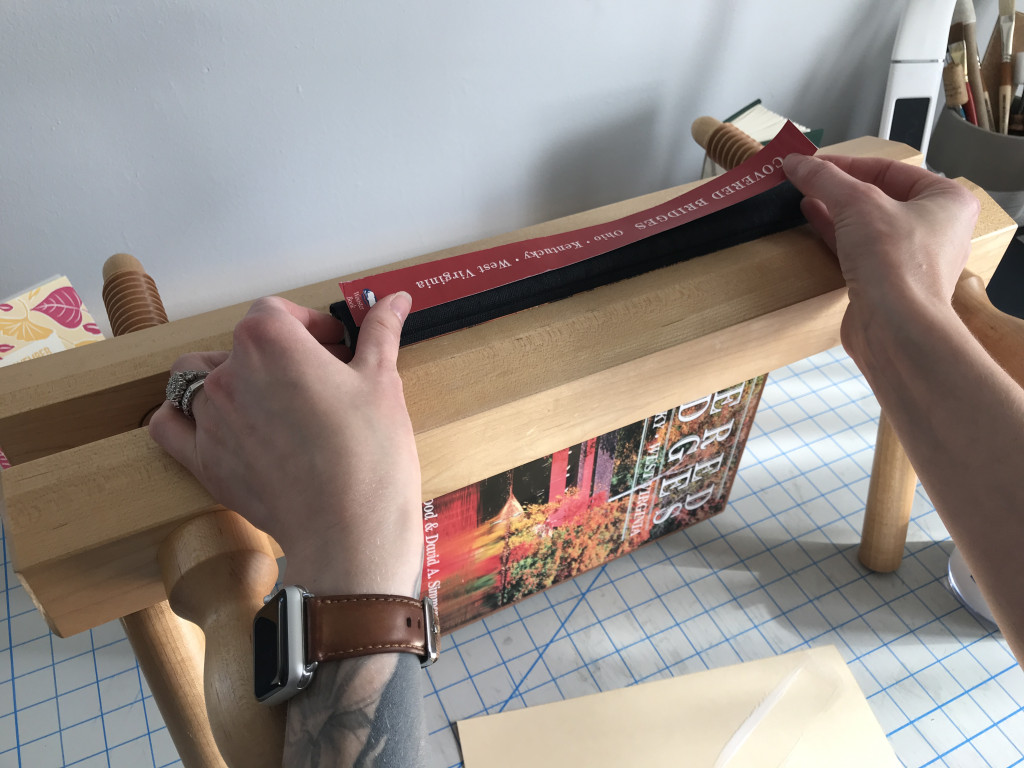
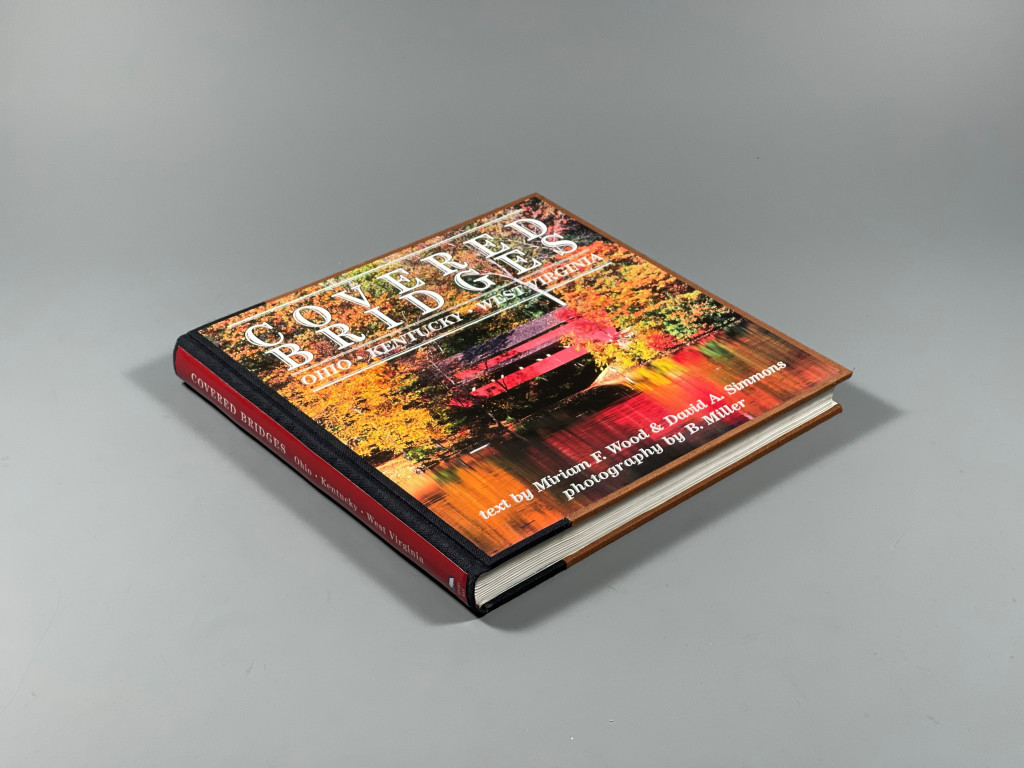
We recently shared a blog post on the Cincinnati & Hamilton County Public Library’s blog that serves as a companion post to this one. Both posts focus on the repair of two CHPL books, Covered Bridges and When Art Meets Design, that received split-board binding treatments carried out by Kasie. While this post focuses on the treatment itself, the other illustrates the journey of a circulating book through treatment in the lab (and at home) and its eventual return to the library. We highly recommend checking out A Journey from Broken to Mended: Repairing Books in the Preservation Lab.
As a hybrid conservation lab, we treat and house both special collection items and general circulating collection items, as well as everything in between. Special collection items are rare or archival materials that typically do not circulate; basically, books and other objects that you can’t take home with you, are out of print, valuable, and/or are less readily available locally, nationally or even globally. General circulating collections are typically books that can be checked out and taken home, and tend to be newer books, books still in print, and/or more popular books. Since we are a collaborative lab that means that we treat and house special collections and general collections from both the University of Cincinnati Libraries (UCL) and the Cincinnati & Hamilton County Public Library (CHPL).
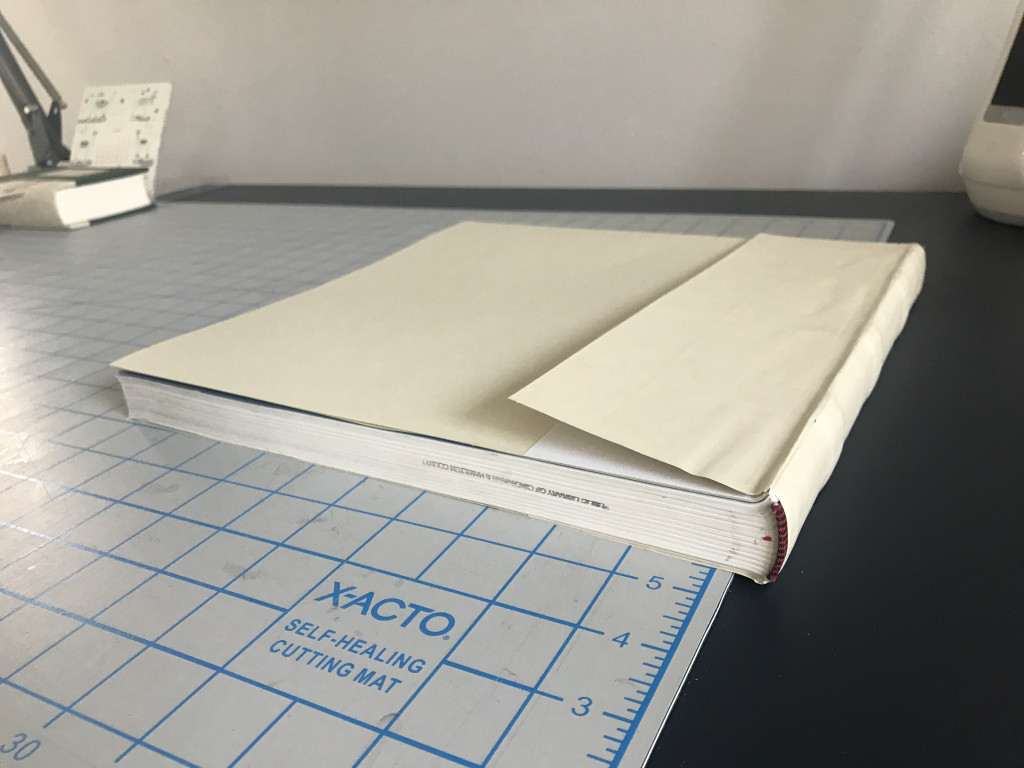
Due to the nature of these two types of collections (general and special), the treatment, documentation and who treats what is very different. Before the pandemic, most of the staff’s time was dedicated to special collection items or the items that fall between the two categories, which we call medium rare, and our students and volunteers, with plenty of hands-on, one-on-one training, handled the bulk of our general collection repairs. But then working from home, all or a majority of the time, became the norm for Lab staff and we had to shift focus and turn to taking on more general collection repairs that we could more easily take home with us. Initially, we took home more difficult sewing projects and mending projects that our students or volunteers either hadn’t gotten to yet or were avoiding for one reason or another. Then, after we could return to the Lab in some capacity to prep our own materials, we realized that split-board bindings* were the ideal general collections treatment for staff to work on from home.
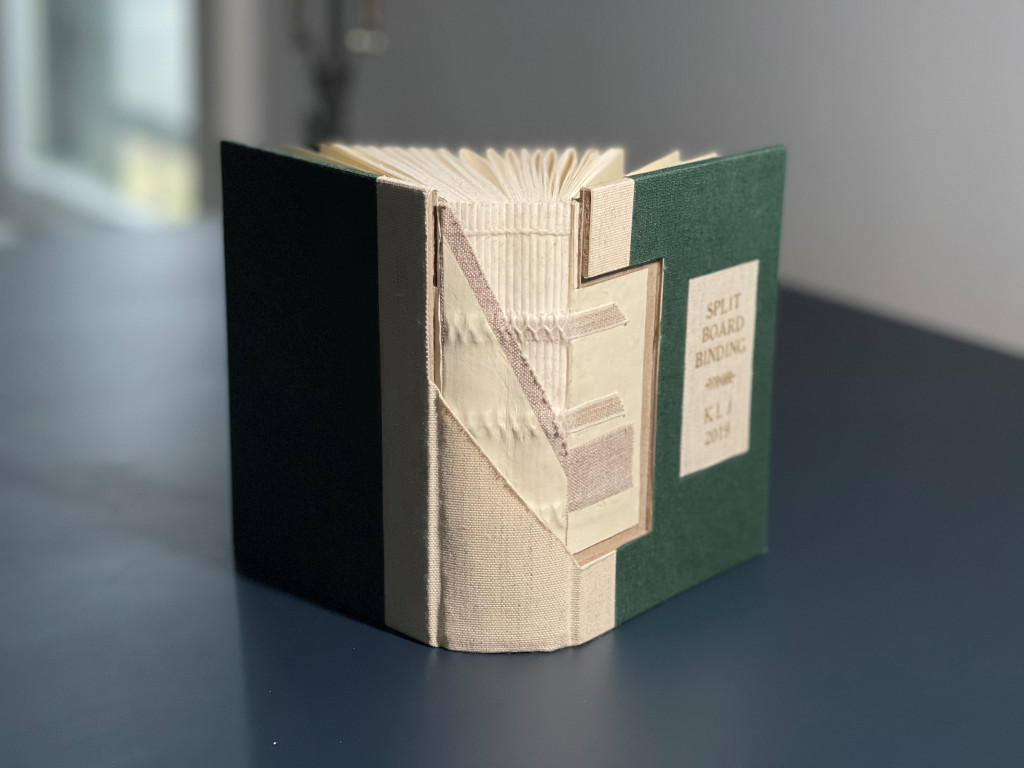
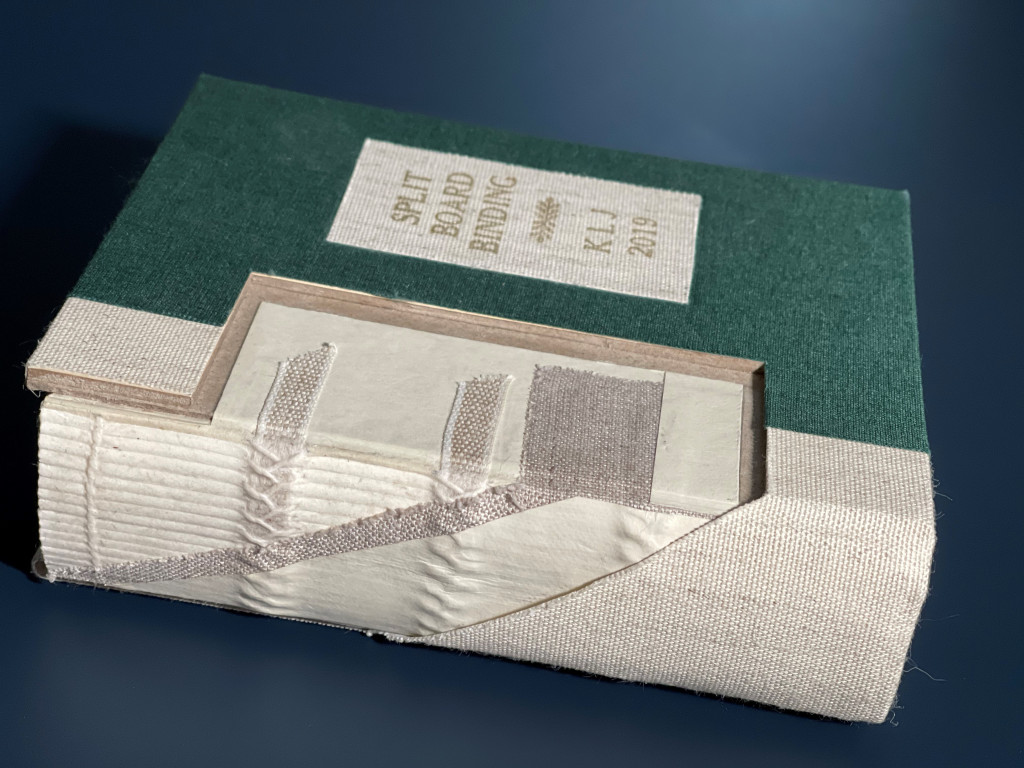
A split-board binding is a new binding or case that incorporates several newly added reinforcement elements that are then sandwiched between two pieces of board that make up the front and back covers.
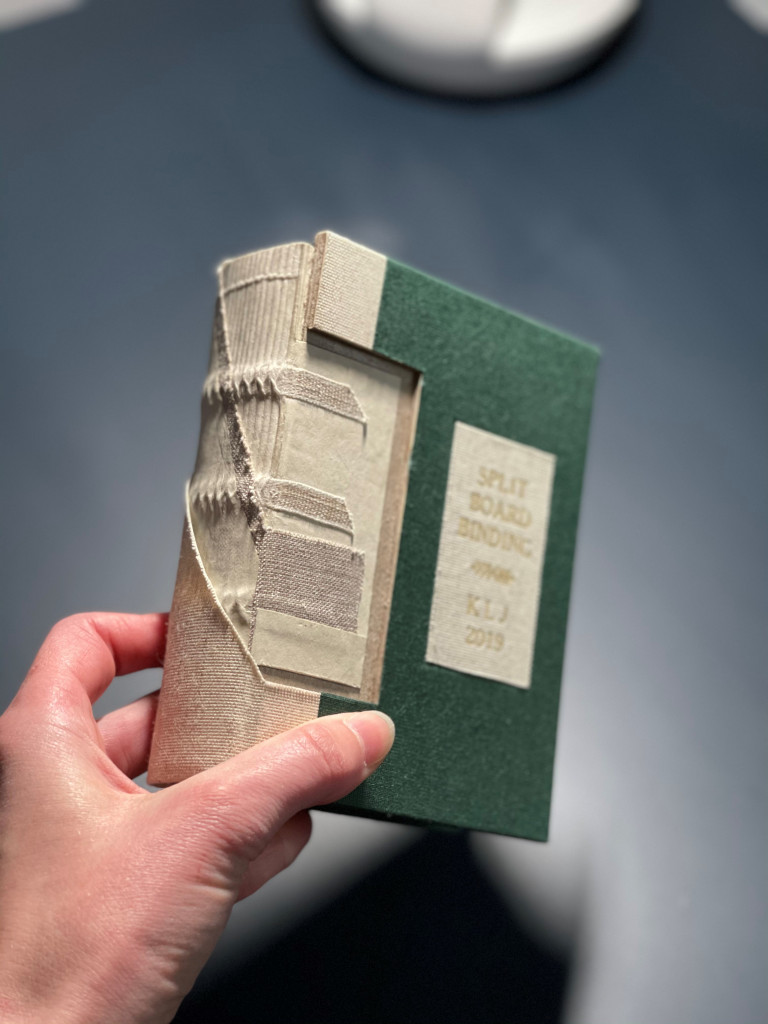
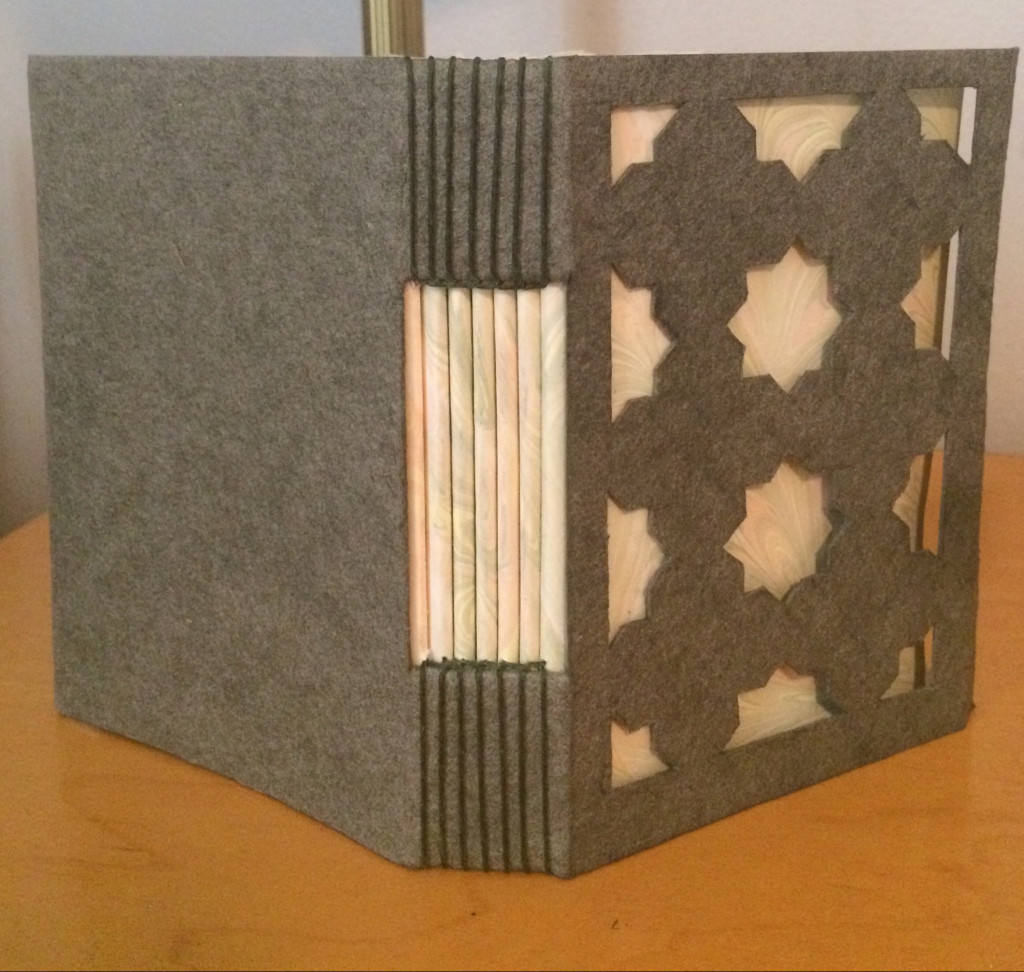
Kasie’s split board binding cutaway model
Each technician has a cutaway model that they’ve made, so they can easily reference it during treatment.
With the cutaway model you can see the various aspects of the treatment.
Split-board bindings are a great solution for oversized, heavy books like coffee table books and art books with glossy pages, which are very common in both UCL and CHPL general circulating collections. They are also, by far, the most complex general collections treatment we perform in the lab and have always been done by the conservation technicians, instead of our students or volunteers. This is not only because of the complexity of the treatment, but also because of the lengthy treatment time involved; a student or volunteer’s limited weekly schedule in the lab is not conducive to such an extensive treatment. Though it was a general collections treatment reserved solely for the conservation technicians, prior to March 2020 the techs unfortunately had little time to work on these treatments, as our focus was primarily on special collections treatments and housing. Therefore, we had amassed a little backlog of split-board binding treatments – enter quarantine and working from home!
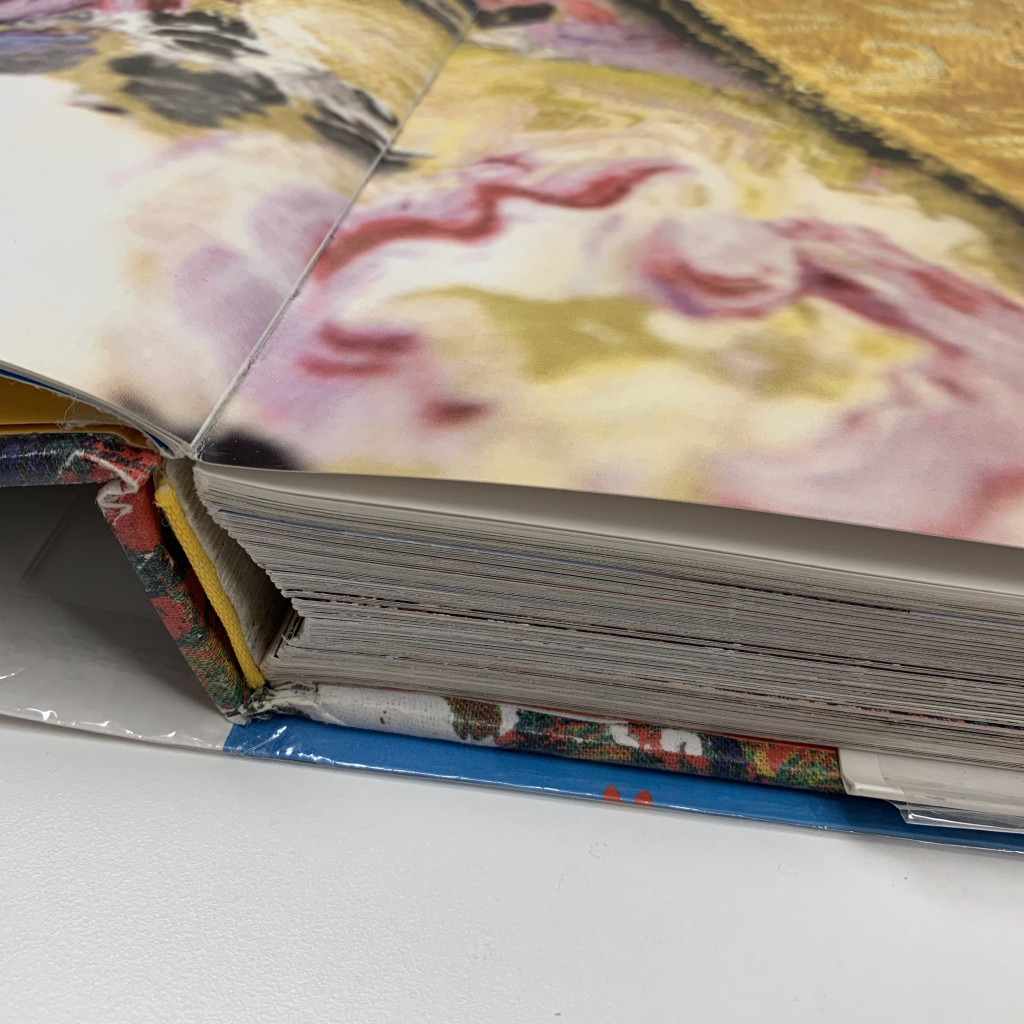
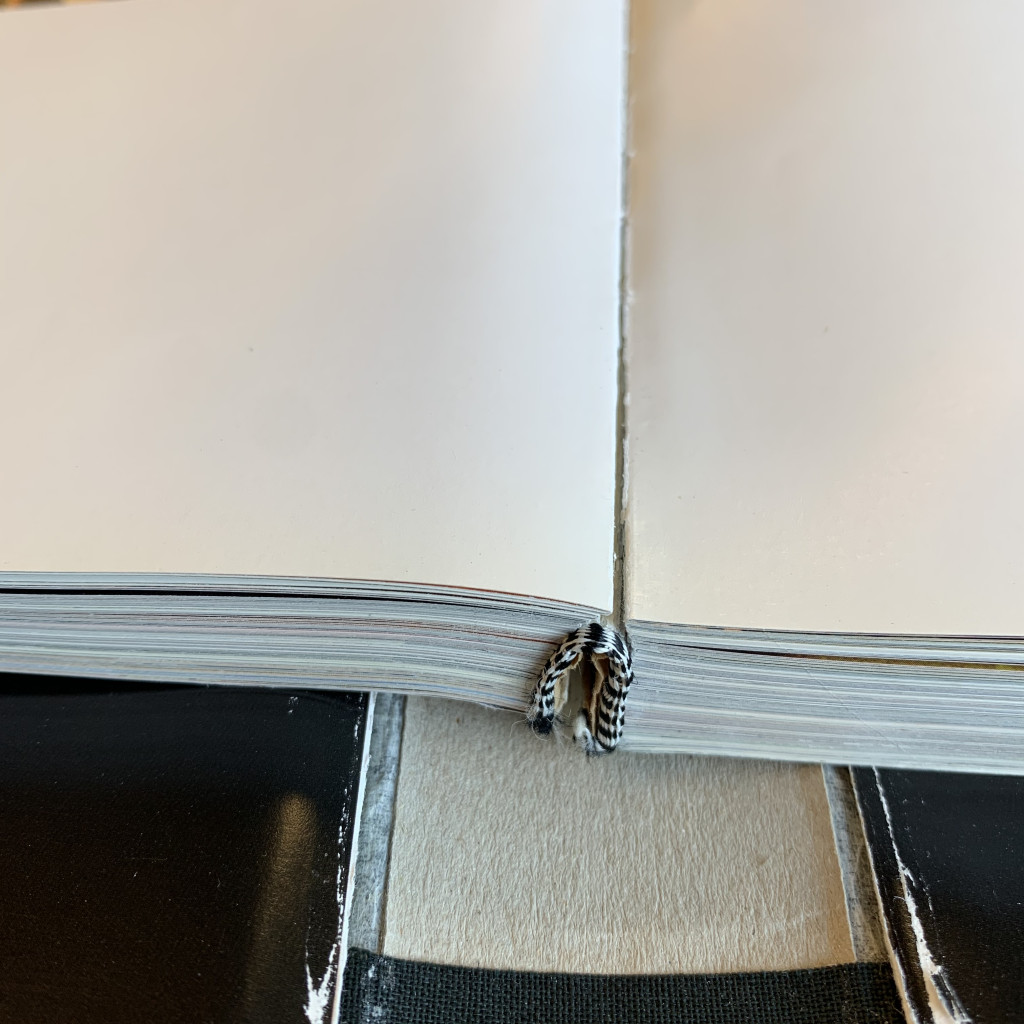
One question that might come to mind, if split-board bindings are so elaborate and extensive, why do them on general collections items at all? Why not just buy a new copy; wouldn’t that be more cost effective? Typically, the books that warrant a split-board binding are more pricey, glossy paged, oversized books, like art and architecture books. And unfortunately, though these books have a much higher retail price than your average James Patterson novel, the construction is generally less than ideal. These books might have beautifully printed, full-color, thick and glossy pages and dynamic cover art, which makes them attractive to the reader, but they also are often sewn with very thin, fragile thread that easily breaks. The spines are generally lined with a layer of rigid plasticized glue that can become very brittle over time. Often, the covers or cases are constructed solely of printed paper, not cloth, and generally have a thick piece of board along the spine (which we call a flat back) that doesn’t allow the book to flex properly when opened and can actually make the spine break down and tear in record time. It is not uncommon for these books to have little to no reinforcement in the attachment of the textblock to the binding (i.e. how the block of pages is attached to the cover), which makes the heavy textblock break away from the cover quite easily with use.
Textblock broken away from the cover
Example of plasticized adhesive that has failed, leaving the textblock unsupported
Example of plasticized adhesive that has failed, leaving the textblock unsupported
Textblock detached from cover and textblock not properly supported
But why are these books constructed so poorly? These large coffee table and art books are constructed with individual use in mind, not with the frequent use and circulation that comes with a library collection item. The split-board treatment, along with many general collection repairs, improves on a bad binding design and makes the book stronger and sturdier, using better binding techniques and materials that can better stand up to use by many library patrons.
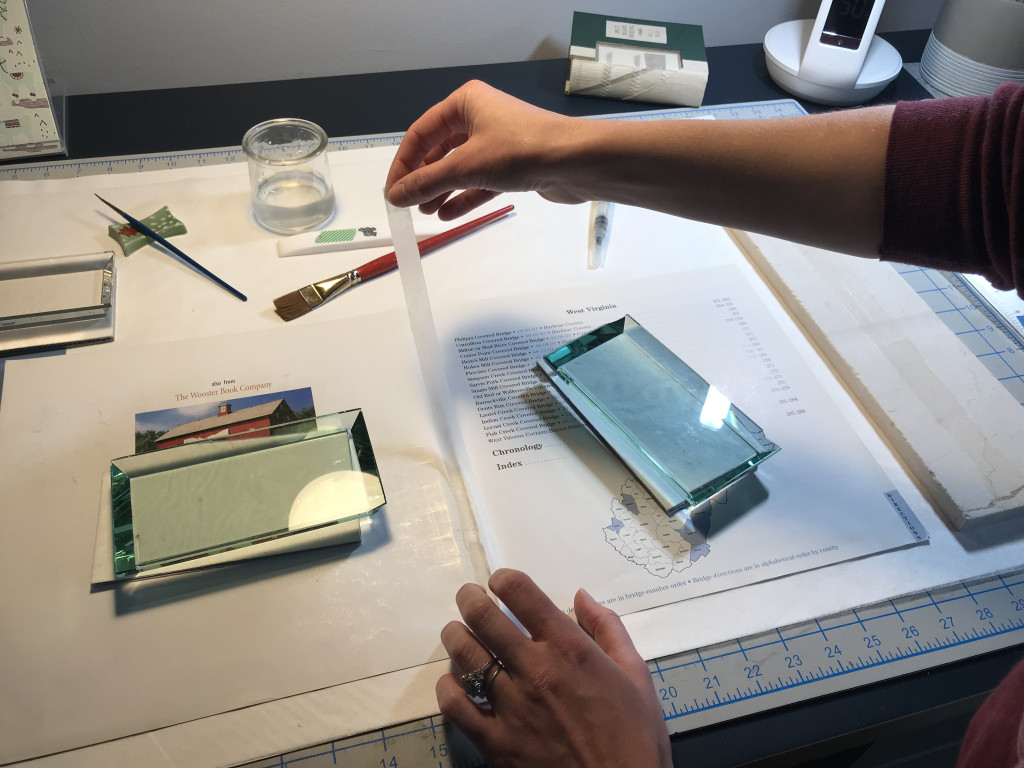
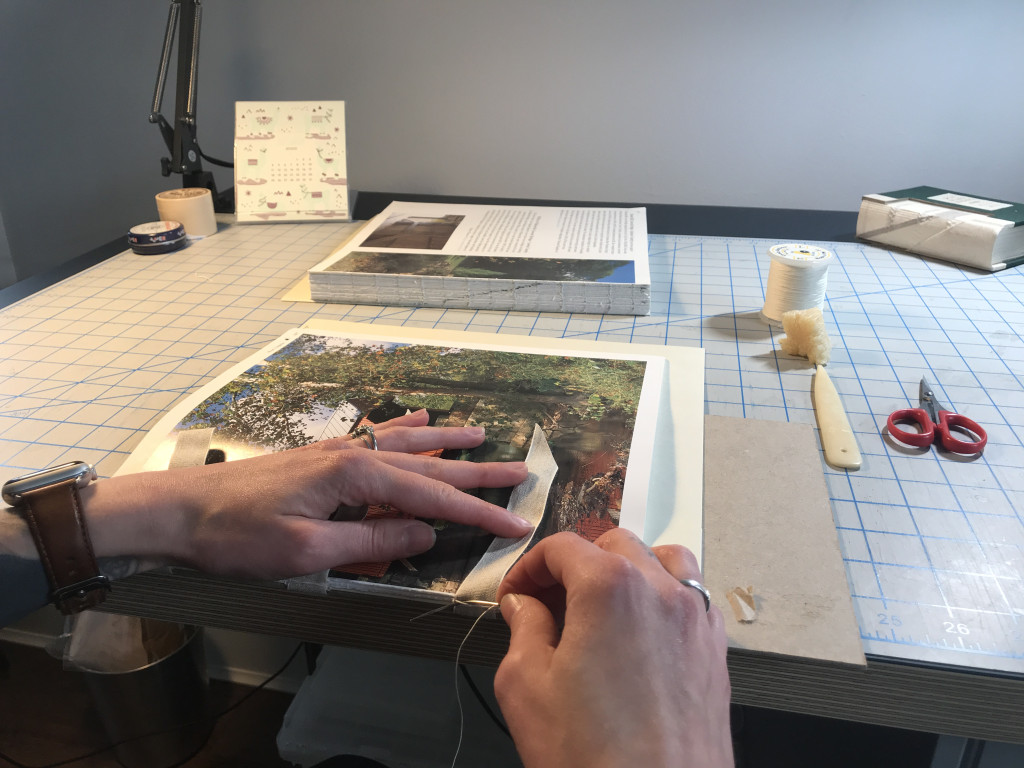
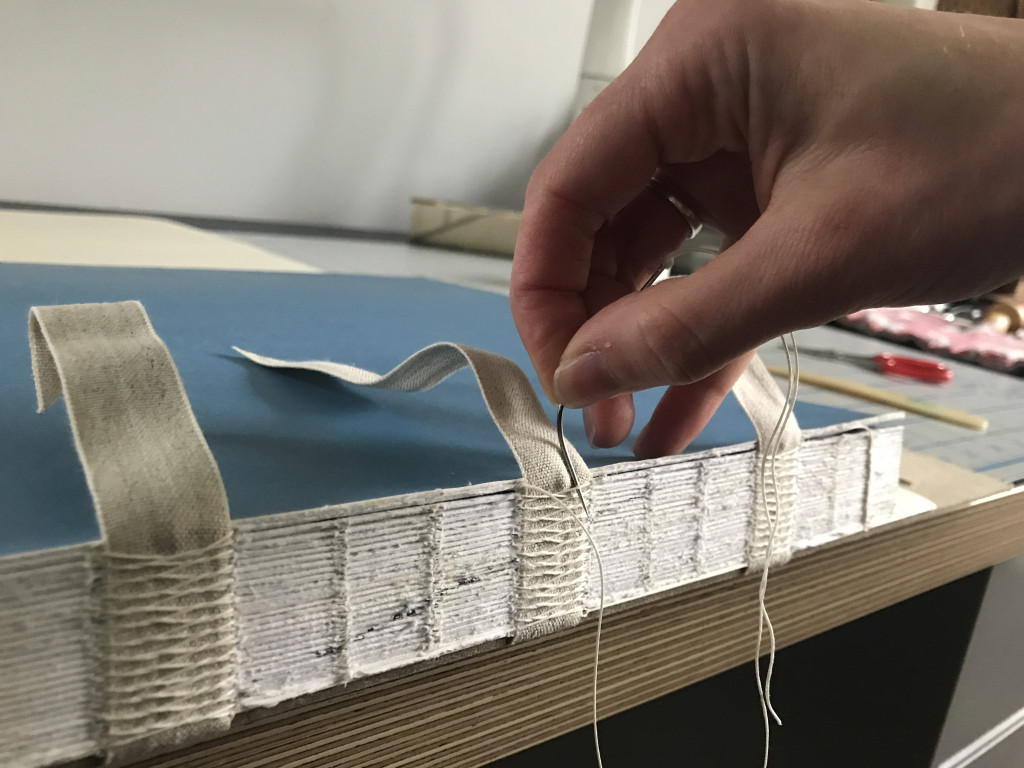
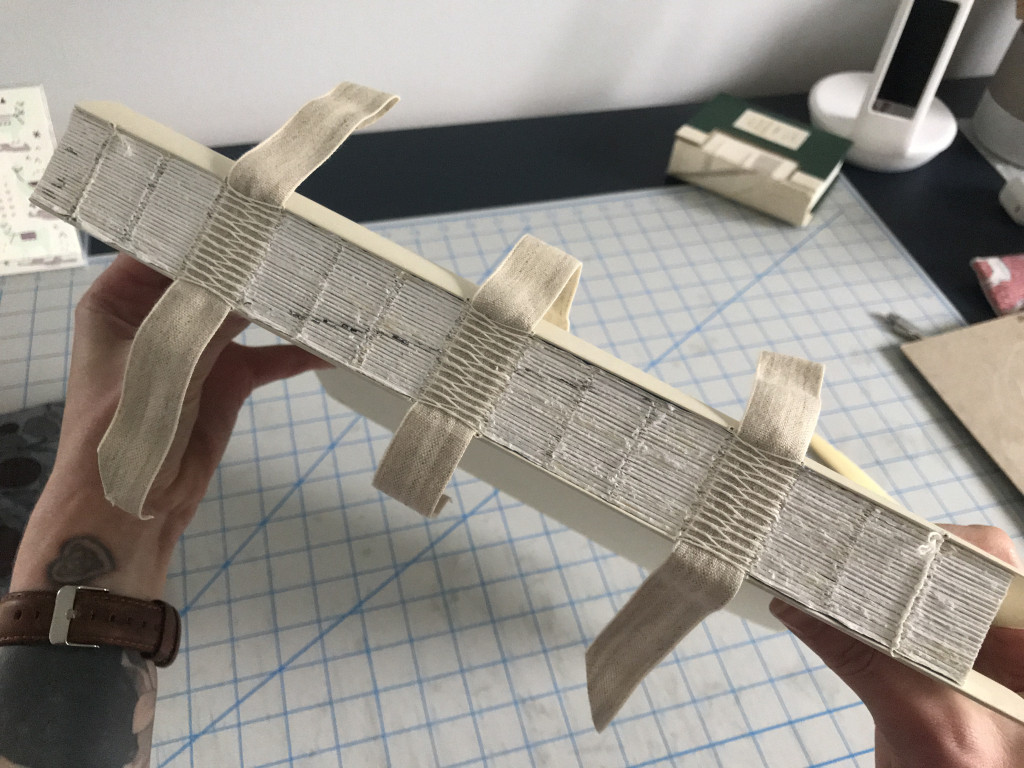
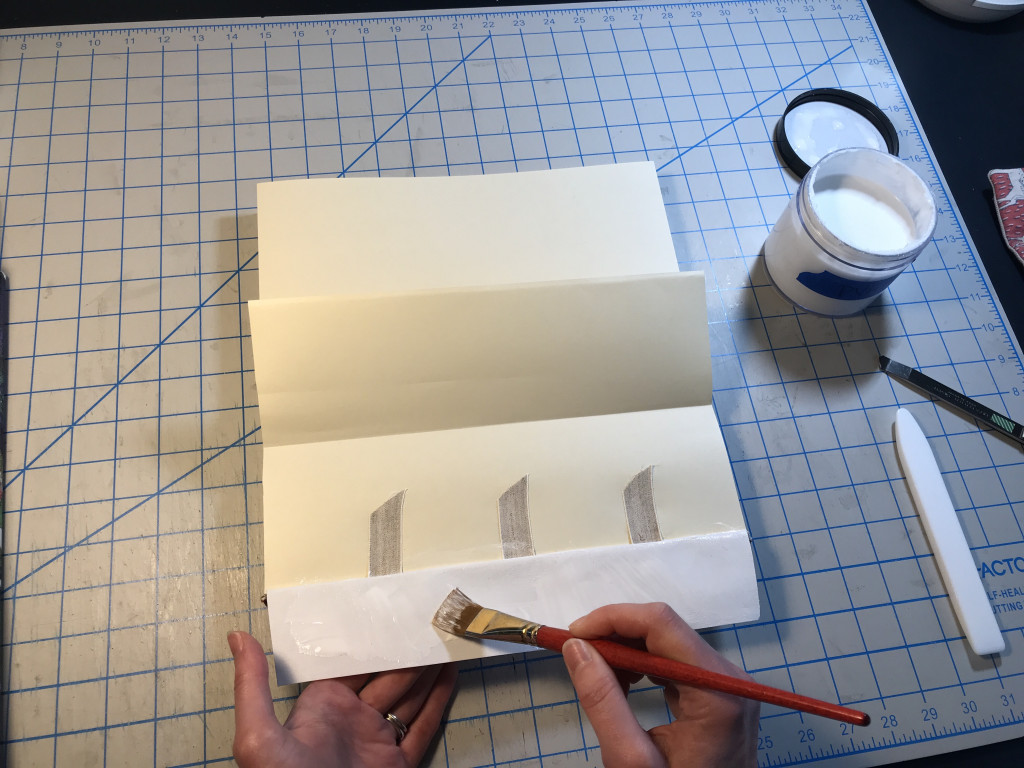
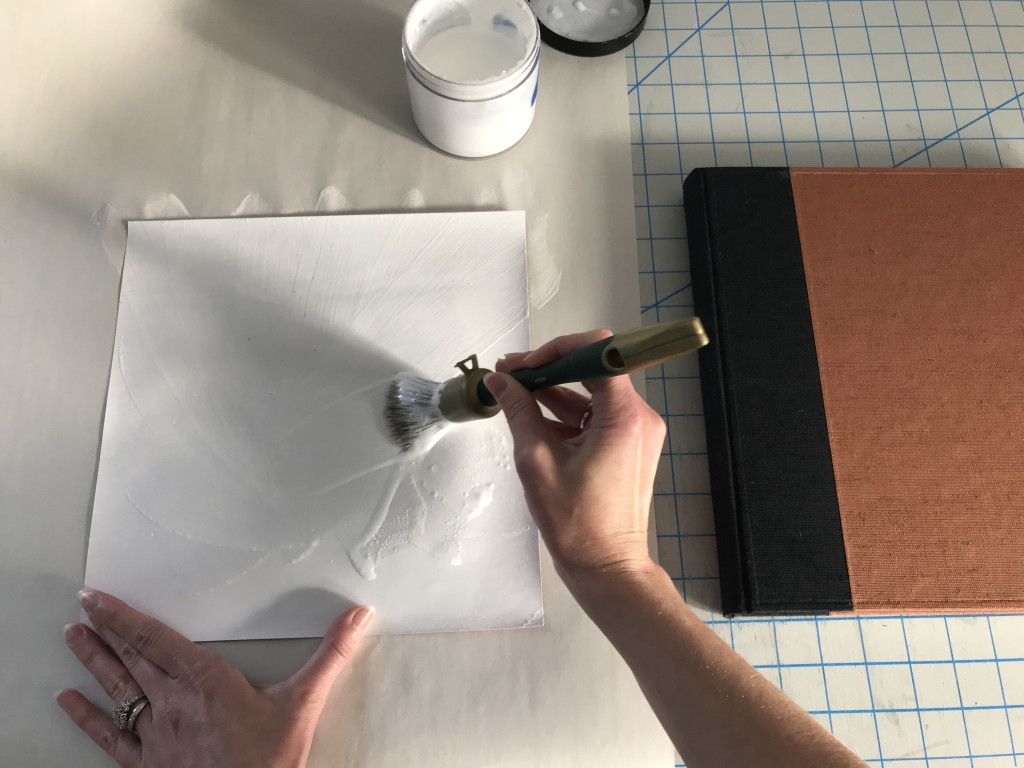
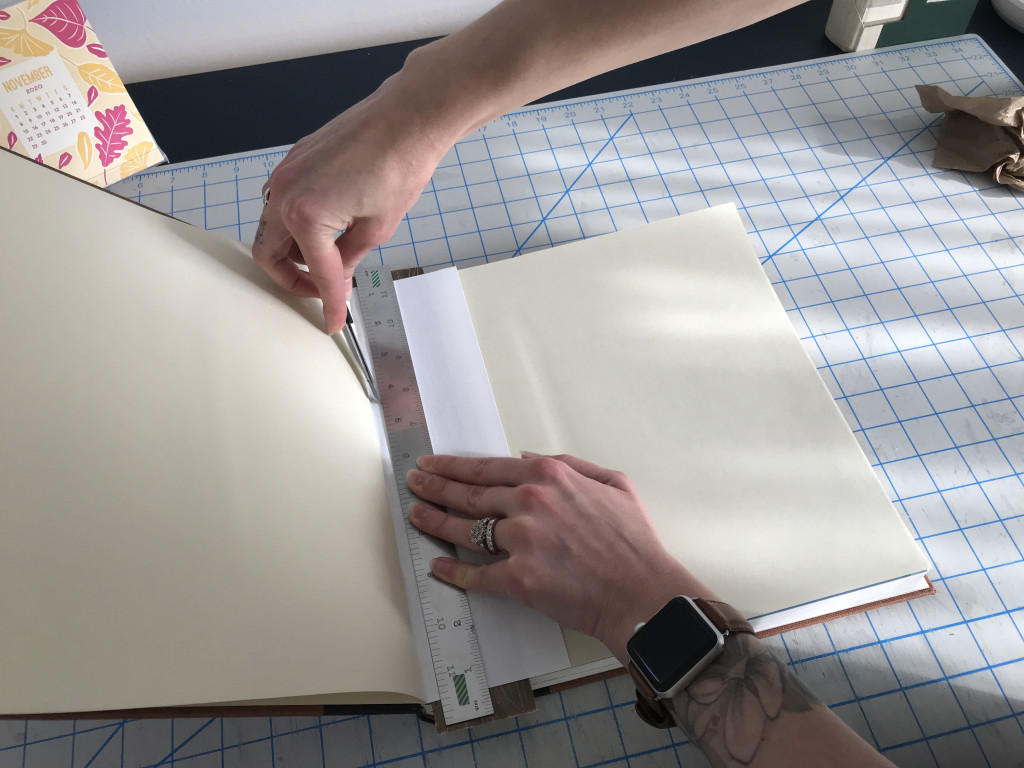
A split-board binding treatment involves creating a new binding with new sewn-on endsheets that are reinforced with cloth, at least three sewn on linen tapes (supports), new spine linings, and a new quarter bound case created with two boards at the front cover and two at the back cover, and generally an inlaying of the original cover designs. However, additional elements of treatment may be warranted based on the condition of the book, such as broken sewing, tears, detached leaves, etc. The steps generally proceed in the following order:
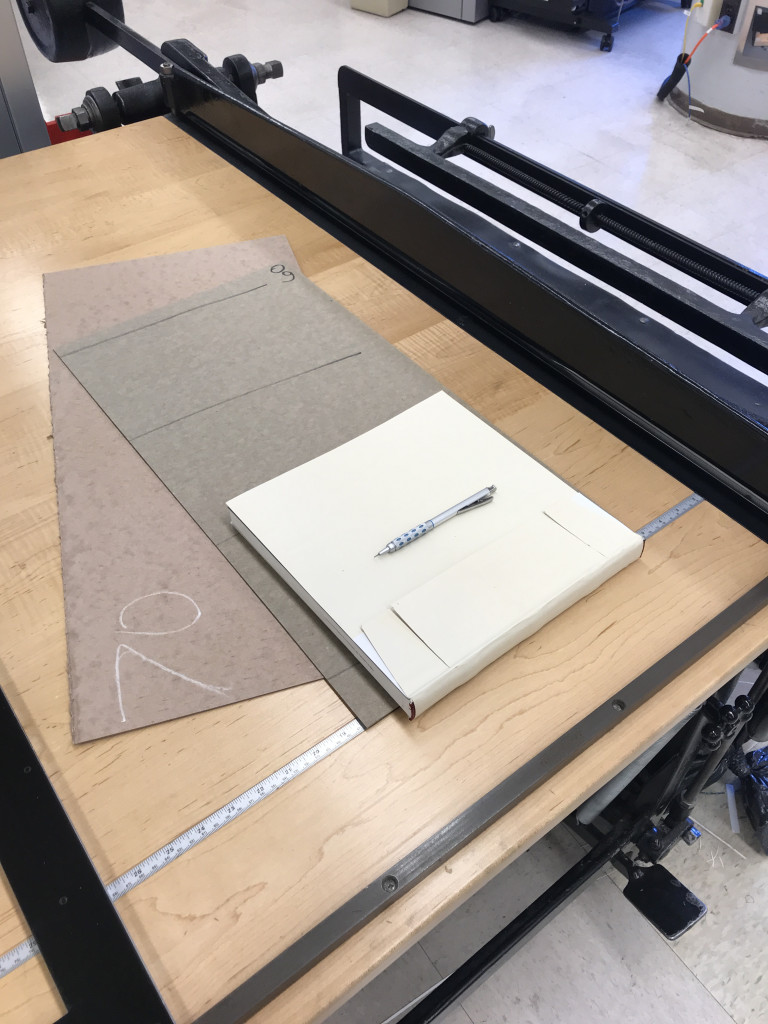
Prepare materials in the Lab – new endsheets, starched reinforcing cloth, linen tapes, spine linings, binders board, bookcloth and Bristol board for inlays.
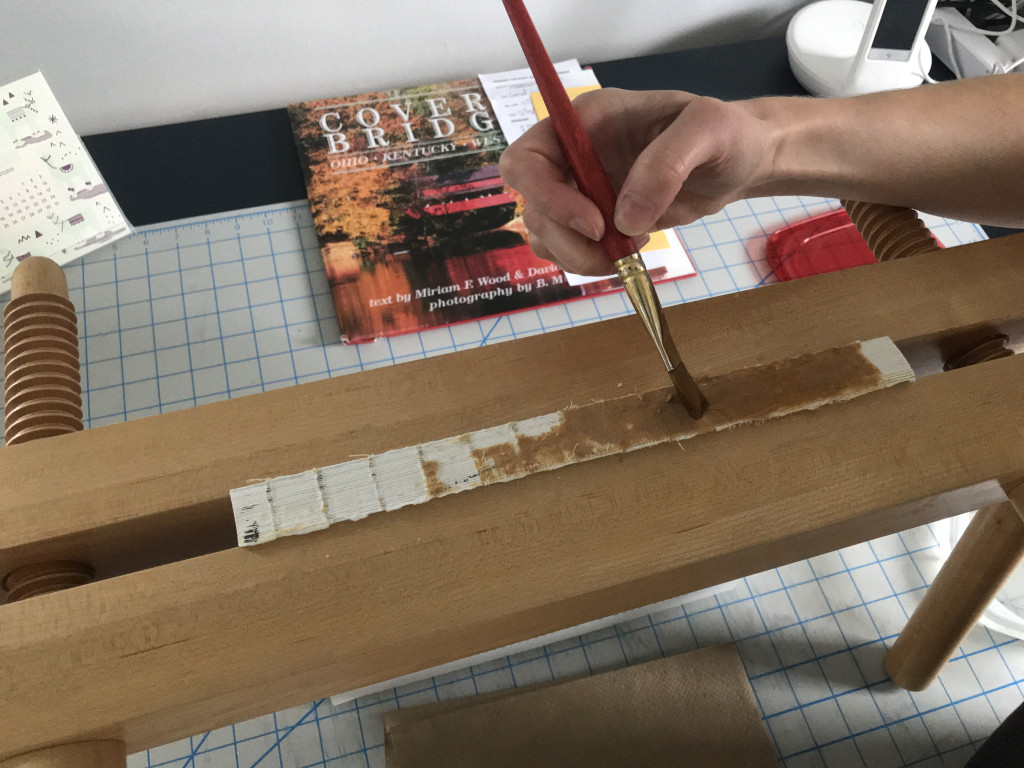
Detach textblock from cover, if needed.
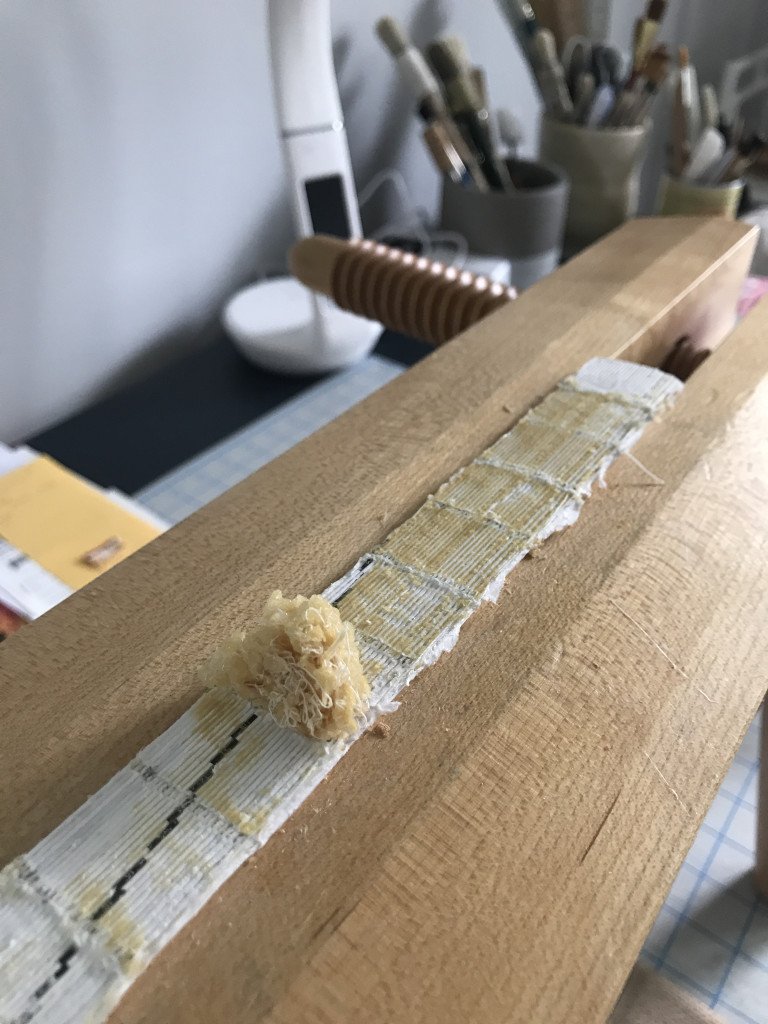
Remove original spine linings, mechanically and with poultices.
If broken, remove original sewing thread and disbind textblock.
Mend any tears and guard any separated, torn or detached leaves.
Sew to include linen tape supports and new endsheets using French link stitch – whether partial/added sewing over the original sewing or complete resewing is dependent on whether the original sewing was intact or if it was broken and the textblock disbound.
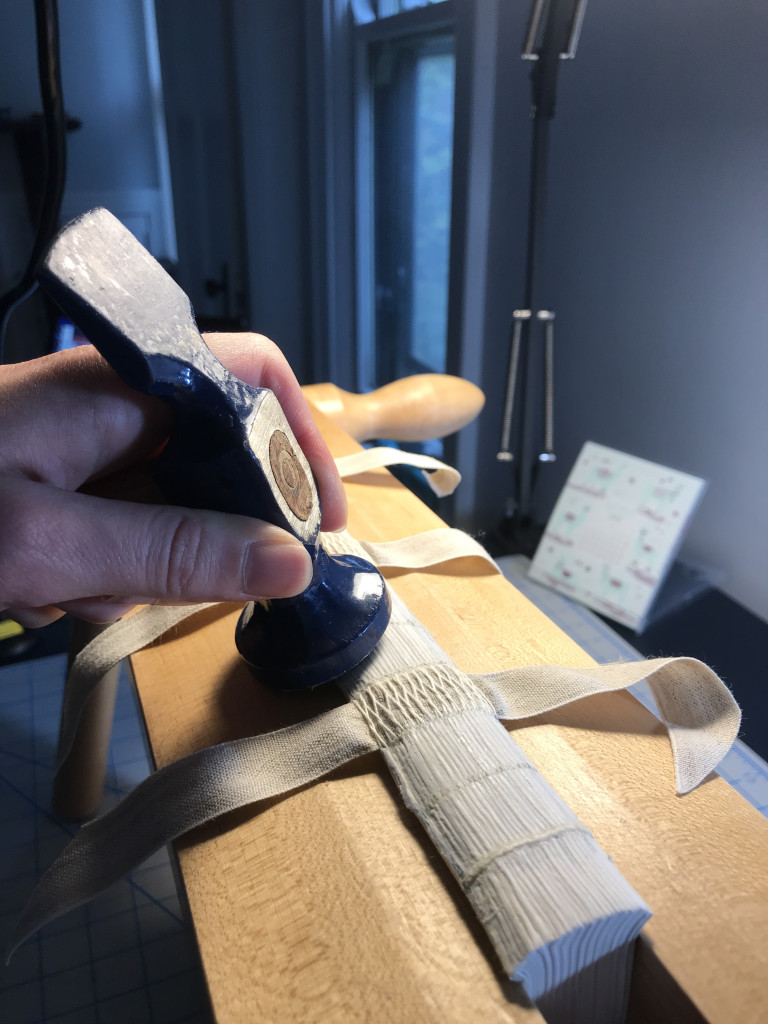
Round and back spine, as needed.
New spine linings adhered to the spine:
Reversible layer of kozo fiber tissue with wheat starch paste.
Original stuck-on endbands, if present, or new endbands.
Cloth reinforcement lining (Cambric) with flanges that extends past the spine on both sides.
Several paper linings to further support the textblock.
Create “laminated flanges”, the key characteristic of a split-board binding, using the sewn on linen tapes, the flanged cloth piece adhered to the spine, and the first and last leaves of the new endsheets. Cut laminated flanges into thirds, with the center portion incorporating all the linen tapes.
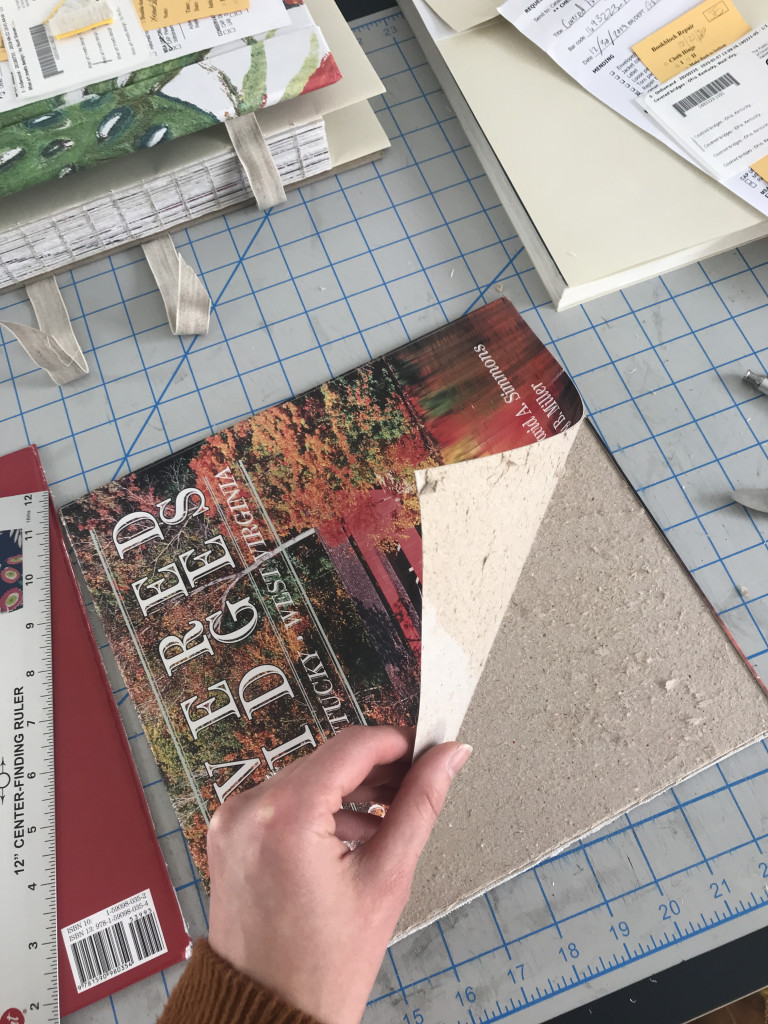
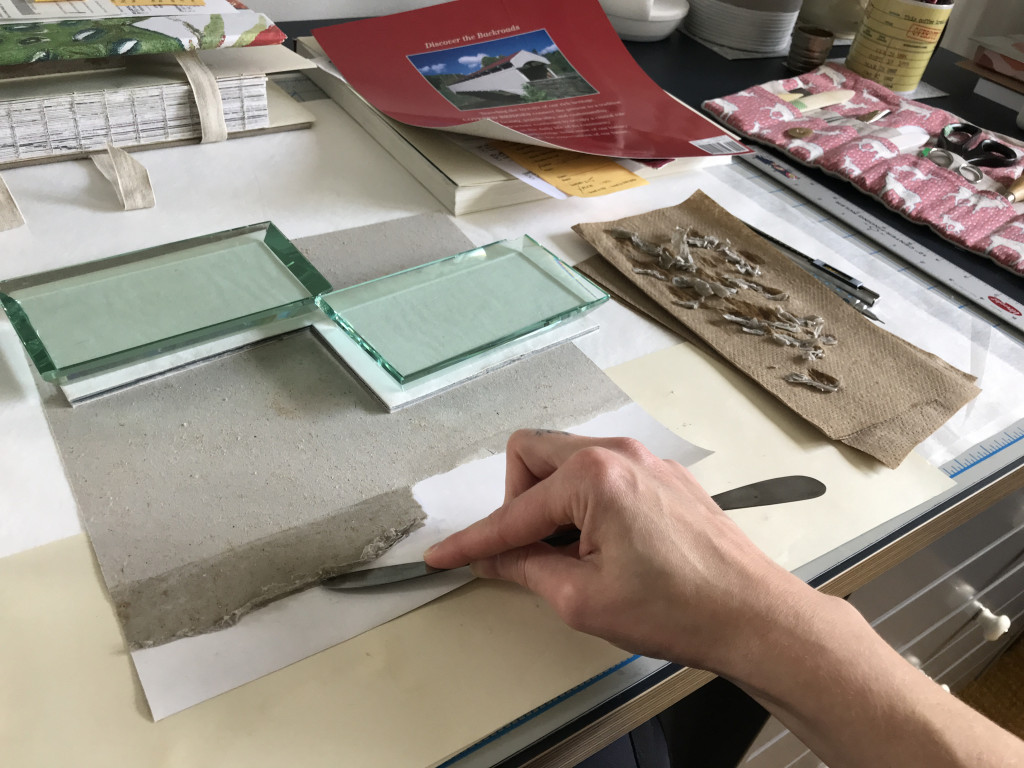
If the original covers included artwork that should be retained, mechanically remove from the original boards. Remove remaining board backing with poultice.
Remove and clean the original spine.
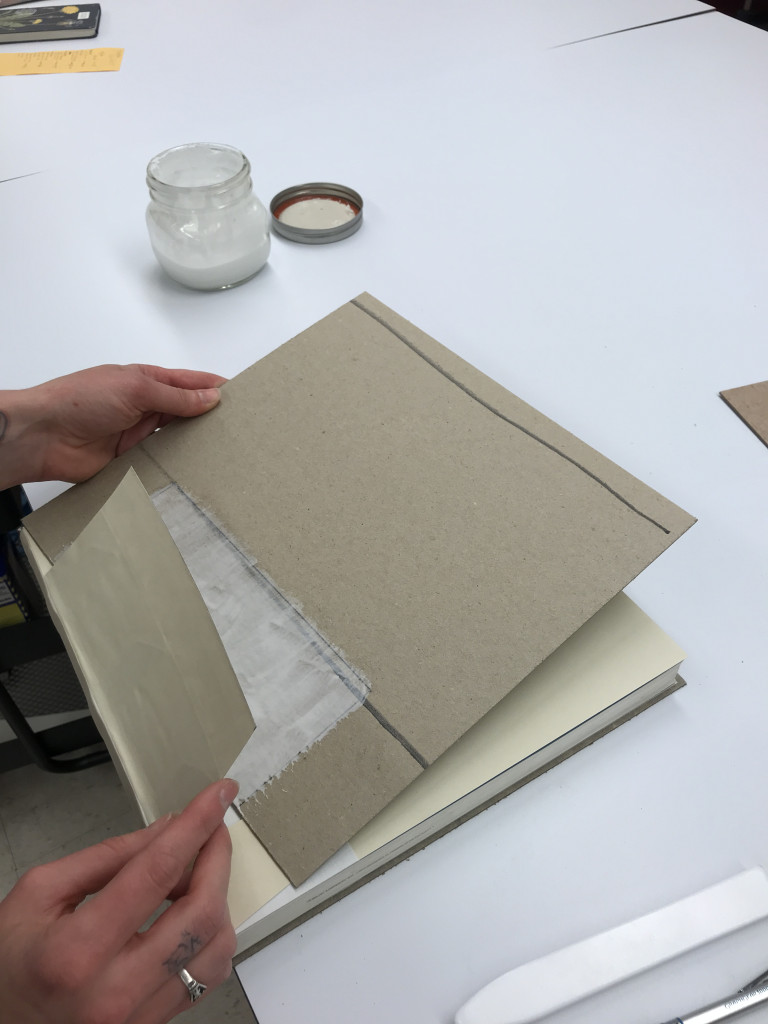
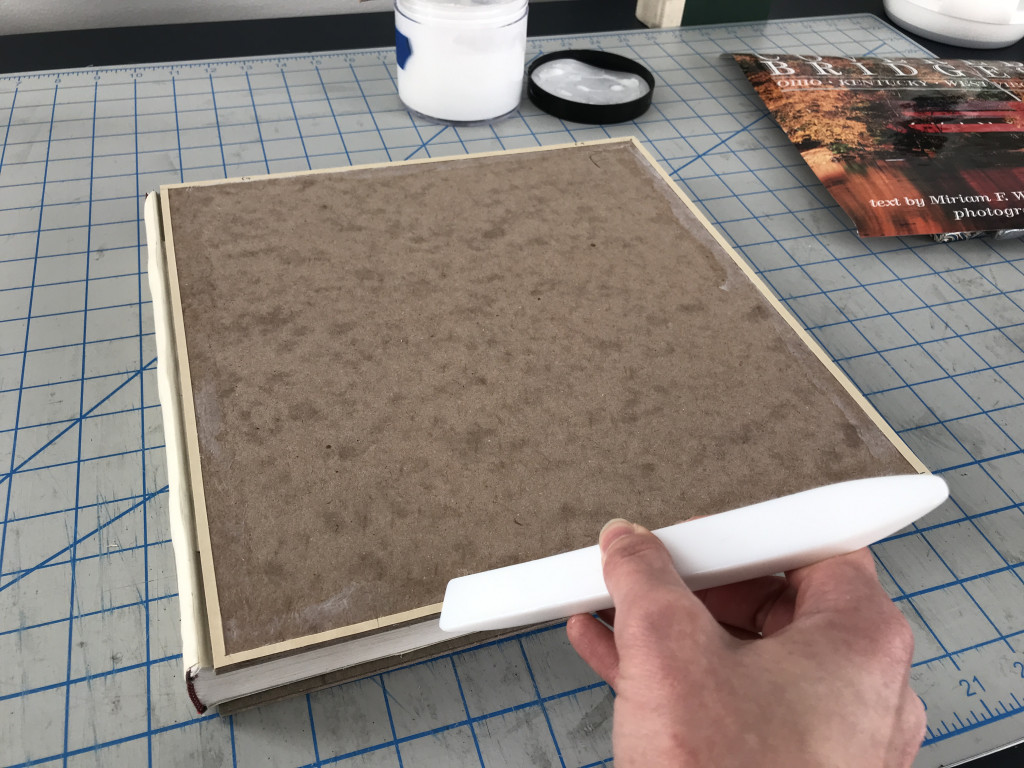
Cut binder’s board to size – 2 pieces of board are cut for both the front and back covers (4 pieces total). The thickness of the boards used is dependent on the shoulder of the book.
Determine placement of the board and adhere the middle laminated flange segment to the top of inner board, keeping the top and bottom laminated flange segment under the inner board, unattached. Adhere the outer board to the inner, thus sandwiching the middle laminated flange section between the two boards.
If the original cover is being inlayed, create and attach an inlay border of thin Bristol board to the cover boards, as needed.
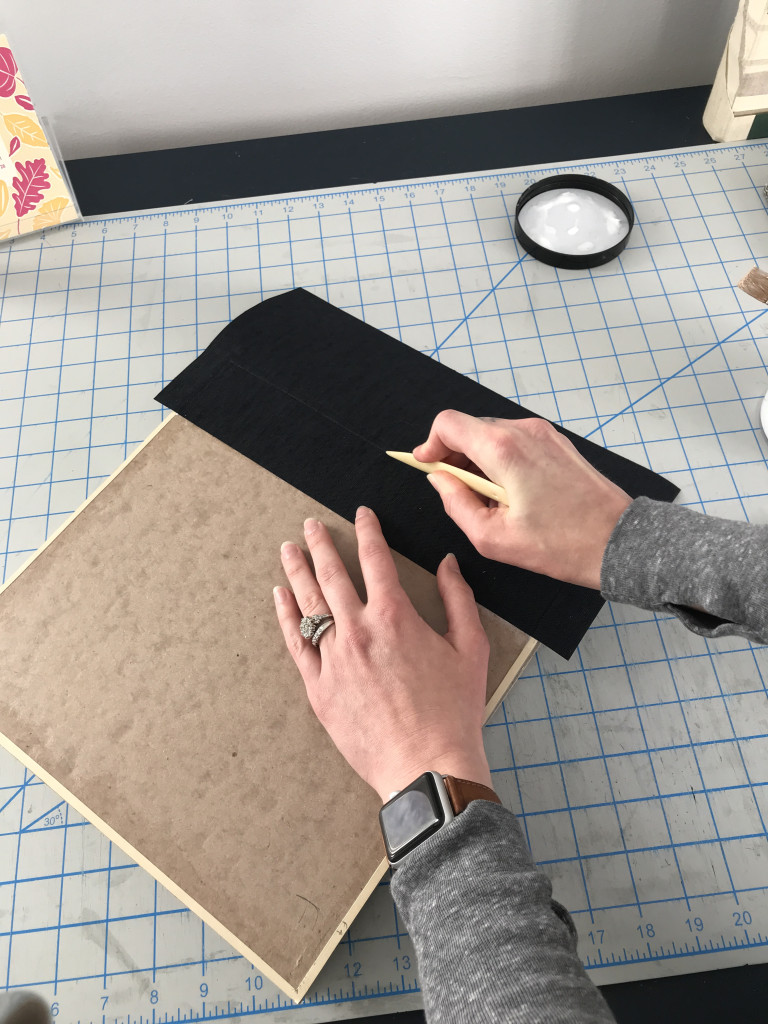
Covering the boards:
Attach the spine cloth piece and turn in at the head and tail.
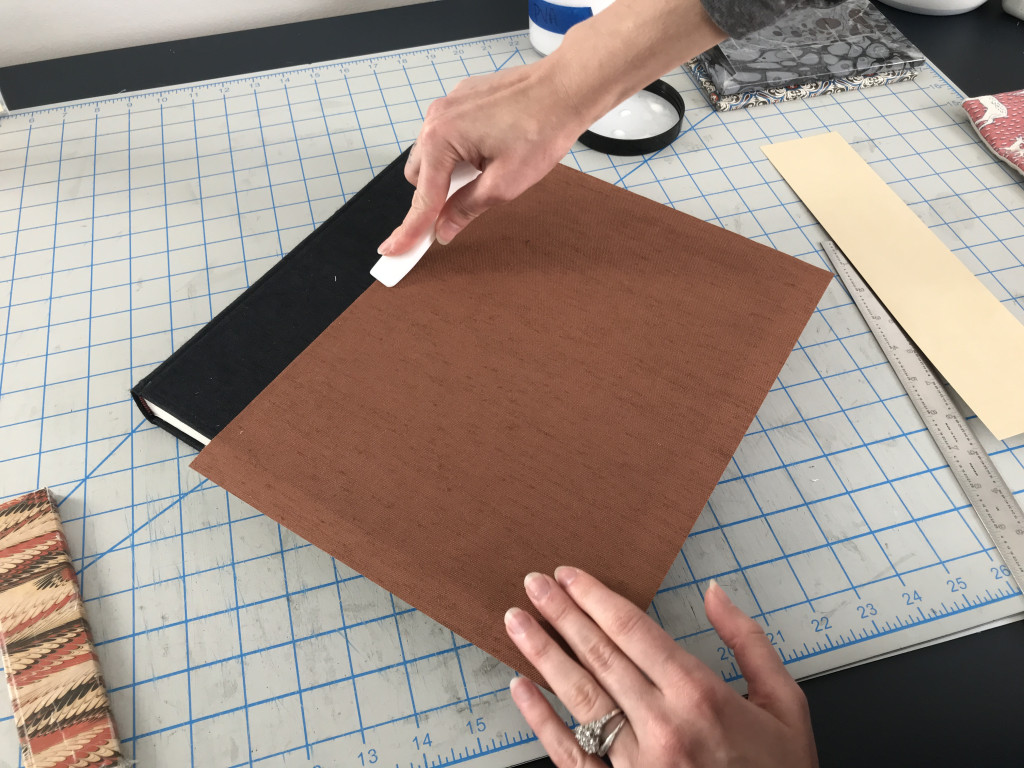
Attach the board cloth to the upper and lower boards and turn in the edges.
Bevel the remaining laminated flanges and sewn on cloth reinforcement (Cambric) slightly and attach both, in sequence, to the inner boards.
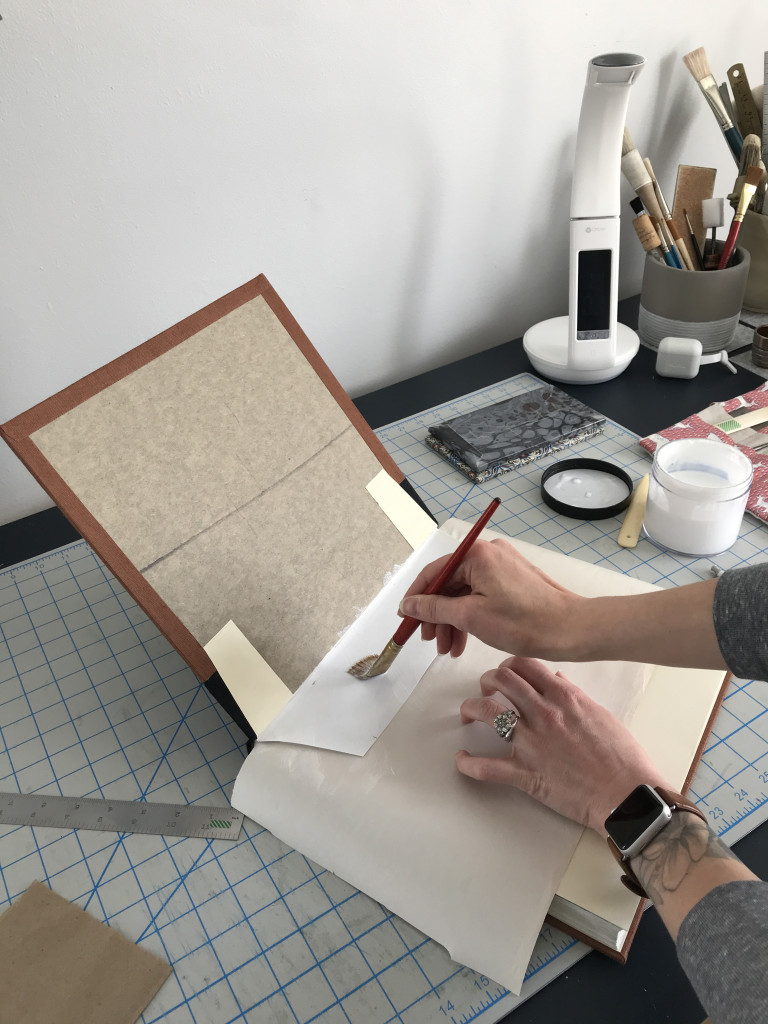
Adhere the pastedowns and trim the remaining sewn on Cambric to roughly 1/8” – ¼”.
If there are cover inlays, adhere the inlay(s) to the cover(s) within the inlay border.
Adhere the original spine to the new spine of the case.
Preparing materials in the Lab
Using the board shear to cut bookcloth for the covers
Ready for treatment at home
Cleaning the spine
Removing original adhesive
Textblock fully disbound
Mending & guarding
Sewing the textblock
Sewing on linen tape supports
Newly resewn textblock
Rounding & backing the spine
Reversible layer
Cloth reinforcement layer
Preparing paper layers
Fully lined spine
Creating the laminated flanges
Creating the laminated flanges
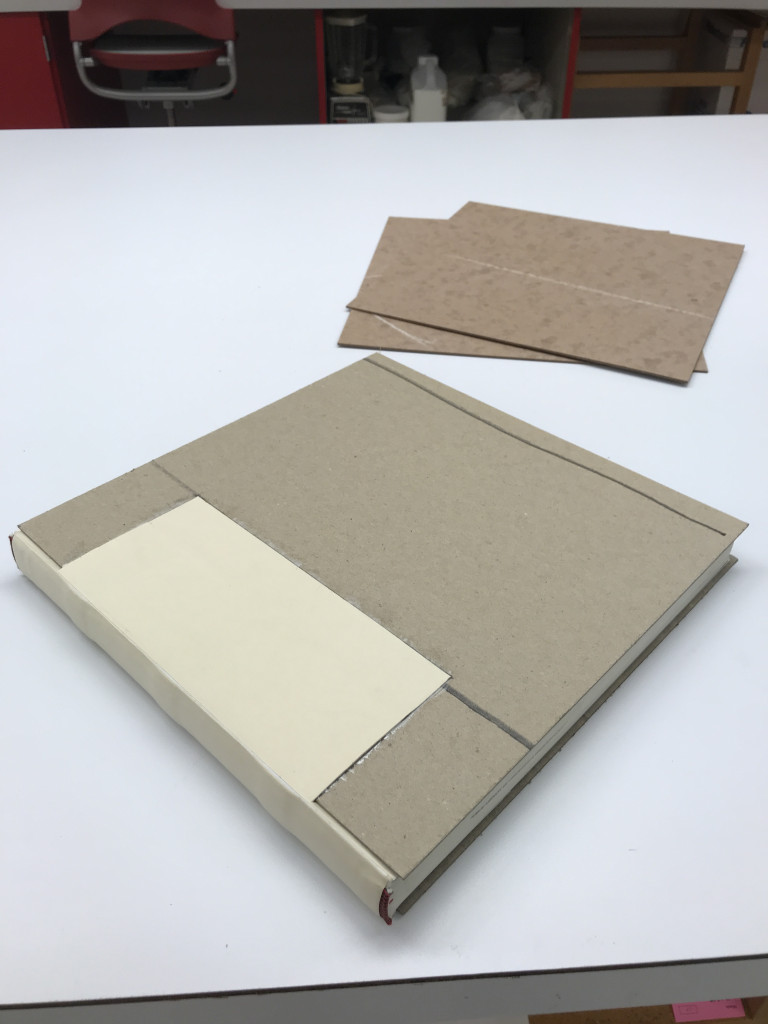
Prepared textblock
Preparing cover inlays
Removing original cover art
Removing the backing from inlay
Cutting the boards to size
Attaching the inner board
Inner board attached
Outer board attached with laminated flange between boards
Attaching inlay boarder
Adhering spine cloth
Turning-in spine cloth
Adhering cover cloth
Attaching laminated flanges and cloth reinforcement
Adhering pastedowns
Pasting out inlay
Attaching inlays
Trimming inner cloth hinge
Adhering spine title
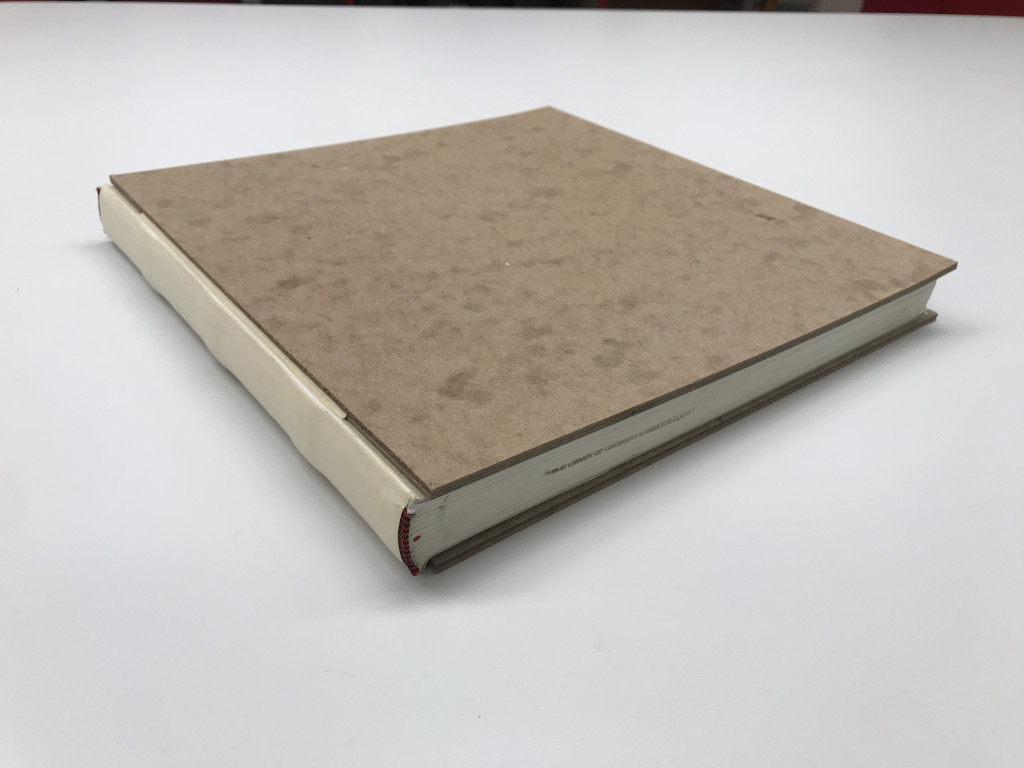
Completed treatment
When completed the treatment offers a substantial amount of support to the textblock and a robust attachment of the textblock to the new case. While it is an involved treatment that requires a good amount of preparation, work and skill, the end results are worth it all, and the improvements are significant.
Treatments of this magnitude take many, many hours over the course of several weeks. Often, only a few steps of the treatment can be accomplished at a time to account for drying time, and timing out visits to the Lab. To take a sneak peak at what some of the steps of treatment look like please check out the video below:
For an example of how Kasie used a split-board binding treatment and modified it for a special collection item that came to the Lab from UC’s Winkler Center without a case, check out her blog, A Monster of a Treatment.
We hope you’ve enjoyed this peek into a split-board binding treatment! If you did and you want to see more of what we do, and see the Lab, then please check out our Virtual Lab Tour which will take place on Tuesday, January 26th at noon, live on the Cincinnati & Hamilton County Public Library’s Facebook page. For forthcoming information about the Virtual Tour follow the Public Library on Facebook and follow the Lab on Instagram (@thepreservationlab).
*This treatment was originally designed at the Brigham Young University lab. Then it was brought to the University of Kansas lab by Brian Baird, where our conservator, Ashleigh Ferguson Schieszer, learned the treatment and thus brought it to the Preservation Lab.
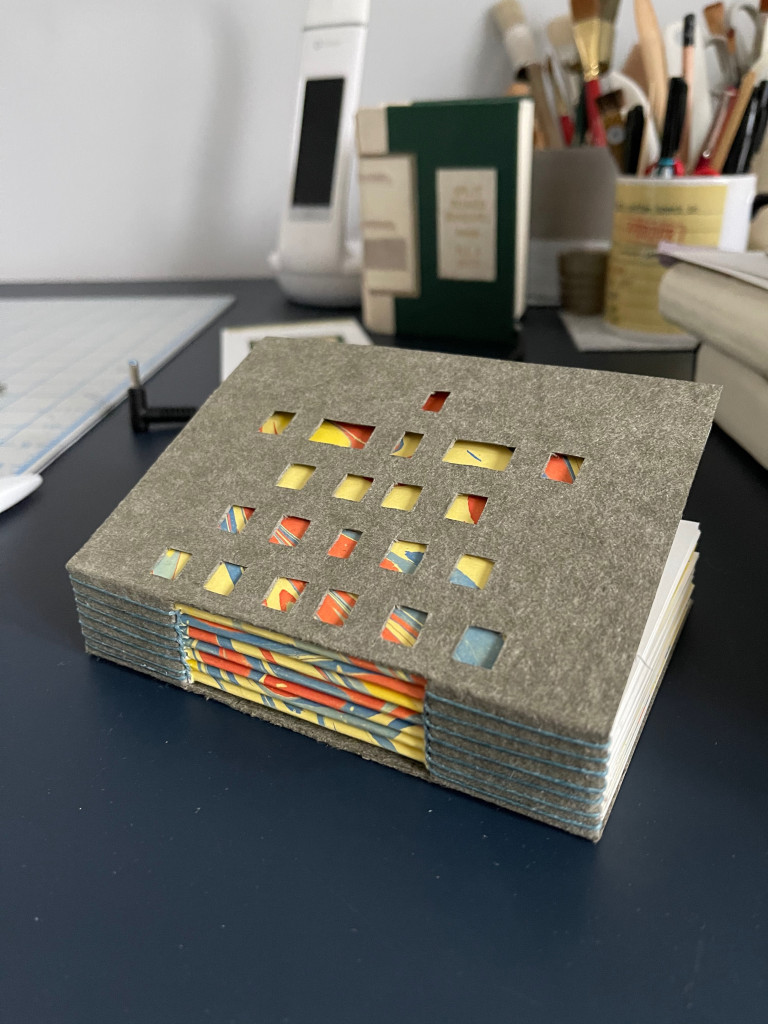
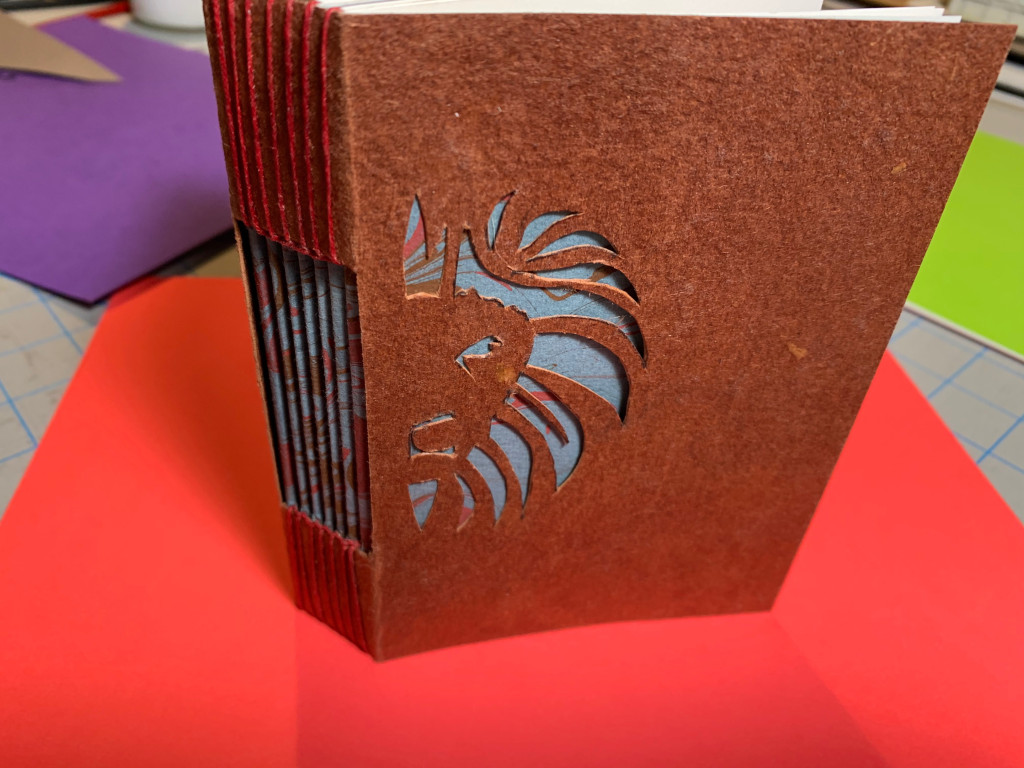
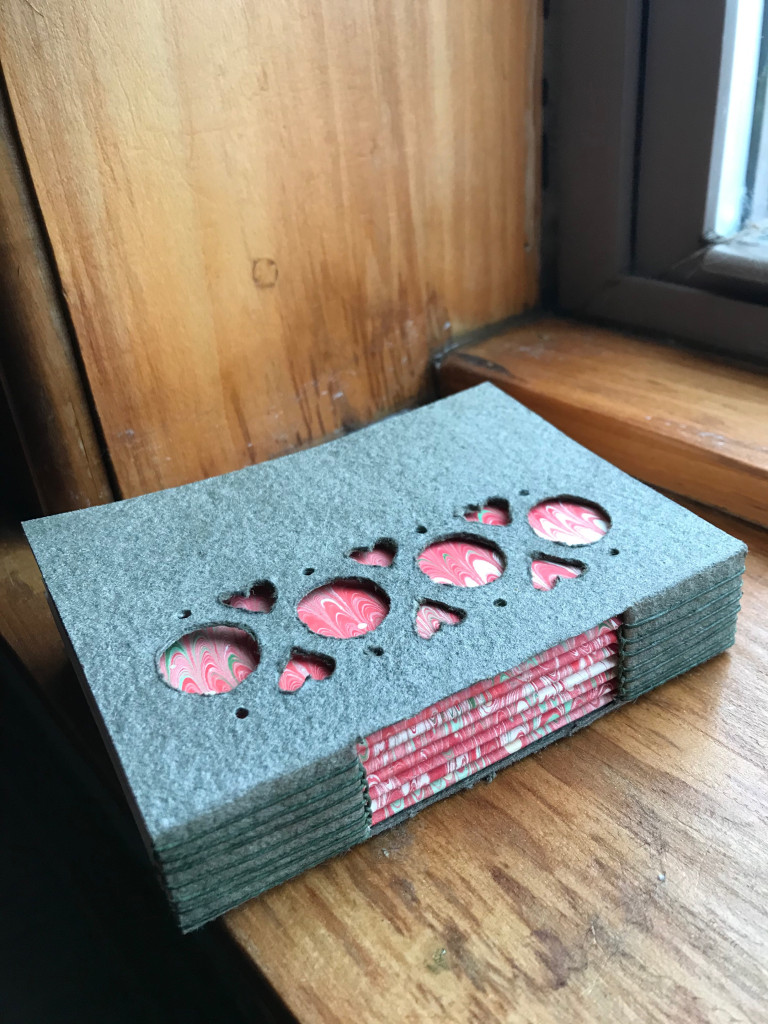
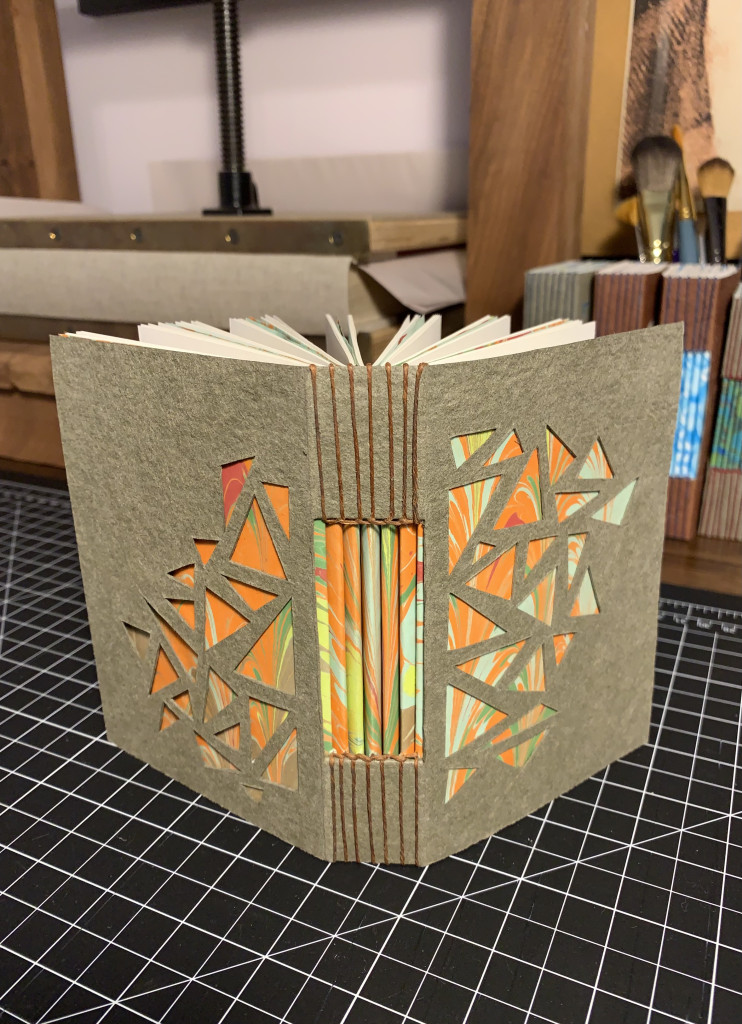
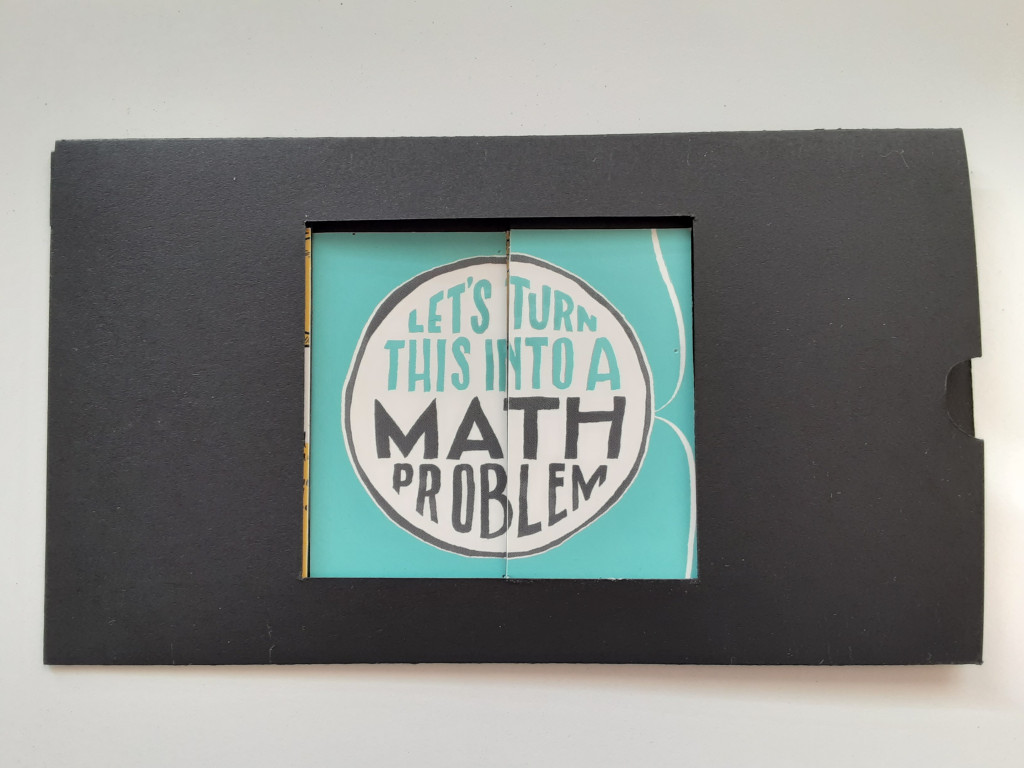
Every year our staff, students and volunteers look forward to our Student & Volunteer Appreciation day, which we affectionately call “fun day”. It generally takes place in late November or early December, always before finals week. It is a time to show our appreciation for all the hard work our students, volunteers and staff do throughout the year, while having an opportunity to come together and learn some new bookbinding or book arts technique. In the past, we’ve done paper marbling, made handmade paper, created German long stitch binds, and more.
I have been coordinating our student & volunteer appreciation days for almost as long as I’ve been in the Lab, so for at least 12 years now. I love it because I am the type of person who enjoys planning these types of things, but also I love watching a student, volunteer or staff member just get really excited about something new. You never know if it’s going to be that quiet new volunteer who just can’t get enough of paper marbling, or that student who doesn’t have any art background but just does the most amazing pulp paintings ever! So after all these years, the thought of 2020/the pandemic ruining everything and not having any sort of student/volunteer appreciation day was just unacceptable!
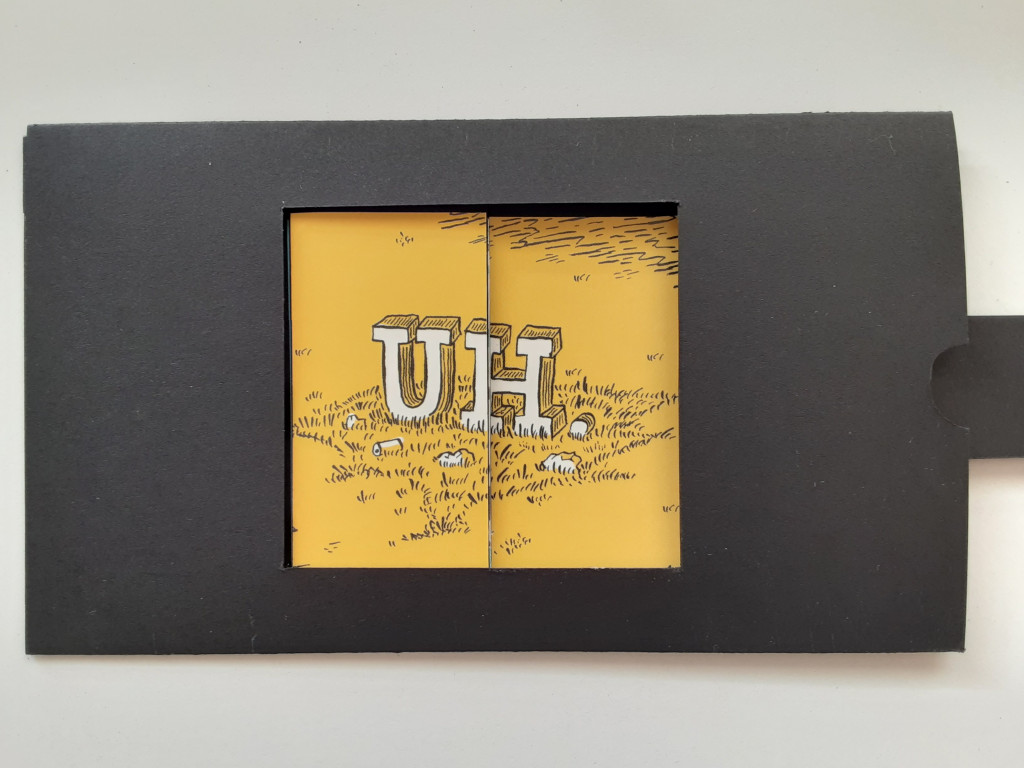
I immediately thought, “What types of activities could we do virtually that would be no cost to the lab and would give everyone a couple hours to come together and decompress?” After a little brainstorming with Holly, we came up with a Button Hole Stitch binding (which I had recently learned) and a simple dissolving view. With the help of my wonderful student staff member and cohort buddy, Lexie, I prepped kits for our virtual event, as well as prepared a step by step video on creating a button hole stitch binding.
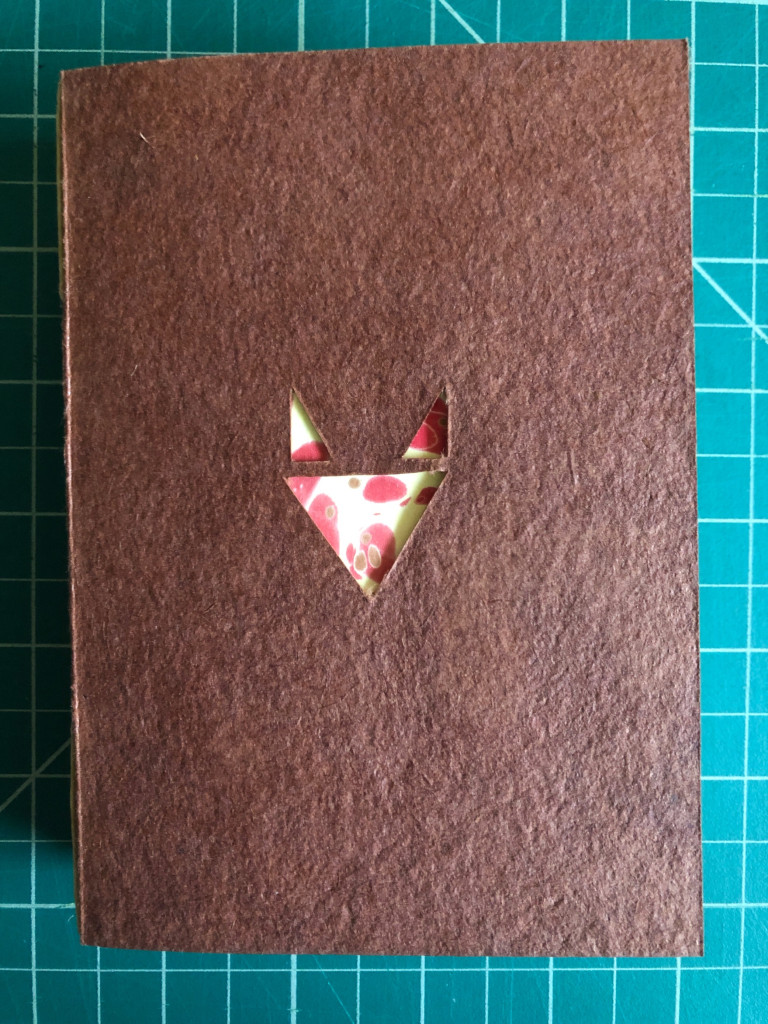
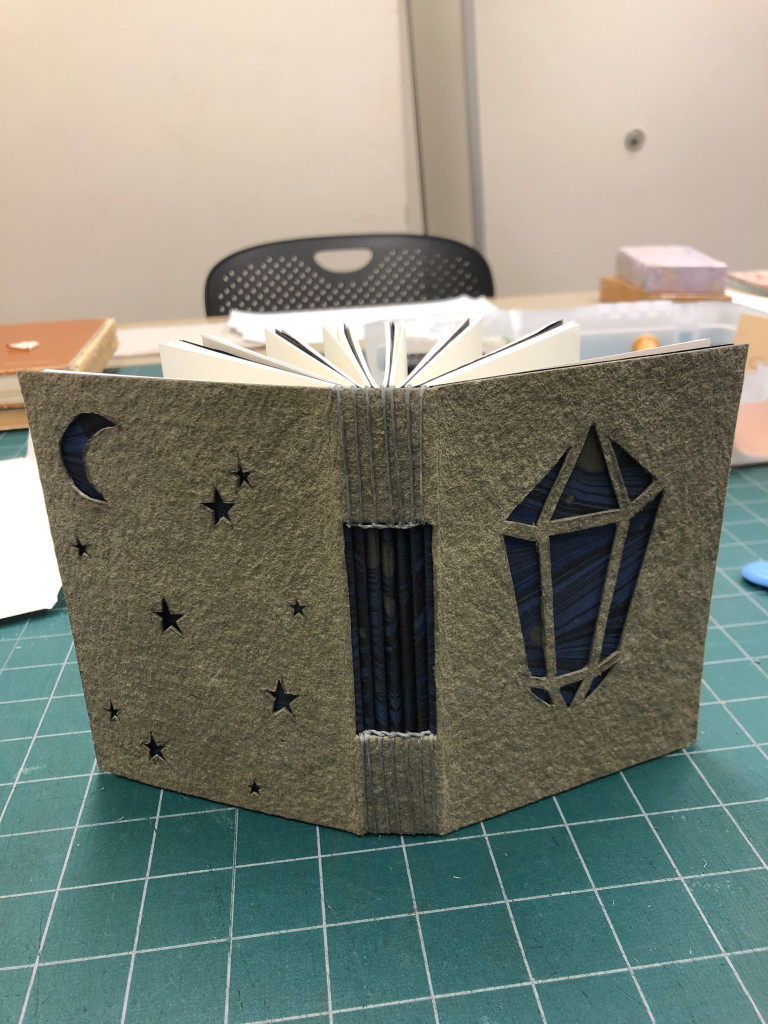
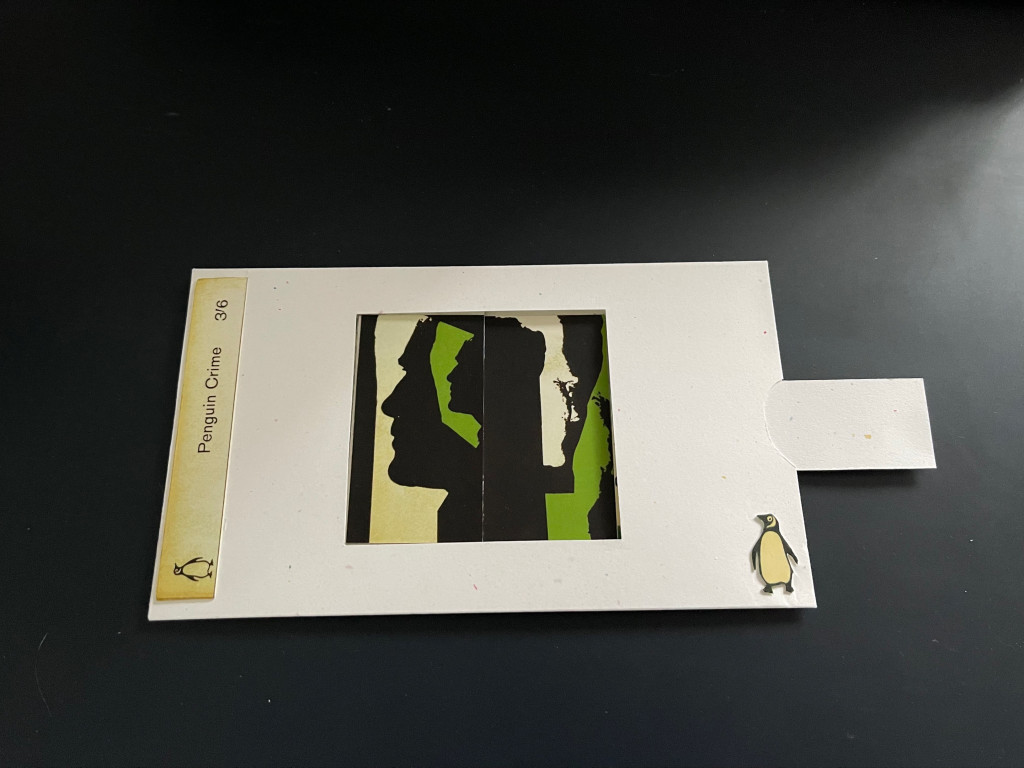
Here are some of the beautiful creations that came out of our little virtual fun day: