Author Archives: Holly Prochaska, Head Preservation Services and Lab

Textiles Conservation at the book and paper lab!

The week of July 18th, the Preservation Lab hosted textile conservator Howard Sutcliffe for a workshop. Howard owns and runs his own textile conservation private practice, River Region Costume and Textile Conservation, based out of Arley, Alabama, and Nashville, Tennessee. We spent four days with Howard learning the basics of textile conservation, with a heavy focus on mount making and sewing skills. This introduction of new methods was eye-opening for us, and many of us are already thinking about ways we can implement the new skills we learned with Howard. 

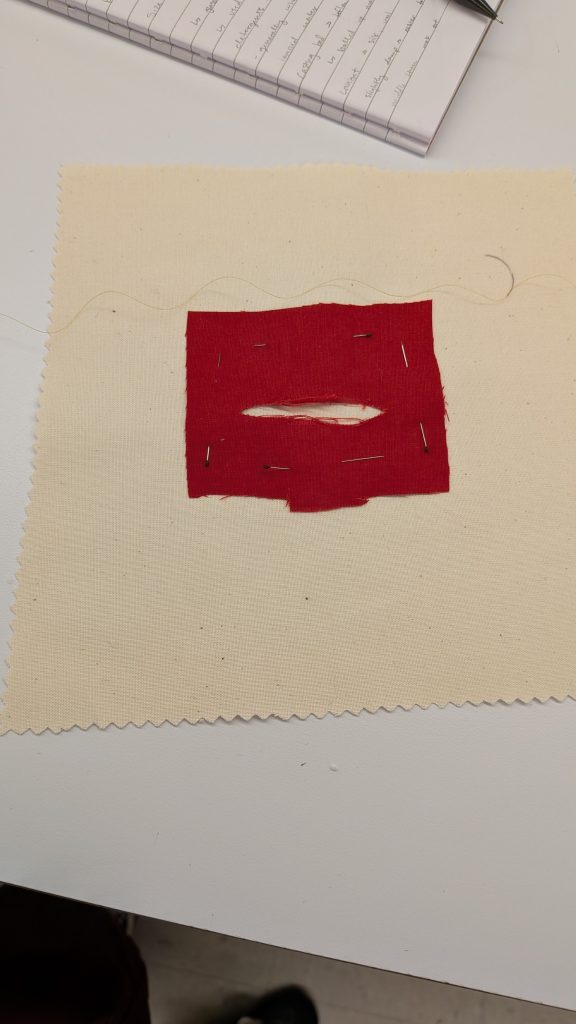
To kick the workshop off, we spent the first half of the day learning about Howard and his practice and seeing the amazing work he’s done on costume pieces, tapestries, and even hats! After the morning lecture, we then went over different types of materials that Howard commonly uses for textile conservation, from silk organza, which we plucked threads from and used to sew delicate stitches, to nylon net and cotton broadcloth that is used for mending and stabilizing. We then learned some basic stitches that are used for mending tears in fabrics, and practiced on our own ‘objects,’ which were pieces of scrap fabric Howard created tears in. 
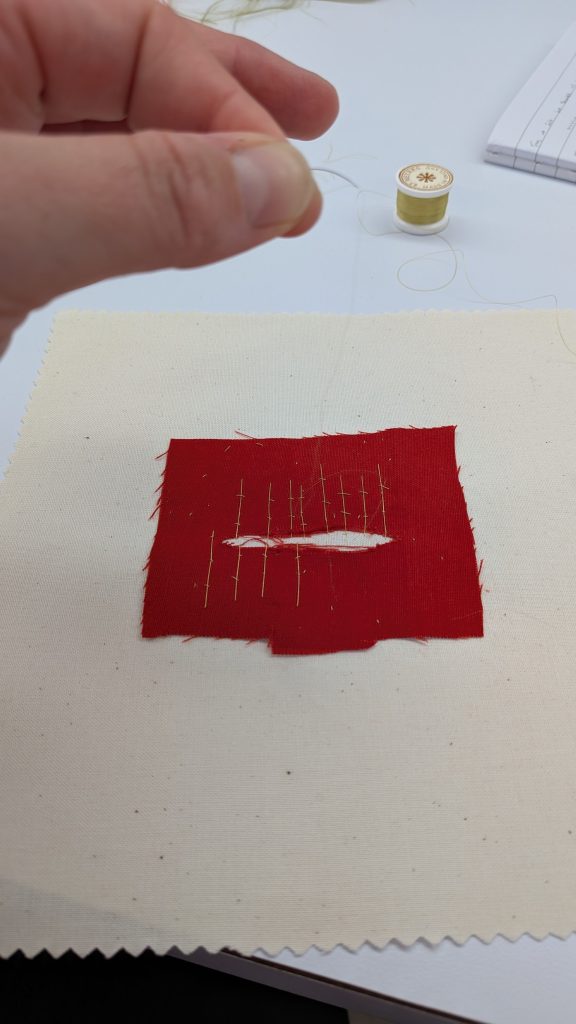
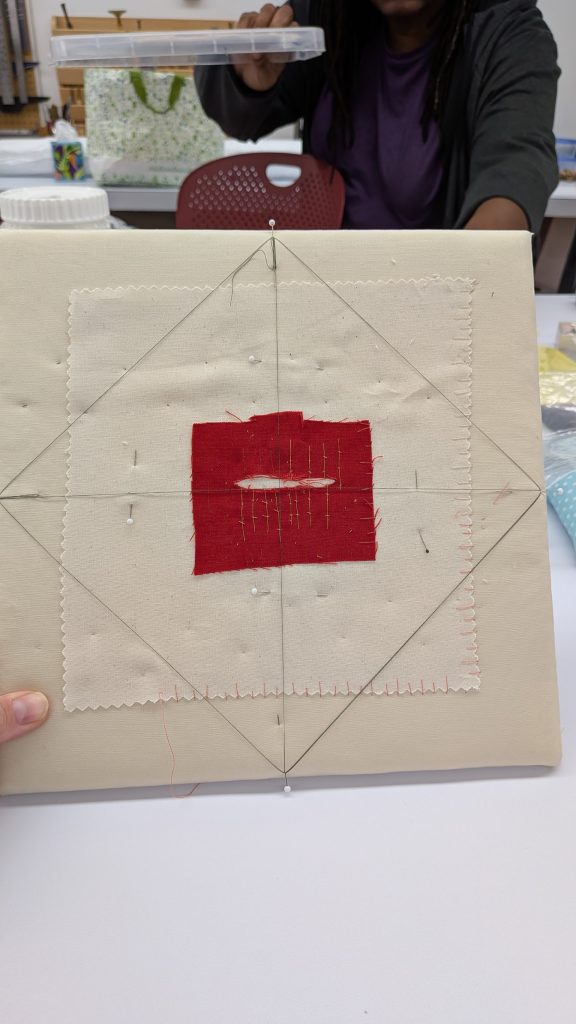
As you can see from the finished product picture, four pins at North, South, East and West on our padded boards were threaded and connected to help us center the object onto the padded board. Typically, after your object is mounted you remove this thread. The padded boards were created by layering corrugated board, batting, and a neutral-colored fabric that we sewed our object onto. Miniscule zig zag stitches were used on the inner part of the object to hold it in place, then the border was sewn with long and short stitches to help reinforce it. While you can see most of the threads in my sample, when working on an object being conserved the thread would be color matched to the item, making the tiny stitches practically invisible. 

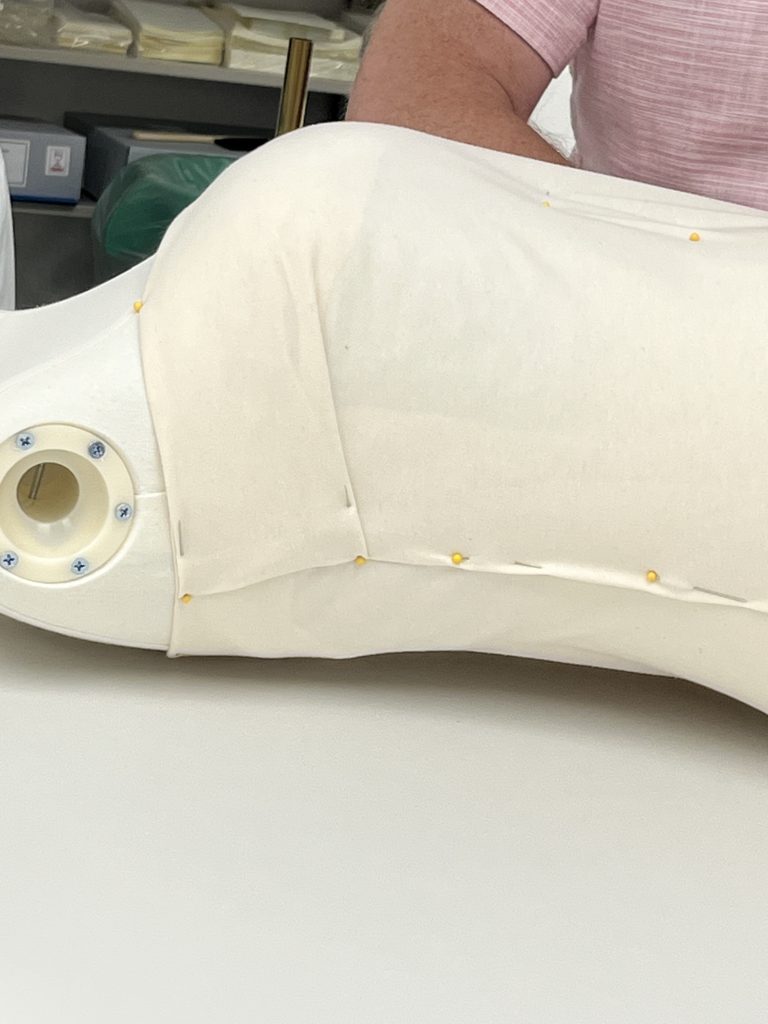
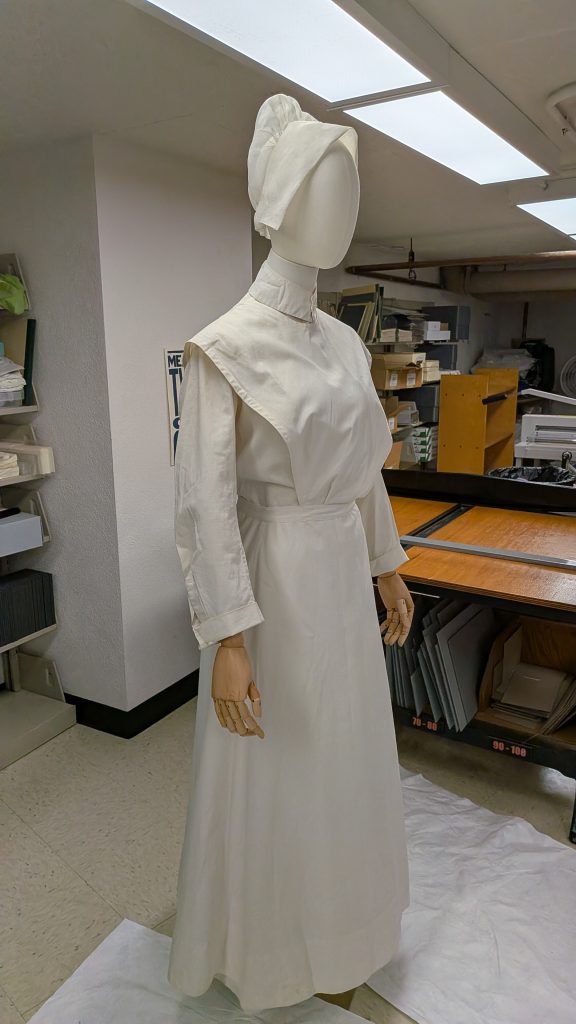
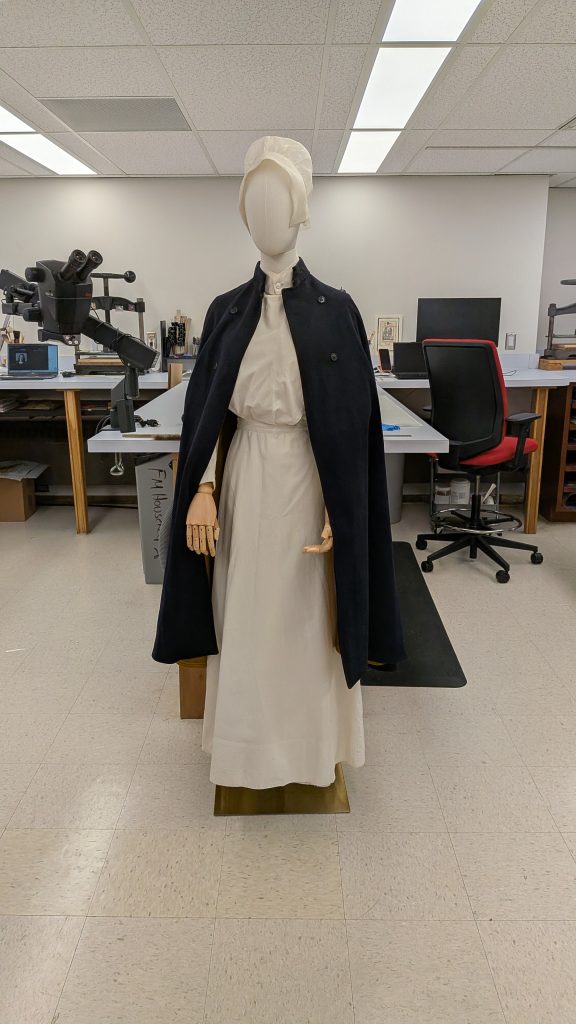
The next three days were primarily dedicated to creating a mount out of a mannequin and batting for a nurse’s uniform we had from Winkler Center for the workshop. We first put the uniform on the mannequin to see where it needed more support, then the dress was removed and a base layer to sew onto was created using a pair of cotton tights.  
Textiles Conservation at the book and paper lab!
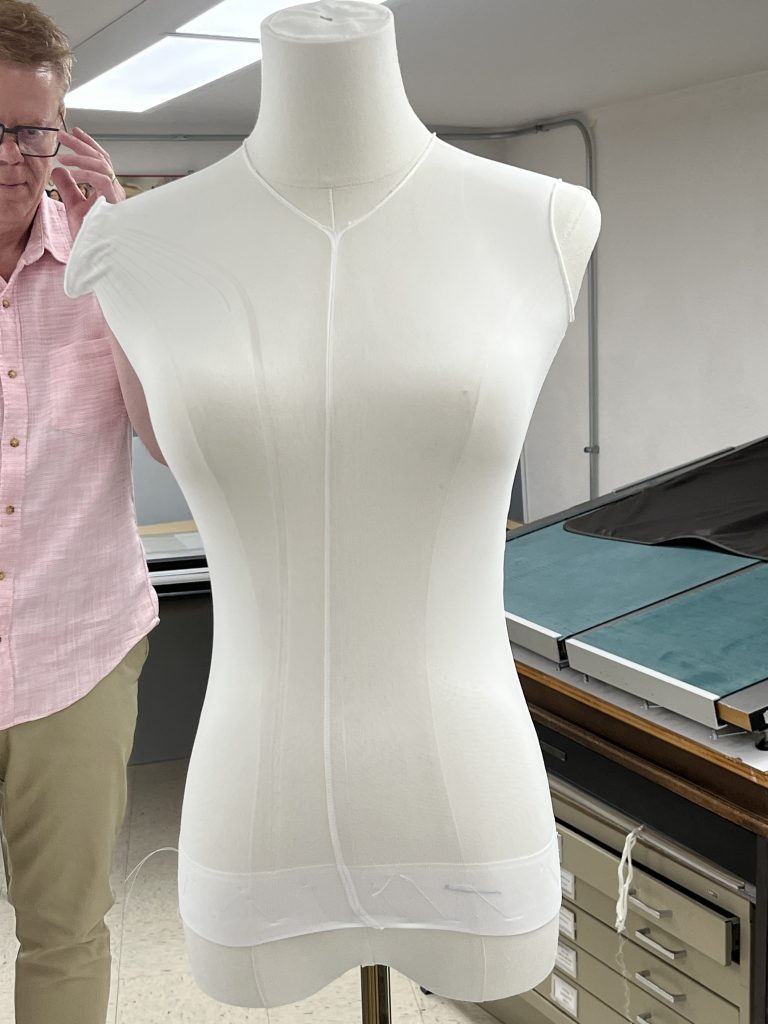
Mannequin covered in cotton tights, legs and gusset cut out to create arm and neck holes.

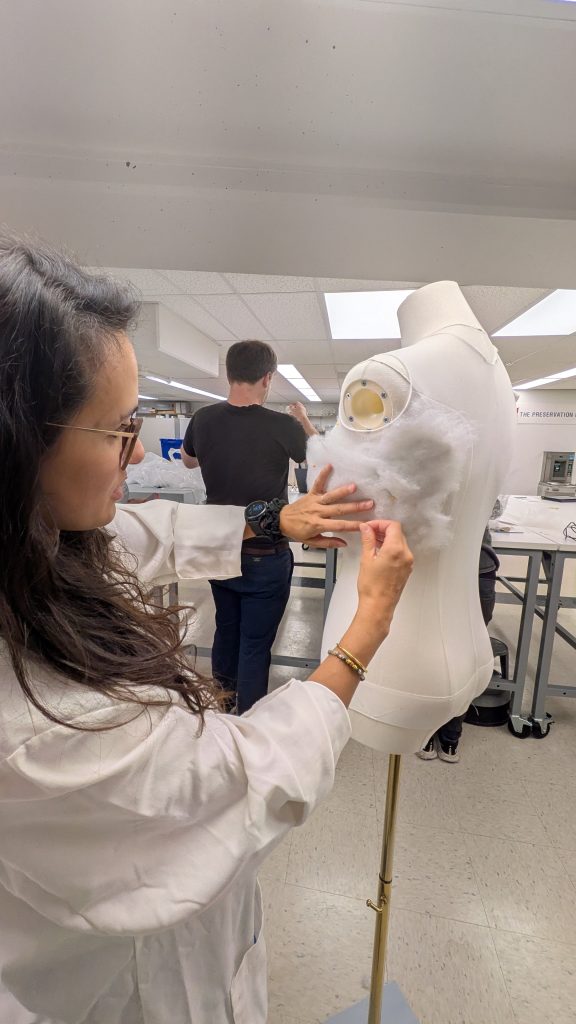
From there, we built up the bust of the mannequin using batting and zig zag stitches. The dress fit the waist well, so we didn’t add anything to the waistline of the mannequin. We layered batting through the bust and the sides to fill out the shape, so it better supported the garment. 
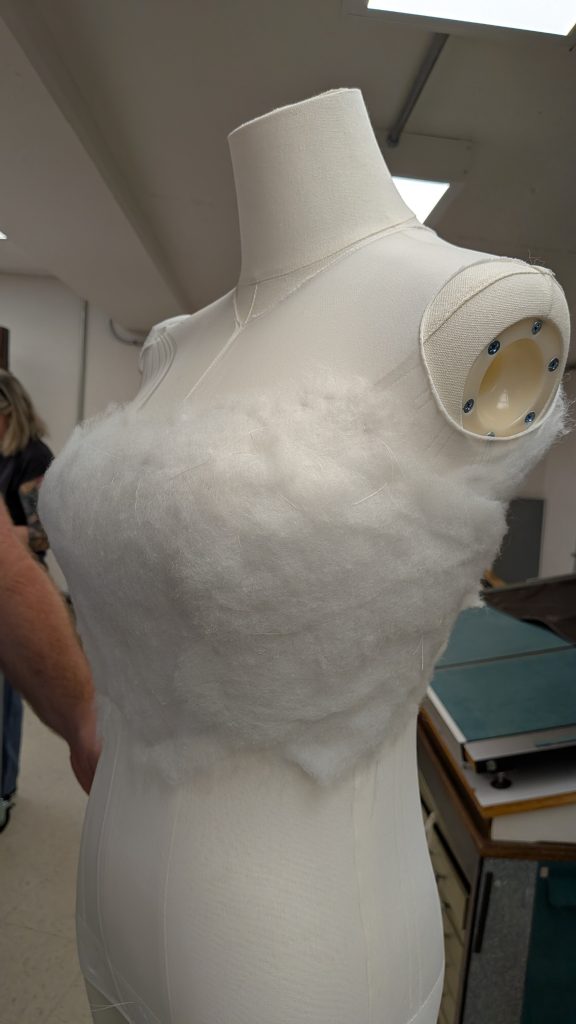
Once the bodice was sufficiently filled out with batting, we cut the tights at the top, folded them down and over the batting, and covered the bodice in cotton jersey to hold it all together. The sides of the jersey were stitched up using a channel stitch. 
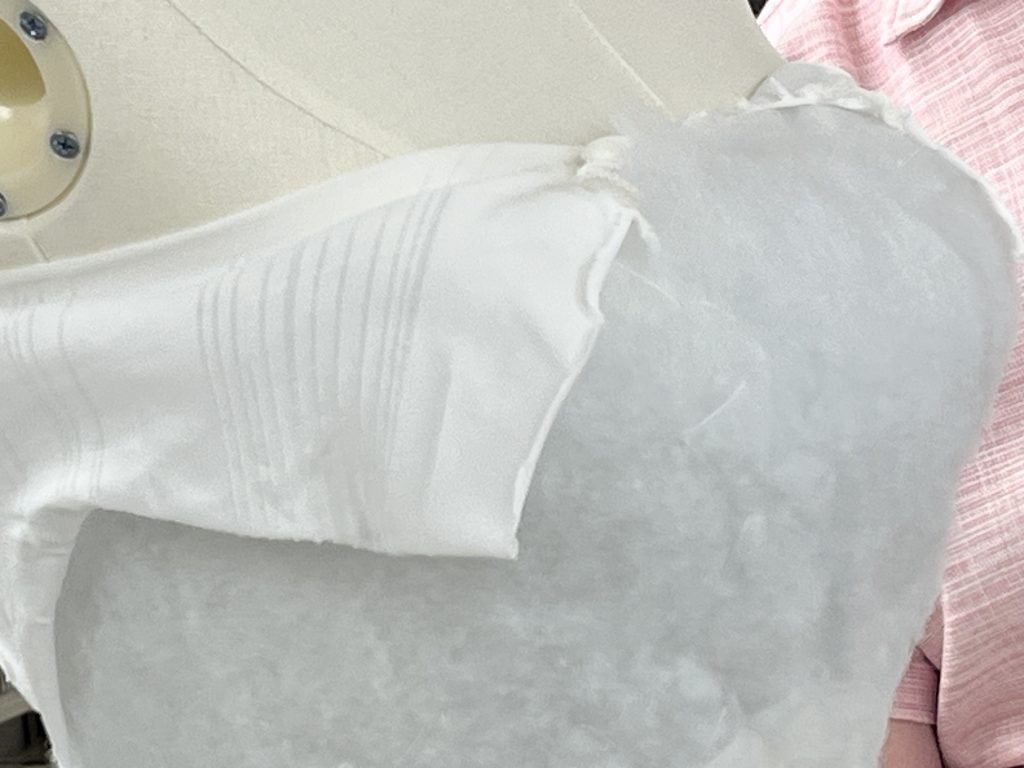
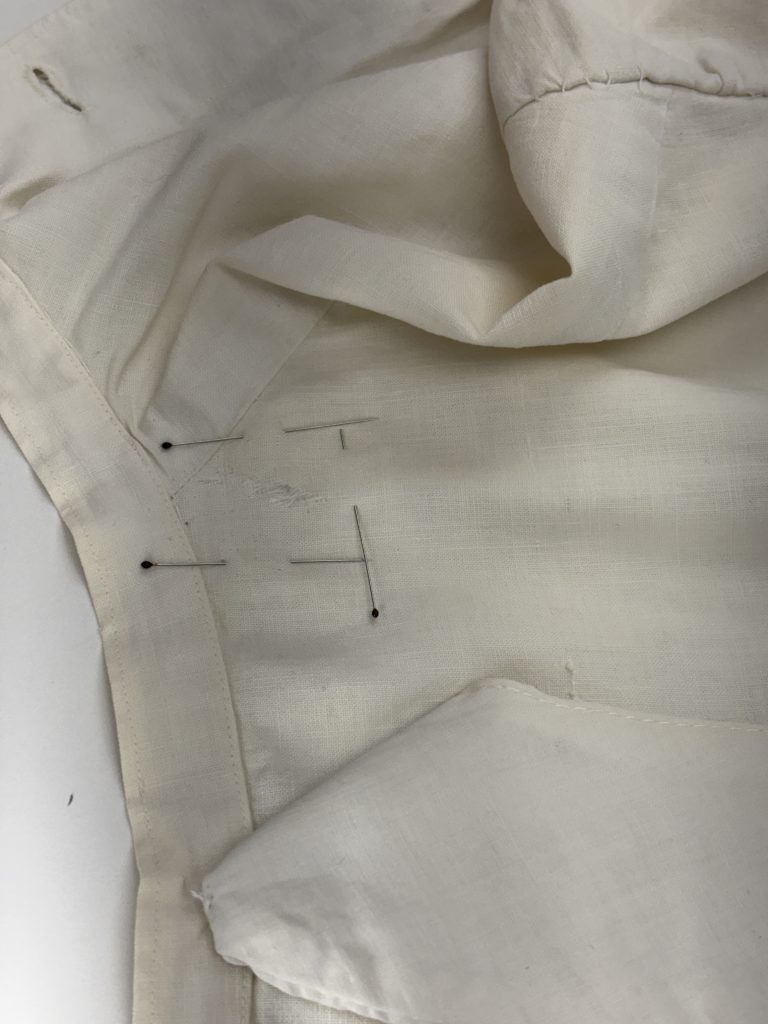
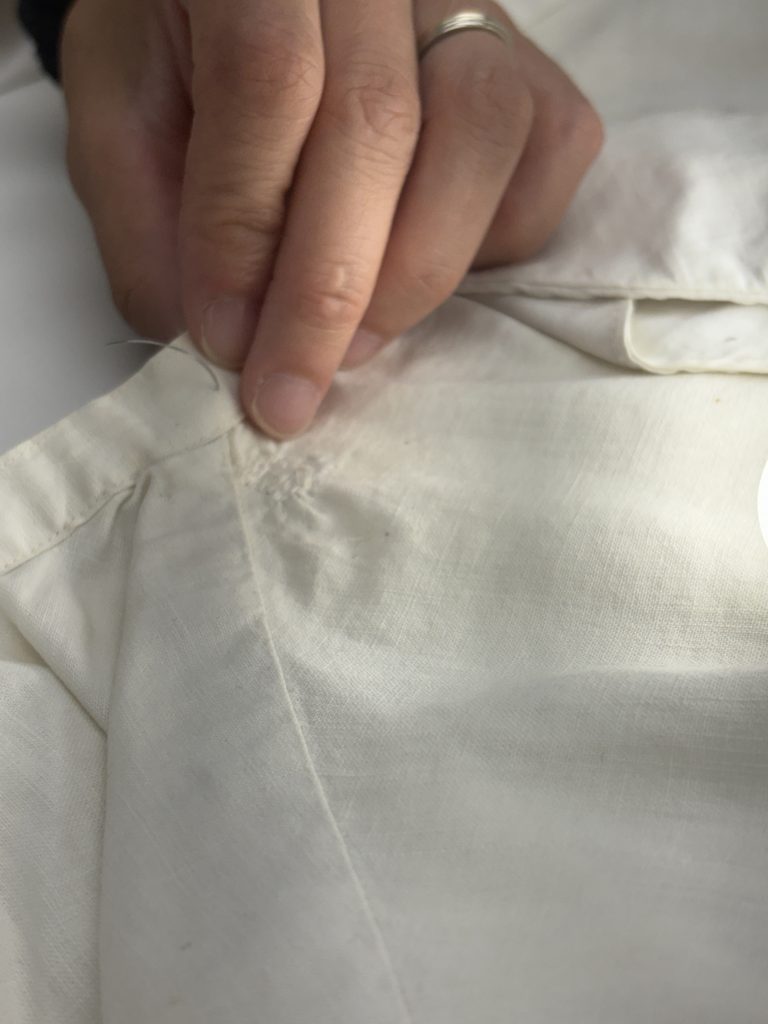
While the conservation technicians and specialists were working on the bodice of the mannequin, the conservators were working to patch some minor holes and slight damages to the nurse’s uniform using the stitching technique we learned on the first day. The dress had three significant holes, two at the top around the collar, and one in the skirt of the dress. 
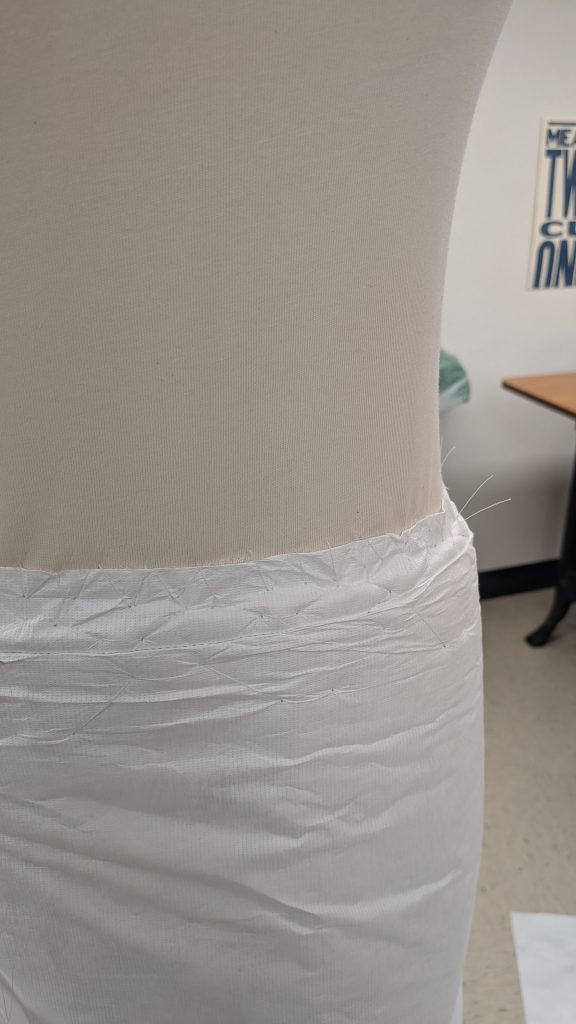
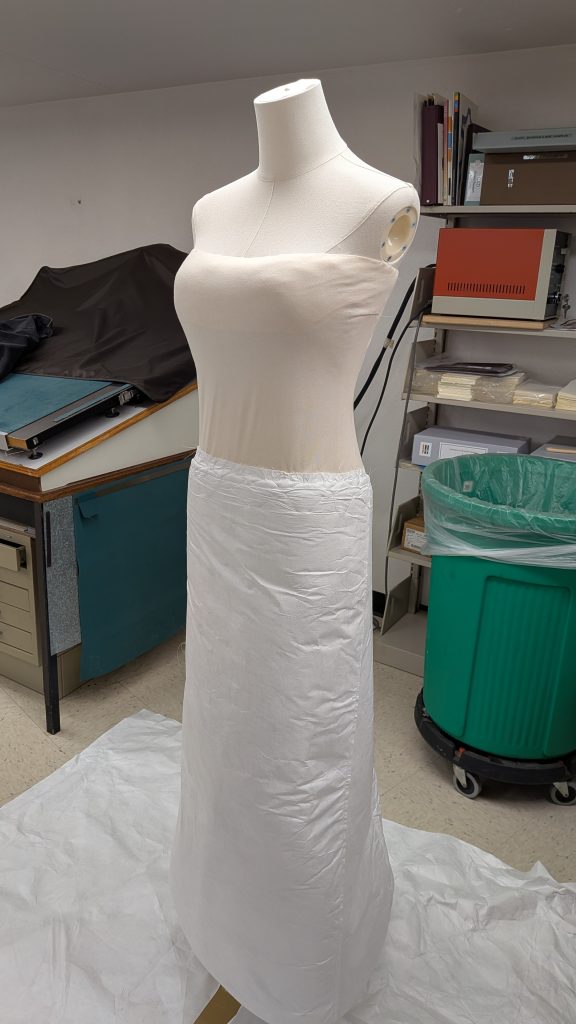
The final step for the mannequin was to create an underskirt to help support the skirt of the dress. This was created from felts sewn between two pieces of Tyvek, which was then sewn beneath the waist of the mannequin. We used zig zag stitches to hold it in place, then more zig zag stitches at the top of the felt to push it down and make the transition a little smoother between the bodice and the skirt. 
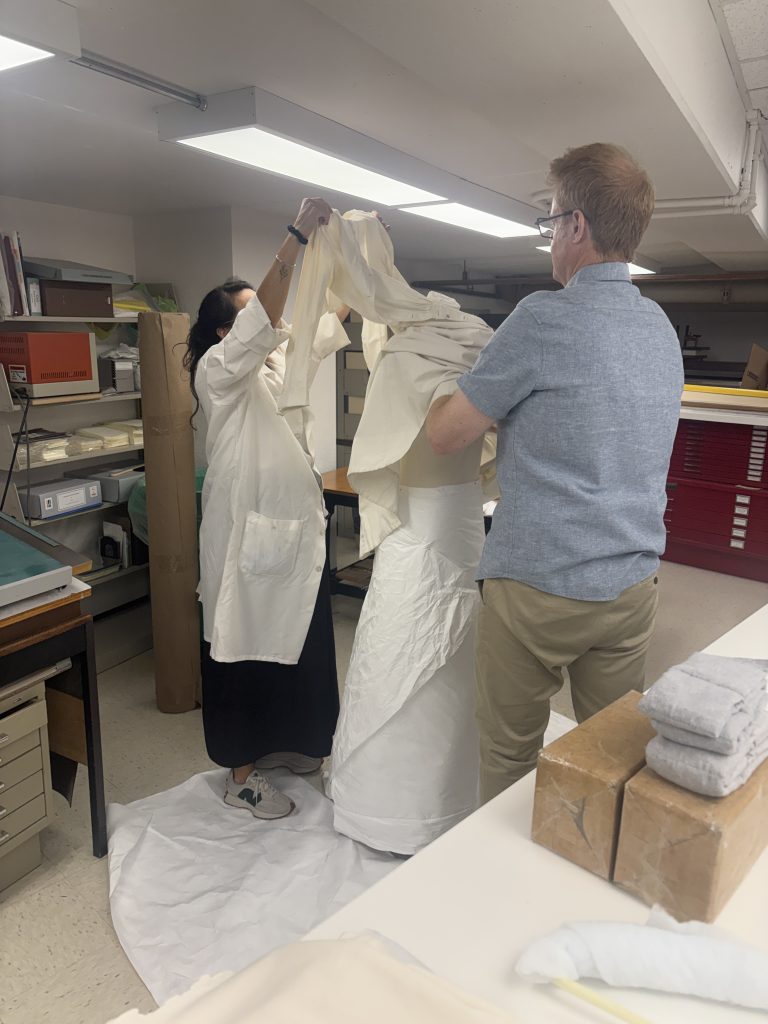
After the skirt was attached, we worked on sewing the legs of the tight around the wooden arms of the mannequin and securing them in place with double-sided tape. Once the arms were complete, it was time to put the dress on! It took two people to get the garment onto the mannequin – one to support the shoulders, the other to lift the skirt over the top. 
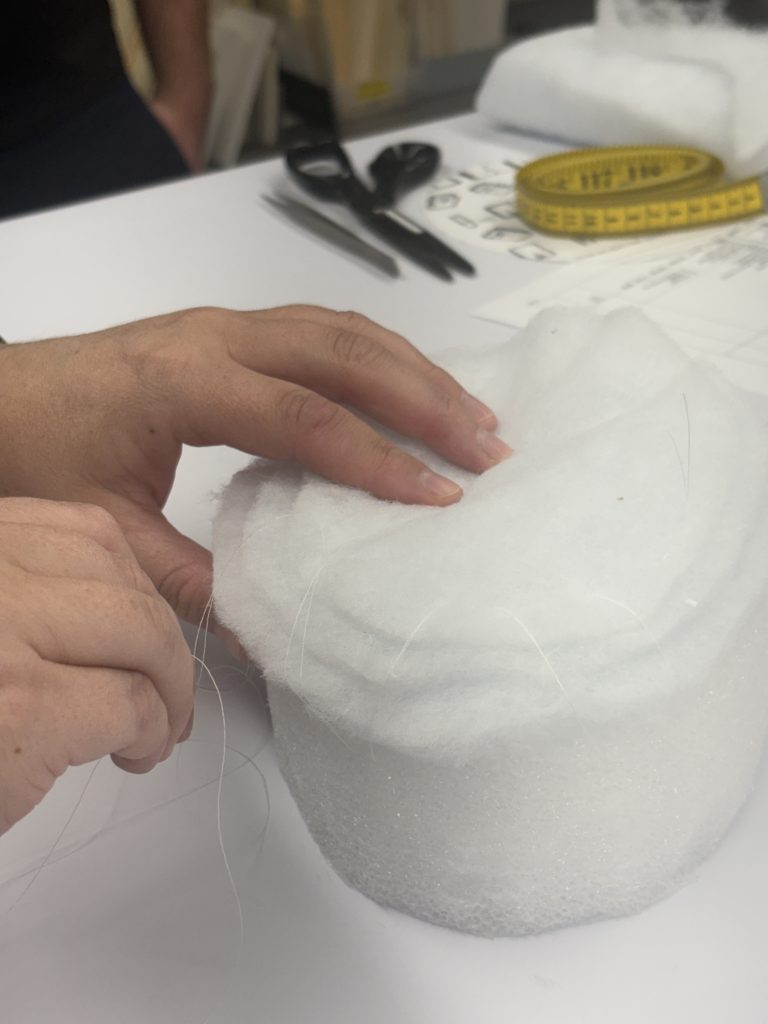
Another type of mount Howard taught us about was hat mounts. We have multiple hats in the lab, and were unsure of how to support them, so Howard showed us how we can sculpt ethafoam and cover the top with batting and wrap the whole thing in soft Tyvek to create a soft mount for hats to sit on.  
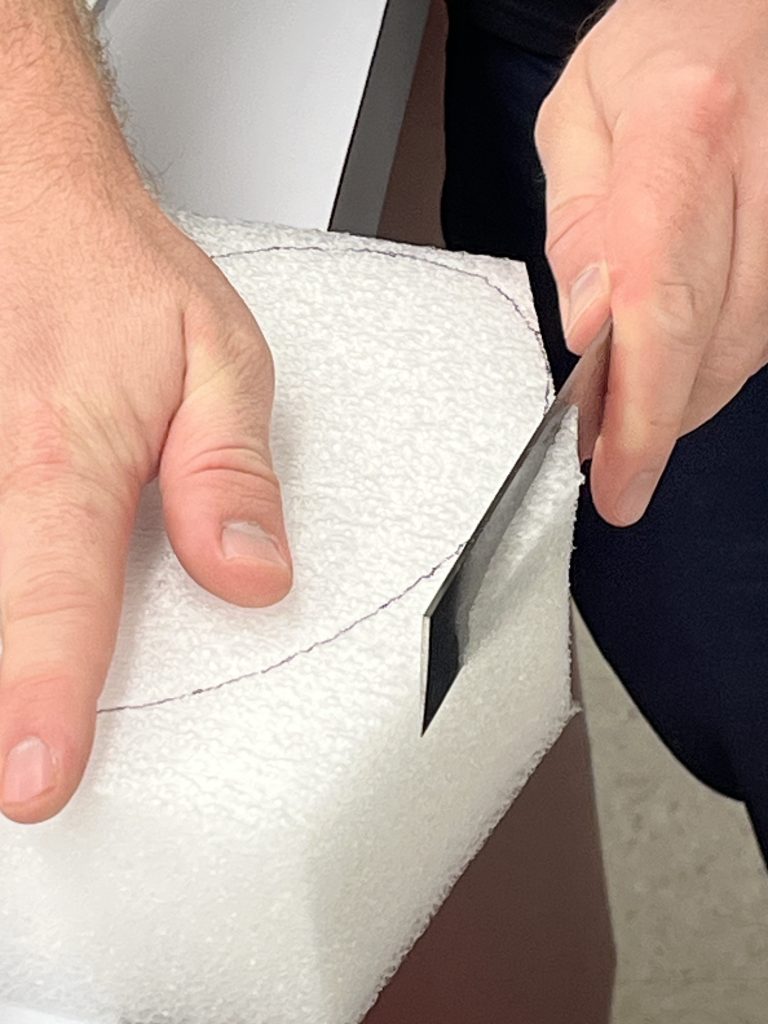
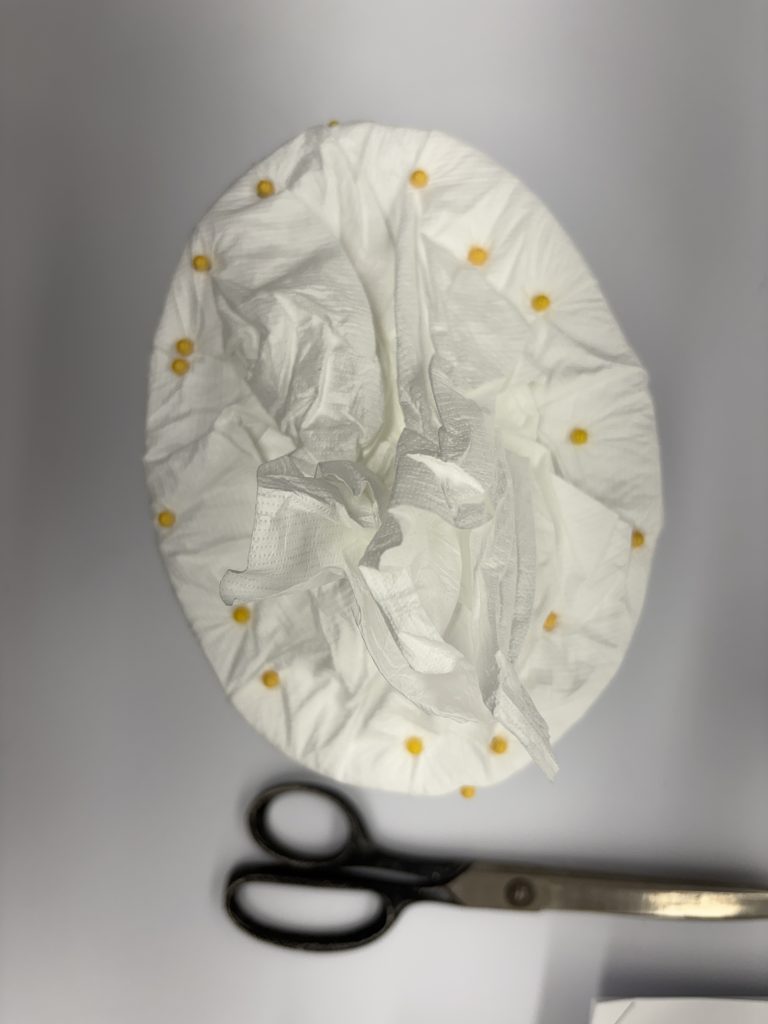
Once the batting and Tyvek were secured onto the ethafoam, a base of mat board was covered in broadcloth, which was stitched on using a running stitch. A blind channel stitch is then used to attach the base to the Tyvek, securing the whole mount together. 
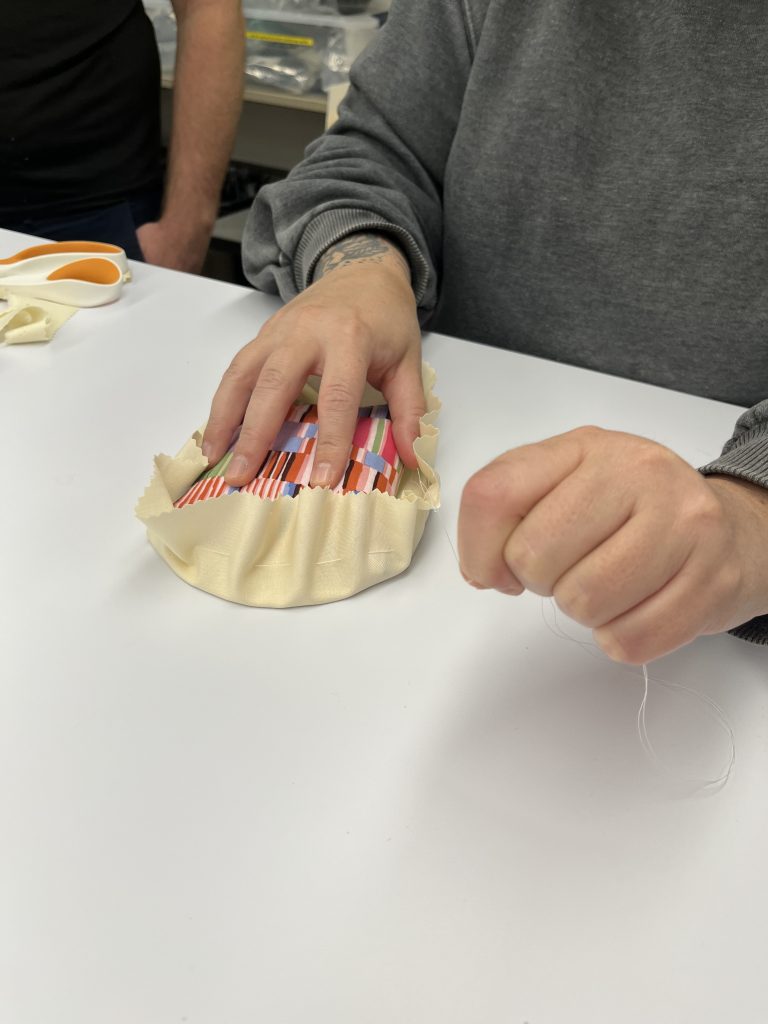
Cloth being cinched around an oval mat board the shape of the base of the hat mount.
Sewing the broadcloth onto the mat board base using a running stitch.

Howard also taught us about adhesives and how to create heat set netting and silk, which can be applied without stitching and using only heat. He also worked with the conservators on dyeing netting and fabrics, and on how to wash textiles to remove stains. 

Our time with Howard was extremely rewarding, and we learned plenty about textile conservation, which for me personally was a branch of the field I knew very little about. Bringing in experts from other parts of conservation helps us to expand our practice, and each of us walked away with a new technique to try that we previously hadn’t thought about using for paper conservation. 
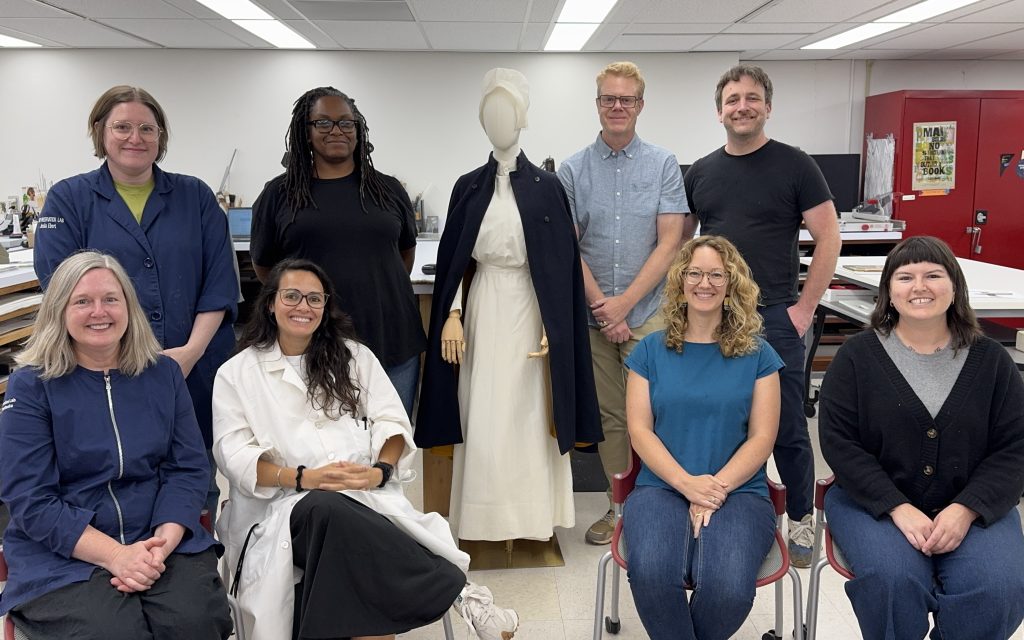
Preservation lab staff and Howard Sutcliffe with the dressed nurse mannequin.
All of the lab members with Howard Sutcliffe and our completed nurse’s uniform.

Nicole Browning – Library Conservation Specialist

Images by Nicole Browning, Jessica Ebert, Hyacinth Tucker, and Holly Prochaska
When you THINK you know the difference between handmade and machine-made paper!

We were delighted to have Dr. Cathleen Baker come to UC for 4 days to teach us all about paper, paper making and printing in a collaborative programming and outreach workshop entitled Identification of Western Hand- & Machine-Made Paper, 1750-1900. The workshop included Preservation Lab staff, staff from UC Libraries Archives and Rare Books Library and the Content Services department, and Kathy Lechuga from Signature Conservation.

With Cathy’s teaching and guidance, we soon discovered some of the key characteristics is in handmade paper and how the introduction of machine-made paper just made everything more complicated. Oof, that dandy roller… But it was so exciting to make discoveries in the paper and learn new tips for paper identification. This will be particularly helpful for Preservation Lab staff when we do our examination of items for treatment proposals.

We are all beyond grateful to Cathy for sharing her immense knowledge and expertise with us. We all learned so much about handmade and machine-made paper and printing. Here’s just a taste of the workshop and us examining special collections items from the ARB Library and the Science Library collections:

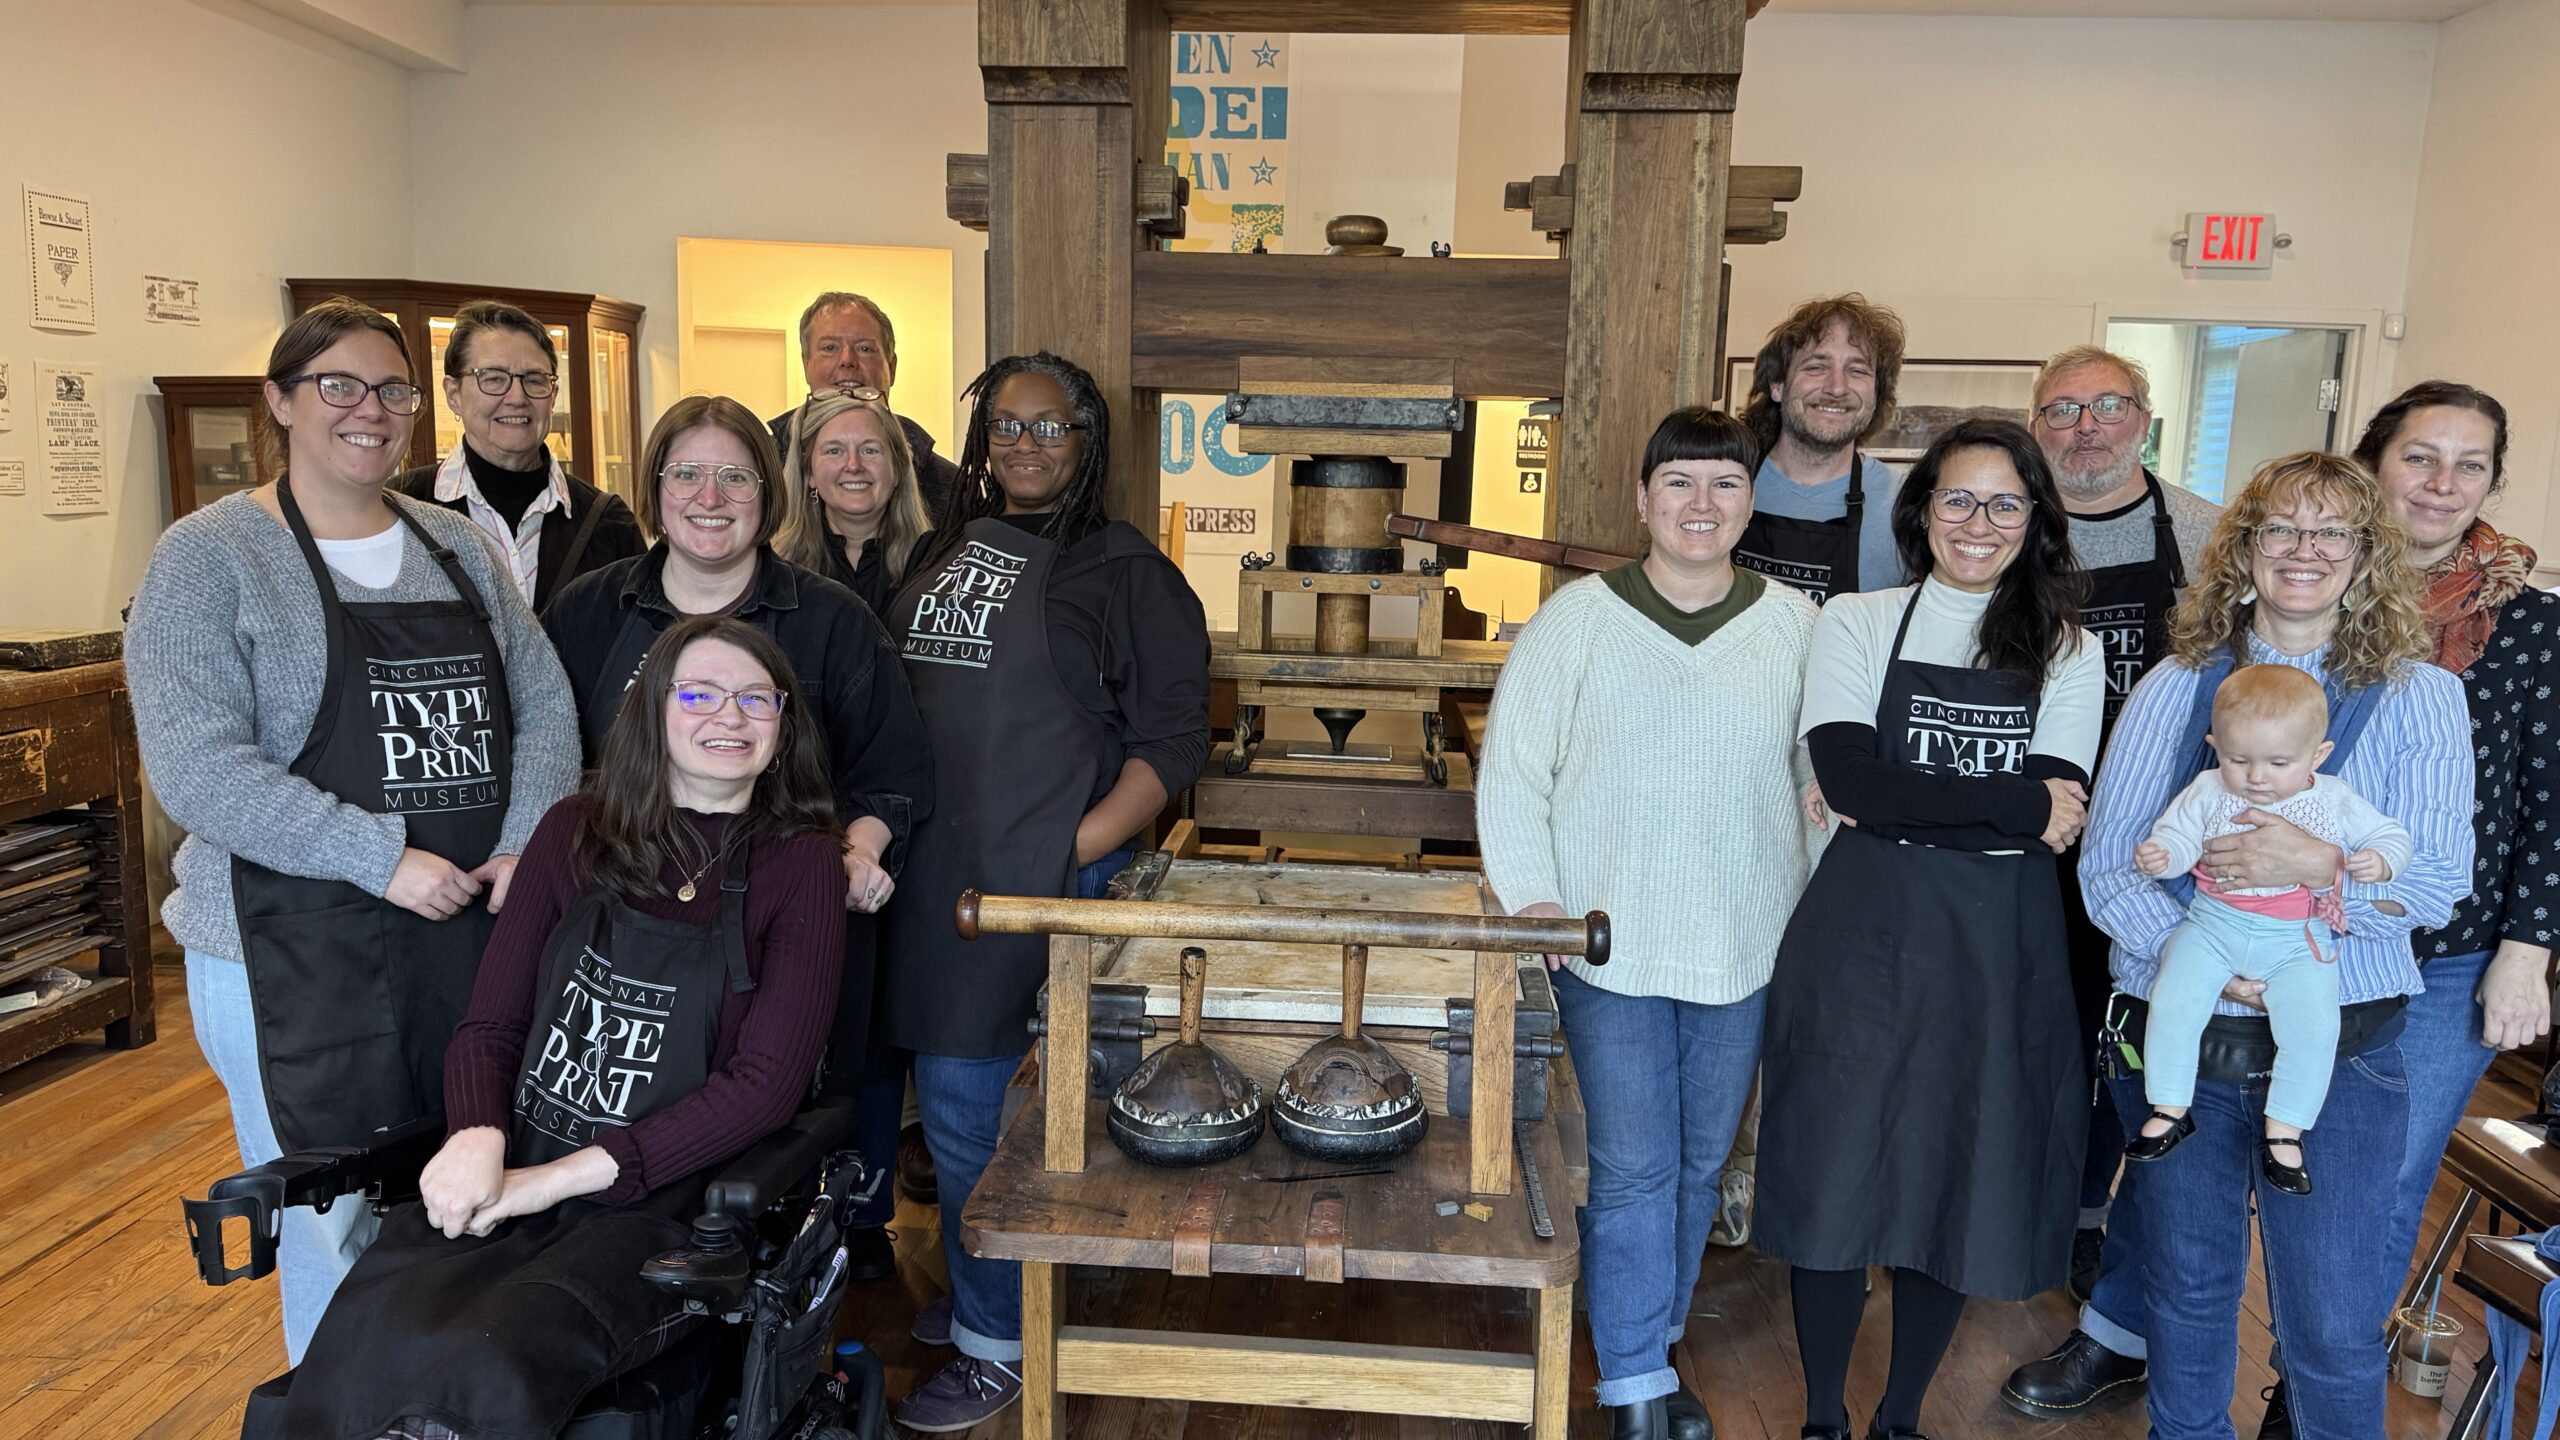
We also took a field trip to the Cincinnati Type & Print Museum to get a paper understanding of printing. It was a fantastic experience! A big thank you to Gary and his staff for a wonderful time printing and a great tour.

13 people and a baby posing in front of a large wooden printing press.
All participants of the workshop and Cathy posing in front of the Cincinnati Type & Print Museum’s wooden hand press.

Jessica Ebert – Assistant Conservator

Retelling Scary Stories

It’s been a busy year in the Lab, and frankly we kind of lost track of our usual Halloween festivities this year. So in lieu of something big, new and grand, I thought I’d share some of the fantastic content we’ve created in years past.

Our Halloween Instagram festivities truly began in 2021 when we hosted five days of Preservation Horrors, complete with a skull rating system and everything!

Day one: Pests

Day Two: Light Damage & Acid Migration

Go to our Instagram feed to see Day 3 (Tape), Day 4 (Brittle Paper), and Day 5 (Water Emergencies).

In 2022 we had another multi-day event called the Haunting of the Preservation Lab where we highlighted tools, equipment and materials that appear in horror movies, but that we also use daily in the Lab. Followed by a fun “actual” haunting of the Lab!

The board shear…always intimidating to new students and staff when they start, and maybe for good reason!?

Solvents are our friends, when used safely…but Chris made a fun mad scientist!

Don’t forget to check out Catarina with the foam saw…it is pretty terrifying! And then there is the Haunting of the Preservation Lab, and part two, which makes question everything…

In 2023 we shared Scary Stories from the Stacks, which included sights from the stacks that strike fear into the hearts of conservation professionals!

Then we received several stories from staff about strange occurrences and happenings in the libraries over the years we recreated those as reels…

Don’t forget to check out the Haunted Stairwell, a ghost story from our much loved colleague Mike Braunlin at the Classics Library.

Then last year we created Halloween Costumes: Conservation Edition, which included last minute costume ideas featuring things you could find around a conservation lab.

Fun fact, we still have the Vigo painting in out back supply room and occasionally it will scare non-team members or new students and we get a chuckle out of it!

Happy Halloween everyone! Stay safe.

Jessica Ebert – Assistant Conservator

A Timeless Tale – How Inscriptions Tell Stories

It’s amazing the different ways books can tell us stories. There’s the obvious: the words that are written on the page and create the story the author wanted to tell. But there’s also what lies beneath the surface — the wear and tear of the book, how it was bound, what materials were used to make it. There’s the outright story a book was meant to share, but there are also context clues, and deeper ways we can dive into the history of a book.

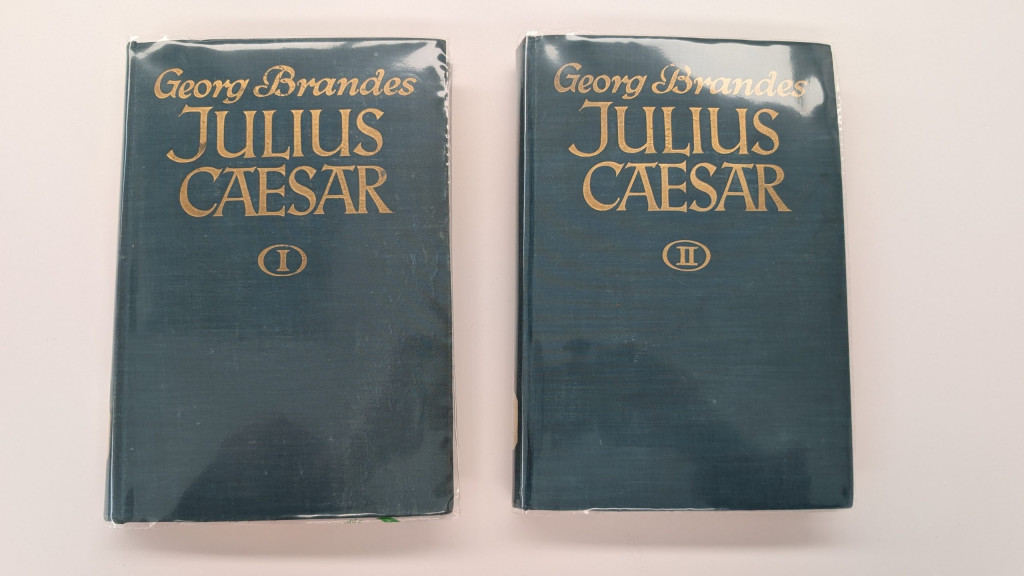
Sometimes, a book just outrightly tells its story through notes left by previous owners. A handwritten message about where it was bought, a book plate of whose library it came from, or an inscription with notable information about damage to the tome are all ways prior owners can document what the book has been through. This latter suggestion is the case for a two-volume set of Cajus Julius Caesar by Georg Brandes.

A Timeless Tale – How Inscriptions Tell Stories
Pictured: volumes I and II of Cajus Julius Caesar.

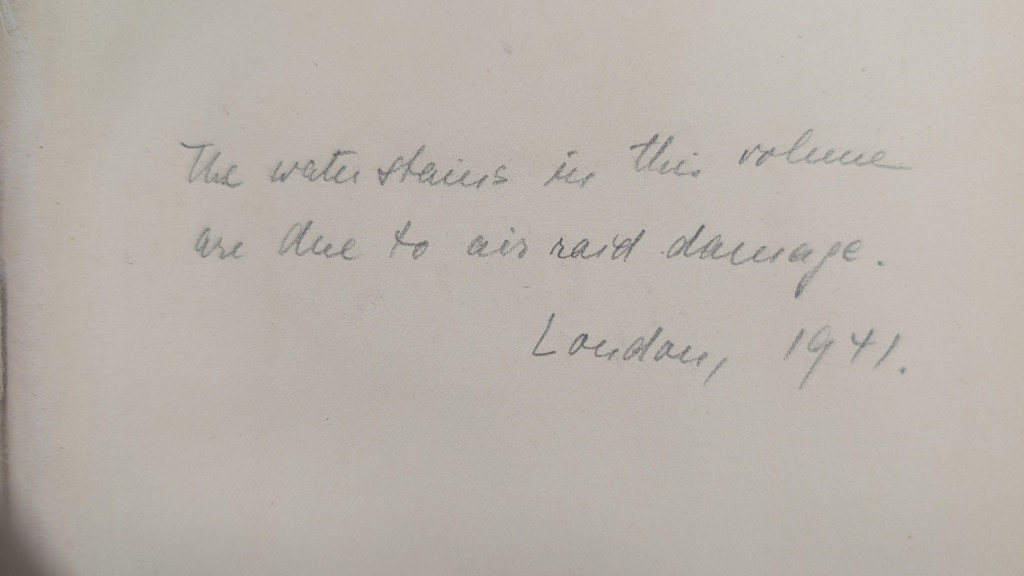
These books were published in 1925 by the Erich Reiss Verlag publishing house. On the fly leaf of both of these volumes is a handwritten inscription which reads “The water stains in this volume are due to air raid damage. London, 1941.” In graphite. What a big journey for two books, from Berlin, Germany, to London, England, and then to Cincinnati, Ohio!

A Timeless Tale – How Inscriptions Tell Stories
Pictured: inscription in Julius Caesar Volume I.
Inside of both volumes, open to the first blank page, where the inscription is visible on both books.
Pictured: inscriptions in Julius Caesar Vol. I and II
Two volumes stacked on top of each other with the bottom of the text block visible. The text block is stained brown on the lower right corners of both volumes due to water damage.
Pictured above: signs of water damage on the book.

The water damage to the books is there but it isn’t too drastic. There is some obvious staining and cockling to the pages, as well as some warping of the covers. These books were treated with v hinges on the front and back fly leaves to prevent further separation of the cover from the text block and were also put in Colibri covers to help keep them protected on the shelves and during use.

One of the books with the front cover open and the text block under weights while being repaired.
Pictured: both volumes of Julius Caeser being treated with v hinges.

These books needed minimal treatment, and then will return to their home at the Classics library. With some care from the preservation lab, these two volumes can continue to tell their story for years to come.

Nicole Browning — Conservation Technician

A Wedge for a Wedge

This is a lovely leather-bound volume that came to us in need of a cloth-covered clamshell with some gentle compression. Unfortunately, it has a bit of an odd shape, meaning we had to solve the problem of the open space in the enclosure.

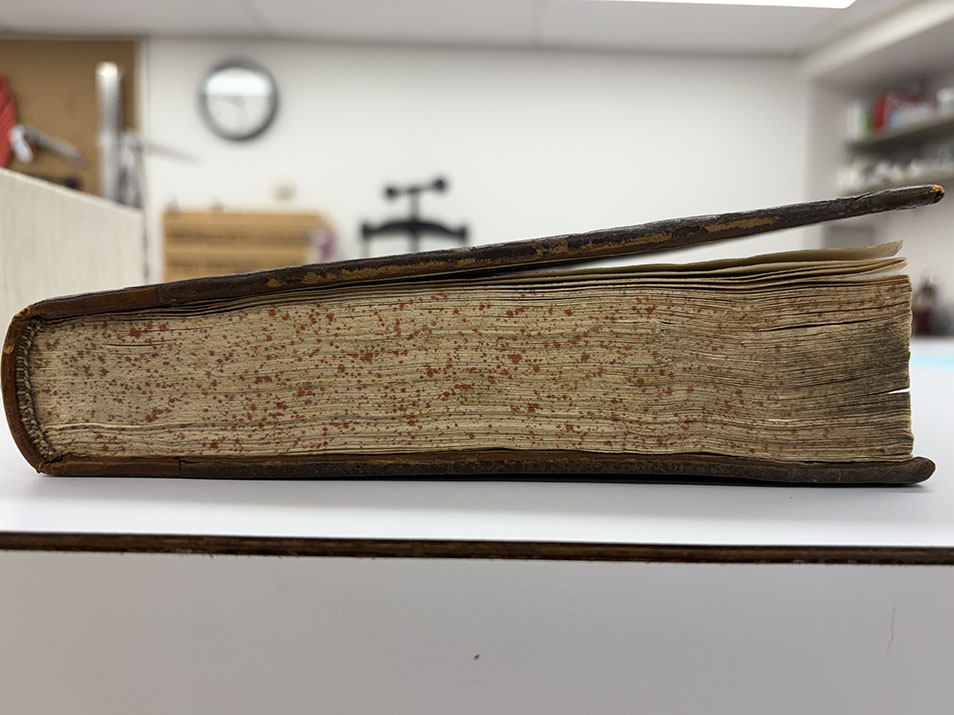
Image of a leather bound book that has deformed into a wedge shape.
Figure 1. The problem: a wedge-shaped volume

Our solution: a wedge to secure the volume and spread the pressure of the compression. We opted for mat board as opposed to book board, both to keep the enclosure from getting to heavy and to give the wedge a little bit of flex.

Thanks to a little math and a little mat board, this volume will be safe and secure and protected from temperature and humidity changes in its home on the shelf!

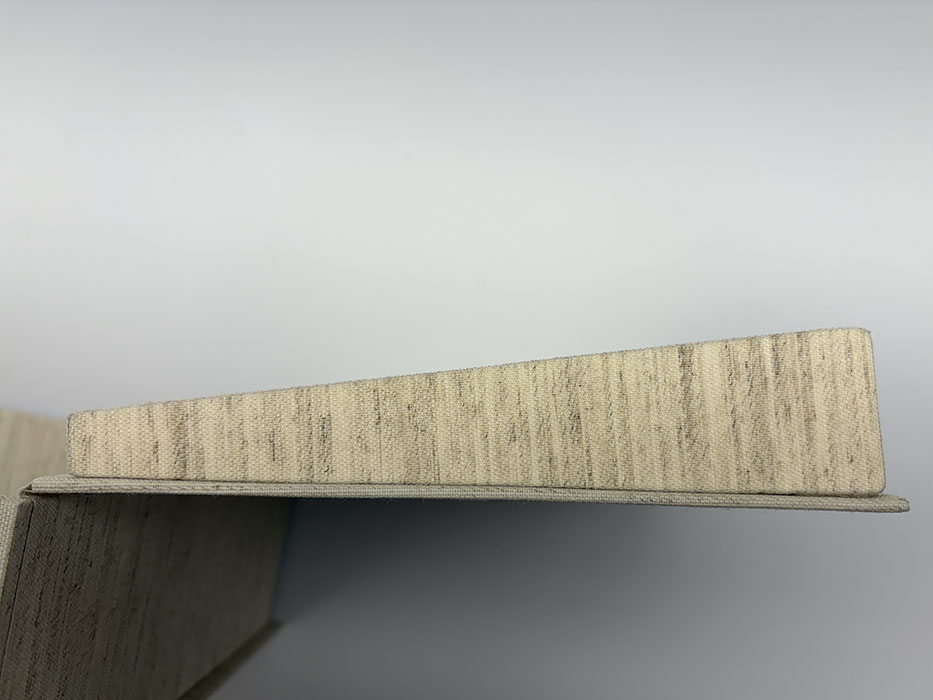
Image of wedge shape constructed of board and book cloth to support the deformed leather book.
Figure 2. The solution: a cloth-covered wedge to spread the compression and fill the empty space.
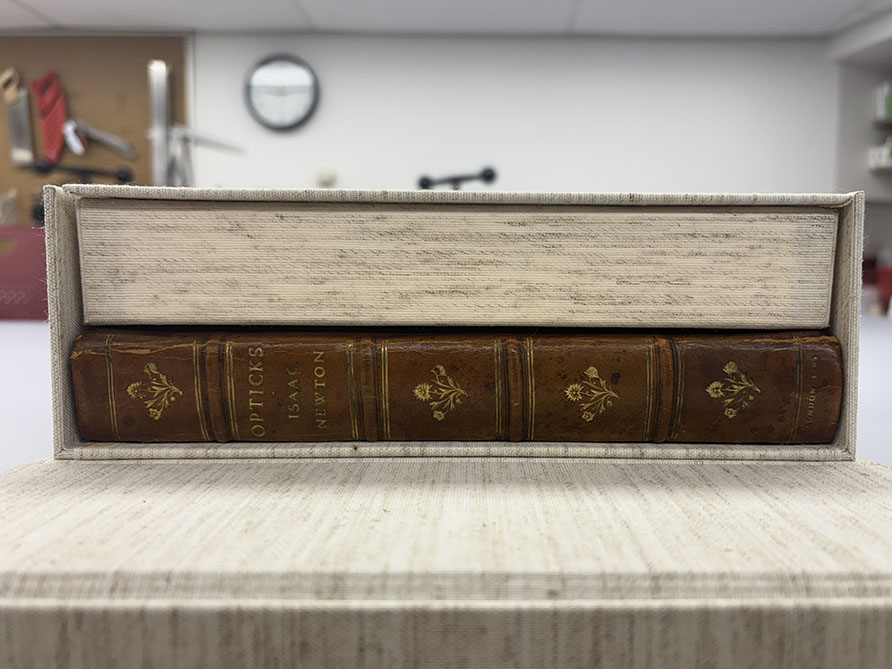
Cloth covered clamshell enclosure with leather book inside.
Figure 3. The completed wedge. A perfect fit!

Hyacinth Tucker – Conservation Technician and Bindery Processor

Faux Jacket-Sling Hybrid?

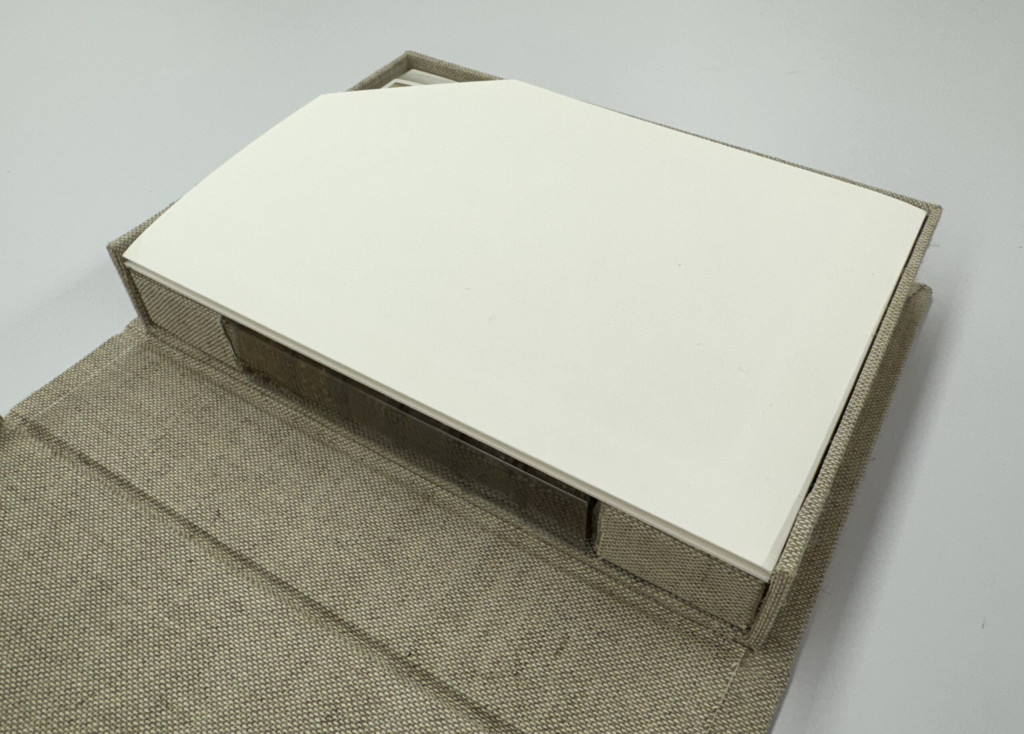
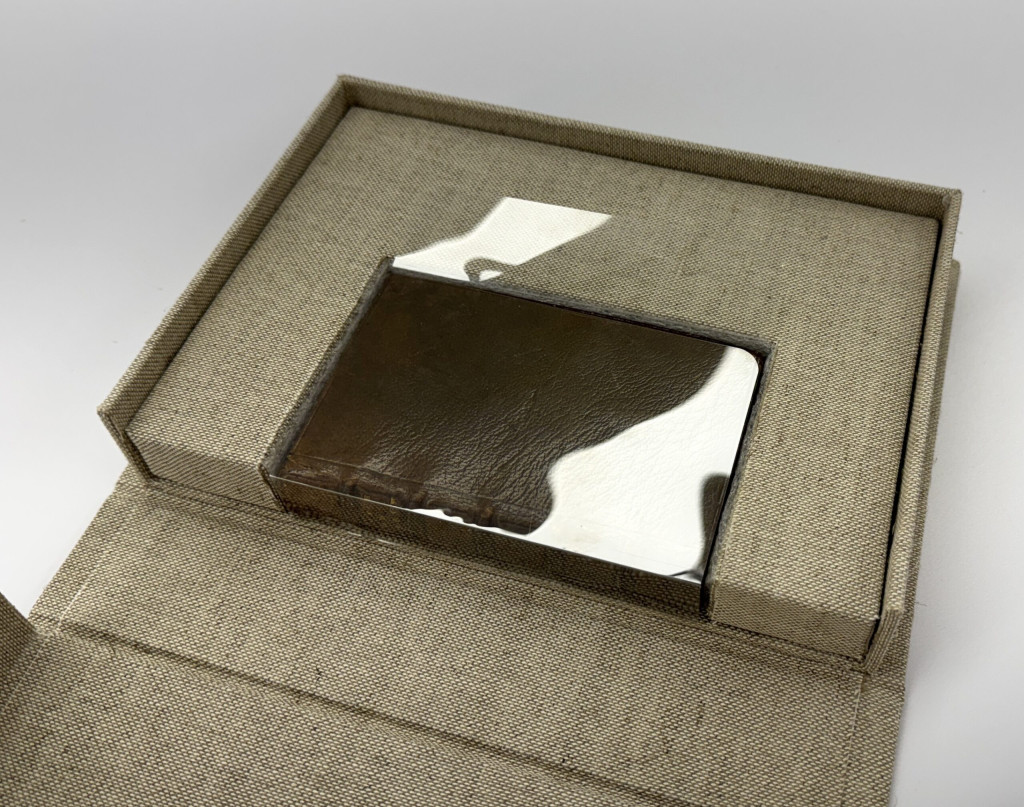
I recently created a cloth covered clamshell enclosure for this small leather volume from the Cincinnati & Hamilton County Public Library. The volume has eight full color miniatures which received surrogate photography. The surrogates were printed to roughly 5×7 inches, making them substantially larger than the text, so an insert was created within the cloth clamshell to house the smaller volume.

Cloth clamshell with insert and small book inside
Interior tray of the cloth clamshell enclosure with the surrogates placed on top of the small leather volume housed within the custom insert.
Small book in insert inside of custom box
To build up the enclosure to the size of the surrogates, an insert was created using archival corrugated board covered in Cotlin bookcloth. I lined the portion of the insert where the volume would rest with thin Ethafoam sheeting, so the fragile leather edges wouldn’t be abraded.
Small book in insert inside of custom box. Book is wrapped in a custom polyester wrapper.
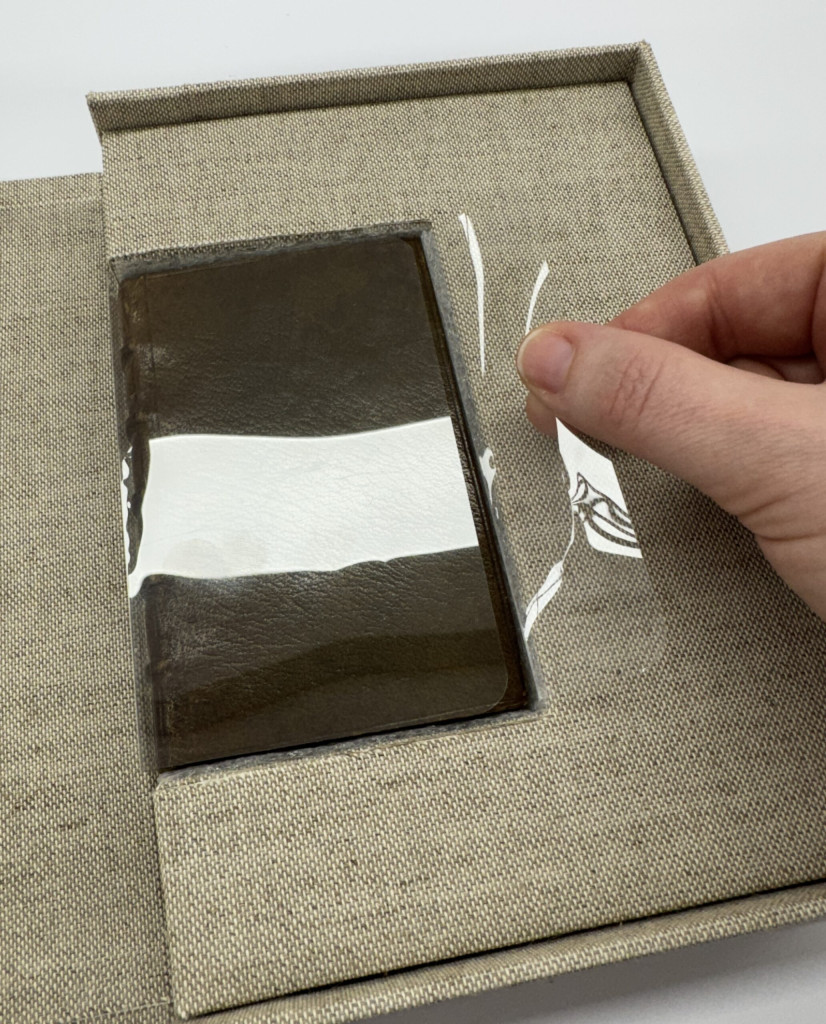
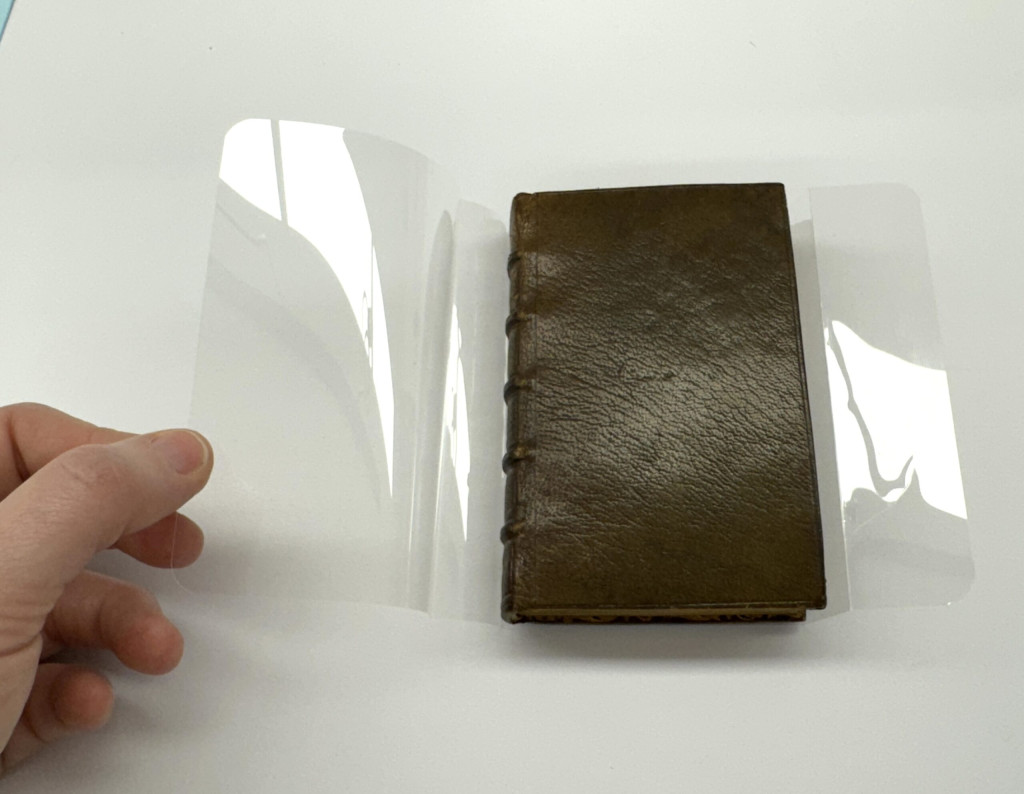
To aid in lifting the volume from the enclosure I created a partial polyester wrapper of sorts. Part jacket, part sling. A faux jacket-sling hybrid, if you will?
Book is wrapped in a custom polyester wrapper.
A closer look at the polyester creation, with rounded corners.

Overall, I think it’s a quick and easy solution that could be beneficial in future situations where a simple modification of an existing enclosure is needed, but space within the enclosure is at a premium.

Jessica Ebert – Assistant Conservator

Allegheny River / Capt. J.W. McLaughlin

How to store a 15ft paper scroll?

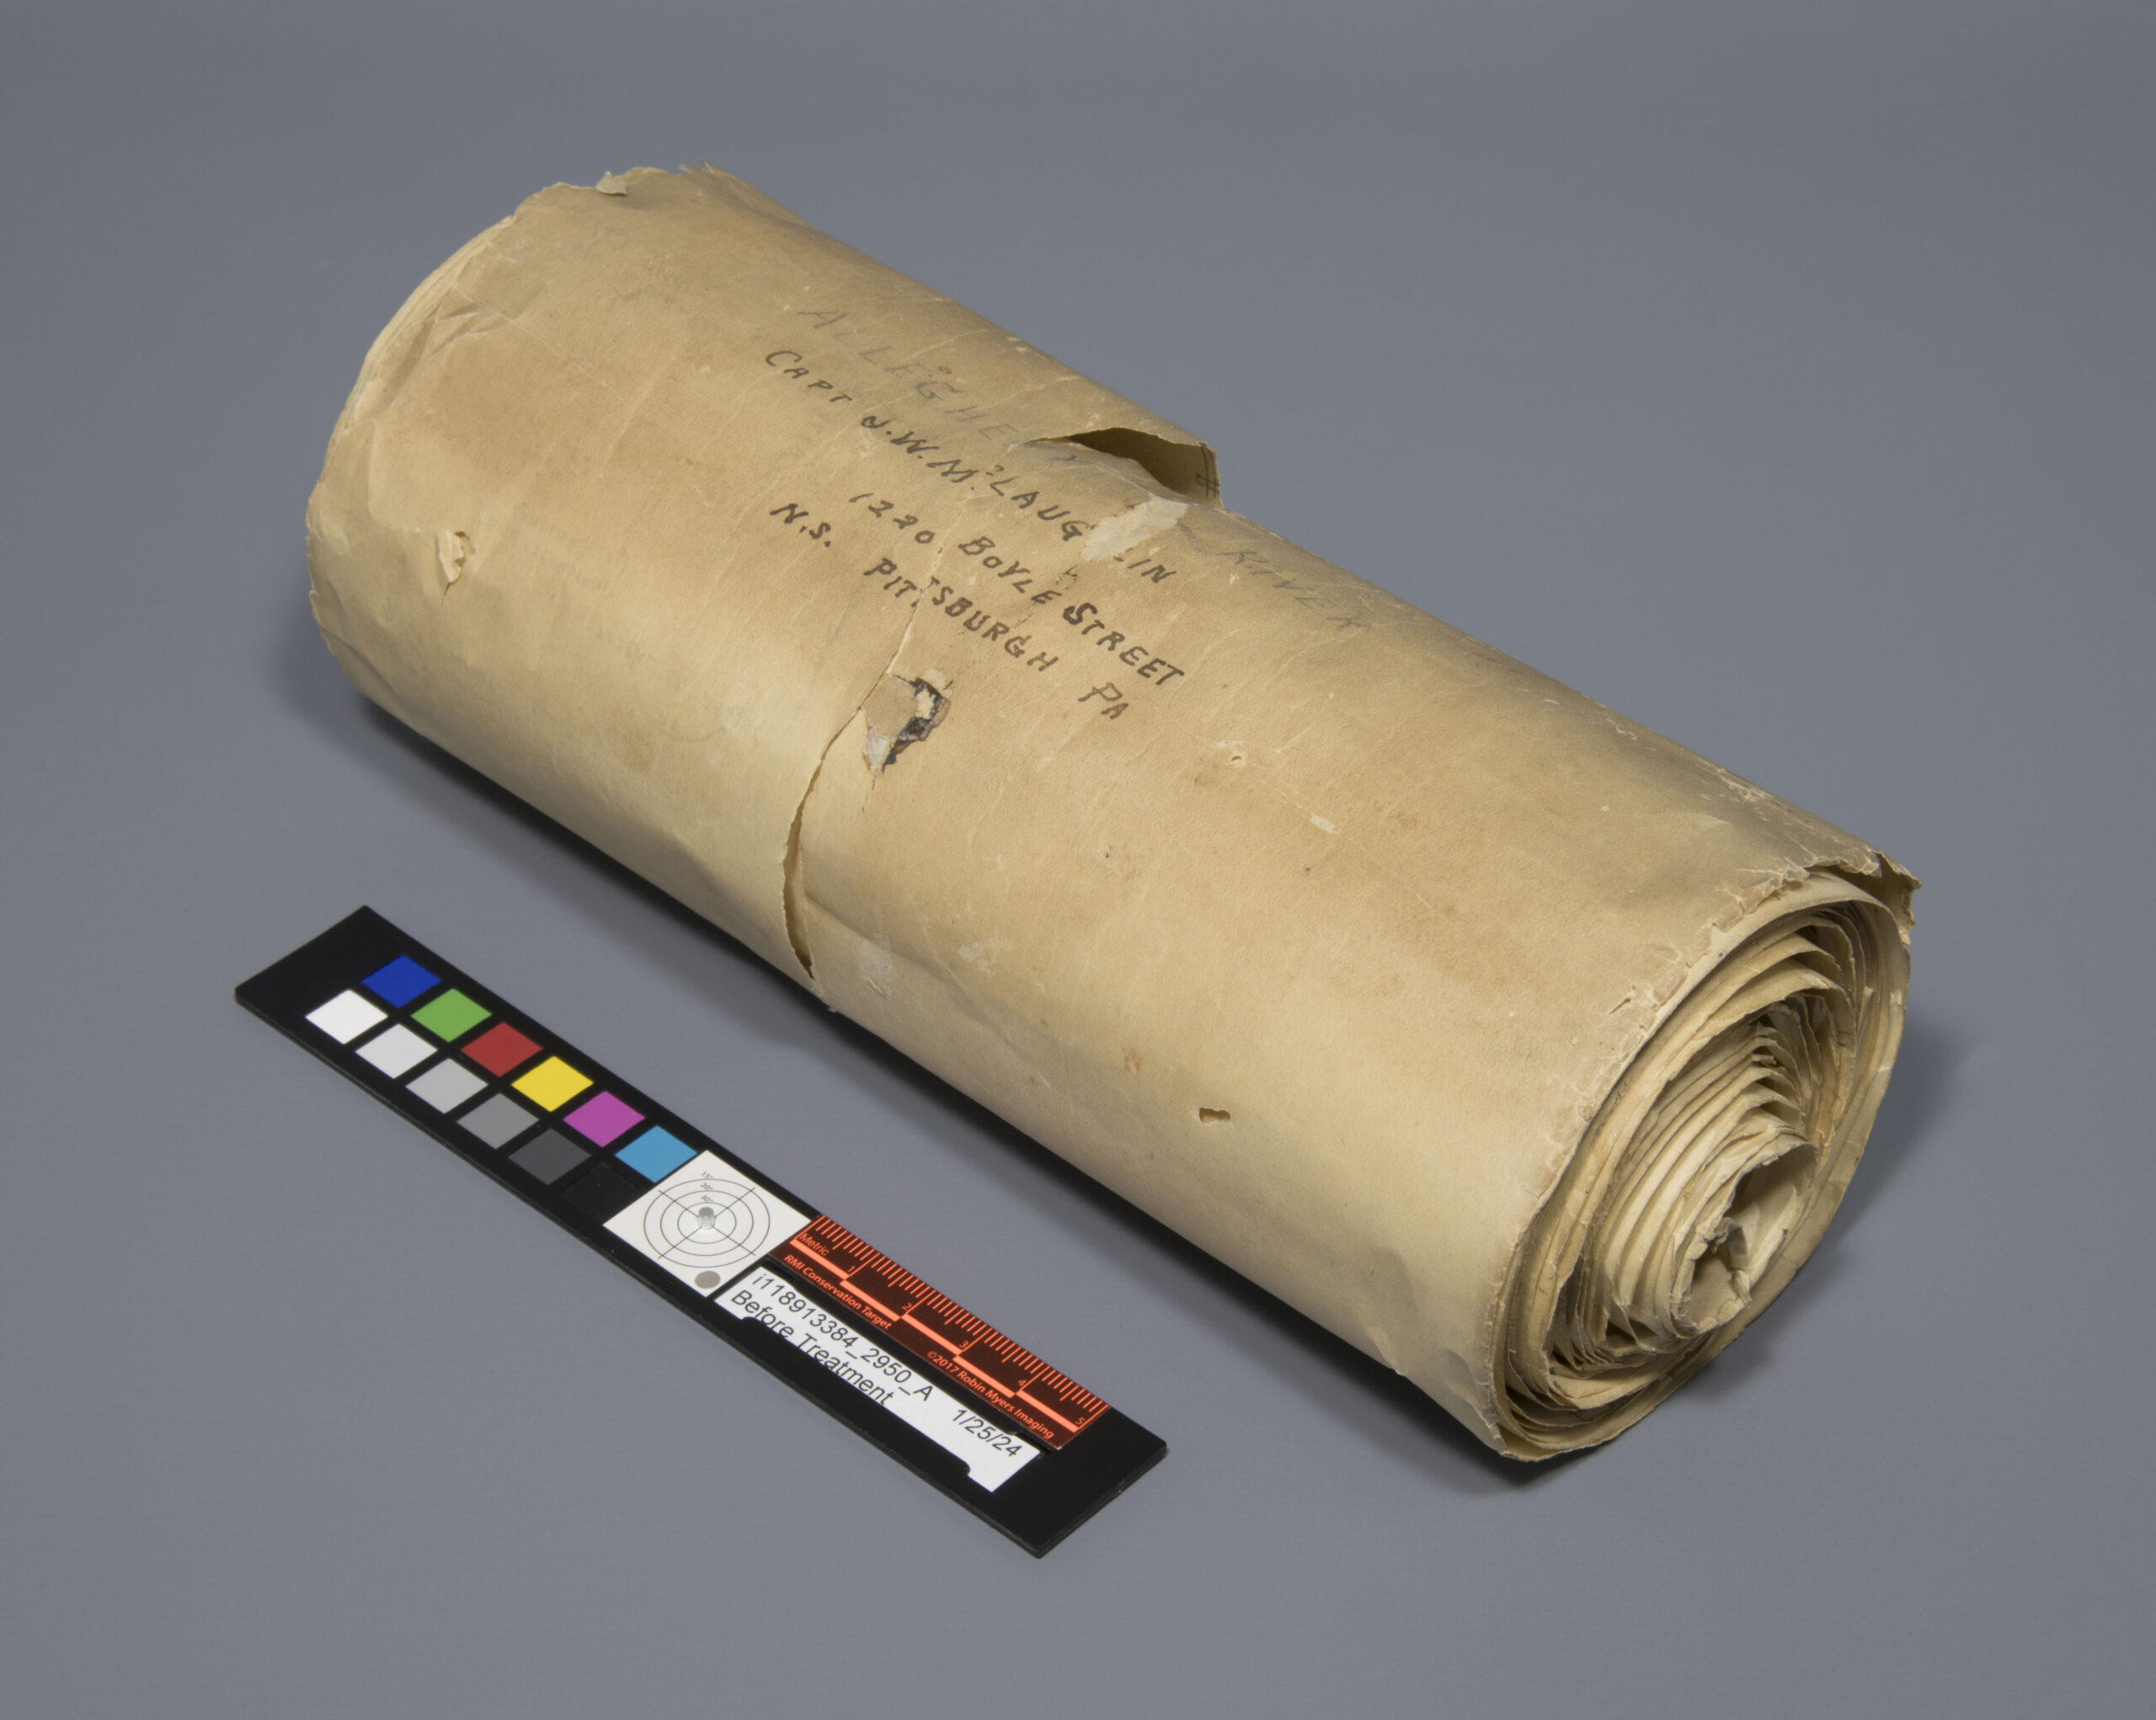
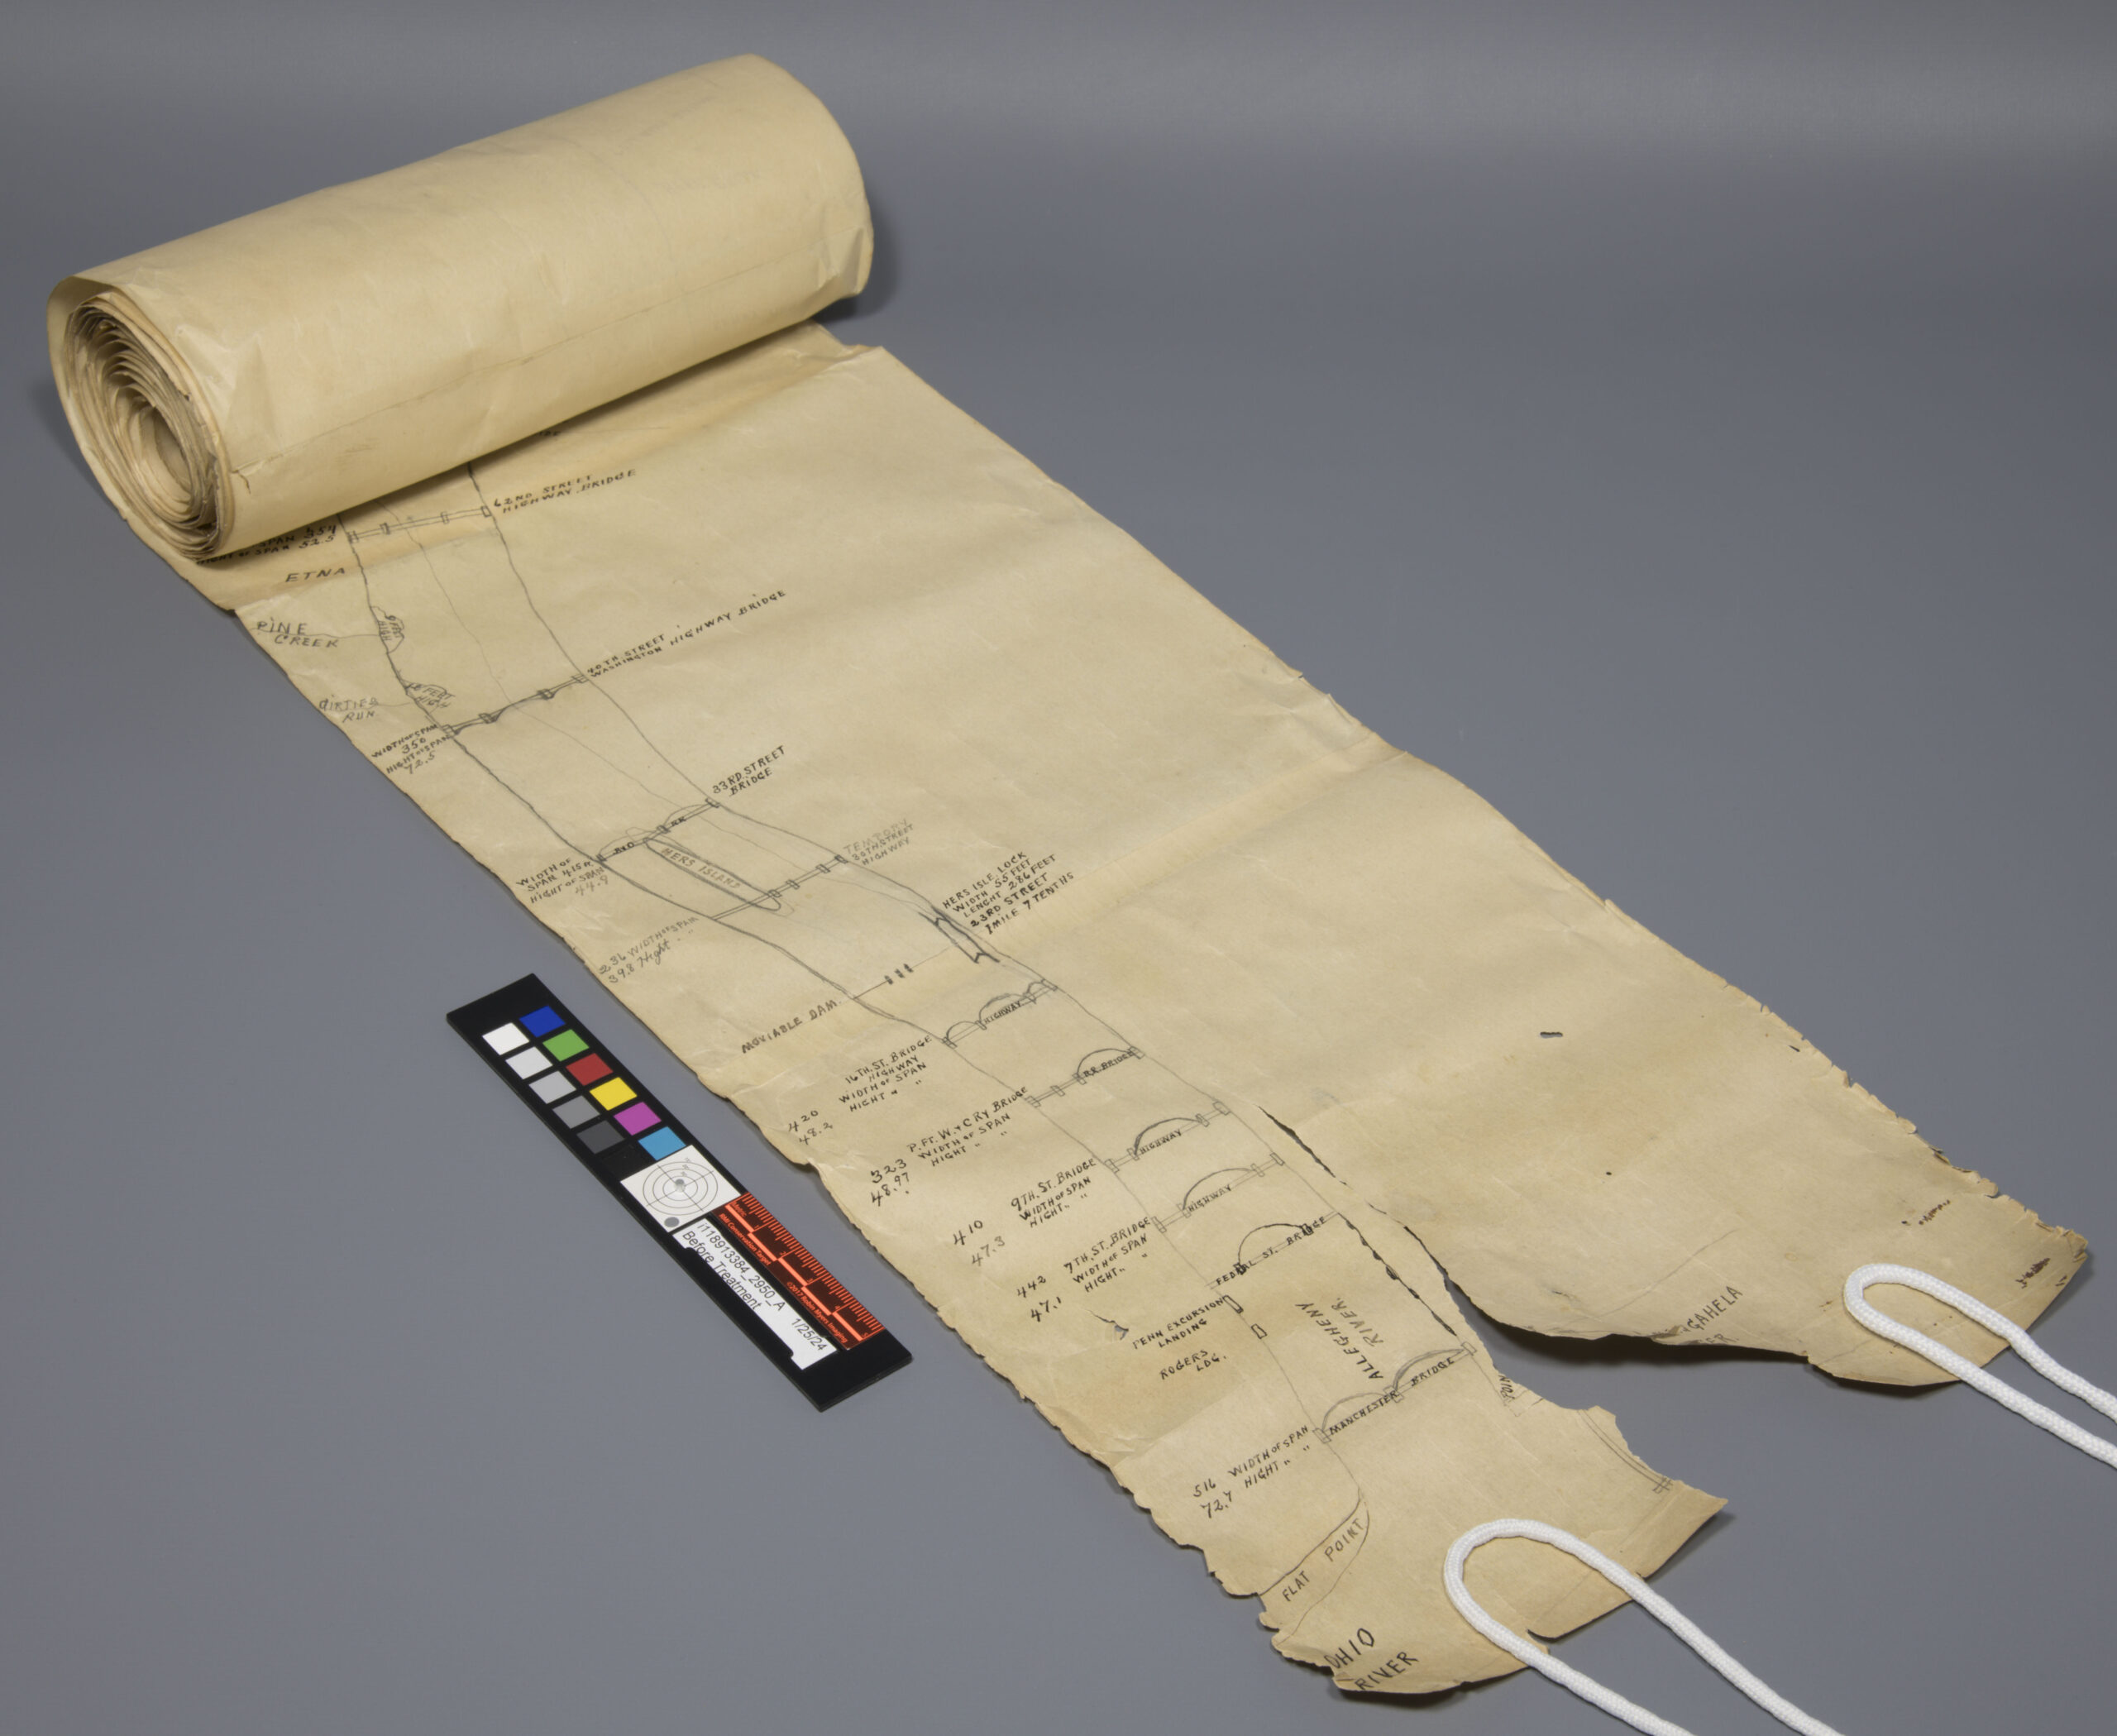
Back in October of 2024, we received something slightly more unusual from the Cincinnati and Hamilton County Public Library, a 15-foot-long, hand-drawn rolled map of the Allegheny River. Yes, fifteen feet.  This map was created by joining smaller sheets edge-to-edge, forming one continuous scroll that looked more like a treasure map than your typical library item.

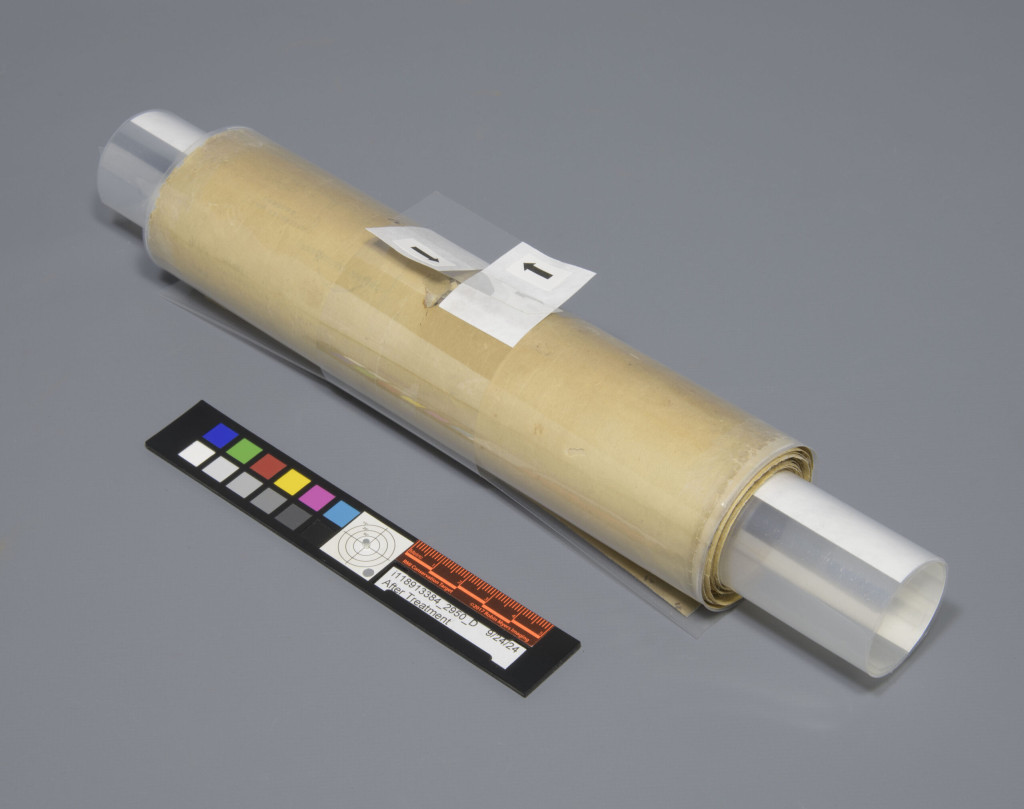
Scroll with photography target in front of it

A dilemma quickly followed, how do I create a housing solution that’s safe and functional, but won’t turn future handling into a logistical nightmare? Like many libraries, they didn’t have a 15-foot shelf just waiting for this (because who does?), so storing it flat was out. Storing it rolled became our only real option. The enclosure needed to be secure and protective for the map, and ideally, easy and elegant to display when needed.

First things first, some stabilization treatment. Before tackling the housing design, the scroll underwent conservation treatment to mend small tears and fill losses, particularly at the “beginning” and “end” (depending on which direction you follow the river). Once stabilized, it was ready for some housing trials.

scroll partially unrolled
Before Treatment – Large loss and tear at one end.
scroll partially unrolled
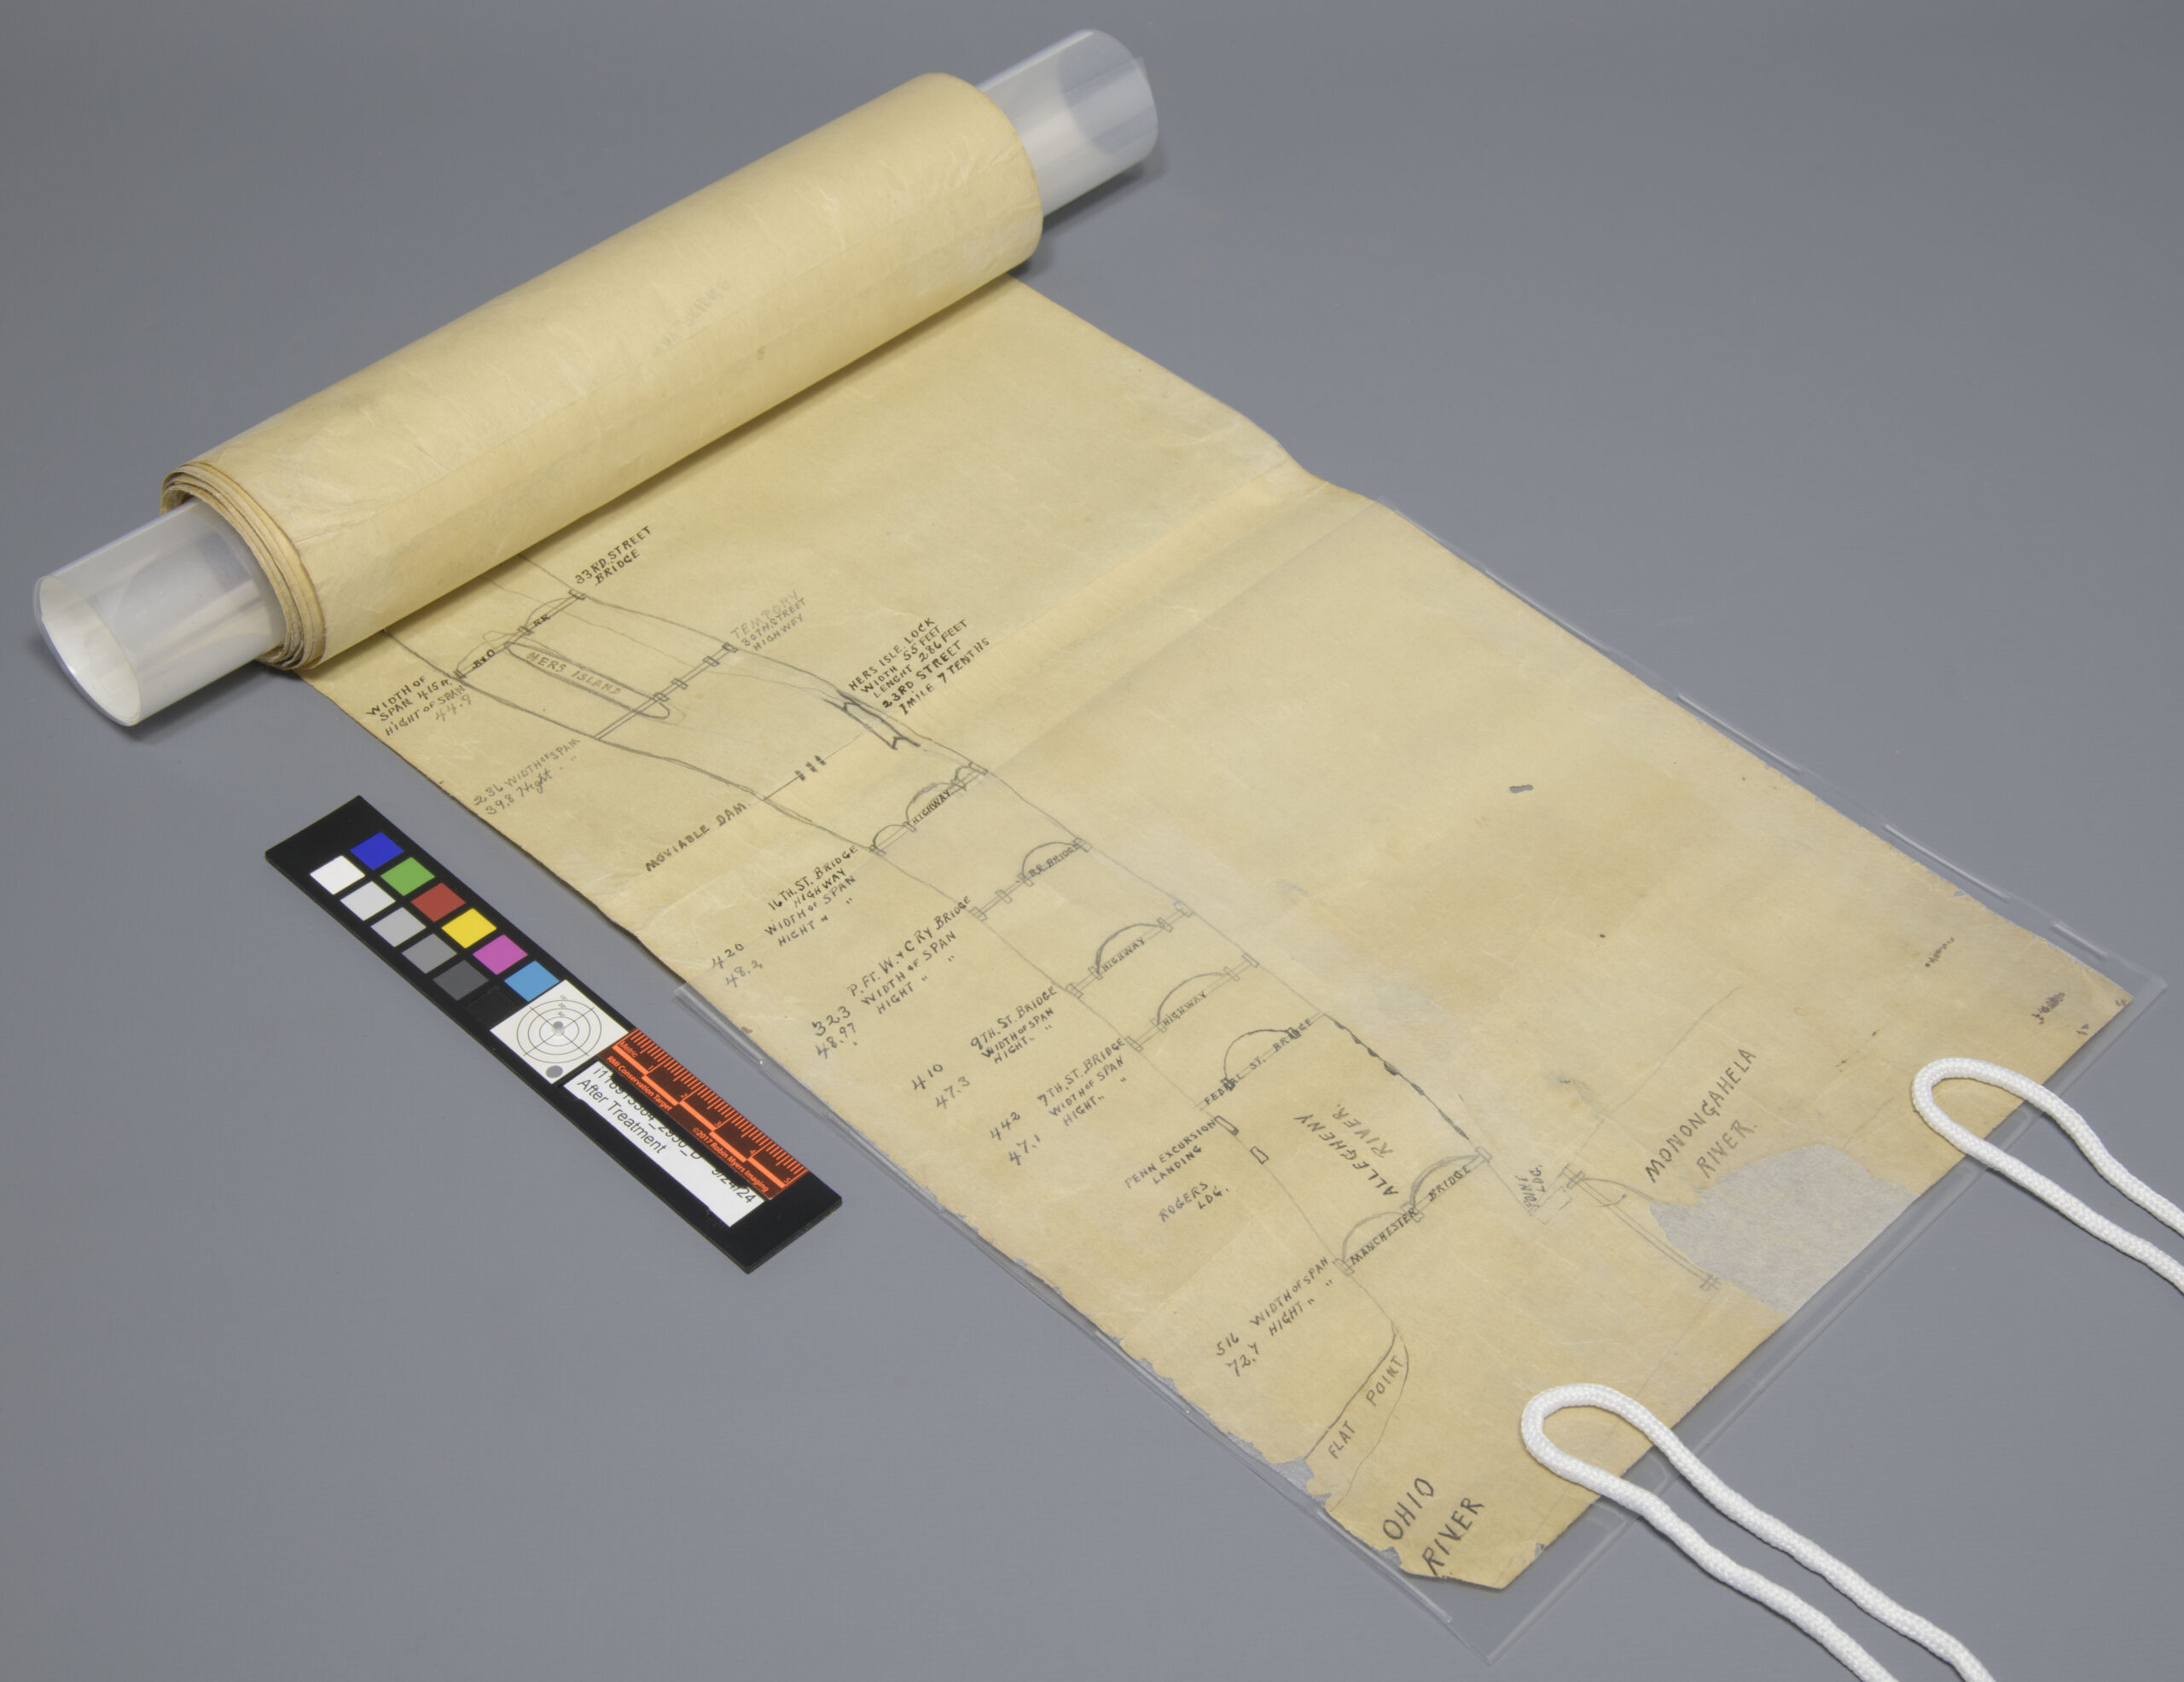
After Treatment – Large loss repaired and map rolled around the polyester cylinder core.

While researching solutions online, I stumbled upon a fantastic blog post by J.M. Iacchei from the Cornell University Library Conservation Lab (link here). Their approach to scroll housing was clever, practical and elegant, and it just gave me the spark I needed to create our own version.

Here is how we rolled:

  • A support core – To give the scroll structure while rolling, I created a polyester cylinder core with a polyethylene sling. The sling supports one end of the scroll as it begins to wrap around the core, providing gentle guidance and protection as you start to roll the map. The map can be easily inserted into the sling to begin rolling.
Allegheny River / Capt. J.W. McLaughlin
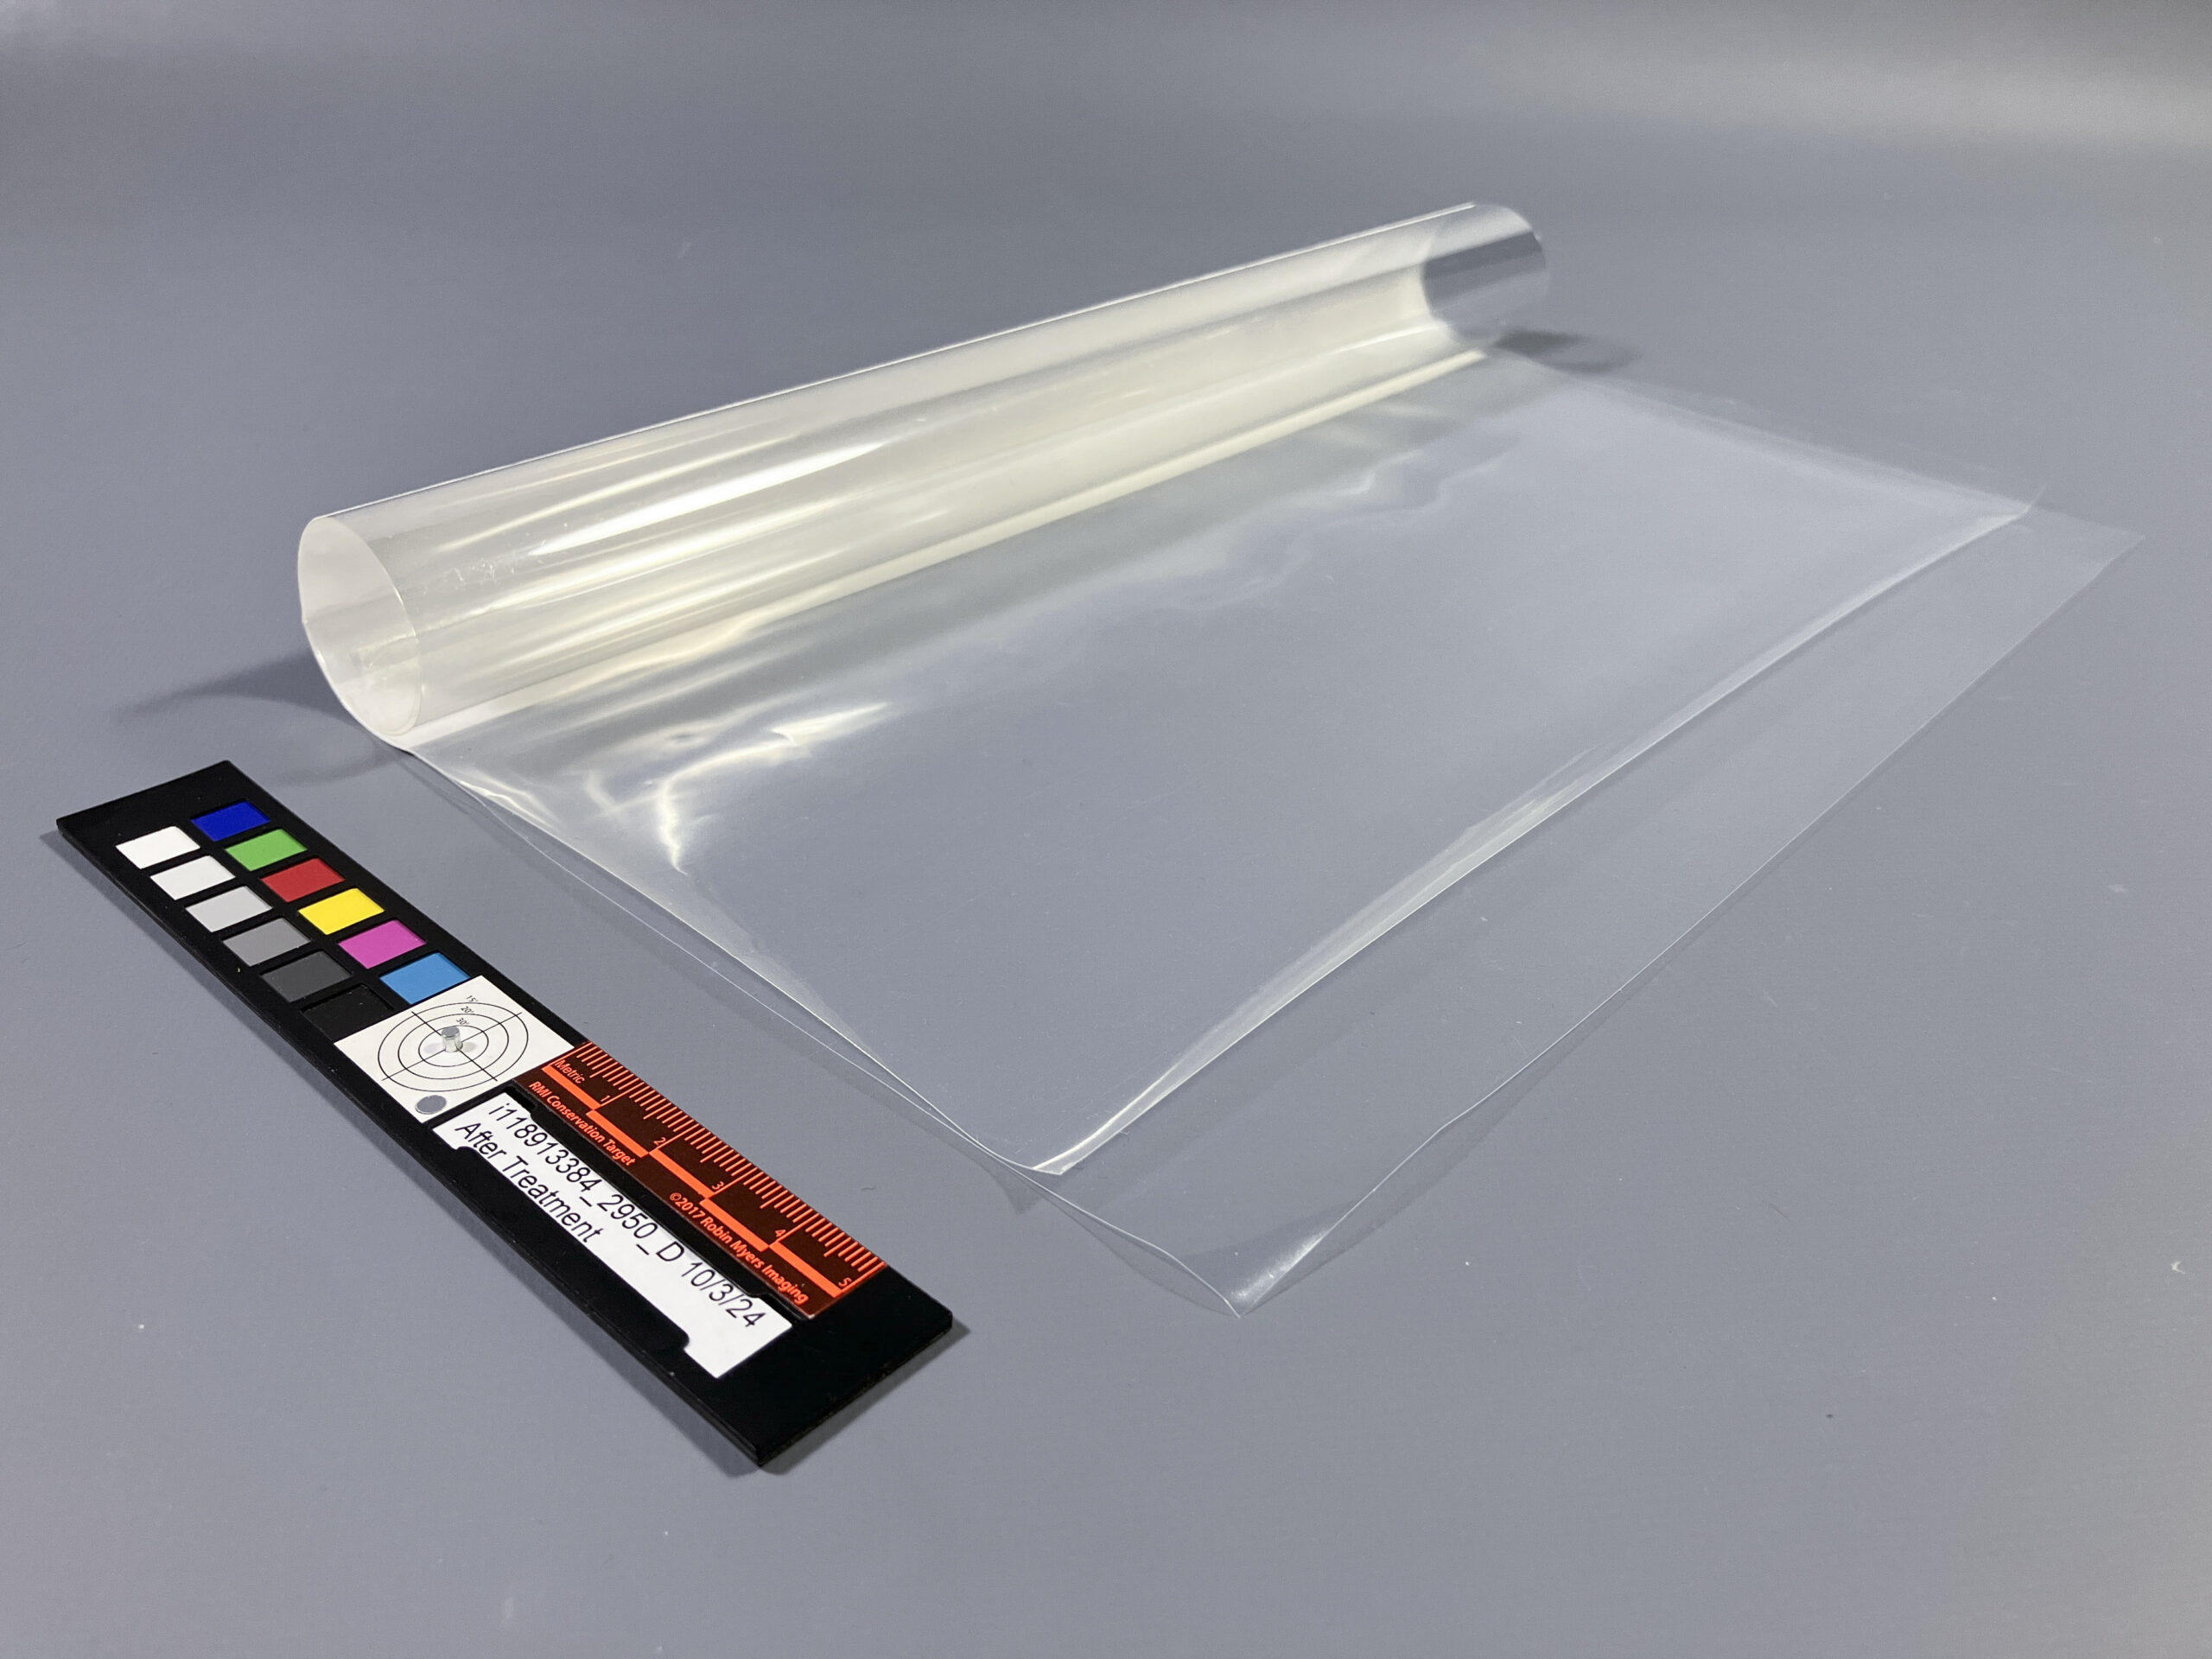
Polyester cylinder core with a polyethylene sling to secure one end of the map.
Allegheny River / Capt. J.W. McLaughlin
The end can be easily inserted into the sling and supported as the map is rolled around the polyester core.
  • Protection of the ends – The opposite end of the scroll was placed into a soft, transparent polyethylene pocket. It’s flexible, unobtrusive, and doesn’t need to be removed, even during after treatment photography.
Scroll partially unrolled
The other end of the map is protected with a polyethylene pocket that is flexible and offers support to the fragile end of the map.
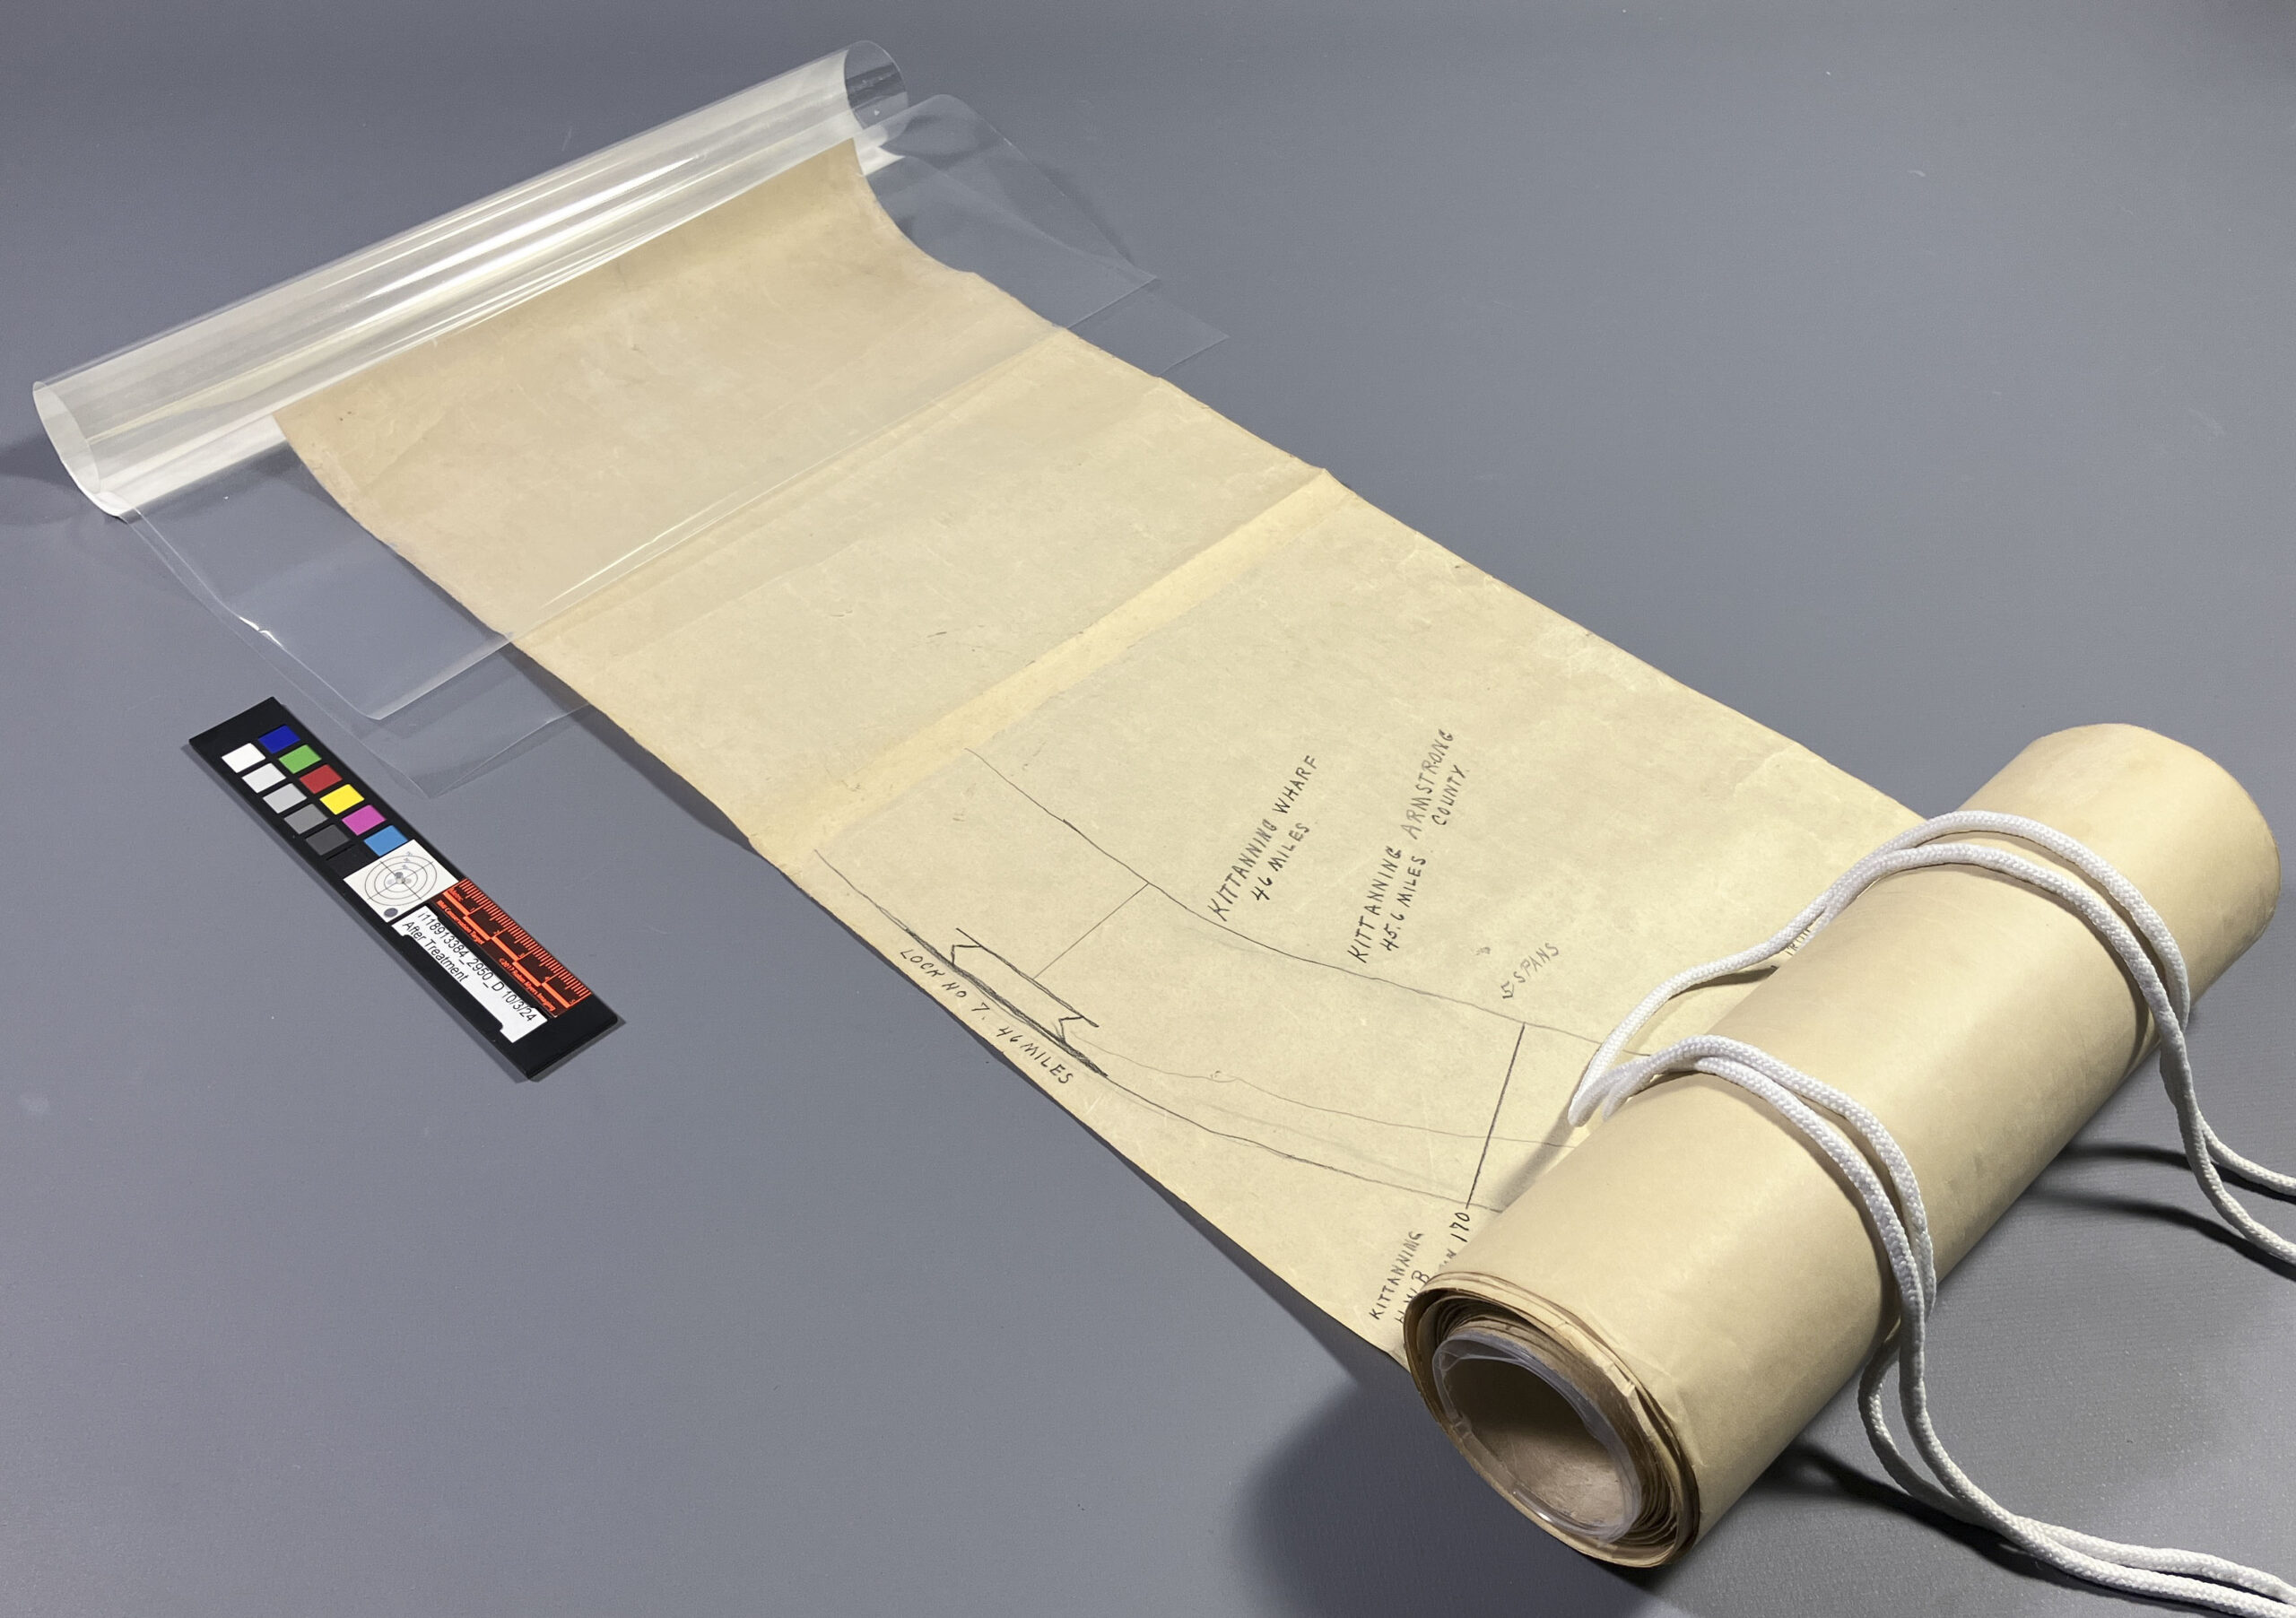
  • Keep it rolled – Once fully rolled, the scroll was secured with a polyester belly band. The polyethylene pocket helped protect the scroll surface from any abrasion caused by the belly band.
rolled scroll with belly band to hold it in place
The rolled map is secured with a polyester belly band.
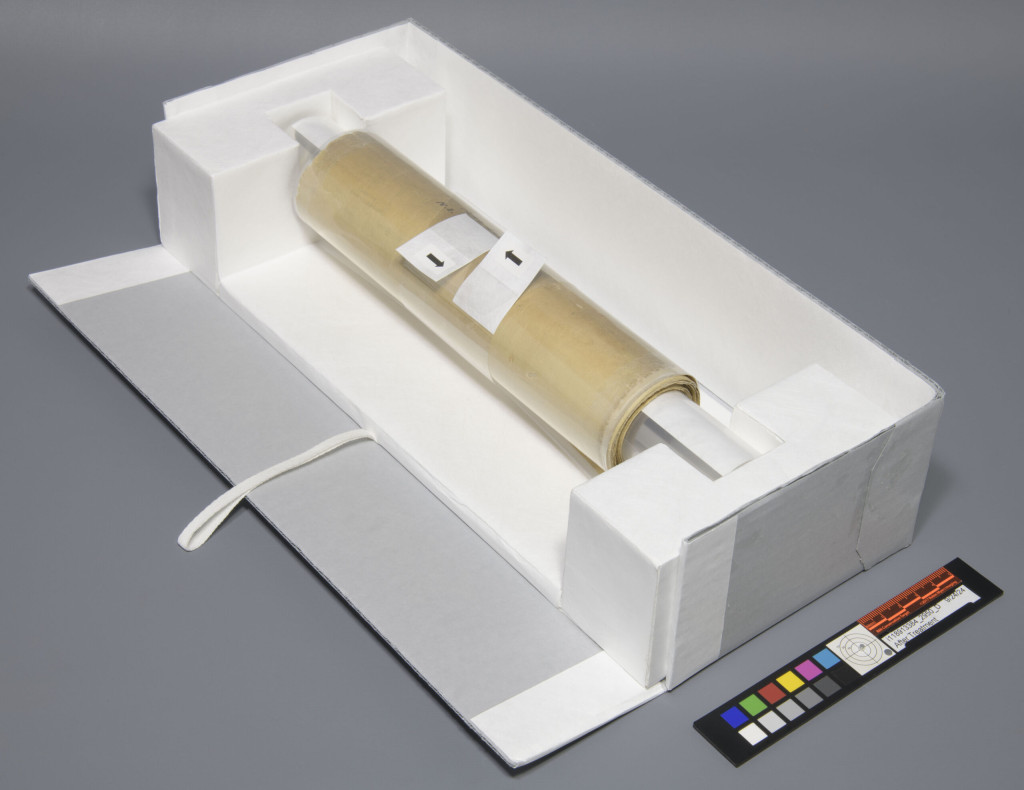
  • Display ready? – For display,I built a removable tray that cradles the rolled scroll without letting it rest directly on a surface. This tray doubles as a mini display platform, so the scroll can be partially unrolled and supported during handling and exhibit. Functional and elegant.
Rolled scroll secured within an enclosure tray
Display tray that offers support to the rolled map for long term storage.

I also tested a few other methods along the way, like supporting the entire scroll in a single 15-foot polyester sheet or sandwiching it between two. But the seams where the map’s original sheets were joined caused additional creases with those solutions.  In the end, supporting the scroll in its entirety just wasn’t viable, so I pivoted to protecting the ends and letting the core do the heavy lifting.

Also: cutting two 15-foot-long sheets of Mylar by hand? Let’s just say I don’t recommend it… and I definitely don’t miss it.

Here is what a 15ft paper map looks like:

Catarina Figueirinhas – Assistant Conservator

The Problem with Foam: Thoughts on our new foam cutter

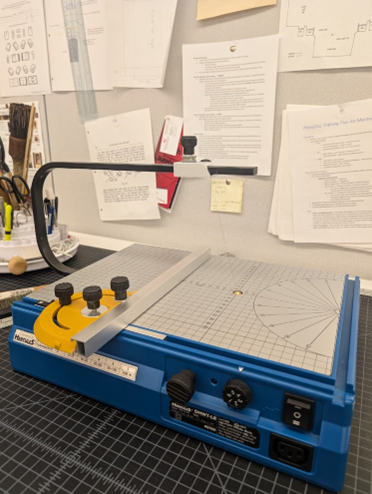
A housing treatment that I have recently taken on led me to getting some hands-on experience with one of the newer tools to arrive at the lab: The Hercules Cordless-Battery Operated Hot Wire Table from Hercules Cutters.

Image of Hercules Cordless battery operated foam cutter
Figure 1: The Hercules Cordless-Battery Operated Hot Wire Table

The Difficulties of Cutting Foam

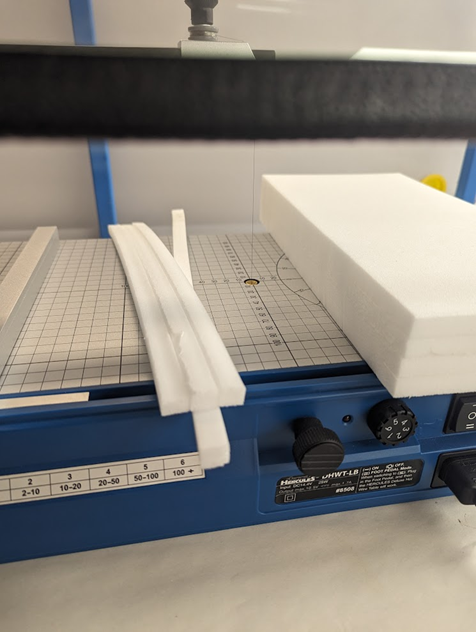
We have typically performed foam cutting at the lab using either a hand-held blade like an Olfa or scalpel, a board shear, or in some cases a hand-held saw. While these methods can be somewhat satisfactory, they are none without their limitations. Cuts with a hand-held blade often look sloppy, especially if the foam needs to be stacked; the compressible nature of foam makes it very difficult to make accurately measured cuts this way, and the inaccuracies become glaringly obvious when trying to stack multiple seemingly same sized pieces for thick fills inside an enclosure (something I often need to achieve!).

Stack of foam sheets with emphasis on their imperfect cut edges.
Figure 2: The minor inaccuracies of hand-cut foam become obvious when the pieces are stacked. Notice the unevenness along the edge of this stack of Plastazote foam. Plastazote, as well as a thinner foam called Volara, are among the most commonly used foams we utilize at The Preservation Lab.

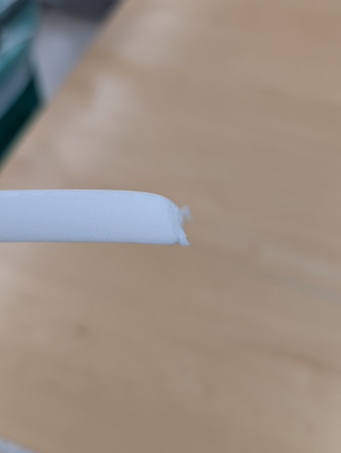
A board shear is quick and offers a measuring guide to provide accurately measured cuts, but the edges where the blade slices through the foam often end up rounded or otherwise distorted.

Image of foam with rough edge from being cut on a board shear.
Figure 3: The downward cutting motion of a board shear can often leave the edge of foam looking rounded or otherwise distorted, as can be seen on this piece of Plastazote.

Finally, cuts with a saw can leave a mess and the teeth can leave a sloppy looking edge on the foam.

Stack of foam roughly cut with a saw.
Figure 4: This stack of Plastazote was cut with a saw. A saw’s teeth can leave a very messy edge when cutting through foam.

The Hercules Foam Cutter: Basic Features and Operation

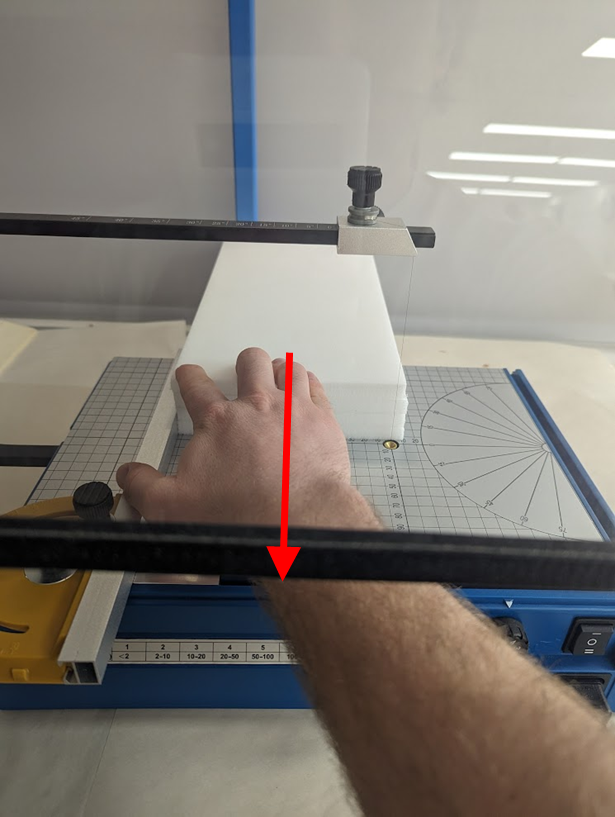
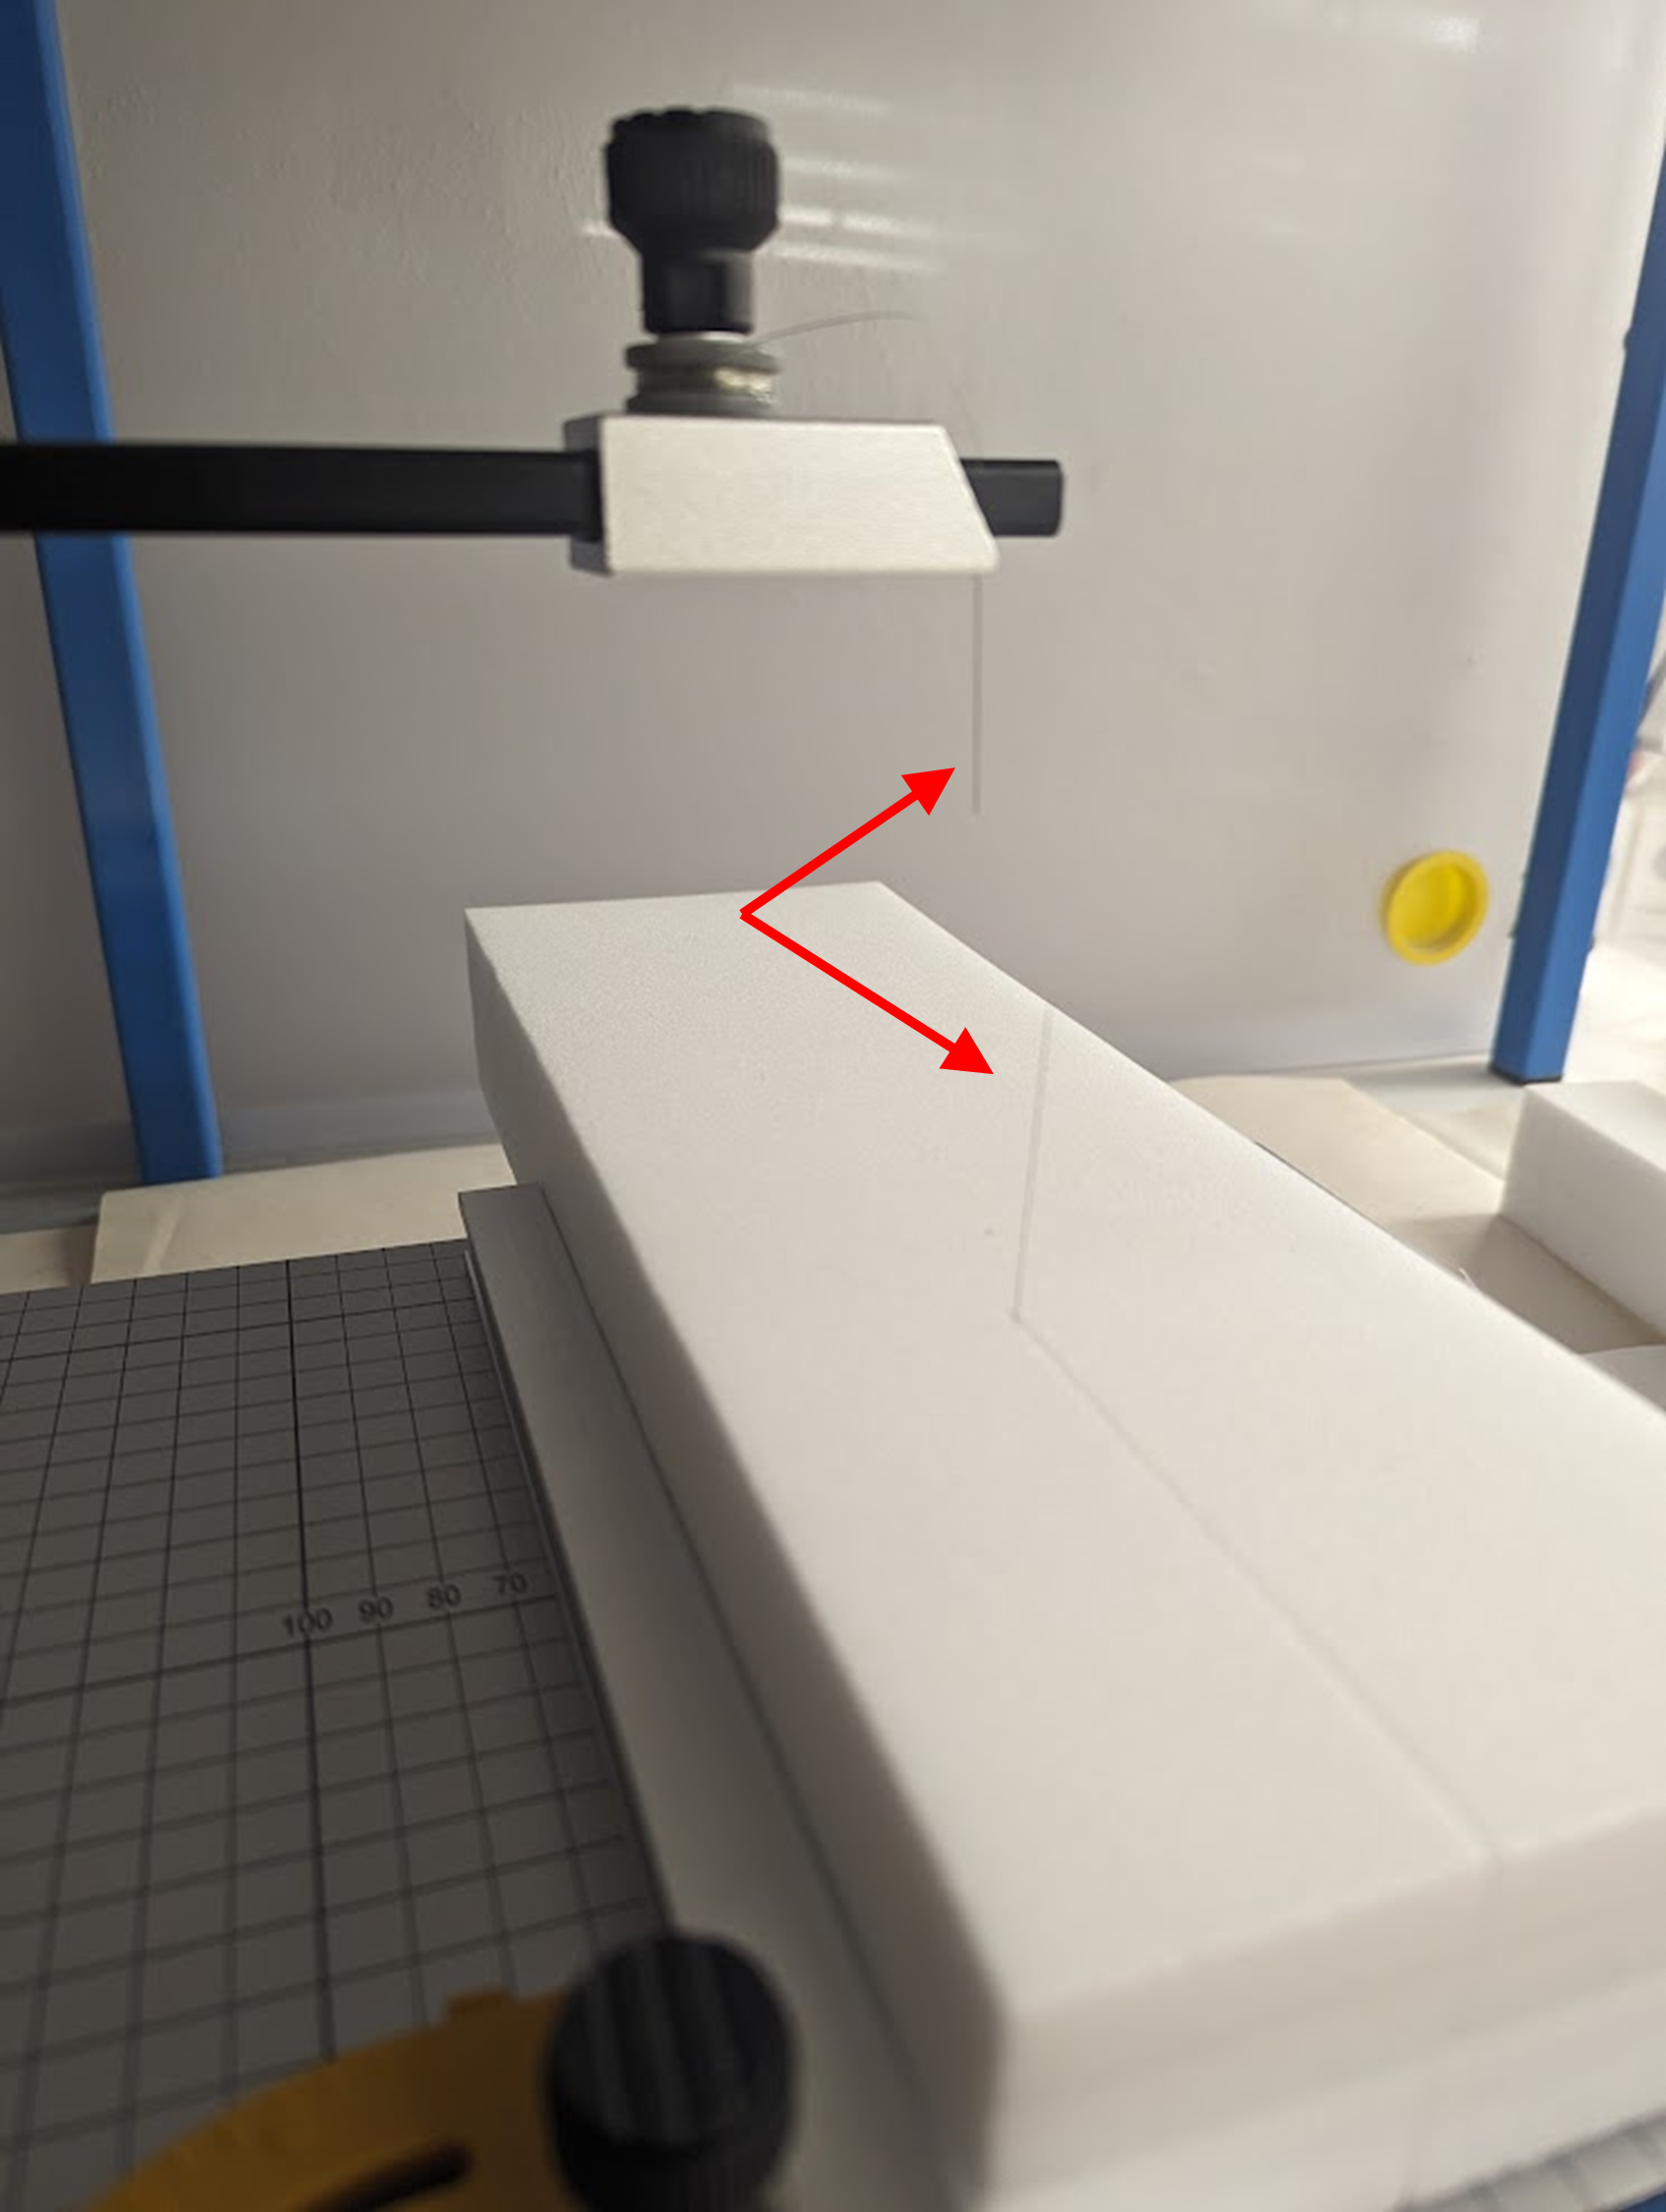
                The Hercules foam cutter uses a different approach. It heats up a filament wire that is pulled taught vertically through the device. While the wire it hot, foam is drawn through the wire to accurately and cleanly (with a little practice) slice through it.

Image of foam plank being cut by a the hot filament of the Hercules foam cutter.
Figure 5: A stack of Plastazote is pulled through the hot filament wire to make a clean cut.

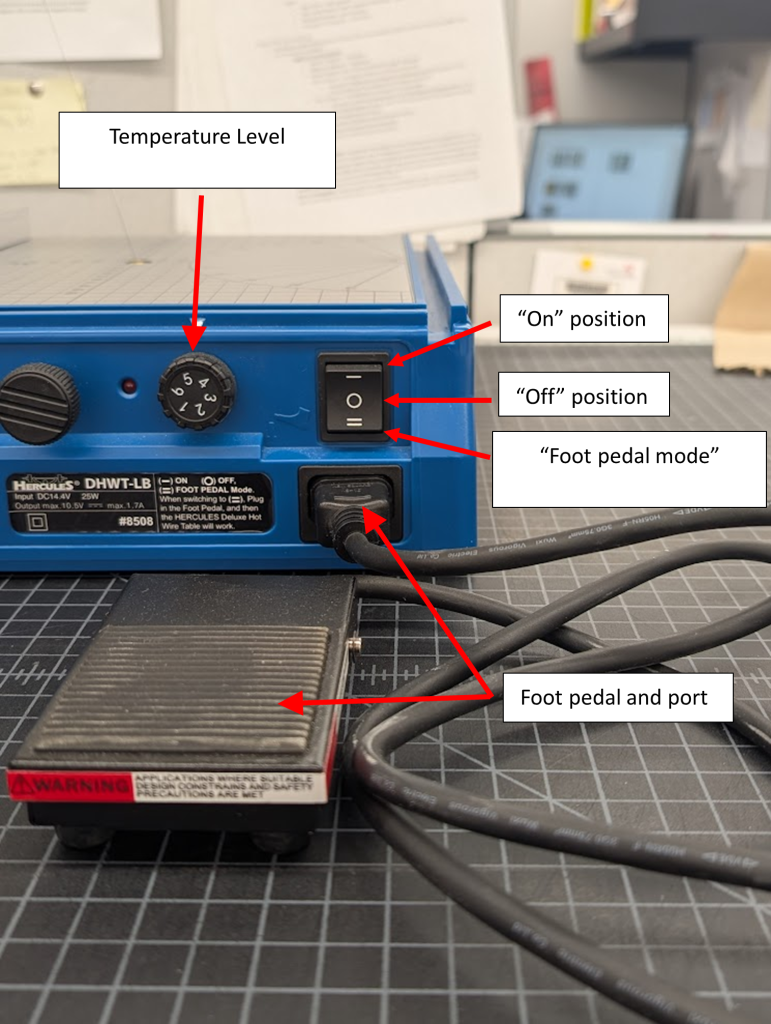
The heat can be engaged in one of two ways: with the power switch turned to “On” mode, the wire stays hot until it is turned off; when the switch is set to “Foot pedal mode”, the wire only heats up while the included foot pedal is pressed. There is an adjustment knob allowing the user to control the temperature of the wire. In general, after experimenting a bit it seems that the thicker the foam, the hotter the wire needs to be.

Image highlighting controls of the Hercules foam cutter.
Figure 6: The Hercules Cutter’s heat controls.

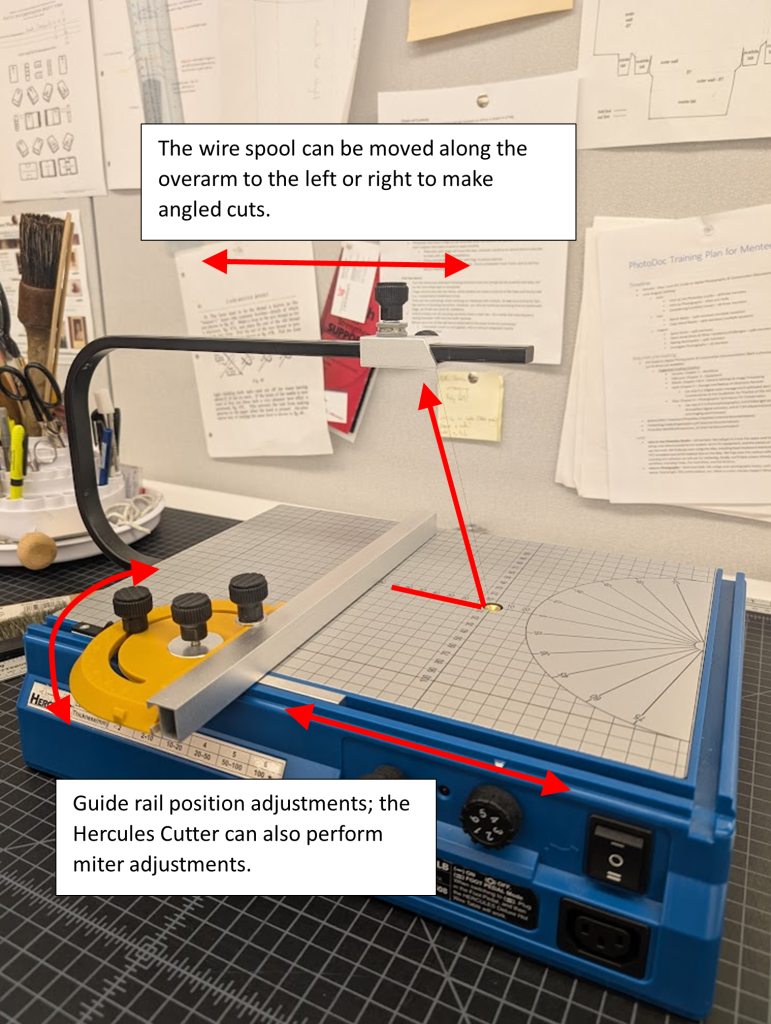
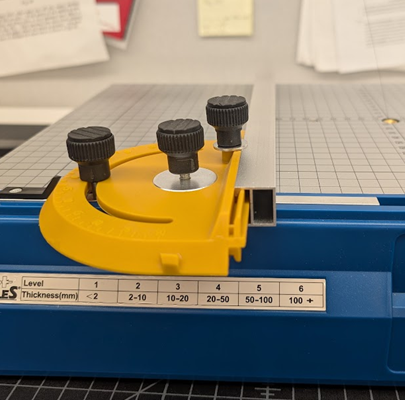
The cutter includes an adjustable guide rail to aid in accurate cutting. The position of the spool that holds the wire is also adjustable, allowing for angled cuts to be made.

Image of Hercules foam cutter with adjustments labeled.
Figure 7: Cutting position adjustments of the Hercules Cutter.

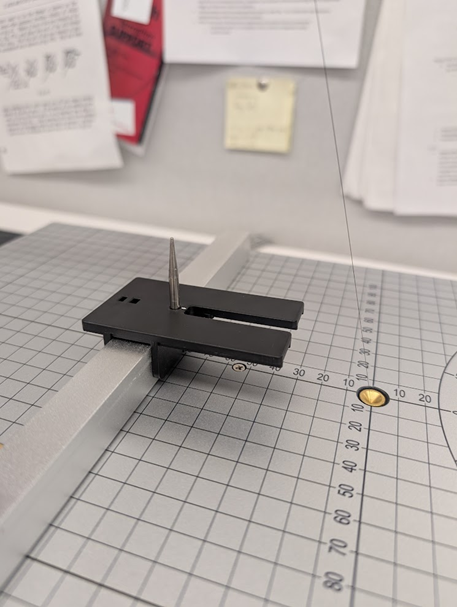
Finally, there is an attachment that can be placed onto the guide rail allowing for circular cuts to be made.

Image of circle cutting attachment on the Hercules foam cutter.
Figure 8: The circle cutting attachment: the foam piece is impaled by the point of the attachment at the center point of the desired circle. The distance from the point to the wire will be the circles radius. Once the attachment is in position for the desired size of circle, the foam piece is rotated as the wire cuts through the foam until a complete circle is made.

Advantages

                The Hercules Foam Cutter’s ability to cut stacked pieces of foam is by far my favorite and the most practical of its uses in my opinion. As previously mentioned, cutting inaccuracies become very noticeable when trying to stack multiple same sized pre-cut pieces of foam. With the Hercules Cutter, the foam pieces can be stacked/attached to each other before hand, and then cut to a uniform size. I was pleased to discover that the heated wire doesn’t seem to have any trouble cutting through multiple layers of foam that have been adhered together using double-sided tape and/or PVA. With a bit of practice, I was able to achieve neat, uniform chunks of foam that were several layers thick. I have found, however, that when cutting foam adhered together using double sided tape it is important to be mindful of where your points of adhesion are inside the stack of foam. It is possible to end up with a stack of foam that doesn’t have any tape holding it together after cutting.

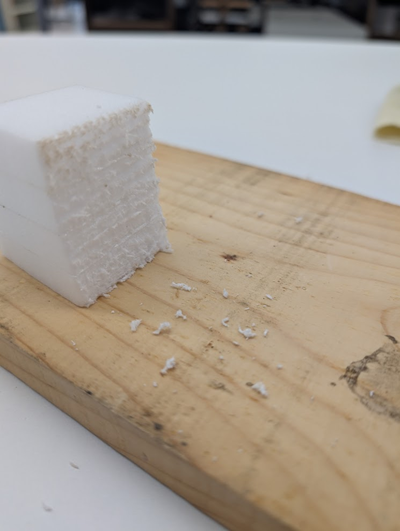
Image of a cleanly cut block of Plastazote using the Hercules foam cutter.
Figure 9: A cleanly cut chunk of Plastazote 4 layers thick. Notice that the section that was cut off has fallen apart due to not having any double-sided tape in this section. Fortunately, this is not the piece I needed from this cut!

Also remember that the thicker the foam, the hotter the wire needs to be. There is a decal attached to the cutter with heat setting recommendations based on how thick the foam is, but the instructions (and also myself) recommend doing a few test cuts with scrap foam first to see what works, as different types of foam will respond differently to various heat settings. It shouldn’t require much pressure from the user to push the foam piece through the wire, and too much pressure will cause the wire to bend or even break; if this happens, the wire isn’t hot enough!

Image of a snapped cutting wire caused by applying to much pressure, and not enough heat, while cutting a foam block.
Figure 10: It is difficult to see as the wire is so thin, but it has snapped. The wire wasn’t hot enough and I had to apply too much pressure to pass this stack of Plastazote through it. Fortunately, there was plenty of wire remaining on the spool, and it was easily threaded back into its port.

I found the foot pedal to be a beneficial feature as well. Some types of cuts require the user to adjust their hand position mid-cut, and it is helpful to have the option to stop the flow of heat into the wire if such an adjustment needs to be made. The wire both heats and cools down almost instantaneously, which is also a nice touch.

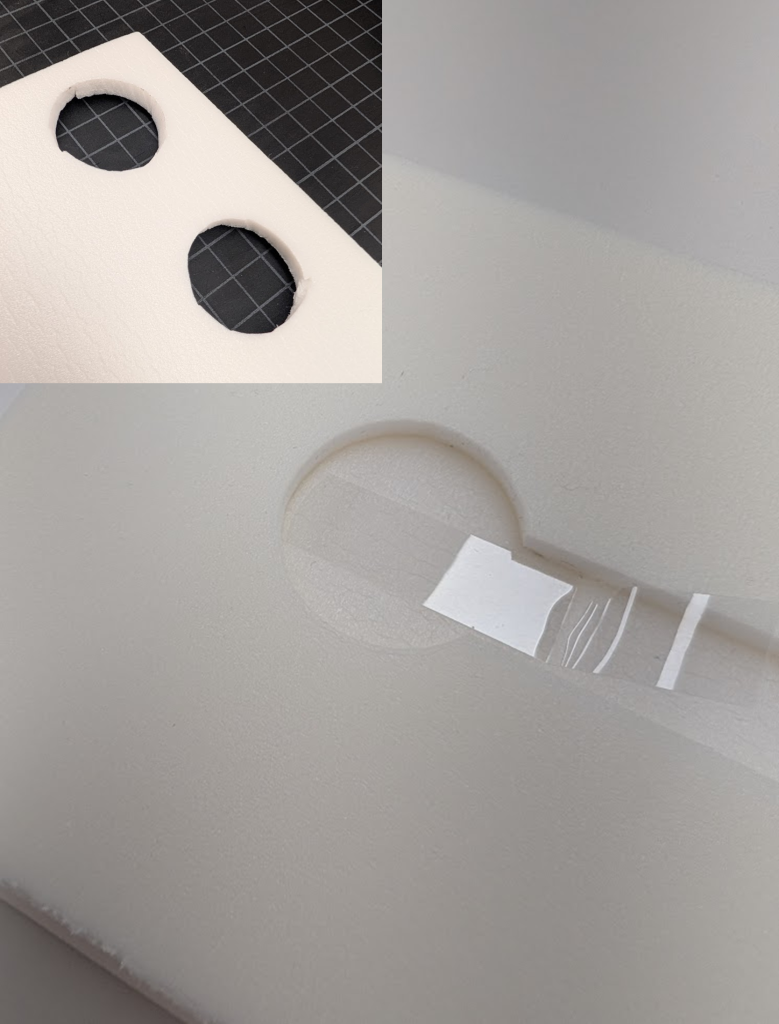
Finally, the circle cutting attachment proved to be useful during a recent housing treatment. I needed to create a compartment in a piece of foam to store a commemorative medallion, and my attempts to cut a circle using a hand-held blade did not look good. I was very pleased with the results I achieved using the attachment, although it took several attempts to get my circle to have the correct diameter.

Two images - a hand cut circle into foam and a circle cut with the Hercules foam cutter.
Figure 11: A circle cut into Volara foam using the circle cutting attachment with my previous attempts to make the cut by hand using a scalpal in the corner of the image.

Drawbacks

                It should be noted that many components of the Hercules Cutter are made of plastic. While this makes it lightweight and portable, it causes some problems. The guide rail feels rather cheap, and even with all the screws secured tightly, the rail still has the potential to wiggle around a bit. This can make getting accurate cuts difficult. I did find that cuts still look better using the rail than doing them free hand, though.

Image of adjustable guides on the Hercules foam cutter.
Figure 12: Most of the components of the adjustable guide rail are made of plastic, giving them the potential to move slightly during use, even when tightly screwed down.

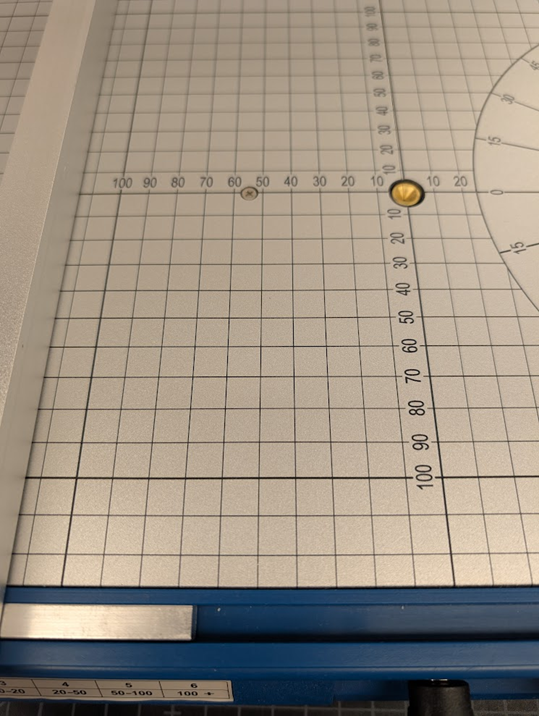
Another issue I had with the cutter lies in its cutting platform. There is centimeter grid on it for measuring/setting the guide rail which is a nice idea; however, I feel it would have been much more helpful to have millimeters indicated somewhere like board shears often do, as precision cuts rarely fall exactly on nice round centimeter measurements. The user is forced into one of three solutions: 1) measuring the foam and adding a tick mark to it, which is not as easy and one would think as foam isn’t very easy to make discreet marks in; 2) using a ruler or other measuring device to set the guide rail, which defeats the purpose of the cutting surface containing a measuring grid to begin with; 3) eyeballing the correct measurement between the grid marks. This parred with the already wobbly nature of the guide rail makes it somewhat challenging to make precision cuts.

Image of the measurement grid in millimeters on the base of the Hercules foam cutter.
Figure 13: Although the numbers represent millimeters, the grid lines on the cutting platform appear only every centimeter.

Finally, as the Hercules Cutter operates through a wire essentially melting foam, it can produce a somewhat unpleasant burnt-plastic smell while in use. It is recommended to use under a fume hood, outside, or in another well-ventilated area if possible.

Final Thoughts

As with all other methods of cutting foam, the Hercules Foam Cutter is not perfect. For making simple cuts in a single layer of foam, I still find using a board shear to be my preferred method; it is quick, easy, and the rounded edges left by the blade don’t bother me much if it is only a single layer of foam.  However, the Hercules Cutter has become the default tool I use to cut stacked foam and to make circular cuts. It has been a fun tool to test out, and it is always possible that more practical uses for it will arise as I continue to make more custom and specialized enclosures.

Matt McCoy — Senior Library Conservation Specialist

Congratulations, Linh & Kristopher!

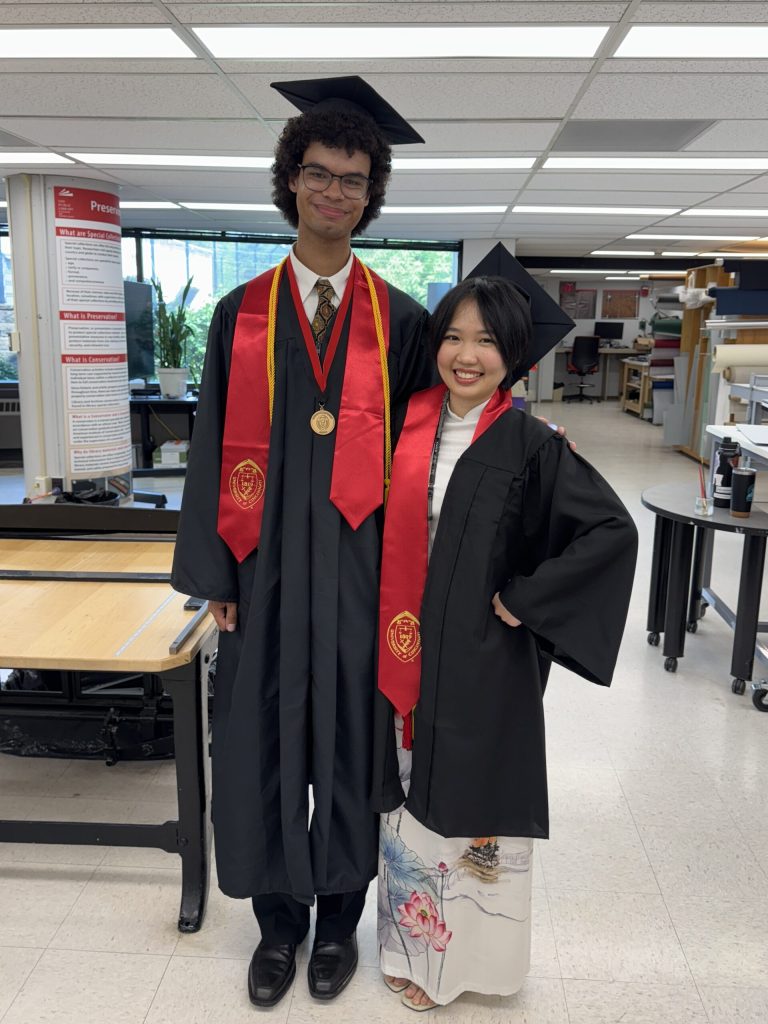
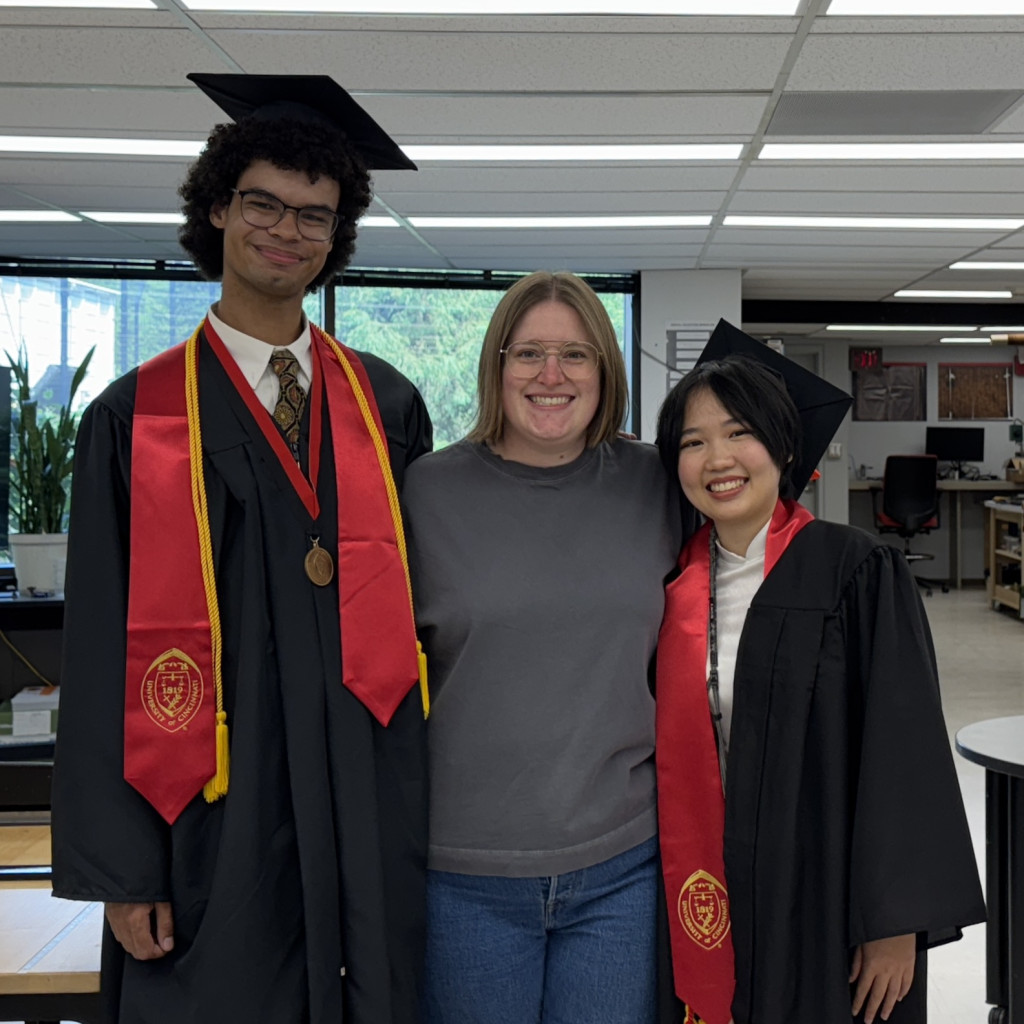
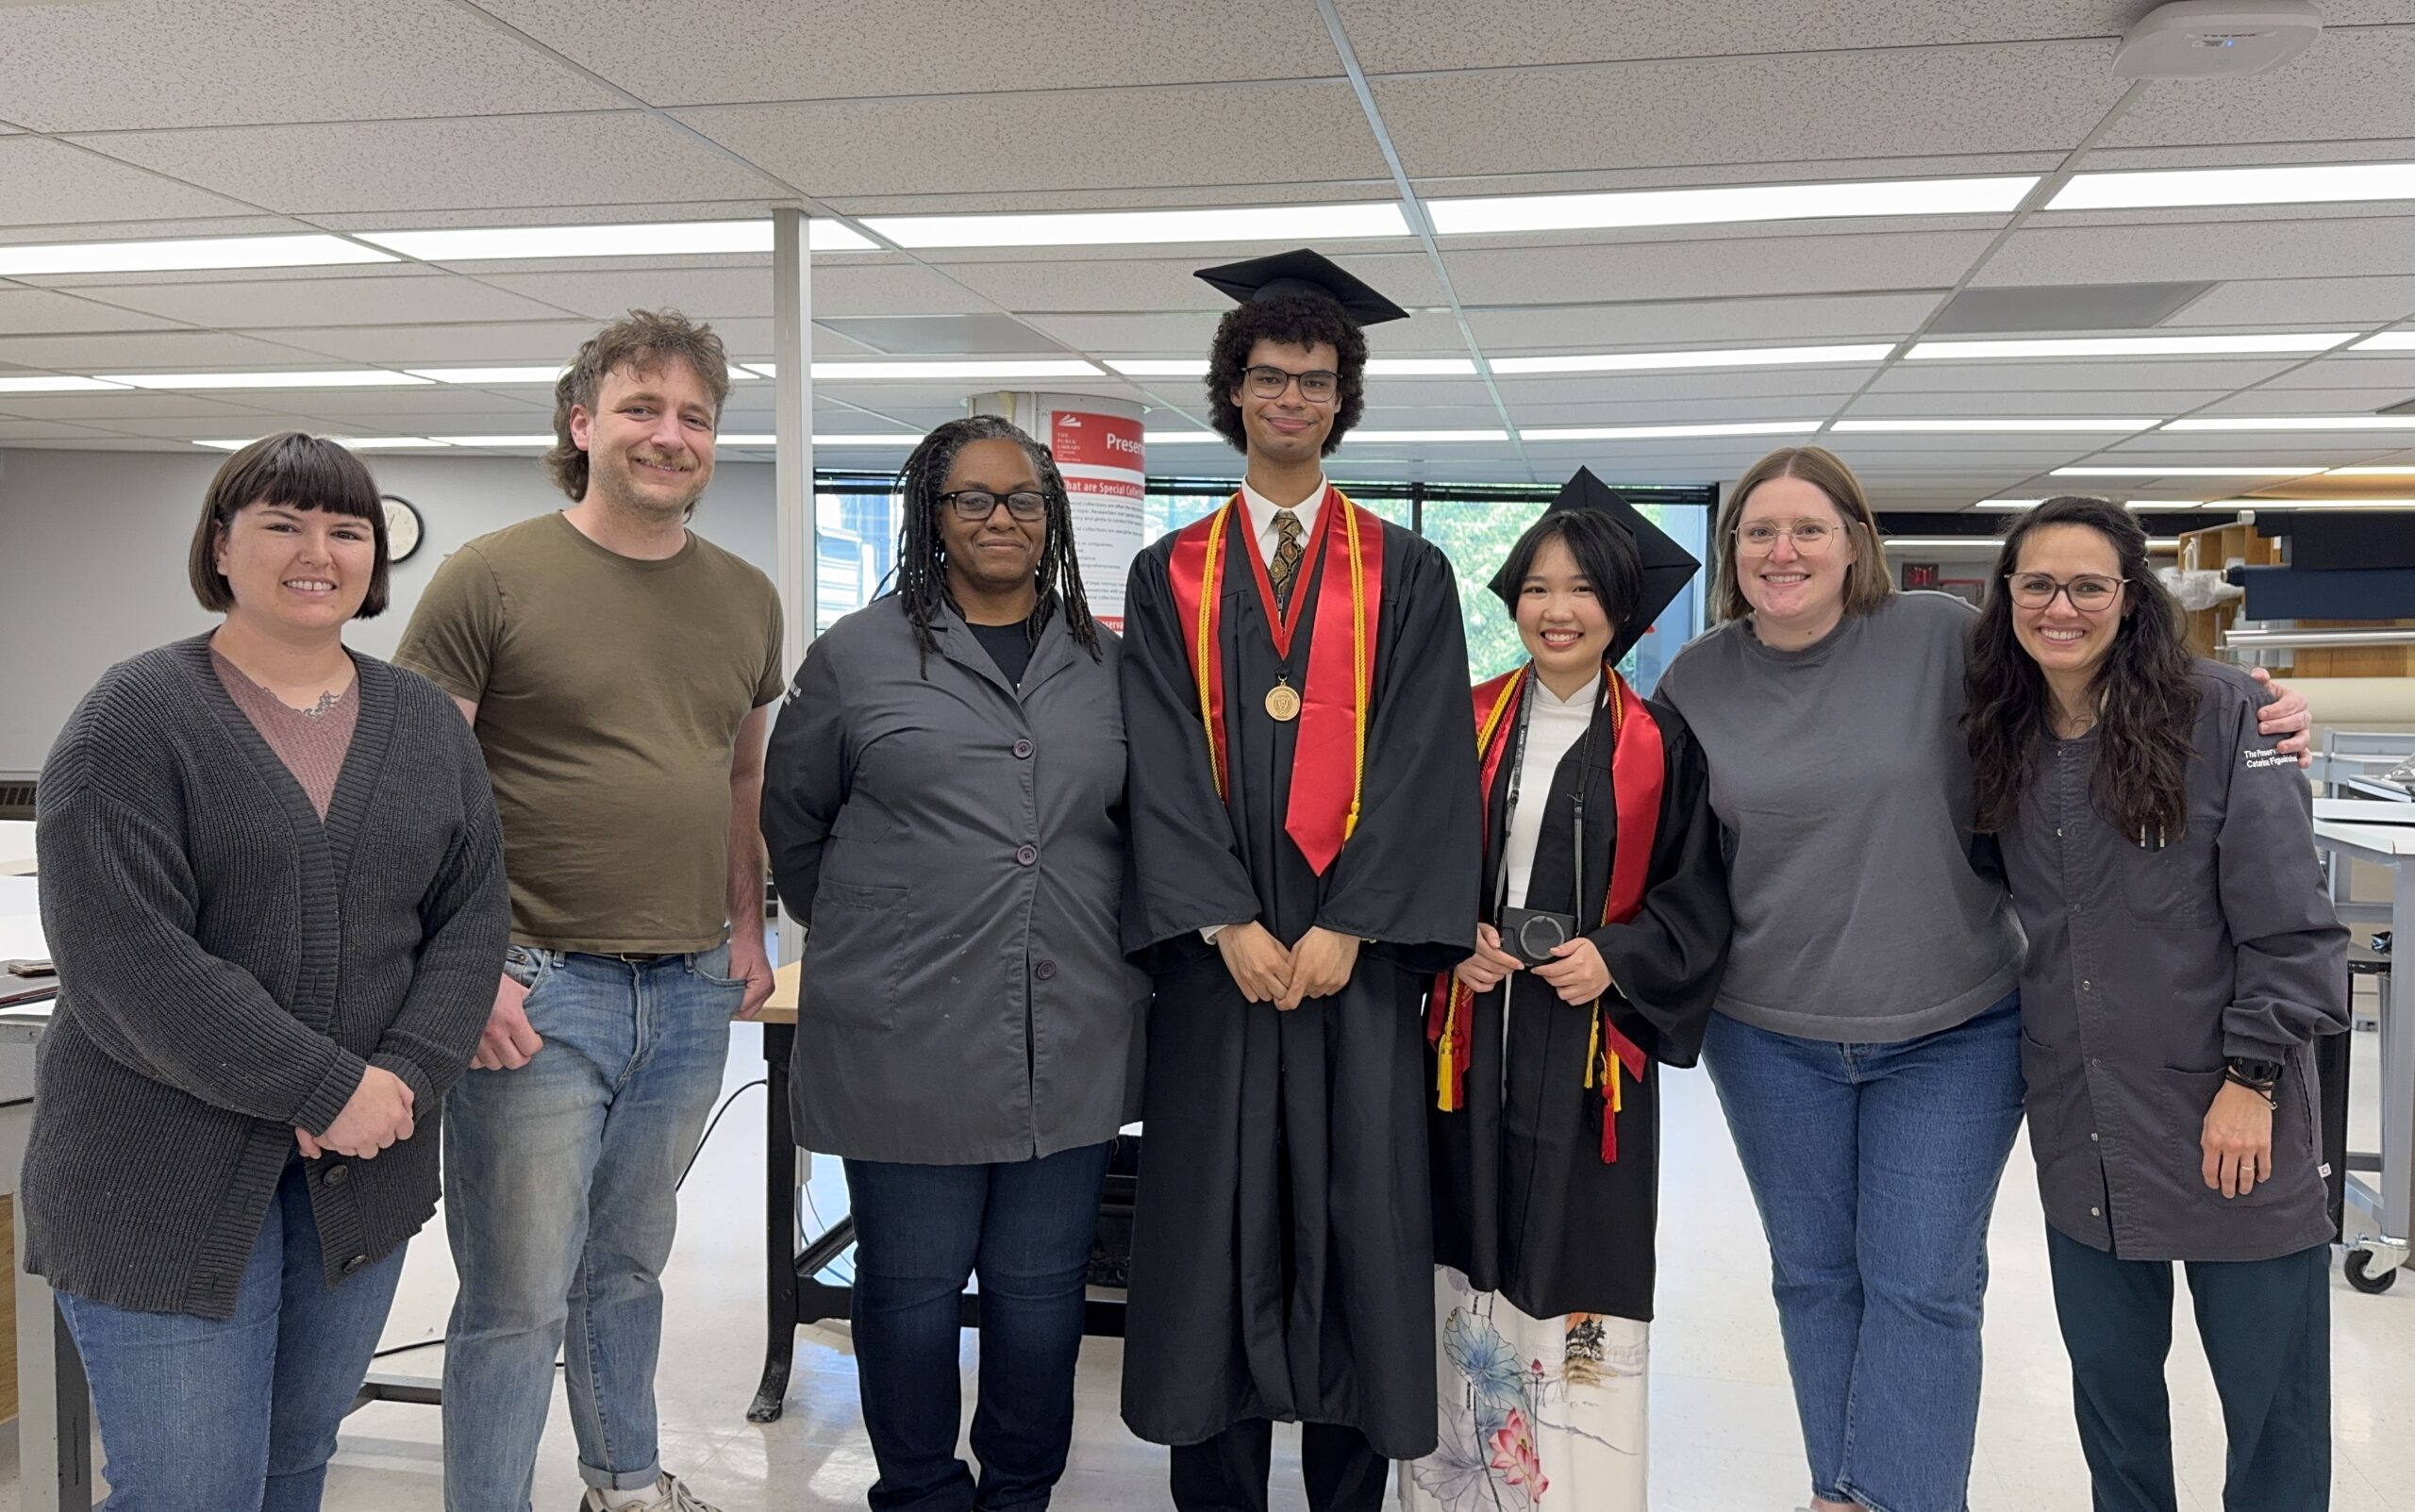
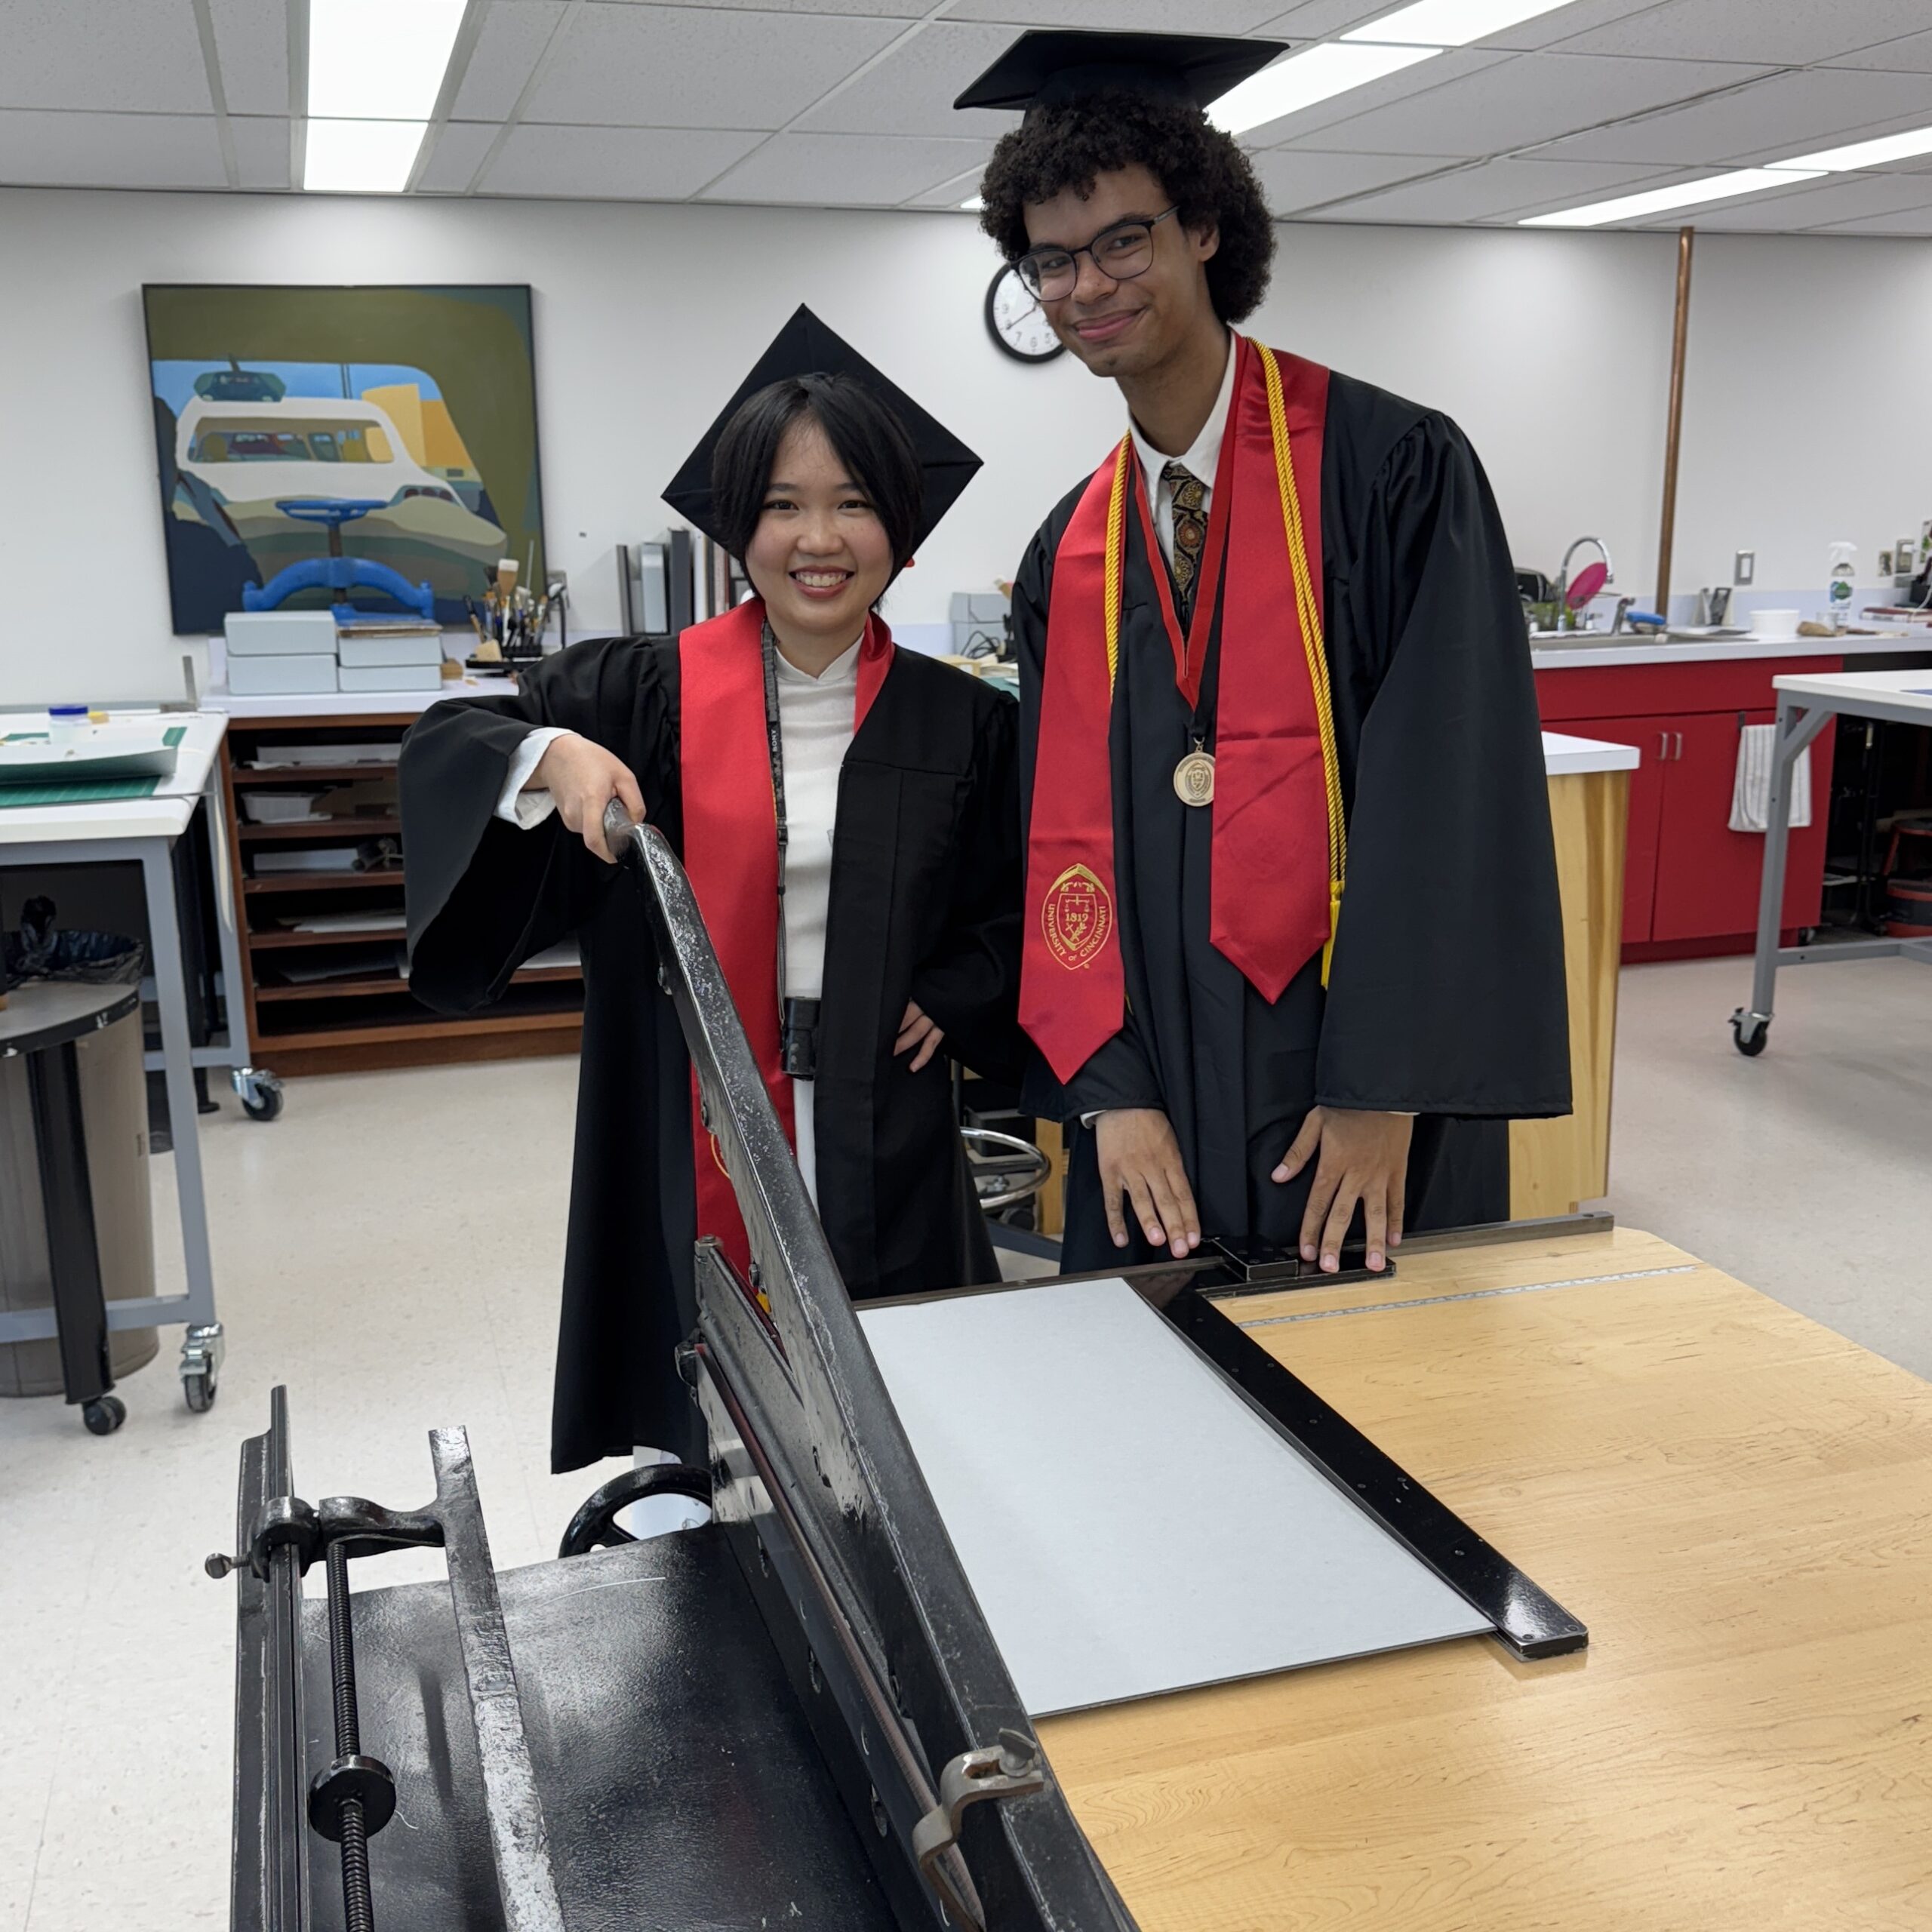
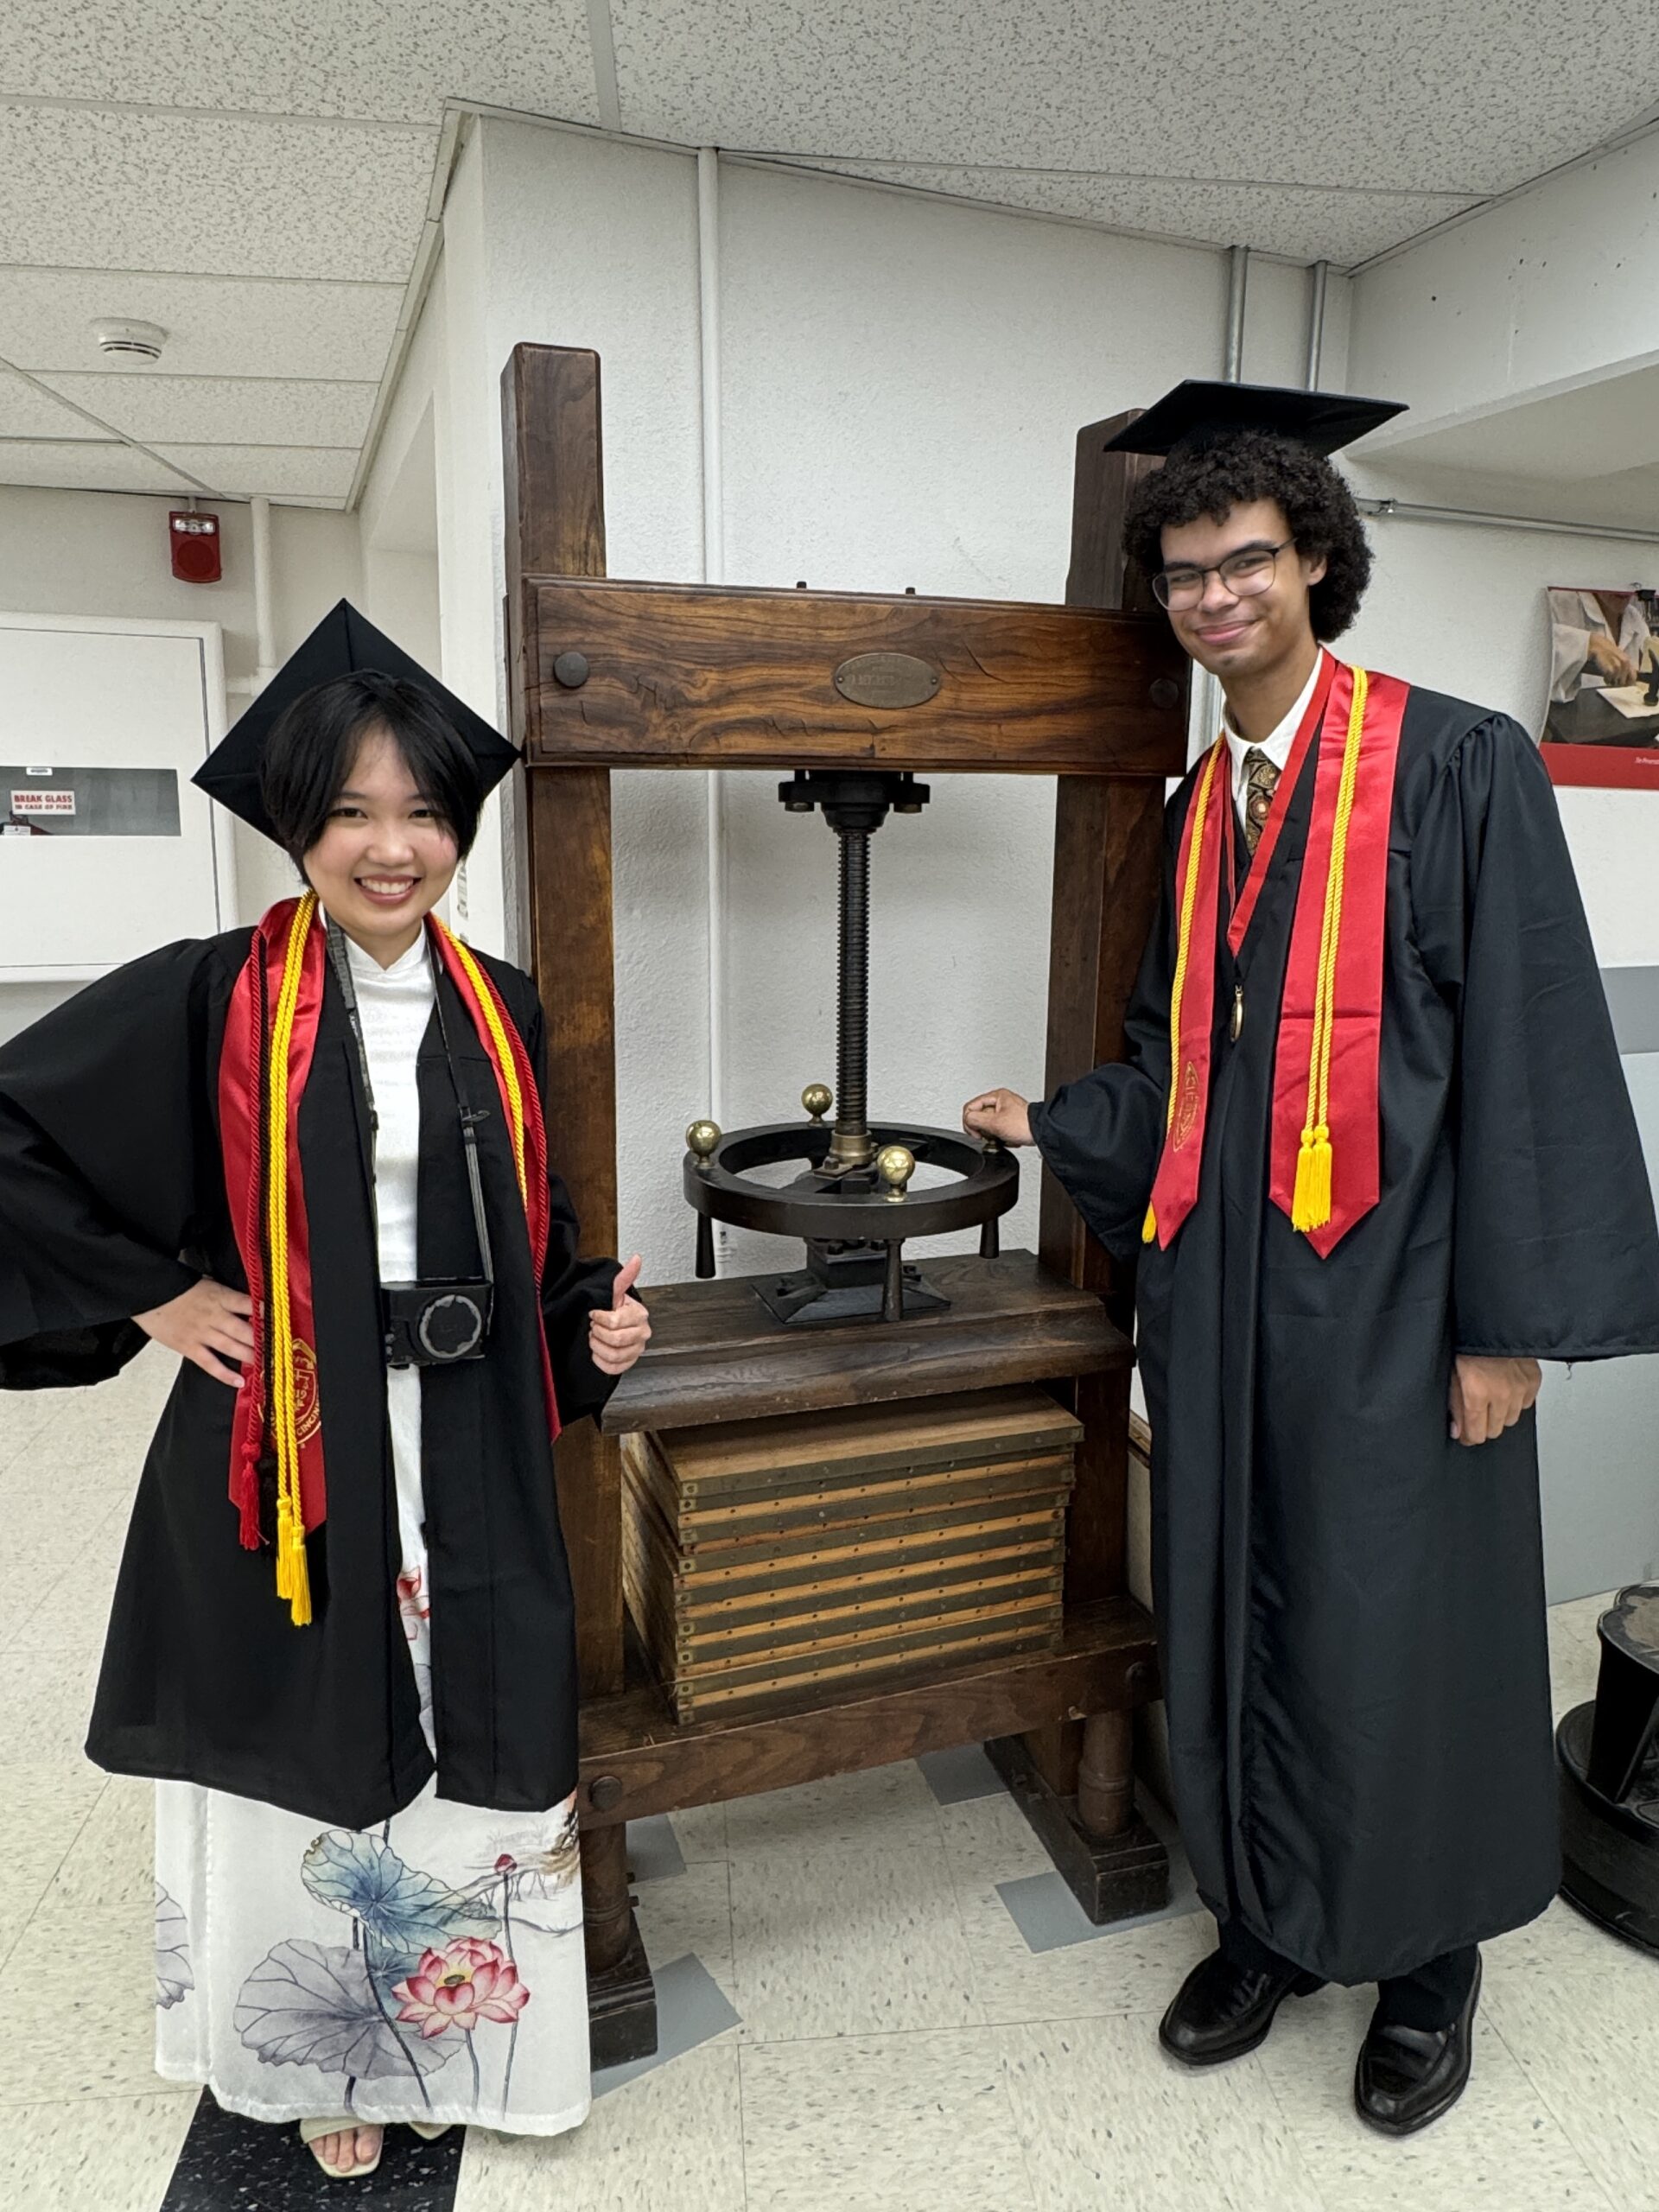
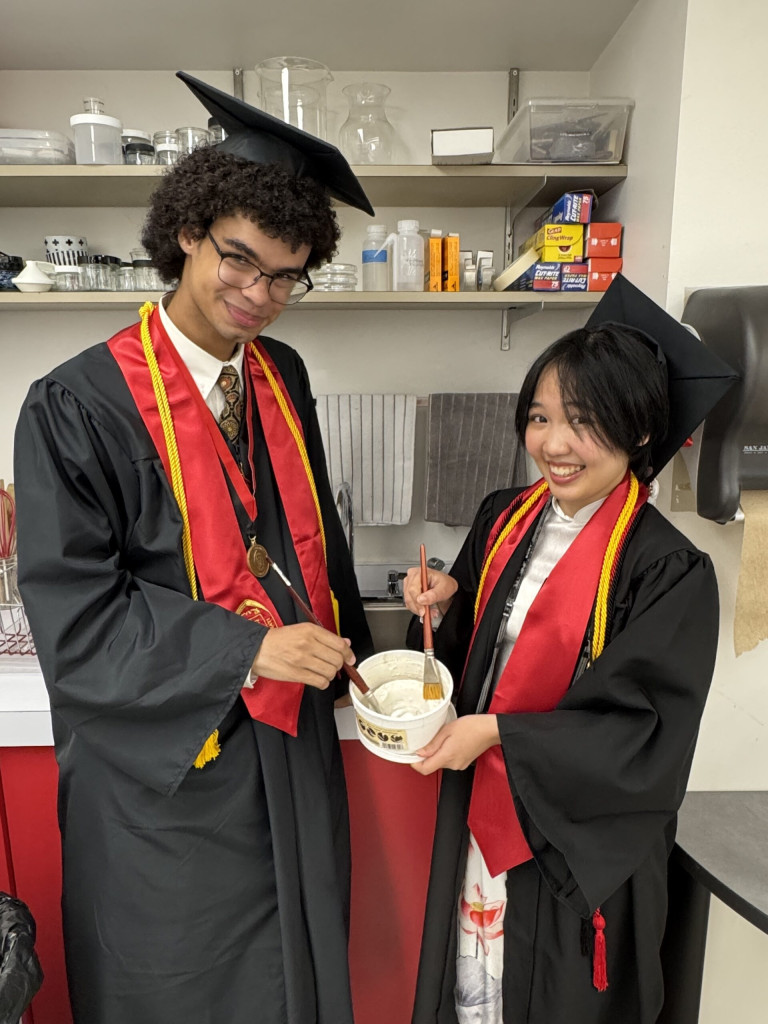
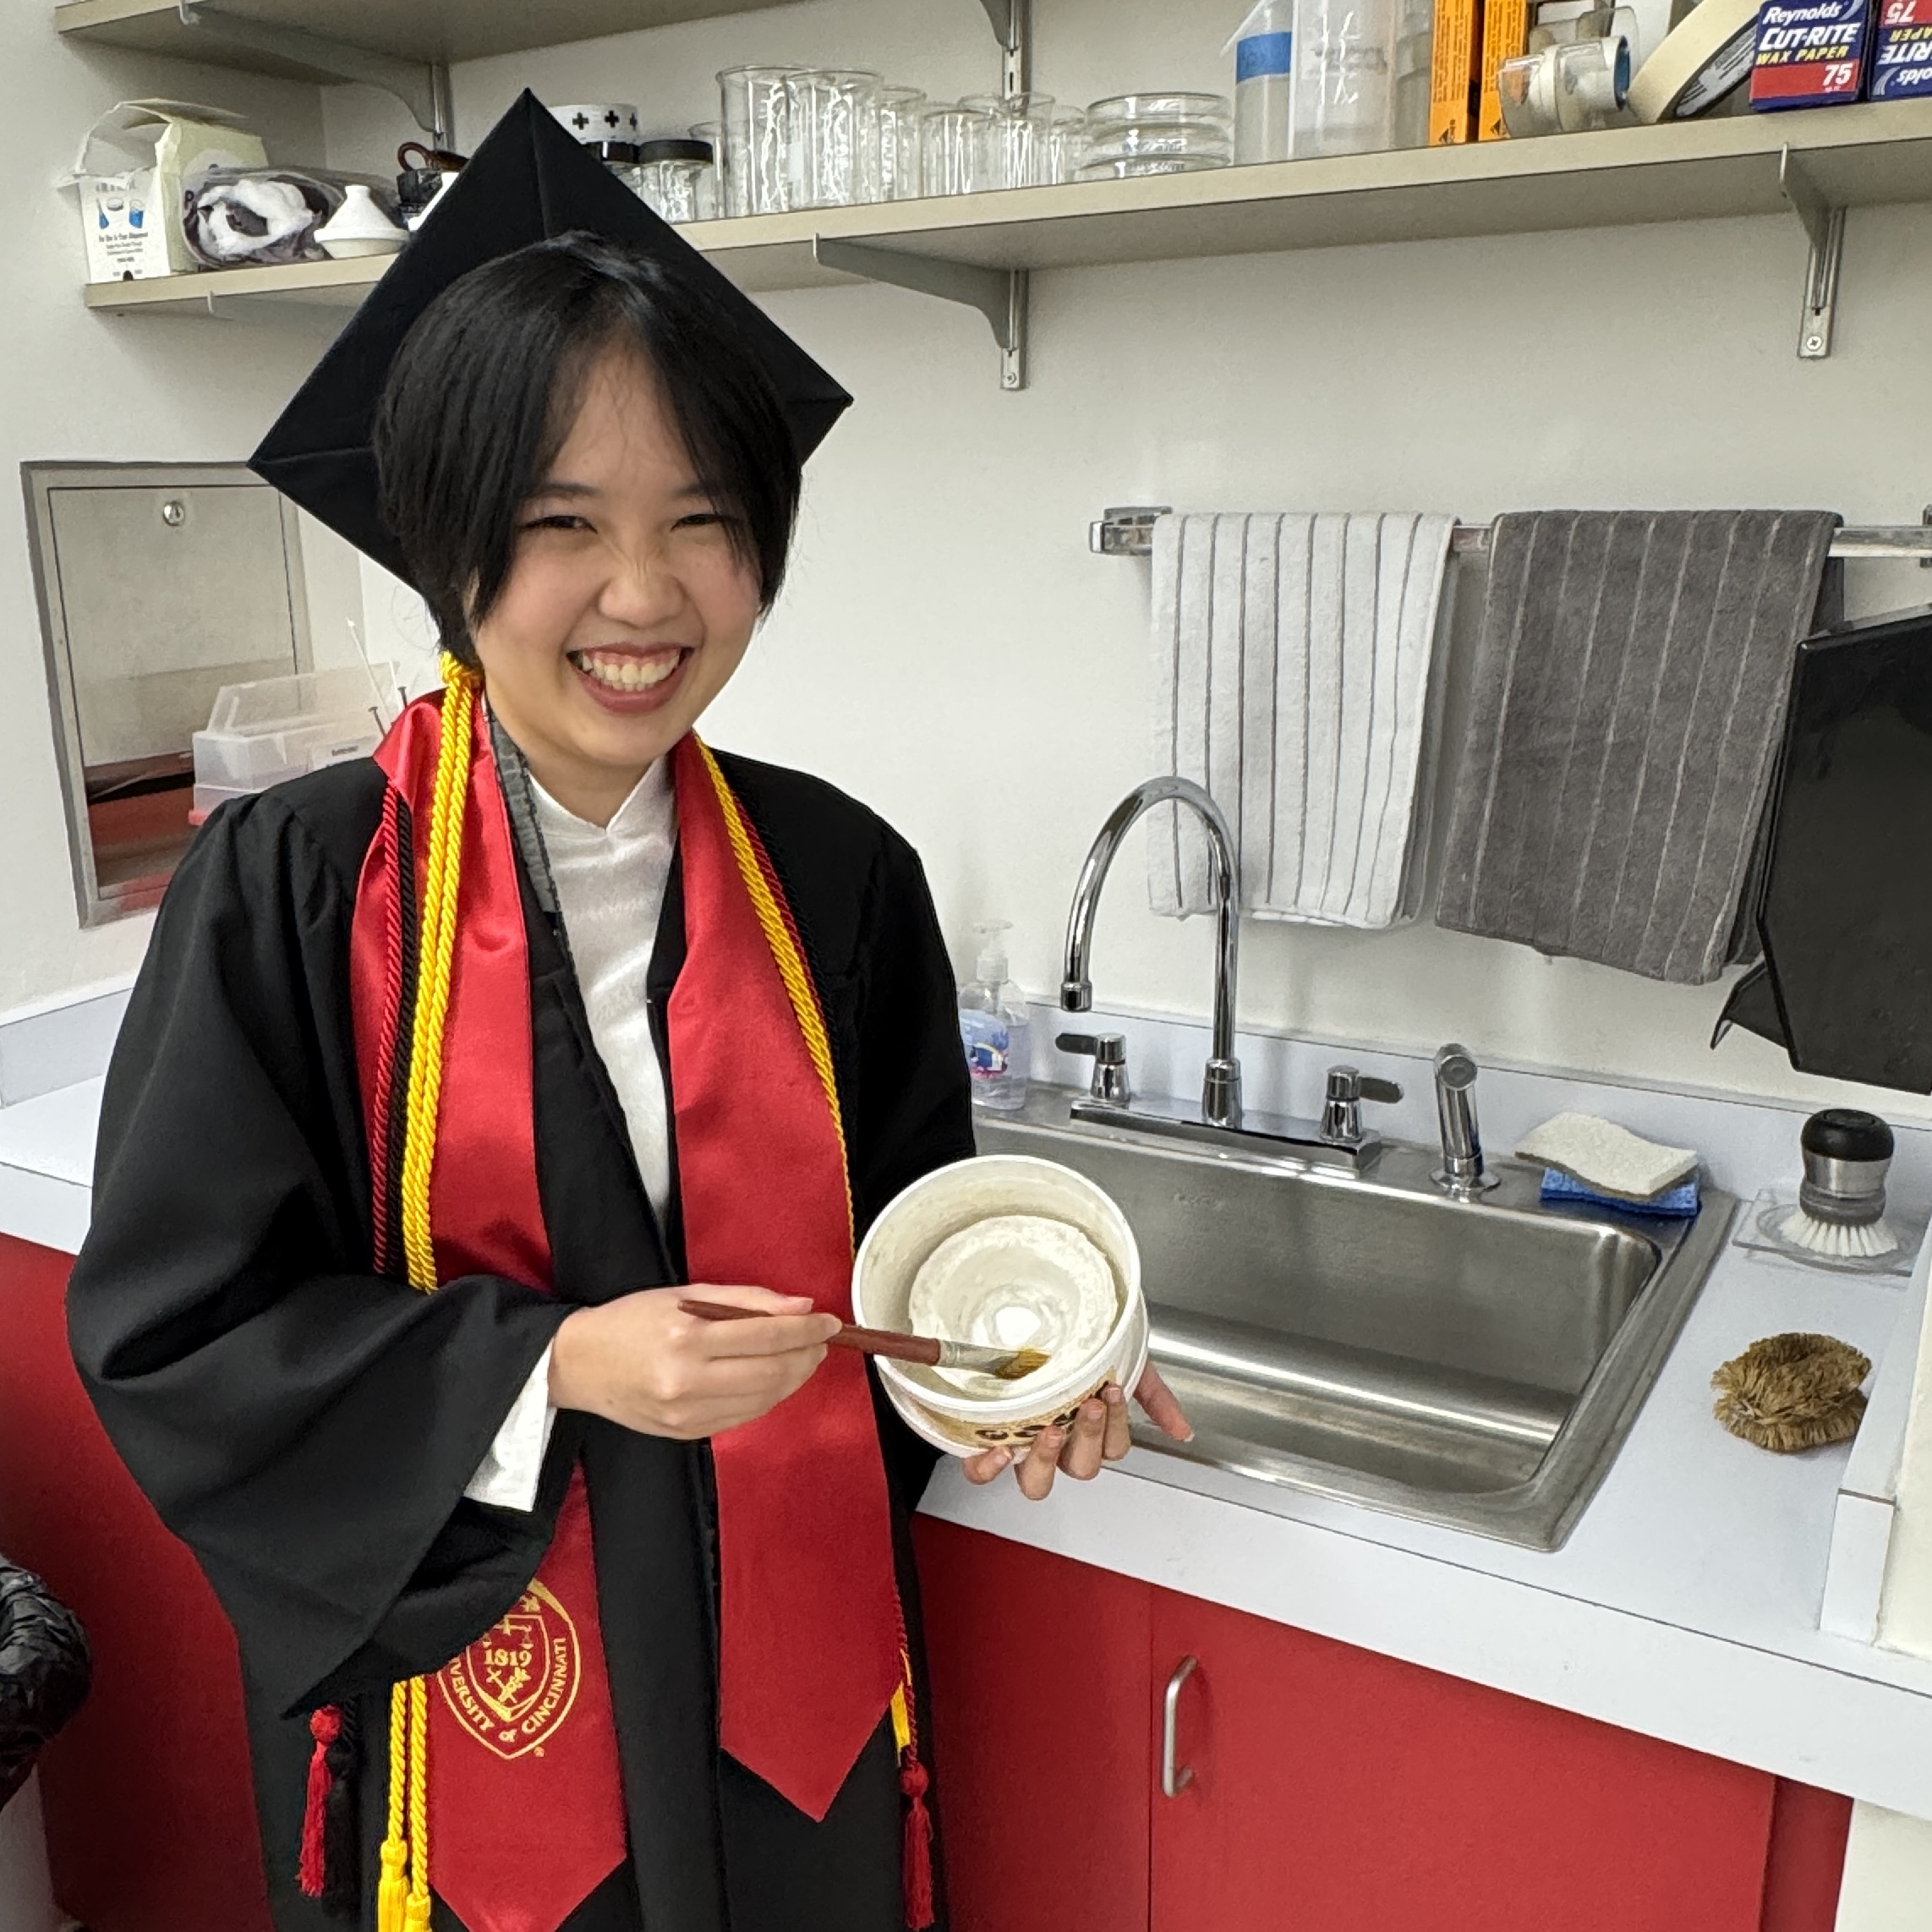
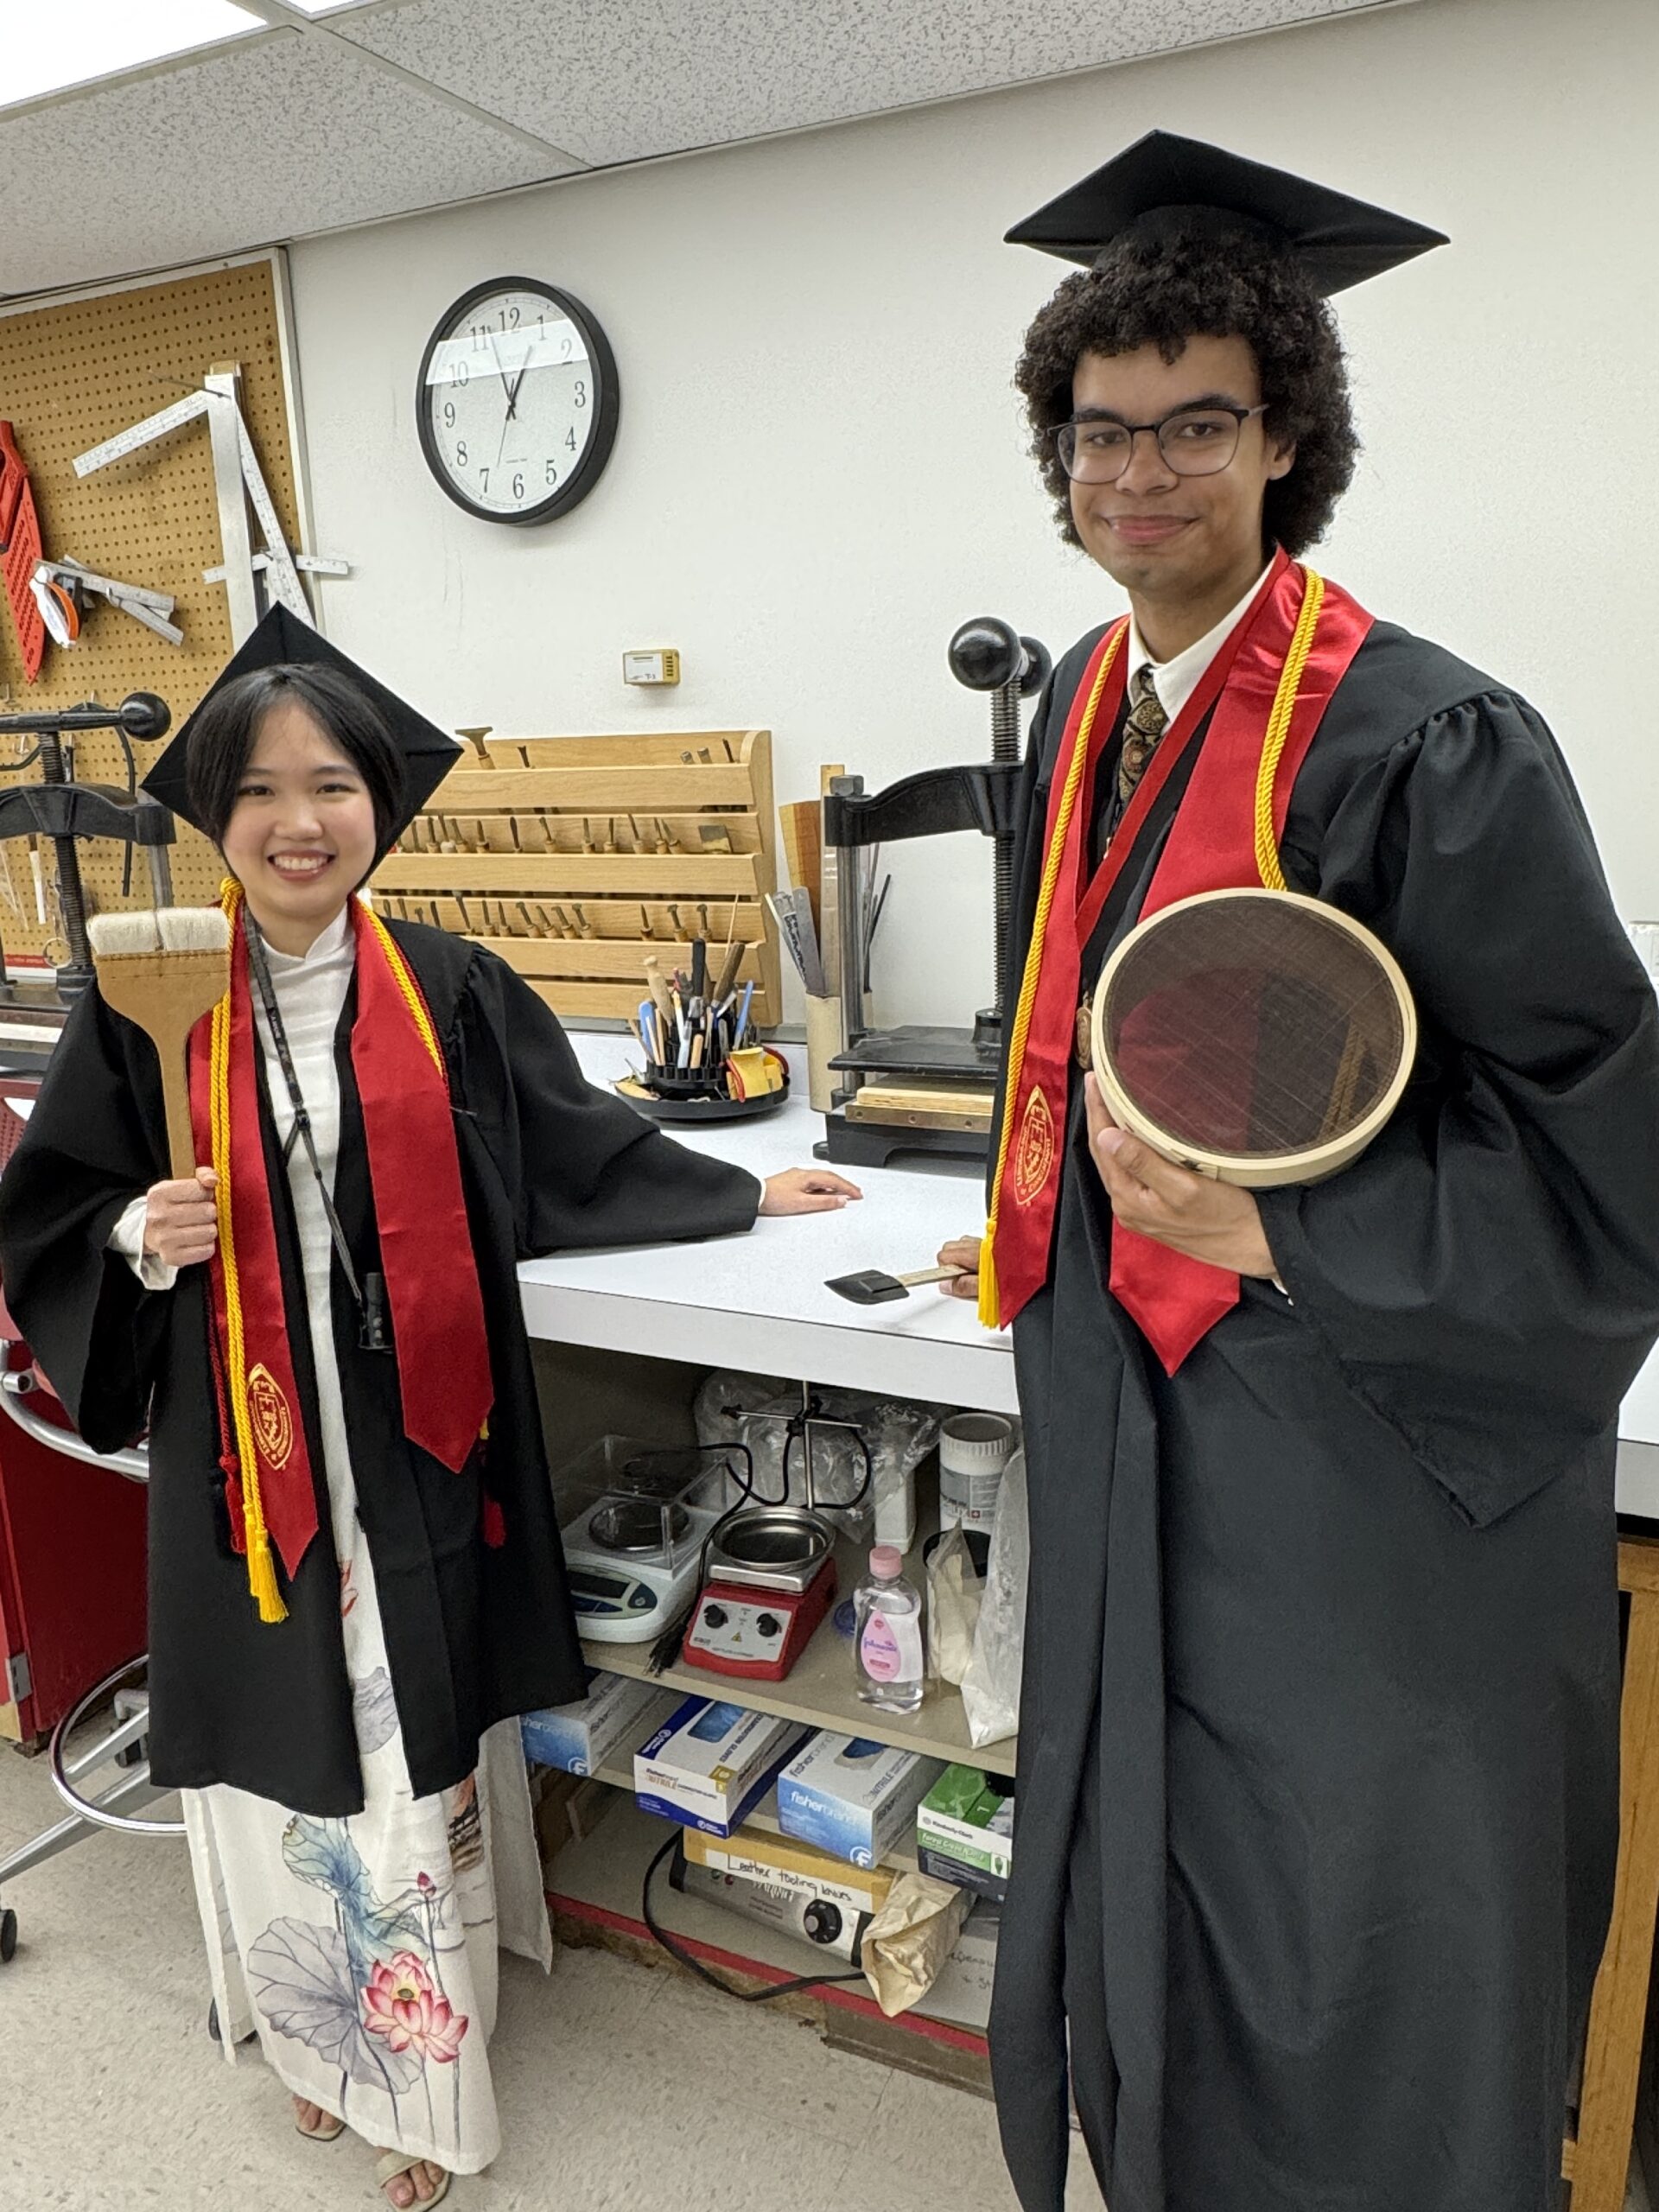
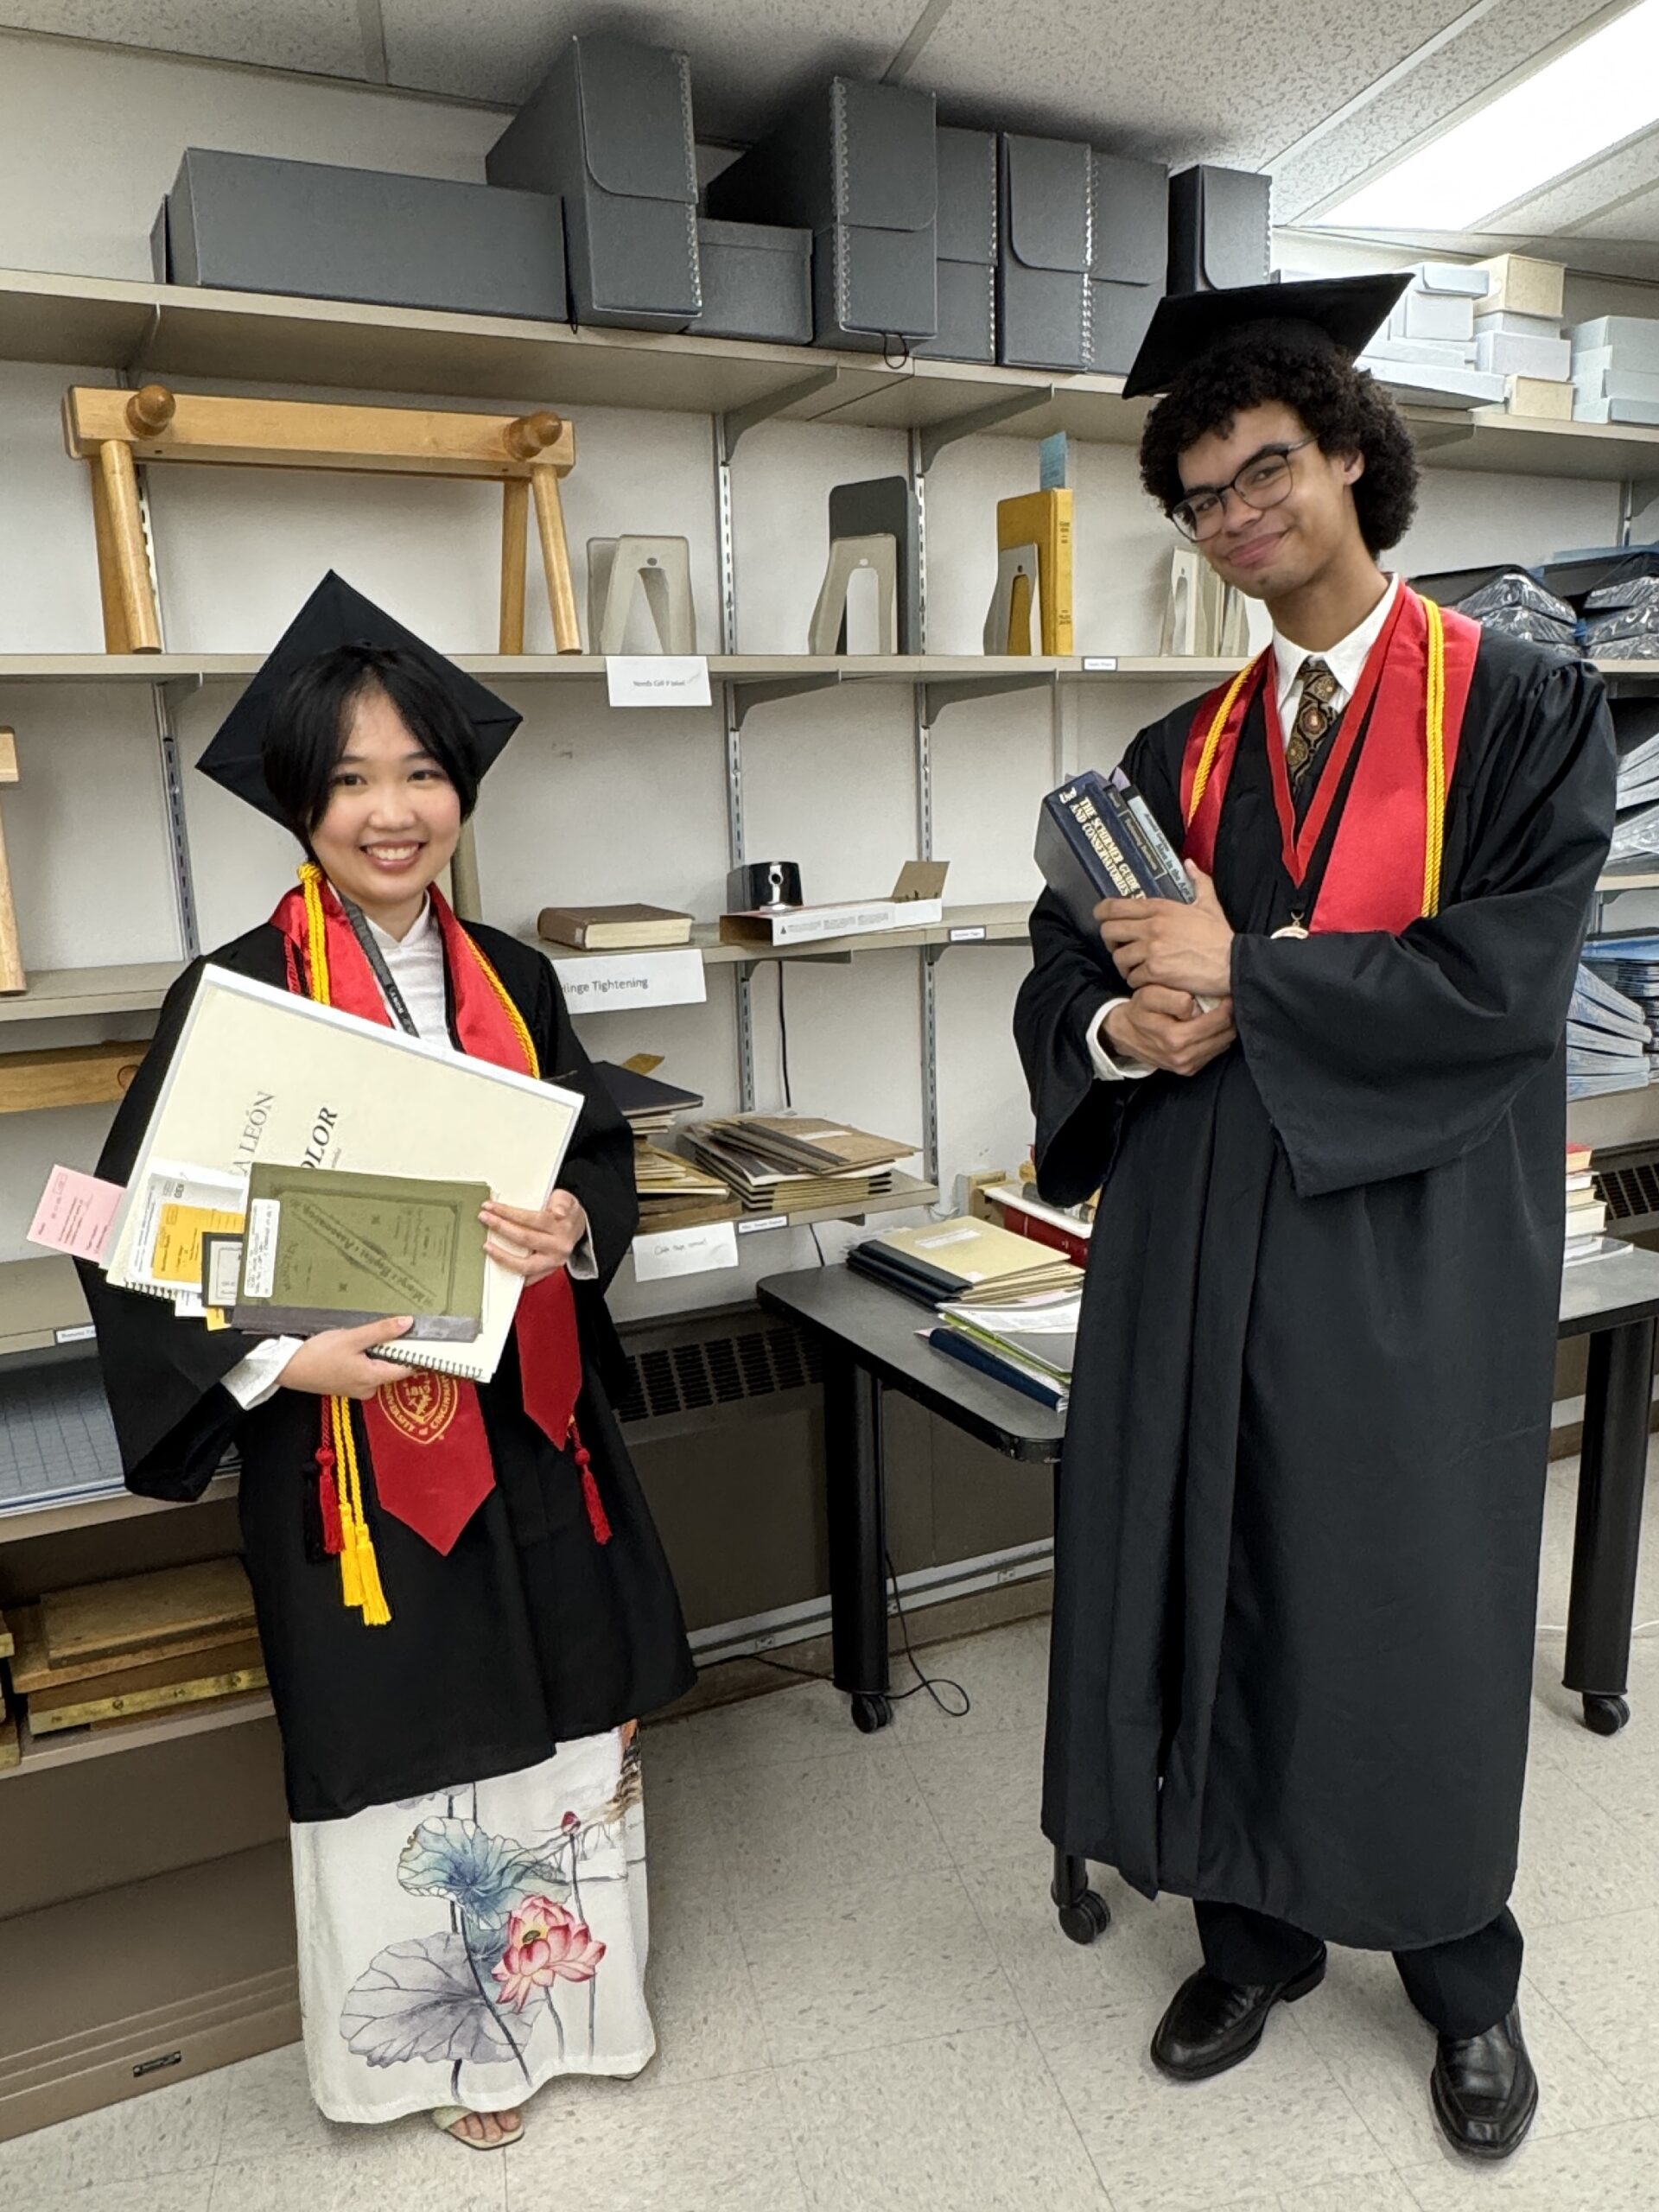
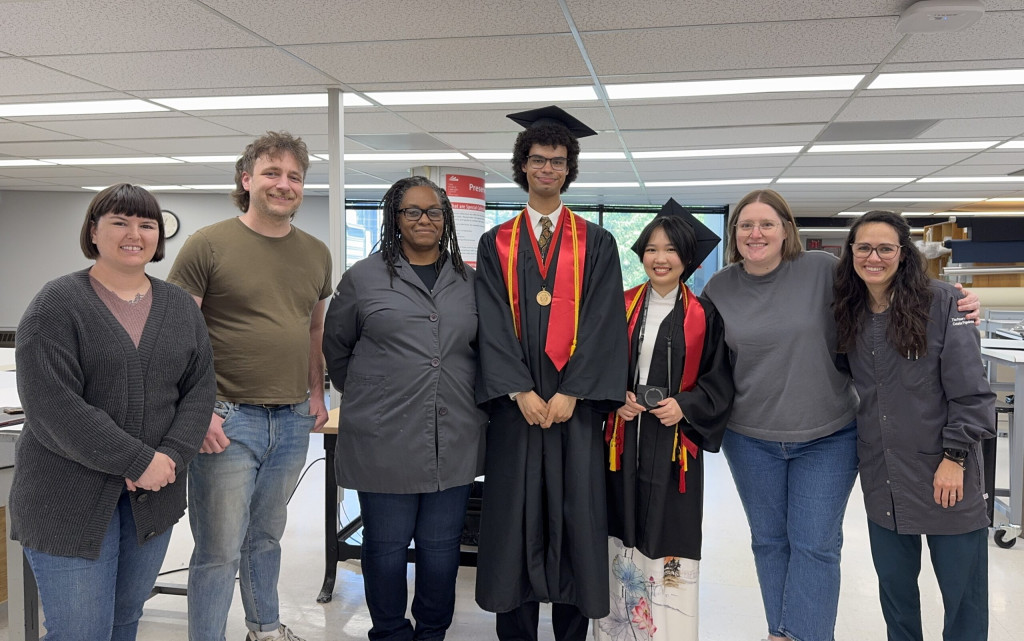
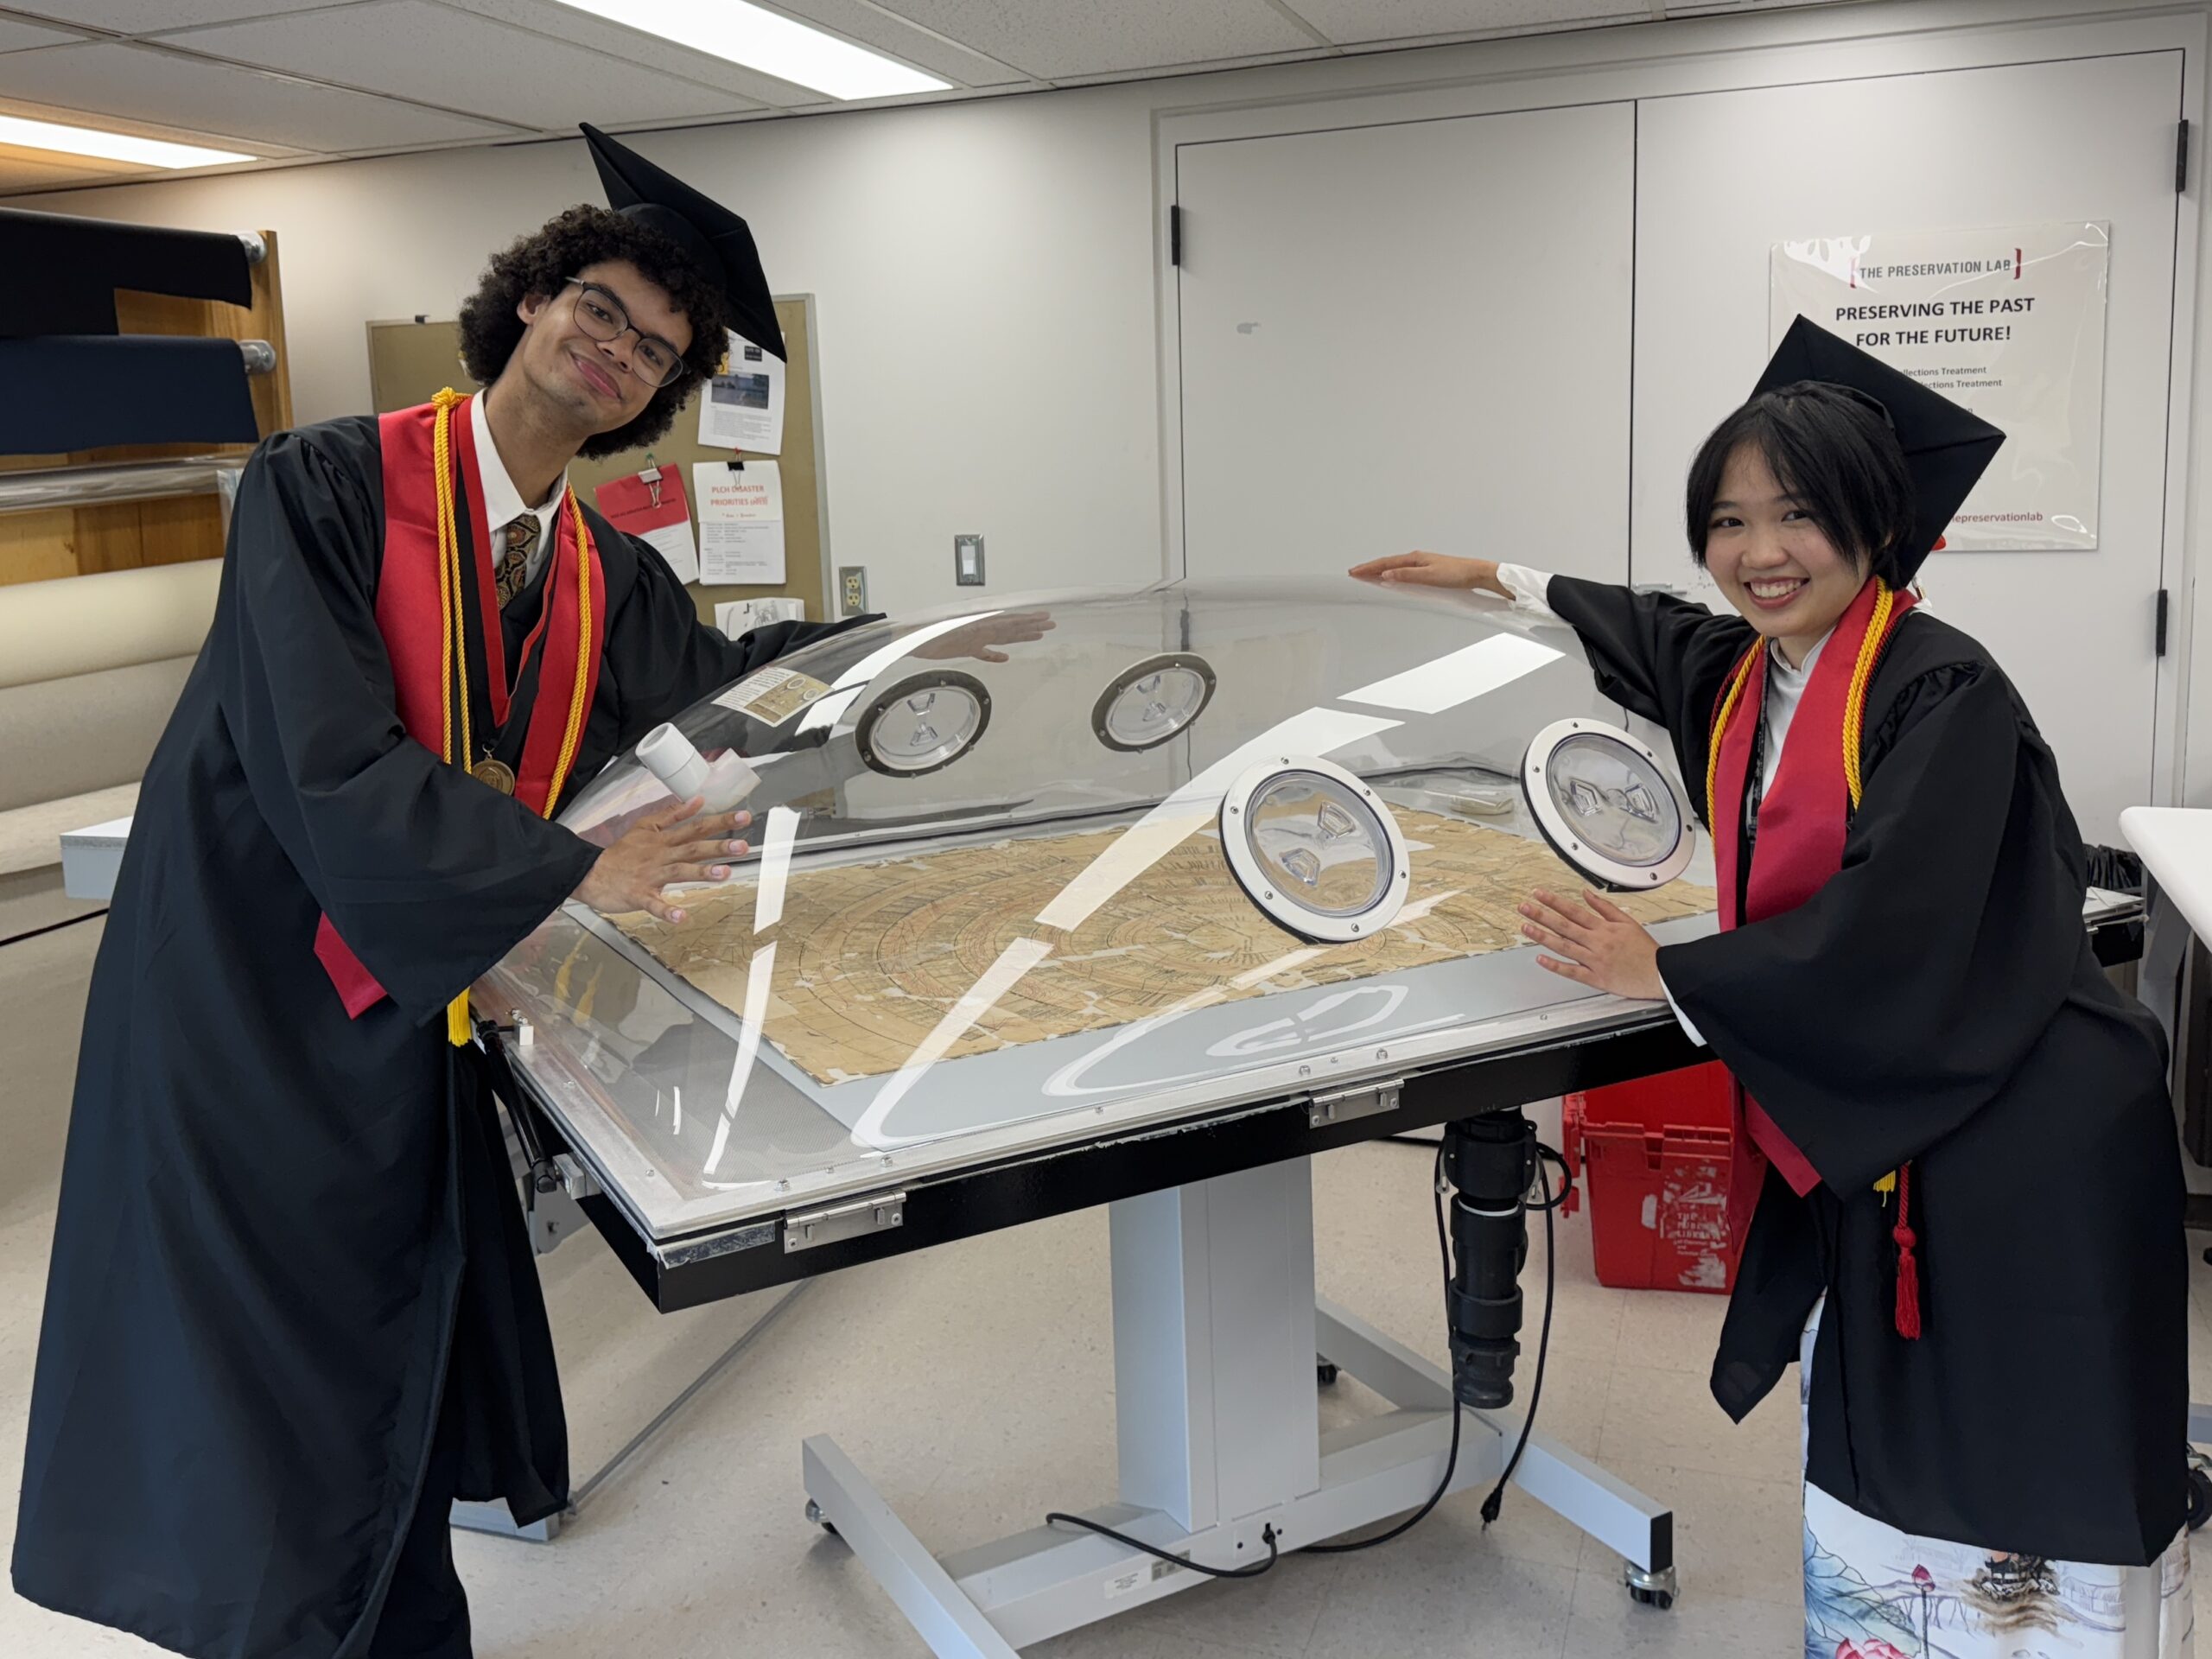
This past Friday two of our Conservation Student Assistants received their bachelor’s degrees from UC! Congratulations Linh (Psychology) and Kristopher (Art History)!! We are so proud of both of you!

Congratulations, Linh & Kristopher!

They both started in the Preservation Lab in January of 2022 and it has been so exciting to see them grow as students, members of our team and people over that time period!

On Friday I was tickled when Linh, who is leaving UC for grad school in Illinois to pursue a future as a therapist, reached out to me asking to come down to the Lab for a picture. I immediately let Kristopher know, suspecting that he might want to join in. Kristopher will be continuing on with us in the Lab, continuing his education at UC’s law school.

Congratulations, Linh & Kristopher!

Linh and Kristopher then asked if I could snap some photos of them around the Lab…a request I could not turn down.

Moments like these are the true reminders of why being a student supervisor is so rewarding. To see students graduating, on the precipice of something new and big, and looking back at their time in the Lab with such fondness is really special and powerful. Congratulations to two amazing students! We wish you a smooth journey ahead through graduate school!

Jessica Ebert – Assistant Conservator & Student Supervisor

Fun with Copying Technology

On Monday, April 7, the Archives and Rare Books Library along with the Elliston Poetry Room hosted a workshop with Rich Dana. Rich is a copier artist and founder of Obsolete Press, and he teaches at the University of Iowa Center for the Book and the Center for Book Arts in New York. The workshop covered obsolete duplicating technologies, which covered the mimeograph and hectograph.

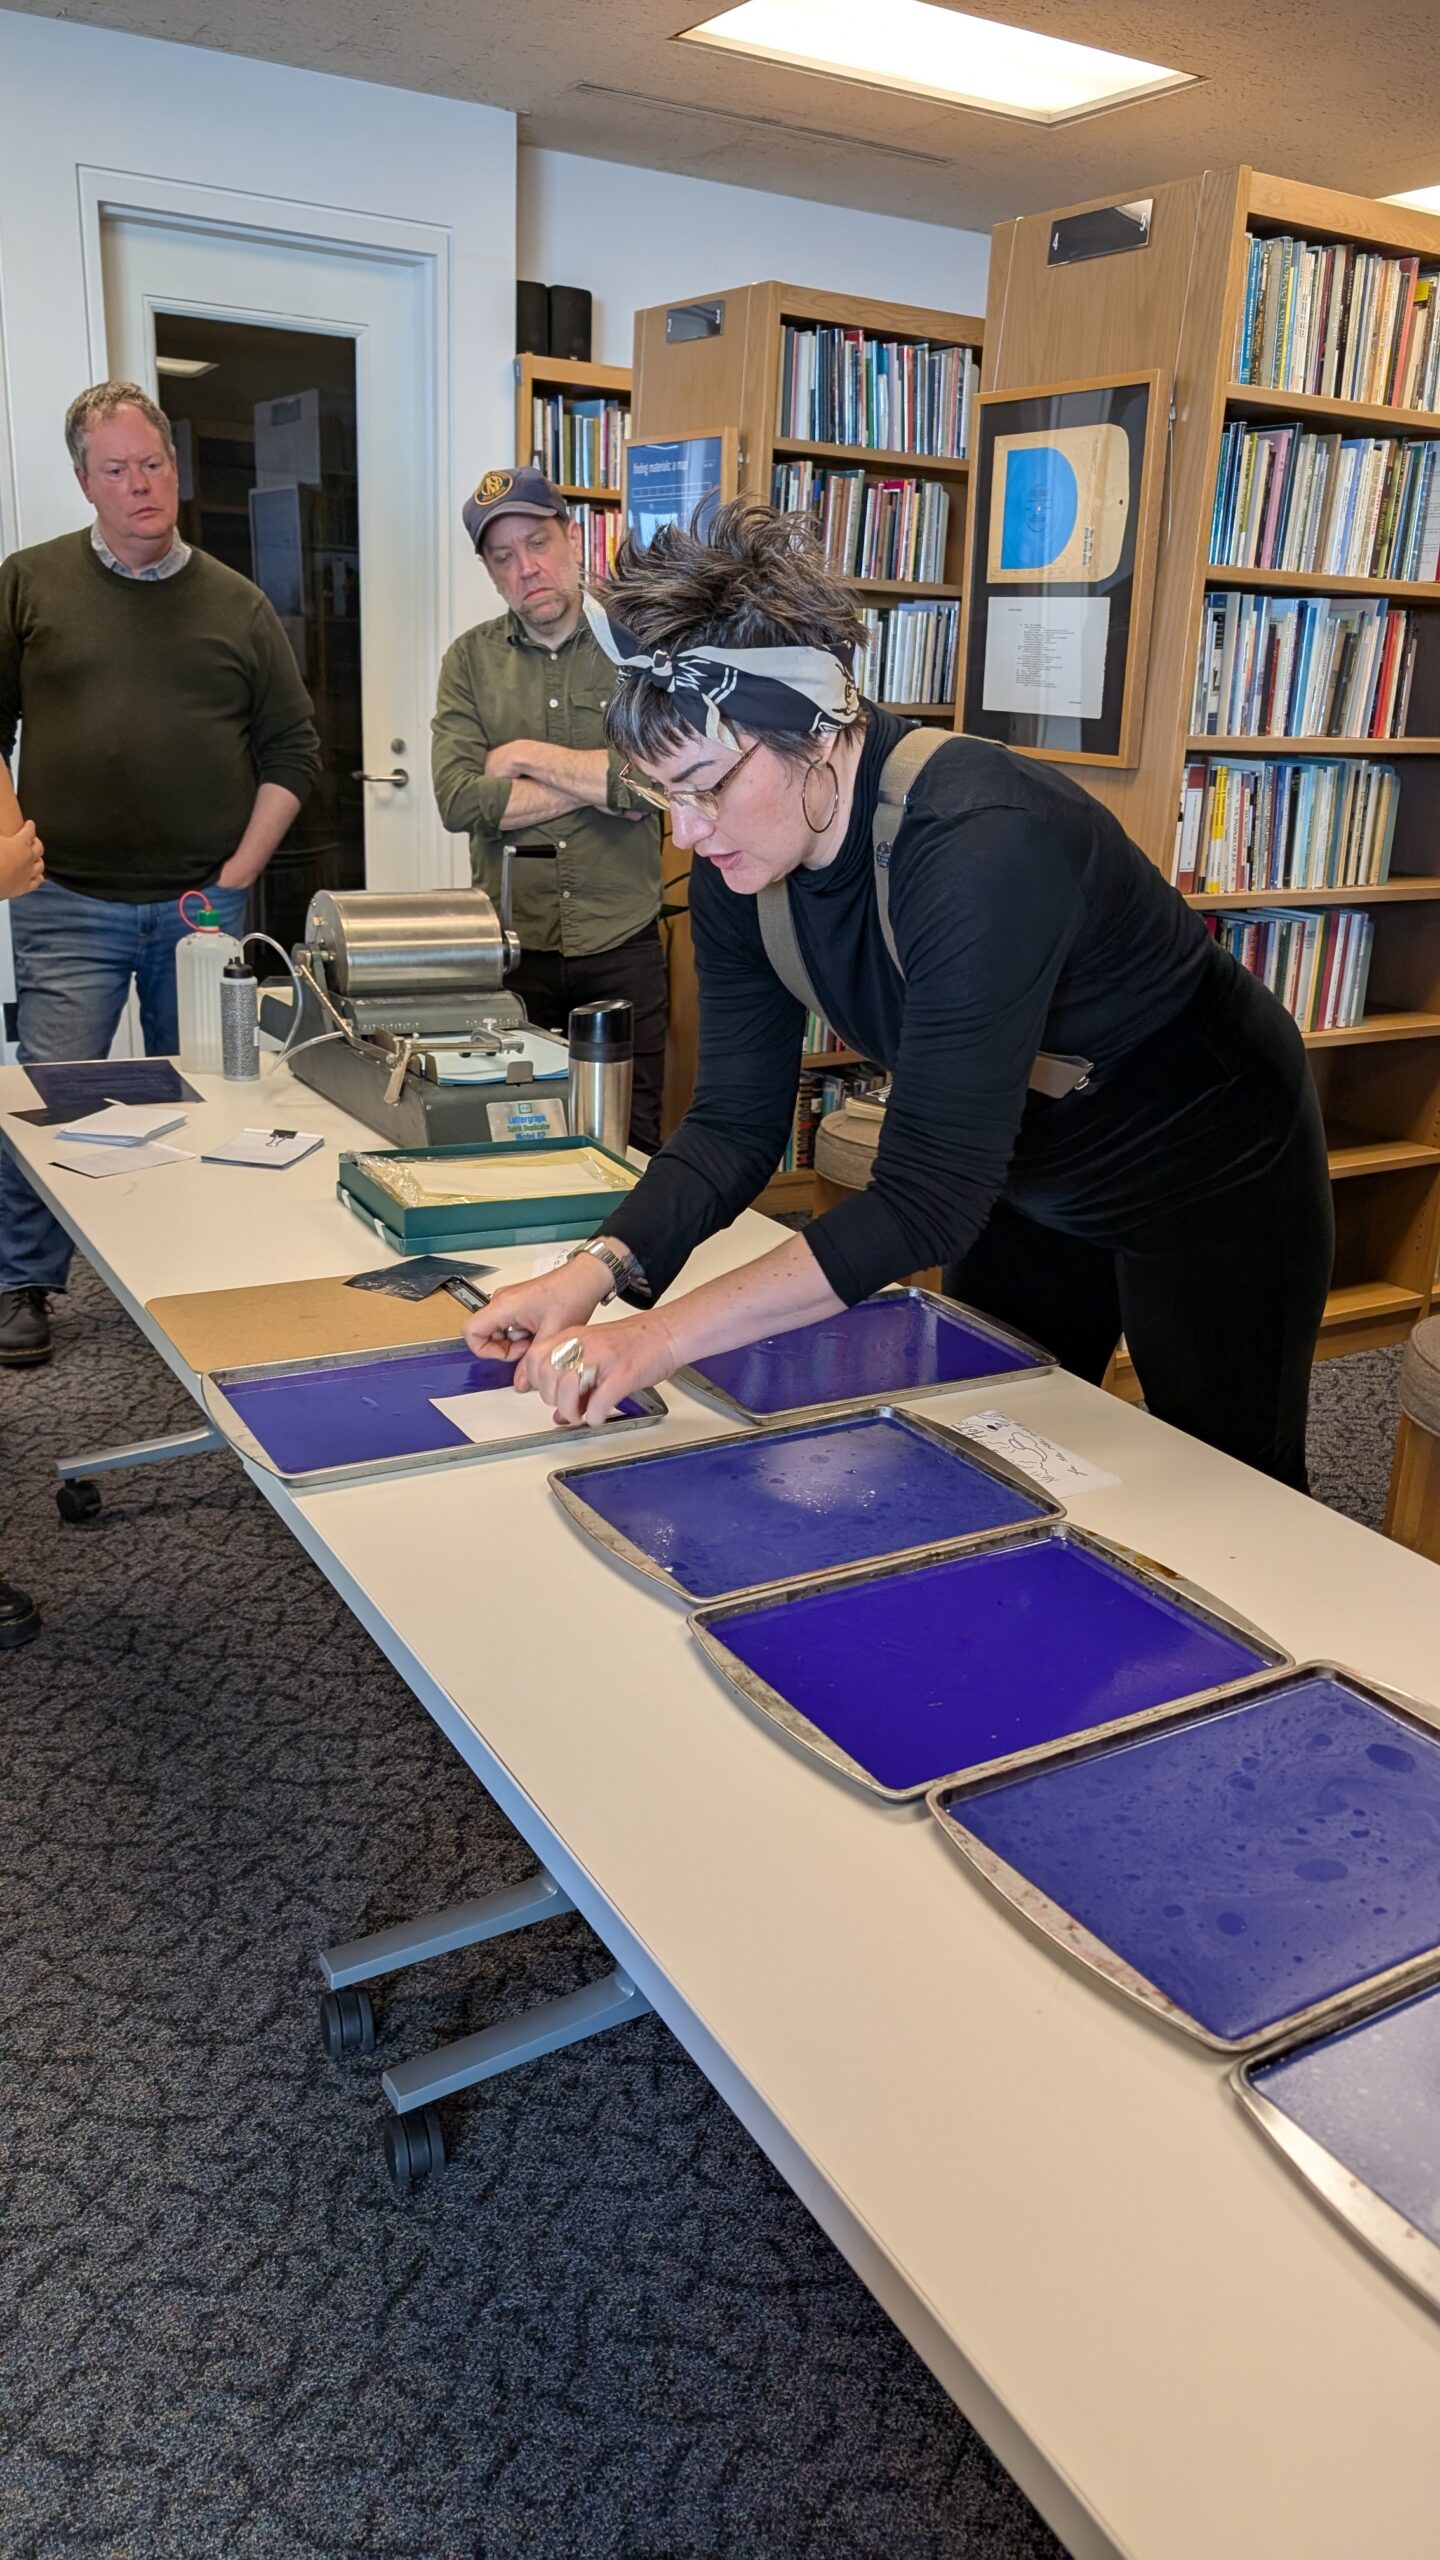
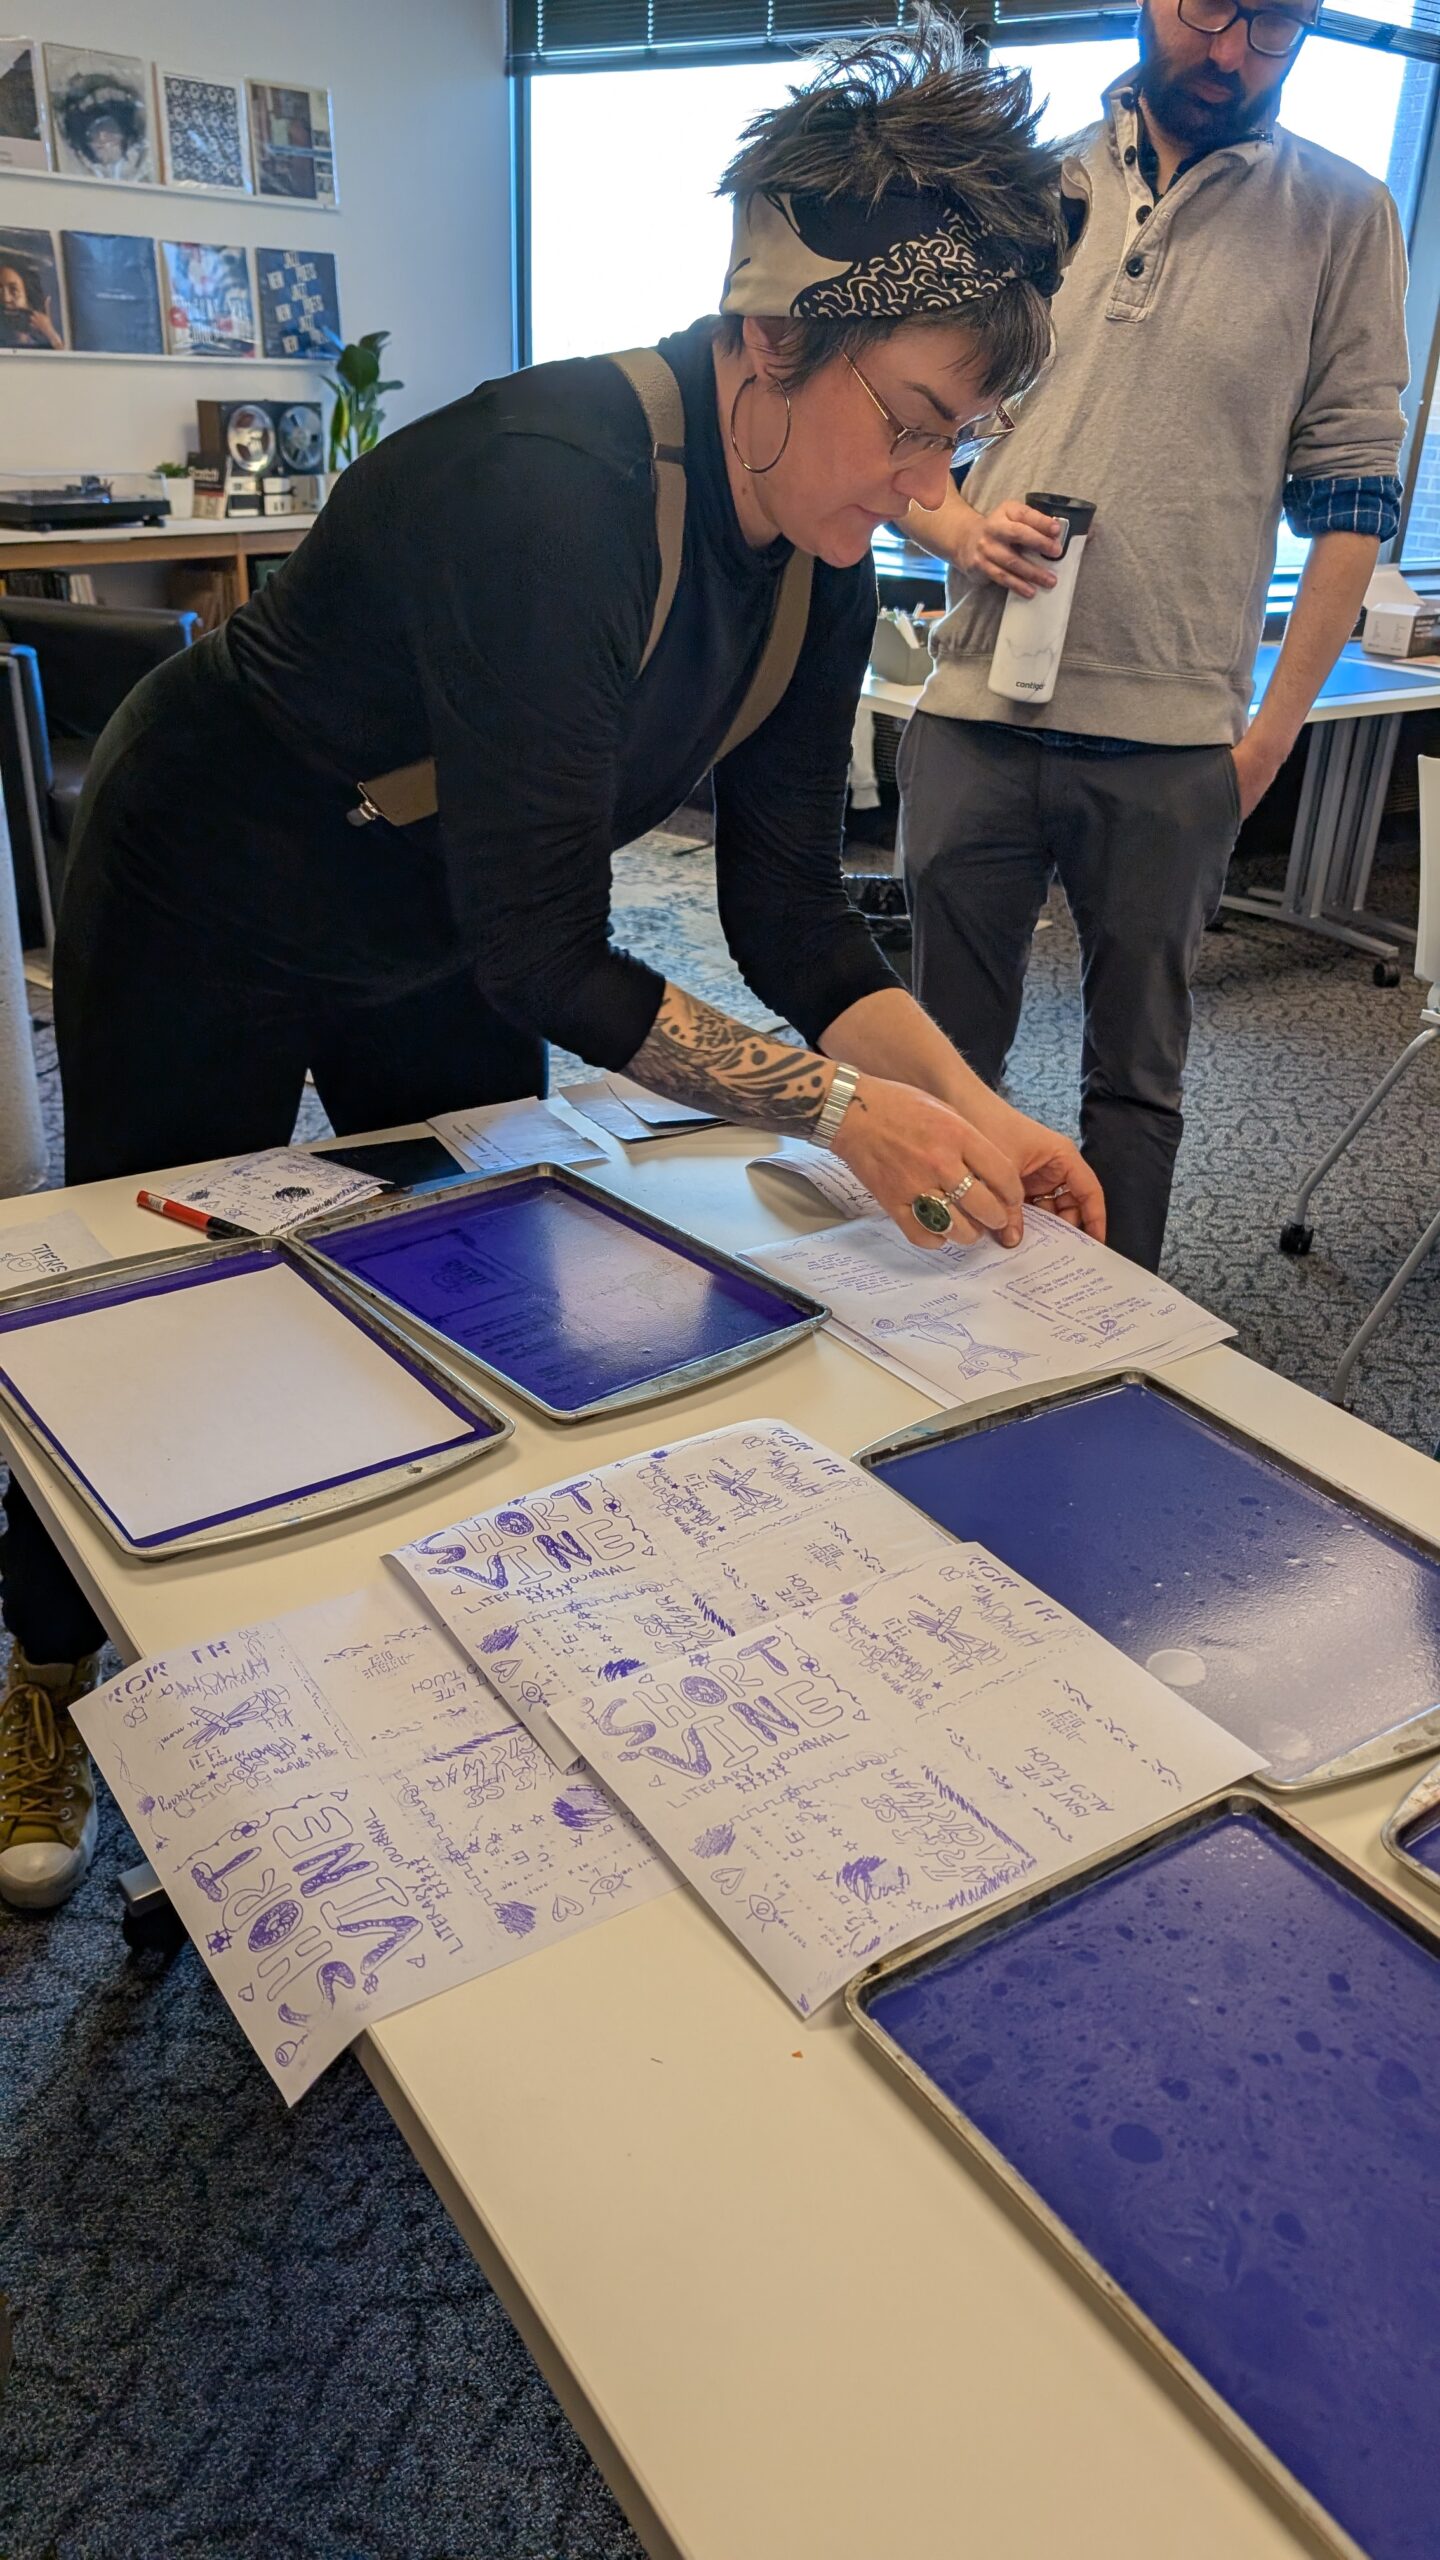
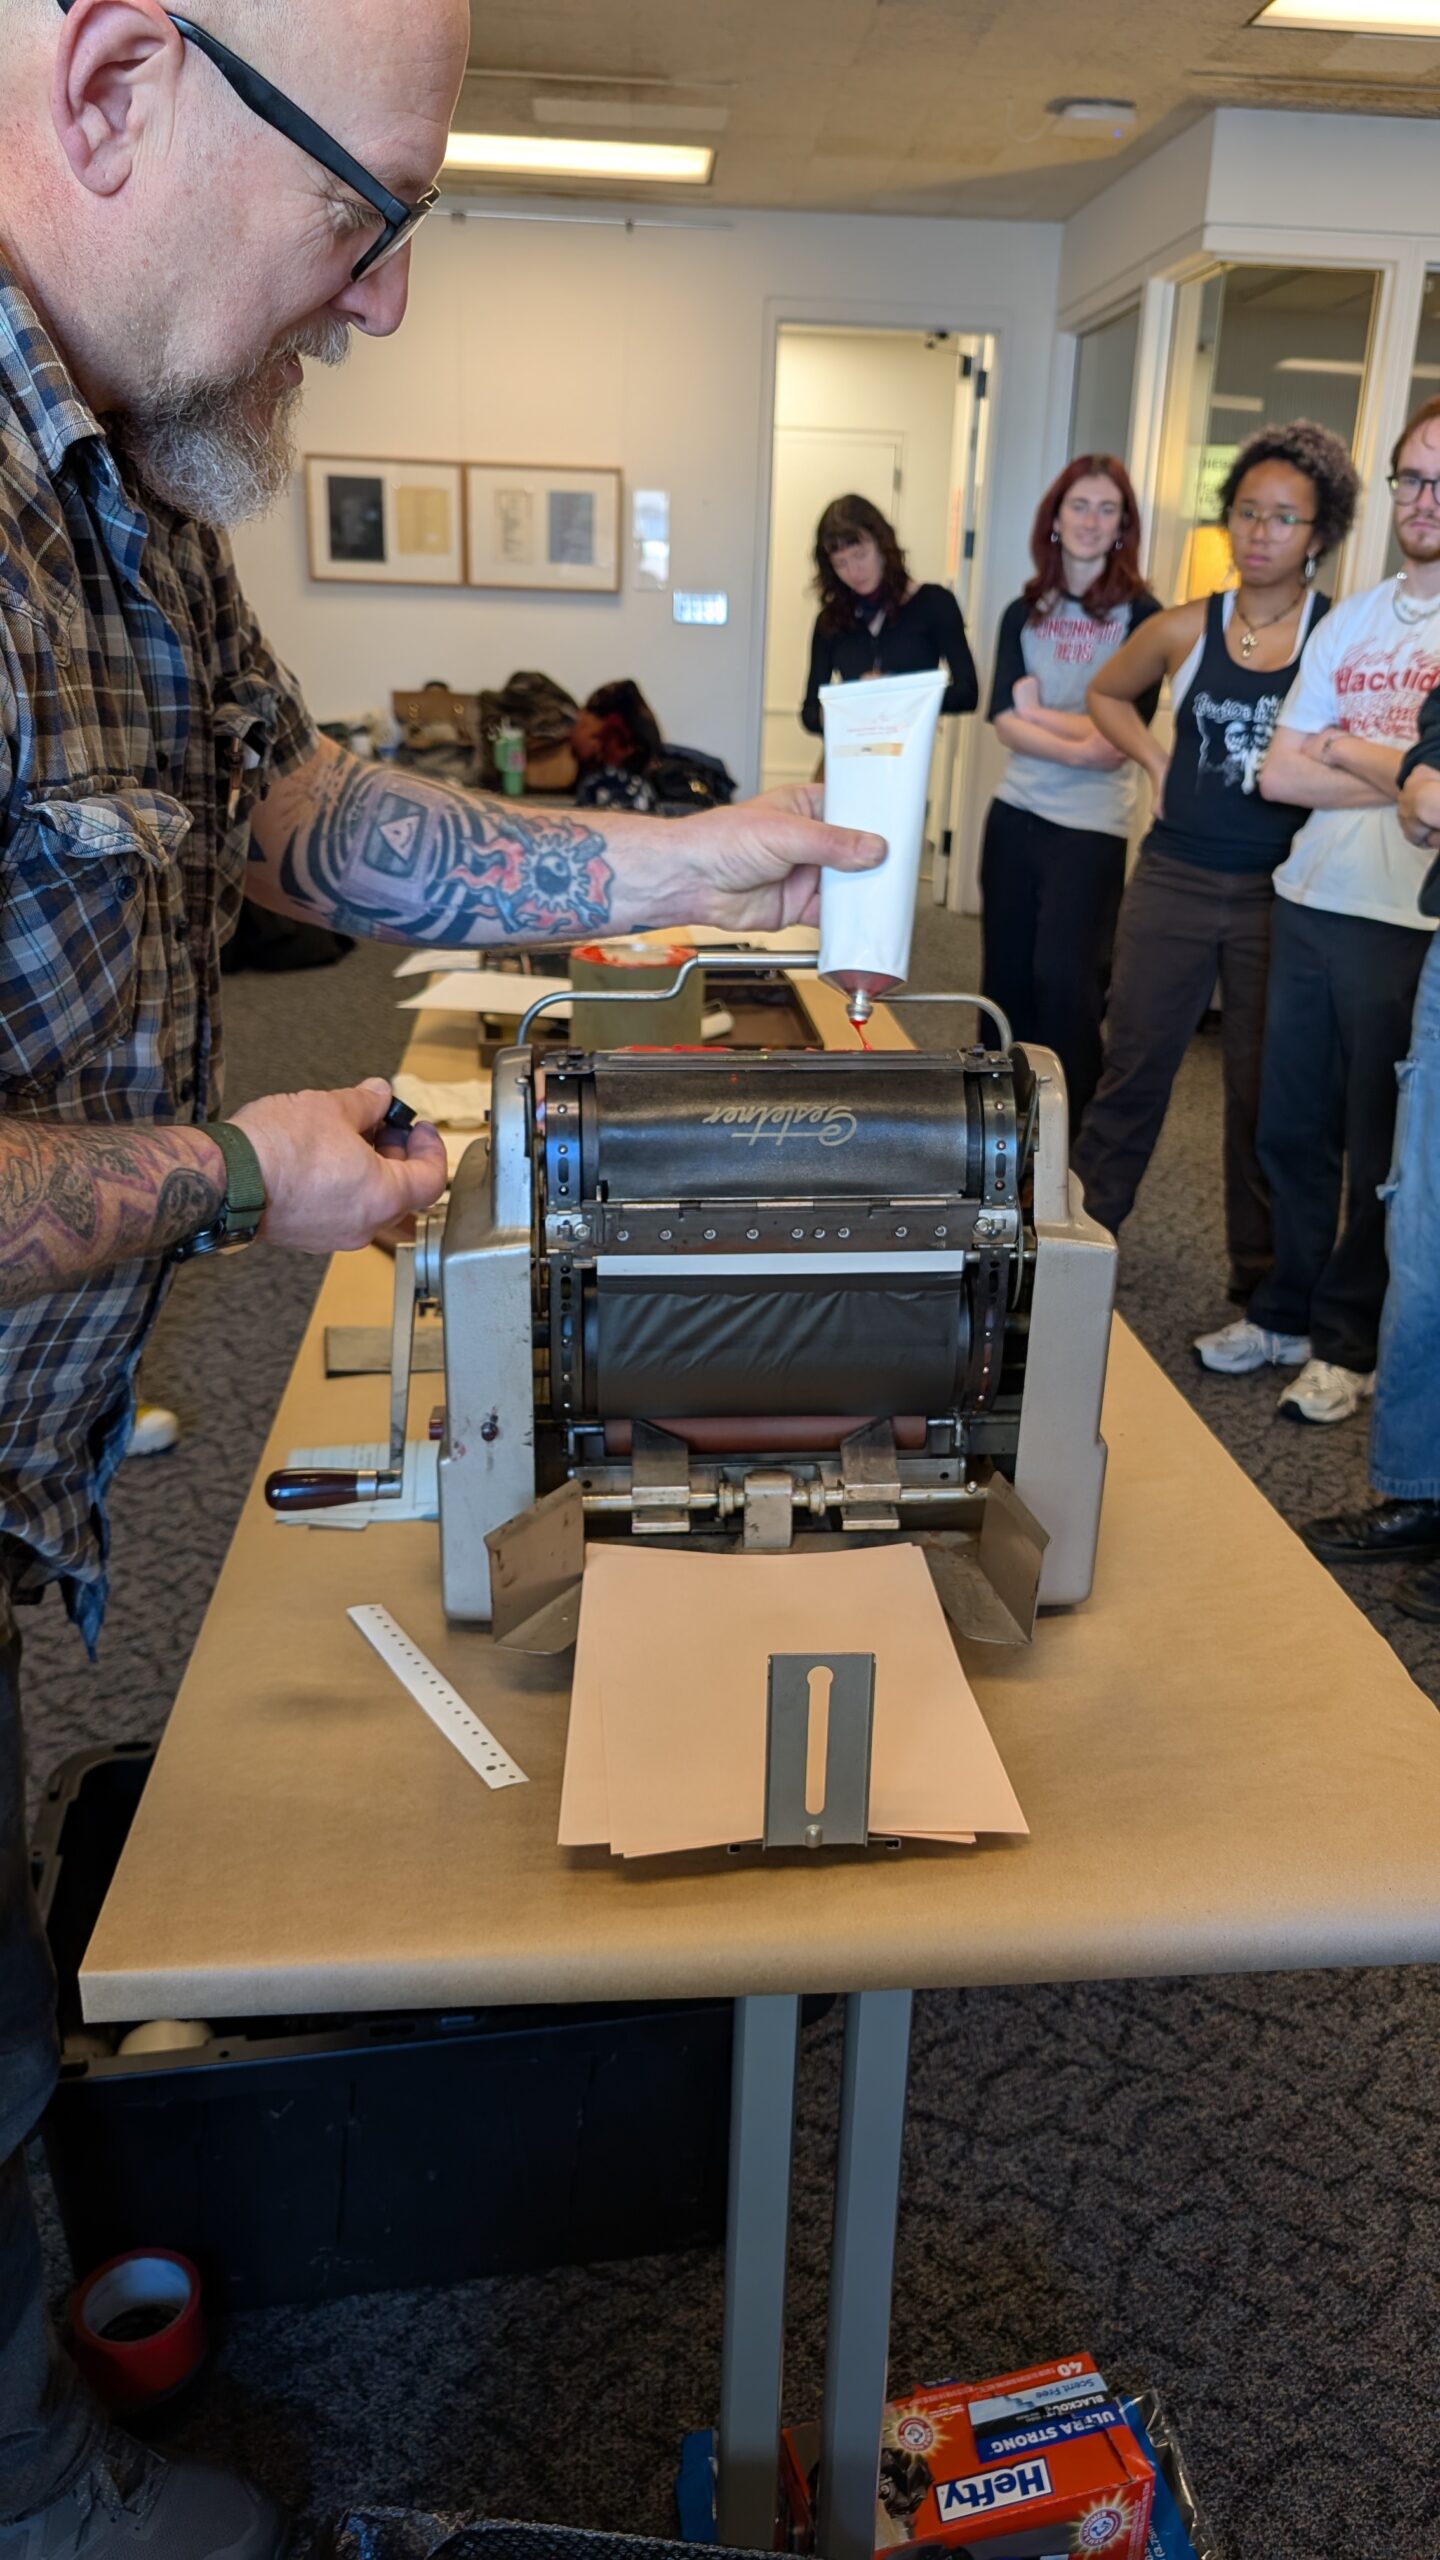
Along with his assistant Leisha, a performance poet and publisher herself, Rich talked us through how to use these machines. The hectograph, also known as a gelatin duplicator, used gelatin in trays as the matrix. Master copies were created using spirit tattoo paper, then the master was pressed to the gelatin matrix. Once the design was down on the gelatin, a fresh sheet of plain paper was pressed to the gelatin matrix, and the design transferred over to the paper. This method can be used multiple times — we made at least twenty copies off it, and the fading was minimal!

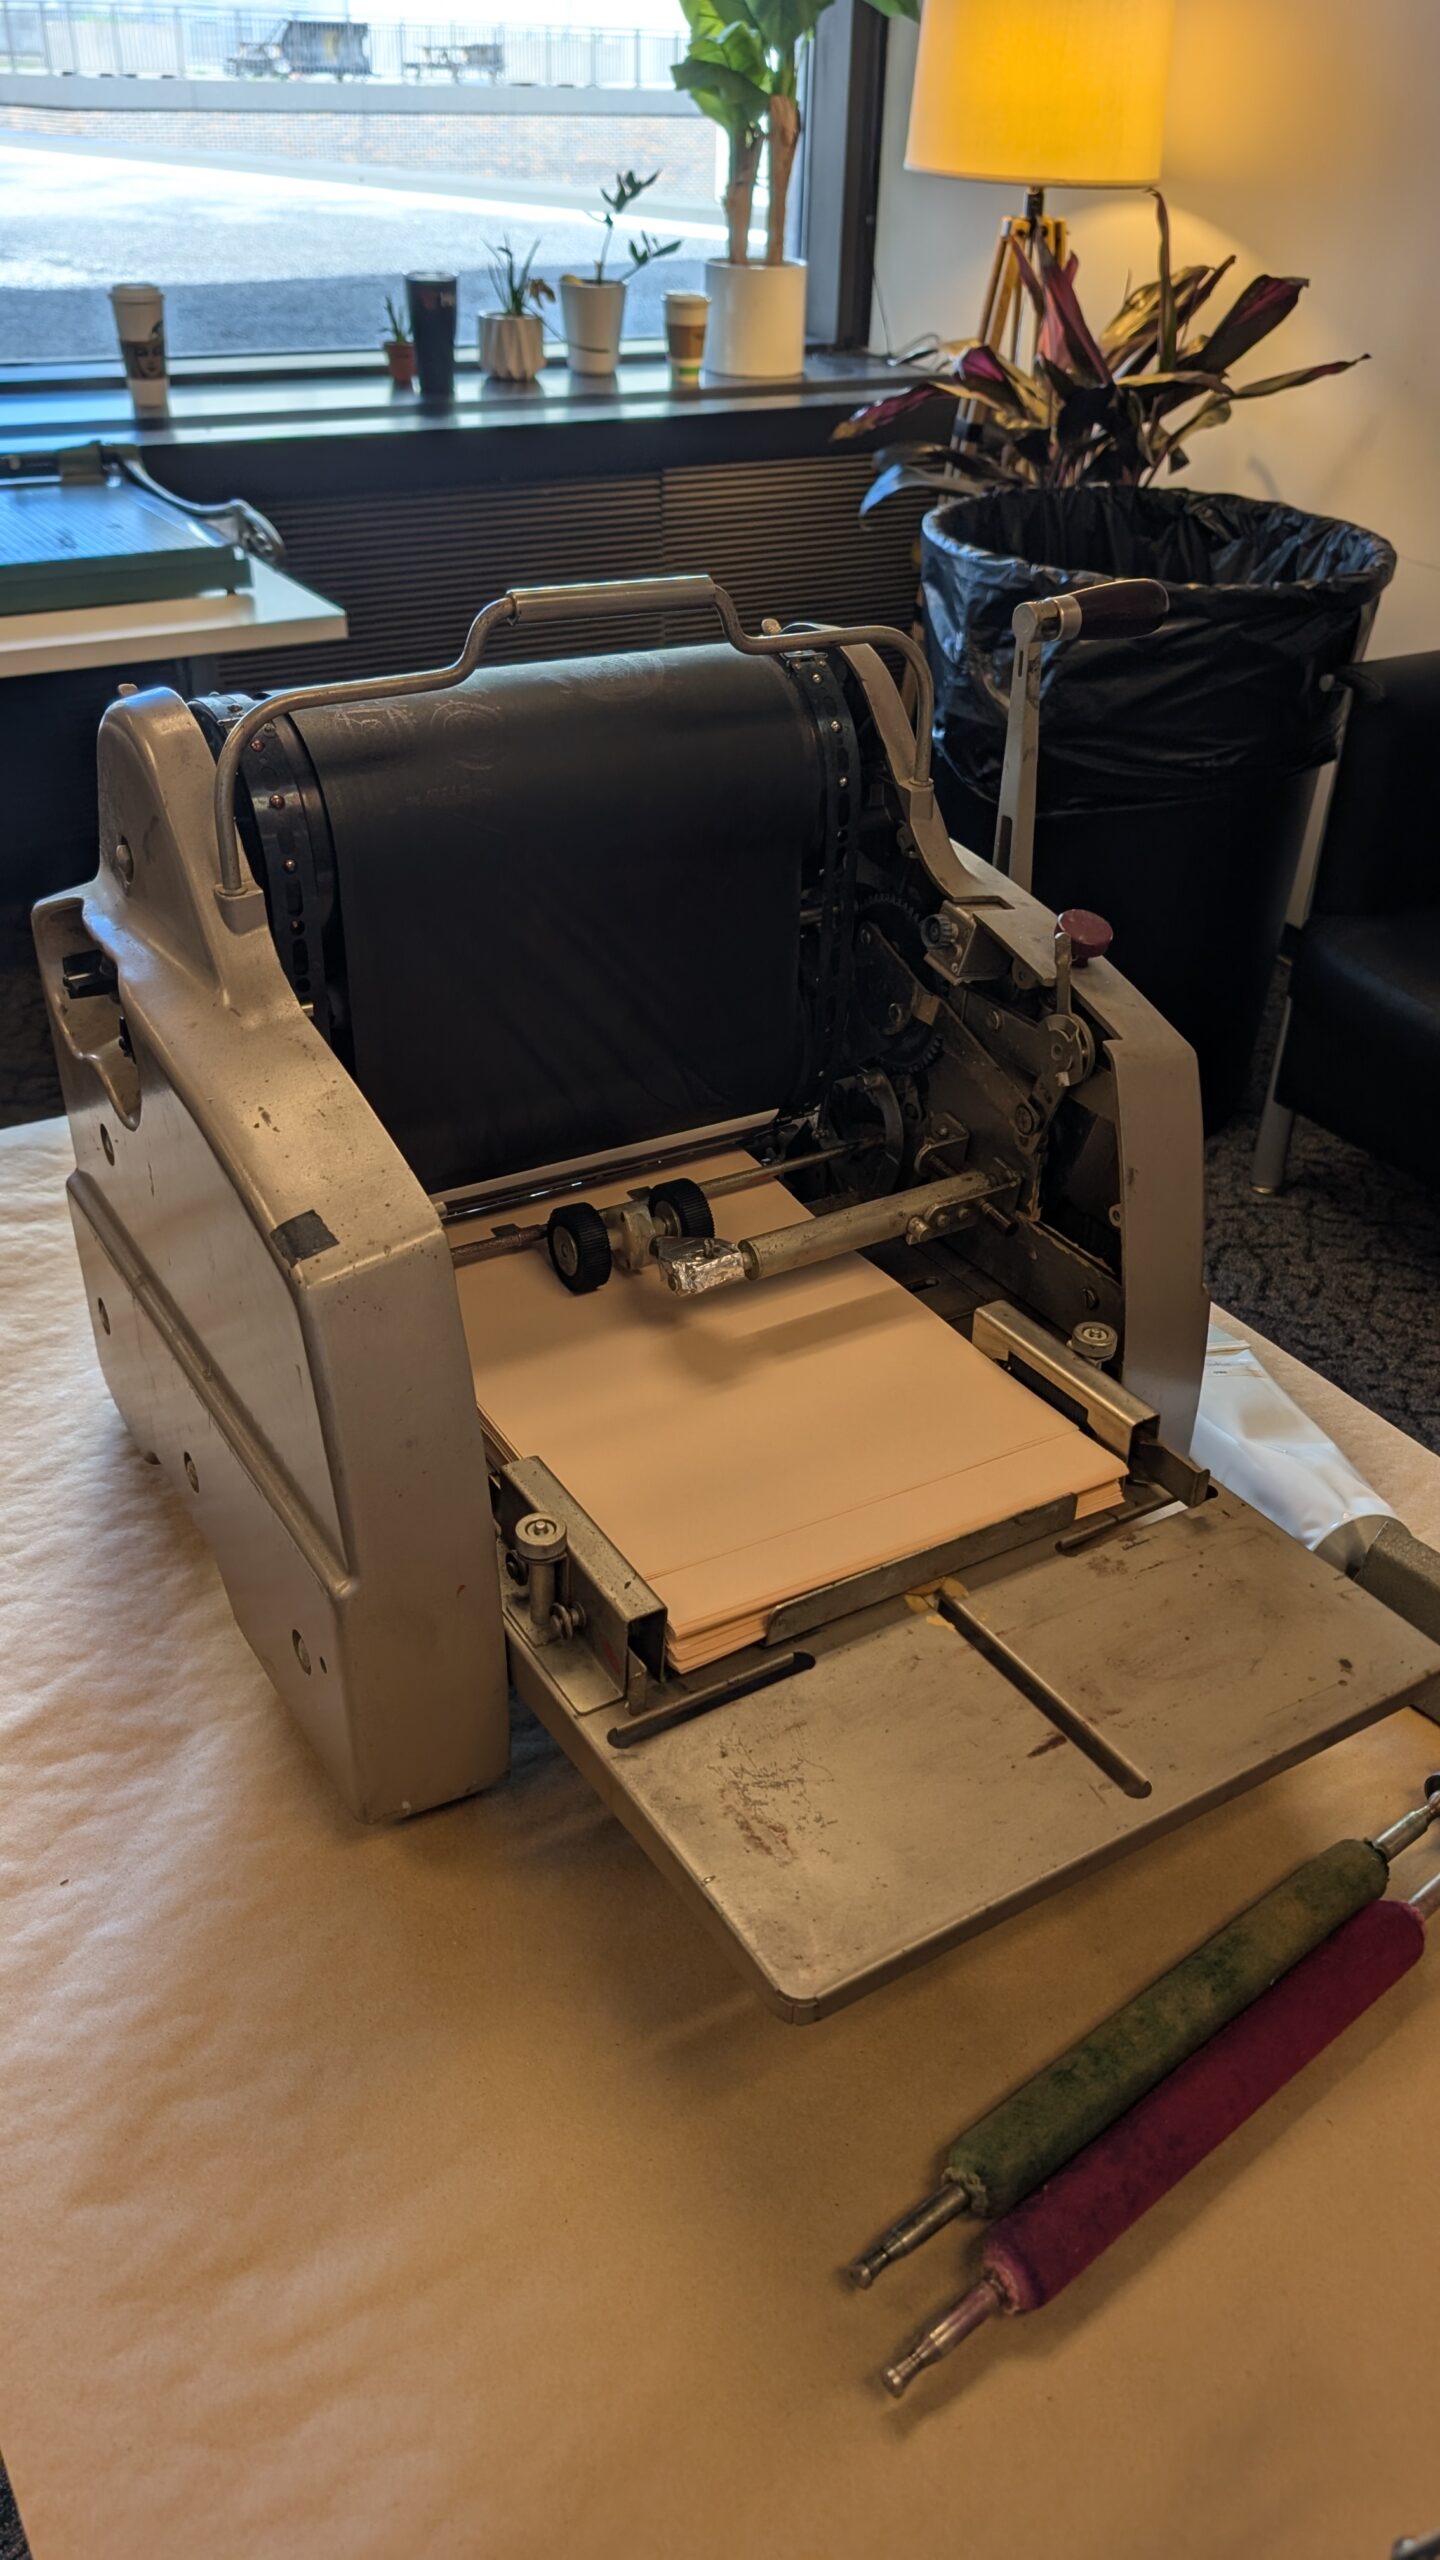
The mimeograph is an upright machine with a crank that picks up the paper and rolls it through the stencil. With a big roller that holds the stencil, the machine forces ink through the stencil and onto paper to create copies. The user must manually put ink on this machine before using it.

Getting to play with these two technologies was so much fun. We got to create our own stencils that we then made copies of and turned into a zine! We were able to use typewriters or styluses, stencils and our own creativity to create our stencils for these pages that we printed. It was amazing to see technology that’s not so modern still in use and working, and to play around with that technology and still use it to create was inspiring.

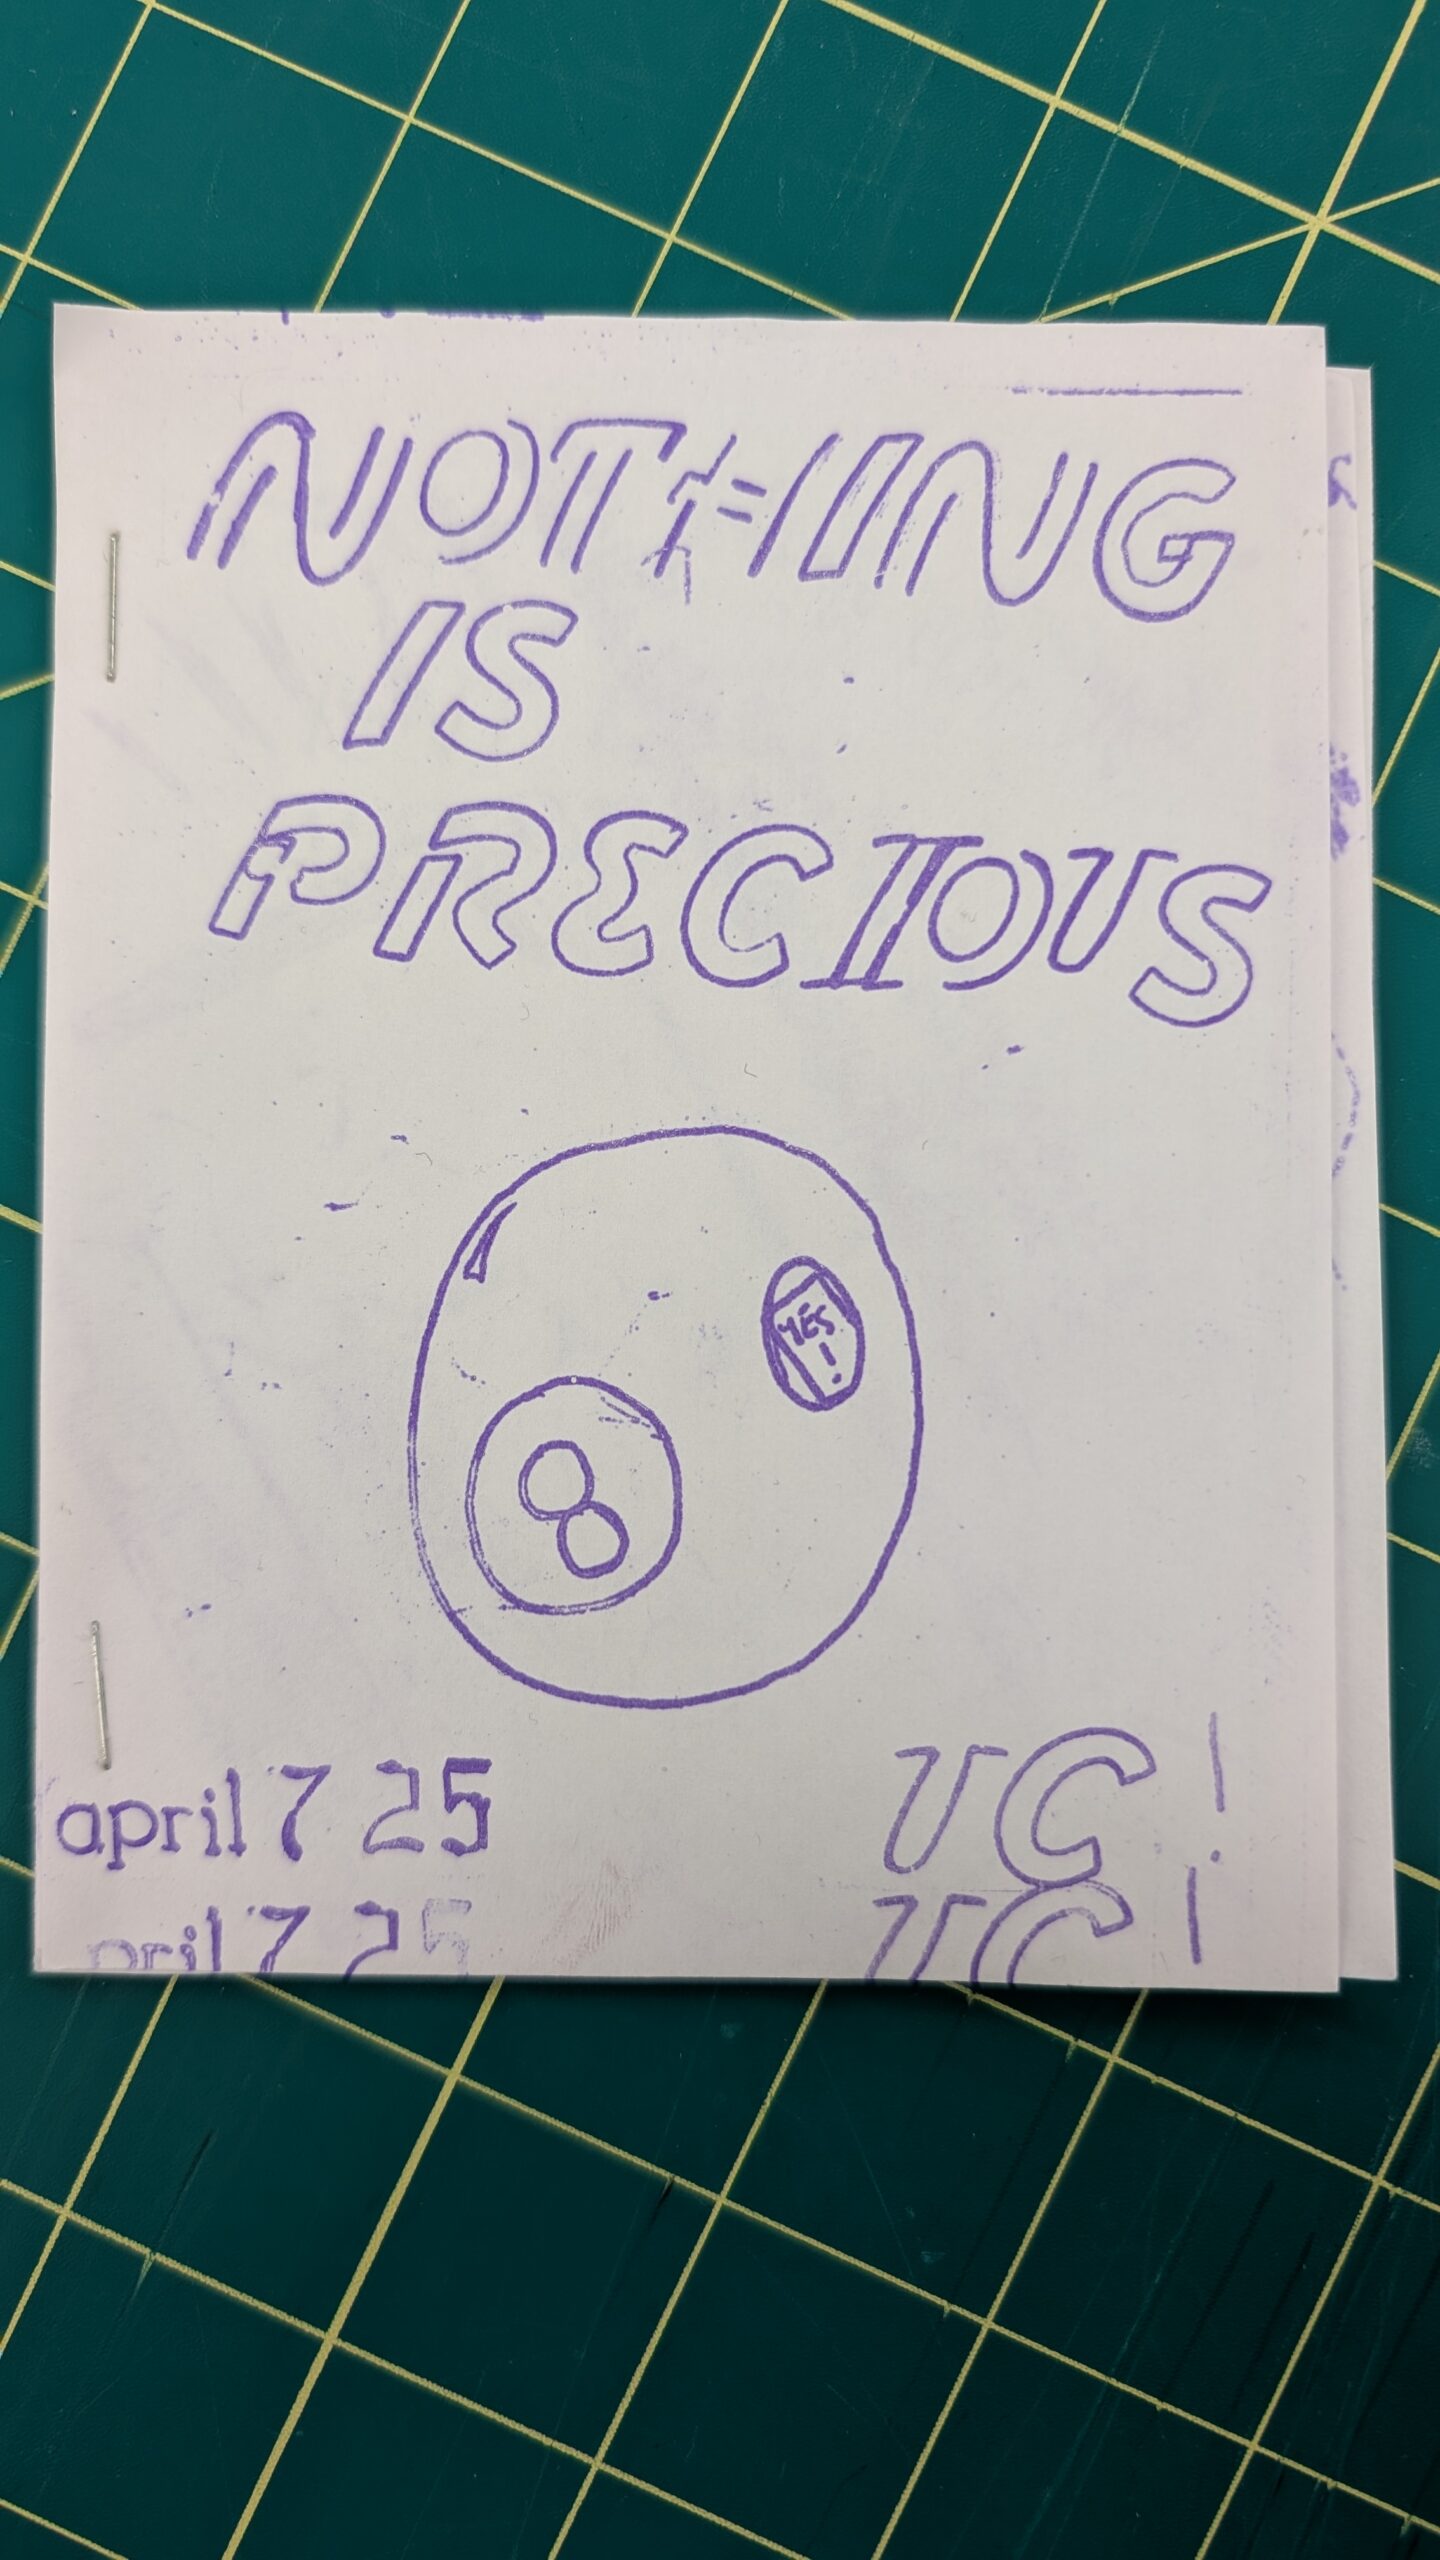
Image of the zine created by the workshop participants on the mimeograph machine.
The cover of the zine we created with the hectograph.

Nicole Browning — Library Conservation Specialist