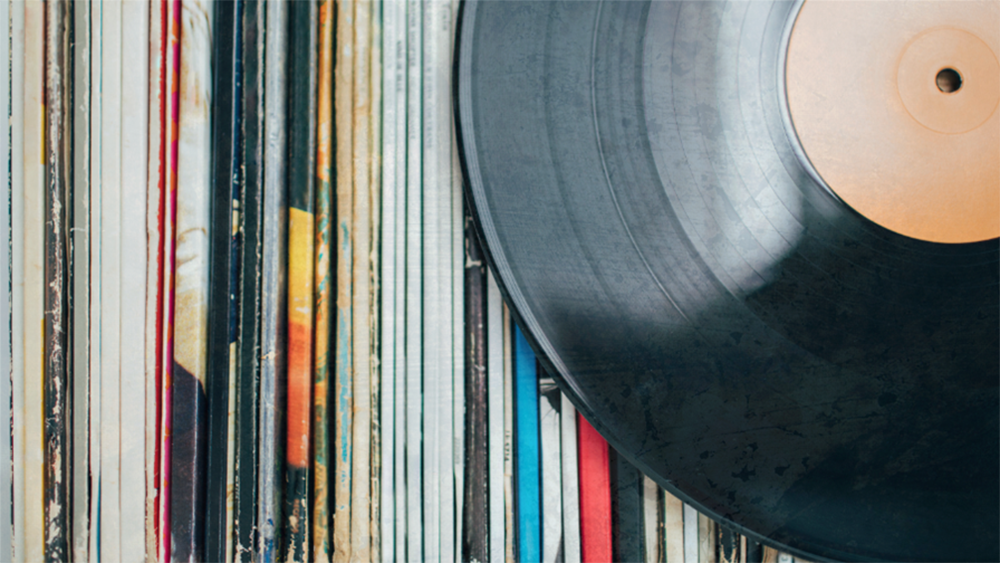
Although The Preservation Lab is primarily a book and paper lab, we often receive items that fall outside this realm and are required to do a little research and get creative. I was recently assigned a small collection of various grooved disc media that required archival storage solutions. “Grooved disc media” is an umbrella term that encompasses any type of sound recording that features small grooves cut into its surface that a stylus then passes over to produce an audio signal. Think vinyl records, shellac discs, 45s and more. Another term I like that covers multiple varieties of grooved discs is the term “records”, which I will use interchangeably with “grooved discs” for the remainder of this post.
Considerations
Until this point, we had not received any grooved disc media requiring new housing at the Lab. In situations like this, I like to do a bit of research and figure out what is required of the housing to determine what is required for safe storage. We found several trustworthy sources that provided tips for what to do as well as what not to do. The most important ones are as follows:
First and foremost, any grooved disc should be stored upright. When multiple discs are placed on top of each other, their collective weight can compound quickly. This weight can then slowly compress the grooves on the discs and result in loss of media.
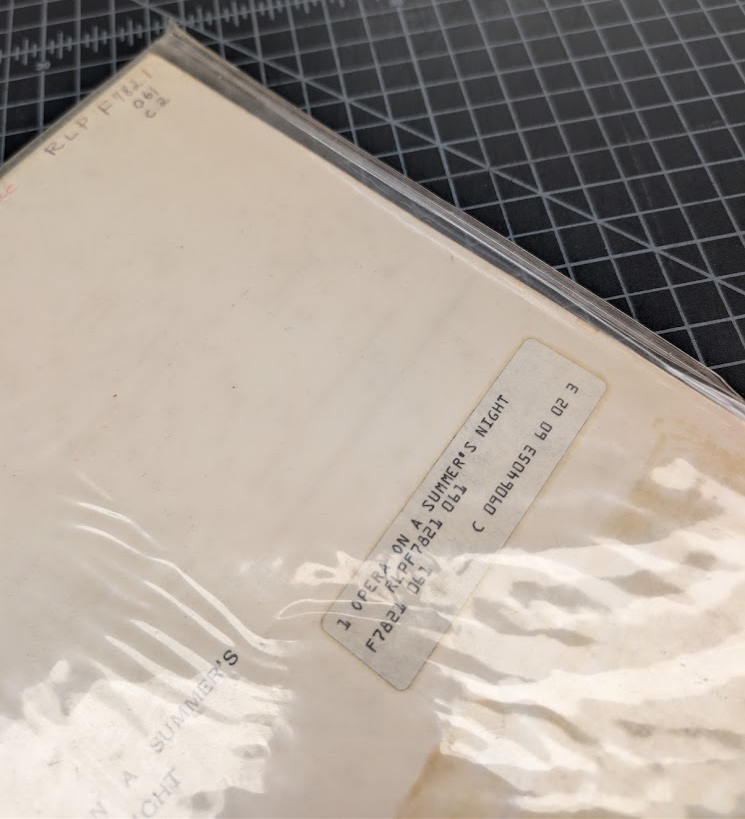
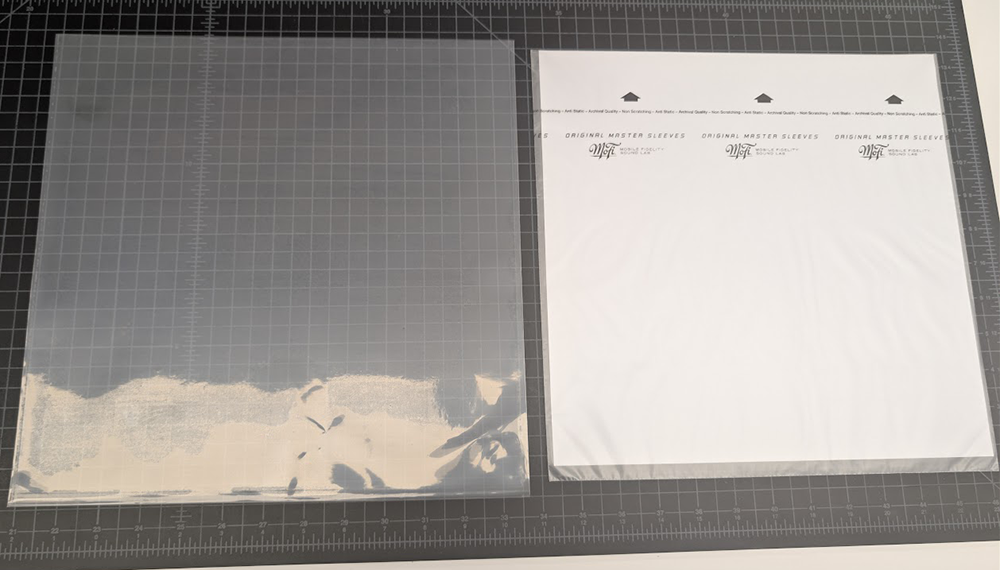
Grooved discs should have their old plastic sleeves, both inner and outer, replaced with archival plastic sleeves. Older records often have non-archival plastic outer sleeves that are susceptible to warping over time. This can lead to the discs themselves warping, affecting playback speeds which can lead to further degradation. We ended up purchasing these Original Master Sleeves and Archival Record Sleeves, both made by Mofi Mobile Fidelity Sound Lab.
A non-archival plastic outer sleeve. Notice how the plastic is starting to curl along the edge.
A new archival plastic outer sleeve (left) next to a new archival plastic inner sleeve (right).
The original cardboard sleeves should be retained if desired and if they contain any information or artwork related to the recording. However, it is advisable to store these separate from the sleeved records, or at least with the record inside a protective archival inner sleeve before placing it inside the cardboard. These cardboard sleeves can sometimes foster mold growth in high humidity environments.
Ideal relative humidity for the storage environment is between 30-50% with fluctuations not exceeding +/- 5% in a 24-hour period.
Solutions
After learning all these considerations, assistant conservator Catarina Figueirinhas came up with the following solution.
The tray and its various components that was designed to hold the records in their new archival sleeves.
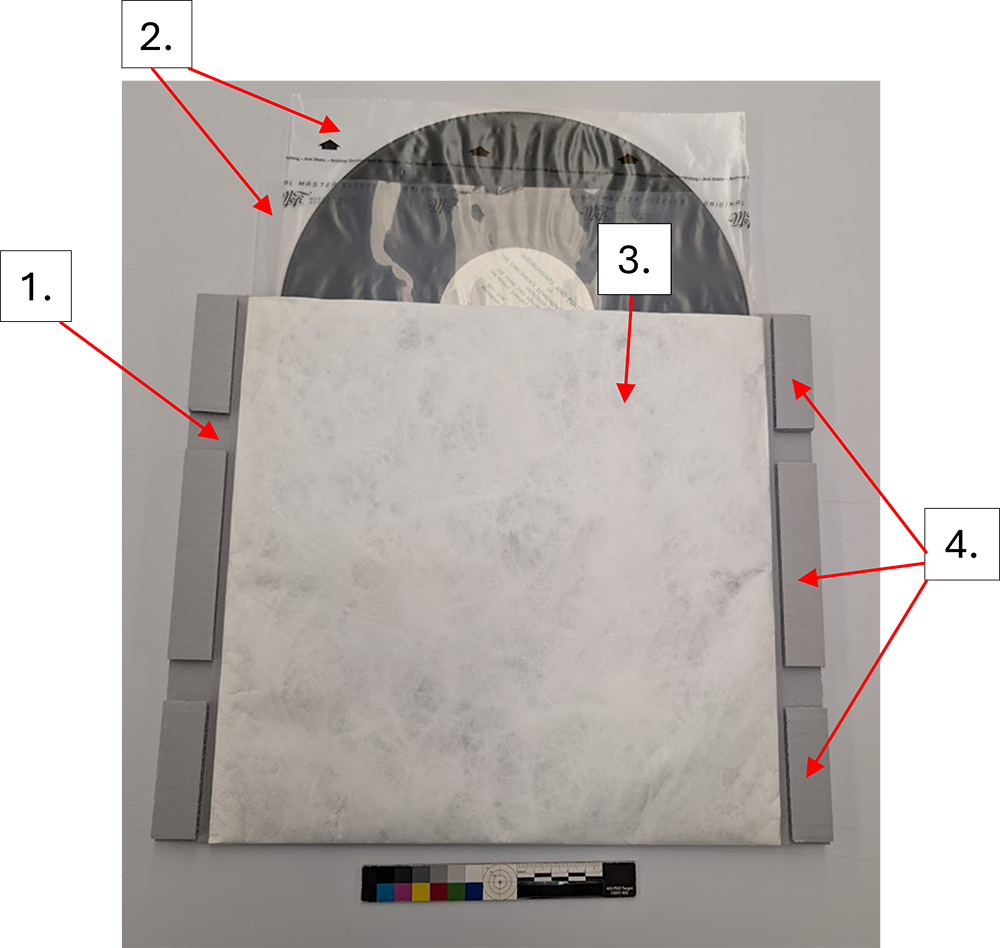
Individual corrugated board trays were constructed for each disc. Corrugated board was chosen because it is lightweight, inexpensive, and relatively strong. They were cut slightly oversized to provide room for protective bumpers to the left and right of where the sleeves will be attached.
Each disc was placed inside its own archival inner sleeve. These are the sleeves that Mofi refers to as “Original Master Sleeves”. Each disc inside its inner sleeve was then placed inside the archival outer sleeves, which Mofi refers to as “Archival Record Sleeves”. In cases where a cardboard sleeve was present, they would also be placed inside these plastic outer sleeves. The disc’s inner sleeve should protect it from coming into contact with the non-archival cardboard, and the plastic outer sleeve will also help protect the cardboard from damage.
A final pocket was constructed of Tyvek to store each disc inside its sleeves, which was then adhered to the corrugated board trays using PVA.
To prevent any potential abrasion to the discs while sliding them in and out of their final enclosure, several small, corrugated board bumpers were added to the left and right of each attached Tyvek pocket that were thicker than the pocket and all its contents.
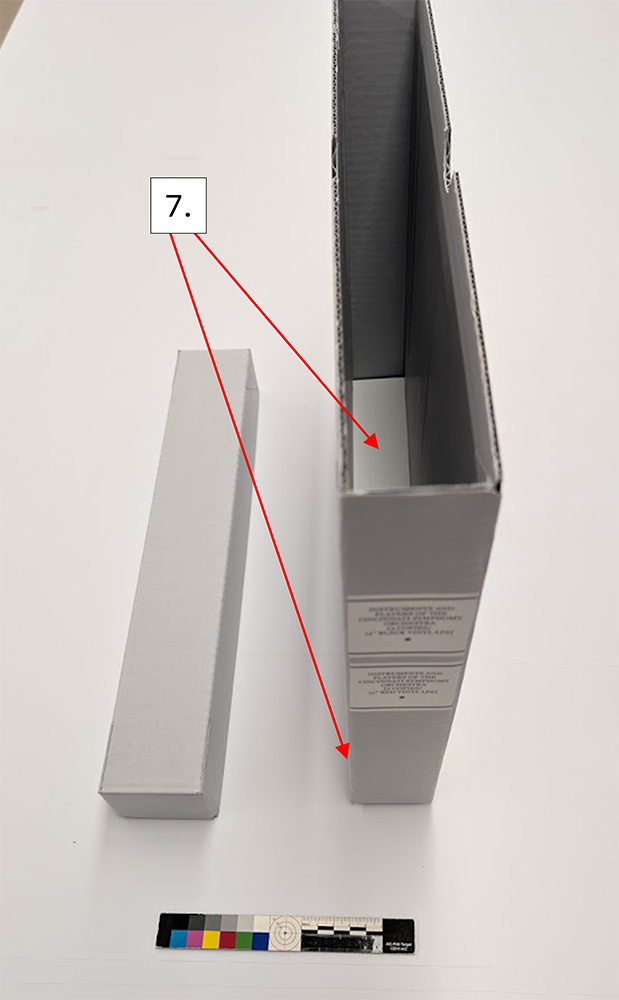
A single corrugated board banker’s style box was constructed to house each disc/tray in the series.
To help with removal, Tyvek tape pull tabs were added to each individual tray.
After adding all the trays and their discs to the banker’s box, it was discovered that the box was quite top-heavy and prone to tipping over. To combat this, I added a strip of Dibond (a composite material consisting of a polyethylene core sandwiched between two pieces of aluminum sheeting) to both the bottom of the inside of the box and to the underside of it as well. This provided extra weight to the bottom and added some nice stability. For future enclosures of this nature, I will make the box thicker, adding fill if necessary. This make it more stable without the need to weight the bottom of the box.
The banker’s box style enclosure with its lid removed to reveal the contents.
The banker’s style box with its trays removed revealing a piece of Dibond lining the bottom. An additional piece of Dibond has been added to the underside of the box for added stability.
Final Thoughts
Although this storage solution will almost certainly continue to evolve as I make more of them, I was very happy with how the first batch turned out. Part of the fun of creating new storage solutions is figuring out what works and what doesn’t and adjusting accordingly.
On a side note, I realize that some readers of this post may be concerned for their record collections as they do not have a conservation lab at their disposal to construct an enclosure like this. To that I would say that any of the storage considerations mentioned that are achievable, such as storing discs upright and in new archival sleeves will go a long way in ensuring the longevity of your collections.
A huge thank you is deserved to both conservator Ashleigh Ferguson-Schieszer and assistant conservator Catarina Figueirinhas, who helped me brainstorm on this project.
When a group of four folded parchment deeds arrived at the Preservation Lab, I was immediately excited about the project. It is not often that we work with parchment, particularly on “flat” items such as parchment deeds. I use “flat” in quotation marks because these were anything but flat once unfolded.
Before treatment photography – four folded parchment documents.
At first glance, they looked deceptively simple: compact, neatly folded, and quite small. Once opened, however, they revealed large, creased, and cockled sheets of animal skin, some with fragile wax seals and one composed of multiple leaves stitched together along the bottom edge. (Prior to treatment, each document was photographed as they were received in the Lab):
These 18th-century documents, part of the Archives and Rare Books Library, include three indentures consisting of single parchment leaves, and one composed of three parchment leaves secured with wax seals and parchment stays along the lower edge. They record land leases and property transactions.
The documents were brought to the lab for stabilization and improved access for teaching and research. In their folded state, they were difficult to handle, especially the multi-leaf example, which could not be fully examined as stored. Centuries of folded storage had clearly left their mark.
Parchment document with three parchment leaves.Parchment document with no wax seals.
So how do we safely unfold and stabilize these items for handling, teaching, and research?
Parchment is highly responsive to humidity. It expands, contracts, cockles, and stiffens depending on environmental conditions. Long-term folded storage had left deep set creases, and exposed areas showed noticeable darkening. These distortions became even more apparent under raking light photography.
Treatment Approach
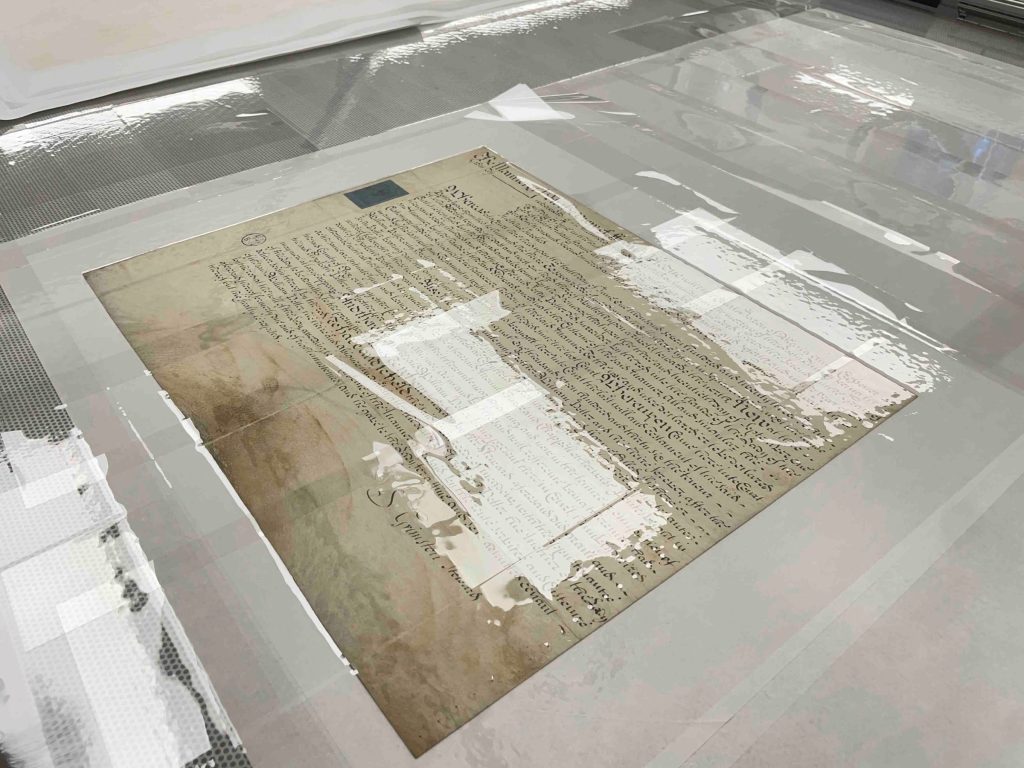
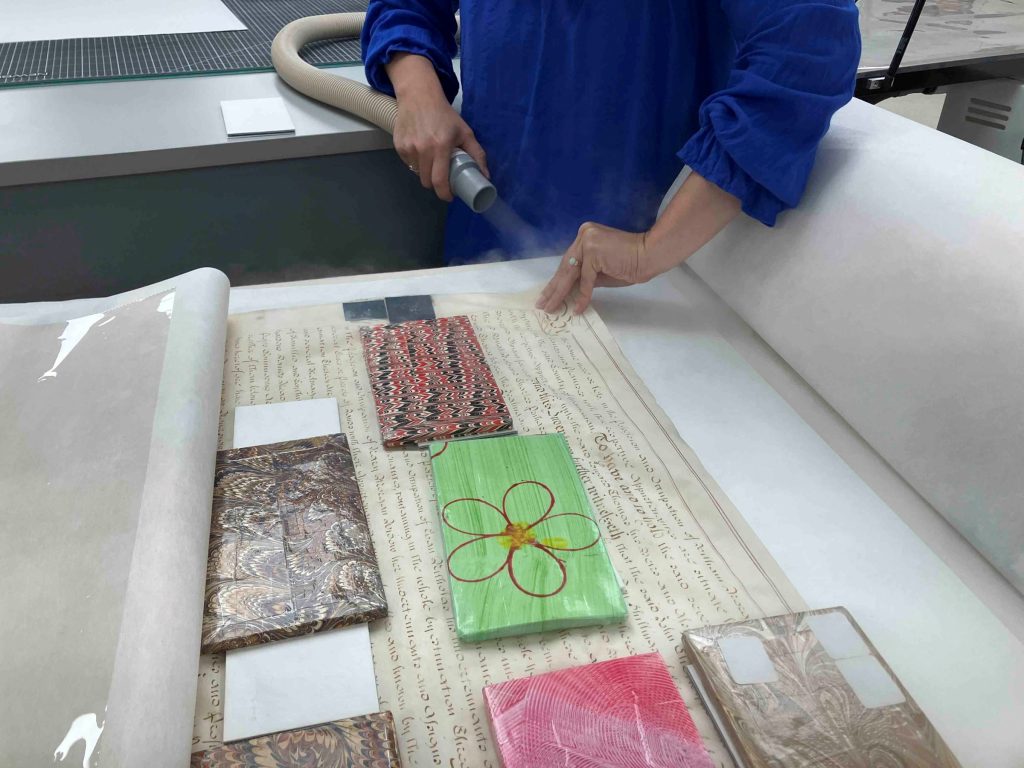
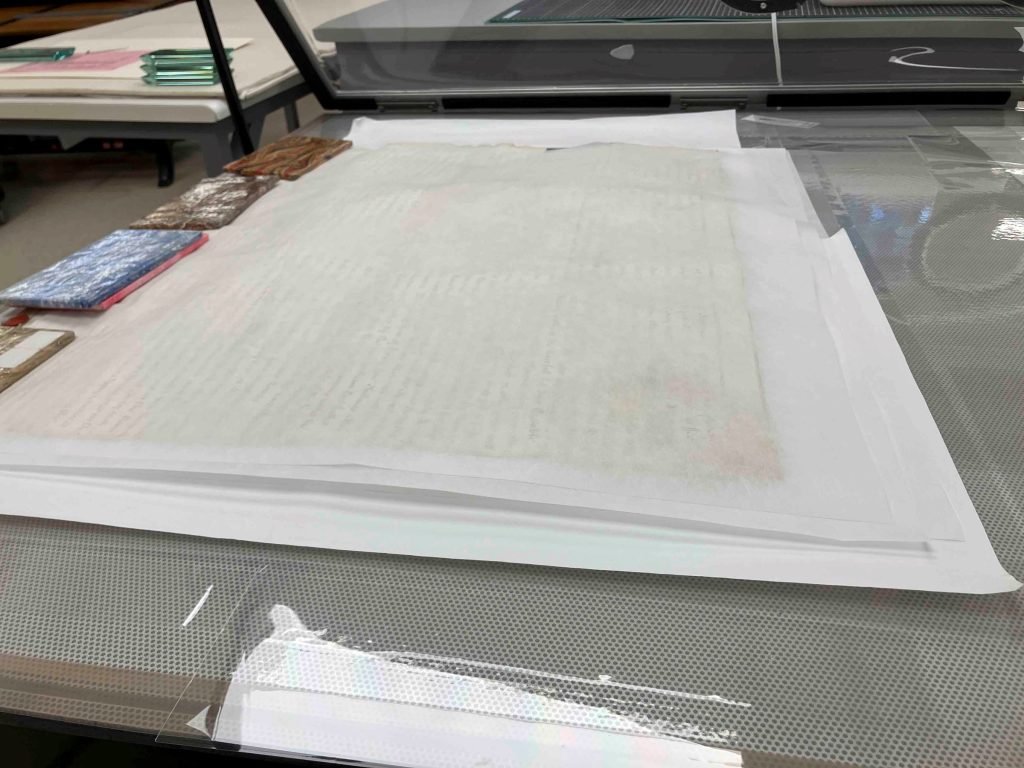
Flattening parchment is never as simple as adding moisture and pressing. Too much humidity risks gelatinization, while too little leaves folds unchanged. Wax seals add another layer of complexity since they are brittle, protruding, and highly sensitive to pressure. To begin conservation treatment, each document was first surface cleaned using a hydrophilic sponge to remove surface grime. Ink testing followed to ensure stability before any humidification. All inks tested were stable, and no iron gall ink was detected. With testing complete, humidification could begin.
Drying on the suction table.
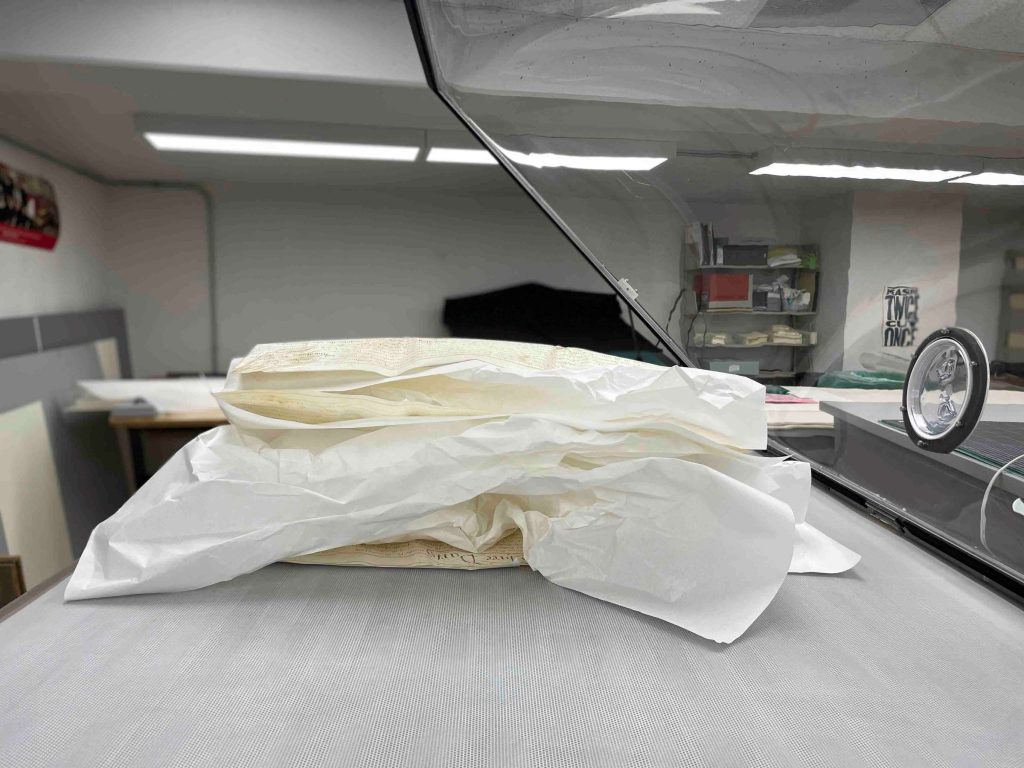
The single-leaf documents were humidified in short cycles within a cold humidity chamber. After each cycle, they were dried gradually under felts, with pressure slowly increased and carefully kept away from seal areas. Drying methods were adapted depending on structure and condition. One single-leaf document without seals was dried under tension on the suction table, while the others were dried under felts and weights, again avoiding direct pressure on wax seals.
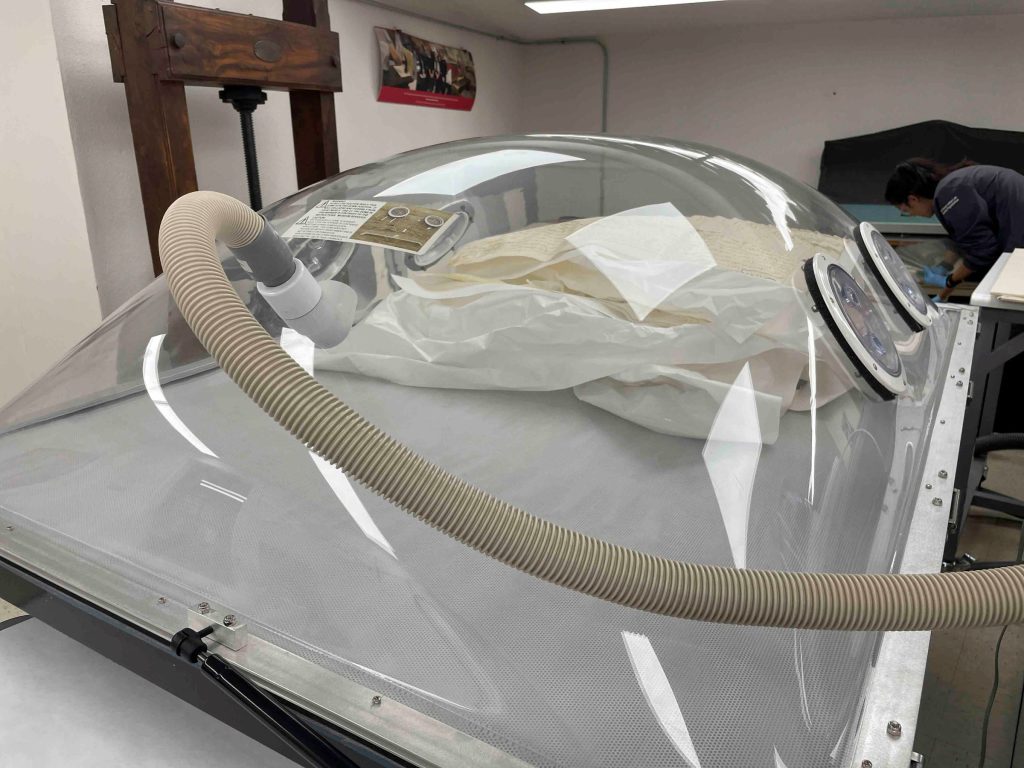
The Multi-Leaf Document
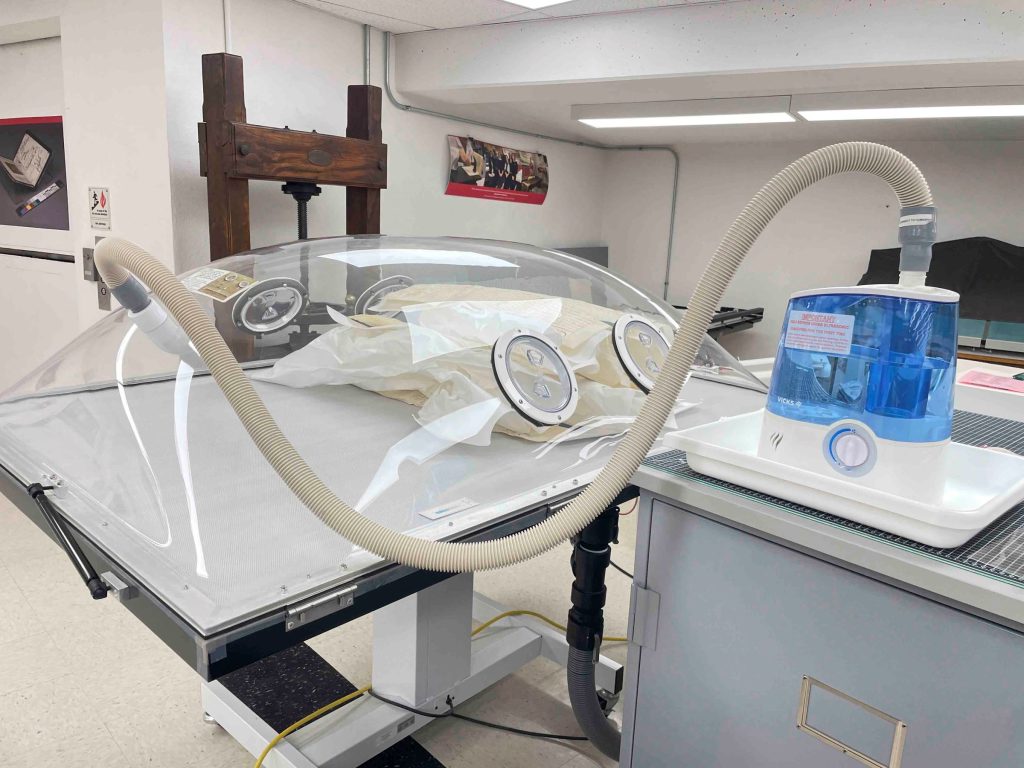
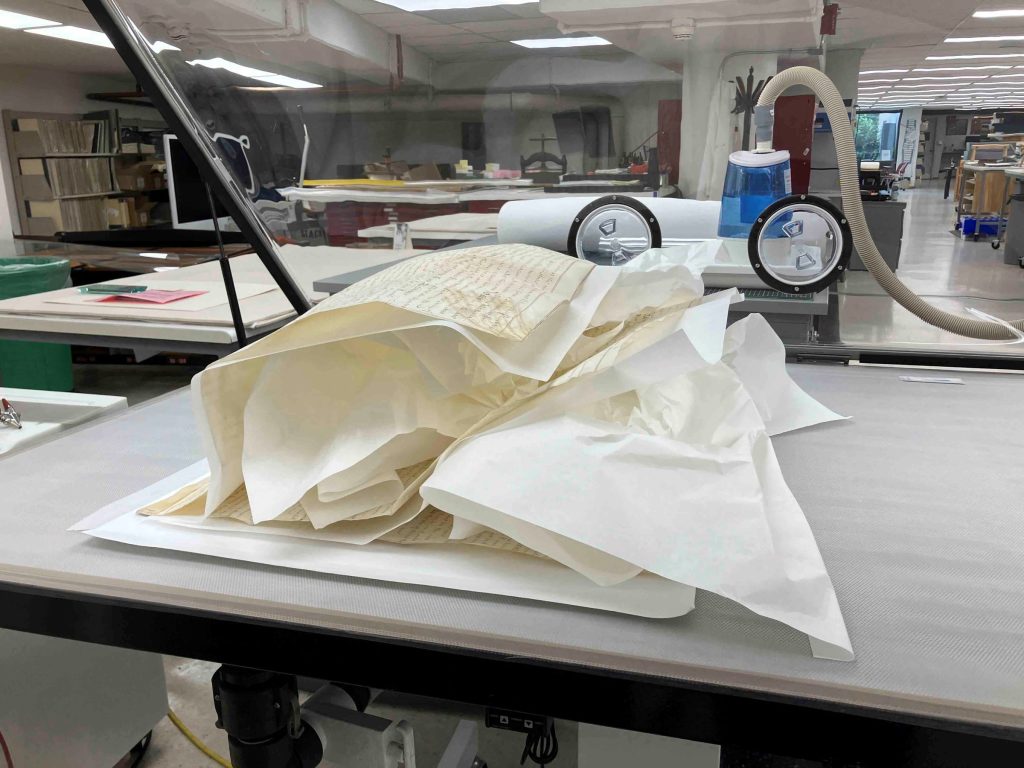
The multi-leaf deed required a more complex and iterative approach. It consists of three parchment leaves attached together, each responding differently to moisture. Initial humidification was carried out using an ultrasonic dome with a Gore-Tex barrier supporting the lower leaf. The upper leaf responded well, but the middle leaf remained resistant. To improve moisture distribution, unbuffered interleaving paper was placed between the leaves. Even so, the middle sheet required additional targeted treatment.
The most effective approach combined localized humidification with staged flattening. Each leaf was treated individually while the others were protected with polyester film and weighted mat board to prevent unwanted moisture transfer or movement. Stubborn folds were gently humidified using a localized ultrasonic humidifier and immediately set under pressing stacks of blotter and Hollytex, followed by gradual weighting. This allowed controlled relaxation of specific areas without over-treating the entire object.
During treatment – localized humidification for the multi-leaf document.
The process was highly collaborative, often requiring two or three people working at once. One person applied moisture and guided the parchment while another adjusted weights and pressing materials in real time. Throughout treatment, wax seals were carefully protected using mat board barriers and spacing systems to ensure they remained free from pressure. Once fully relaxed, the document was dried under felts with weights in place, while polyester sheeting remained between the leaves to prevent adhesion or distortion.
Wax seals
Three of the four documents retain wax seals along their lower edges. These seals were structurally fragile and were consolidated using fish gelatin applied with a fine brush. During treatment and flattening, they were carefully isolated so that no direct pressure was applied.
During treatment – multi-leaf document after humidification and flattening.
Housing for Support and Access
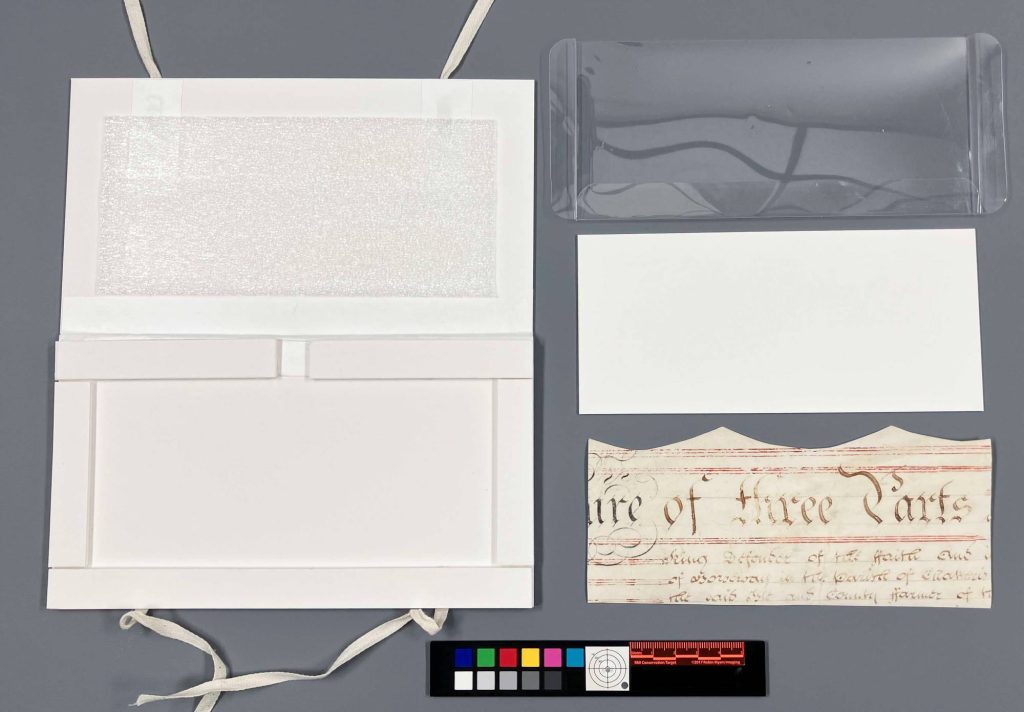
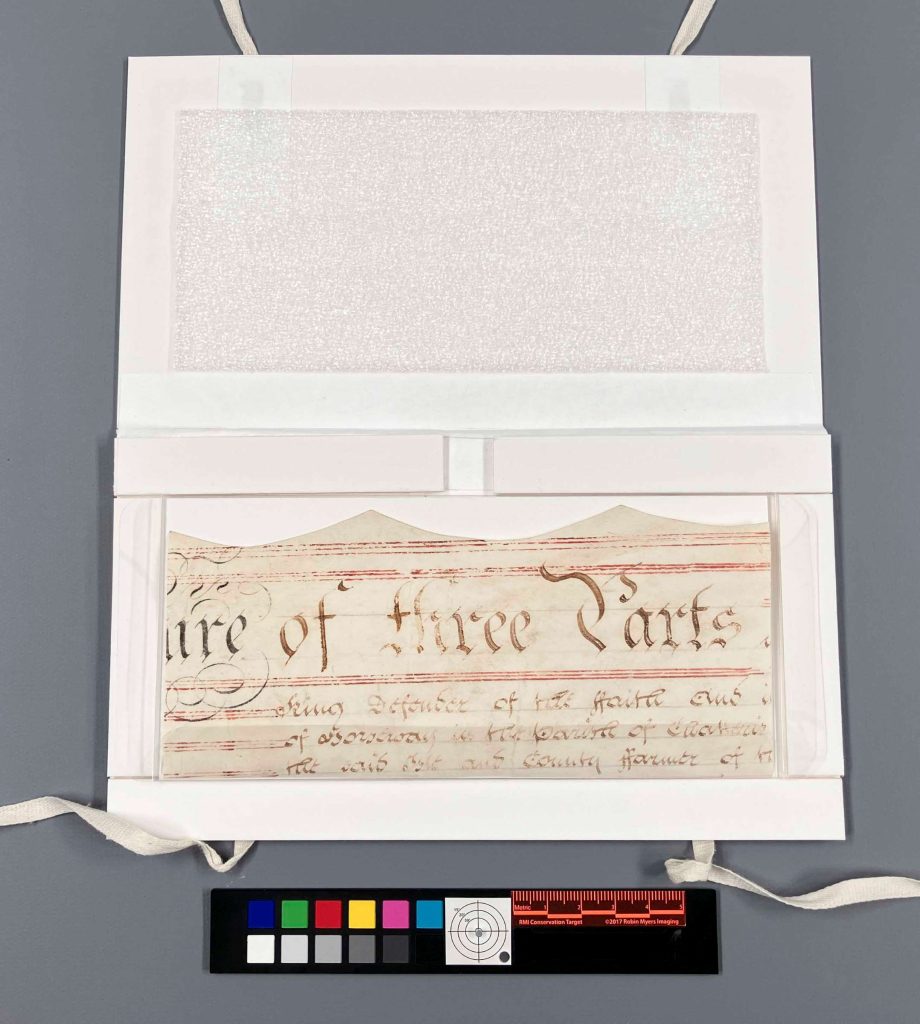
Following treatment, each document was rehoused in a custom sink mat system. Before constructing the full-sized enclosures, I made a small working model using a scrap piece of parchment to ensure that what I had in mind would actually function for these large documents in practice.
Small scaled model of the enclosure for each parchment document with the different components, including sink mat and polyester film sling.Small scaled model created for the parchment documents.
The documents rest on polyester slings secured within sink mats and are held in place with cloth ties. The interior lids are lined with Ethafoam, providing gentle compression and helping to minimize movement caused by environmental fluctuations. The multi-leaf document required additional structural support through reinforced mat board construction. The three smaller documents were housed together in a corrugated clamshell enclosure. This housing balances long-term preservation with accessibility, allowing the documents to be safely handled for teaching and research.
Each document housed in a custom matting system.
Final results
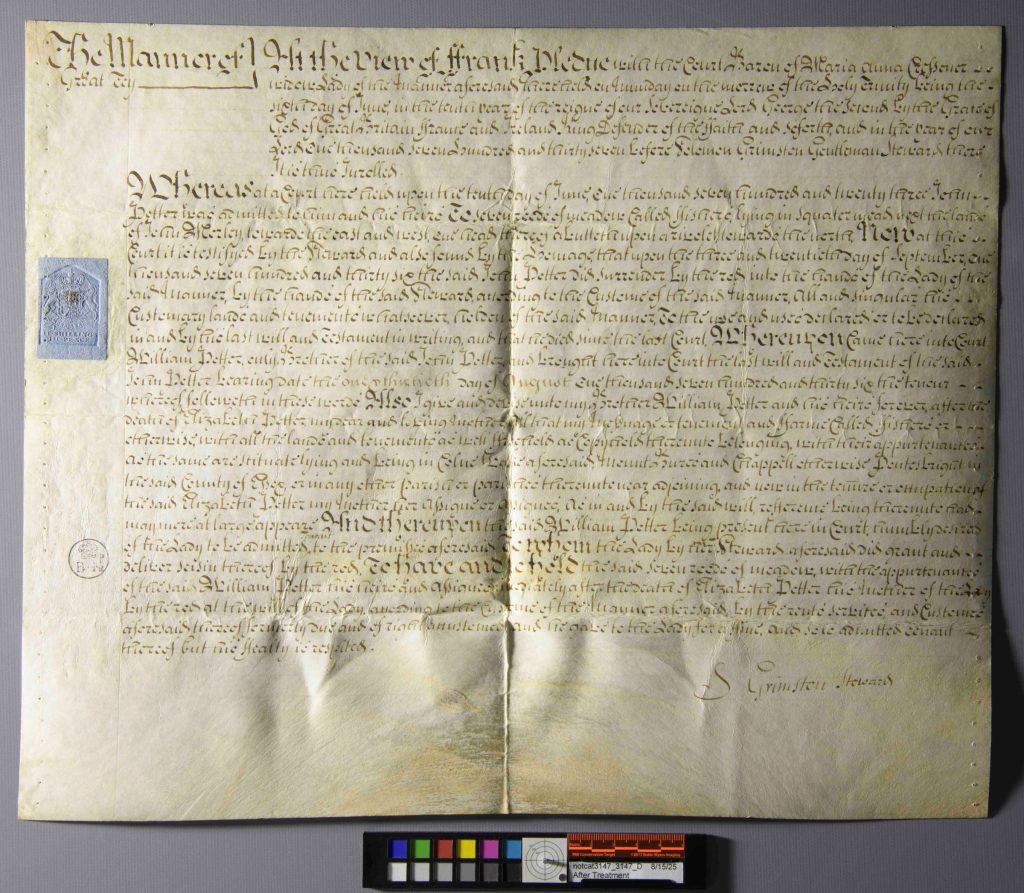
Raking light photography after treatment shows a clear reduction in creasing, along with a noticeable shift in how the documents behave physically. The parchment still carries evidence of its long folded history, as these materials tend to do, but it is no longer locked into those distortions. While not perfectly flat, the material is now stable, supported, and significantly less stressed along its former fold lines. Under raking light, what once appeared as sharp ridges and tension lines now reads as a softer, more coherent surface. It feels as though the parchment has settled back into itself after a long period of compression.
Before treatmentAfter treatmentBefore treatmentAfter treatment
Perhaps the most satisfying change, though, is in handling. What began as awkward, resistant objects that required constant caution are now stable enough to be lifted, viewed, and studied with far more confidence. They remain delicate, but they are no longer unpredictable in the same way. There is a clear sense that they can finally move between storage, teaching, and research without the same level of hesitation at every step.
Before treatmentAfter treatmentAfter Treatment – parchment document housed in a matting system with a polyester sling.
I picked this tattered Bible up off the shelf where it had been waiting for an enclosure thinking it would be a quick and easy project. All it seemed to need was a corrugated clamshell and a pocket for some ephemera – easy enough. What I wasn’t expecting was for the ephemera inside of this book to be human hair. Multiple locks of it.
A card that accompanied the bible from Kenton County Public Library said that the family listed in this Bible (last name of Gegner) seemed to be more Cincinnati-based than Northern Kentucky-based, and it ‘contained lots of interesting items within.’ And ‘interesting items’ was an understatement!
Along with the Bible was a folded handkerchief, which, when unfolded, contained a small lock of hair tied with a blue ribbon.
I thought this was the interesting items mentioned but decided to untie the Bible and peek through it as well. Imagine my surprise when I came across another lock of hair tucked within the pages! But it didn’t stop at one – I ended up uncovering three locks of hair, three pressed flowers, and one icon of Jesus and the Sacred Heart that seemed to be hand embroidered.
After talking to some people about the Bible at our annual open house, it came to my attention that this Bible is probably a family Bible, used to keep family records. I also was made aware that typically in family Bibles, deaths, births and marriages are recorded on the pages between the Old Testament and the New Testament. Lo and behold, when I opened this Bible to the New Testament, sure enough there were birth and death dates!
As mentioned above, this Bible wasn’t in for any major treatment – it received a corrugated clamshell with some fill to make it 5” x 7” so it doesn’t get lost on the shelves, and a pocket was made and attached to corrugated board to keep the handkerchief and the card from Kenton County Public Library. Additionally, the newly discovered items inside the Bible were also placed in polyester sleeves, in order to protect the pages, and then laid back in where they were found. These efforts will help to keep the Bible stabilized on the shelf, so it will be useable for longer.
While this Bible isn’t connected to any famous names, it’s still amazing to know that we are helping preserve local history. Hopefully, we can help future generations get a glimpse into their past relatives’ lives by preserving something like this Bible.
Like many tools used in conservation, some of our most useful equipment didn’t begin in the field of conservation. Conservators often adapt tools from other industries for highly specialized preservation work. This ultrasonic welder is one of those examples.
What Is Encapsulation?
In conservation, encapsulation is a common preservation method for storing fragile documents or artifacts, such as the dried botanical specimen pictured. The vulnerable item is placed inside a clear sleeve made from polyester film, which supports the object during handling while keeping all of its physical features and information fully visible.
Encapsulation is often confused with lamination, but the two are very different. Lamination uses adhesives or waxes that permanently bond to an object, making it non-archival. The adhesives and waxes often cause discoloration of the object overtime. Encapsulation uses no adhesive at all. Instead, the polyester film is sealed to itself around the perimeter of the item, leaving the object untouched inside. The process is fully reversible and safe for long-term preservation.
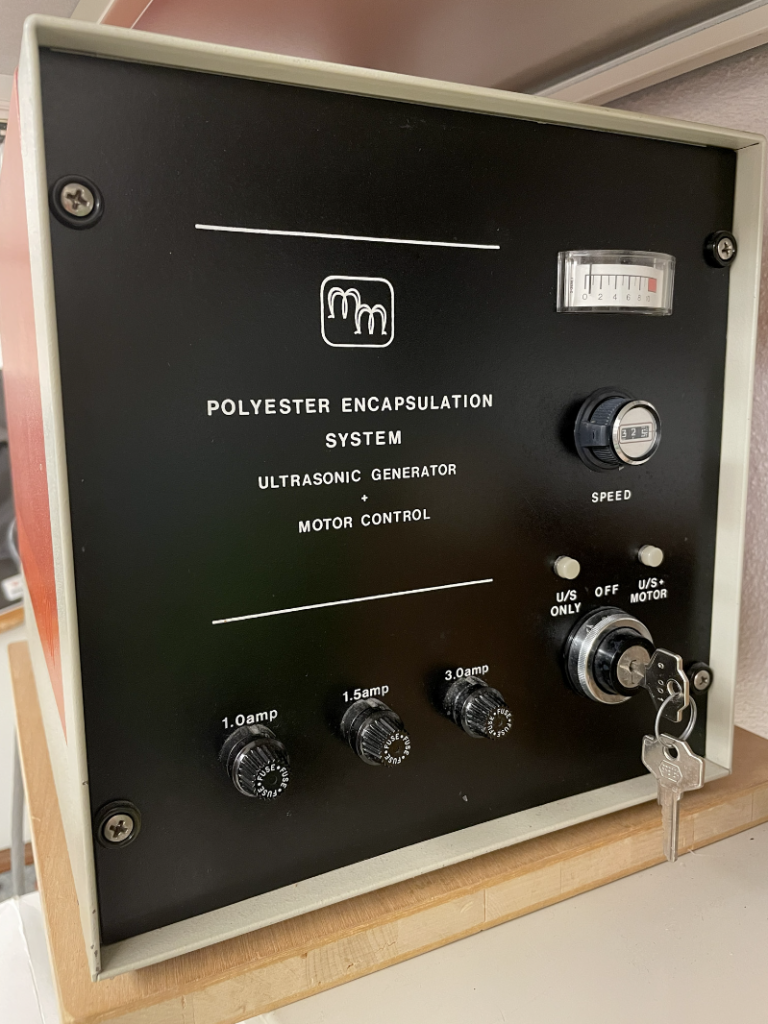
Bill Minter’s Ultrasonic Welder
At the Preservation Lab, we have the luxury of using a specialized ultrasonic welder designed specifically for conservation work. Unlike commercial welders that can require objects to be fed through a machine, this model has a metal tabletop, magnetic blankets, and a movable electronic arm that glides over the object, holding a document secure in place. The settings can be adjusted for speed and weld intensity, making it ideal for creating custom polyester enclosures for flat paper materials without using a traditional heat weld.
This machine was developed by conservator Bill Minter in the 1970s–80s. Existing units are highly sought after by conservation labs, and every time ours needs maintenance, there’s a sense of collective anxiety in the lab. It can still be serviced, but replacement options are limited.
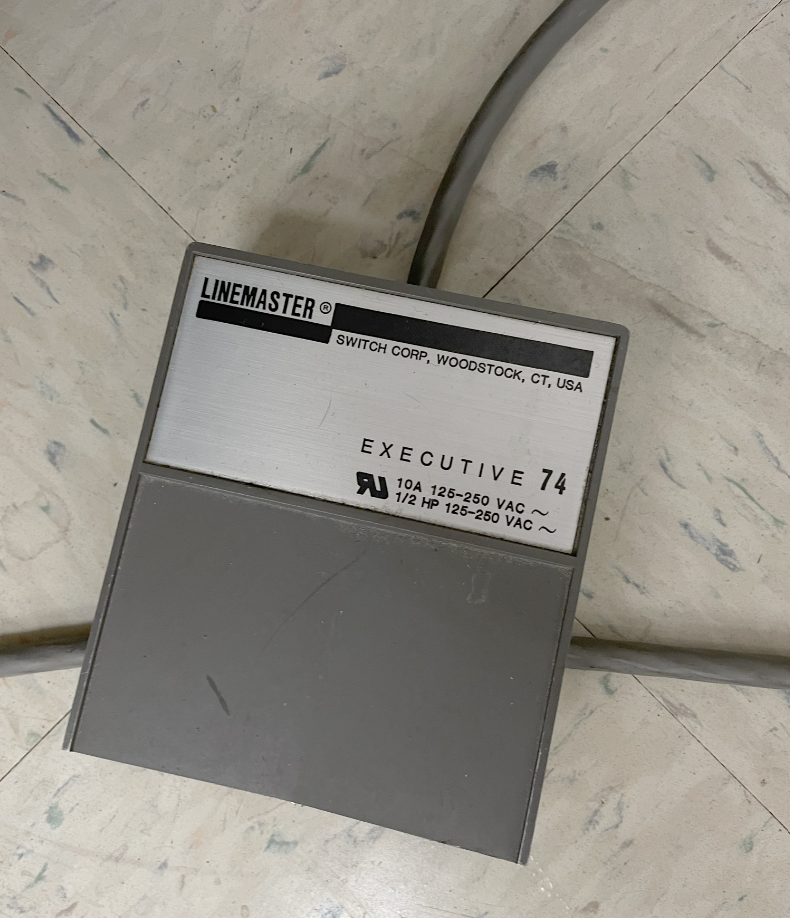
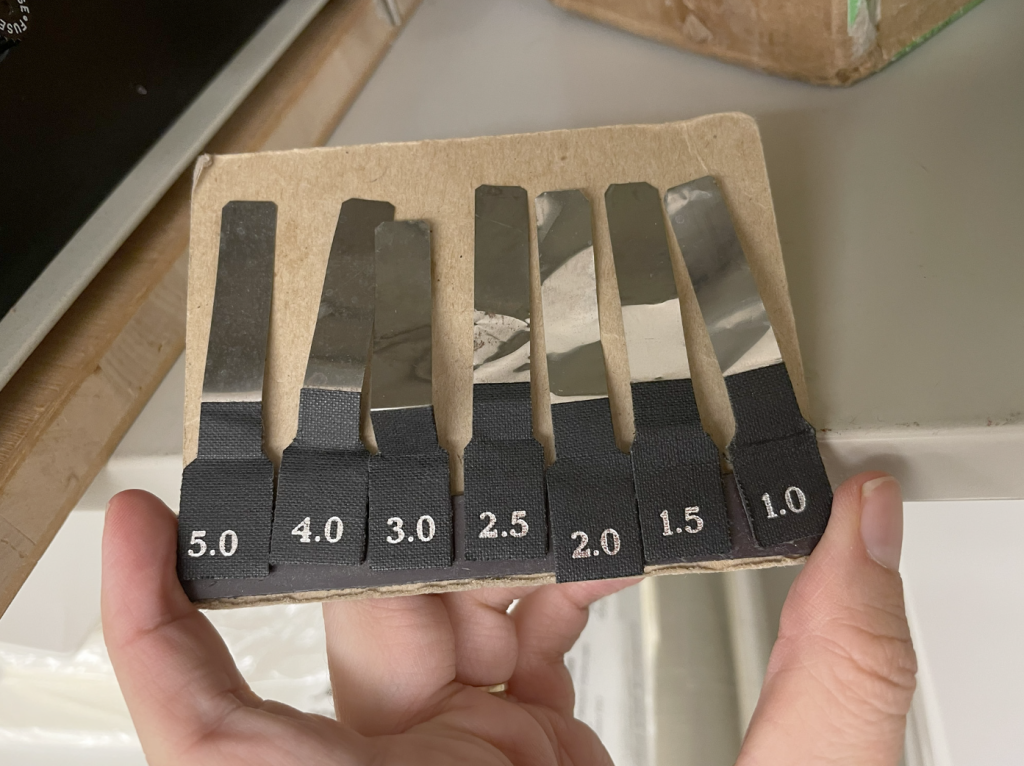
Used to create custom polyester sleeves for flat paper items without heat. Unique to the conservation world, this specialized machine was invented by book conservator, Bill Minter.Generator with motor/speed control dialFoot pedal to engage and control direction of weldShims to place between horn and anvil to control intensity of weld
Looking for Alternates
Because these conservation welders are increasingly scarce, conservators have been exploring newer options.
Others have recommended the UltraTek 40KHz Hand-Held Welder; however at around $6,000, it remains quite pricey and would require an additional metal base to operate on top of.
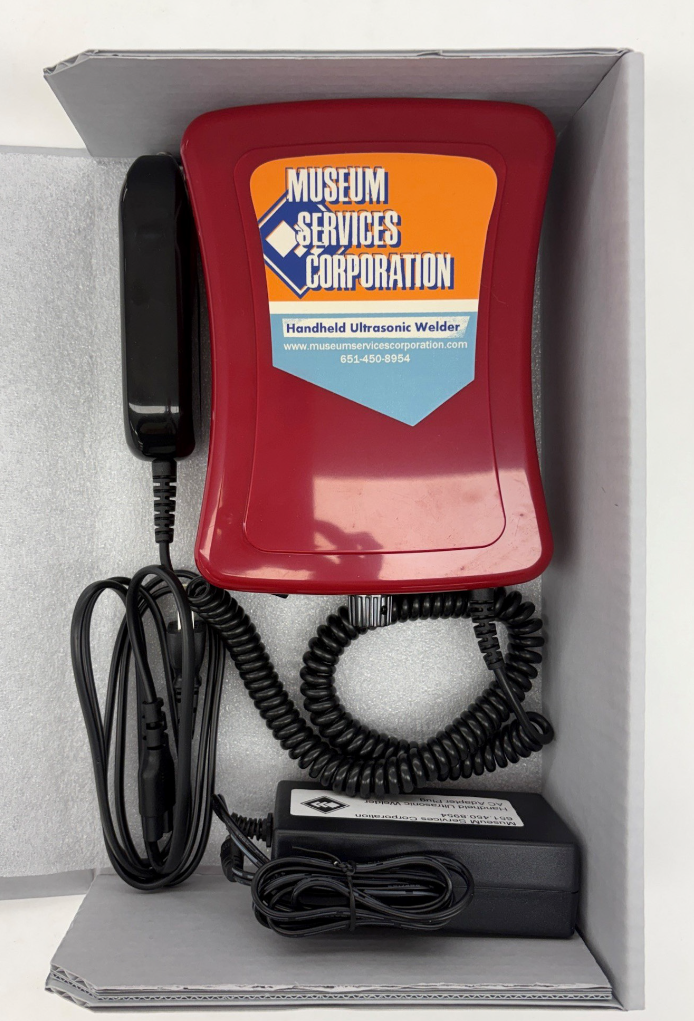
A more recent option comes from Museum Services Corporation in the USA, which offers the 1000 Series: MS Handheld Ultrasonic Welder. It’s a unique model that houses all the components in the handle (no metal base needed), is easily portable – and more affordable at $840!
Museum Services Corporation 1000 Series: MS Handheld Ultrasonic Welder
After spotting this device at an Midwest Regional Conservation Guild Annual Meeting in Columbus, IN, our lab jumped on the opportunity to purchase and test it out.
It comes with two welding wheels: one flat wheel that creates a solid weld line and a slotted wheel that creates a dotted weld line. They are interchangeable in the handle.
MSC Handheld Ultrasonic Welder in new enclosureThe slotted welding wheel is used in the food industry. It may be worth trying for a more continuous weld (?) but may not be considered as pretty.
Tips For Using the MSC Welder
After some trial and error, a few practical observations emerged:
Practice is needed. There is a learning curve to producing a straight and connected weld.
The unit has an internal safety timer that automatically stops the weld after a max of 6 seconds.
Turning dial fully to right allows the maximum interval between welds.
Ensure polyester is clean and dust free before welding.
Extend polyester over the edge of the table ~ ½ inch.
Use the table edge as a guide to push against while sliding the welder.
Hold “stapler” handle with both hands to improve control. To get a straight weld, move with the handle using your body and arms as a single unit (more like practicing Tai Chi or wheel pottery throwing), rather than moving only one arm along.
Only a light pressure is needed.
It’s always exciting when a new tool expands what’s possible in the lab, especially when it helps bridge a gap left by equipment that is becoming increasingly rare to find and difficult to maintain.
Now that we have the MSC handheld spot welder, I’m excited to experiment with new enclosure possibilities, such as creating polyester pockets for spines within jackets, like the example shared on the Book and Paper Gathering blog, mentioned above.
I’ve also had success testing out encapsulation possibilities such as the ones we used during our project to encapsulate pages from Althea Hurst’s scrapbook, such as welding Hollytex or paper hinges into the sleeves.
This new welder may also open up interesting applications for polyethylene welding or creating circular welds as well!
Ashleigh Ferguson Schieszer – Book and Paper Conservator
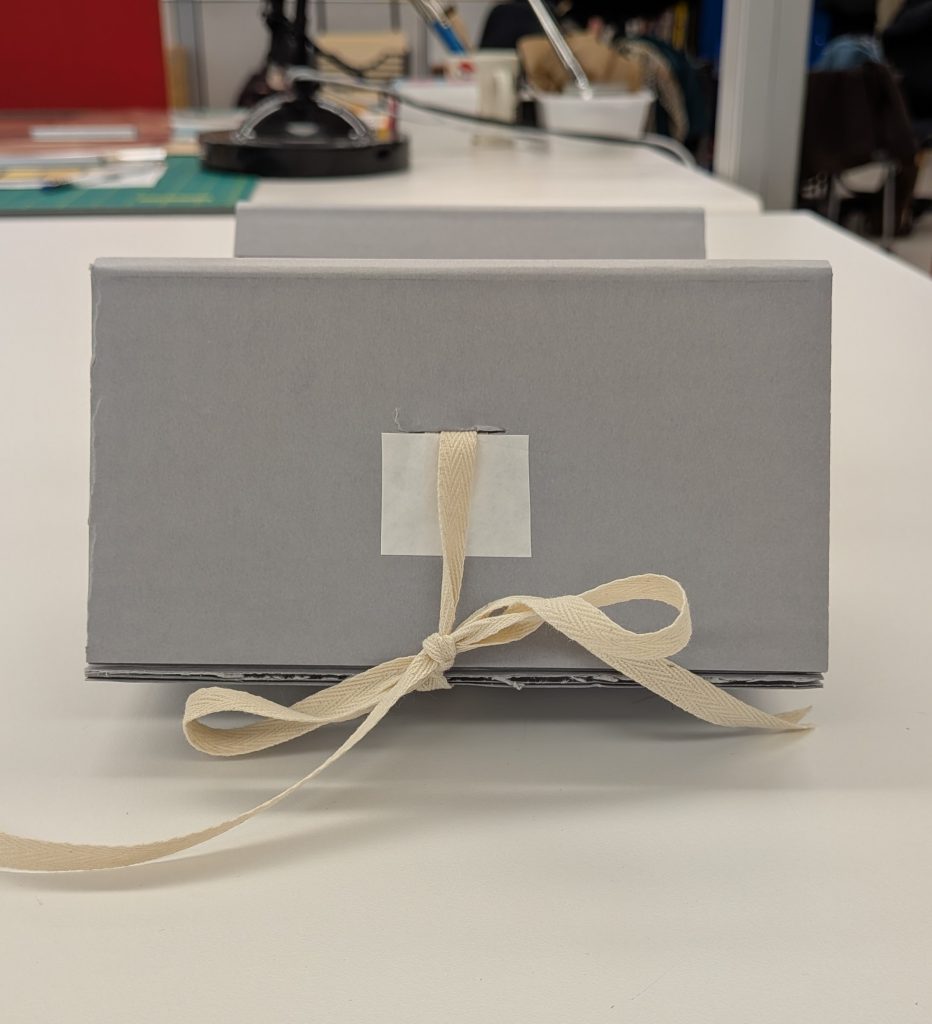
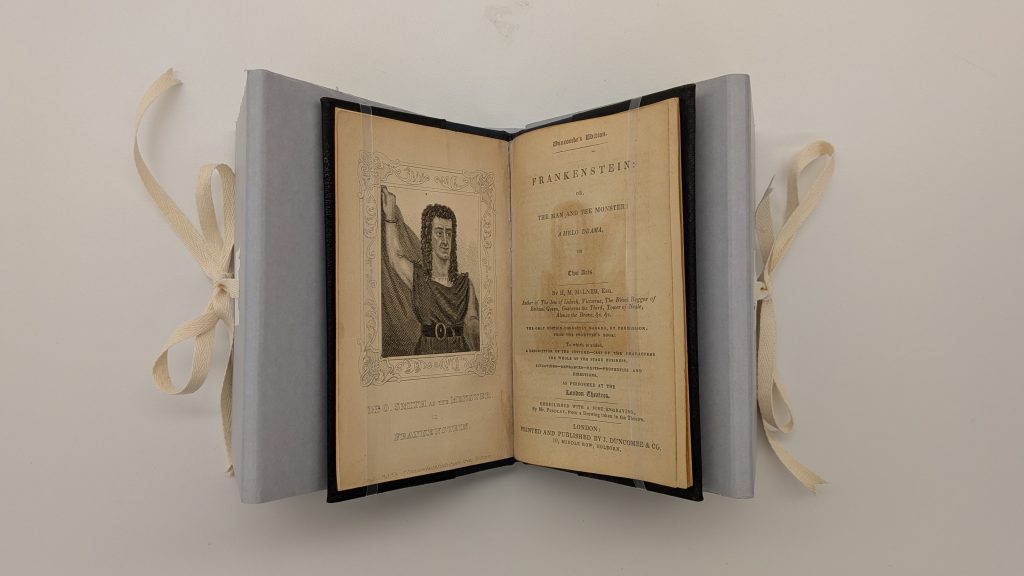
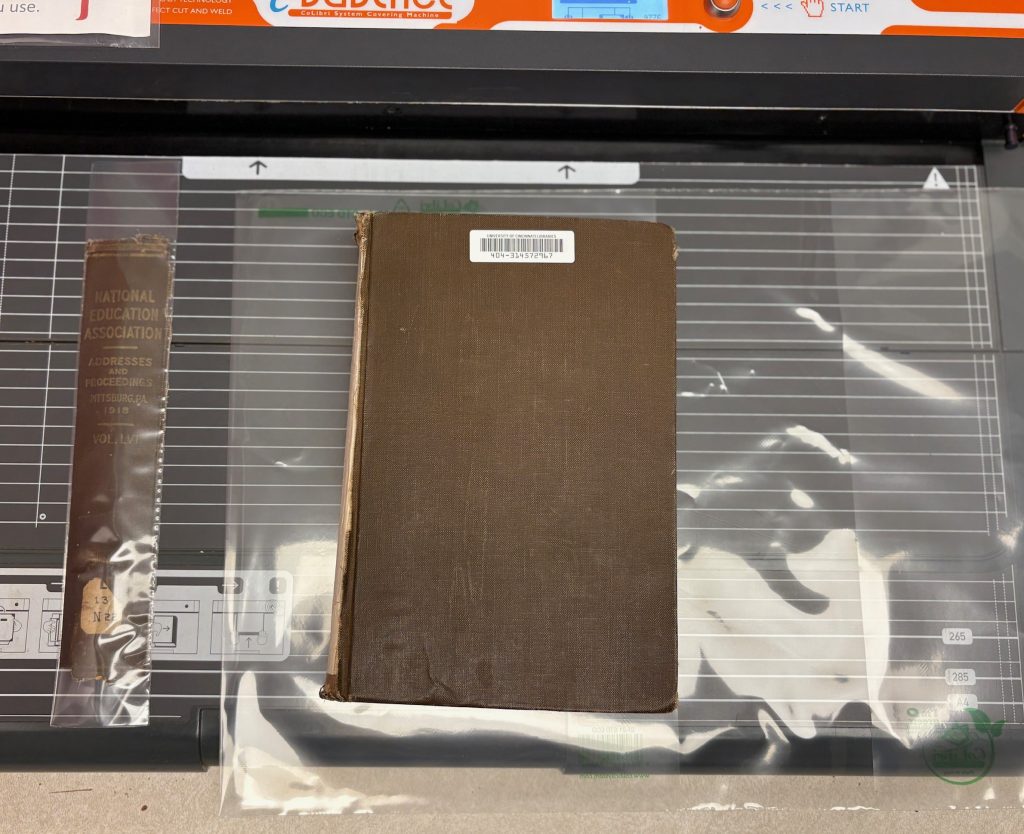
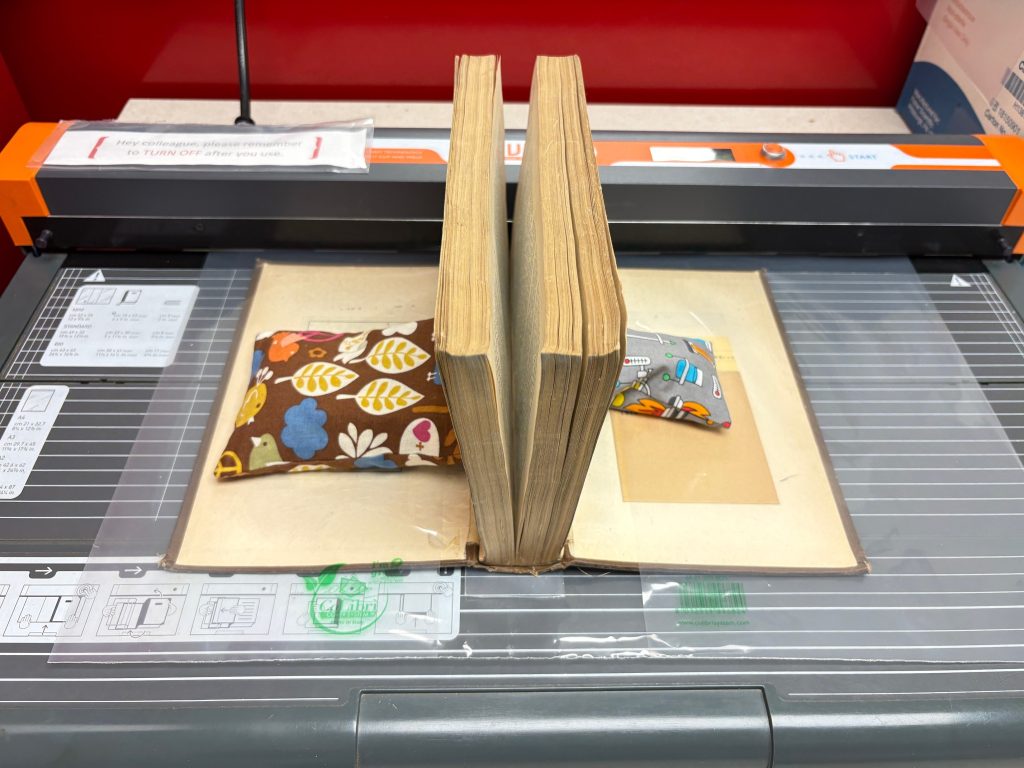
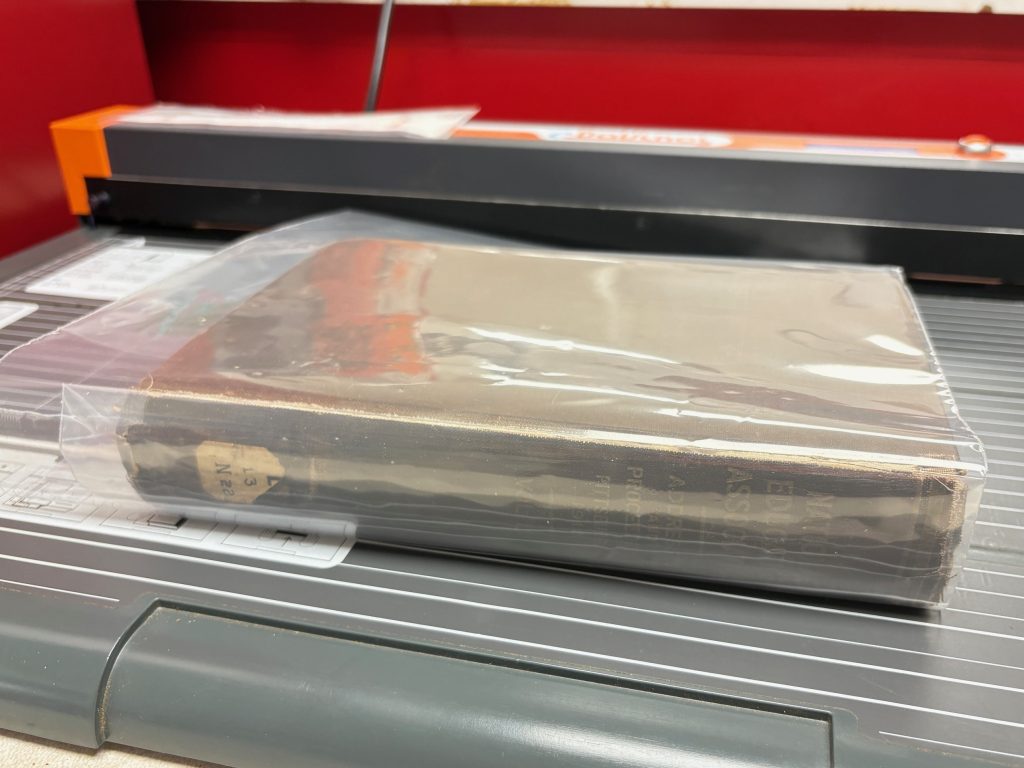
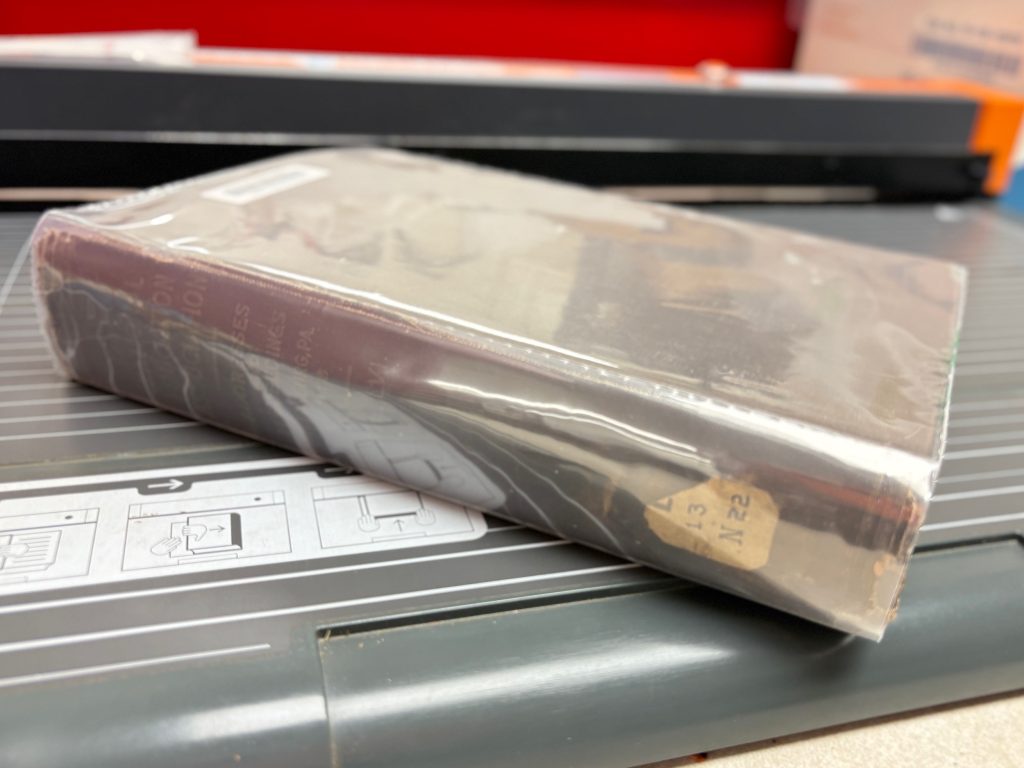
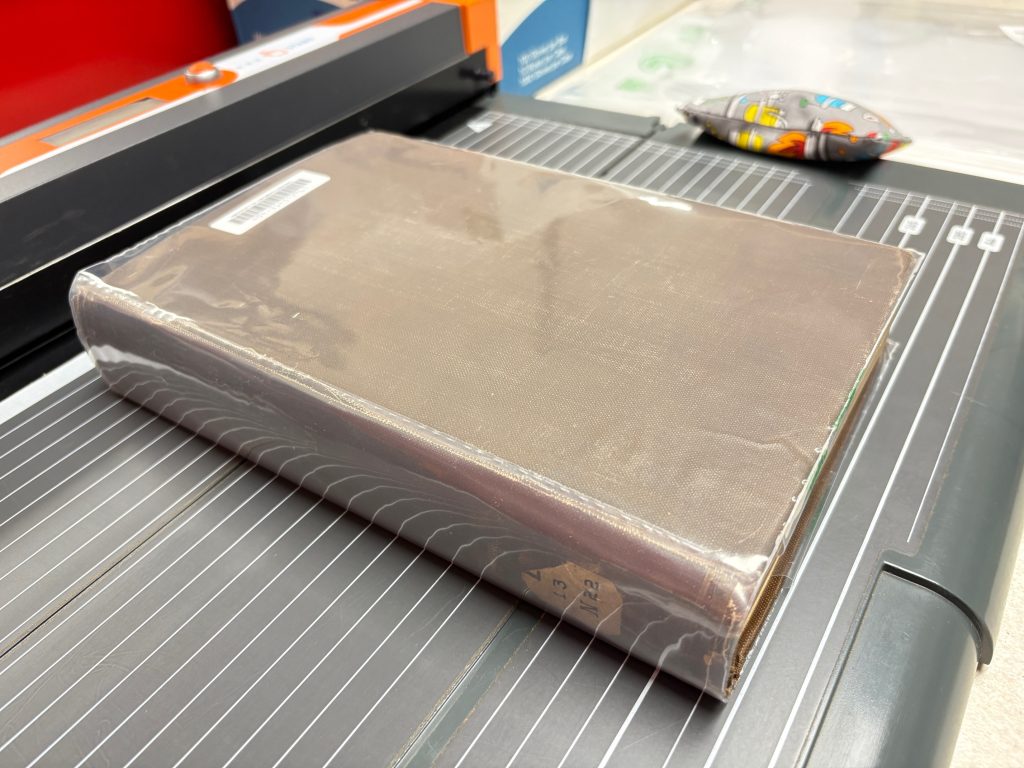
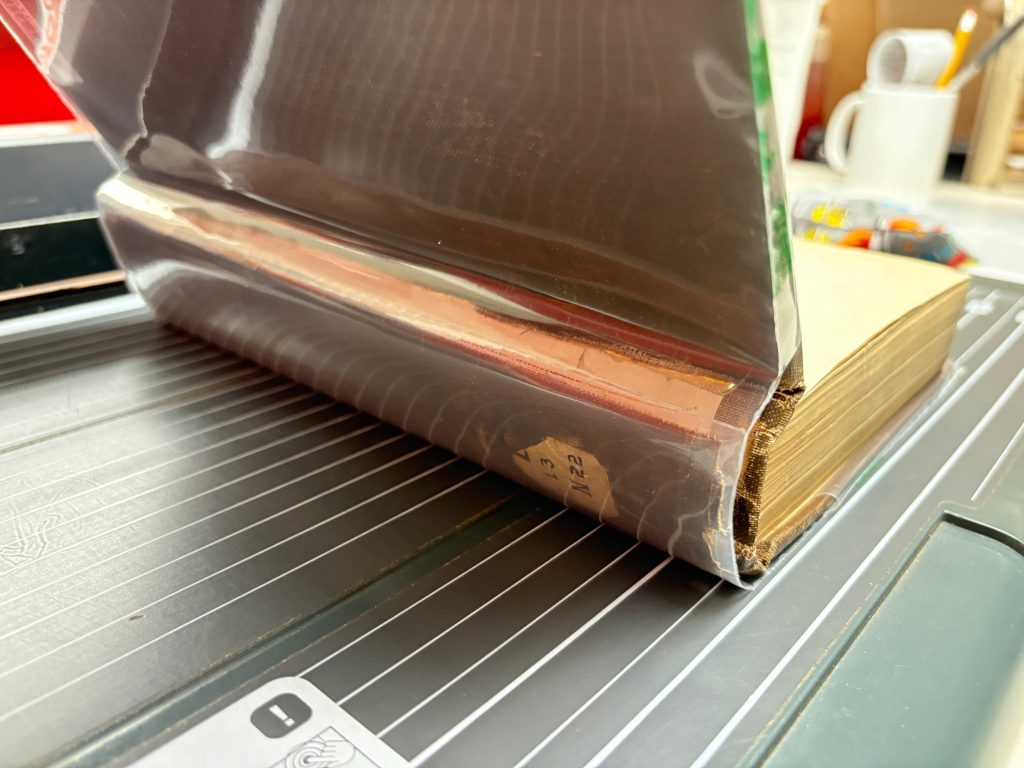
When a copy of Frankenstein: the Man and the Monster came into the lab from CHPL, Catarina asked me to make an enclosure for it – easy enough. What I didn’t imagine was how tricky a book this little can be. This book measured around 6 inches tall by 4 inches wide and maybe a quarter of an inch thick – small, thin, and not very heavy at all.
The problem wasn’t the box, but the integrated cradle, which is essentially a few pieces of corrugated board adhered together to create a rest so the book can open with less stress on the spine. With a book as small and lightweight as this one, the pages and cover weren’t heavy enough to weigh down the arms of the cradle, therefore I needed to figure out a way to keep the arms of the cradle down so the book could open fully.
To achieve this, I used linen tapes to hold the two halves of the arms together so they stayed firmly down without needing the book to weigh them. The tape on the outer part of the arm is tied into a bow with another piece of tape that is attached to the base of the cradle.
Furthermore, to keep the cradle from opening too far, I used more linen tapes on the interior of the arms to hold the arms at the exact width I wanted them from the spine of the book. This helped the cradle keep it’s shape, and created tension for the ties.
UC Libraries are faced with many books in need repair. Often, books must be thoughtfully housed while they wait their turn for treatment priority.
For books with a detached spine, this option can be challenging to find a solution to prevent the spine from becoming lost or crushed (especially if fragile leather!).
As an alternative to storing a loose spine in a baggy or envelope, or holding the spine in place with a cloth tie, behold a satisfying and easy solution…
…to encapsulate the loose spine in a SCRAP of a polyethylene CoLibri jacket, then attach it to the jacket itself!
This option gives the look and feel of a repaired binding, with none of the work!
Cloth covered binding with a fully detached spine ready for a CoLibri jacket
To Encapsulate:
1. First make a polyethylene pocket with the spine inside. Create a pocket taller than the book height. Weld the pocket only on the long sides at this time. Continue to leave the length taller than the book at both the top and bottom. You will weld the head and tail later and will need this length for both welds!
2. Grab a CoLibri jacket that is larger than the height of the book. Wrap the CoLibri jacket around the book. Take care to make the book squared and centered in the jacket.
3. Position the encapsulated spine under the jacket against the spine of the book. Center it and align as close as possible to where it would have once sat.
4. Place light weights on the opened covers to help hold the pages upright and prevent the jacket from sliding. Make any last minute spine adjustments at this time.
5. Weld the jacket at the head to secure the pocket in place.
6. Next, weld the jacket at the fore edges. At this time you can close the book and wiggle the book side to side to also help re-position the spine into place.
7. Weld the CoLibri jacket at the tail. The pocket will now be attached to the top and bottom welds on the jacket!
This solution results in a spine that is safely held to the book during storage without a concern of it becoming lost. The only way it can become lost is if the jacket is removed from the covers!
Encapsulated spine is securely attached with CoLibri jacket.
When book is opened, the encapsulated spine pops away from book.
Below are two preventive-conservation treatment reports where this option was successfully utilized for two leather bound books. Click the links to view the reports on the University of Cincinnati’s Digital Resource Commons:
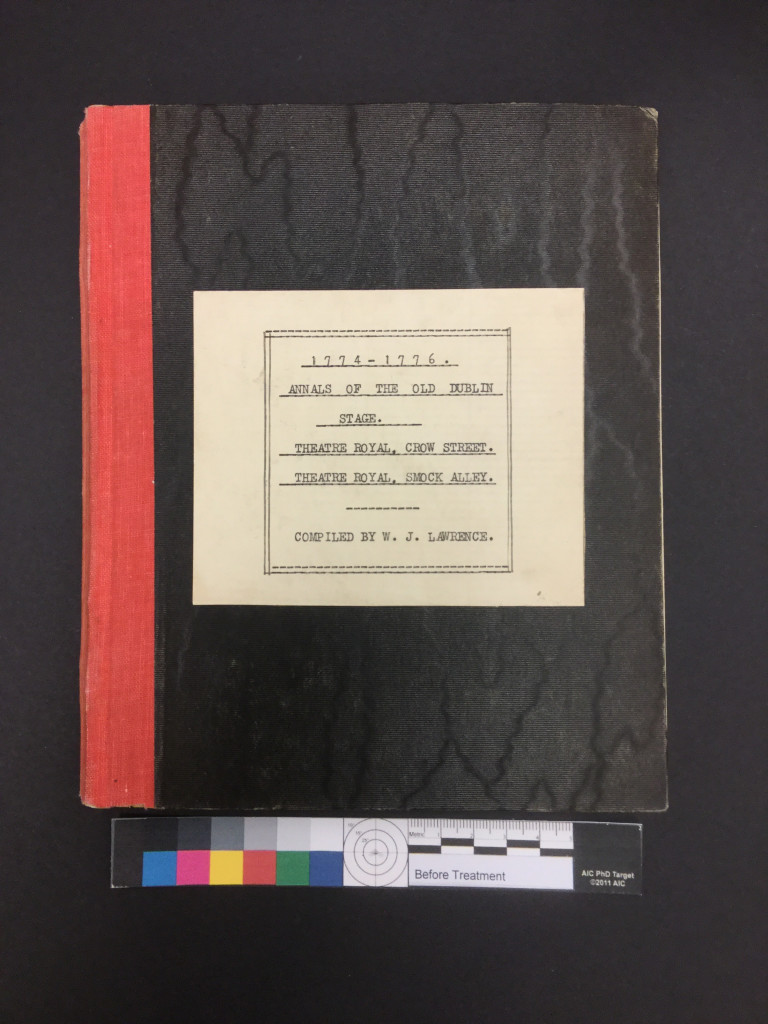
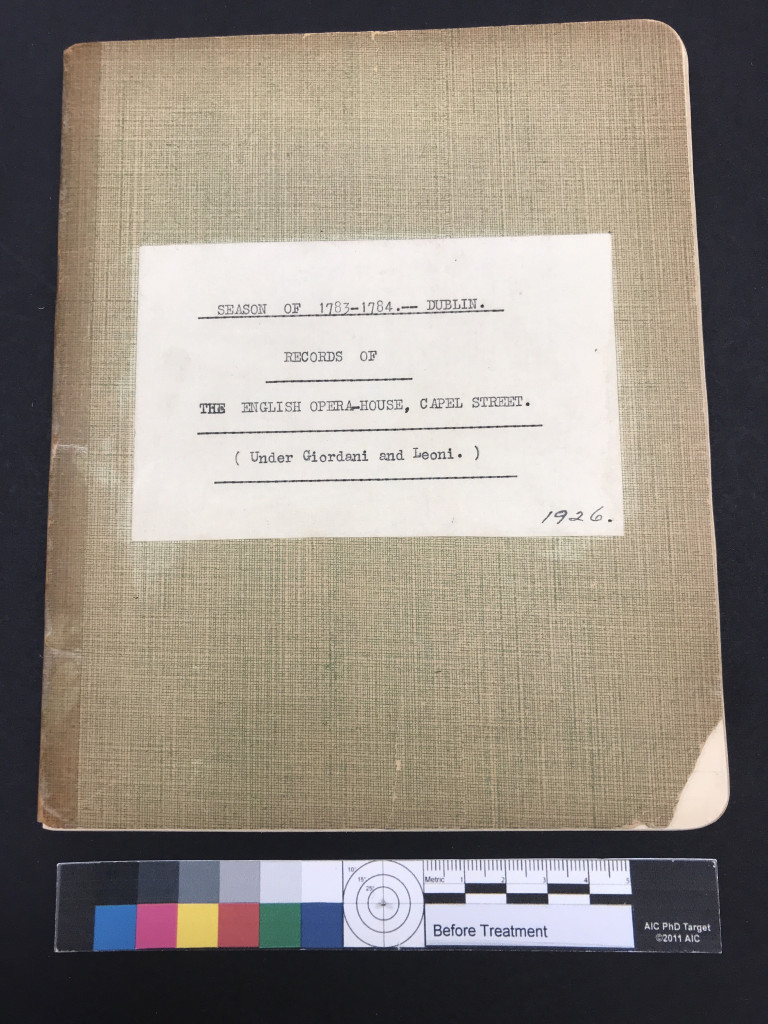
For the past few years, I have been working on the conservation treatment of the Lawrence Notebooks, a remarkable collection of 99 handwritten volumes created by William J. Lawrence that document his extensive research on the Irish stage from 1630 to 1911. Over many years, Lawrence filled these small, lined notebooks with careful handwriting, news clippings, photographs of actors, typed play transcriptions, and detailed notes on theaters, performances, ticket prices, and even personal anecdotes. Together, the notebooks offer a rich and vivid window into the history of Irish theater and the cultural life of Dublin from the seventeenth through the early twentieth centuries.
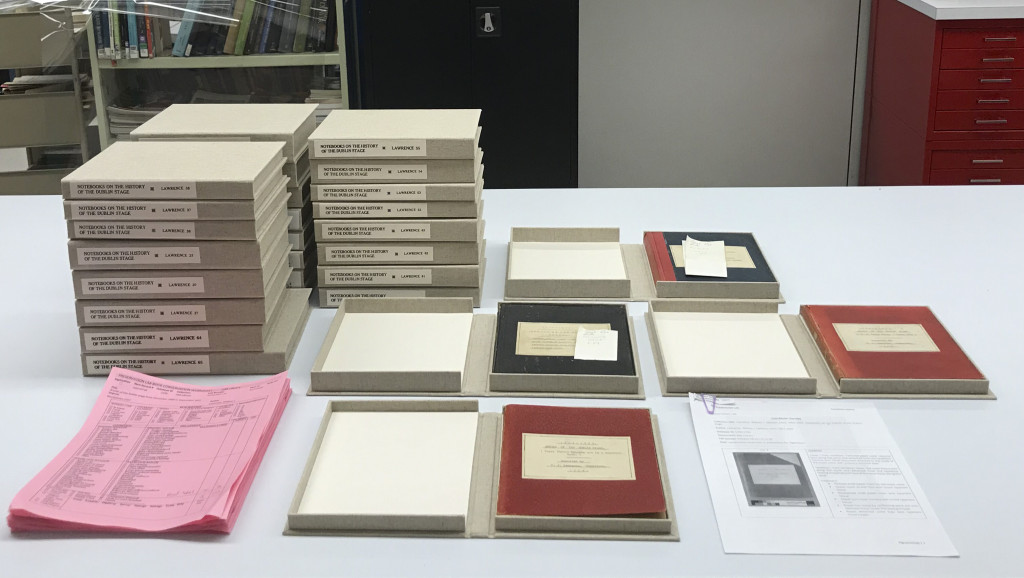
In 2021, we had already completed 37 of the 99 volumes, and we still have 62 volumes in the Lab.
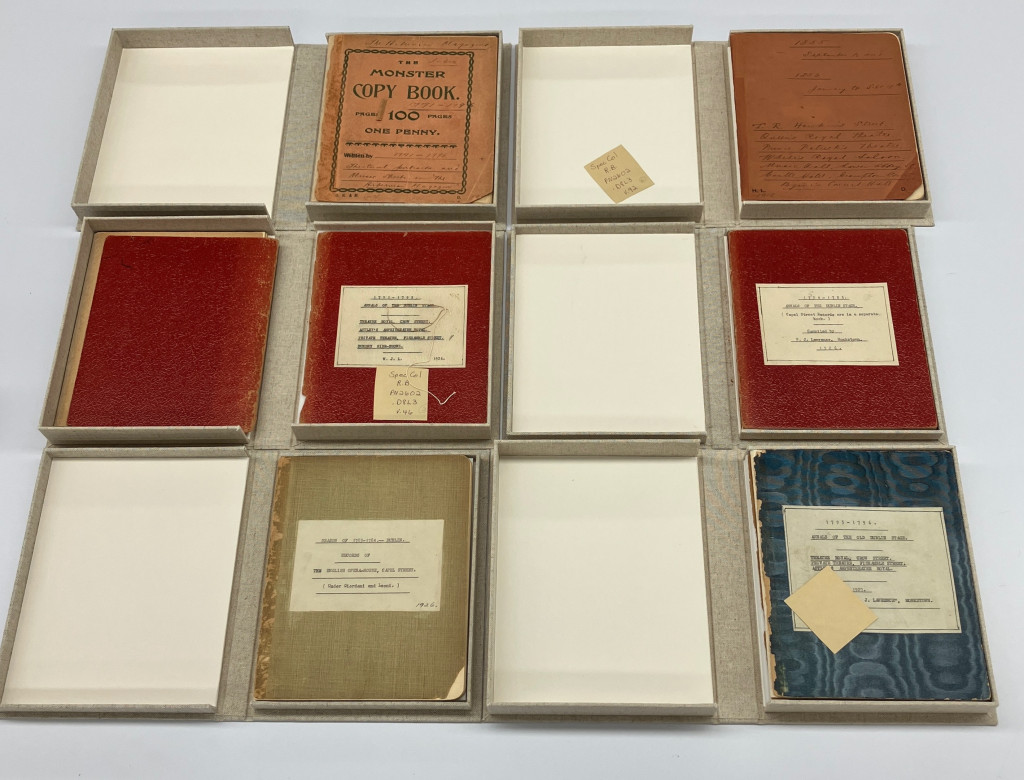
This project was a collaborative effort and was completed gradually over several years, with individual volumes treated alongside other conservation projects rather than all at once. Our former colleague Chris Voynovich created custom cloth-covered clamshell enclosures for all 99 volumes, while I was responsible for the evaluation and conservation treatment of the notebooks themselves.
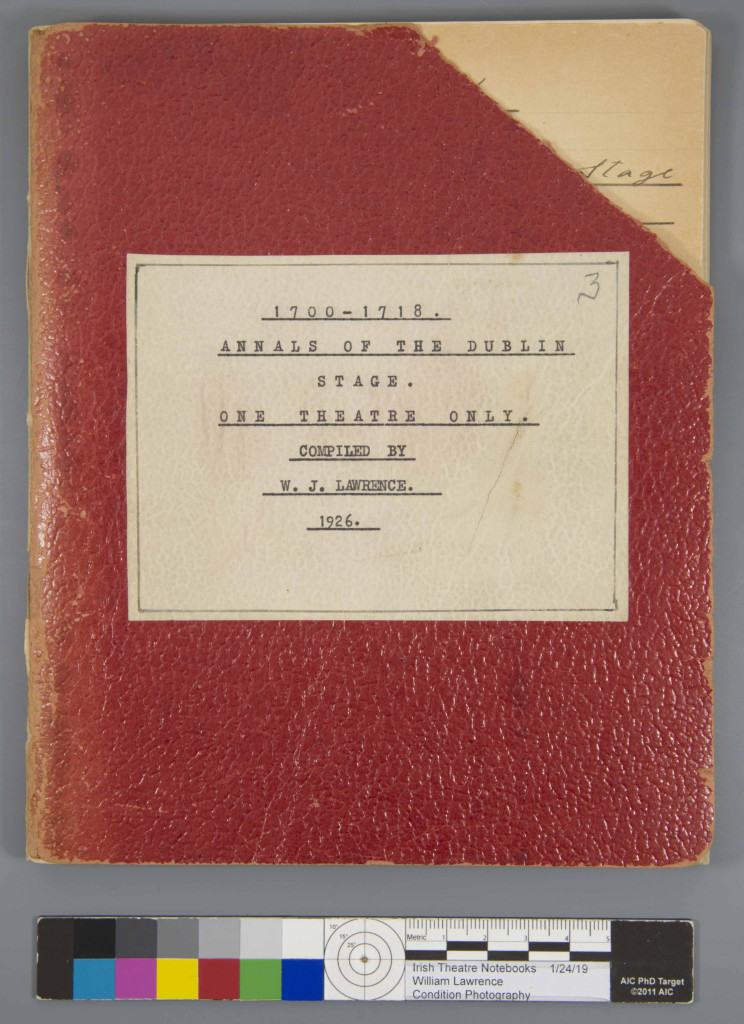
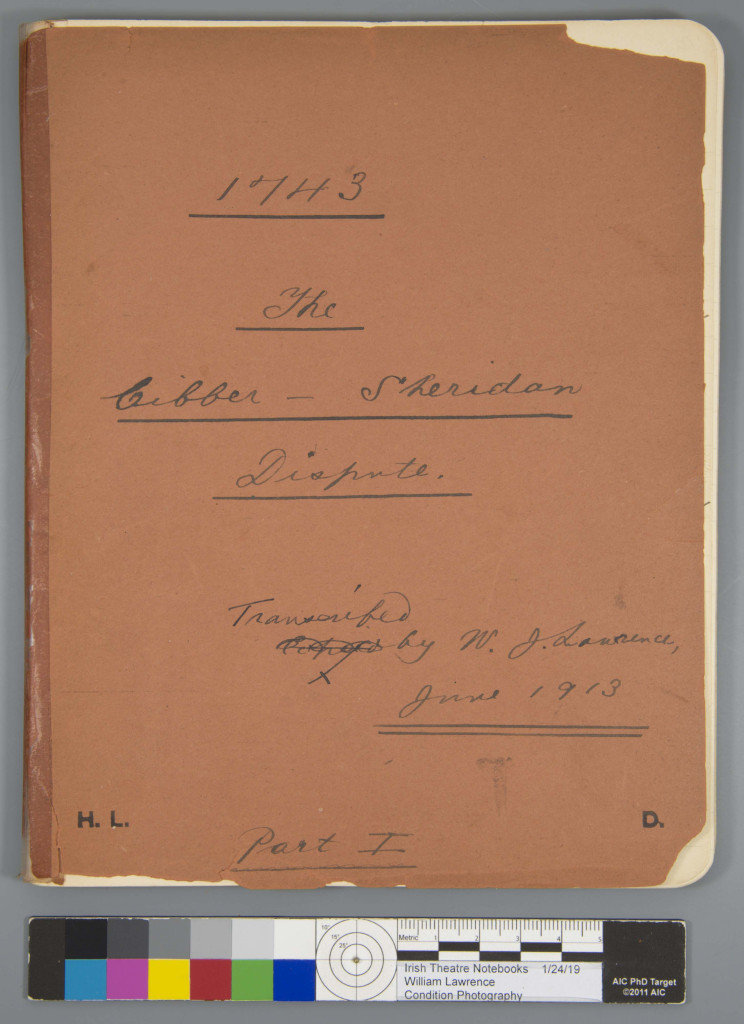
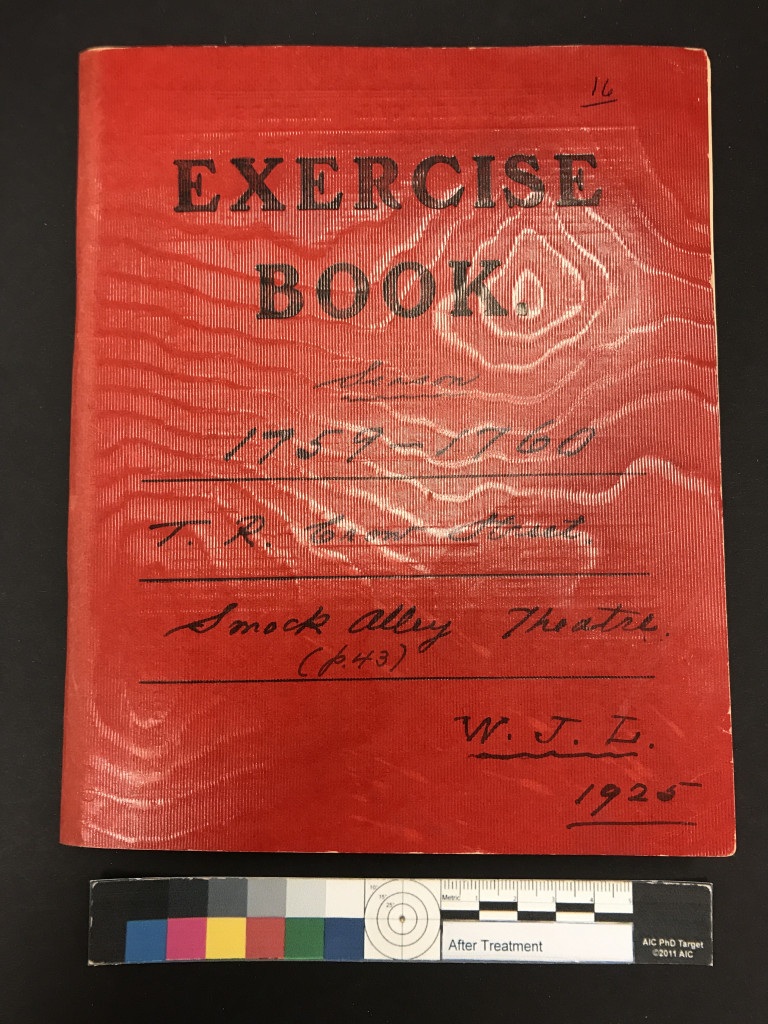
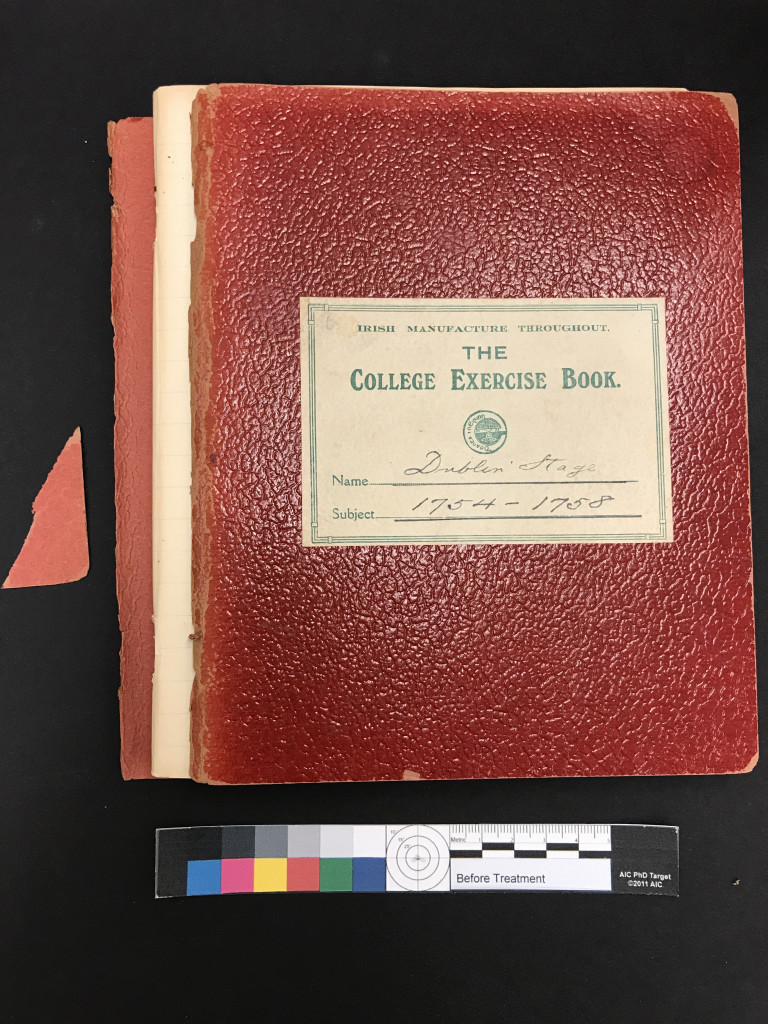
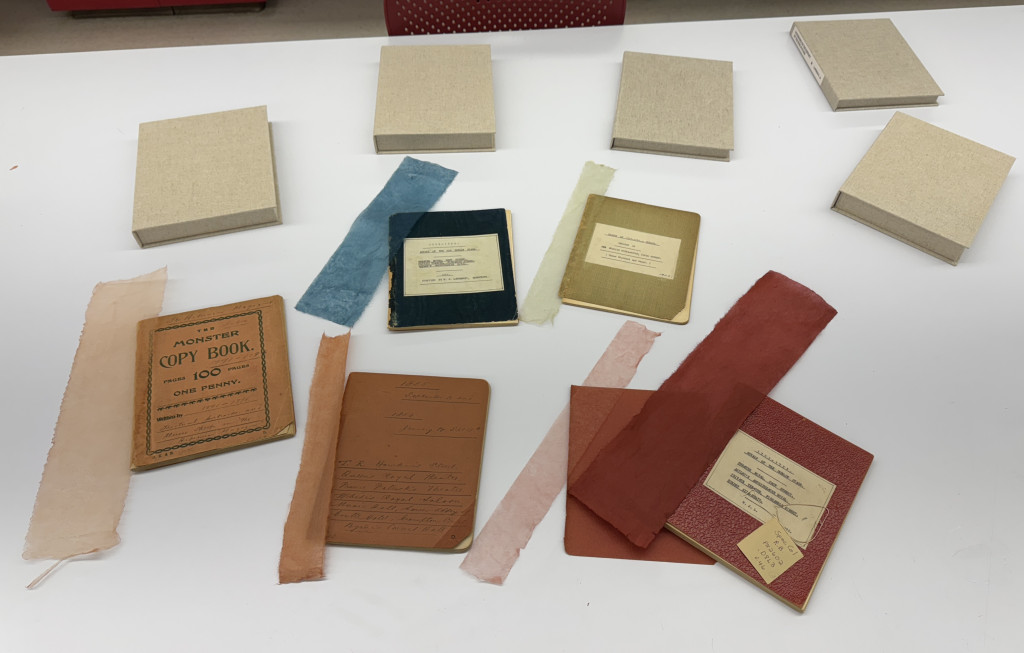
Although the Lawrence Notebooks shared a broadly similar format, closer examination revealed subtle but meaningful variations in both their covers and text blocks. Most volumes were small, square notebooks with thin boards covered in cloth or paper covers, in a range of muted colors including red, orange, green, blue, and black. The text blocks were generally composed of one or several gatherings sewn through the fold, with the primary support most often being lined paper.
Variations in cover materials and colors across the Lawrence Notebooks.
Once all the volumes were received in the lab, each notebook was evaluated for its condition and assigned to one of three categories: good (no treatment required), fair (requiring stabilization), or poor (requiring more extensive treatment). The notebooks showed clear signs of long-term handling and use. Many volumes had weakened or detached covers, some of which had been previously repaired with pressure-sensitive tape. Other common condition issues included broken sewing, tears along the spine folds of the text block pages, and brittle newspaper clippings that had also been repaired with pressure-sensitive tape.
Condition evaluation of the Lawrence Notebooks prior to treatment.
When determining the most appropriate conservation treatment for each volume, it was also important to consider their future digitization. Treatments were selected to stabilize the notebooks while ensuring they could be safely opened, handled, and imaged without placing additional stress on the original materials.
Most of my conservation treatment ended up being hours spent removing pressure-sensitive tape, many more hours toning Japanese paper with acrylics for the repair and stabilization of paper covers, along with surface cleaning and a lot of time dedicated to tear repair.
Toning Japanese paper with acrylics.Toning Japanese paper with acrylics.Toned Japanese paper for repair and stabilization next to the respective notebooks.
Completing the conservation treatment of all 99 Lawrence Notebooks marked the end of a project that unfolded slowly over several years. Because the work was done alongside many other conservation projects, progress often happened one volume at a time, making the moment when the final notebook was finished feel especially satisfying.
With treatment complete and each volume now housed in a custom clamshell enclosure, the Lawrence Notebooks are stabilized and better supported for future handling, digitization, and research. While the notebooks still show the signs of long use that make them such compelling working documents, they are now structurally sound and prepared for the next phase of their life in the collection.
Projects like this reveal how conservation work happens slowly and methodically, often behind the scenes. Completing treatment on all 99 notebooks and seeing them reunited as a stabilized collection reinforces the importance of long-term care in preserving these records of Irish theatrical history for future research and access.
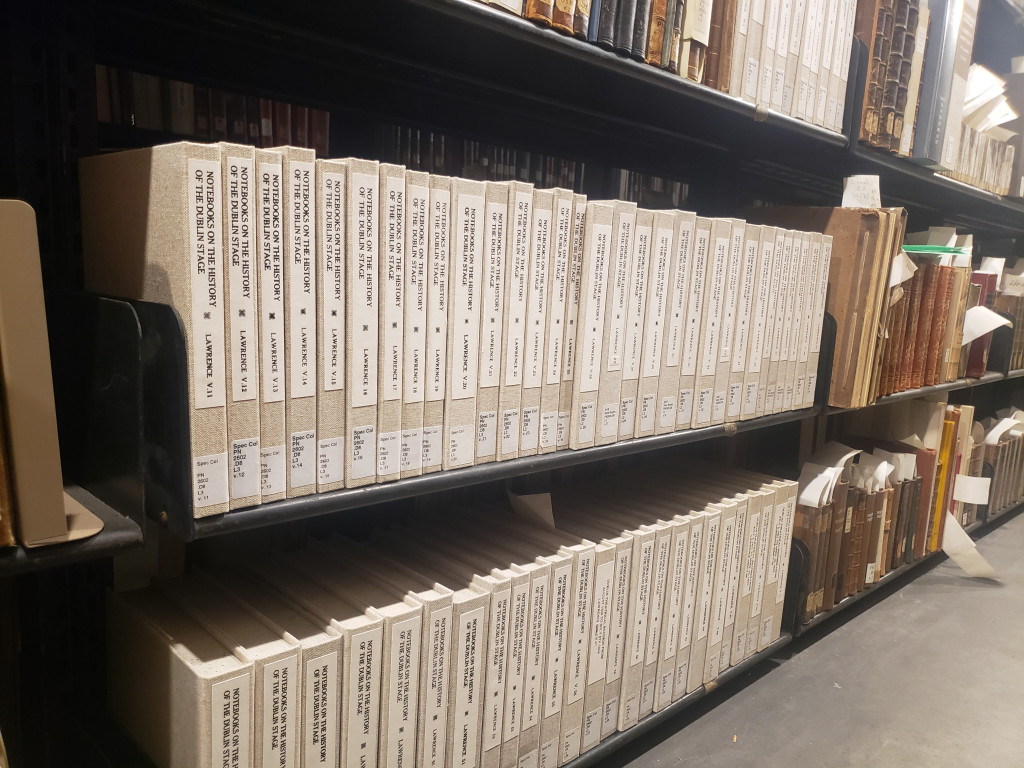
The Lawrence Notebooks shelves in the Archives and Rare Books Library stacks.
How often do we pay attention to the framed portraits of important people and historical figures that hang on the walls of our institutions? Perhaps we glance their way every now and again, perhaps we even contemplate these forgotten ghosts briefly; but how often does a piece with its own provenance, characters, and stories simply become part of the everyday background, and how do we approach preserving these items, so they are not lost to history?
Frame By Frame
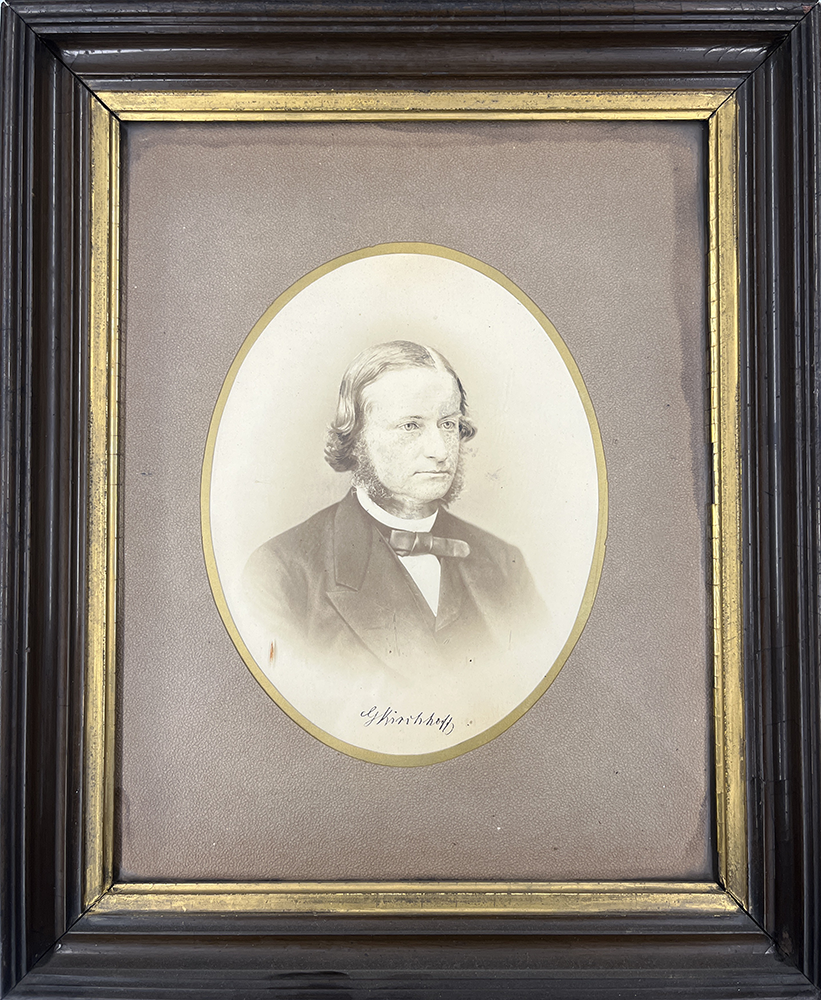
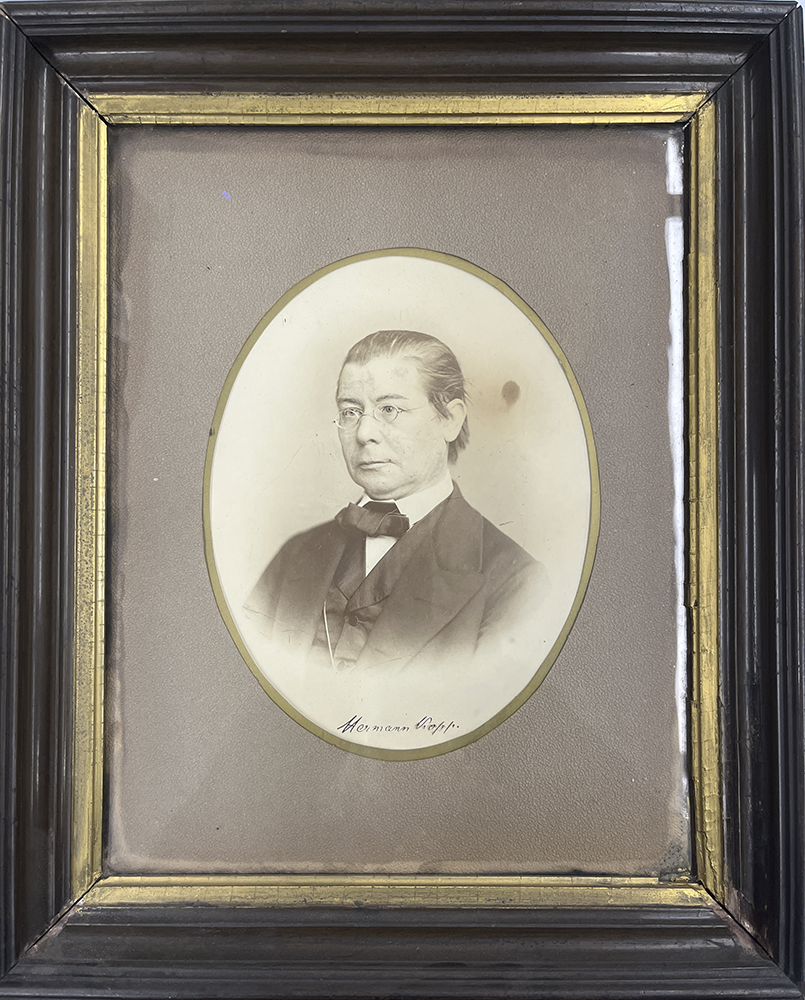
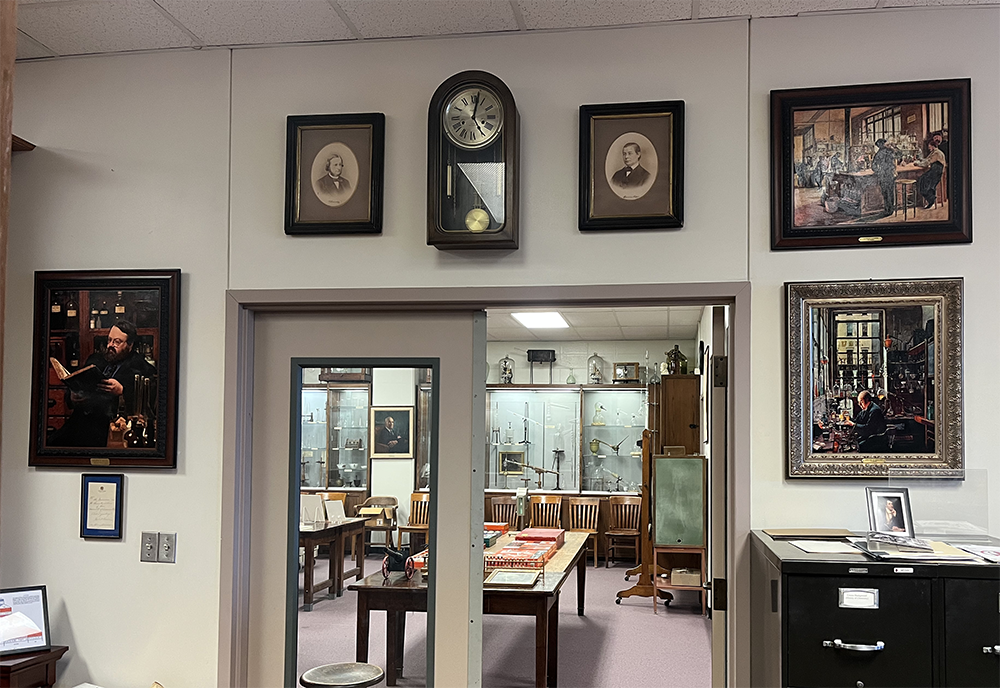
Recently I was assigned a framed portrait of German chemist and historian Hermann Kopp from the Oesper Collections in the History of Chemistry at the University of Cincinnati Libraries. It arrived with a similarly framed portrait of German physicist/mathematician Gustav Kirchhoff, both of which were gifted to early UC chemistry department chair Thomas Norton in 1875 upon completion of his PhD at the University of Heidelberg. They would later become part of the Oesper Collections, and have been, for some time now, hanging on the wall of the library section since the collection was moved there in 1998, according to librarian Mark Chalmers.
The framed portrait of chemist and historian Hermann Kopp, before treatmentThe framed portrait of physicist and mathematician Gustav Kirchhoff, before treatment
The Preservation Lab has received quite a few framed items from this collection as of late and the treatment/housing requested by the selectors has become a common one that we practice. It involves scanning the original and printing a high-quality surrogate image of the photograph or print which can then replace it inside the original frame. The original photograph/print can then be moved to a more archival storage option where it will be less susceptible to damage and degradation. A framed portrait of Marie Curie’s daughter, Irene Joliot-Curie with an inscription from Ralph Oesper received this treatment and storage solution.
The Kopp portrait however, proved to require more creativity than prior framed items, and gave me an opportunity to try out a more unique storage solution.
Kopp’s Portrait
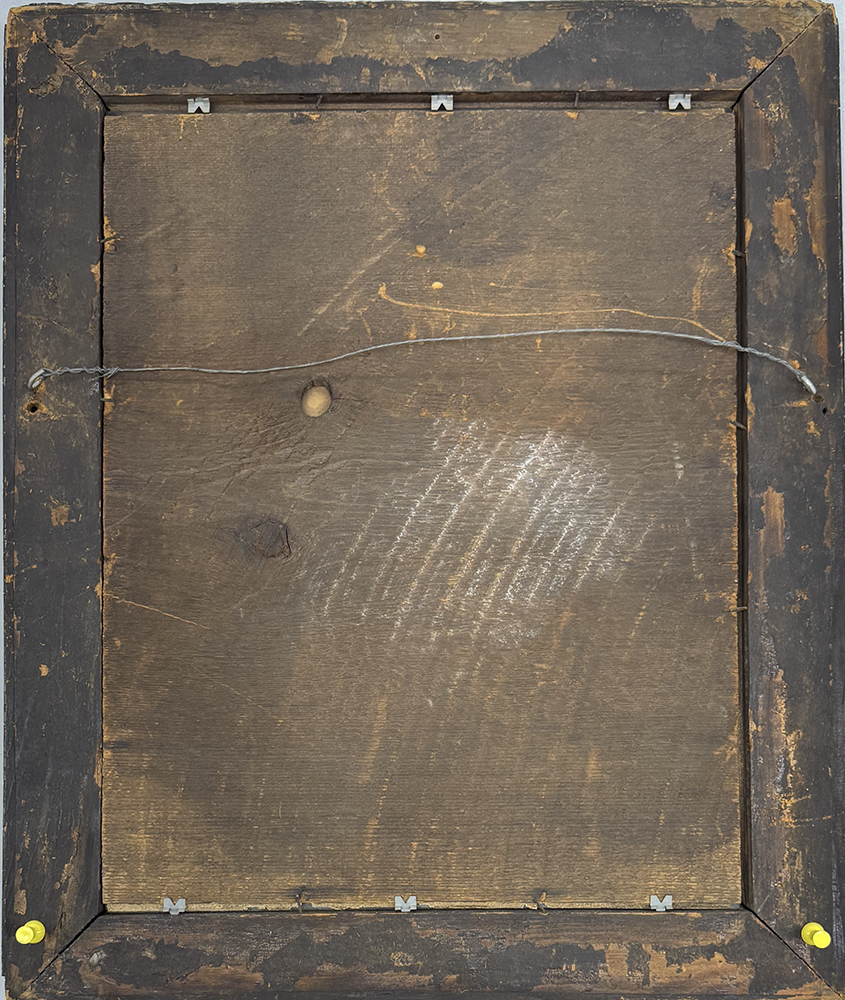
The portrait was framed under several layers. From the bottom up, they included: a beige backing mat which the (likely) albumen print photo of Kopp was attached to, a thin piece of paper featuring an oval-shaped window with a golden border, and a thick brown textured paper, also with an oval-shaped window. These had been secured into a brown varnished wooden frame with painted gold inlays and a solid wood backing board held in place with rusty nails and metal brackets.
Kopp’s portrait seen inside its original frame before treatmentThe verso of the original frame before treatment
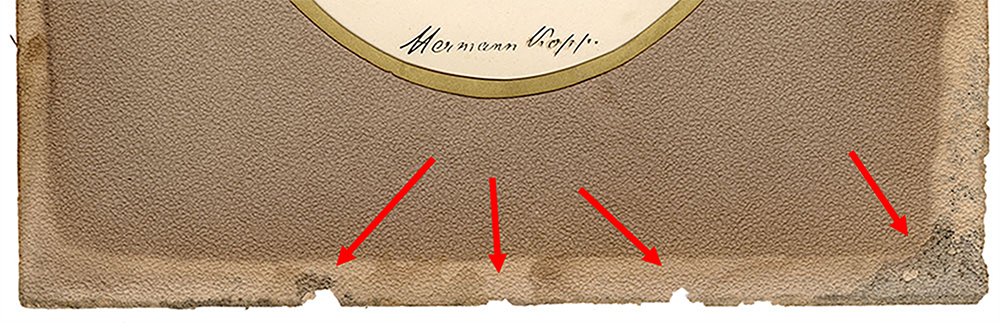
Unfortunately, just about everything outside of the photograph itself is in poor condition. The entire matting system is extremely acidic and brittle with pieces of the brown paper window flaking off around the edges. There is also evidence that it has suffered water damage in the past.
The portrait’s matting system is extremely acidic and brittle; areas where bits have flaked off can be seen. Evidence of water damage can also be seen in the lower right corner.
The Original Frame
Although the wooden frame the portrait was housed in for years is original and part of the object’s history, it is far from archival. With its varnished finish, rough wooden edges, and surface grime, it was likely doing more harm than good as far as the long-term preservation of Kopp’s portrait; it could not remain in this frame. The frame is, however, every bit as storied as the actual photograph.
Conditions such as those presented by this frame are a good example of why we often replace original items inside frames with surrogate images. This way, any potential damage or degradation caused by poor storage conditions will happen to a reproduction image opposed to the actual object.
The Surrogates
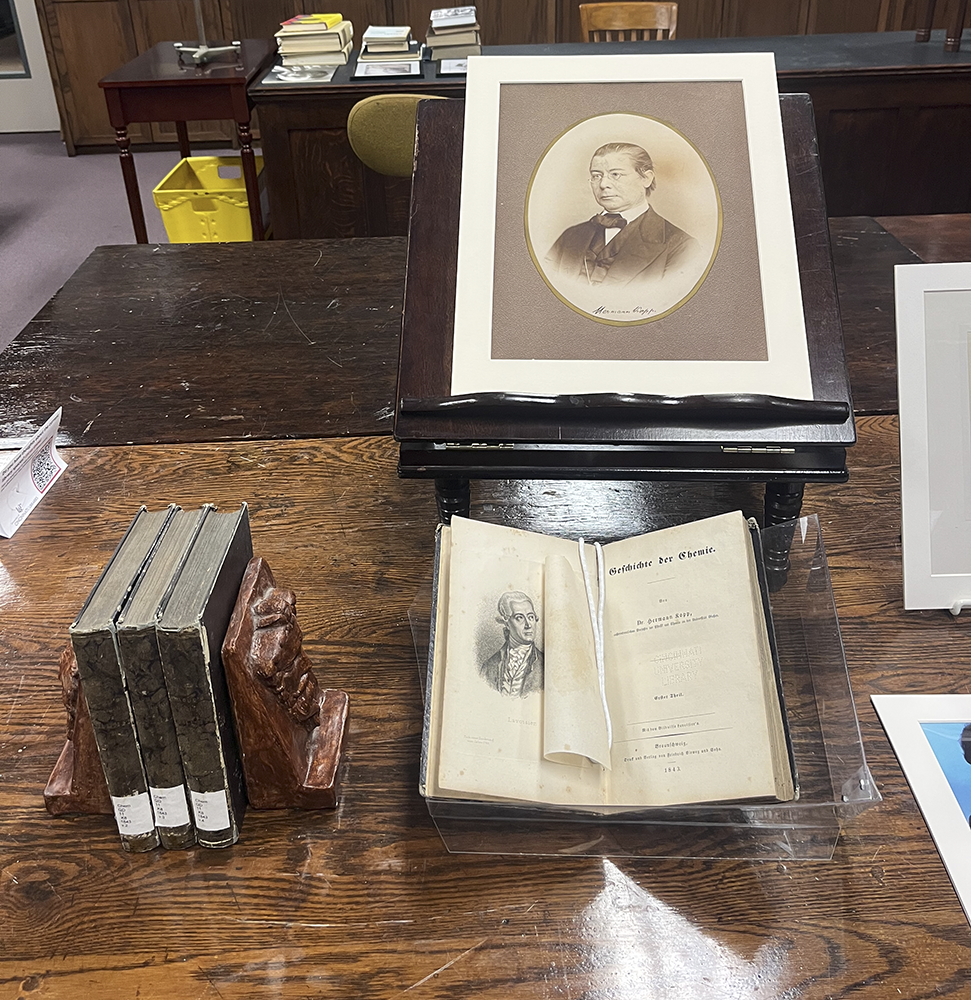
For this treatment, it was determined that two surrogates would be printed to be displayed in the Oesper Collection: one to take the place of Kopp’s original portrait inside the frame which could then be re-hung on the wall of the library, and the other to be added to a display in the museum section.
One of the surrogates of Kopp’s portrait on display in the museum section of the Oesper Collections alongside Kopp’s four-volume series Geschichte der Chemi (1843-1847), courtesy of Mark Chalmers.The other surrogate back in its original frame re-hung on the wall of the Oesper Collections library, Courtesy of Mark Chalmers.
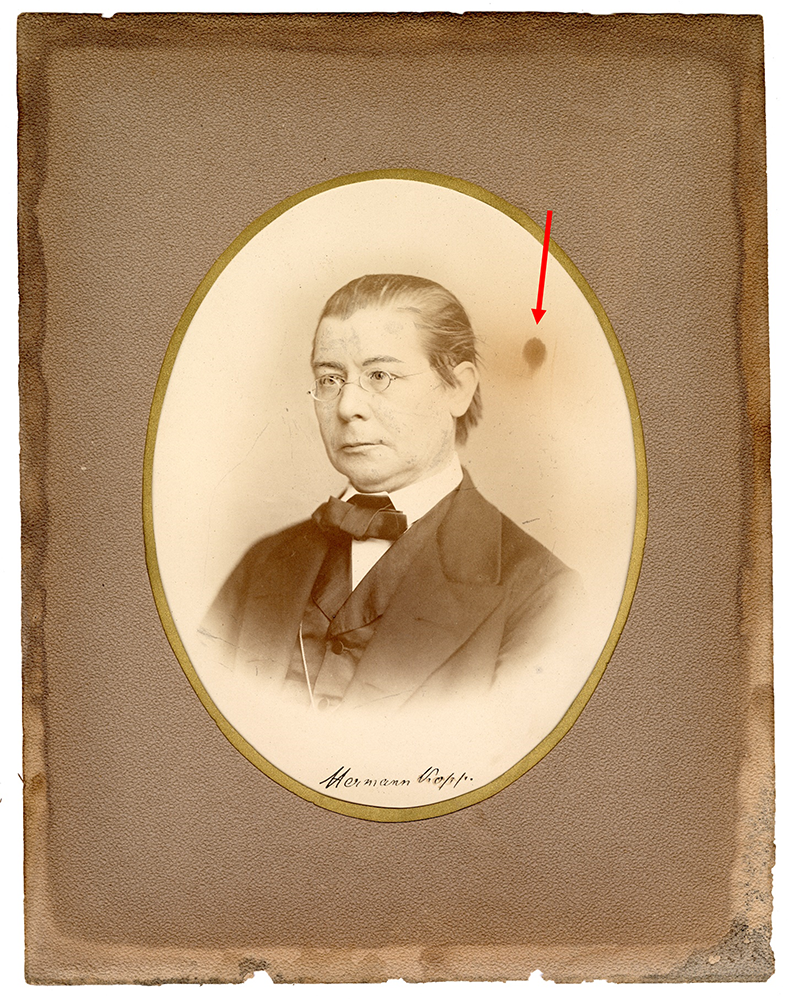
Jessica Ebert, Assistant Conservator at the Preservation Lab, and our go-to personnel for digital imaging, gently digitally retouched the image of Kopp, after consultation with the curator.
The scanned image before digital retouching.The scanned image after digital retouching; notice the absence of the spot to the right of his head.
Storage Considerations
As with earlier framed items we have received from The Oesper Collections, it was decided a matting system was appropriate for safe storage of the unframed portrait and its included parts. However, the brittleness of the items and some uncertainty about how the photograph would react to environmental factors presented some unique challenges.
Although the mounting technique of placing them inside a polyester L-sleeve and mounting this with photo corners/strips would be easy and fast, there was some concern that humidity could enter the sleeve and cause damage to the photograph’s emulsion layer. Also, items mounted this way often need to flex and bend to a degree that these fragile materials likely could not afford.
The Paper Cradle with Z-folds
After considering these factors, Assistant Conservator Jessica Ebert suggested a paper cradle with z-folds. This mounting technique utilizes archival paper that is partially cut diagonally at each corner. Each edge of the paper is then folded over itself twice in opposite directions, creating a pocket for the edges of an object to rest gently inside.
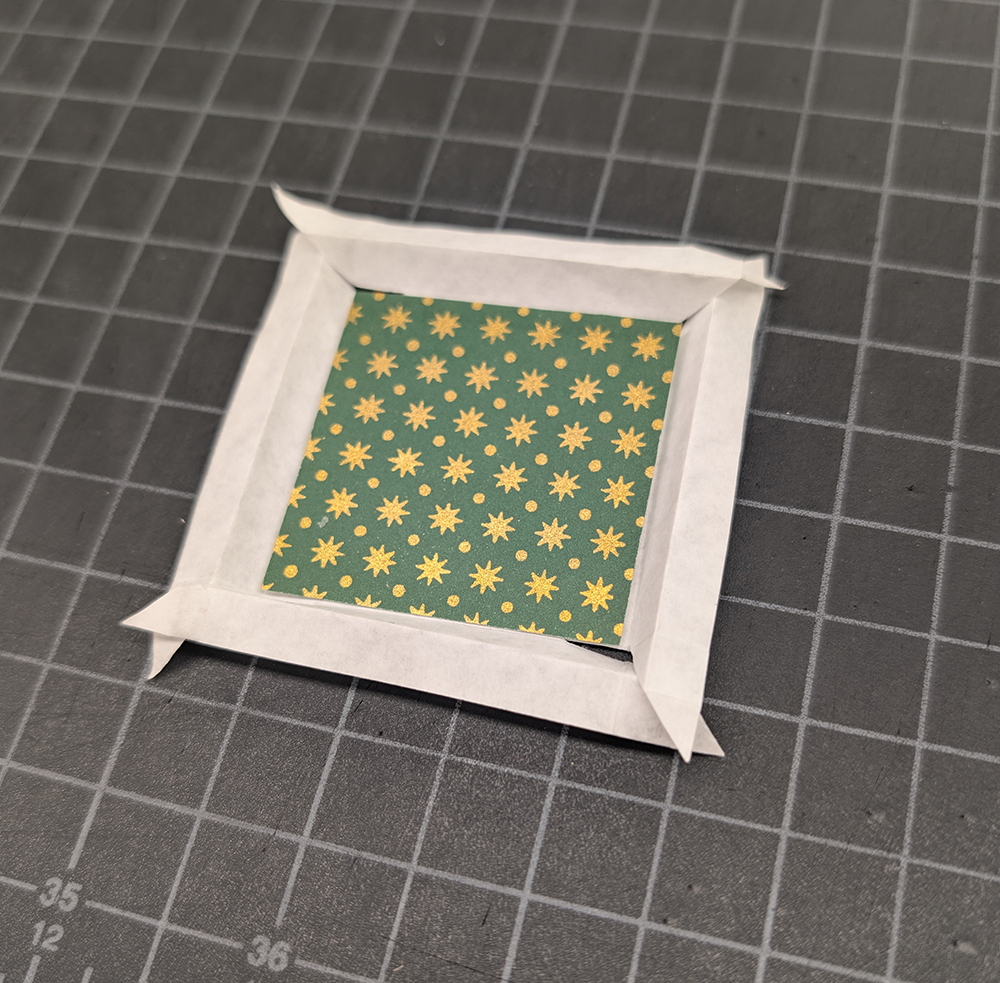
A small model of a paper cradle after the cuts and folds have been made.
Profile view of the pocket created when making the above folds; image from 2010 Art Conservator Tech Notes by Jennifer McGlinchy.
Once the cuts and folds have been made and the object is safely inside the cradle, the paper tabs extending off the corners of the cradle can then be mounted to a back mat using archival tape.
Once cuts and folds are made, the cradle features two tabs at each corner; these are used to mount the cradle using archival tape.
The Package
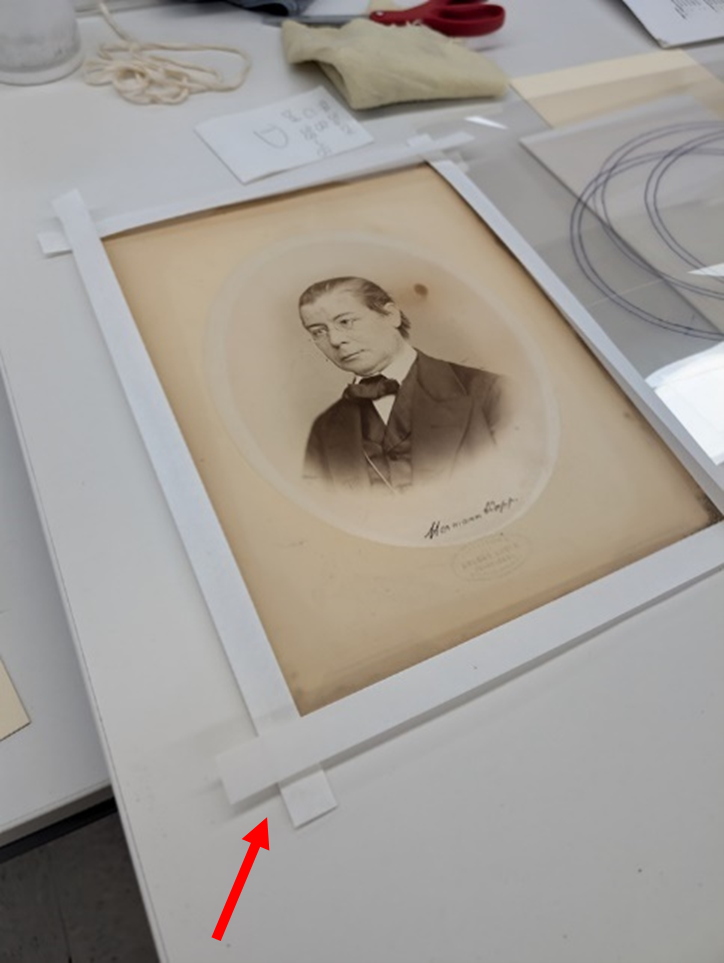
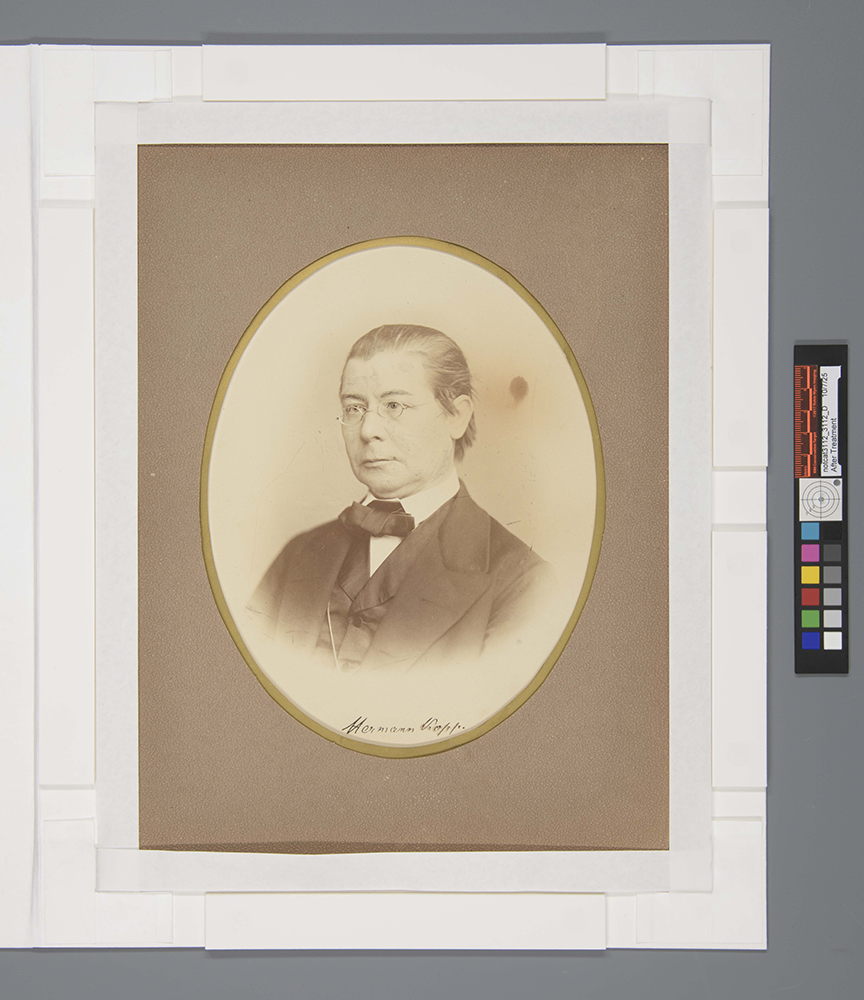
We wanted to store both the photograph and its original brown paper window mat together inside of the paper cradle, but the acidity of the brown paper was still a concern. We determined that several protective layers should be included to prevent any acid migration from the brown paper to the photograph. All the layers inside of the paper cradle, affectionately referred to as “the package”, are as follows, starting from the bottom up:
A piece of mat board to provide rigidity to the package.
This will prevent any potential bending of the extremely brittle materials which could easily lead to damage. It was cut to be slightly larger than the rest of the package, allowing for small micro movements of the brown paper window mat, hopefully preventing its brittle edges from becoming damaged inside the creases of the cradle.
The photograph itself.
The photograph and its original back mat were mounted to the unbuffered mat board piece described in the previous layer using edge strips.
A piece of unbuffered interleaving paper with an oval-shaped window, allowing the portrait to still be viewed.
This layer was added because the polyester sheeting mentioned in the next layer has a sharp edge around its window. The interleaving paper protects the emulsion layer of the photograph from scratches and other abrasions.
A piece of polyester sheeting, also with an oval-shaped window, allowing the portrait to still be viewed.
This layer adds a bit of rigidity to the original brown paper window mat. This will further help prevent the acidic brown paper from bending and breaking.
The original brown paper window mat
The individual layers of the “package” to be stored inside the paper cradle.
The Sink Mat
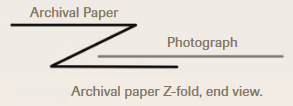
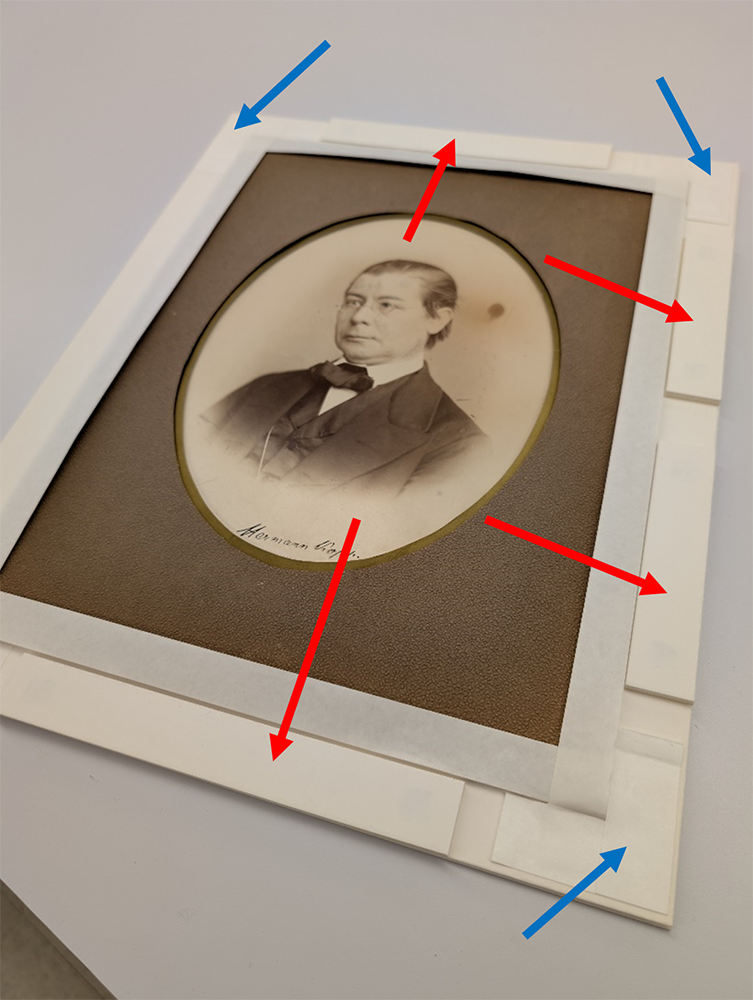
Now that the portrait/package was safely inside its paper cradle, I could begin working on the matting system. As is typically the case with any item with a significant amount of thickness, I planned on building a sink mat. However, when constructing this sink mat, I had to allocate space around the perimeter of the object when attaching the mat board spacers so that the paper cradle’s tabs had space to be taped down; this contrasts with a typical sink mat in which the spacers are typically placed around the entire perimeter.
Although the perimeter is still built up around the object with mat board (indicated with the red arrows), space had to be allocated to allow the tabs of the paper cradle to be attached using archival tape (indicated with the blue arrows).
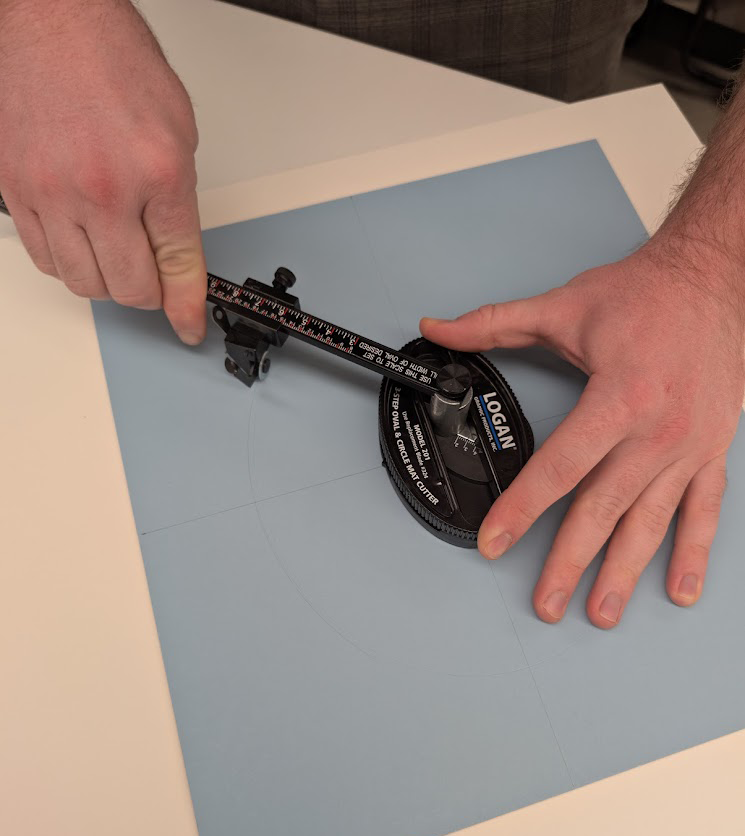
Cutting Ovals
For the new window of the matting system, Assistant Conservator Catarina Figueirinhas suggested that cutting the window in the shape of an oval would be appropriate as the original brown paper window mat had an oval window, and the photograph itself was oval-shaped. After a bit of research, we discovered a moderately-priced (around $65 on Amazon) adjustable mat board cutter that could cut ovals at a beveled angle: The Model 201 Oval & Circle Mat Cutter from Logan.
The Logan Model 201 in action; one hand holds the base steady while the other guides the arm with an attached blade around the center point.
After watching a very helpful YouTube video I felt ready to give the Logan Cutter a try. I found it easy to use after a little practice and was satisfied with the results.
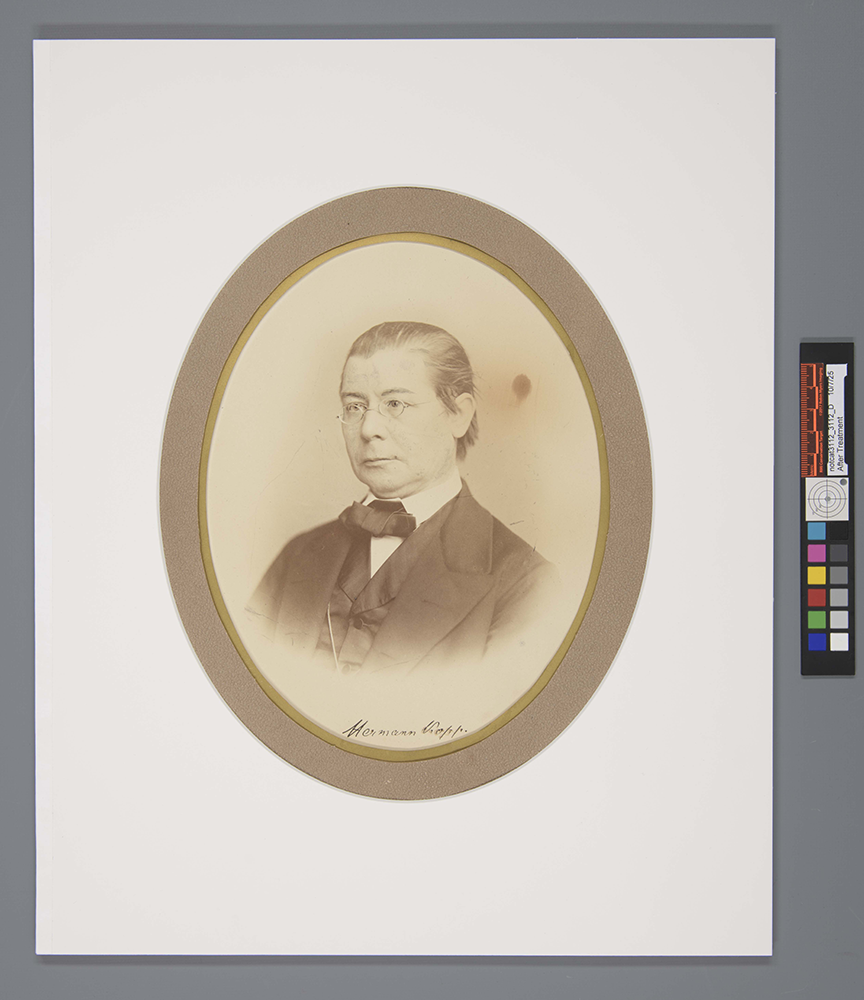
The Completed Matting System
Once the sink mat spacers were added, the paper cradle was taped down, and the oval window mat was attached, the matting system was complete.
Kopp’s portrait inside its matting system with an oval window.The inside of the matting system; Kopp’s portrait can be seen inside its mounted paper cradle.
As Kopp’s actual portrait inside its new matting system is not going to be displayed any time soon, I also constructed a tuxedo box for long-term storage. This will help further protect it, especially from any light damage.
Final Thoughts
The display surrogates, however, can currently be viewed and contemplated by anyone who tours the Oesper Collection. Sometimes I like to think about how the work that we do at the Preservation Lab is becoming part of the items we treat’s history. Just as this portrait has crossed an ocean, passed through the hands of Thomas Norton, Ralph Oesper and multiple UC Chemistry department heads, hung on that cold wall of the chemistry library in 521 Rieveschl Hall for countless aspiring chemists to contemplate, and finally ended up under the stewardship of current UC librarian Mark Chalmers, it was briefly in my possession. As stewards of cultural heritage, we can only hope that the time these objects spend in our care can extend these histories indefinitely.
Historical References Provided by Mark Chalmers:
Cincinnati Chemists: Assorted Papers on the History of the Cincinnati Chemical Community by William B. Jensen
Robert Bunsen’s Sweet Tooth: Bunseniana in the Oesper Collections by William B. Jensen
Image and Other Supplemental References:
2010 Art Conservator Tech Notes by Jennifer McGlinchy
We were delighted to have Dr. Cathleen Baker come to UC for 4 days to teach us all about paper, paper making and printing in a collaborative programming and outreach workshop entitled Identification of Western Hand- & Machine-Made Paper, 1750-1900. The workshop included Preservation Lab staff, staff from UC Libraries Archives and Rare Books Library and the Content Services department, and Kathy Lechuga from Signature Conservation.
With Cathy’s teaching and guidance, we soon discovered some of the key characteristics is in handmade paper and how the introduction of machine-made paper just made everything more complicated. Oof, that dandy roller… But it was so exciting to make discoveries in the paper and learn new tips for paper identification. This will be particularly helpful for Preservation Lab staff when we do our examination of items for treatment proposals.
We are all beyond grateful to Cathy for sharing her immense knowledge and expertise with us. We all learned so much about handmade and machine-made paper and printing. Here’s just a taste of the workshop and us examining special collections items from the ARB Library and the Science Library collections:
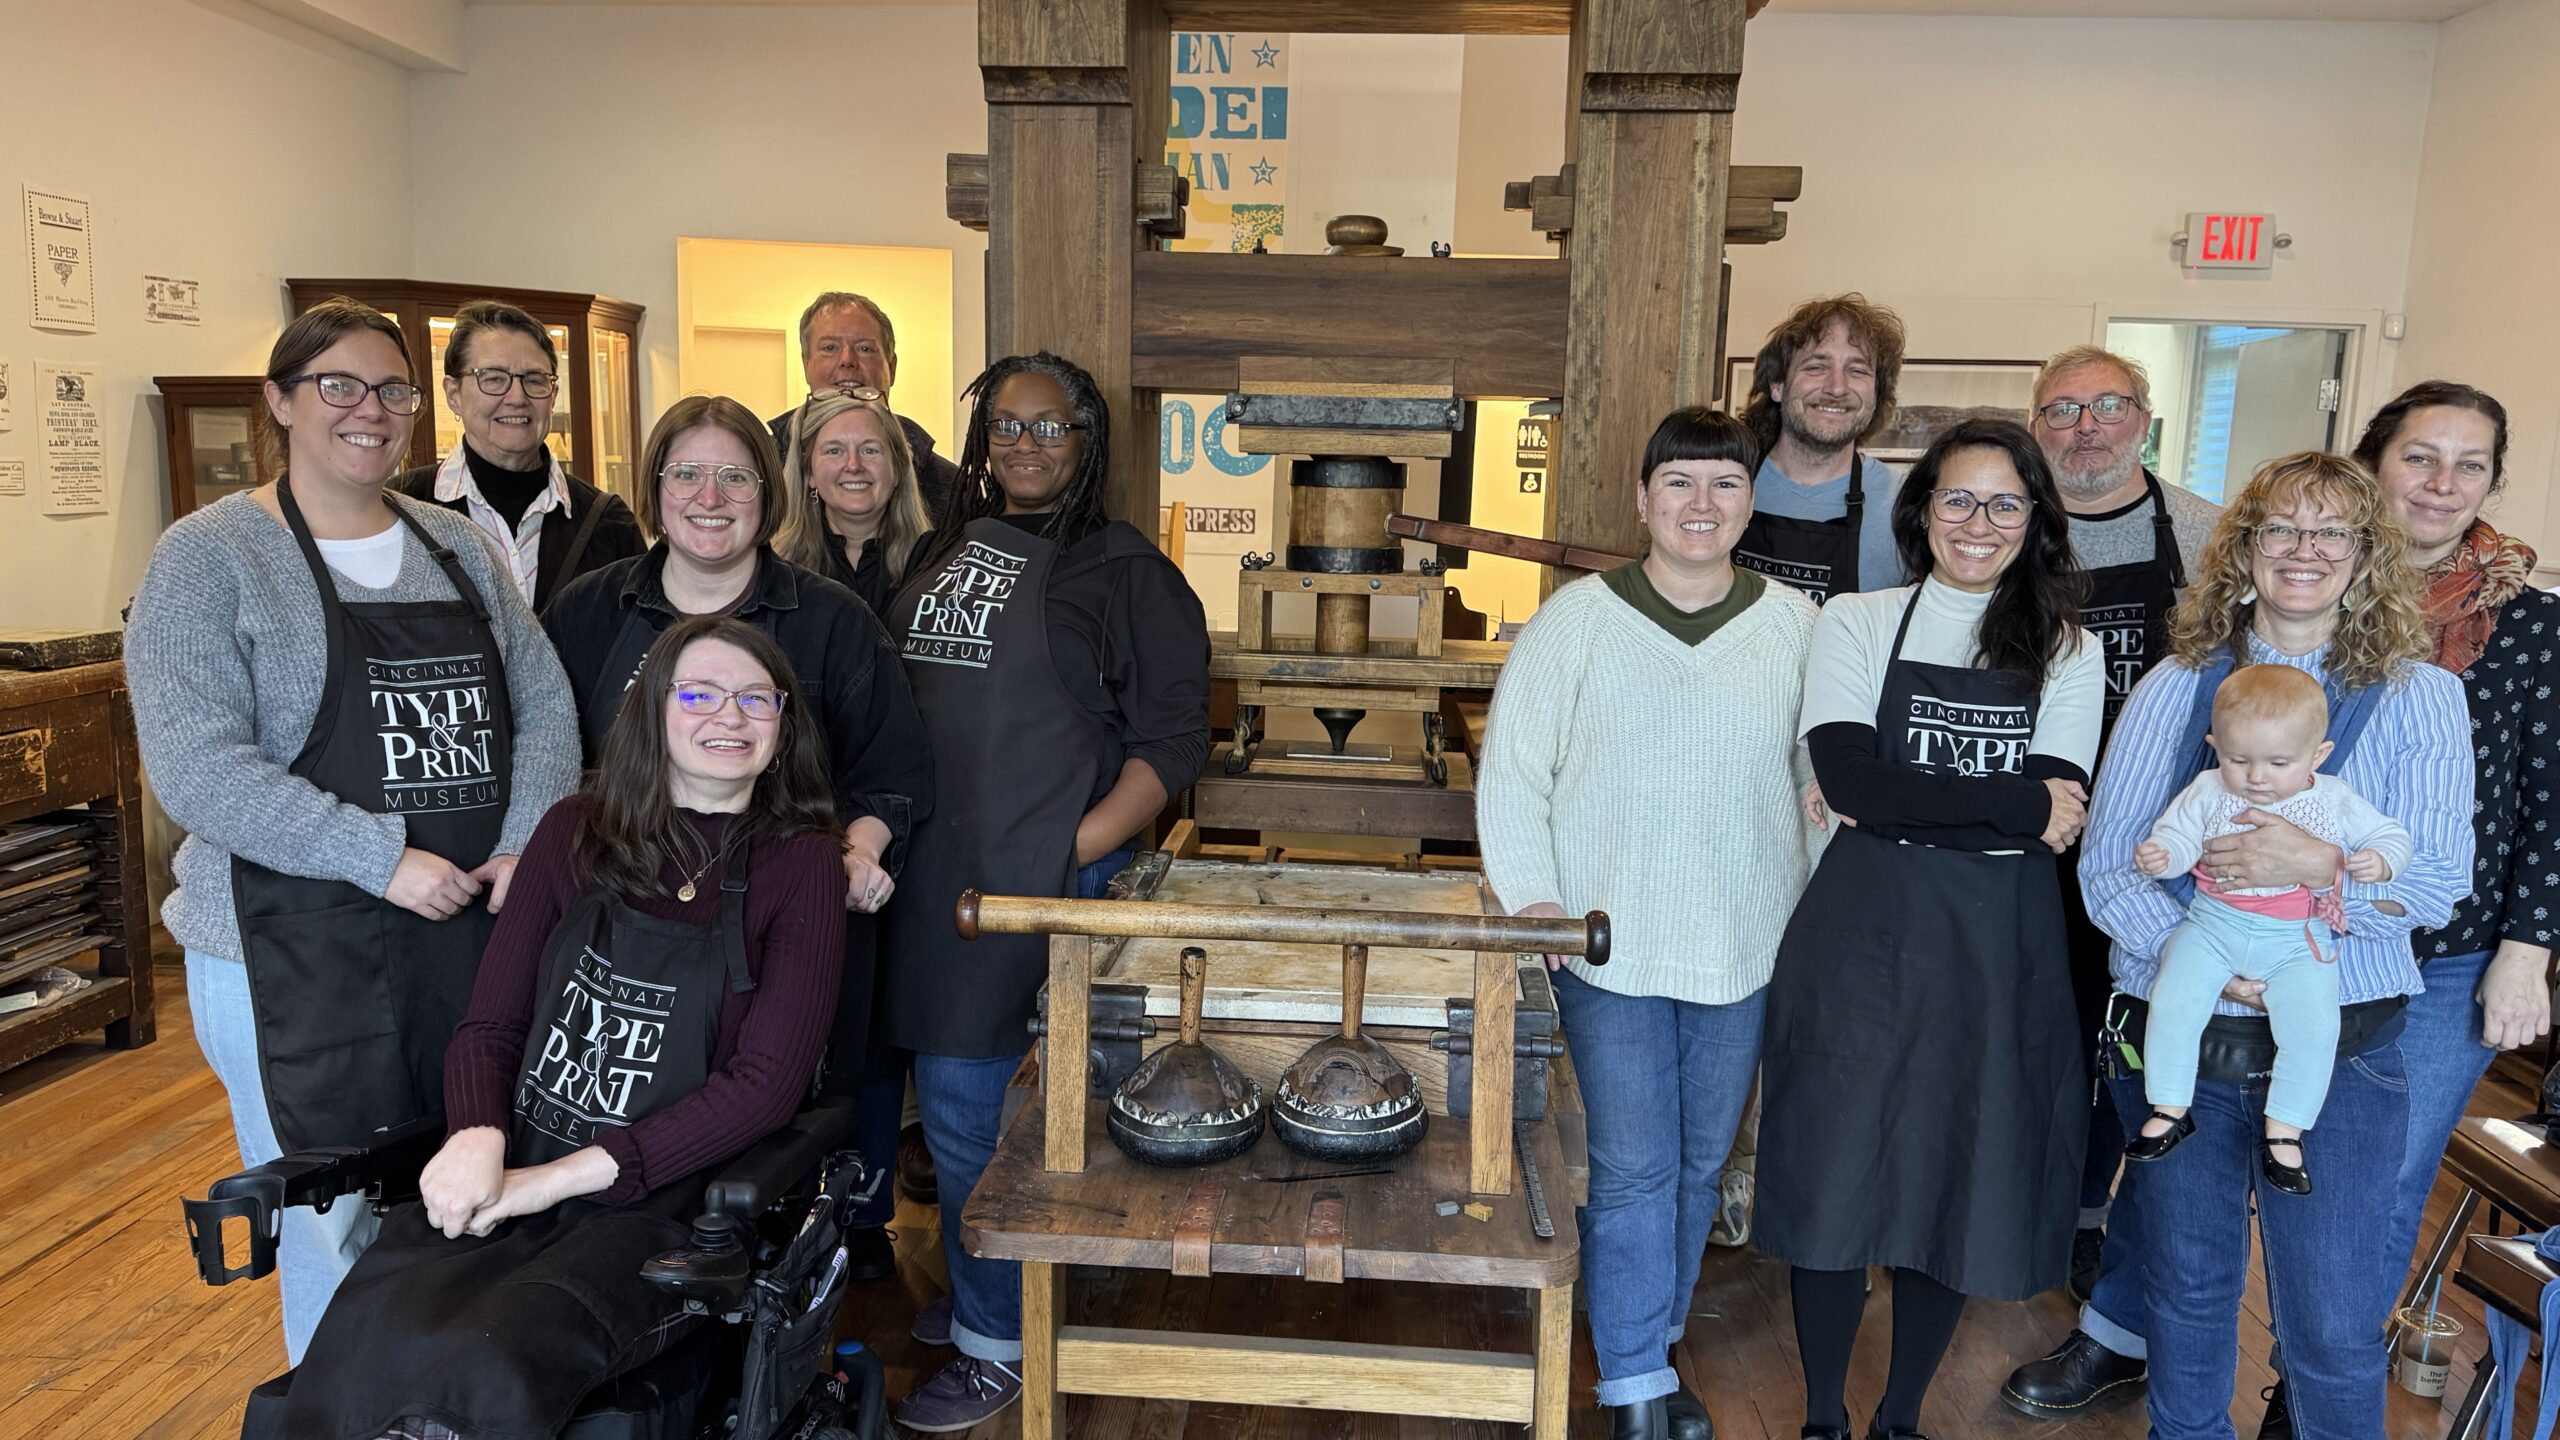
We also took a field trip to the Cincinnati Type & Print Museum to get a paper understanding of printing. It was a fantastic experience! A big thank you to Gary and his staff for a wonderful time printing and a great tour.
It’s amazing the different ways books can tell us stories. There’s the obvious: the words that are written on the page and create the story the author wanted to tell. But there’s also what lies beneath the surface — the wear and tear of the book, how it was bound, what materials were used to make it. There’s the outright story a book was meant to share, but there are also context clues, and deeper ways we can dive into the history of a book.
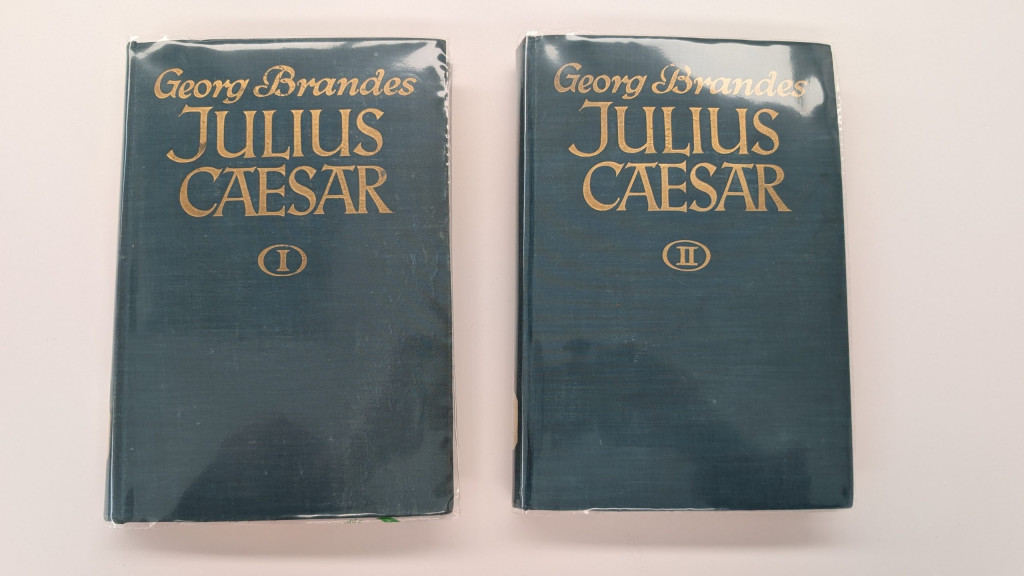
Sometimes, a book just outrightly tells its story through notes left by previous owners. A handwritten message about where it was bought, a book plate of whose library it came from, or an inscription with notable information about damage to the tome are all ways prior owners can document what the book has been through. This latter suggestion is the case for a two-volume set of Cajus Julius Caesar by Georg Brandes.
Pictured: volumes I and II of Cajus Julius Caesar.
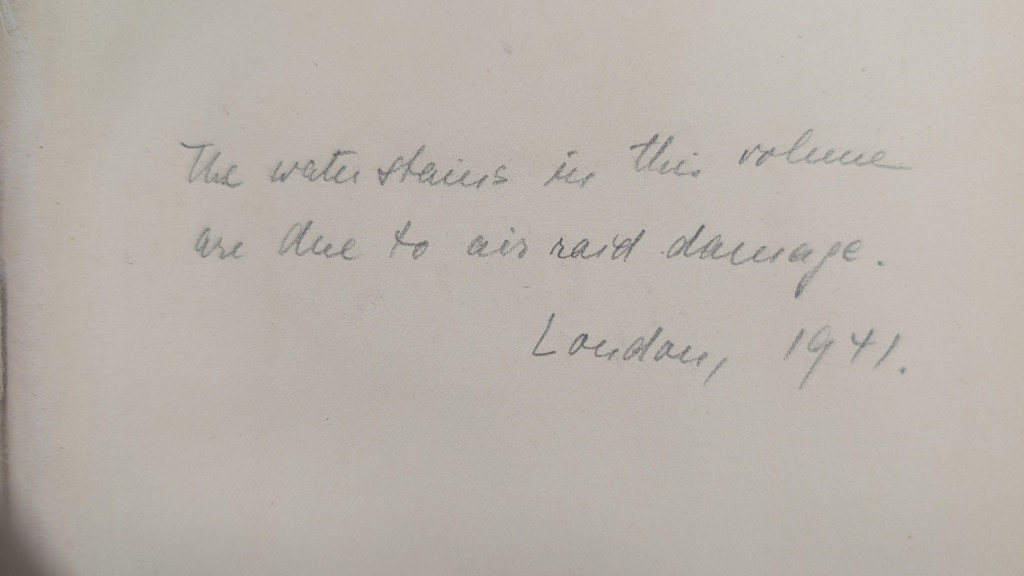
These books were published in 1925 by the Erich Reiss Verlag publishing house. On the fly leaf of both of these volumes is a handwritten inscription which reads “The water stains in this volume are due to air raid damage. London, 1941.” In graphite. What a big journey for two books, from Berlin, Germany, to London, England, and then to Cincinnati, Ohio!
Pictured: inscription in Julius Caesar Volume I.Pictured: inscriptions in Julius Caesar Vol. I and IIPictured above: signs of water damage on the book.
The water damage to the books is there but it isn’t too drastic. There is some obvious staining and cockling to the pages, as well as some warping of the covers. These books were treated with v hinges on the front and back fly leaves to prevent further separation of the cover from the text block and were also put in Colibri covers to help keep them protected on the shelves and during use.
Pictured: both volumes of Julius Caeser being treated with v hinges.
These books needed minimal treatment, and then will return to their home at the Classics library. With some care from the preservation lab, these two volumes can continue to tell their story for years to come.
Nicole Browning — Conservation Technician
The Preservation Lab at UC Blog uses Accessibility Checker to monitor our website's accessibility.