Check it out: www.thepreservationlab.org

Check it out: www.thepreservationlab.org
Last week I worked on a simple evaluation project for housing late nineteenth and early twentieth century publishers bindings. Here are three that I found particularly pleasing (and in good shape).
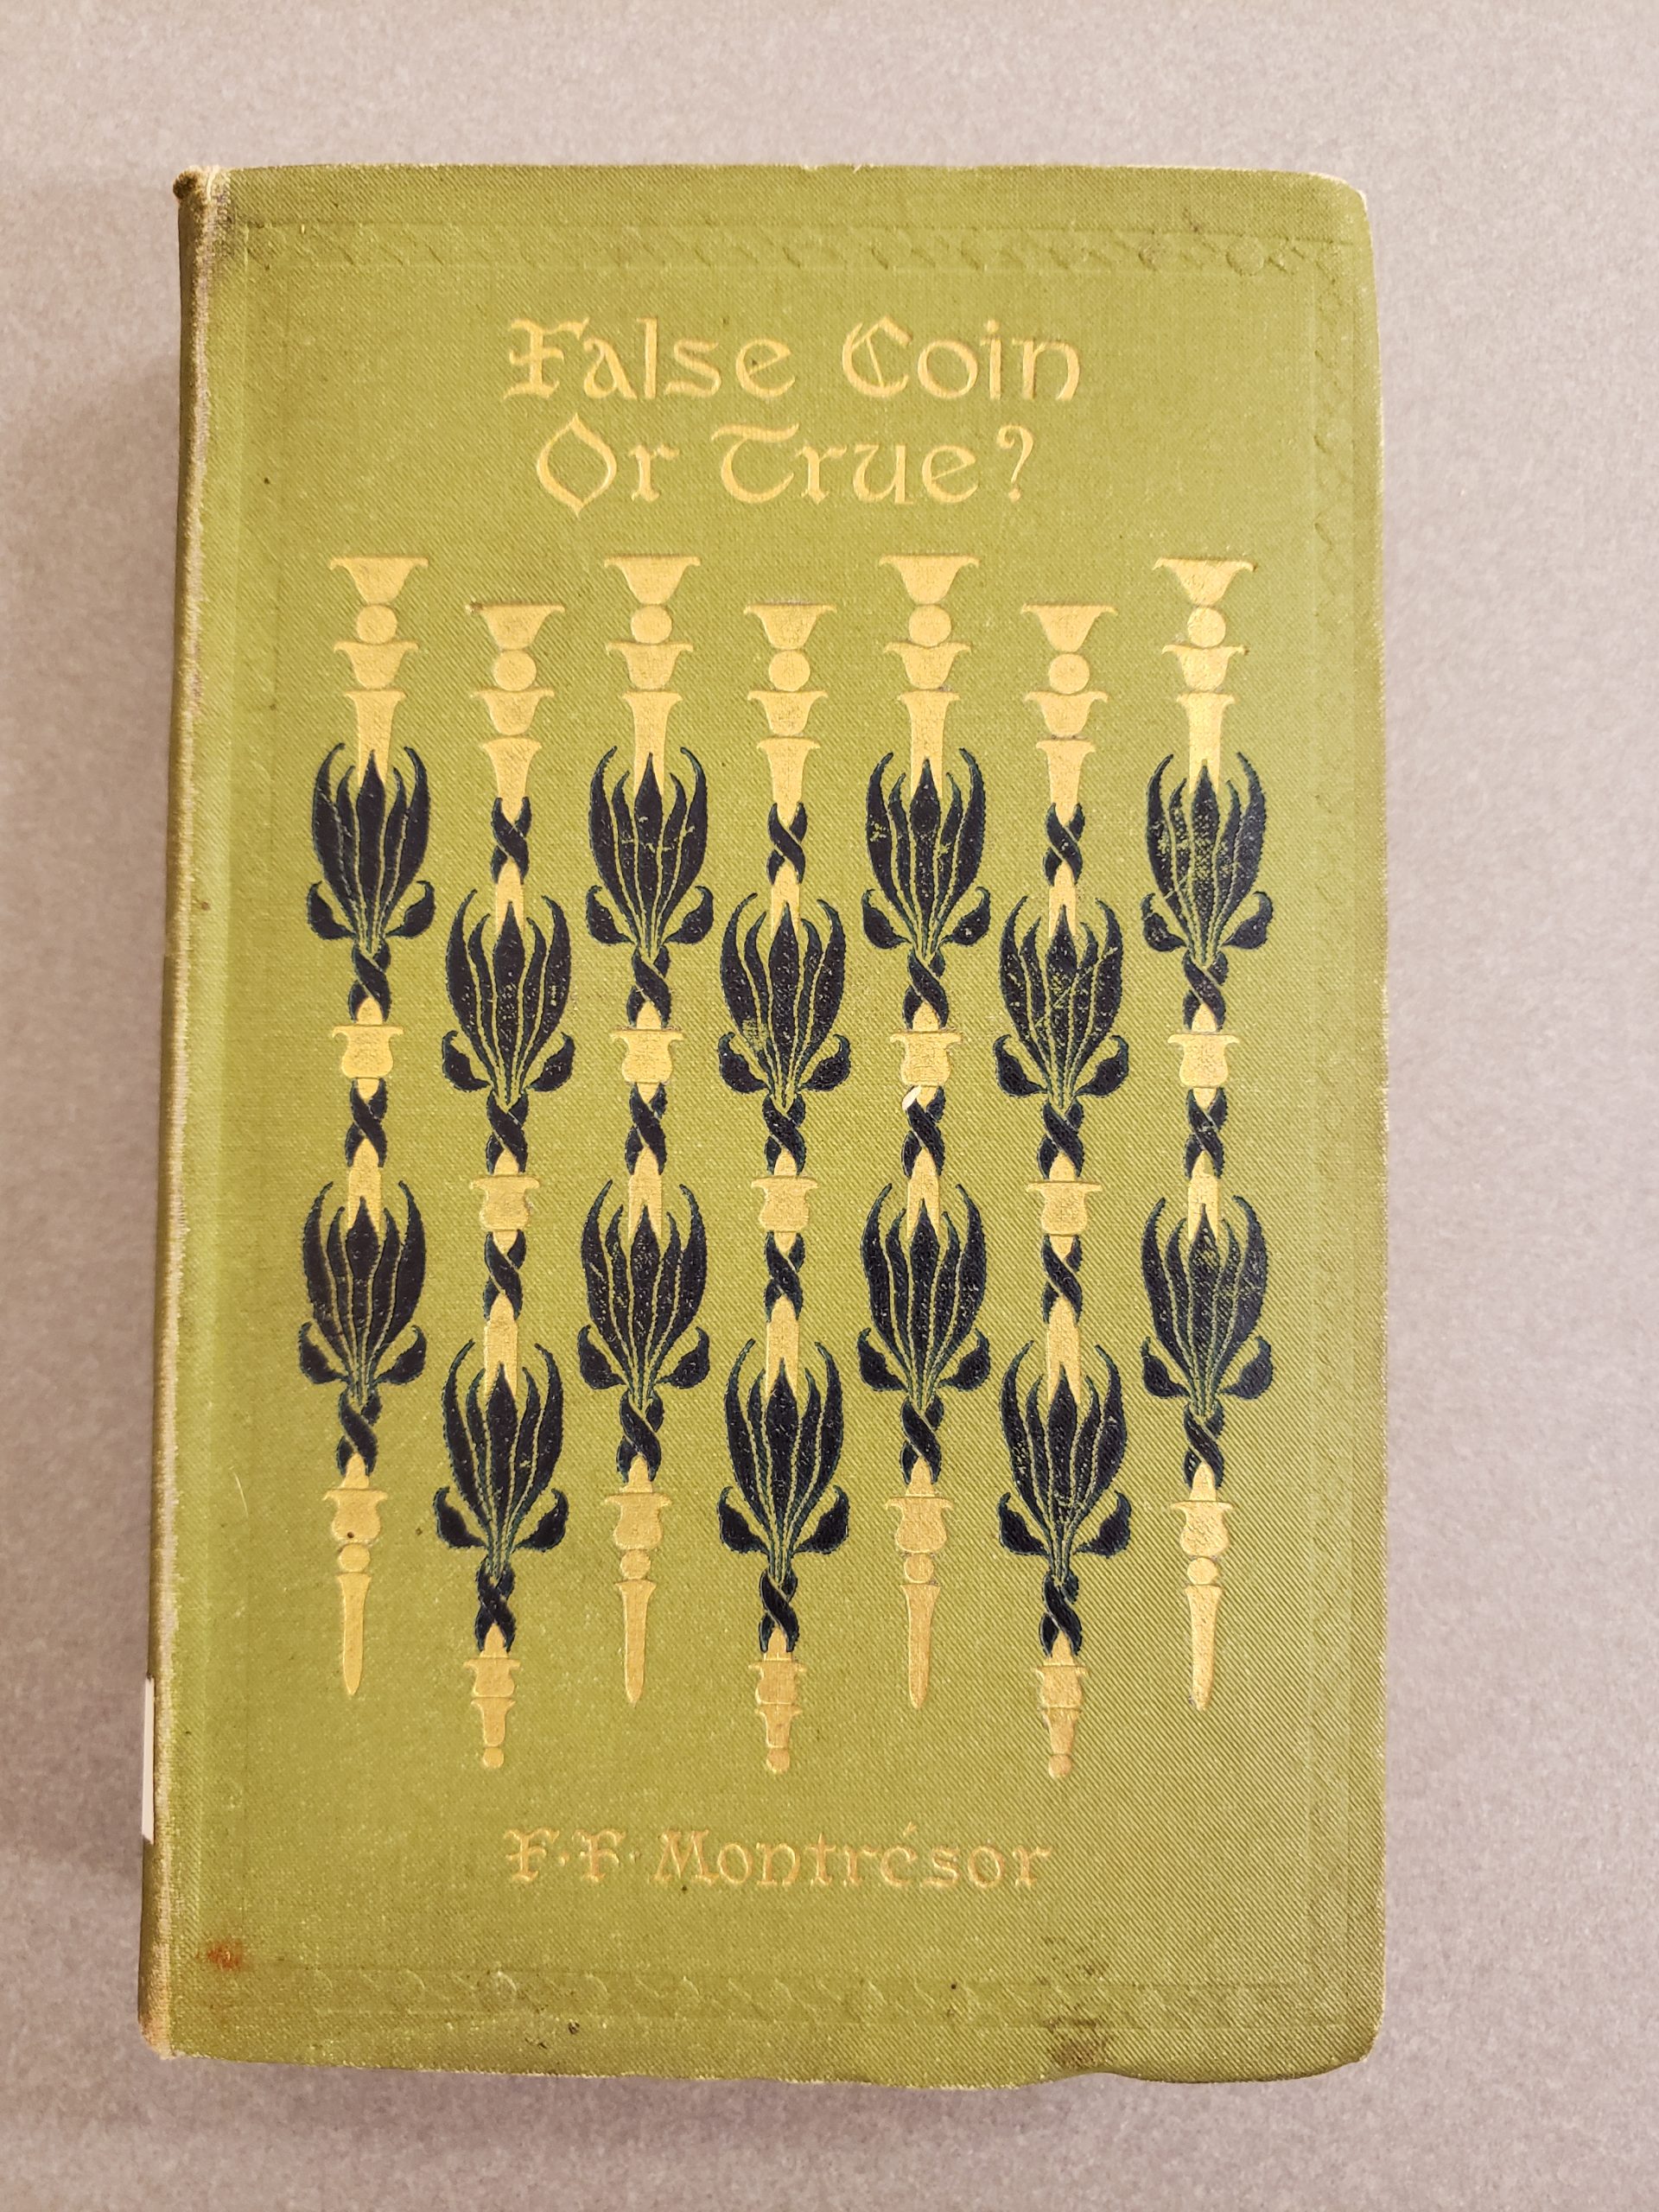
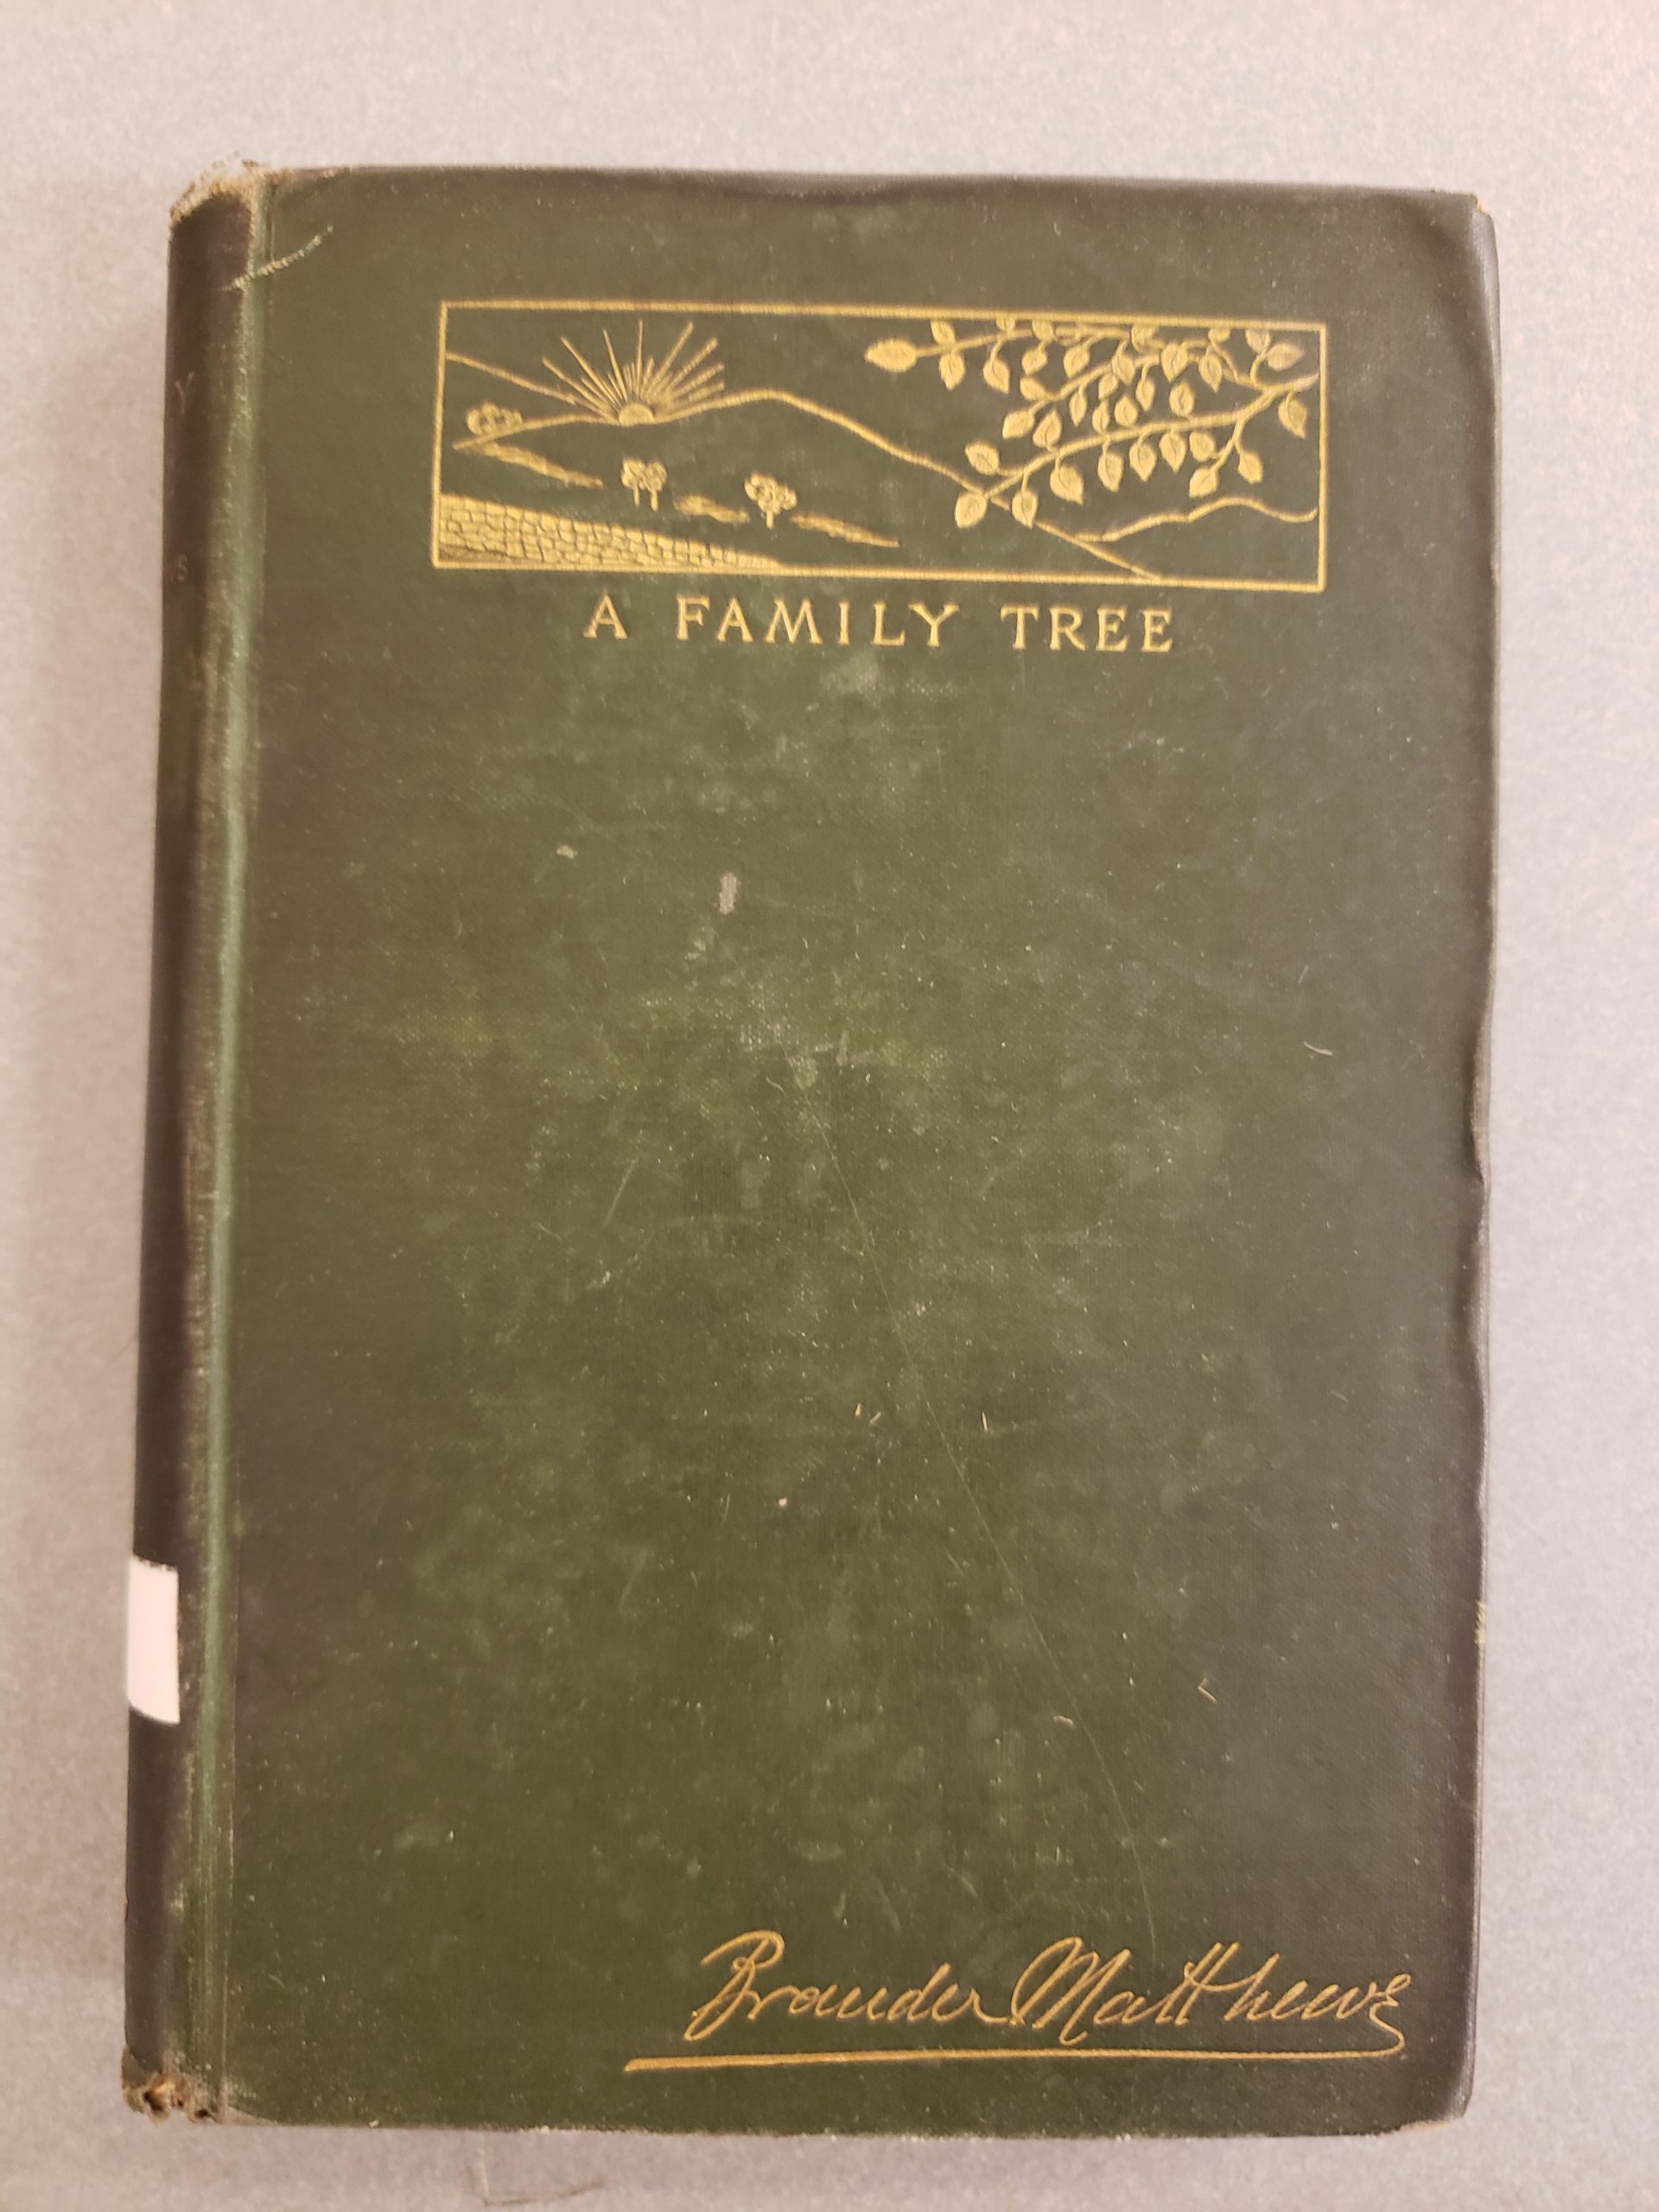
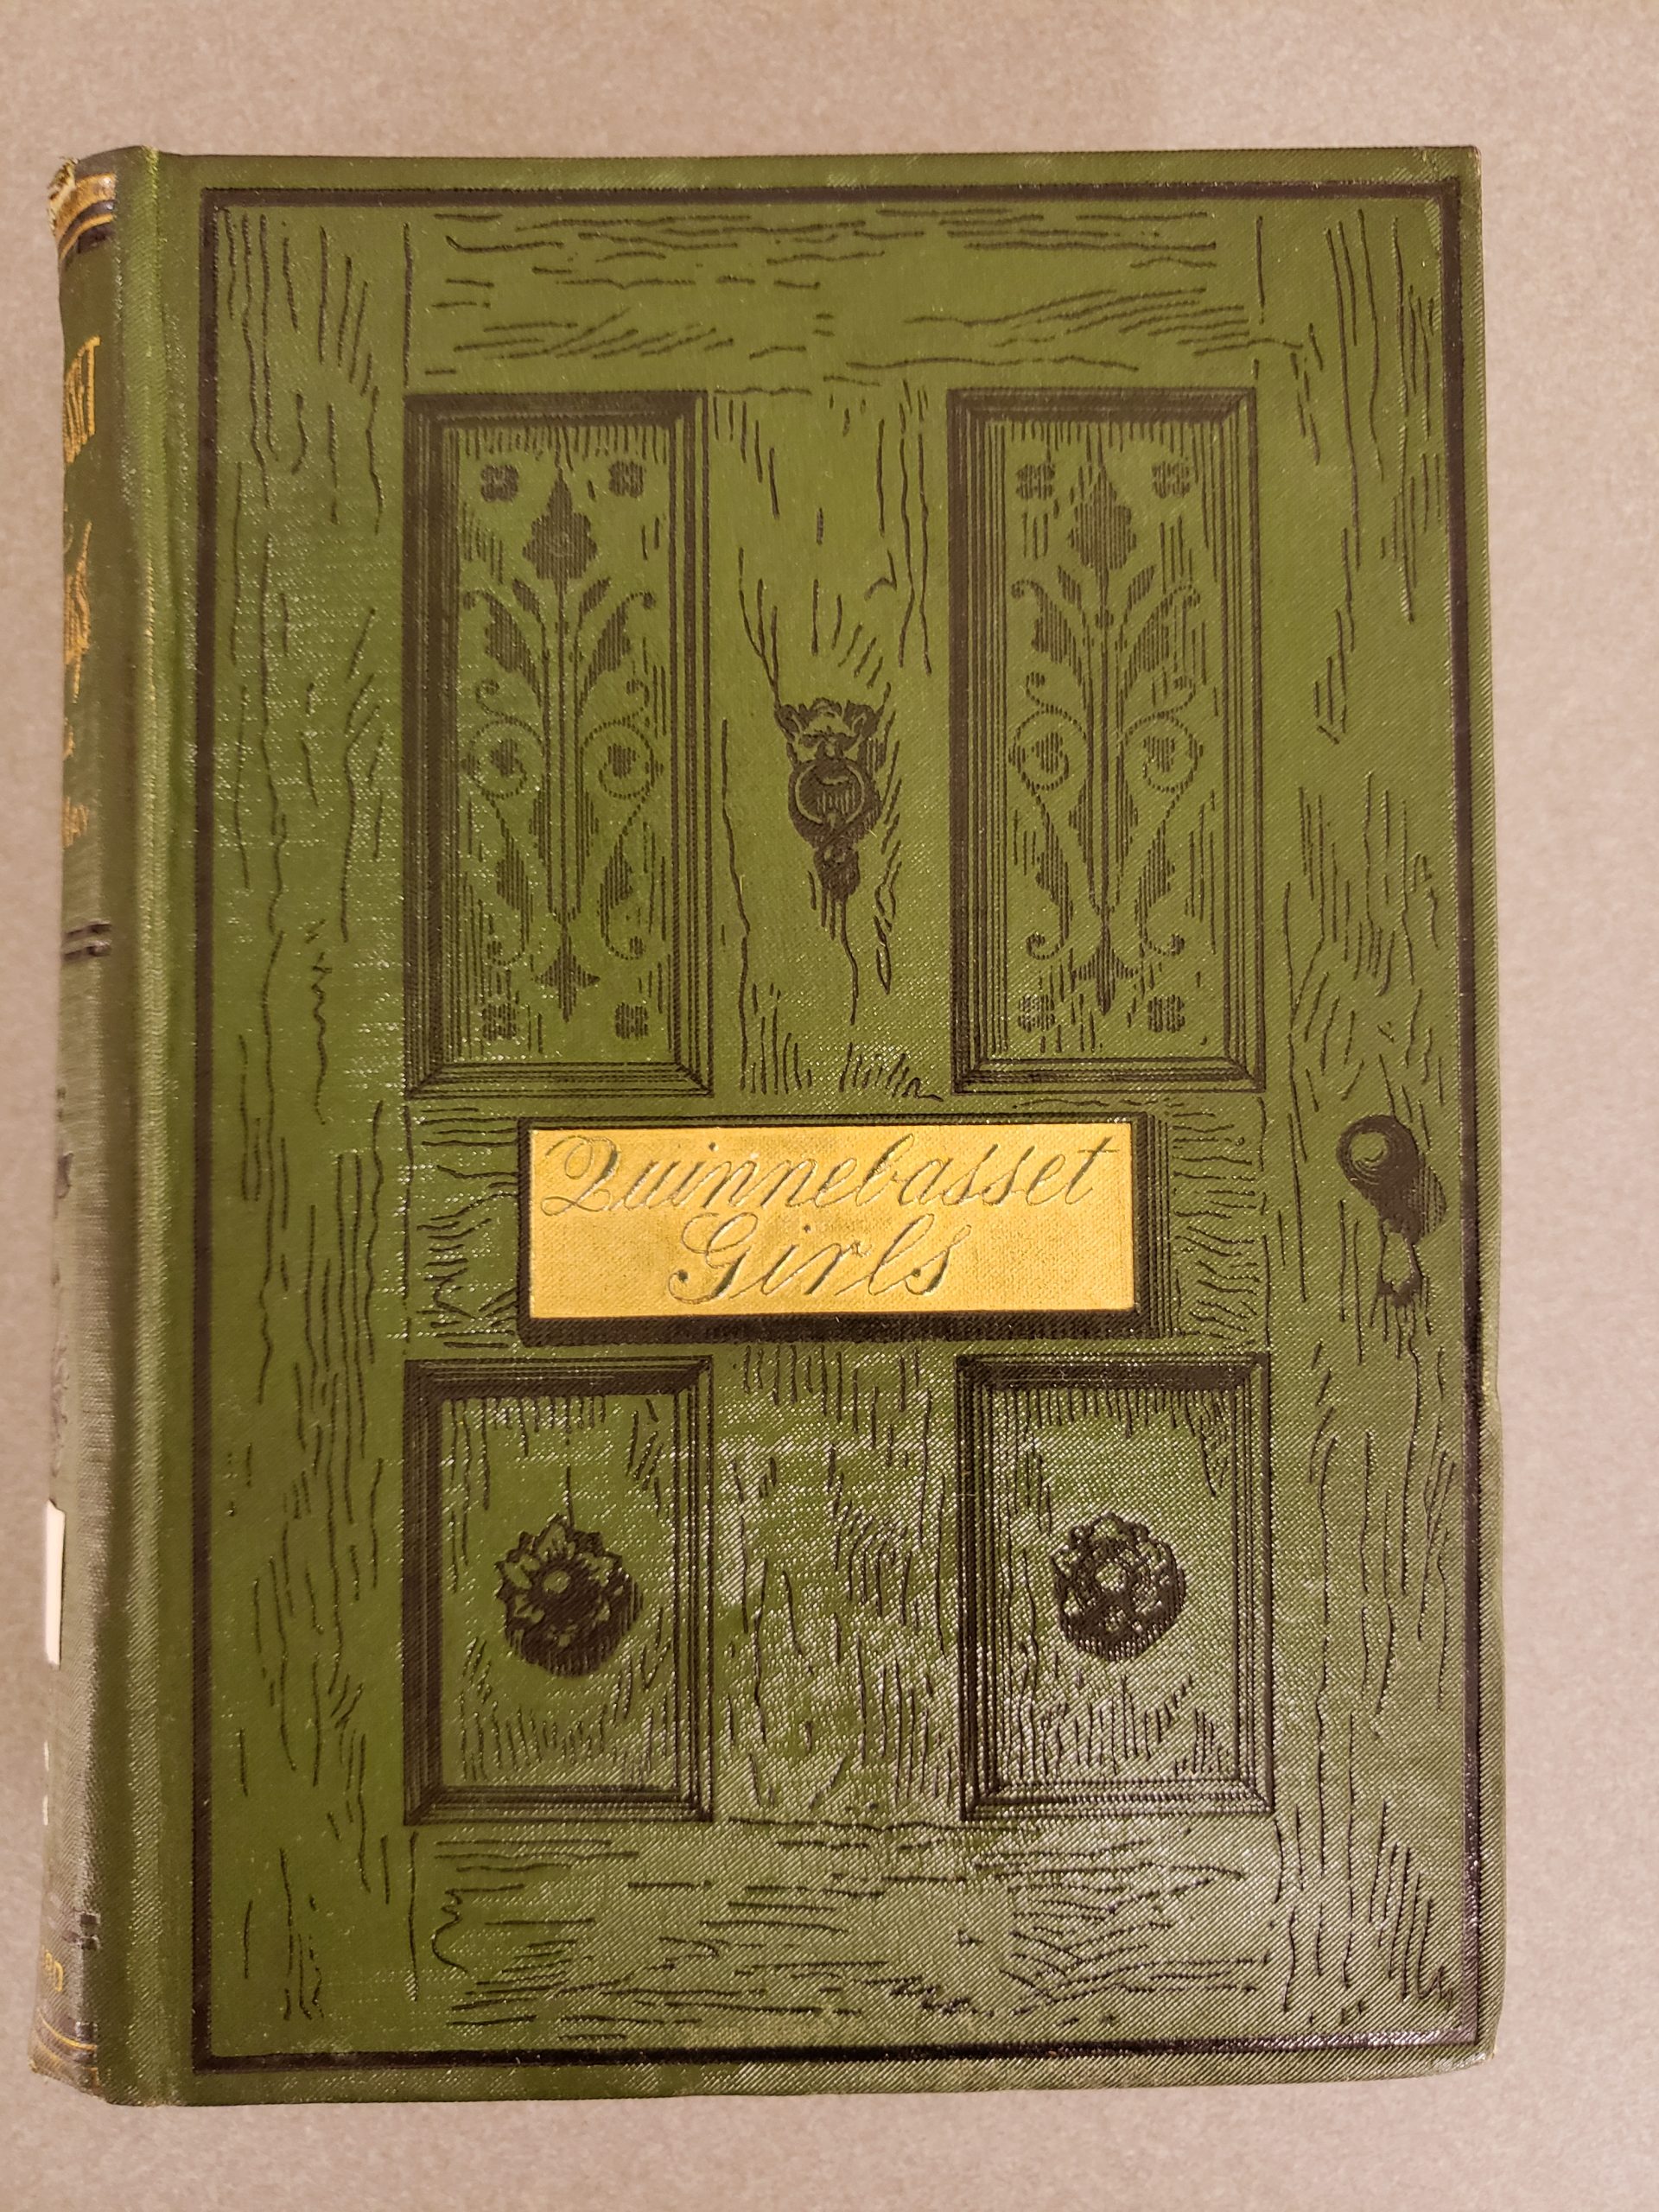
They all have in common different interesting green hues – just in case I washed my hands after handling! Why? Check out this post to find out!
Holly Prochaska (UCL) — Preservation Librarian
Join the Preservation Lab staff on Wednesday, October 20th at 3pm (EST) for an quick Instagram Live event centered around a collection of Japanese bindings that were recently conserved and are now in the process of receiving specialized, custom enclosures. We’ll be talking about the two different types of bindings in the collection, creating Japanese four-sided enclosures, why we make models, and answering any questions you might have!
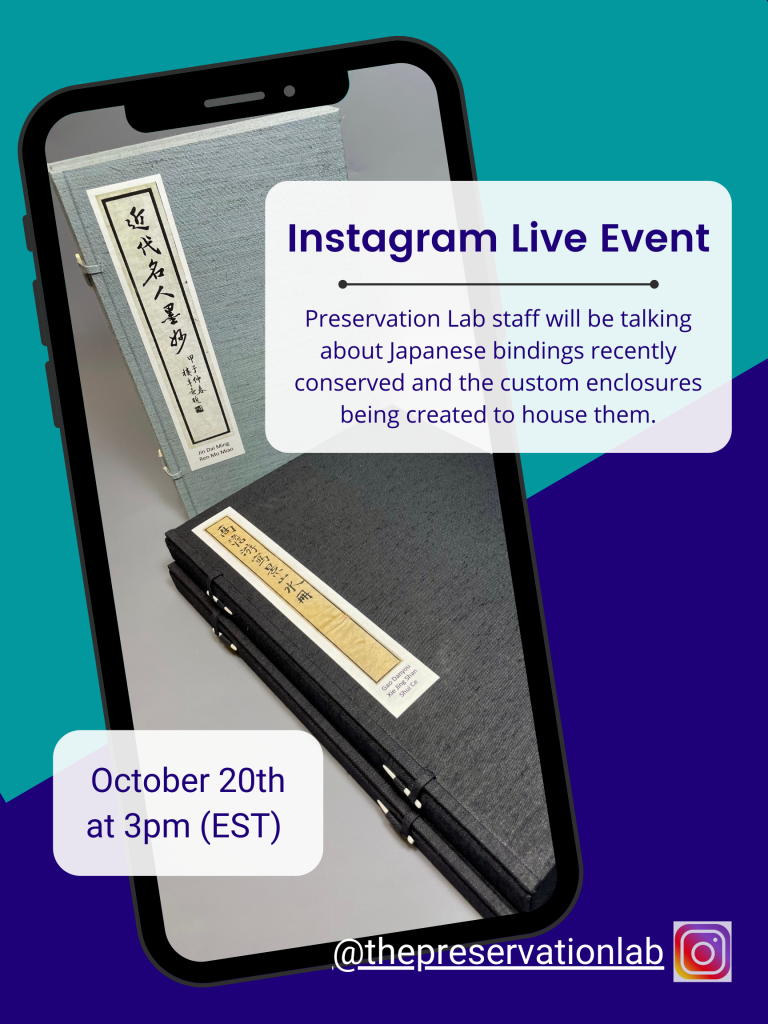
Mark your calendars, or better yet, follow us on Instagram @thepreservationlab for updates, because you won’t want to miss this behind-the-scenes look at what goes on in the Lab. See you then!
You can now view the live event on the Preservation Lab’s IGTV.
Jessica Ebert [UCL] – Sr. Conservation & Photographic Documentation Specialist
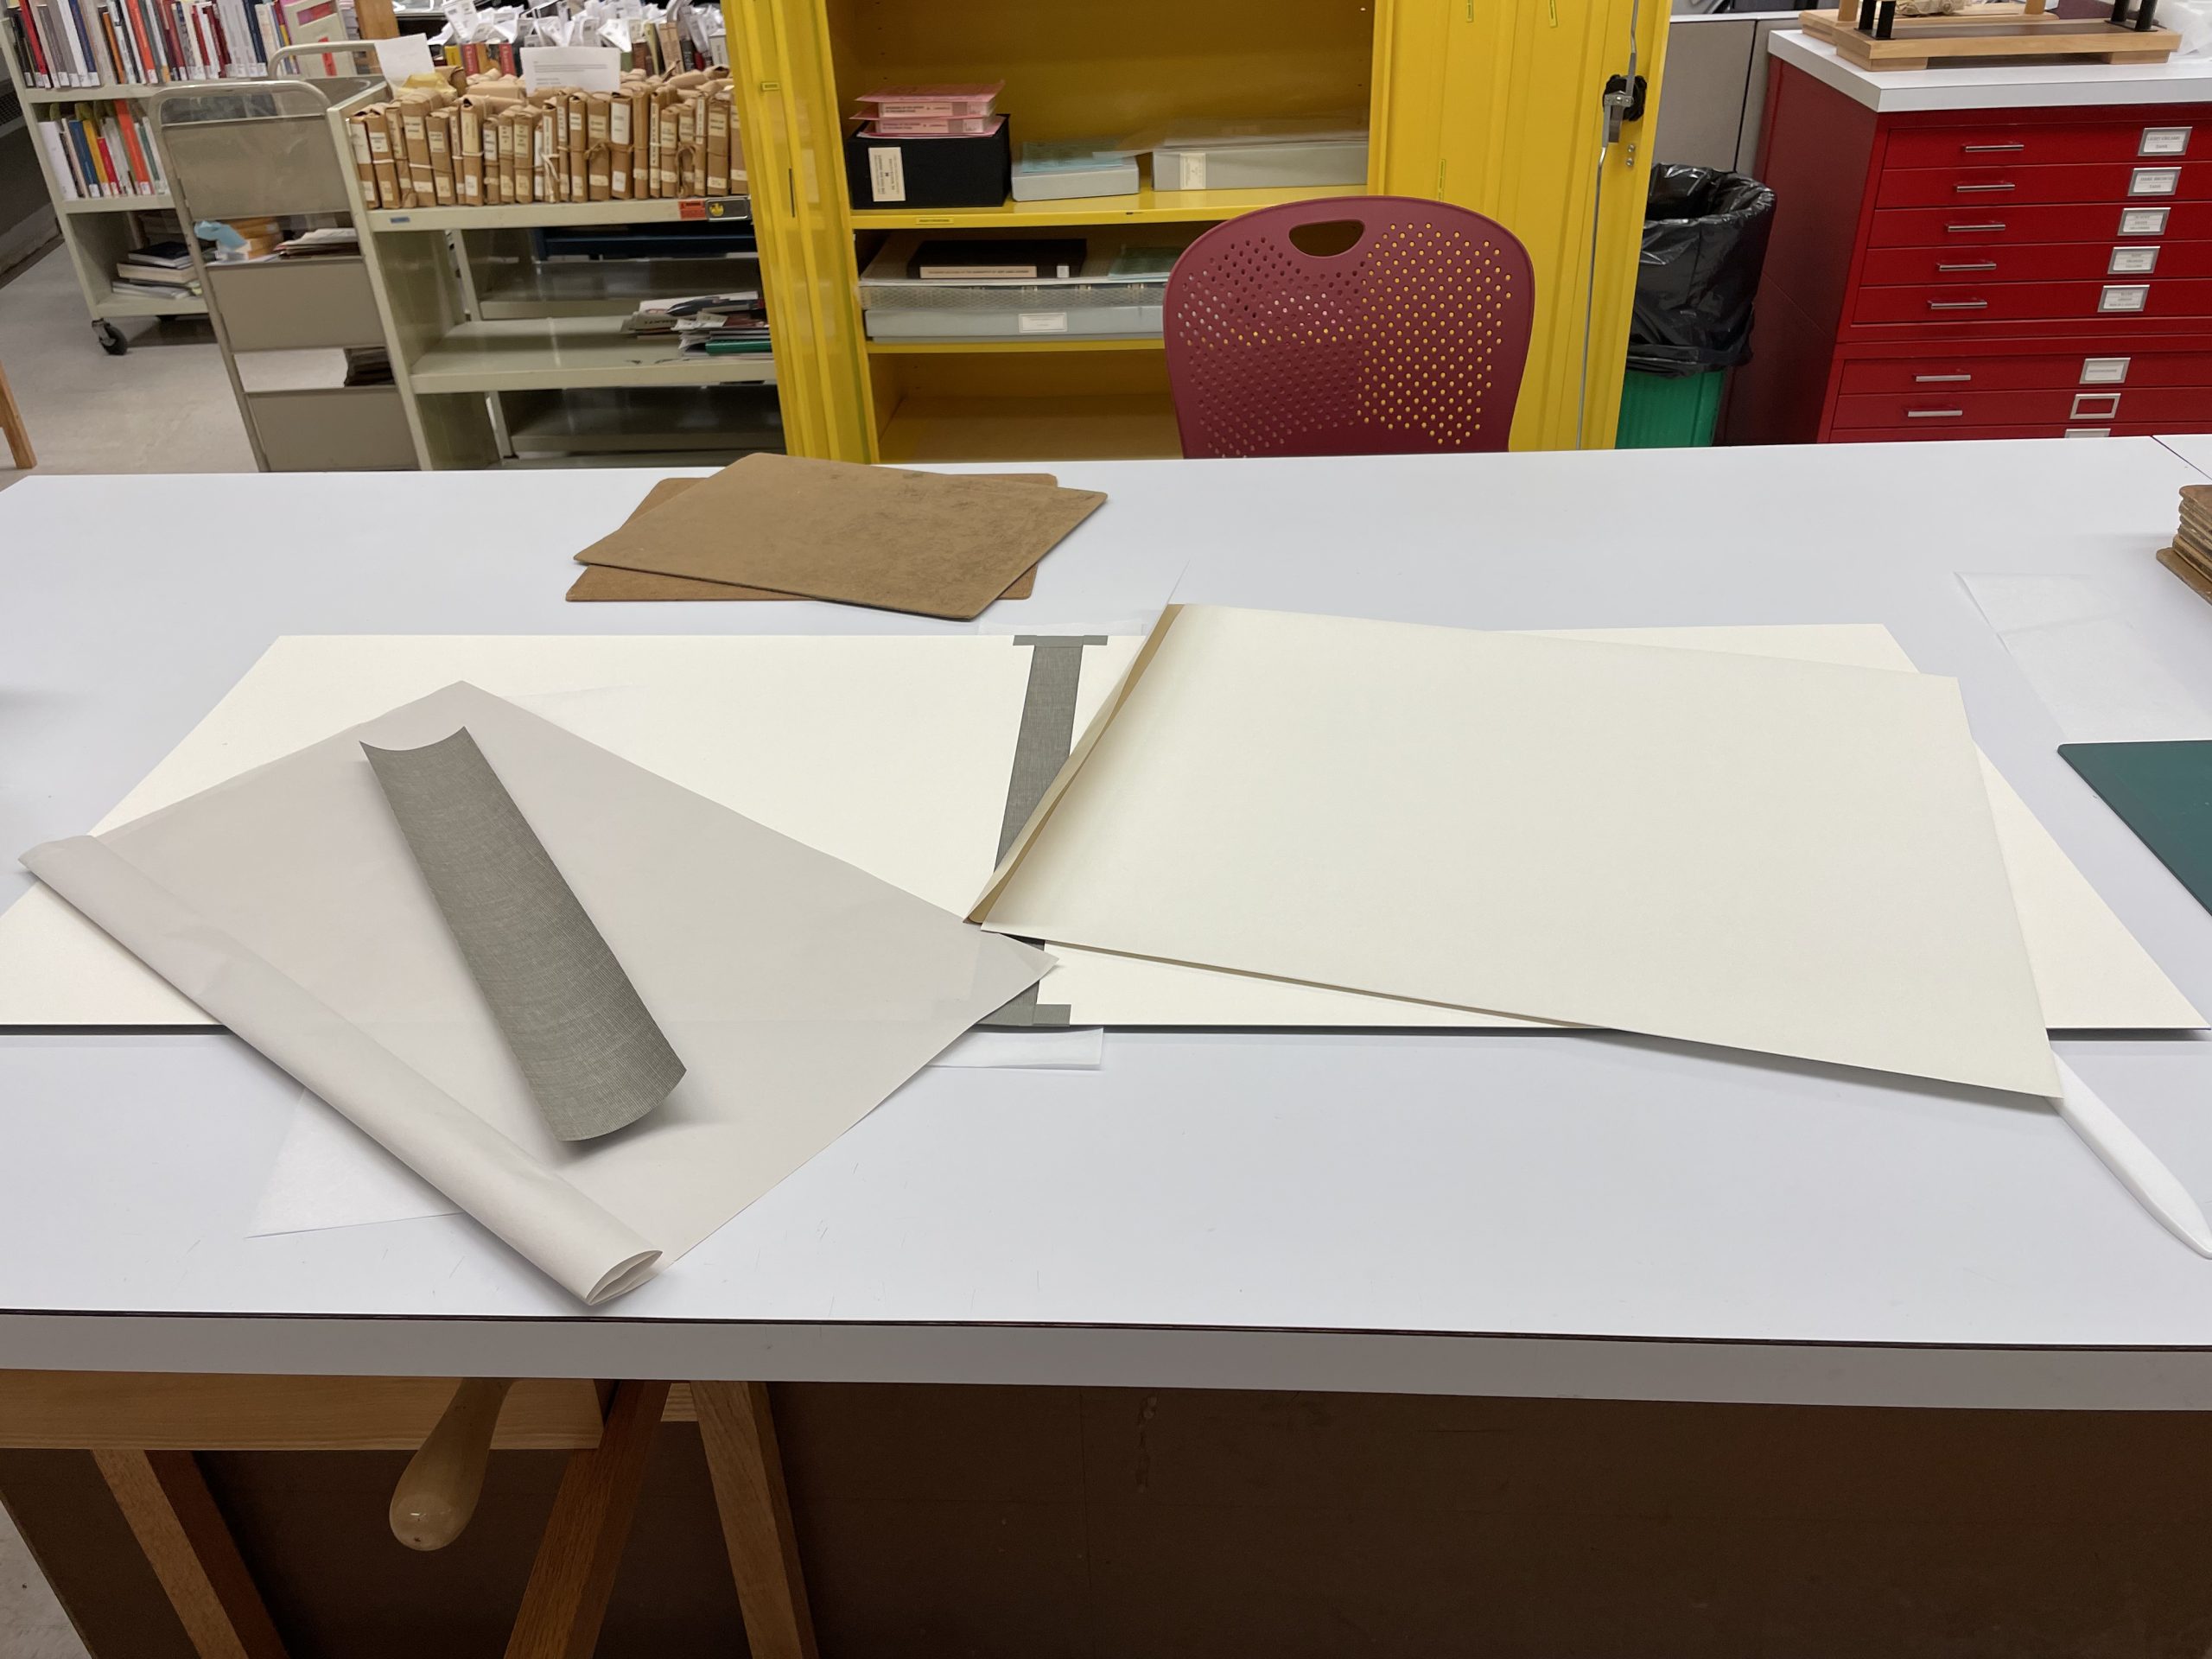
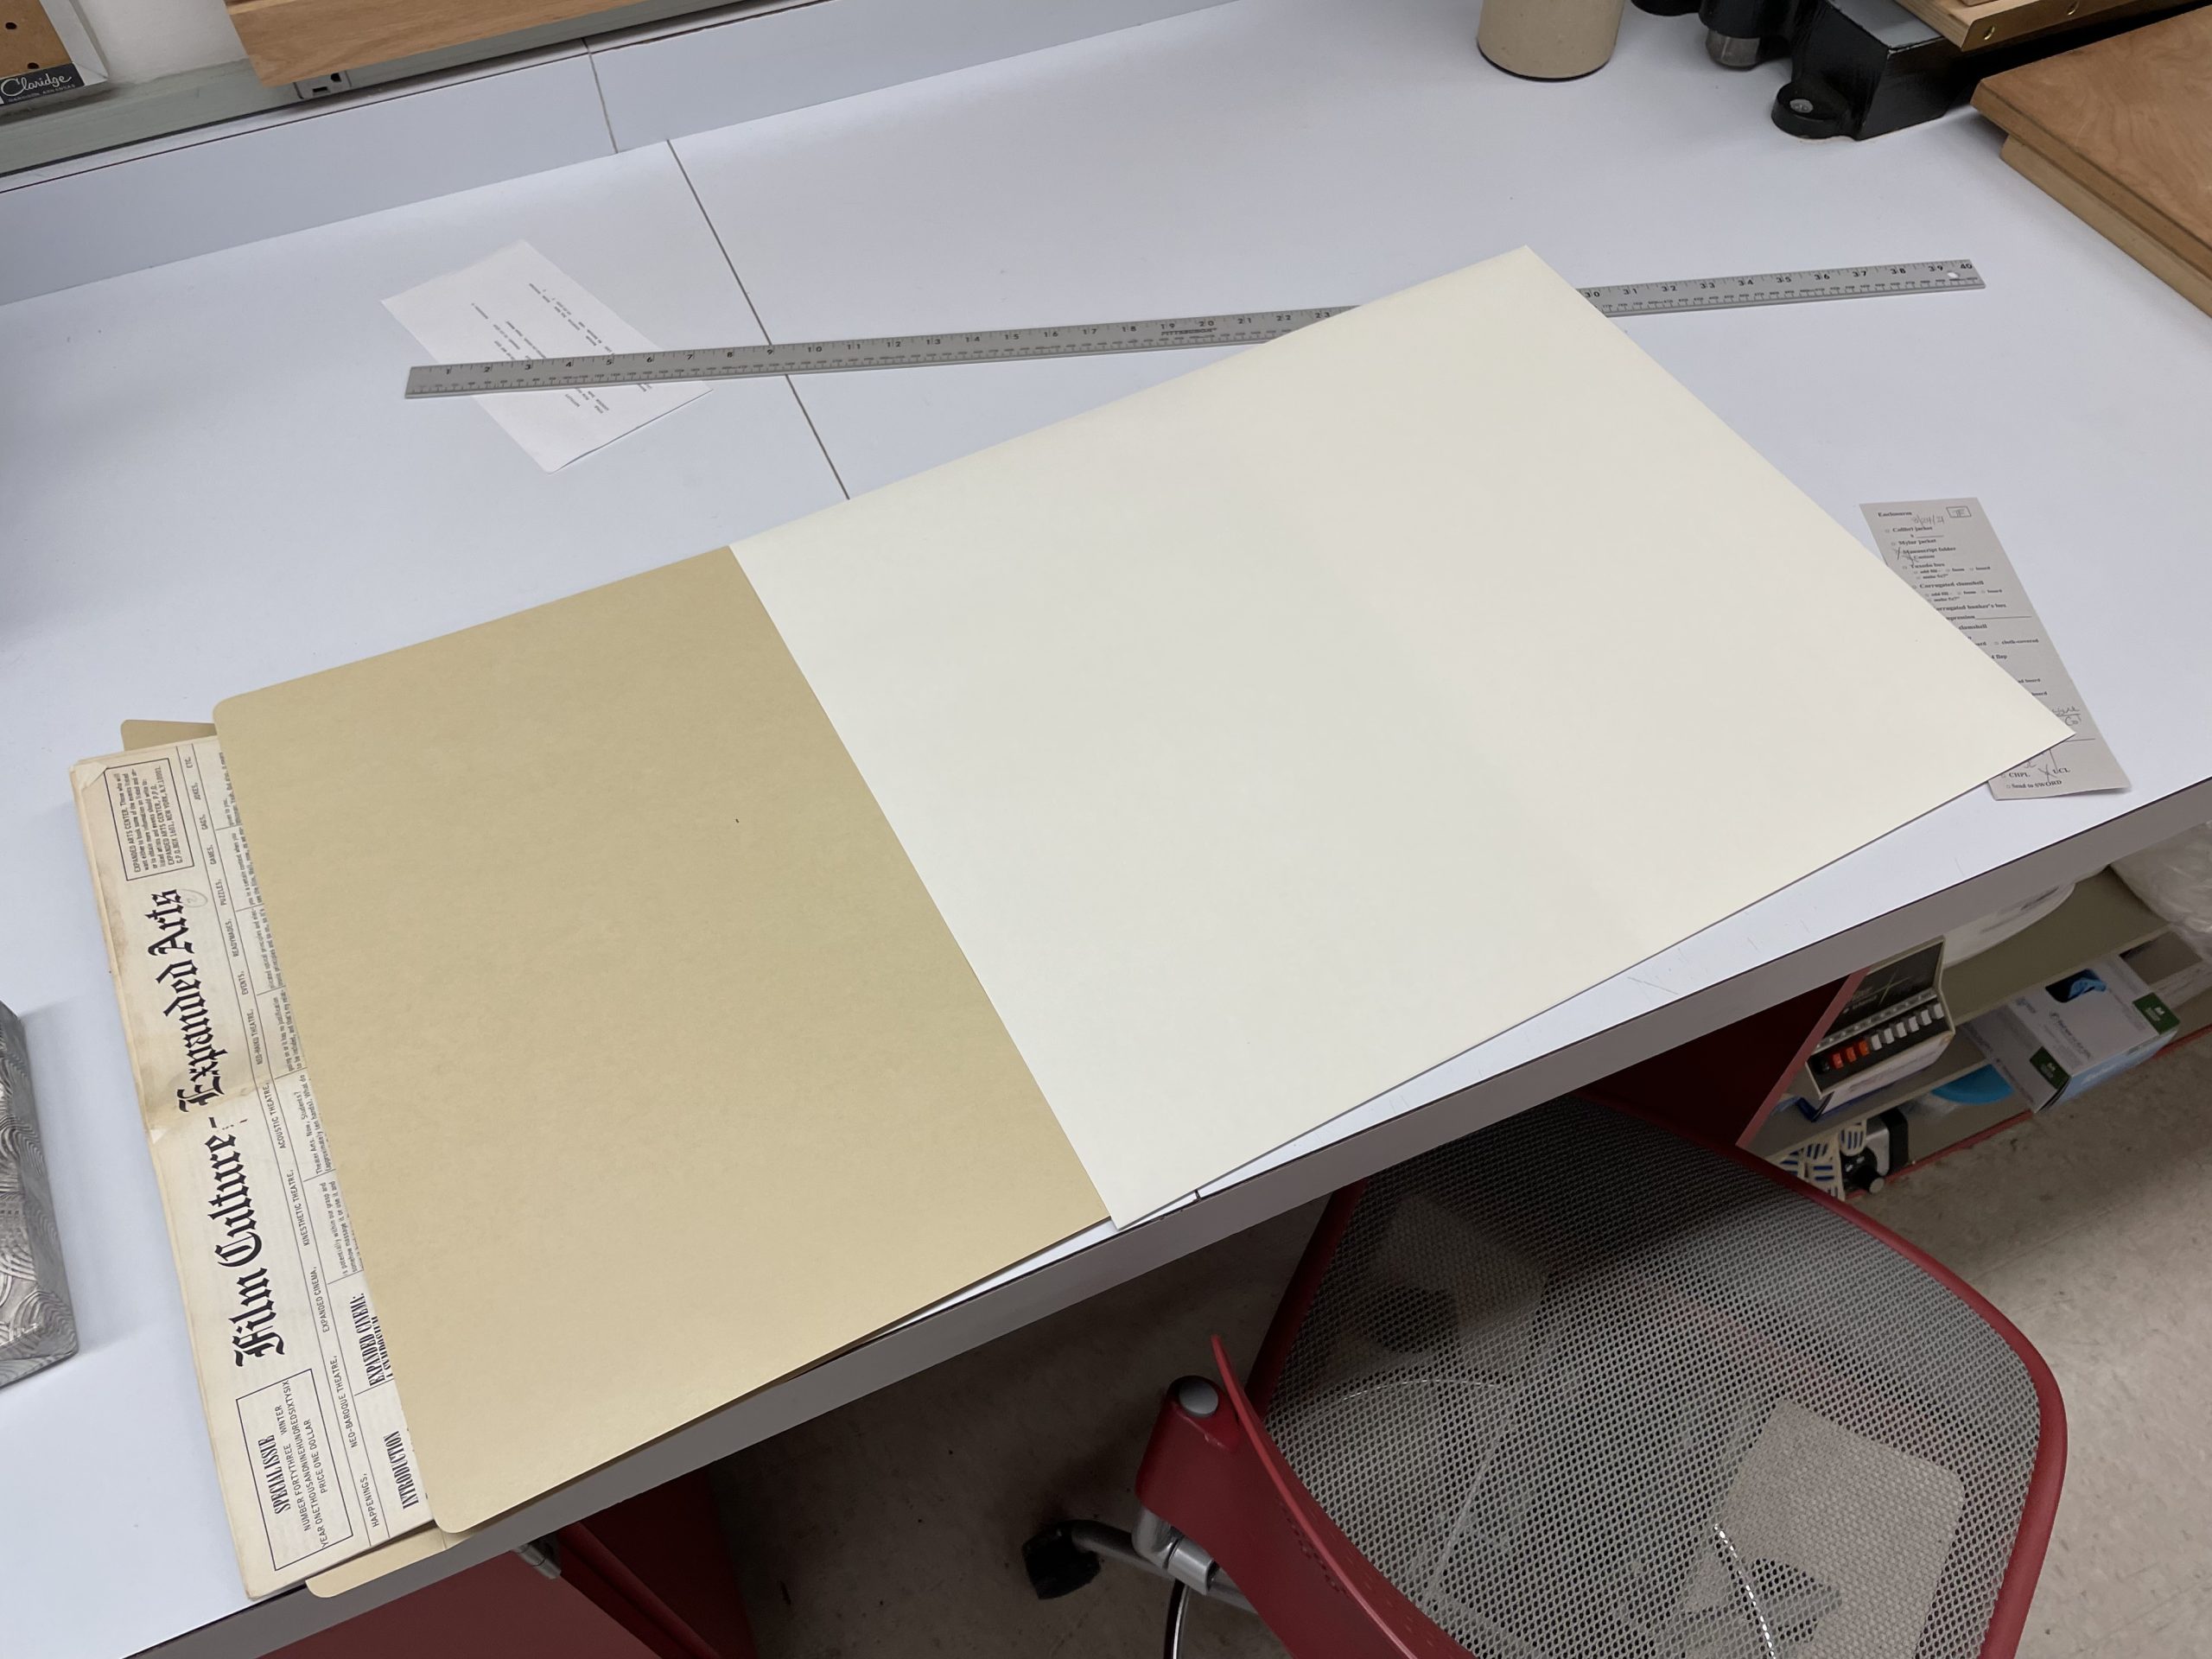
It’s great to be back in the Lab full-time! And it’s great to be learning new things. I’m up to my eyebrows in General Collection treatment training, and I couldn’t be more excited about it. Today: custom pambinders and manuscript folders.
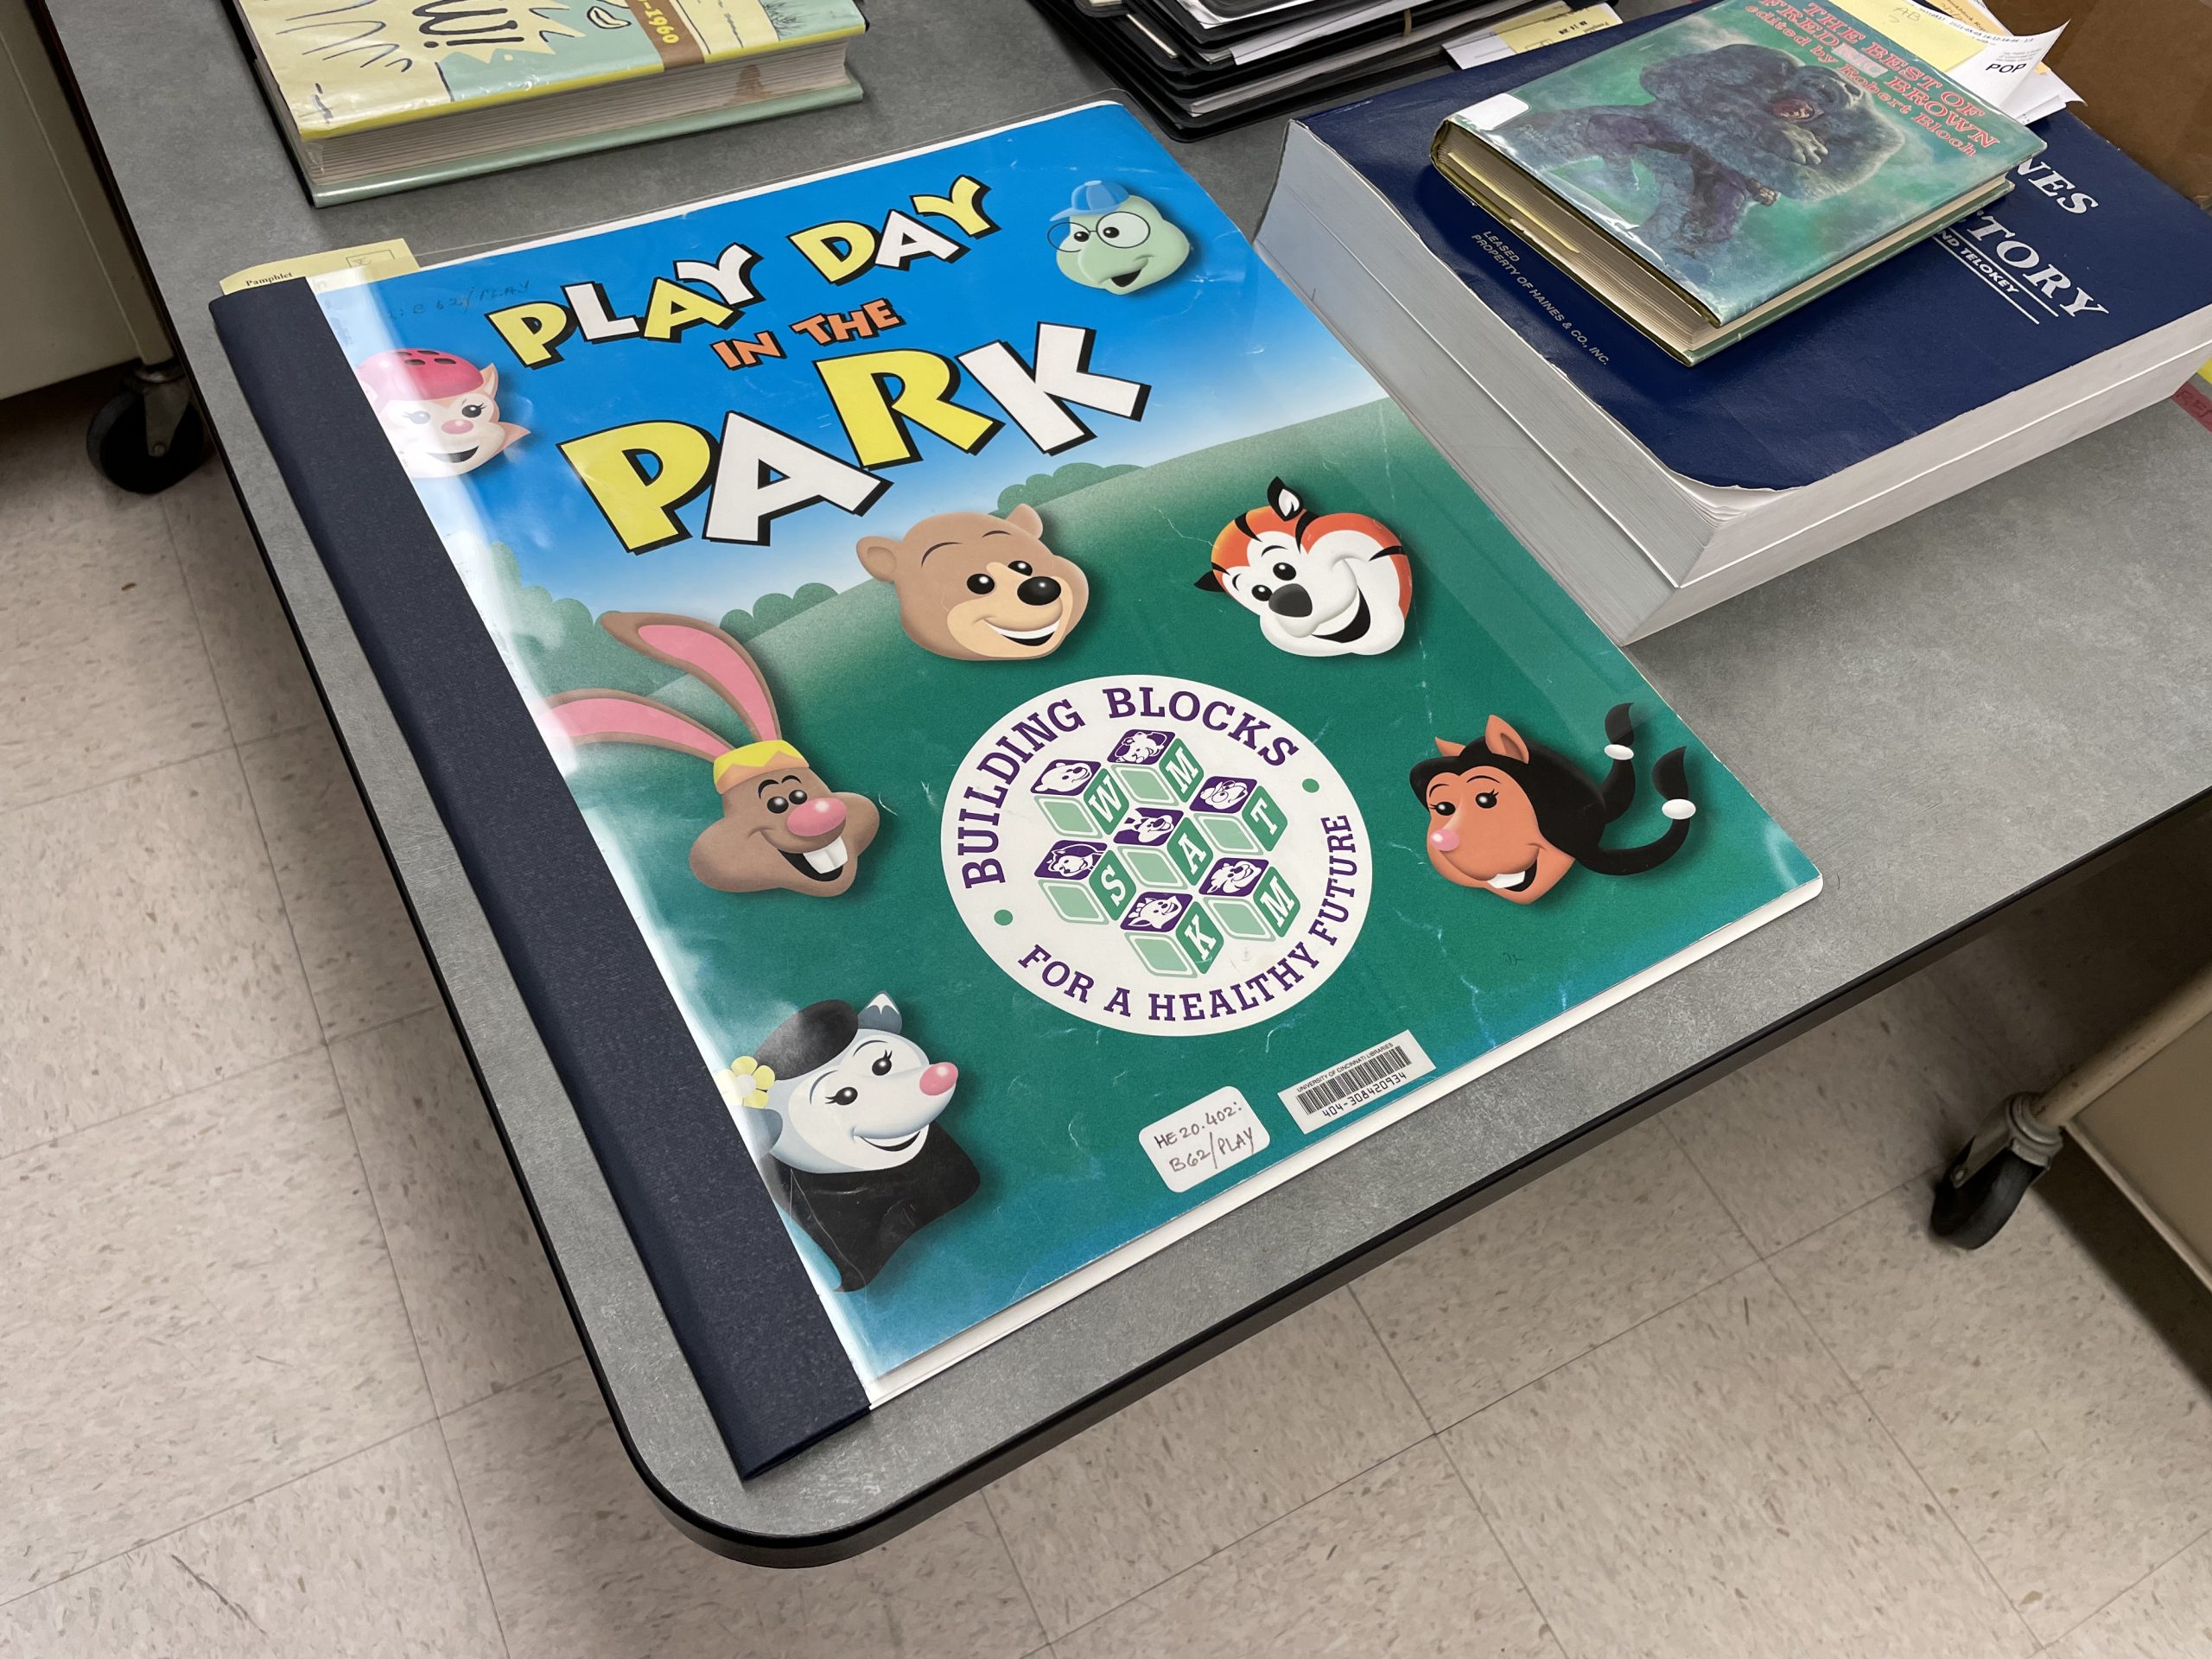
Hyacinth Tucker (UCL) —- Bindery and Conservation Technician
Join Holly and Ashleigh this Thursday at 7pm (EST) for the 3rd lecture in the Cecil Striker Webinar series, Off the Shelf and into the Lab: Medical History, Preservation, & the University of Cincinnati Libraries’ Adopt-A-Book Program.
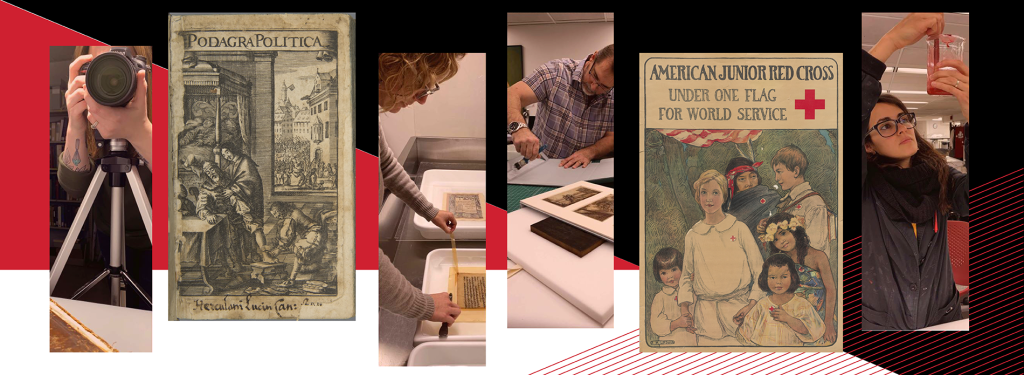
Ashleigh and Holly will talk about the work we do in the Lab and UC Libraries’ Adopt-A-Book program.
Zoom details:
https://ucincinnati.zoom.us/j/93403337138
Meeting ID: 934 0333 7138
More details about the Adopt-A-Book Program and items up for adoption can be found at: https://libapps.libraries.uc.edu/adoptabook/
Jessica Ebert (UCL) – Conservation Tech & Photographic Documentation Specialist
To celebrate national Preservation Week (April 25 – May1, 2021), staff at the Preservation Lab are sharing the following answers to the question below as they reflect upon the wealth of library resources located in the Cincinnati community:
What is your favorite treatment or project that you have worked on in the Lab?

Jessica Ebert:
Learning a new photographic imaging technique, RTI
In April of 2017 I had the amazing opportunity of attending a 4-day workshop at Yale University to learn Reflectance Transformation Imaging (RTI) from the experts at Cultural Heritage Imaging. It was one of the most exciting experiences of my career, and when I came back to the Lab to show the staff what I had learned, Aller Bucher Und Schrifften volume from Martin Luther was one of the first items we captured with RTI. I remember that moment when Catarina and I completed the capture and processed the images – we were just in awe of everything we could see with RTI that we couldn’t under normal illumination. Since then, we’ve made changes to our equipment and our workflow, so now the results are even better than they were back then…but this will always be my favorite.
Catarina Figueirinhas:
Treatment of Diseases of the Sexual Organs, Male and Female from the Winkler Center
Of all the projects I have worked on at the Preservation Lab, this item is by far one of my ultimate favorite treatments I was able to perform. This book was brought to the Preservation Lab in poor condition. The book had no binding, the text block was split in multiple areas, the sewing was broken, and several pages of the text block where either torn or had extensive loss. In addition, most of the text block showed signs of water damage. Since this book was in such poor condition and the curator of the collection wanted the book to be handled by scholars and the public, it was necessary to do a full conservation treatment.
I was thrilled when I got assigned to this book treatment. I love to work on any book, but the more complicated or involved treatments the better and this was definitely the case. In this treatment, I was able to repair the text block, reduce some of the tideline staining, fill losses and resew the entire text block, while also creating a new binding (called a split board binding) that is strong and flexible to allow such a heavy book to be read.
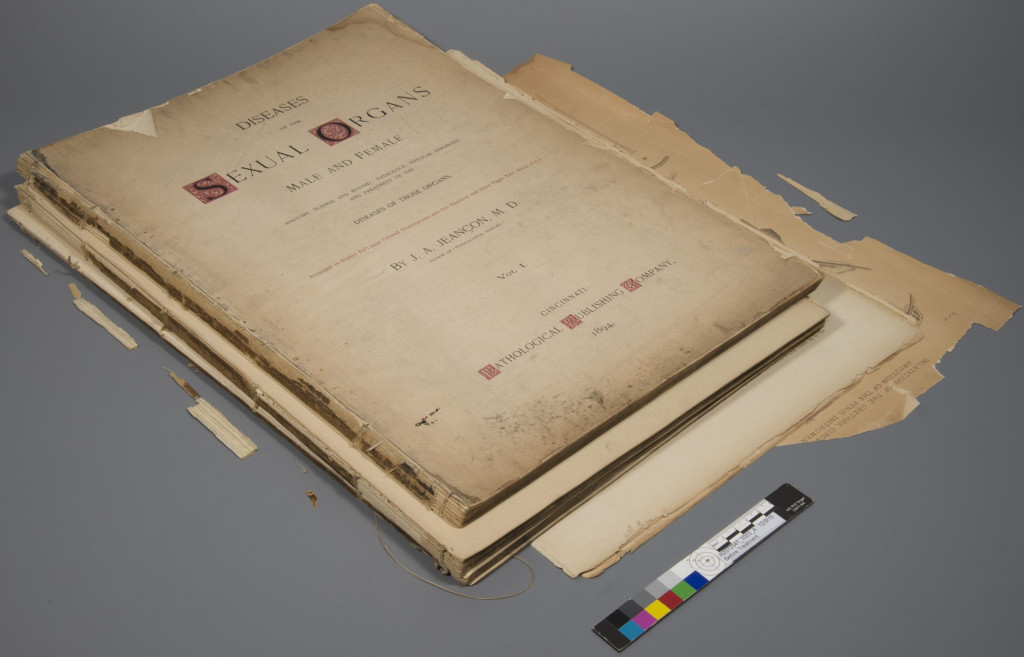
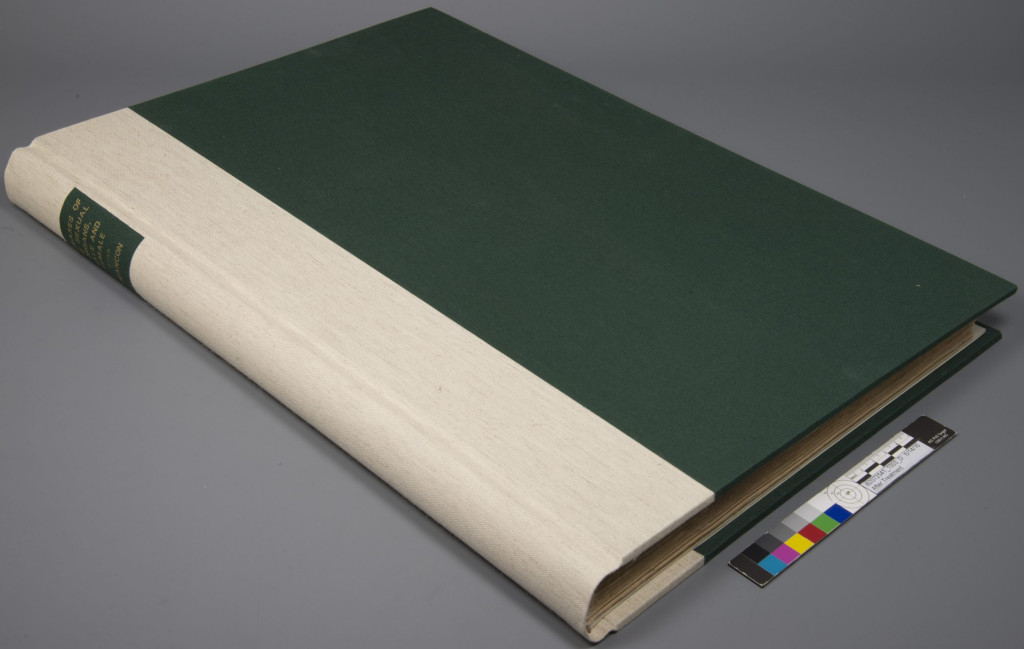
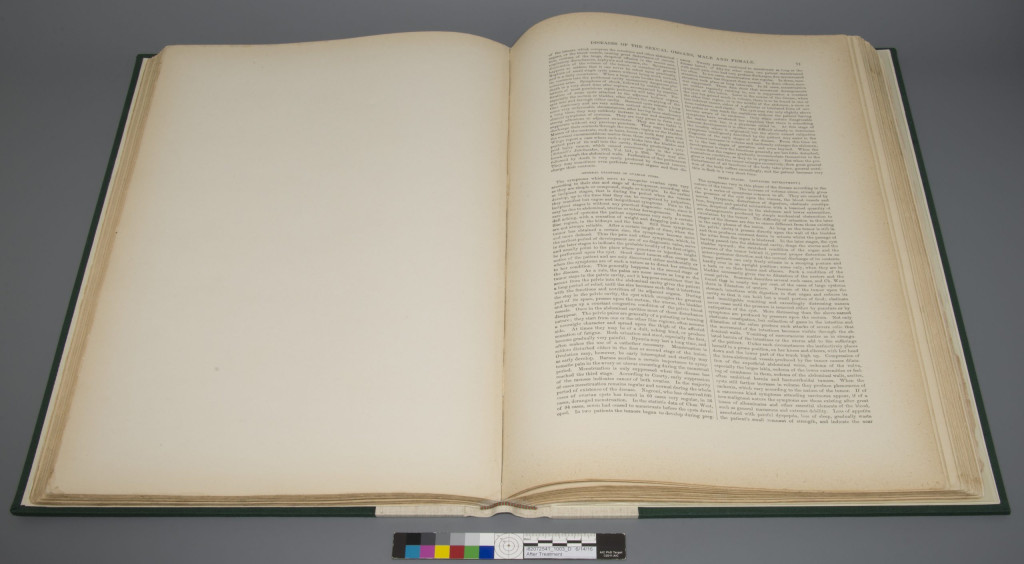
This treatment took a long time to complete, and to this day it is still one of the projects that I have enjoyed the most. Click here to see the complete treatment report and all the photographic documentation. To learn more about conservation split board bindings, check out the Preservation Lab blog post by Kasie and Jessica.

Kasie Janssen:
Iron gall ink treatment of the CHPL Jones Account Book
Washing and rebinding treatments are always a favorite when they come across my bench, as they allow a highly damaged item to become usable and accessible once again. An account book of Jones and Rammelsberg offered one such treatment as it came to the lab with a myriad of issues: a damaged book block without a binding, corroding iron gall ink, previous mold damage, and a shocking amount of pest evidence. The treatment is incredibly memorable because to tackle the issues of aging iron gall ink I was able wash the pages of the book block using a calcium phytate bath to stabilize the manuscript. Once the washing was complete, I was able to resew and rebind the book block, making it whole, functional, and protected once again. It is rare and special to have done such an involved treatment, but in this case the in-depth steps allowed previous damage to be treated and helped remedy the inherent vice of aging materials.
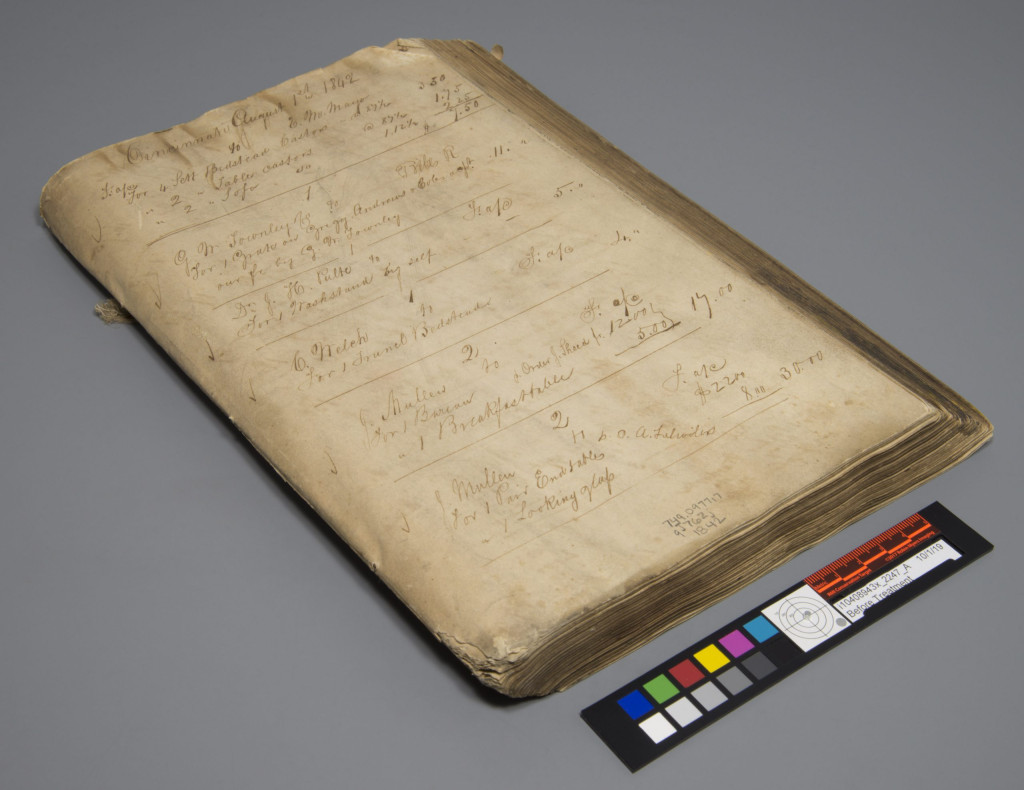
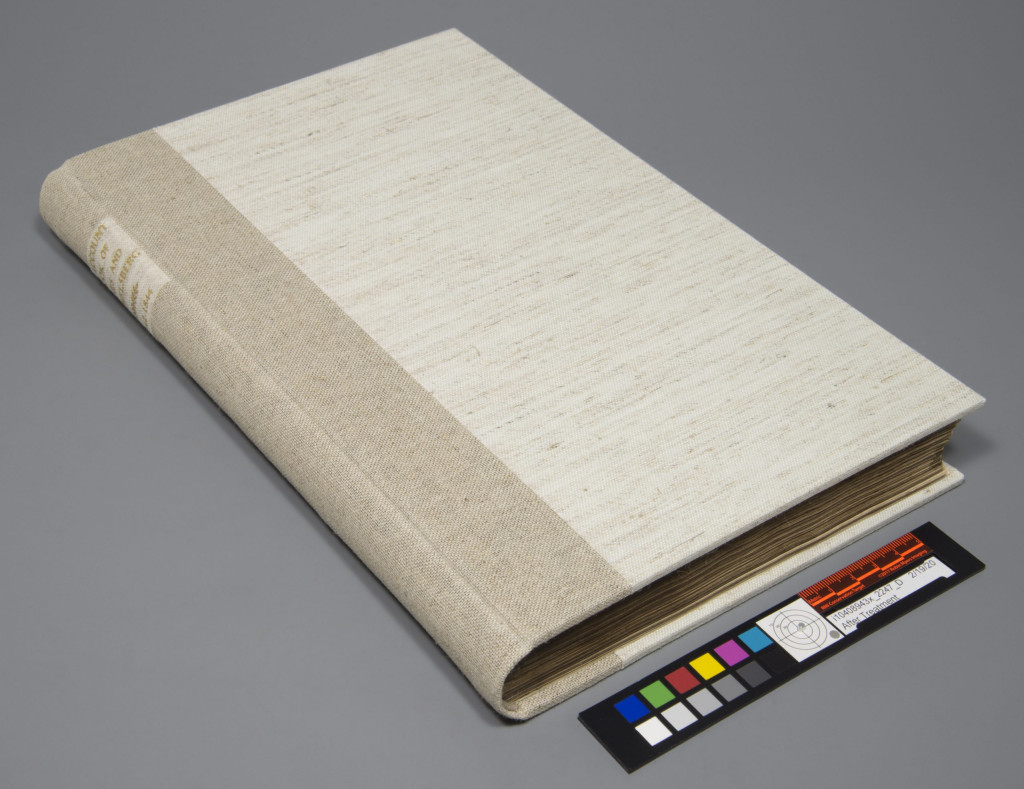
Curious about what some of this process looks like? Check out our Preservation Lab Instagram, @thepreservationlab, and see our Phytate Treatment Stories!

Holly Prochaska:
Creating the Italian ledger binding for our teaching model collection
The lab creates a lot of models. Many of these models are made in preparation for treatments. However, some models are created with instruction or engagement in mind. These models, such as the Italian stationery binding (laminated archival bind) I created, help illustrate the history of the book as its form and manufacturing process change over time. Check out the model at the blog entry where you can see a video of the binding being handled. Follow the instructions on the blog make you very own, and in the future, come see it for yourself when our in-person open houses resume in the future.


Ashleigh Ferguson Schieszer:
Treatment of a Haggadah owned by Hebrew Union College
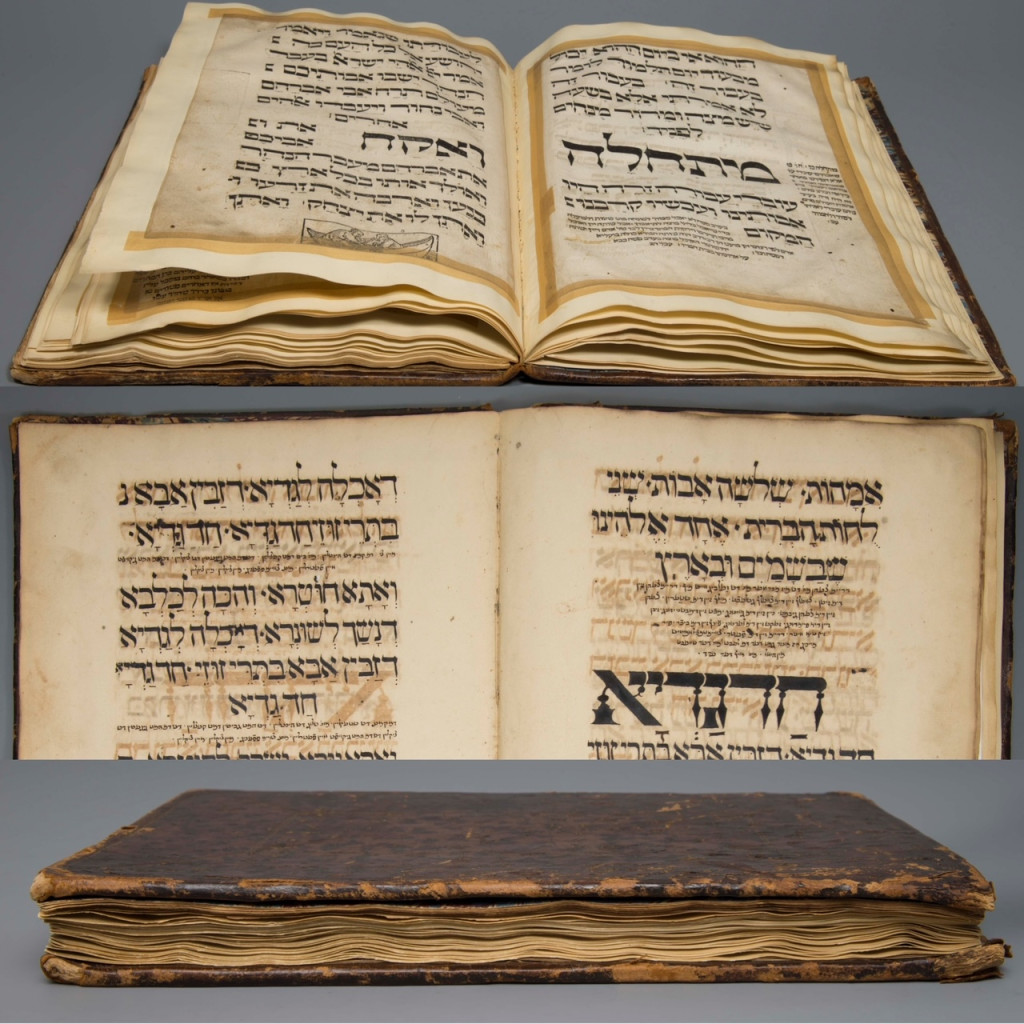
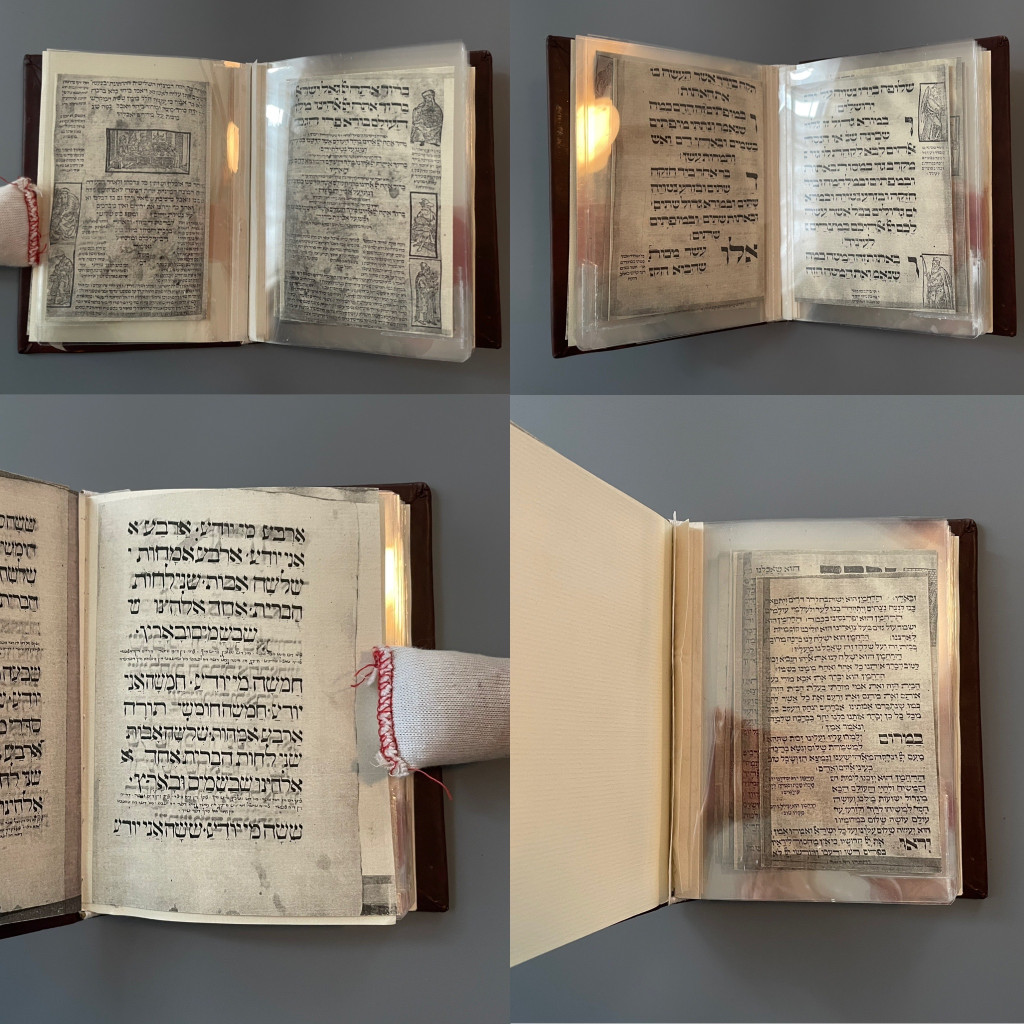
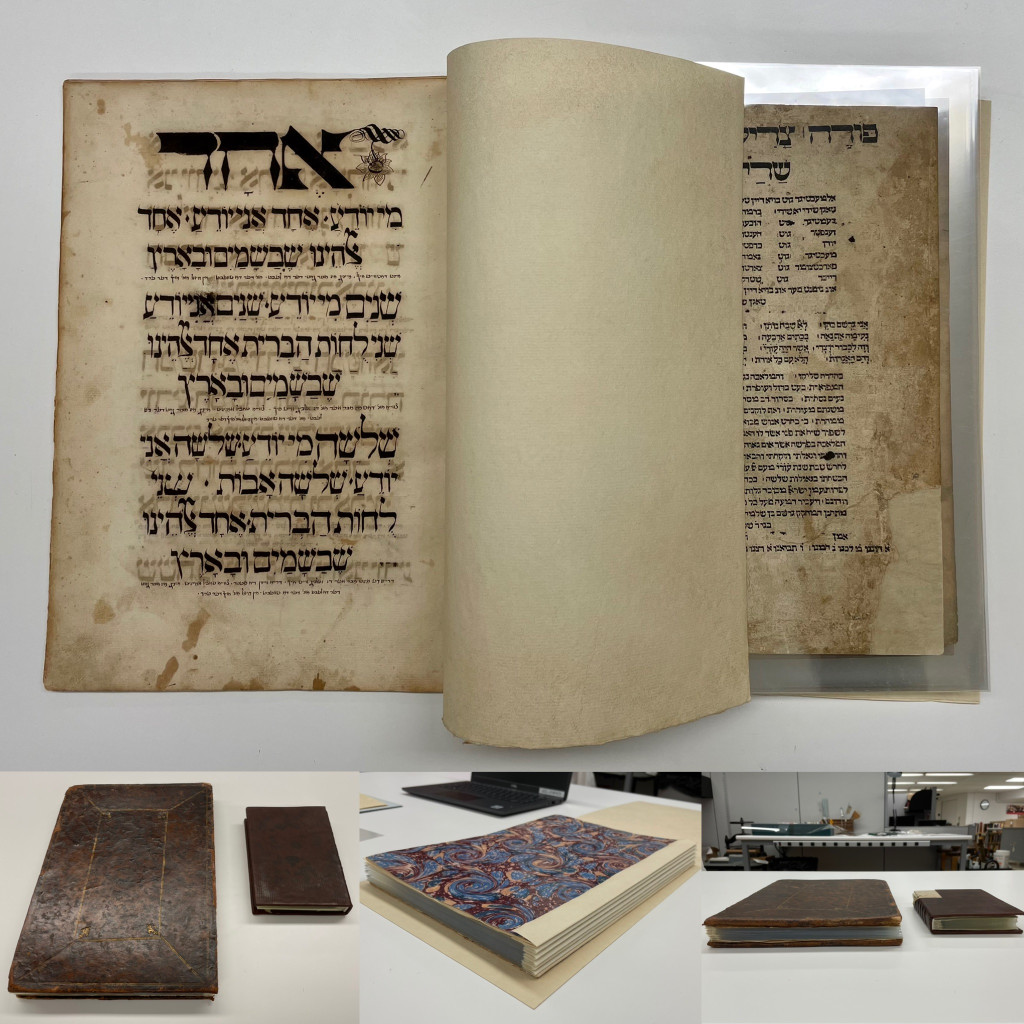
I particularly enjoy the problem solving nature of special collection treatments and thus, my “favorite” treatment is usually the one I’m working on. Currently, I’m treating a Haggadah owned by Hebrew Union College that dates to 1526 or 1527. While I’ve treated other haggadahs from HUC, including this one, this project involved iron gall ink treatment AND rebinding a textblock with two different sized leaves, or pages, into its original historic leather cover. Because the binding had been previously treated and reformatted with materials that did not age well, collaboration with the librarians at HUC required exploration into whether we wanted to re-create the past reformatting option with longer lasting materials, or perhaps, explore a new option altogether. Before we committed to a solution, I created a model to test out a new option since unanticipated questions or outcomes often arise during experimental pursuits. For that reason, it’s better to problem solve on a model, rather than on an actual special collection material. In the end, the librarians and I were happy with the results of the new option, and I’m currently at the stage where I’m ready to start rebinding the pages of the actual object.

Hyacinth Tucker:
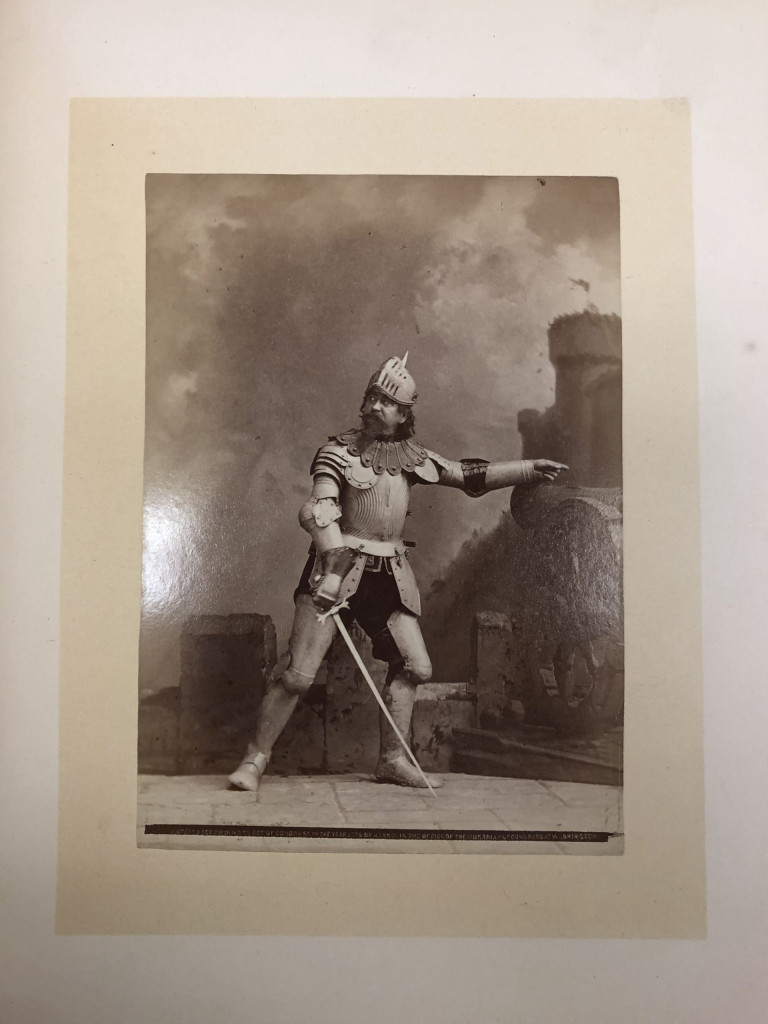
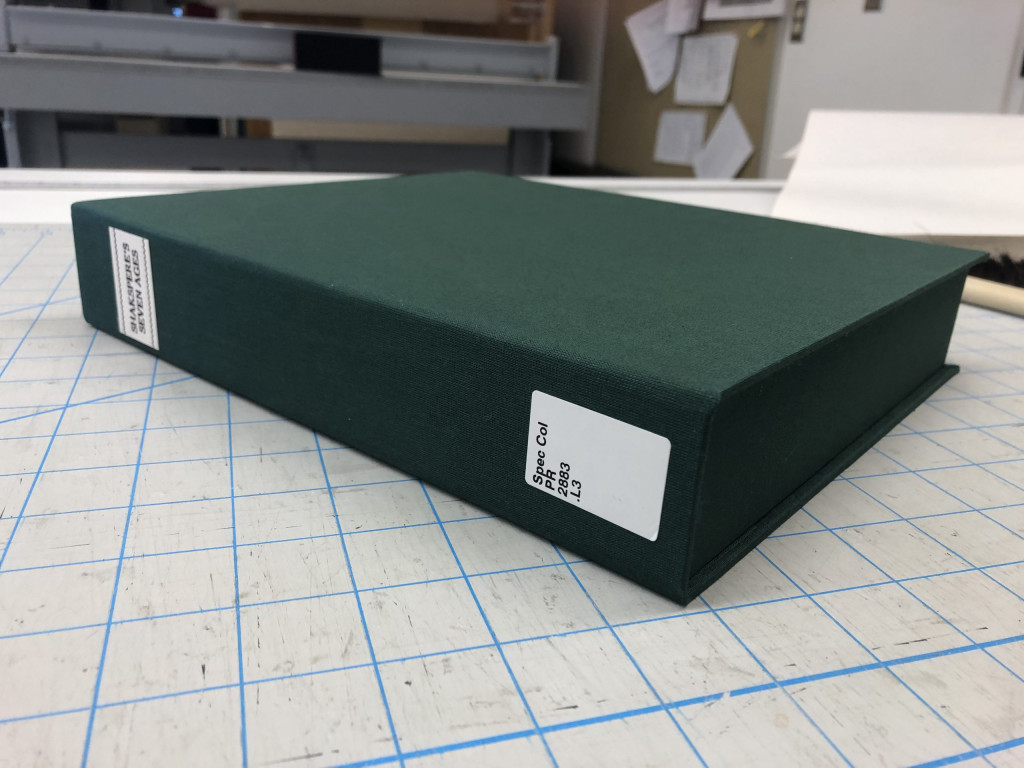
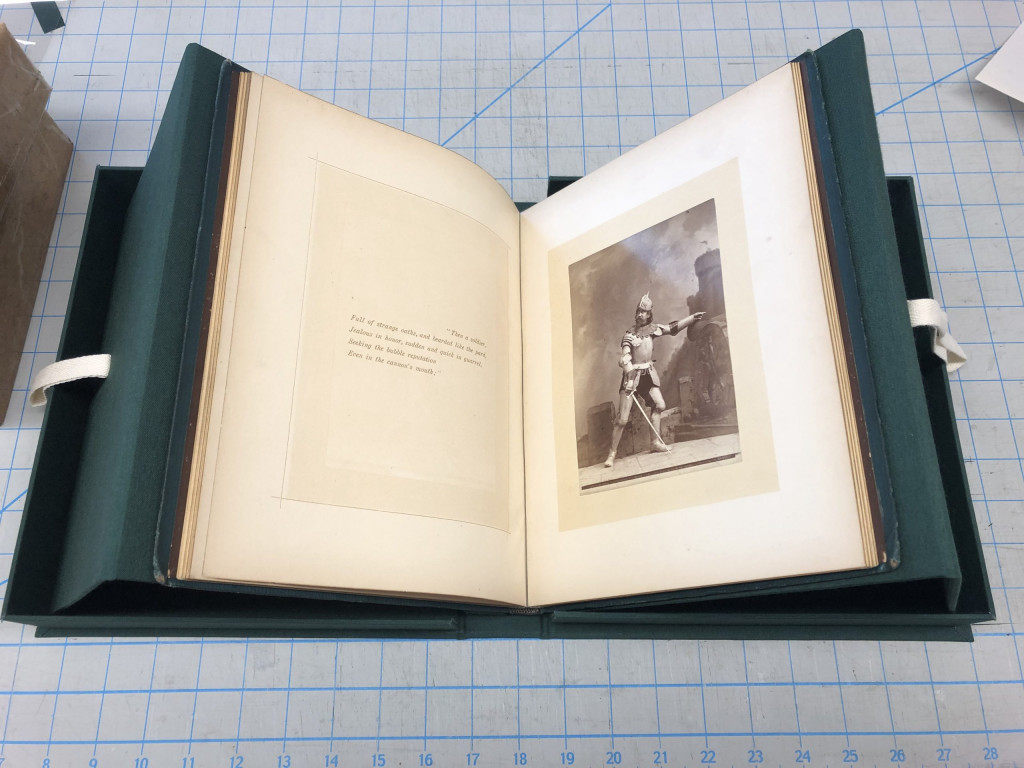
Treatment of Shakspere’s Seven Ages illustrated by James Landy
Not only was this piece based on a favorite subject of mine (I love Shakespeare!), this was a historic photograph treatment I was able to handle with just a little guidance. I was able to properly identify the photographic elements on the first try, performed a surface cleaning on the piece, and created my very first cloth-covered clamshell and cradle to house it. It was such a wealth of learning experiences within one project, which is the best part of my work!

Chris Voynovich:
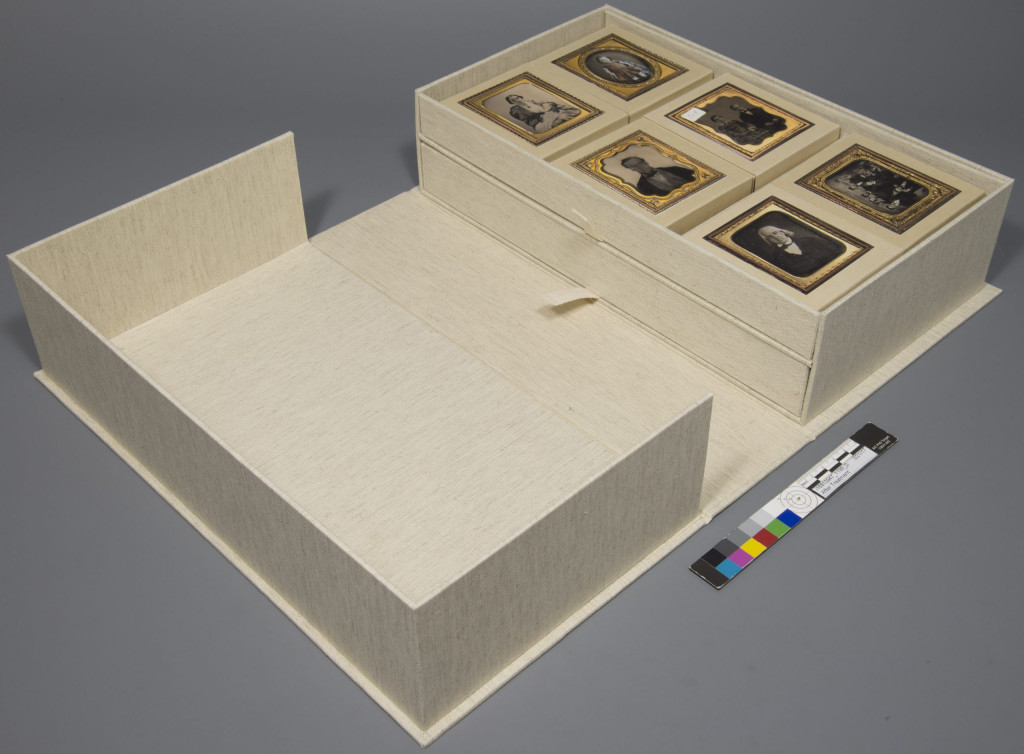
Constructing a custom cloth-covered enclosure to house the Public Library’s William S. Porter Collection of photographs
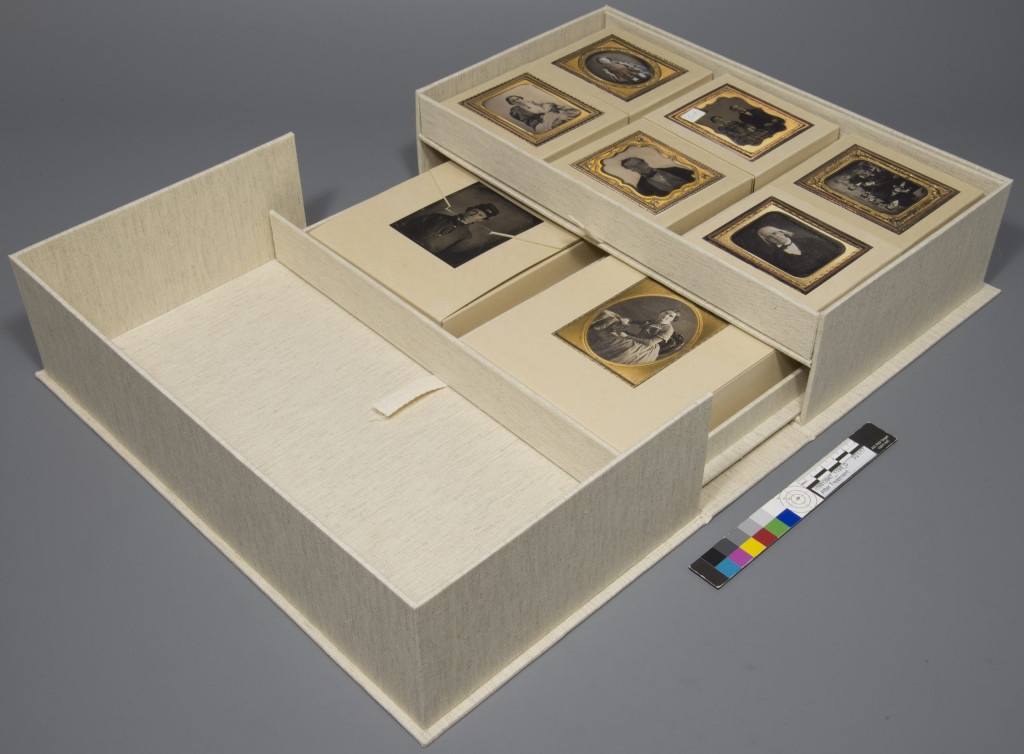
One of my favorite aspects of the job here, in the lab, is designing and creating custom enclosures. This collection of rare daguerreotypes, ambrotypes, and tintypes is an example of adapting a standard cloth covered clamshell to accommodate a collection. I created two trays with pull tabs that are removable for easy access and display. Each photograph has its own tuxedo box and is set in polyethylene foam (Volara) for protection. The tuxedo box enclosures are identical in size to reduce confusion while repacking. Check out this blog created by Jessica that shows a gif of the enclosure opening and closing, and this blog post showing a similar enclosure I created for a dairy collection.
In case you missed, head over to the Cincinnati & Hamilton County Public Library’s blog where Holly shared some of the Lab staff’s favorite tools and equipment yesterday.
Today at 3pm (EST) join Jessica and Catarina on the Preservation Lab’s Instagram (@thepreservationlab) for a quick, informal Instagram Live.
Then tomorrow, make sure to tune into the Public Library’s Instagram (@cincylibrary) at 12pm (EST) for an in-depth Instagram Live event where Catarina and Jessica will be sharing treatments they are currently working on; giving you a behind-the-scenes look and answering all your questions “Live in the Lab”.
Finally, Friday a new video will be posted on the Preservation Lab’s YouTube channel.
Ashleigh Ferguson Schieszer [CHPL] – Rare Book and Paper Conservator, Lab Co-Manager
Previously, we talked just a little bit about halides, and how they fit into the formation of silver gelatin-based images. Today, we’re going to take a closer look at part of the “how.”
Let’s begin with a brief overview of the darkroom process. As a reminder, the mechanics of creating a black and white print generally include the following steps:
Now, let’s delve a little deeper into the chemical reaction described in step two, beginning with a bit of a thought experiment. If I say to you, “semiconductor,” what springs to mind? Something involving electronics, perhaps? Maybe chips, lots of little circuits and tiny wires? Maybe, if you’re more photography-minded, a digital camera? All excellent things to think of! With this in mind, what if I told you that our silver gelatin emulsion is also a semiconductor, one that converts light into latent images instead of electricity?
Well, that is what we’re going to explore today, the basics of the mechanism by which light gets our emulsion ready to record latent images. The light shines on an atom (in this case, our silver halide ion), energy is transferred to an electron, and the electron moves to an excited state and is ready to make chemical magic.
If you refer back to your basic chemistry, atoms are composed of three parts: protons, neutrons, and electrons. Protons are positively charged and reside in the nucleus (center) of an atom with chargeless neutrons. Negatively charged electrons orbit the nucleus in bands. When all things are equal, an atom has the same number of protons as electrons, leaving the atom neutral. There aren’t a lot of atoms that are naturally like this, however; an atom will often have too many or too few electrons in orbit. This is a good thing, as it not only makes them stable, it makes them available for bonding with other atoms and creating chemical reactions.
Now let’s apply some of that to our silver halide. The electrons near the nucleus of our ion are in the “ground” state. They’re unexcited. The nucleus has them firmly gripped in its gravitational pull and they’re uninterested in going anywhere. This area of grounded electrons is known as the valence band. In order for them to be available for any sort of exchange, they’ll need to get farther away from that nucleus, and out into an outer band of the ion, conveniently known as the conductance band.
How does this all relate to the parking lots I mentioned in the title? I’m glad you asked. The parking lot analogy is a fantastic illustration of the process by which light interacts with matter. Let’s think of it this way: the nucleus of the silver halide ion is your typical Big Box Store. Directly outside of the store is the valence band parking lot, full of electron cars, all off, all waiting in the ground state. Beyond the parking lot is a strip of grass, which we’ll get to shortly, and beyond that is the conductance band (i.e, the road), where the cars are all in motion, on their way to any number of places.
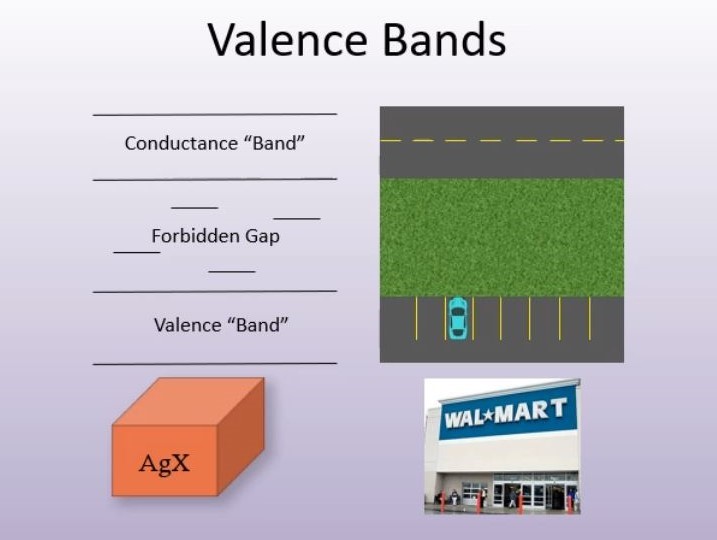
In order for the cars to get out of the valence band, they’re going to need some energy. For our electrons, the needed energy is light. Once they get light to get the engines going, they can pull out of the parking lot and onto the road and drive off to chemical reactions.
Now let’s detour briefly to that grassy strip that I mentioned earlier. It’s known as the forbidden gap. Ideally, this area is empty. However, due to defects such as insufficient energy, an electron may not be able to completely cross to the conductance band, and may be temporarily stuck in this gap. Even here they can be useful as stepping stones for other electrons that need to cross over. Stuck electrons will either receive more energy to get them to the outer bands, or they’ll lose energy and be pulled back to the valence band.
I’ll note here that this structure is characteristic of all semiconductors, including digital camera sensors. In silver halide grains, this excitement of electrons will always happen when it comes into contact with light, as silver halide has a light sensitivity of 100%. No matter what, when a grain of silver halide is exposed to light, it will always liberate an electron. You also needn’t think of it as just one electron at a time being excited in this fashion. The grain can have so much energy that its valence band is completely empty, and vice versa.
What happens after this? Well, that’s an exploration for next time.
Hyacinth Tucker (UCL) — Bindery and Conservation Technician
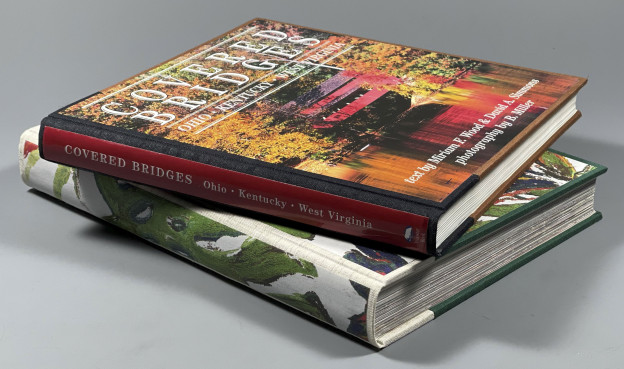
We recently shared a blog post on the Cincinnati & Hamilton County Public Library’s blog that serves as a companion post to this one. Both posts focus on the repair of two CHPL books, Covered Bridges and When Art Meets Design, that received split-board binding treatments carried out by Kasie. While this post focuses on the treatment itself, the other illustrates the journey of a circulating book through treatment in the lab (and at home) and its eventual return to the library. We highly recommend checking out A Journey from Broken to Mended: Repairing Books in the Preservation Lab.
As a hybrid conservation lab, we treat and house both special collection items and general circulating collection items, as well as everything in between. Special collection items are rare or archival materials that typically do not circulate; basically, books and other objects that you can’t take home with you, are out of print, valuable, and/or are less readily available locally, nationally or even globally. General circulating collections are typically books that can be checked out and taken home, and tend to be newer books, books still in print, and/or more popular books. Since we are a collaborative lab that means that we treat and house special collections and general collections from both the University of Cincinnati Libraries (UCL) and the Cincinnati & Hamilton County Public Library (CHPL).
Due to the nature of these two types of collections (general and special), the treatment, documentation and who treats what is very different. Before the pandemic, most of the staff’s time was dedicated to special collection items or the items that fall between the two categories, which we call medium rare, and our students and volunteers, with plenty of hands-on, one-on-one training, handled the bulk of our general collection repairs. But then working from home, all or a majority of the time, became the norm for Lab staff and we had to shift focus and turn to taking on more general collection repairs that we could more easily take home with us. Initially, we took home more difficult sewing projects and mending projects that our students or volunteers either hadn’t gotten to yet or were avoiding for one reason or another. Then, after we could return to the Lab in some capacity to prep our own materials, we realized that split-board bindings* were the ideal general collections treatment for staff to work on from home.
A split-board binding is a new binding or case that incorporates several newly added reinforcement elements that are then sandwiched between two pieces of board that make up the front and back covers.
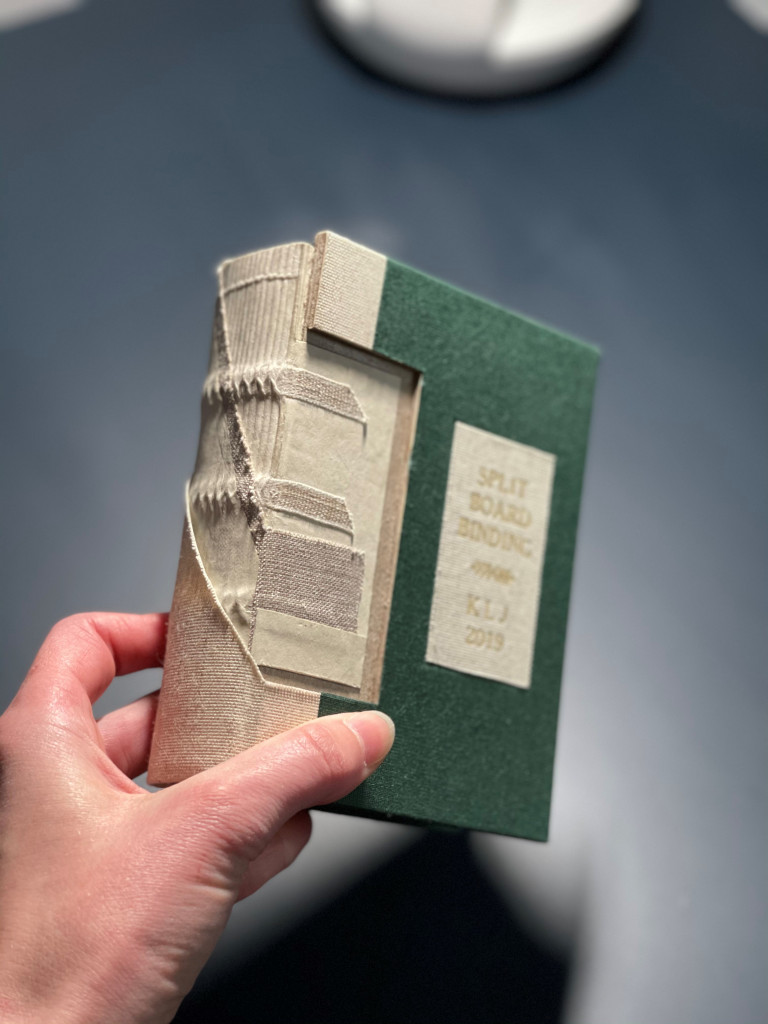
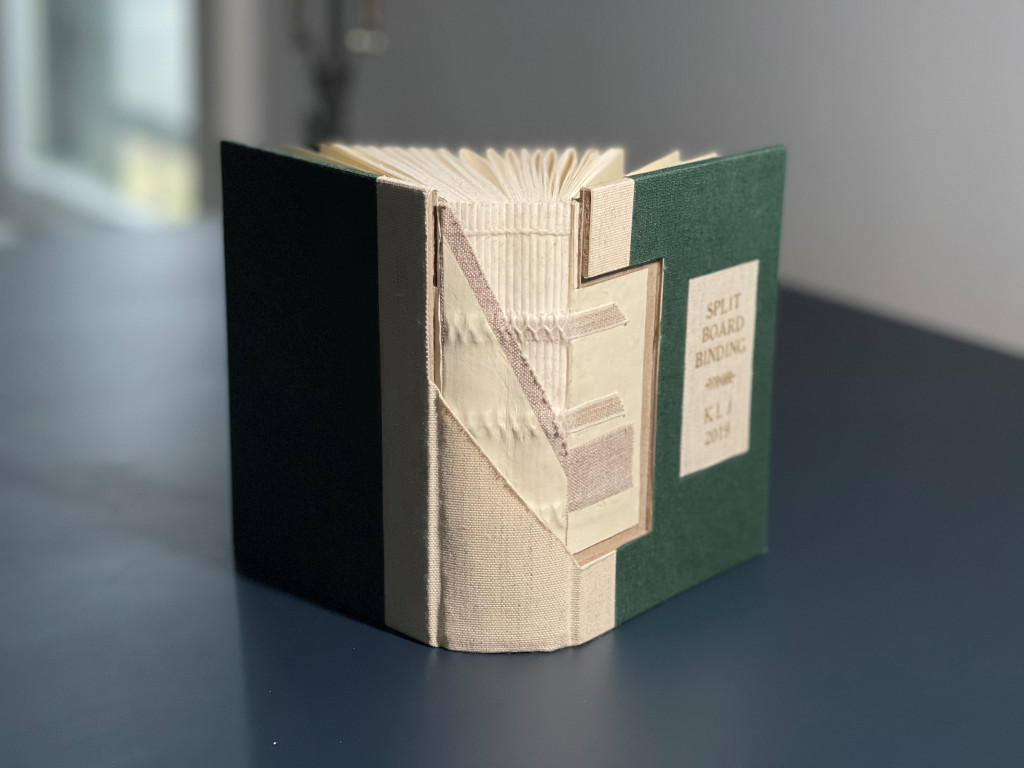
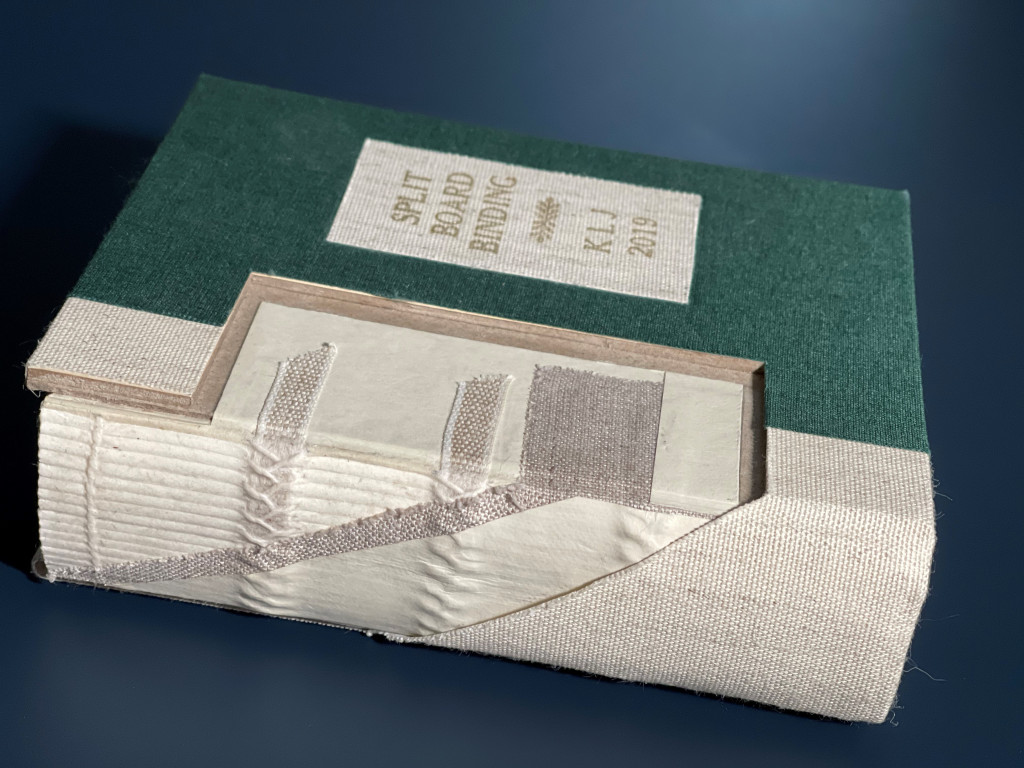
Split-board bindings are a great solution for oversized, heavy books like coffee table books and art books with glossy pages, which are very common in both UCL and CHPL general circulating collections. They are also, by far, the most complex general collections treatment we perform in the lab and have always been done by the conservation technicians, instead of our students or volunteers. This is not only because of the complexity of the treatment, but also because of the lengthy treatment time involved; a student or volunteer’s limited weekly schedule in the lab is not conducive to such an extensive treatment. Though it was a general collections treatment reserved solely for the conservation technicians, prior to March 2020 the techs unfortunately had little time to work on these treatments, as our focus was primarily on special collections treatments and housing. Therefore, we had amassed a little backlog of split-board binding treatments – enter quarantine and working from home!
One question that might come to mind, if split-board bindings are so elaborate and extensive, why do them on general collections items at all? Why not just buy a new copy; wouldn’t that be more cost effective? Typically, the books that warrant a split-board binding are more pricey, glossy paged, oversized books, like art and architecture books. And unfortunately, though these books have a much higher retail price than your average James Patterson novel, the construction is generally less than ideal. These books might have beautifully printed, full-color, thick and glossy pages and dynamic cover art, which makes them attractive to the reader, but they also are often sewn with very thin, fragile thread that easily breaks. The spines are generally lined with a layer of rigid plasticized glue that can become very brittle over time. Often, the covers or cases are constructed solely of printed paper, not cloth, and generally have a thick piece of board along the spine (which we call a flat back) that doesn’t allow the book to flex properly when opened and can actually make the spine break down and tear in record time. It is not uncommon for these books to have little to no reinforcement in the attachment of the textblock to the binding (i.e. how the block of pages is attached to the cover), which makes the heavy textblock break away from the cover quite easily with use.
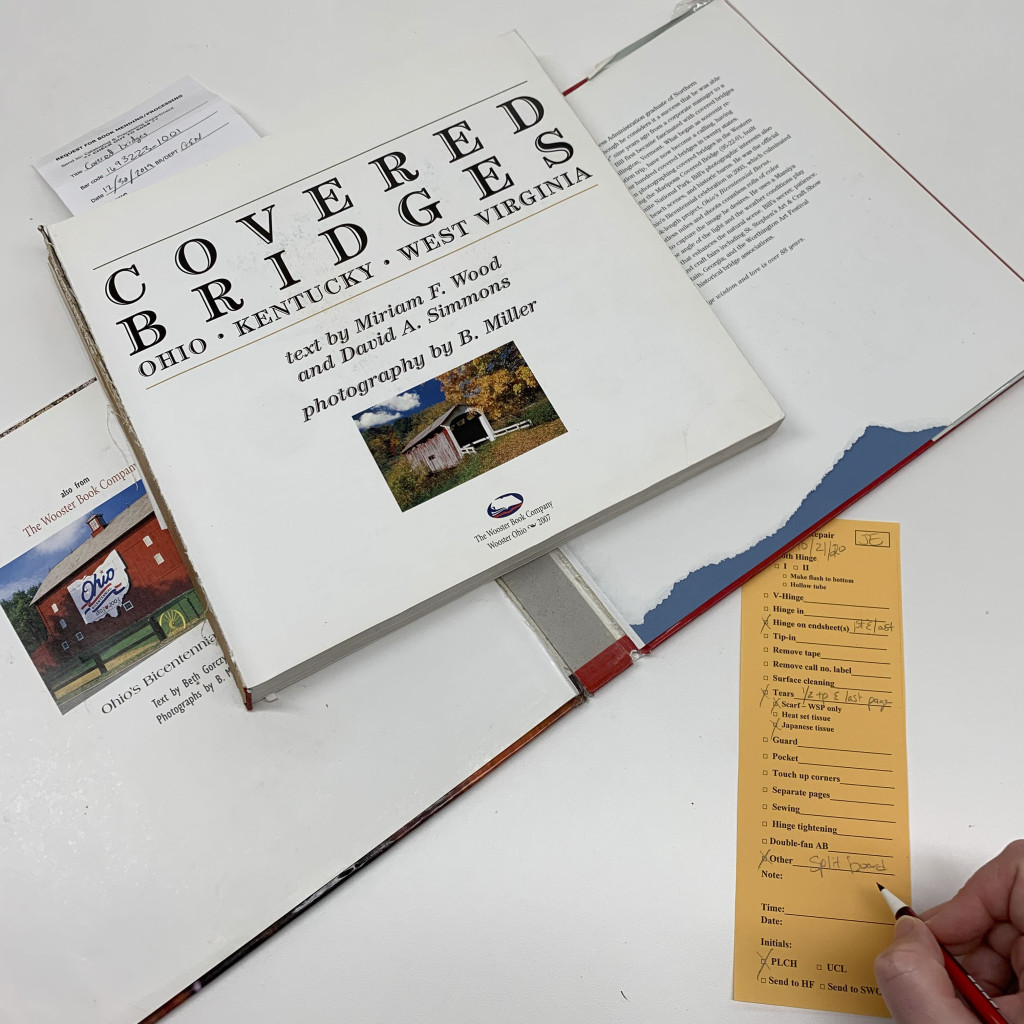
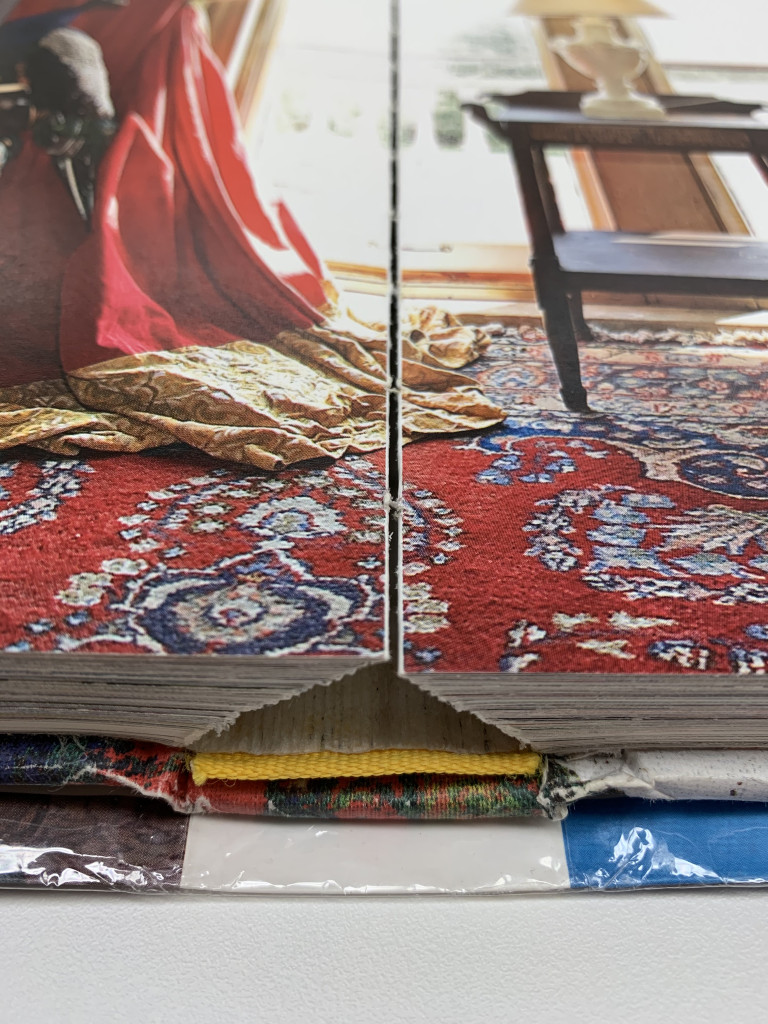
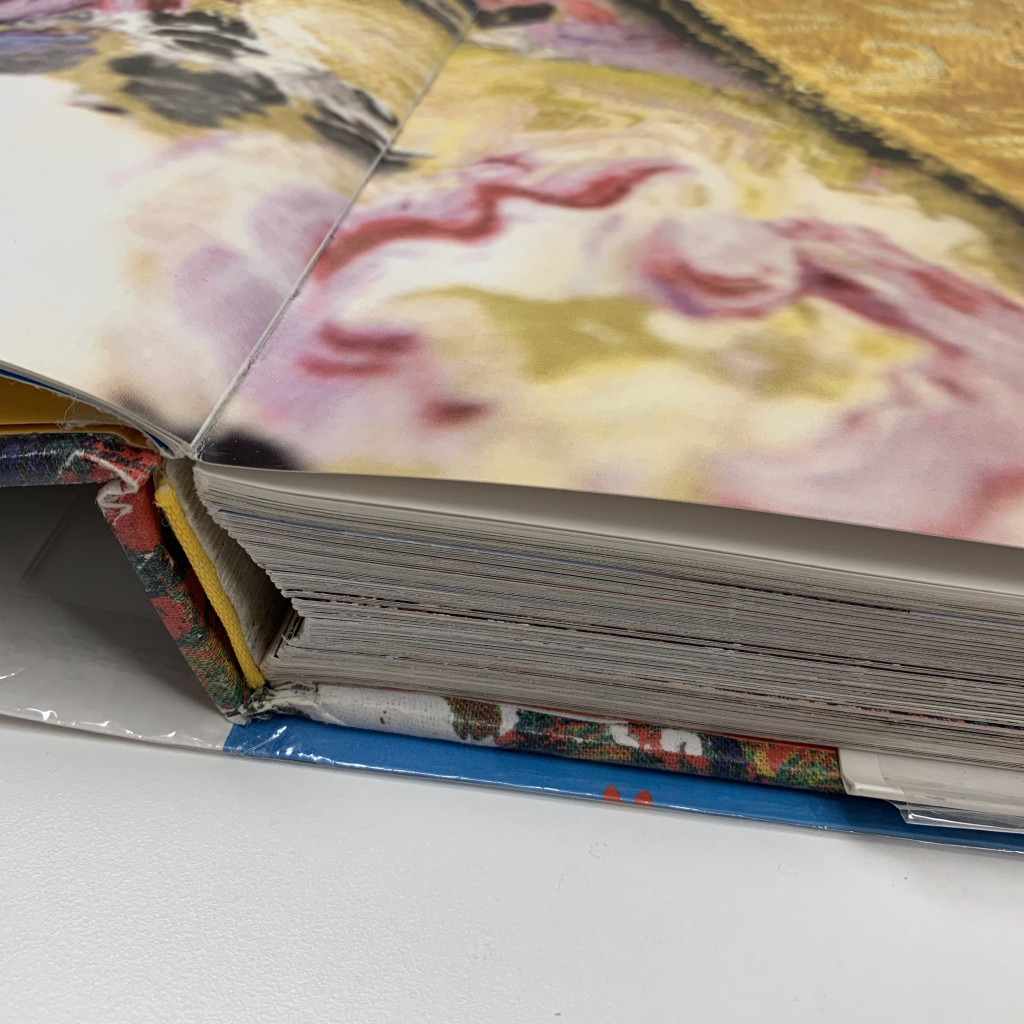
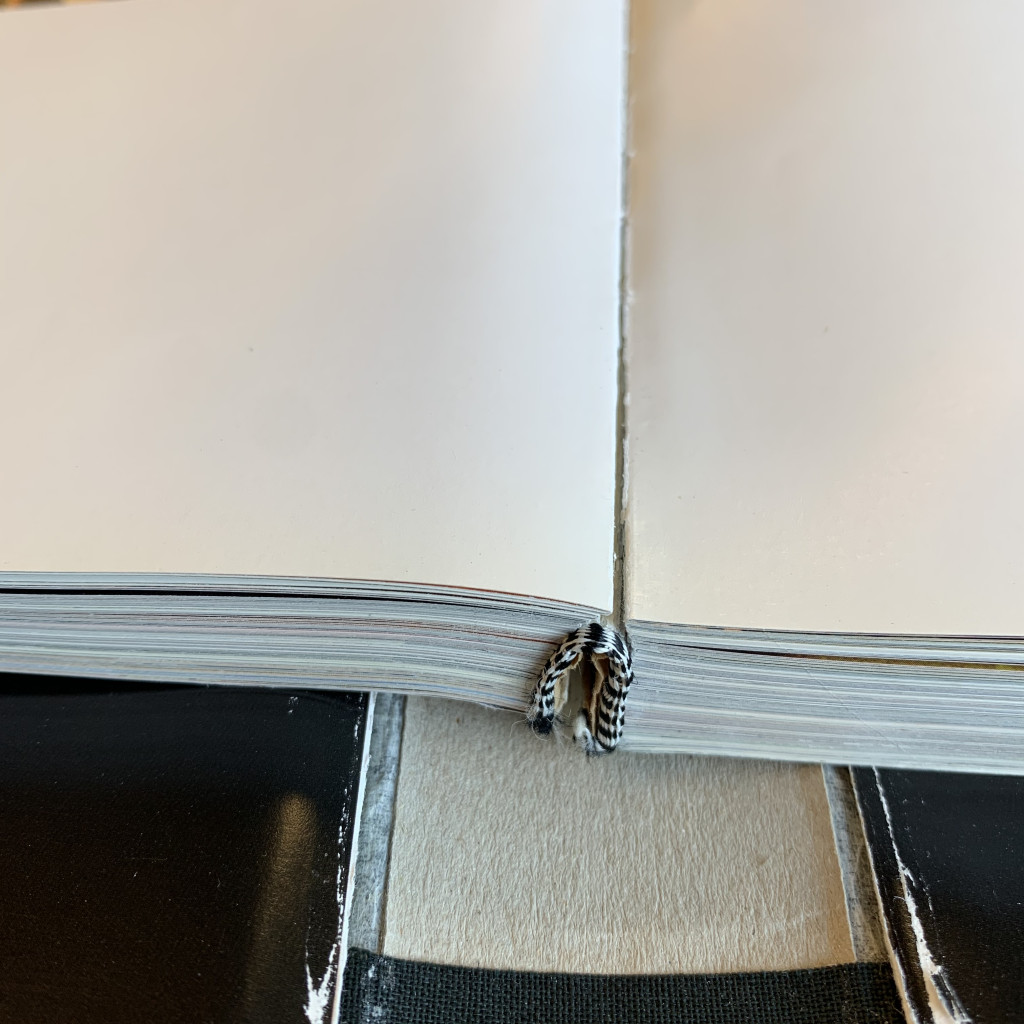
But why are these books constructed so poorly? These large coffee table and art books are constructed with individual use in mind, not with the frequent use and circulation that comes with a library collection item. The split-board treatment, along with many general collection repairs, improves on a bad binding design and makes the book stronger and sturdier, using better binding techniques and materials that can better stand up to use by many library patrons.
A split-board binding treatment involves creating a new binding with new sewn-on endsheets that are reinforced with cloth, at least three sewn on linen tapes (supports), new spine linings, and a new quarter bound case created with two boards at the front cover and two at the back cover, and generally an inlaying of the original cover designs. However, additional elements of treatment may be warranted based on the condition of the book, such as broken sewing, tears, detached leaves, etc. The steps generally proceed in the following order:
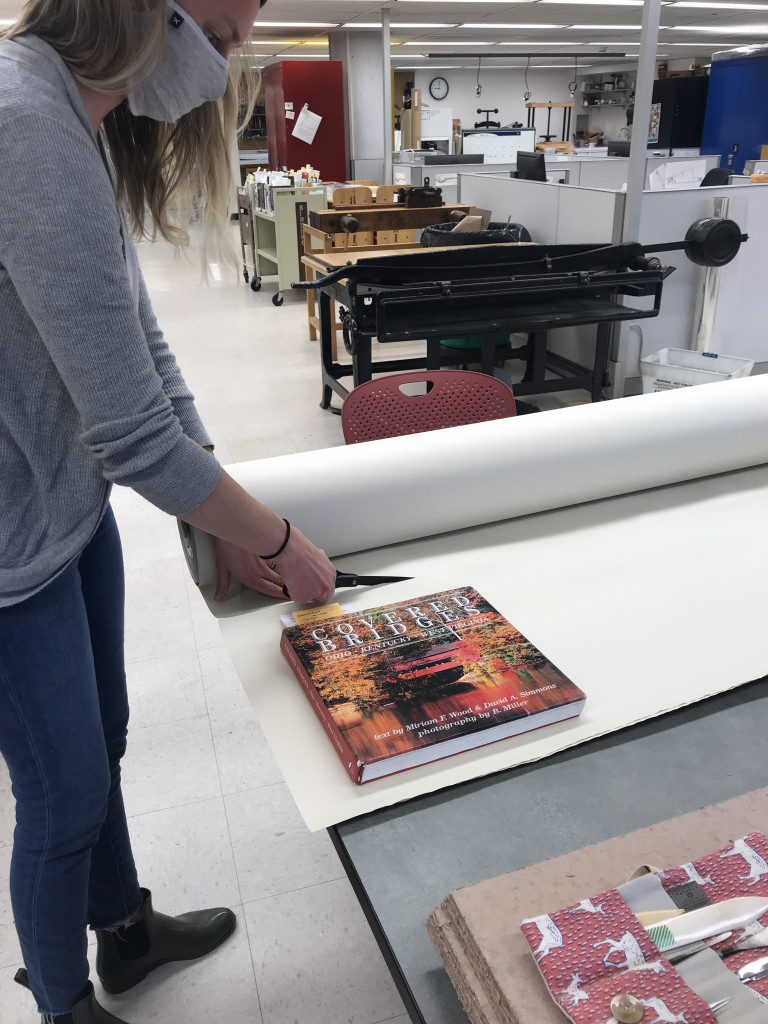
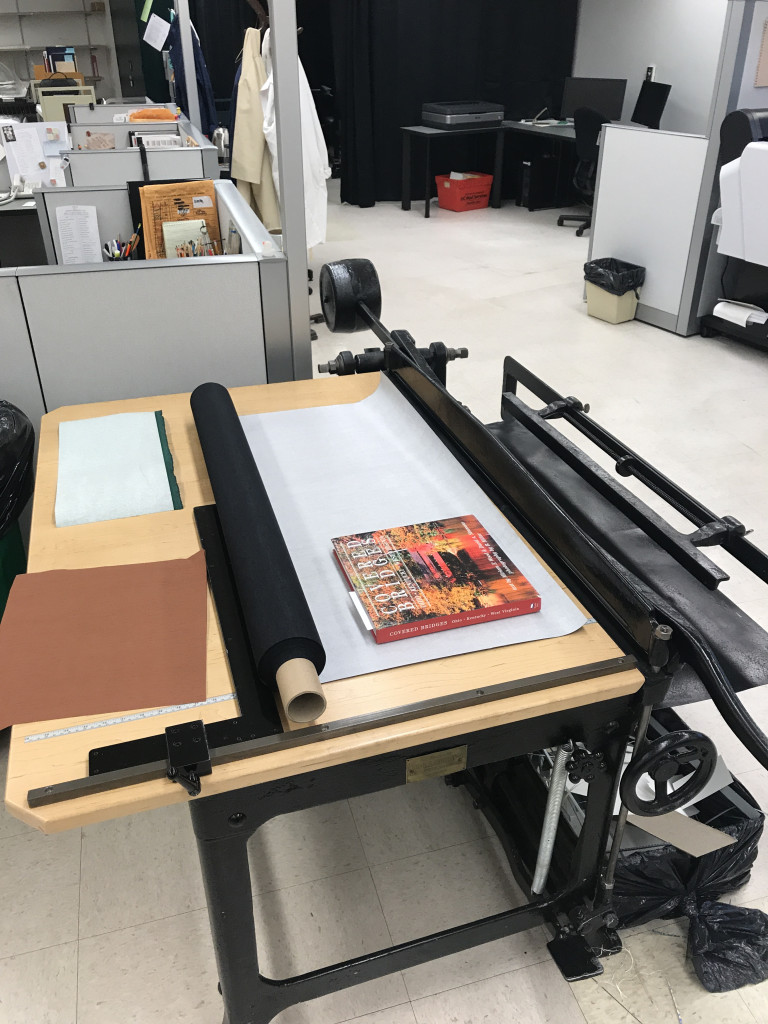
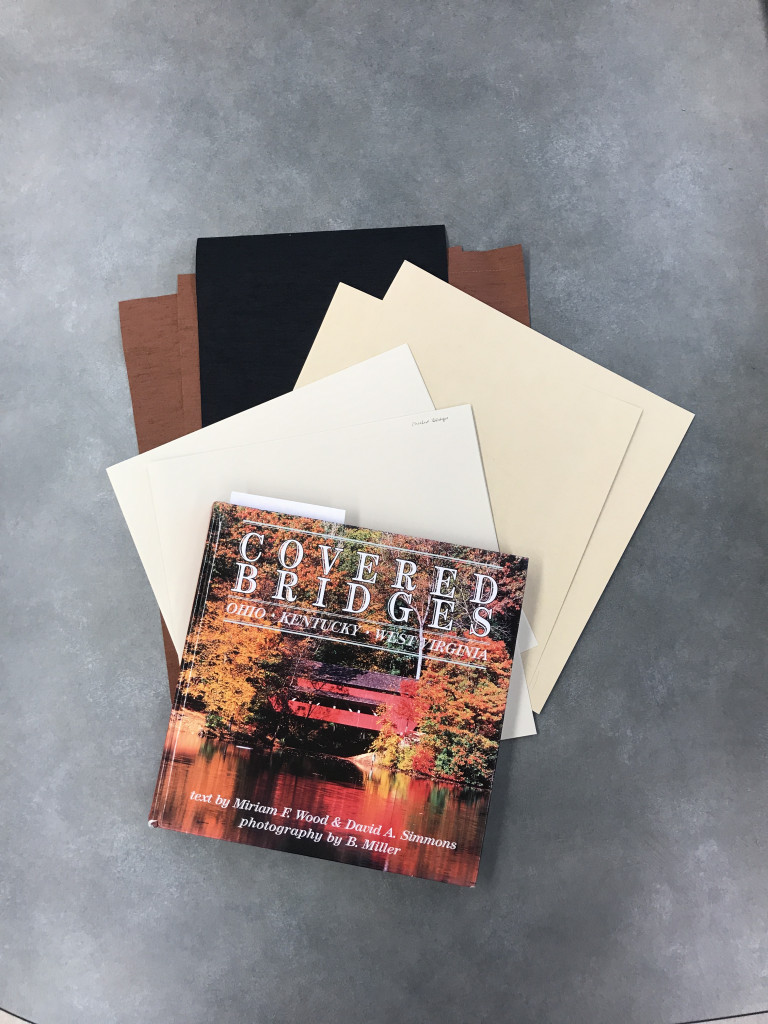
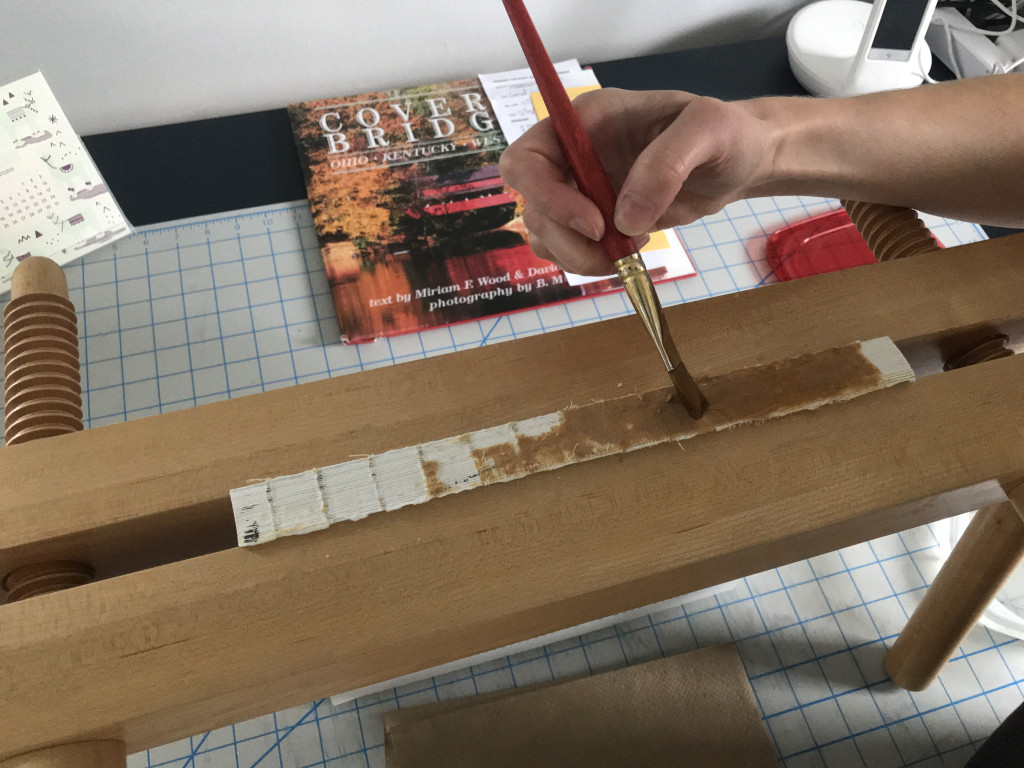
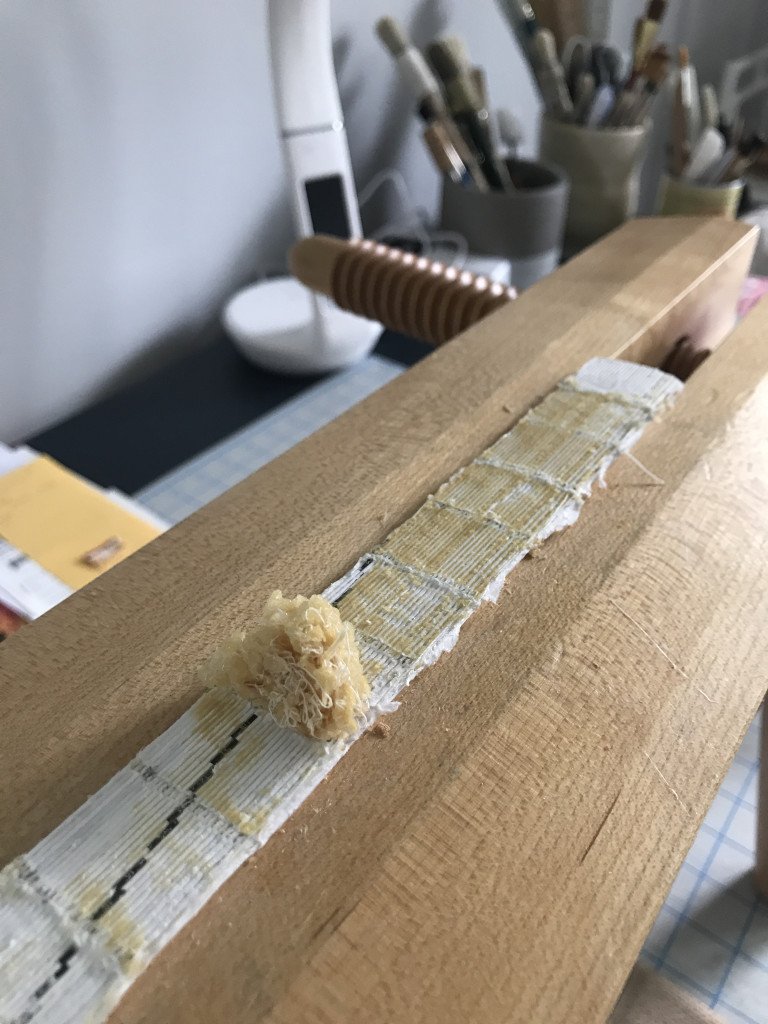
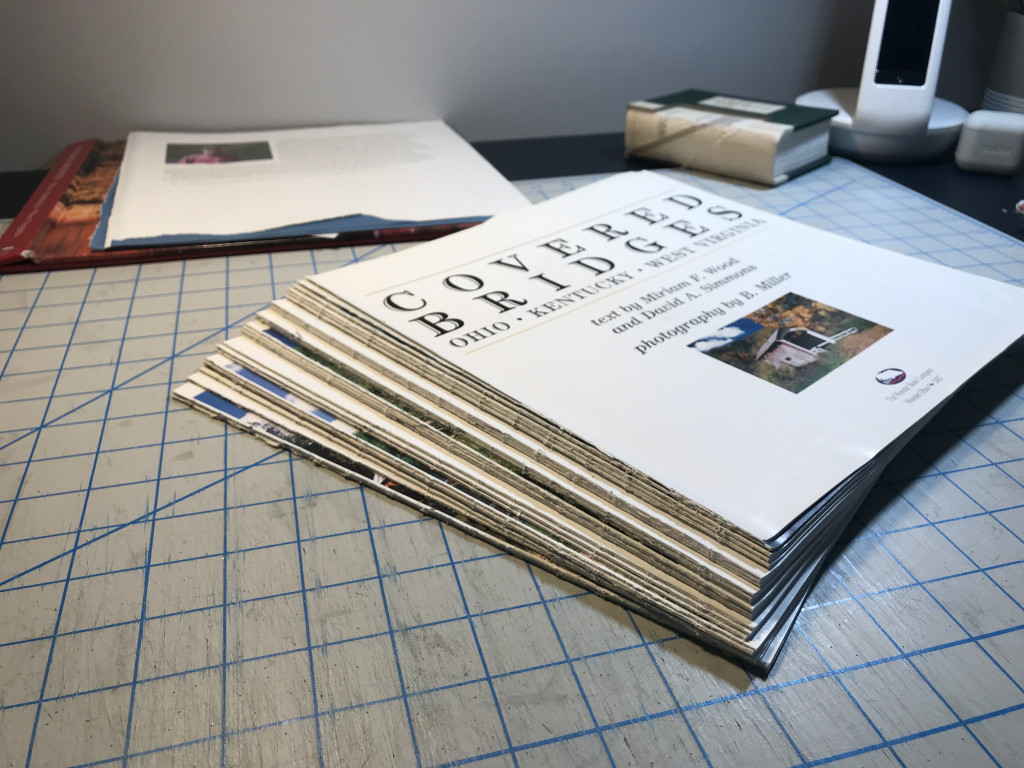
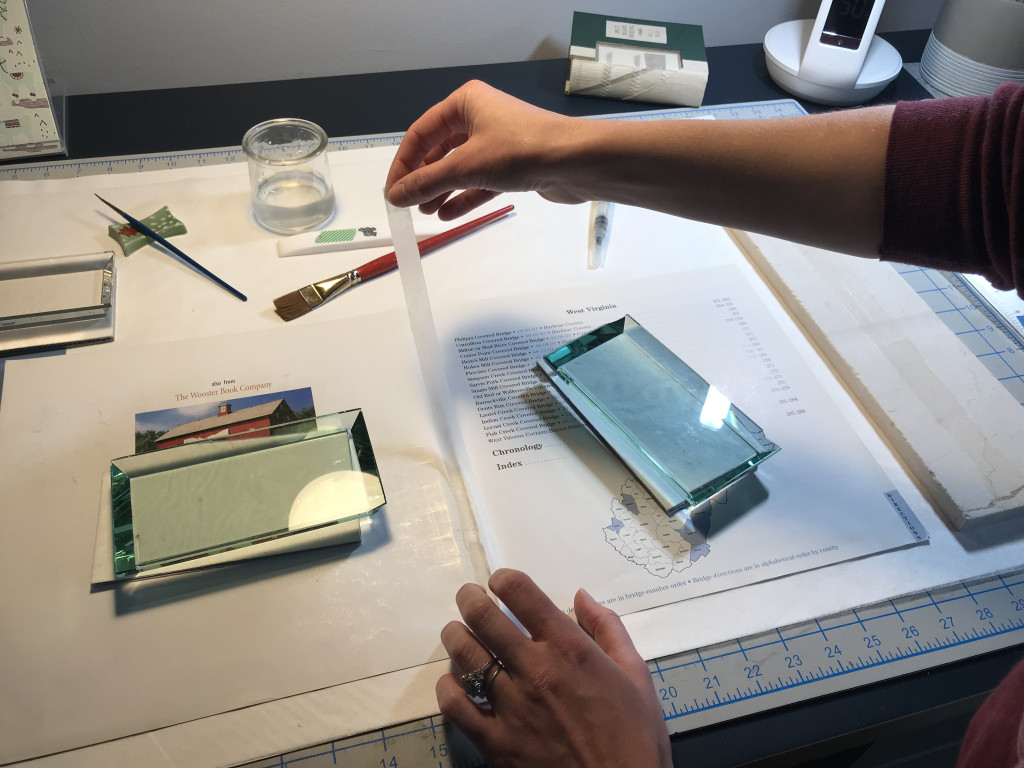
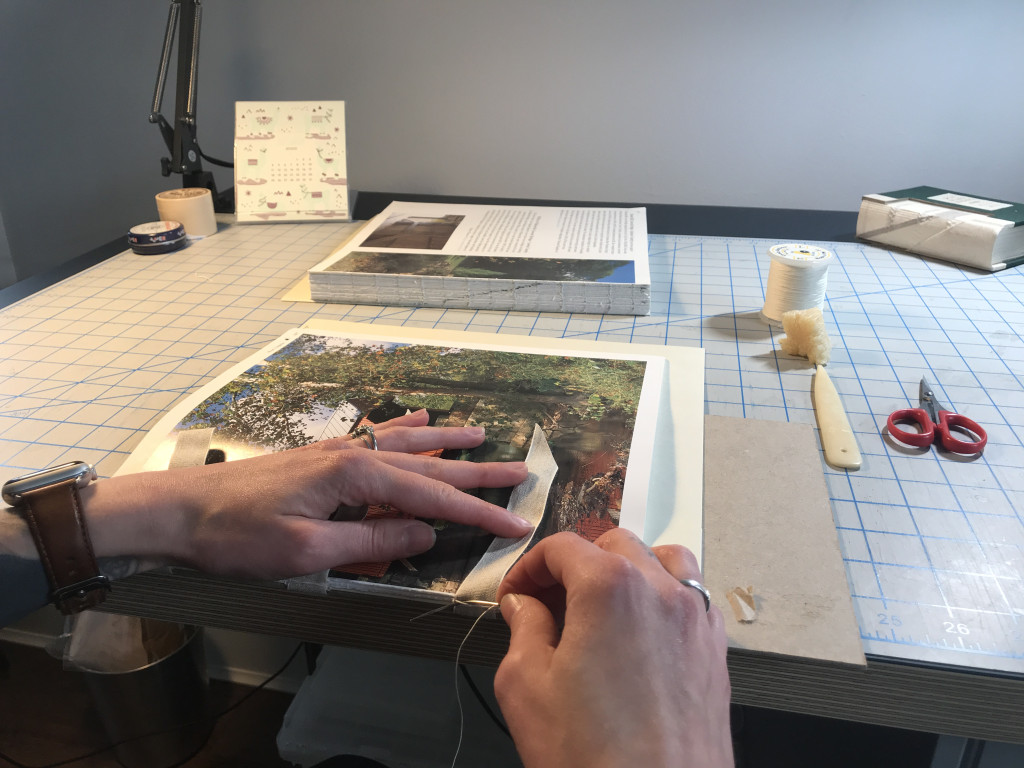
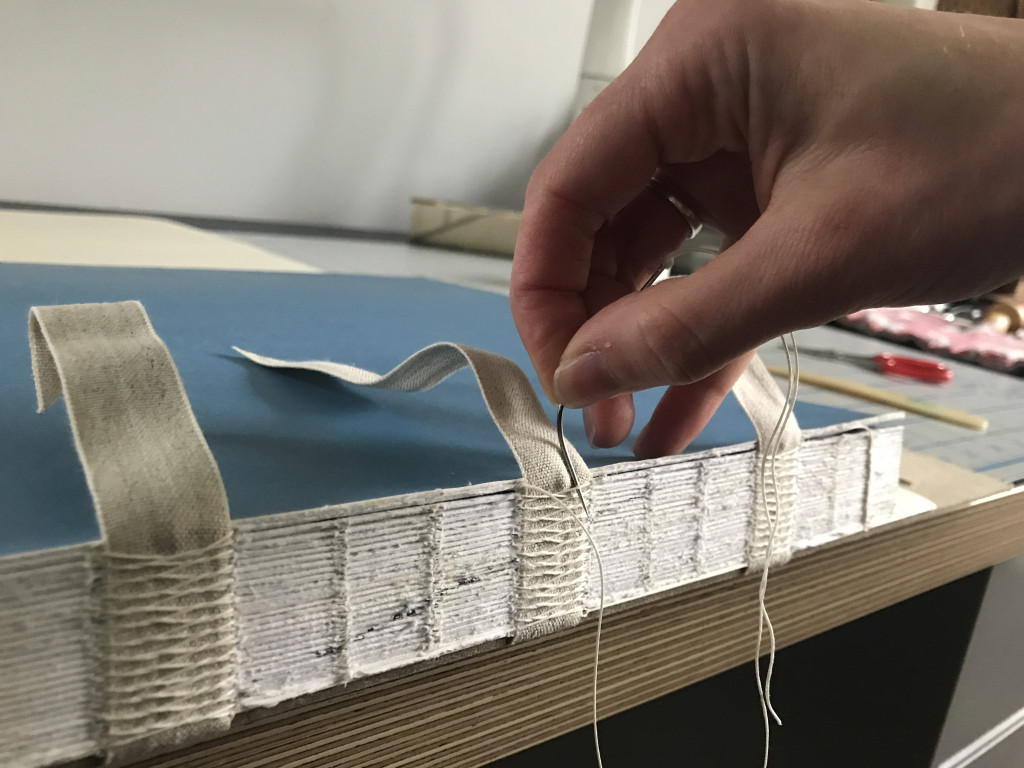
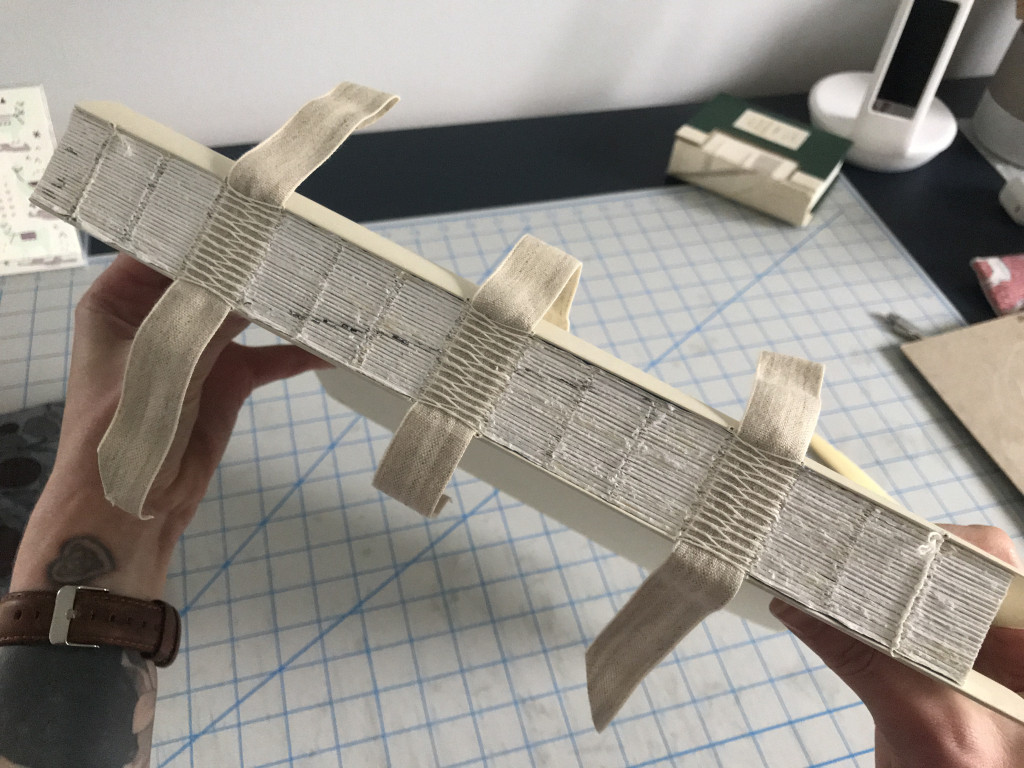
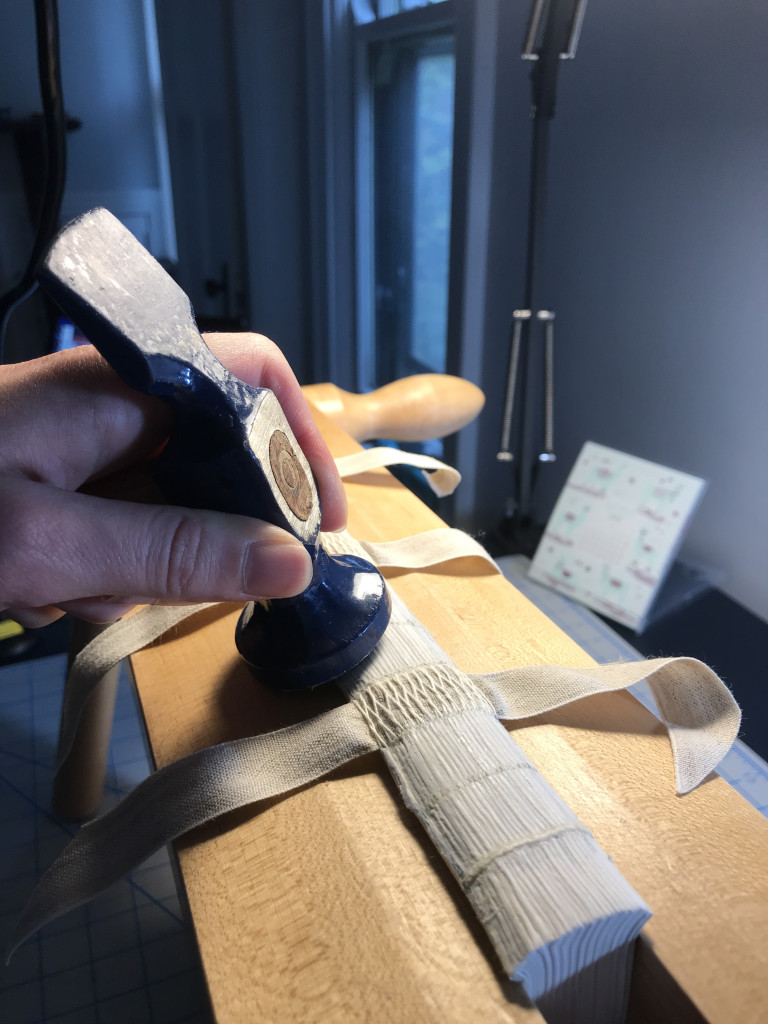
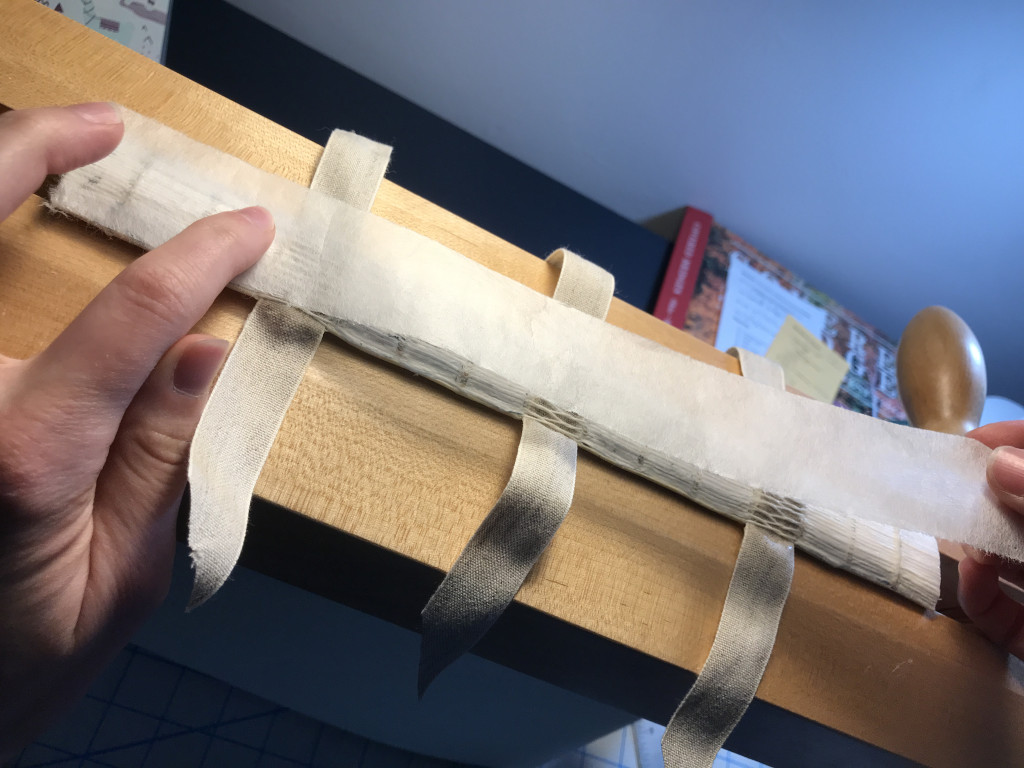
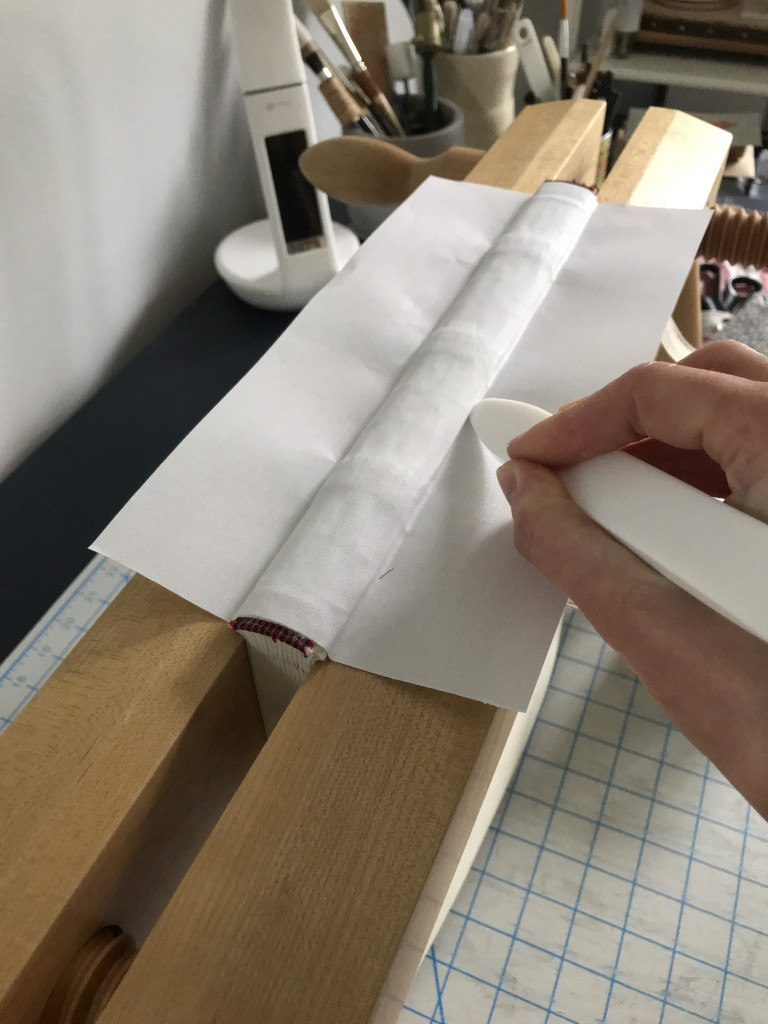
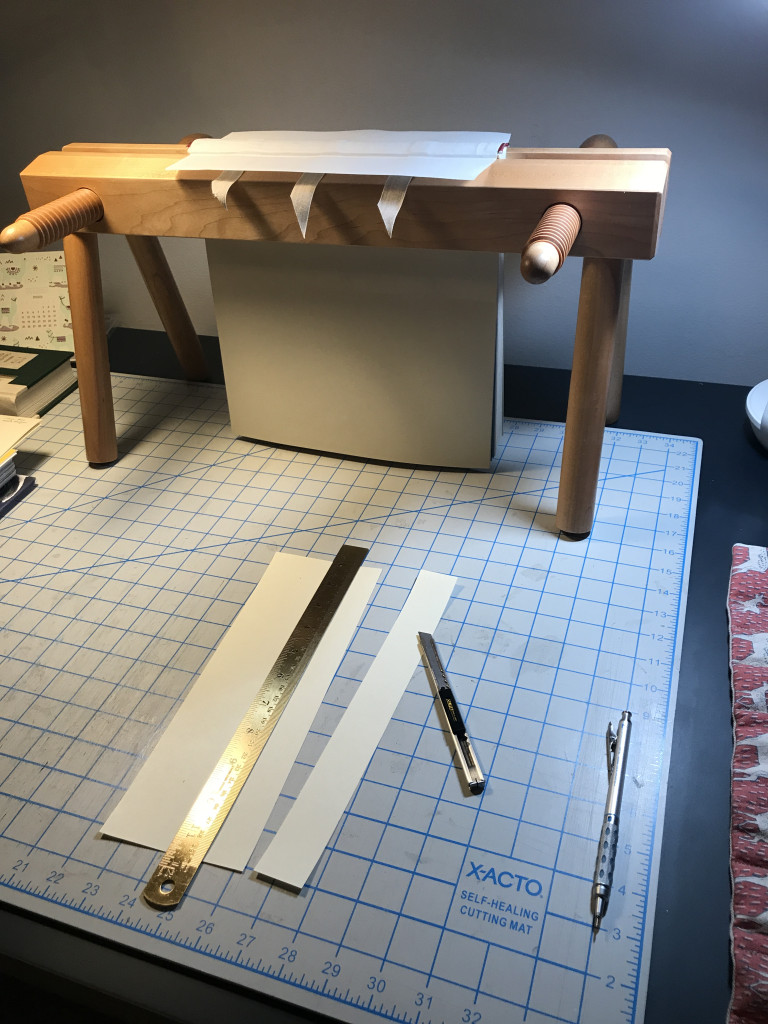
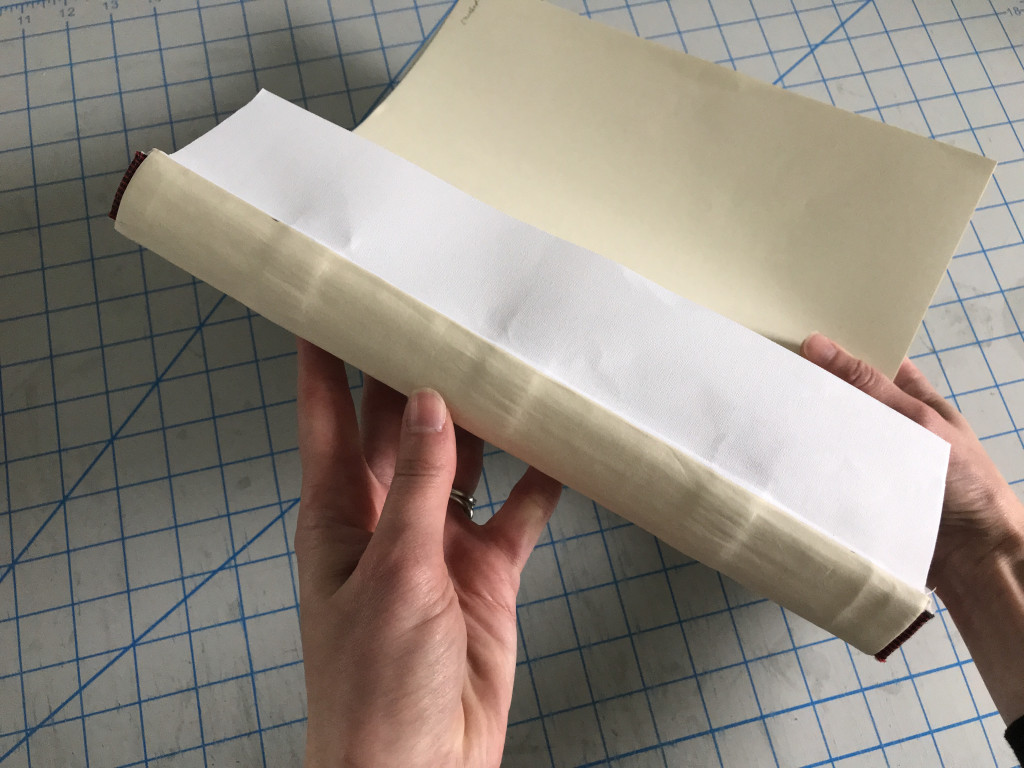
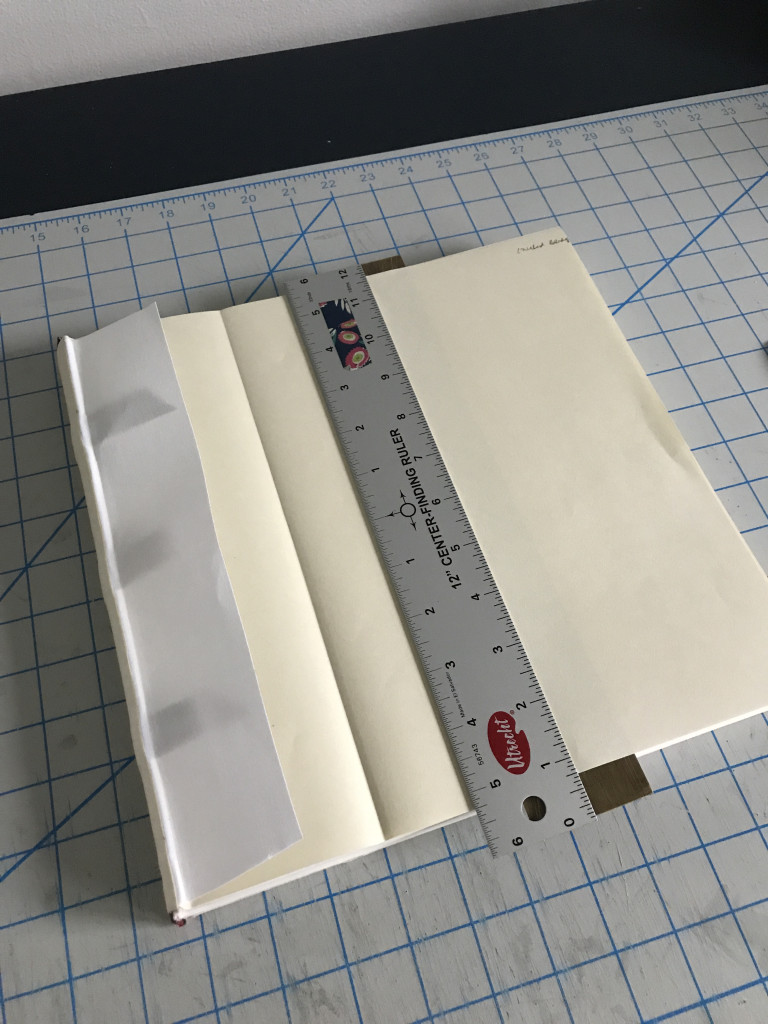
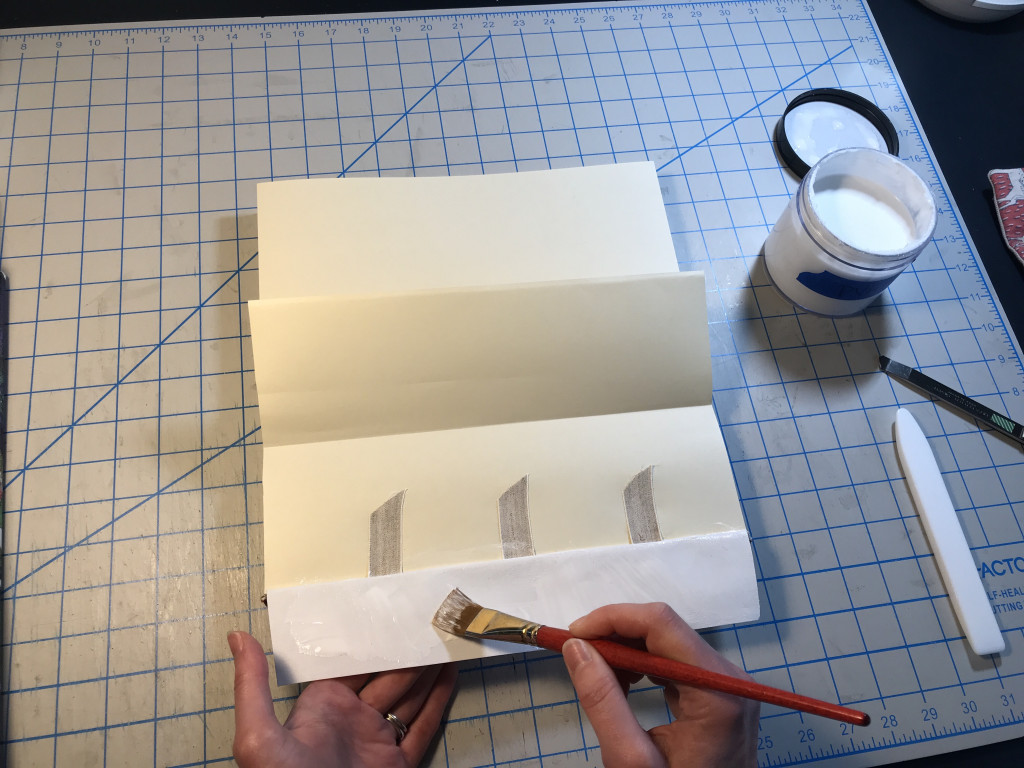
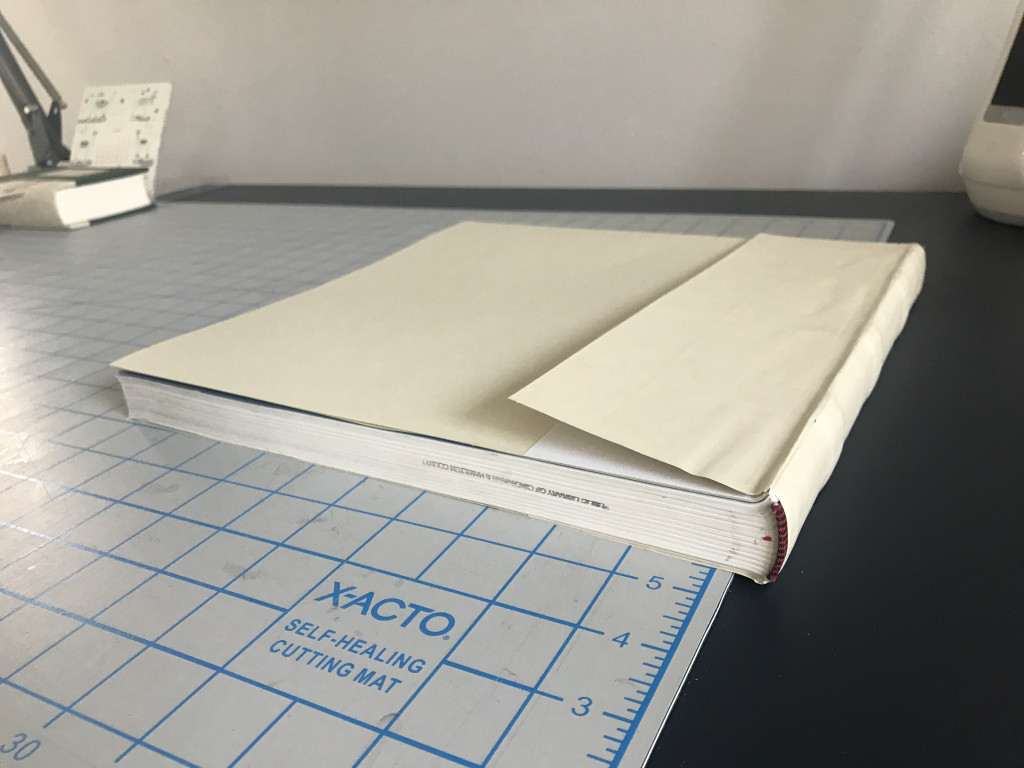
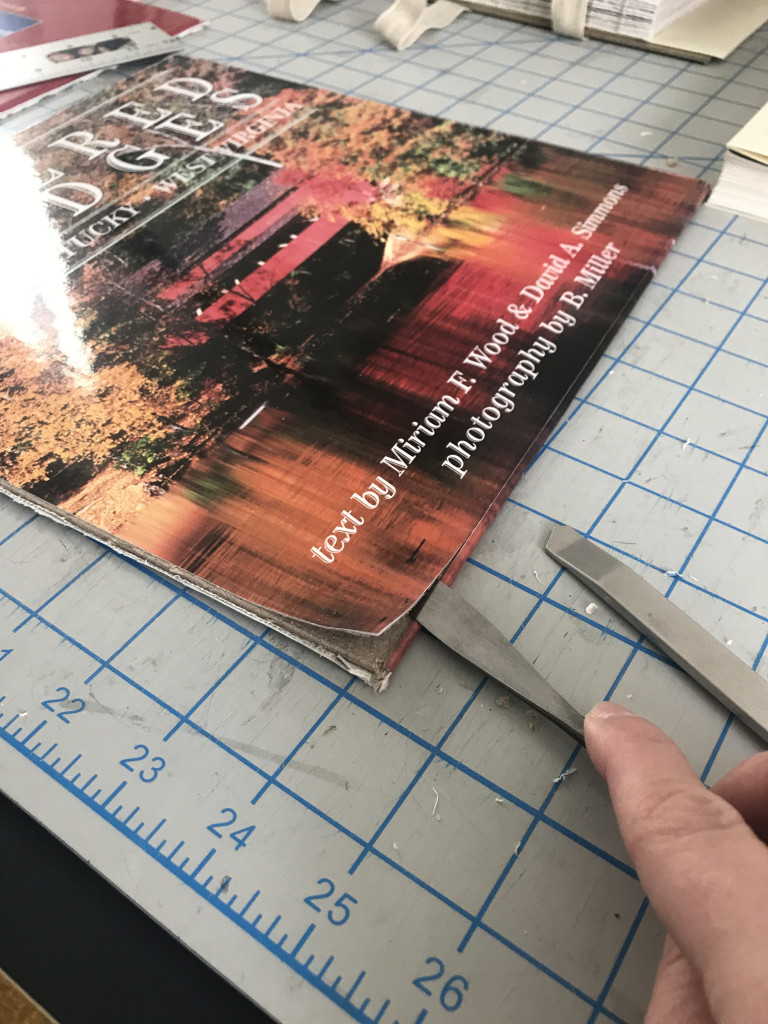
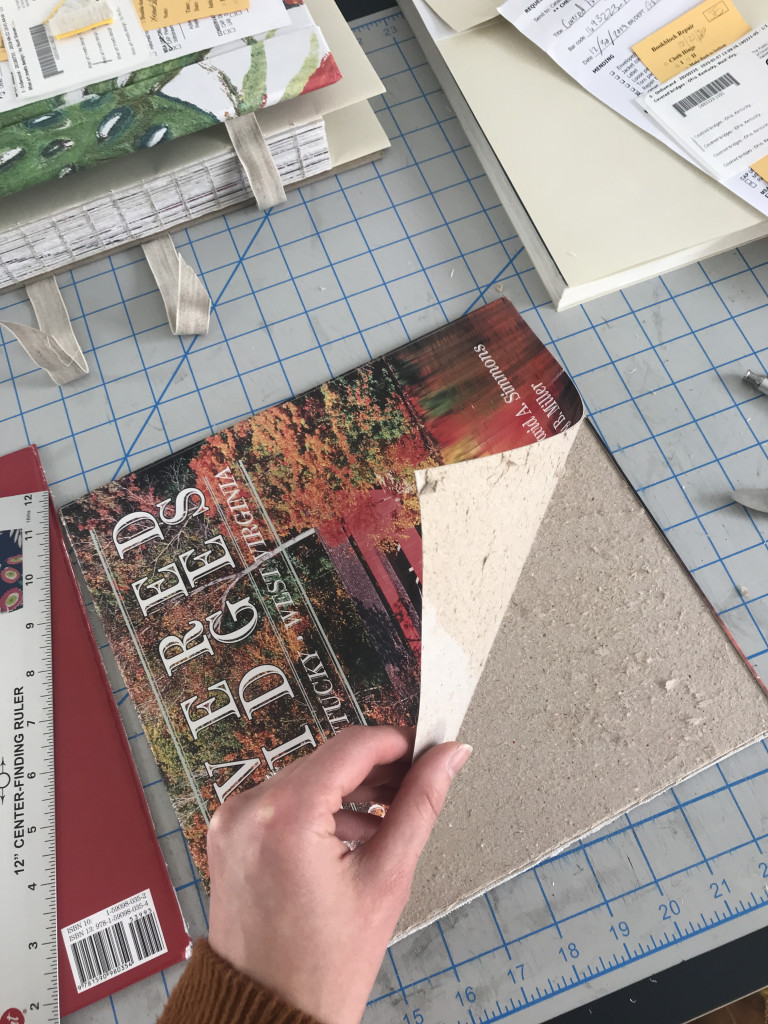
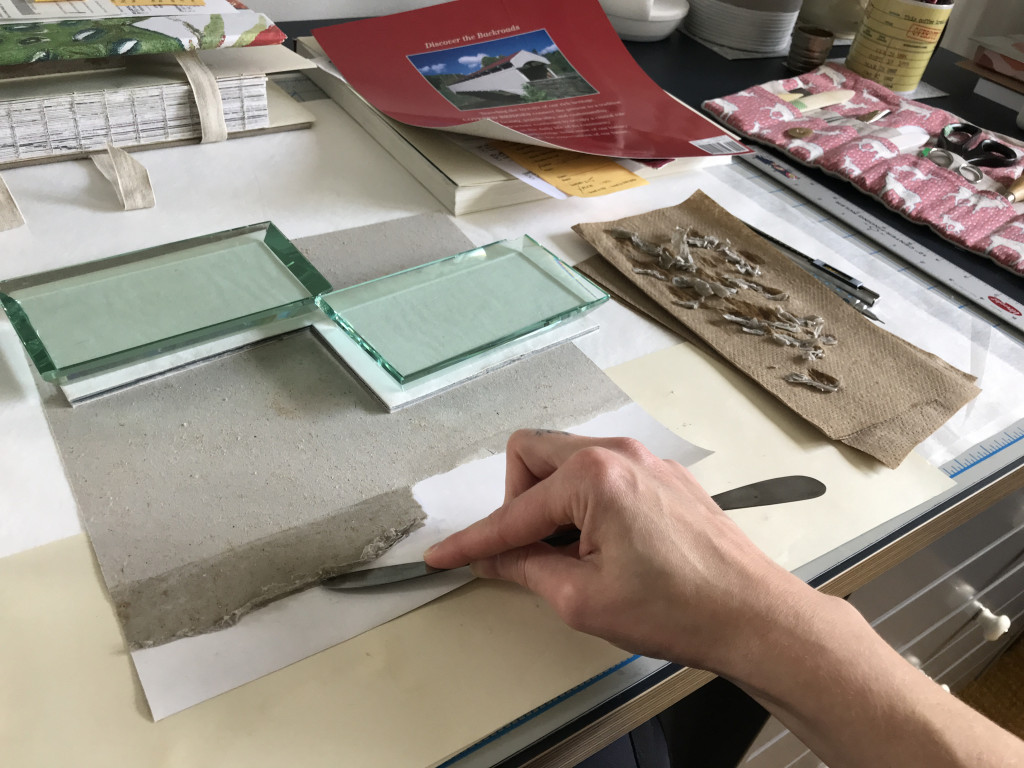
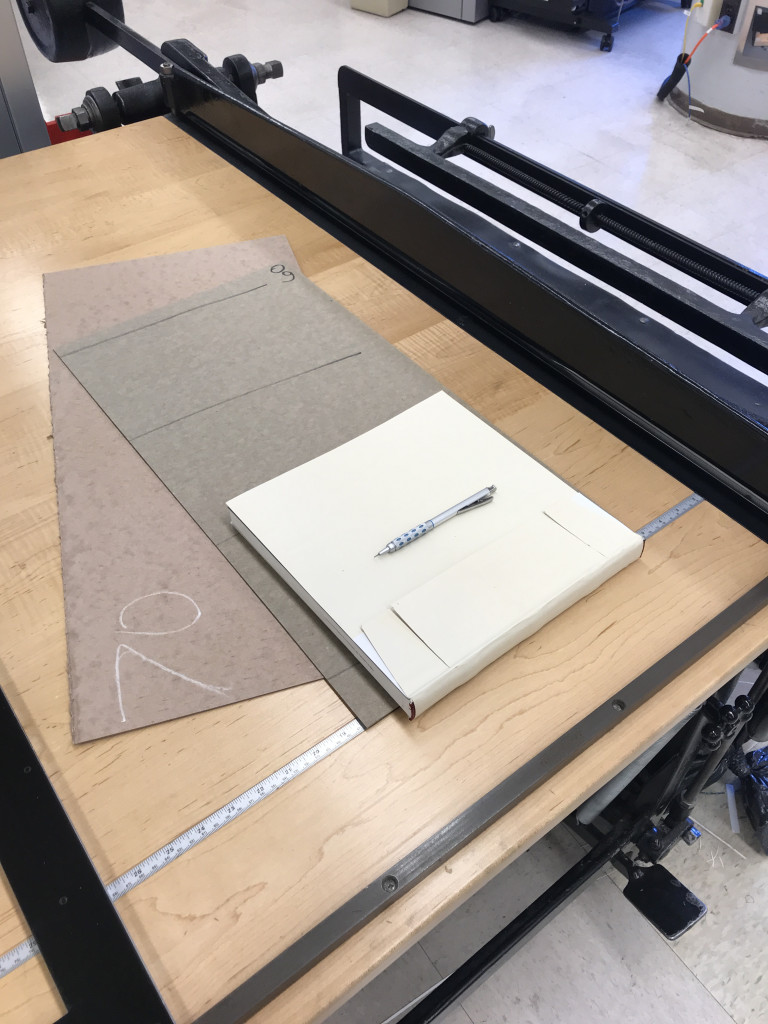
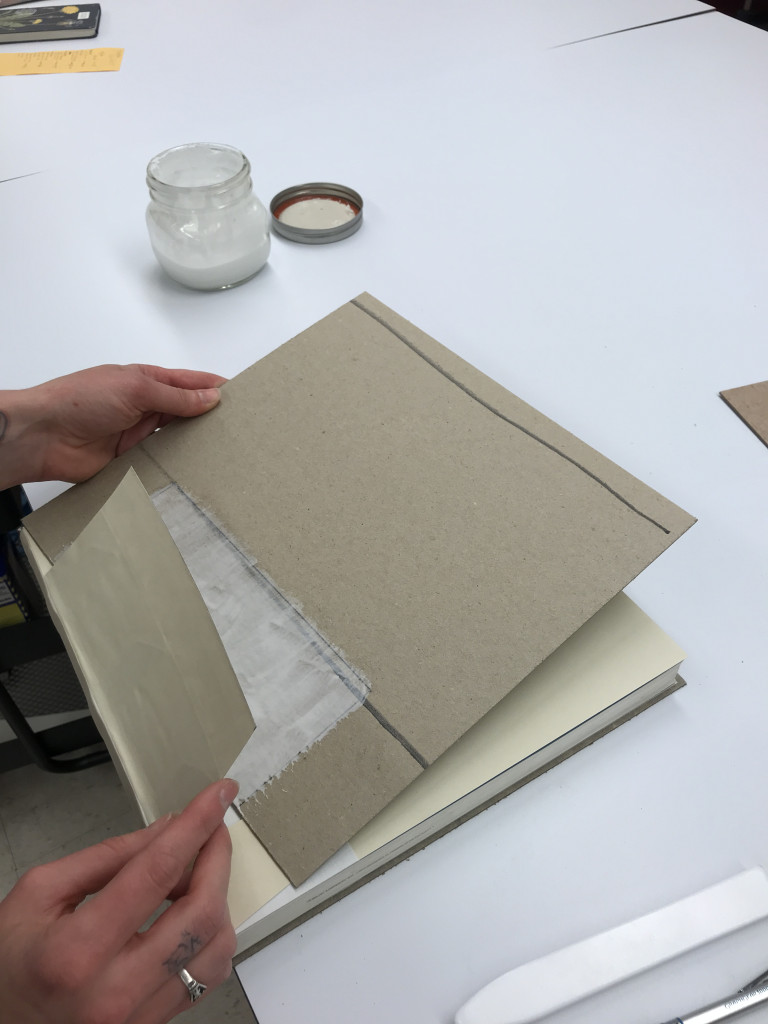
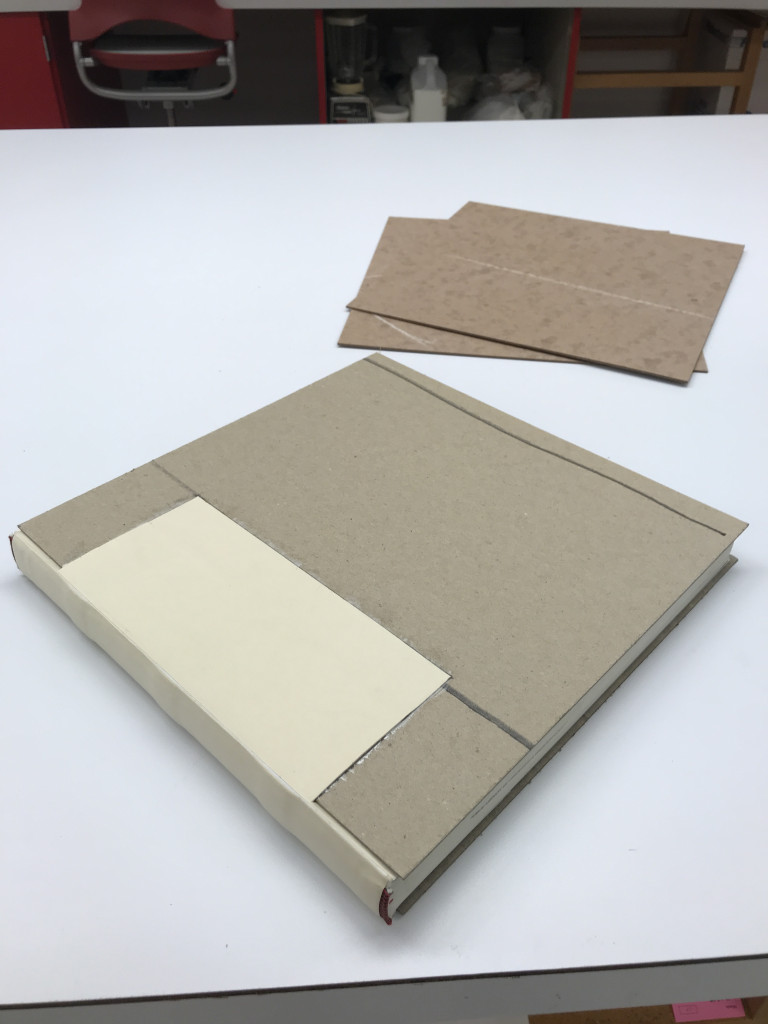
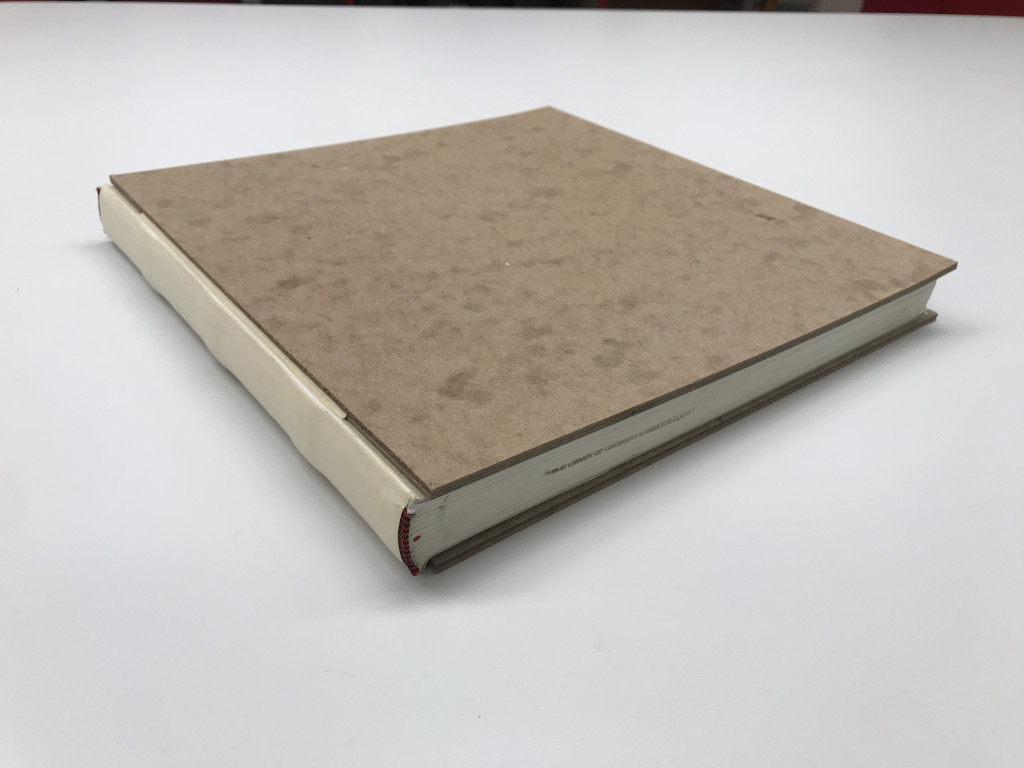
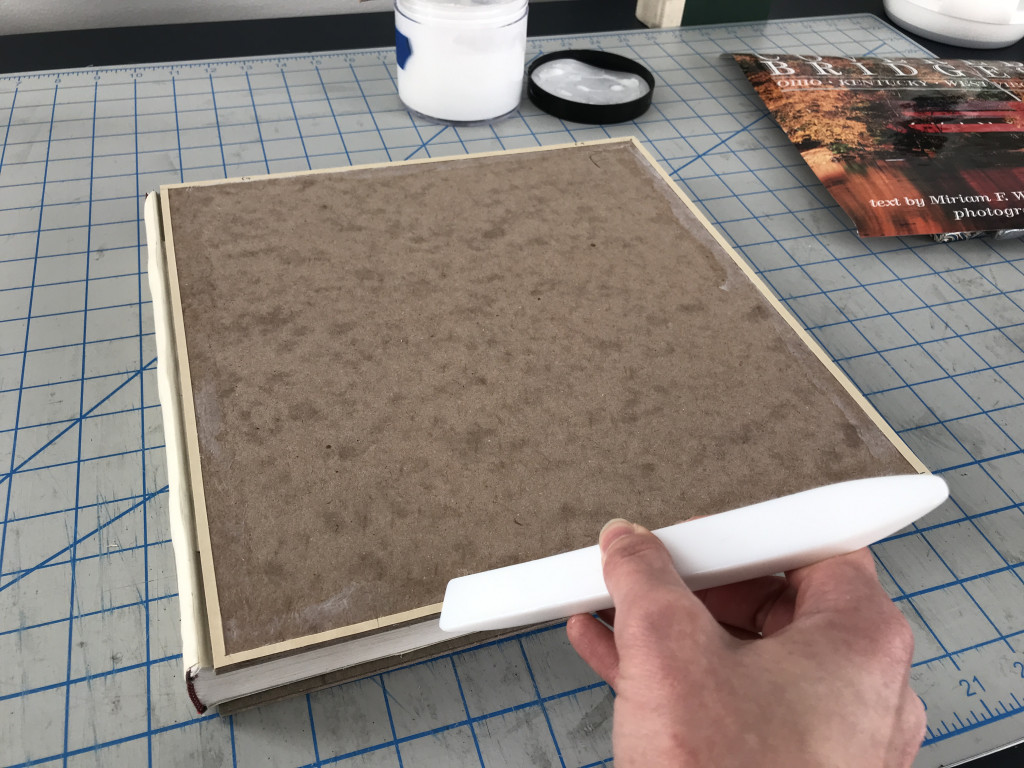
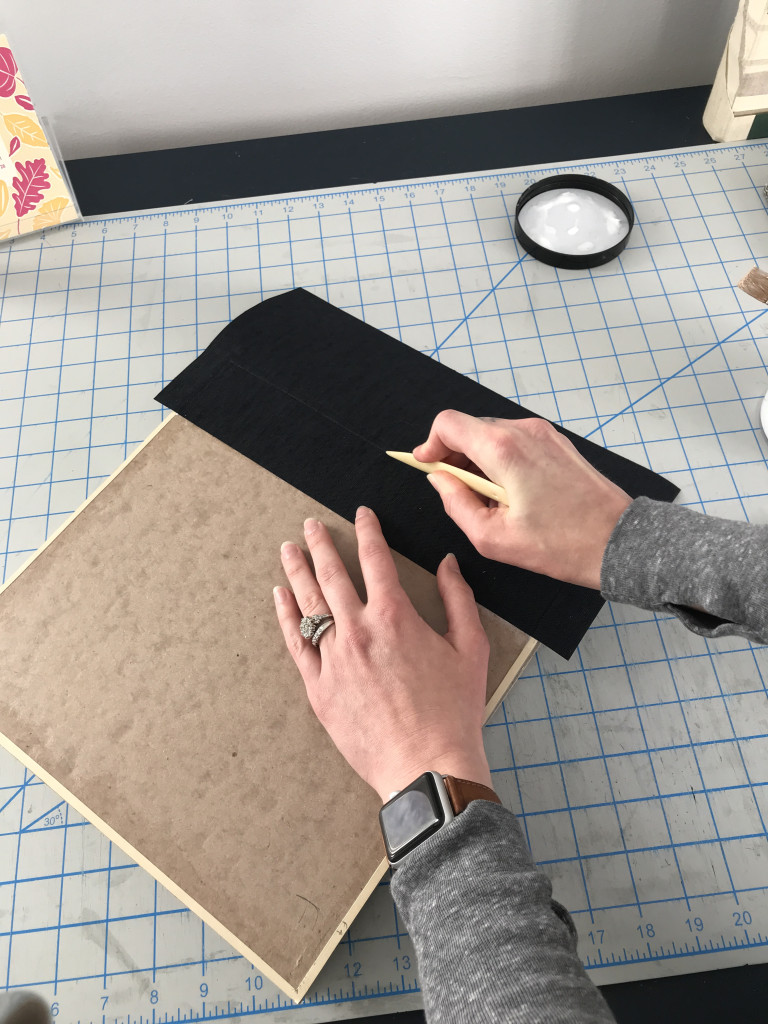
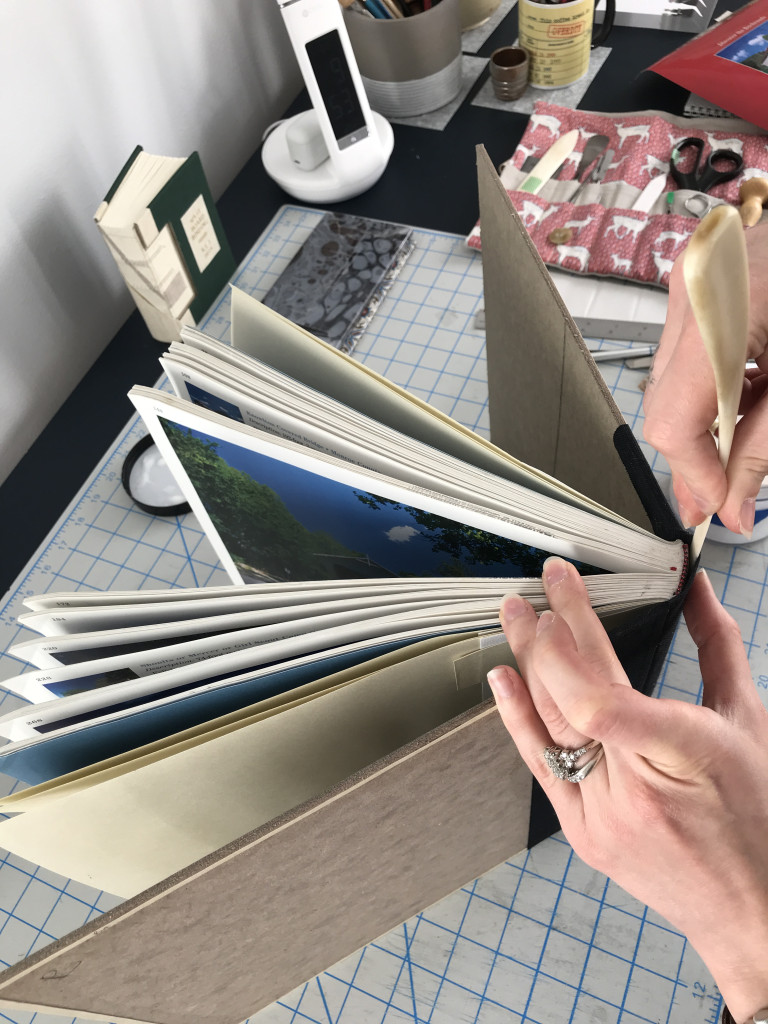
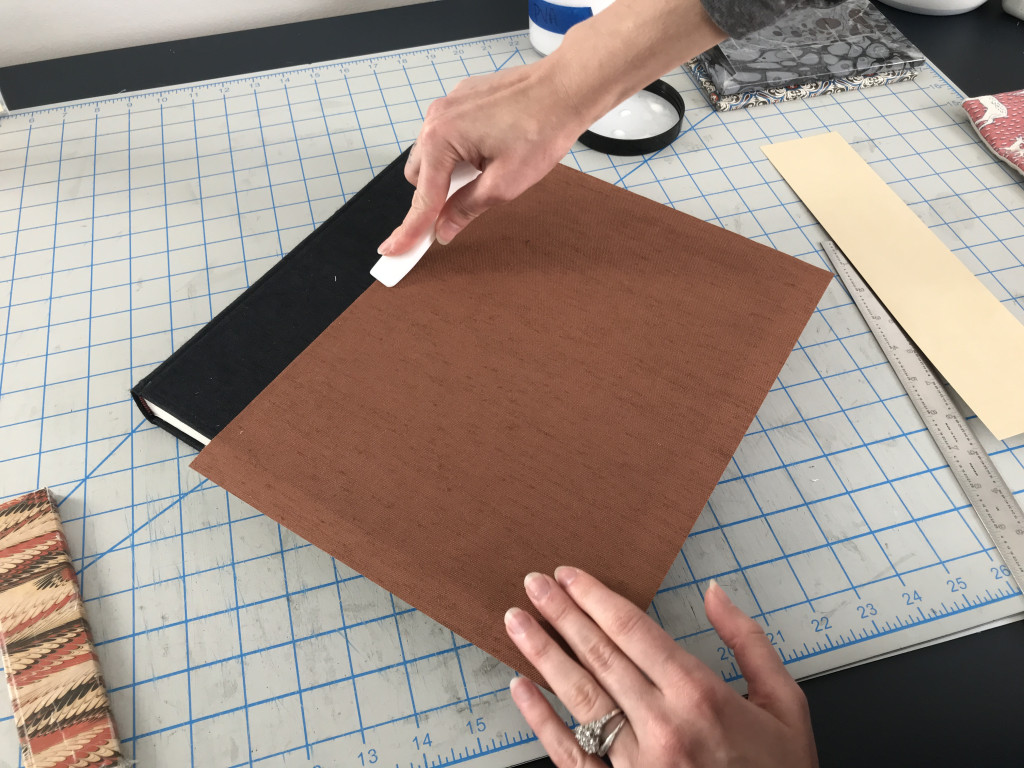
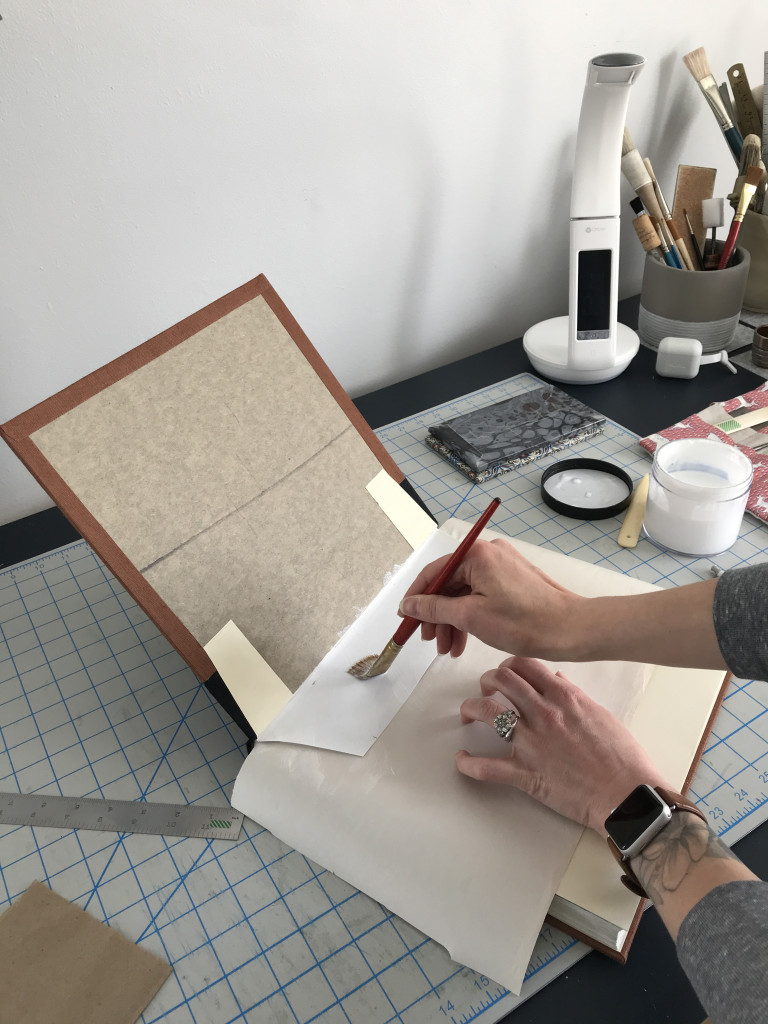
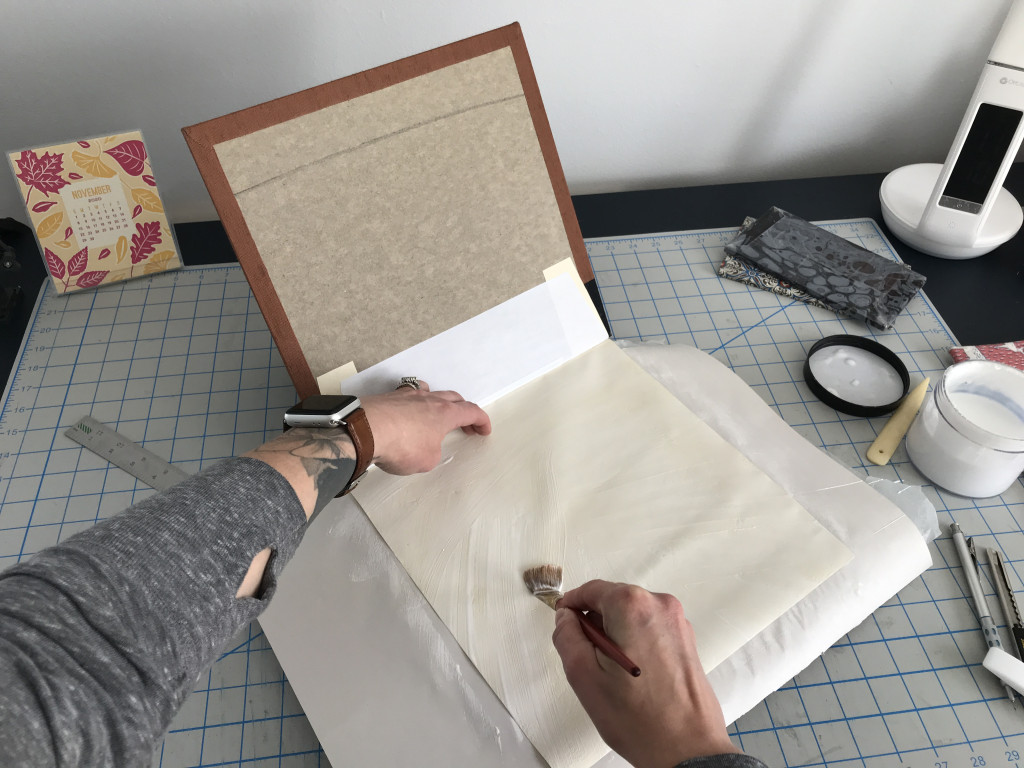
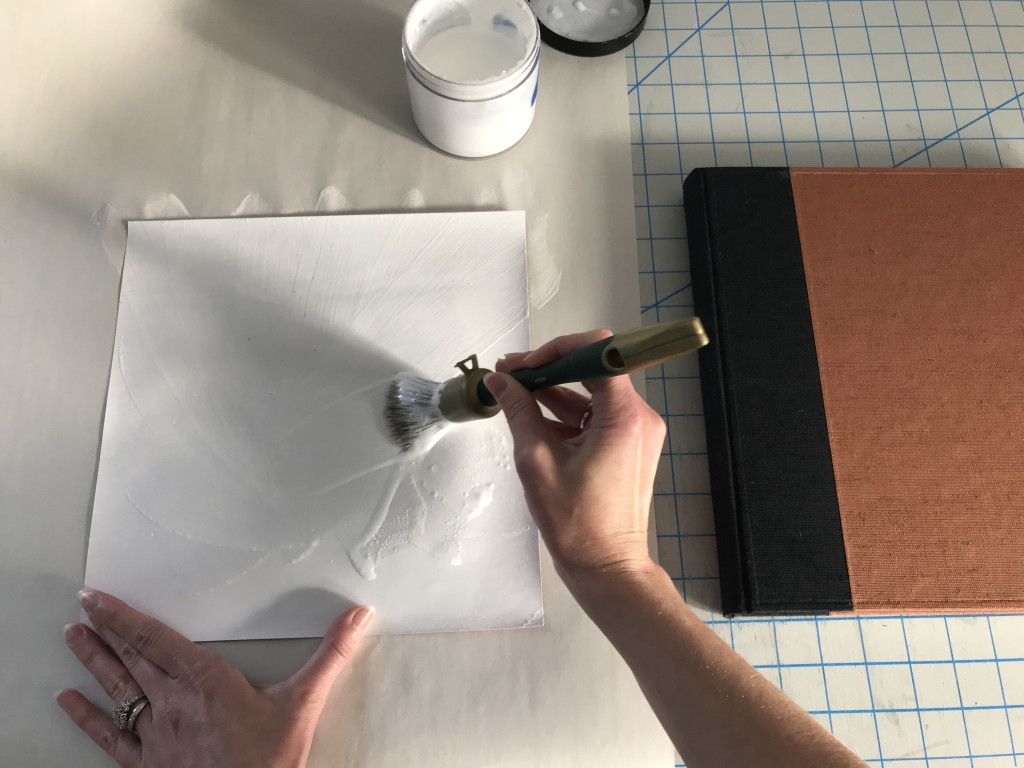
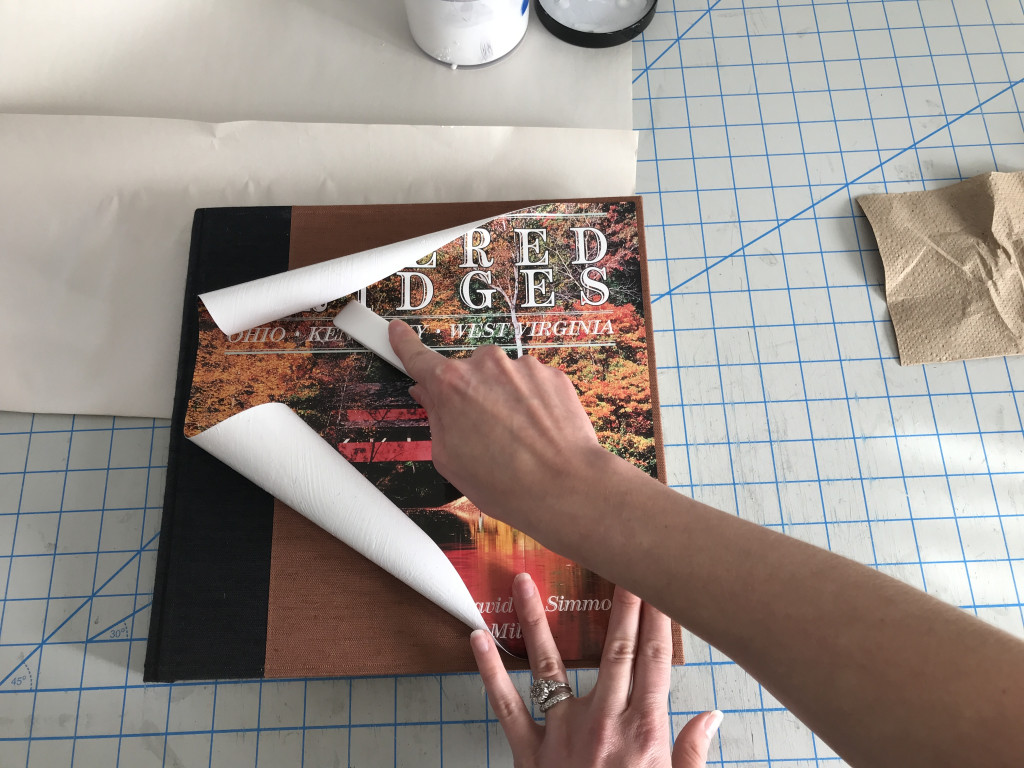
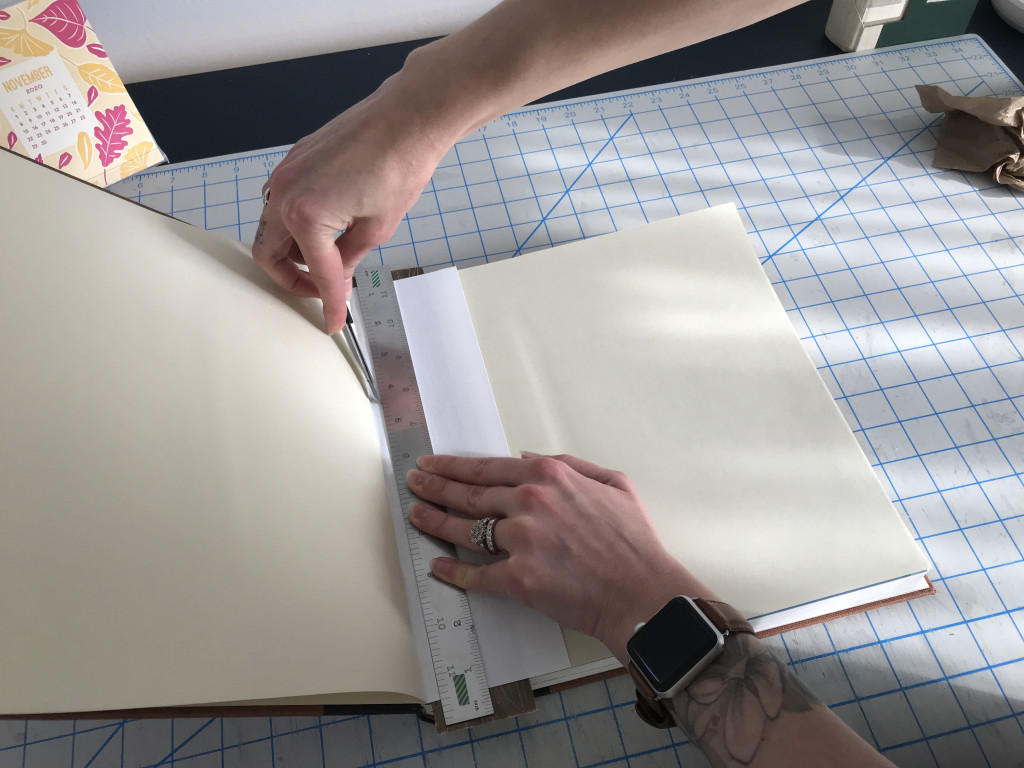
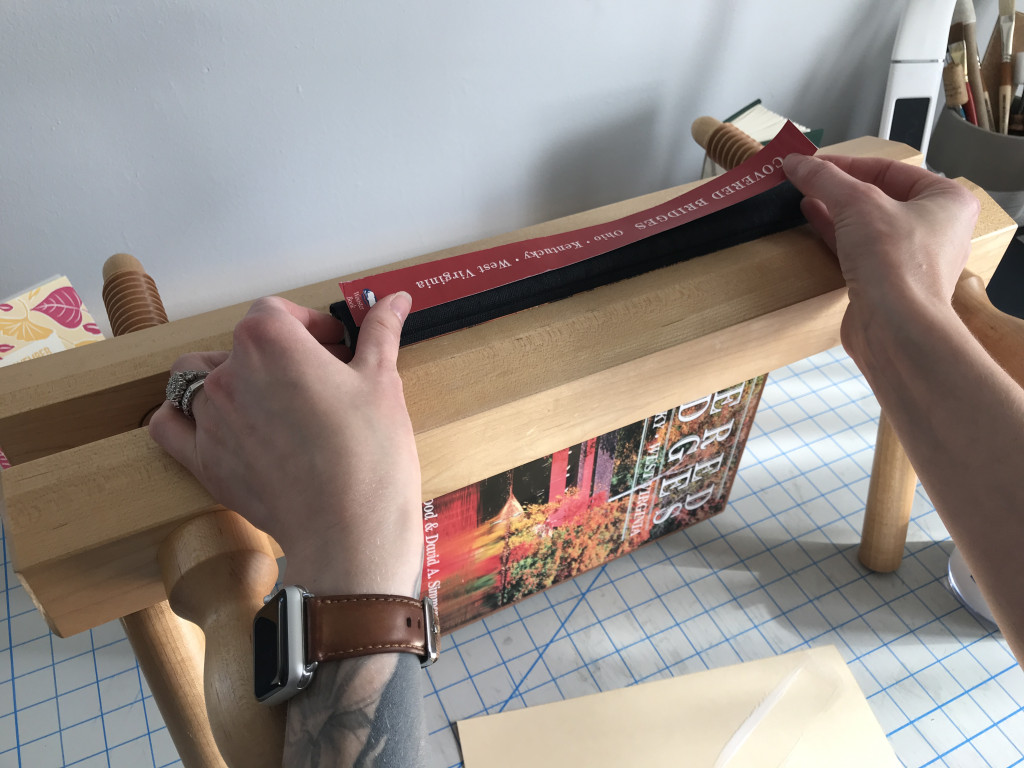
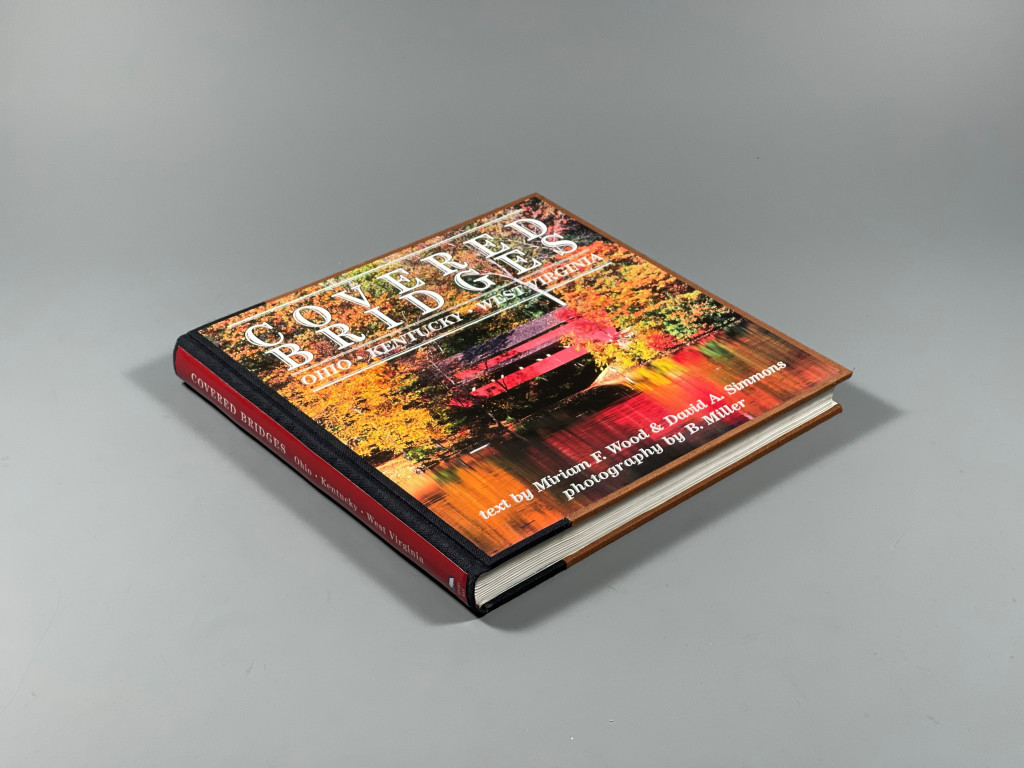
When completed the treatment offers a substantial amount of support to the textblock and a robust attachment of the textblock to the new case. While it is an involved treatment that requires a good amount of preparation, work and skill, the end results are worth it all, and the improvements are significant.
Treatments of this magnitude take many, many hours over the course of several weeks. Often, only a few steps of the treatment can be accomplished at a time to account for drying time, and timing out visits to the Lab. To take a sneak peak at what some of the steps of treatment look like please check out the video below:
For an example of how Kasie used a split-board binding treatment and modified it for a special collection item that came to the Lab from UC’s Winkler Center without a case, check out her blog, A Monster of a Treatment.
We hope you’ve enjoyed this peek into a split-board binding treatment! If you did and you want to see more of what we do, and see the Lab, then please check out our Virtual Lab Tour which will take place on Tuesday, January 26th at noon, live on the Cincinnati & Hamilton County Public Library’s Facebook page. For forthcoming information about the Virtual Tour follow the Public Library on Facebook and follow the Lab on Instagram (@thepreservationlab).
*This treatment was originally designed at the Brigham Young University lab. Then it was brought to the University of Kansas lab by Brian Baird, where our conservator, Ashleigh Ferguson Schieszer, learned the treatment and thus brought it to the Preservation Lab.
Kasie Janssen (CHPL) – Senior Conservation Technician & Jessica Ebert (UCL) – Conservation Technician
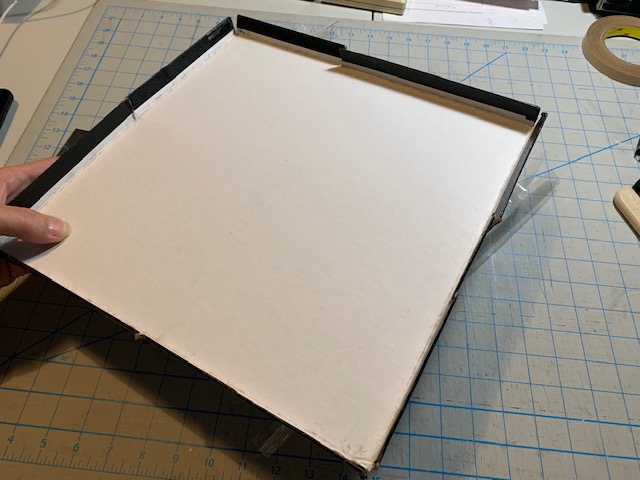
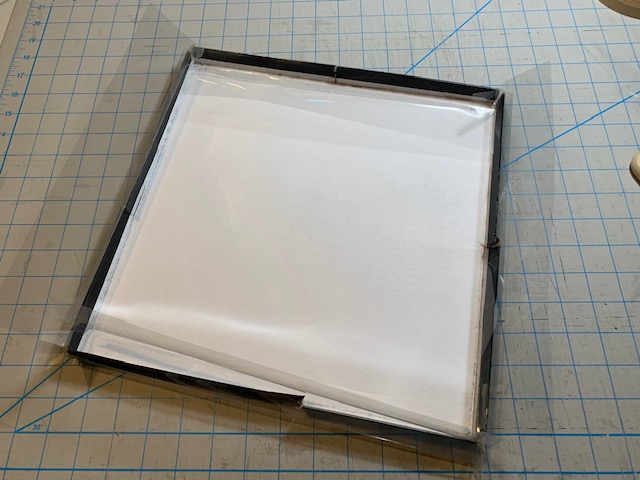
The purpose of this blog is to show a relatively easy long-term solution for strengthening and protecting the packaging for shallow banker’s box enclosures. There are two notable benefits to using this solution. The first being that in some cases little to no repairing needs to be done to damaged parts of the box and the second is at no time does any adhesive come into contact with the original piece. I have developed this system down to a science. If I make my measurements correctly, from start to finish, the lid and base jacket can be made from the custom stencils in about 180 minutes.
Ultimately you’ll be cutting 2 pieces of 4 mil Mylar to the following dimensions (W+thx4+4inches x H+thx4+4 inches) with the help of stencils.
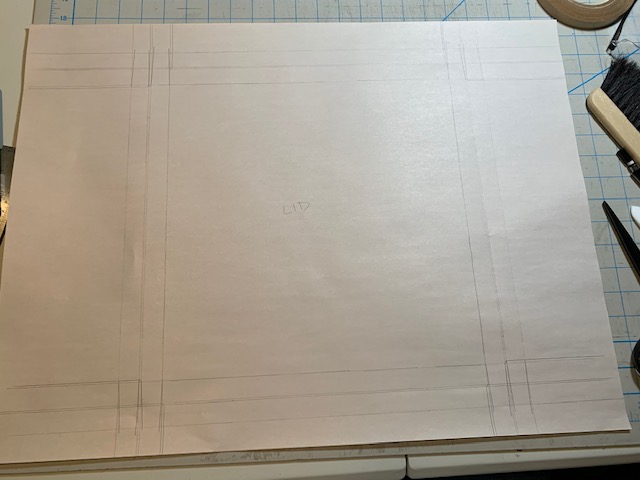
To make a stencil I just place the lid in the center of the wastepaper and adding about 1mm all around, trace the width and height. Add 1 wall thickness all around followed by 1 wall board thickness all around then another wall thickness all around. Draw each of these added lines all the way to the edge of the paper.
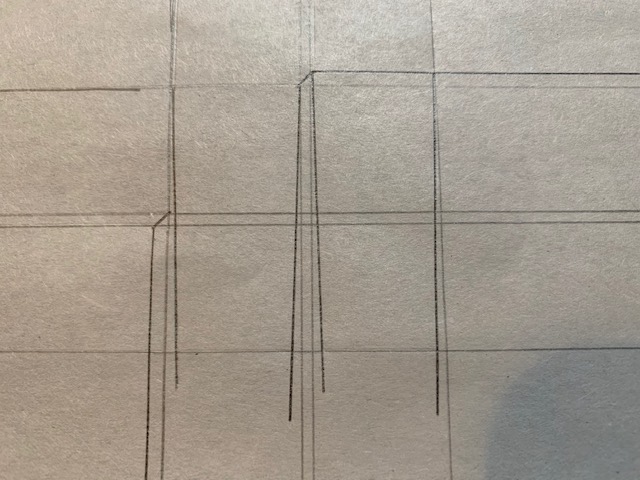
You may notice little adaptations to the tabs that will be cut out of the Mylar. I make the tabs on opposite sides to create symmetry. Here is a close-up of one.
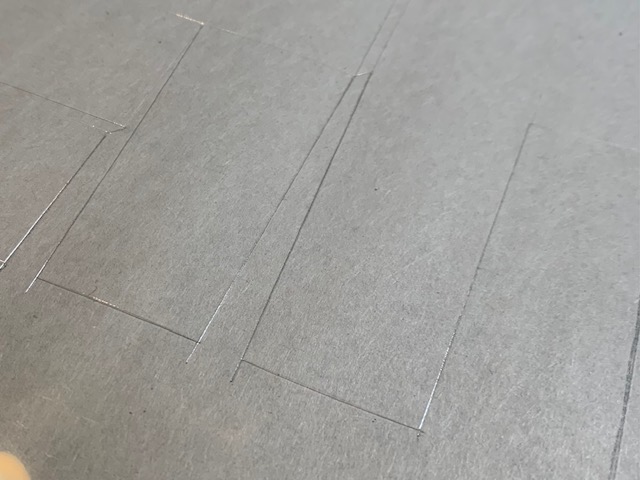
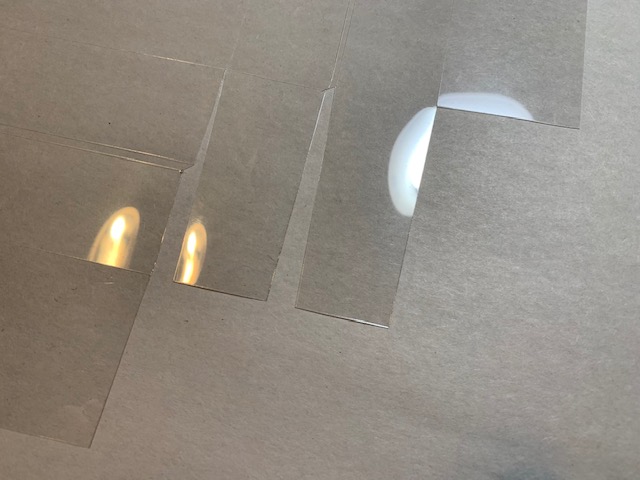
After scoring and cutting out the Mylar to match the pattern, fold on the lines using either a ruler and bone folder or your fingers.
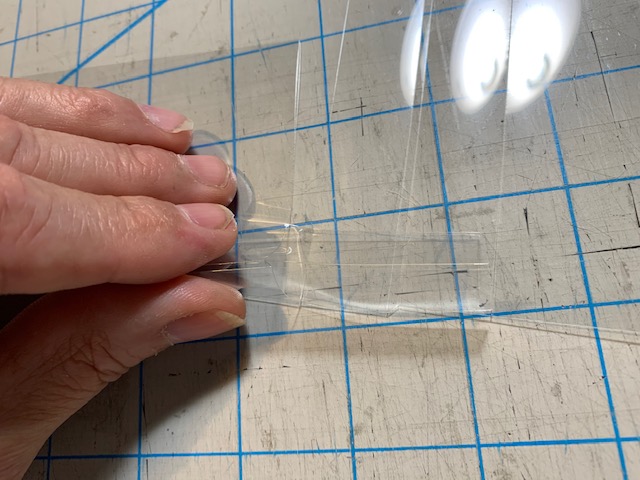
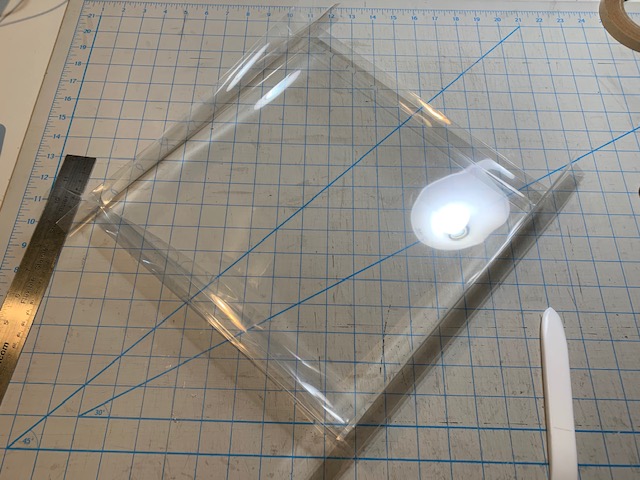
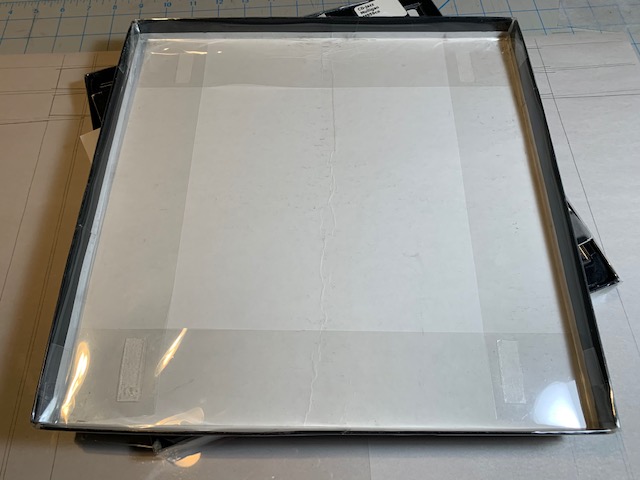
When you are all ready, place the box in the center of the Mylar sleeve and place double stick tape where the tabs will secure the corners. Start with the outside corners first.
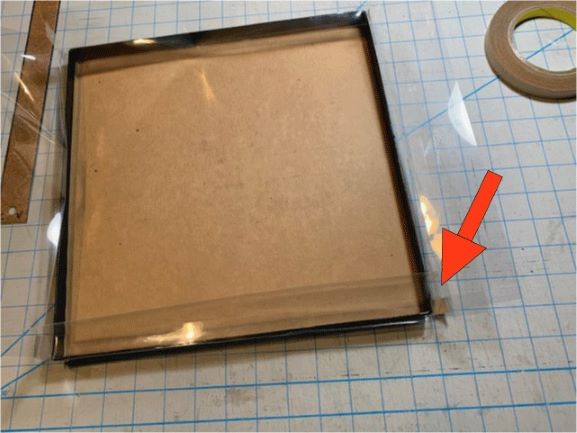
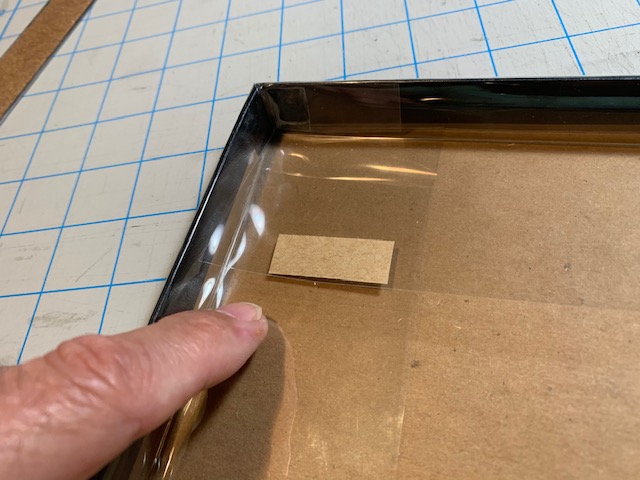
One of the great qualities of this protective wrapper is that it can cut out repair time by the virtue of the strength of the wrapper itself.
Secure the rest of the outside, then inside corners, and we’re done!
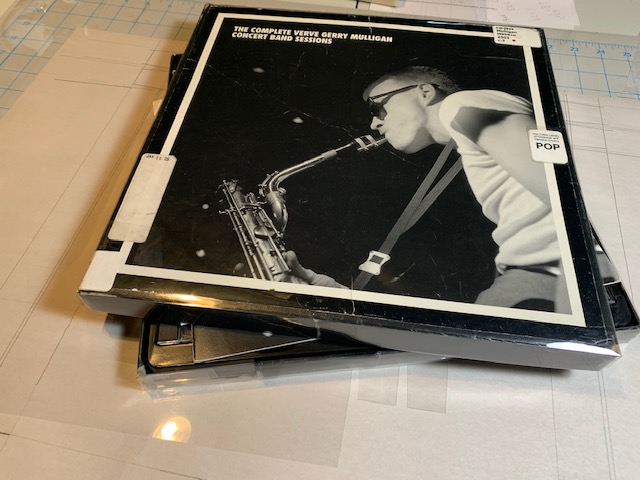
Now it’s time to enjoy the music.
Chris Voynovich (CHPL) — Senior Conservation Technician
Poisonous Book Project
In the Victorian era, textiles were colored with a green copper aceto-arsentite, used from 1814 to the late 1800’s. (Side note: this green is sometimes referred to as Paris green or emerald green and was widely used by impressionist painters.) And since books were bound in textiles, it’s no surprise that these vivid green cloths were used to bind publisher’s bindings. Therefore, it’s entirely possible that these copper arsenic covers are lurking within our library collections dating to the 19th century. In 1855, Viridian green was invented which eventually replaced Paris Green; therefore, green cloth bindings from the 20th century to today are of likely no concern.
So how do we know if a binding is poisonous? Until recently, there hasn’t been a lot of published research on the subject. The ability to perform scientific analysis testing is required, such as the use of XRF (x-ray fluorescence elemental analysis). See this article for more info: https://theconversation.com/how-we-discovered-three-poisonous-books-in-our-university-library-98358.
When faced with the question of how to ID these textiles in the past, I’ve referred researchers to textile conservators who may be more familiar with this subject – as well as paintings conservators since they deal with pigments on a regular basis. The best resource on the subject I could track down was an adjacently-related conservation study on Navajo Textiles, titled, Coping With Arsenic-Based Pesticides on Textile Collections by Jae R. Anderson, Nancy Odegaard, Martina Dawley, Delana Joy Farley, and Werner Zimmt from the American Institute for Conservation ‘s Objects Specialty Group Postprints, Volume 21, 2014.
However, new research being conducted by Melissa Tedone and researchers at Winterthur Museum, Garden & Library shines new light on the subject. They provide helpful recommendations on ID, handling, and storage. Please see https://www.iiconservation.org/content/poison-book-project to learn about the Poisonous Book Project being performed by Winterthur Library.
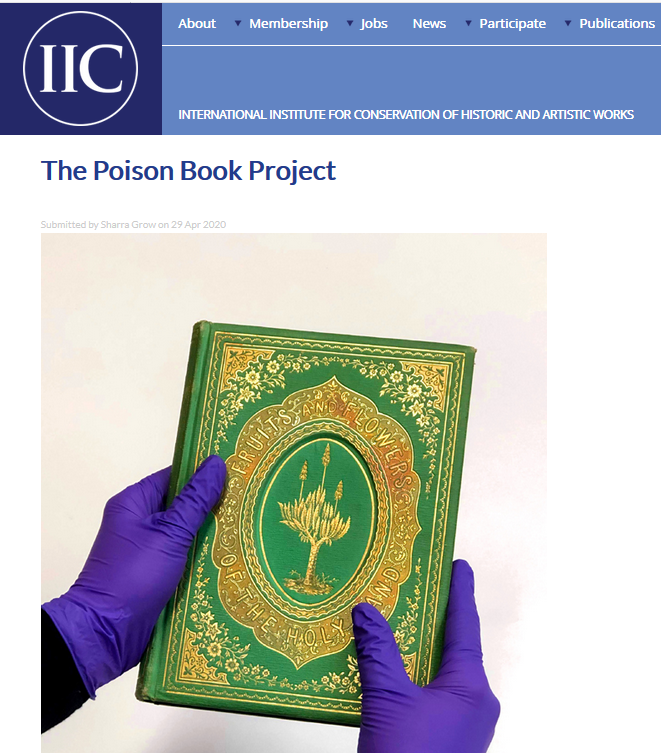
While our lab does not currently perform x-ray fluorescence spectroscopy to confirm whether a book is poisonous, there are some visual clues to be aware of. When handling a copy of Rustic Adornments for Homes and Taste (1857) Melissa Tedone notes how “the bright green colorant flakes readily from the bookcloth with even the gentlest touch of my porcupine quill.” This pigment seems to be impregnated into the cloth rather than dyed, and therefore prone to brittleness and flaking.
Recommendations to those without the ability to ID pigments: If you suspect that your book may be bound within the Victorian era of the 19th century, treat the book as though it may contain arsenic.
Additional recommendations for libraries by Melissa Tedone and the Winterthur crew include:
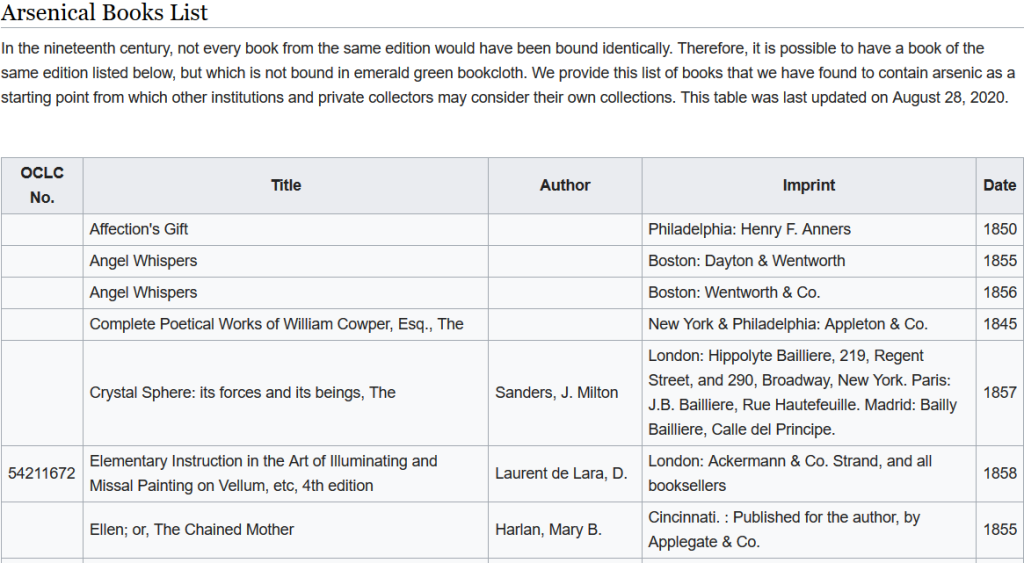
Curious to know if there are specific titles of books that have tested positive for “poison?” Check out this link for a table of books identified by the Poisonous Book project and compare against duplicate titles in your collection:
See http://wiki.winterthur.org/wiki/Poison_Book_Project
Since testing continues, the Winterthur research team has created a color swatch bookmark to assist with identifying potentially arsenical green bookcloth. The library asks for the consideration of of $5 or more to help cover printing and mailing costs. Email reference@wintherthur.org for more information.
To learn more, check out the 2023 Connecting to Collections (C2C) Care Webinar The Poison Book Project.
Ashleigh Ferguson Schieszer (CHPL) – Rare Book and Paper Conservator, Lab Co-Manager
List of Resources:
https://www.iiconservation.org/content/poison-book-project
http://wiki.winterthur.org/wiki/Poison_Book_Project
https://www.iiconservation.org/content/news-conservation-issue-77-april-may-2020
https://theconversation.com/how-we-discovered-three-poisonous-books-in-our-university-library-98358
https://www.finebooksmagazine.com/issue/arsenic-and-old-books
The Preservation Lab at UC Blog uses Accessibility Checker to monitor our website's accessibility.