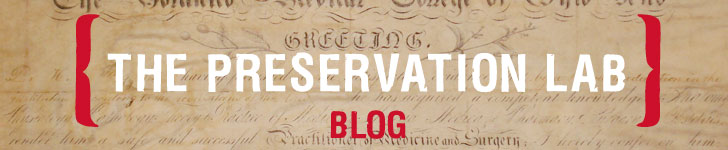
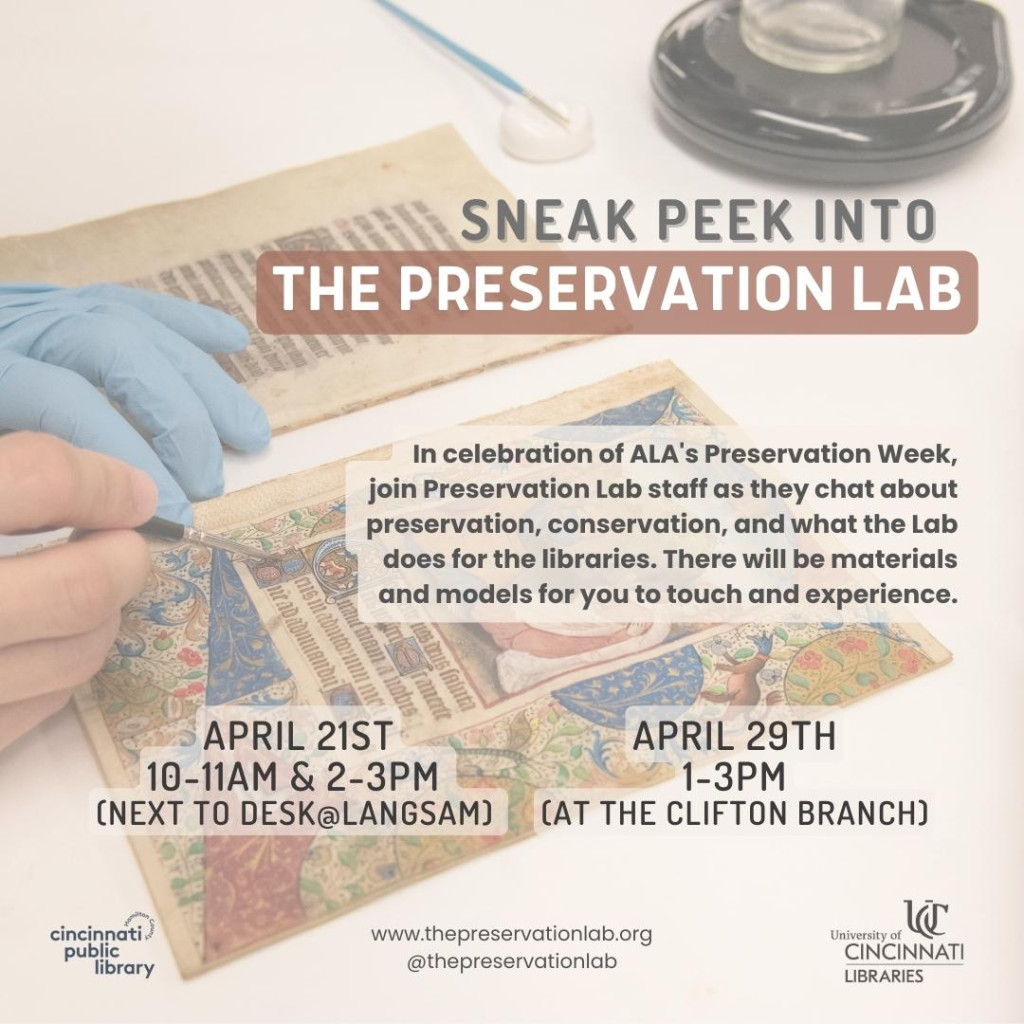
After a two year hiatus, the Preservation Lab once again was able to celebrate the American Library Association’s Preservation Week. And this year, the lab decided to take Preservation Week to the public.
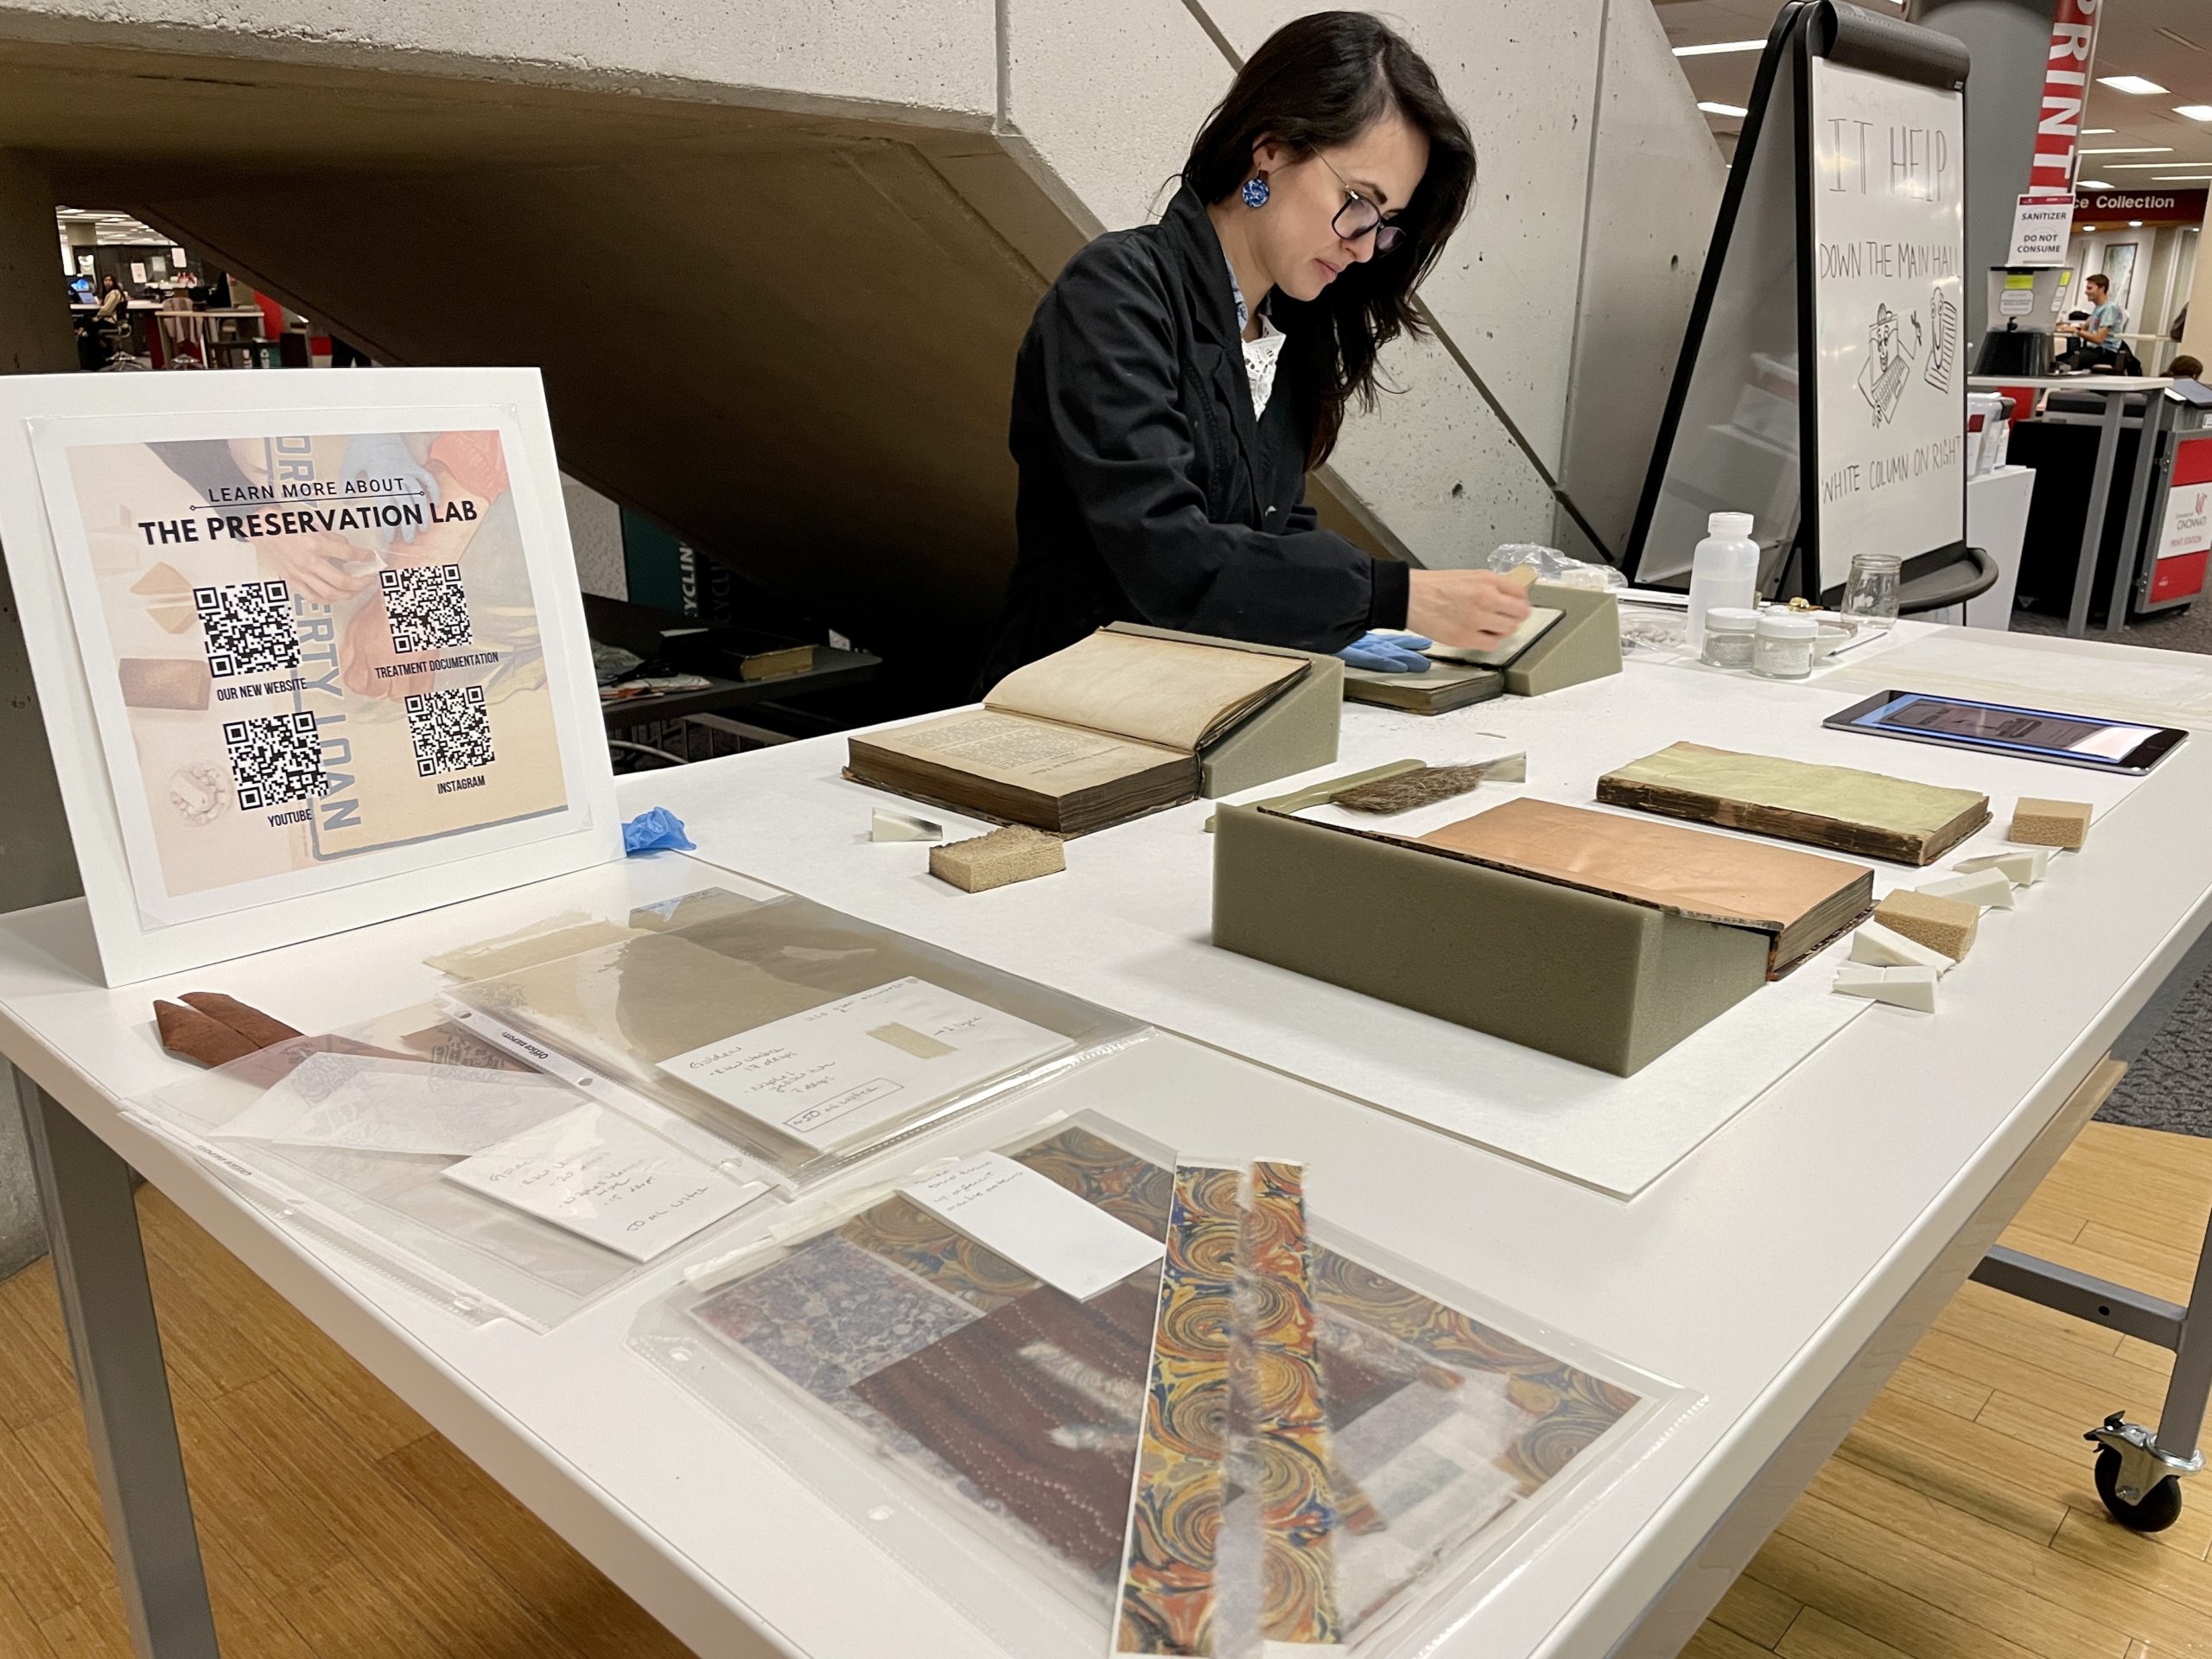
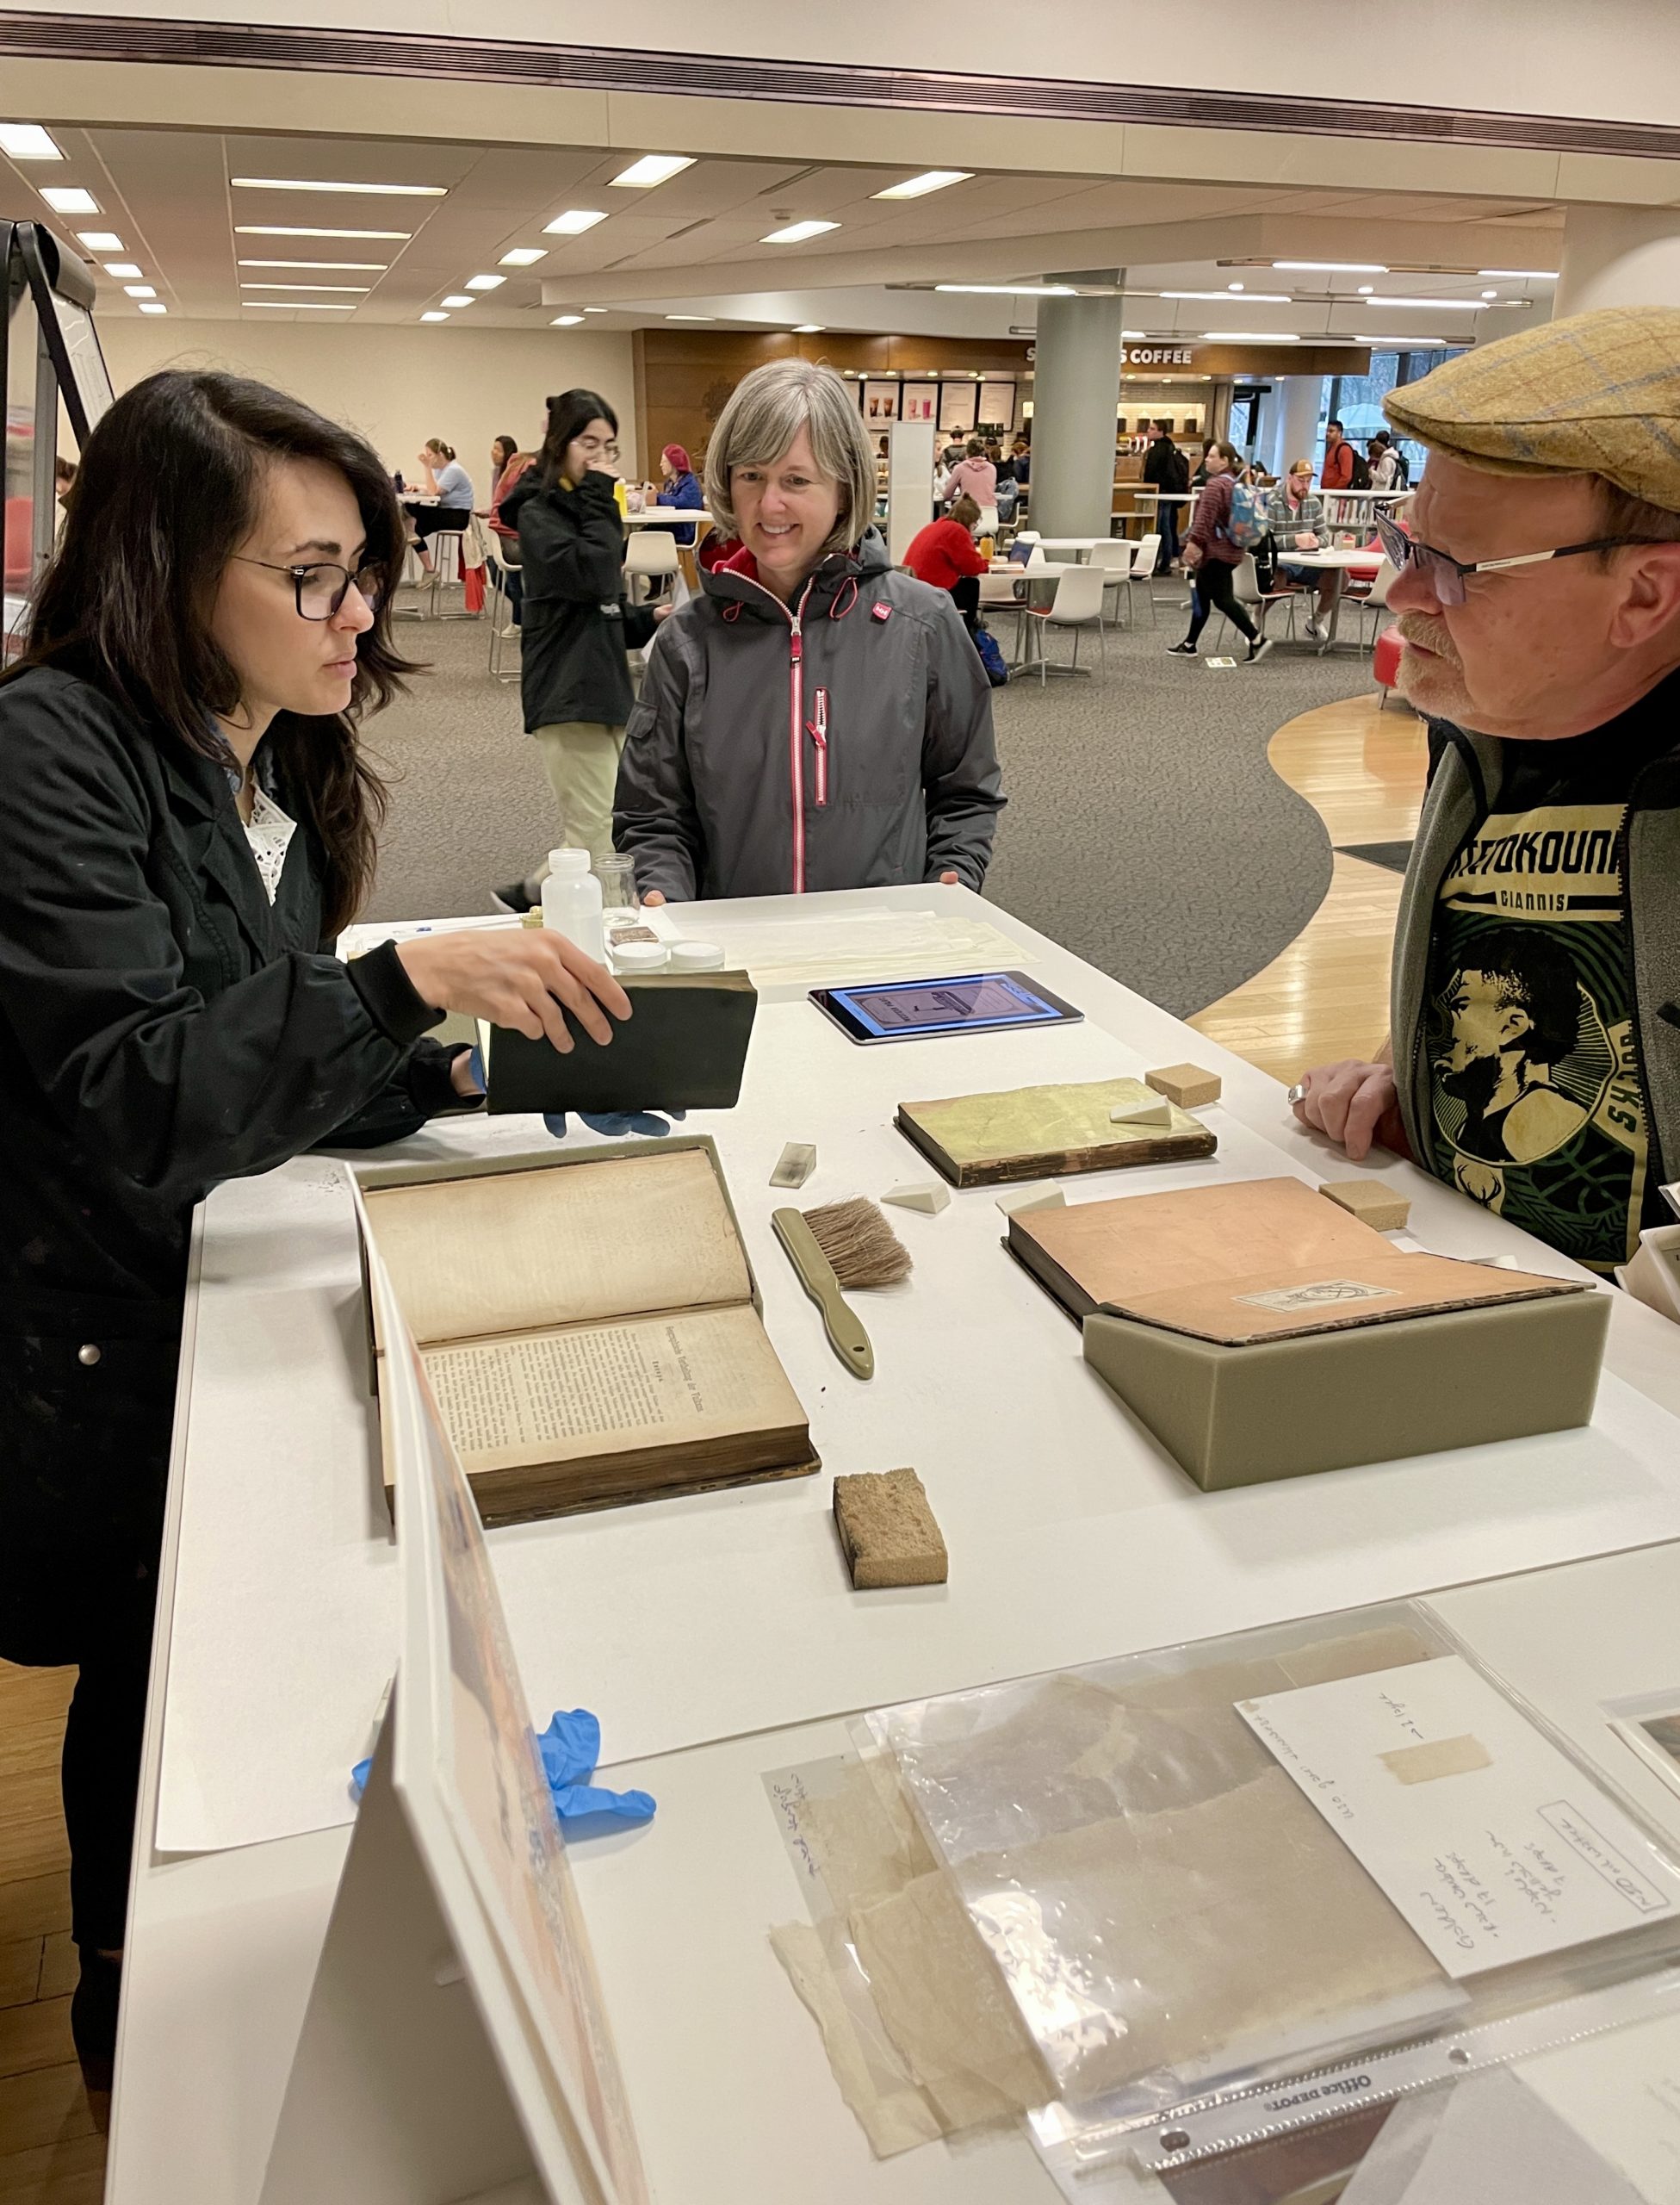
On the morning of April 21st, Catarina and Jessica took one of the lab’s rolling work tables to the entrance of the Langsam library. There they set up a demonstration area with some very dirty books, to show the public a little bit about surface cleaning. They brought out the different supplies used in surface cleaning (such as hydrophilic sponges, smoke sponges, eraser crumbles and vinyl erasers). In addition to surface cleaning materials, Jessica and Catarina also brought some Japanese tissue for the public to touch and learn about tear repair.
Jessica is actively surface cleaning a very grimy book.Catarina is surface cleaning a dirty book using a hydrophilic sponge.Another view of the entire set up with a tear repair station.
A few members of the public were too nervous to even try to surface clean a little bit of the dirty books (all filled with soot from coal burning stoves), but others were brave enough and felt that surface cleaning was a very satisfying and relaxing treatment.
Jessica encouraging a UC student to try to surface clean.Catarina explaining why surface cleaning was the first step to repair the broken inner joint.
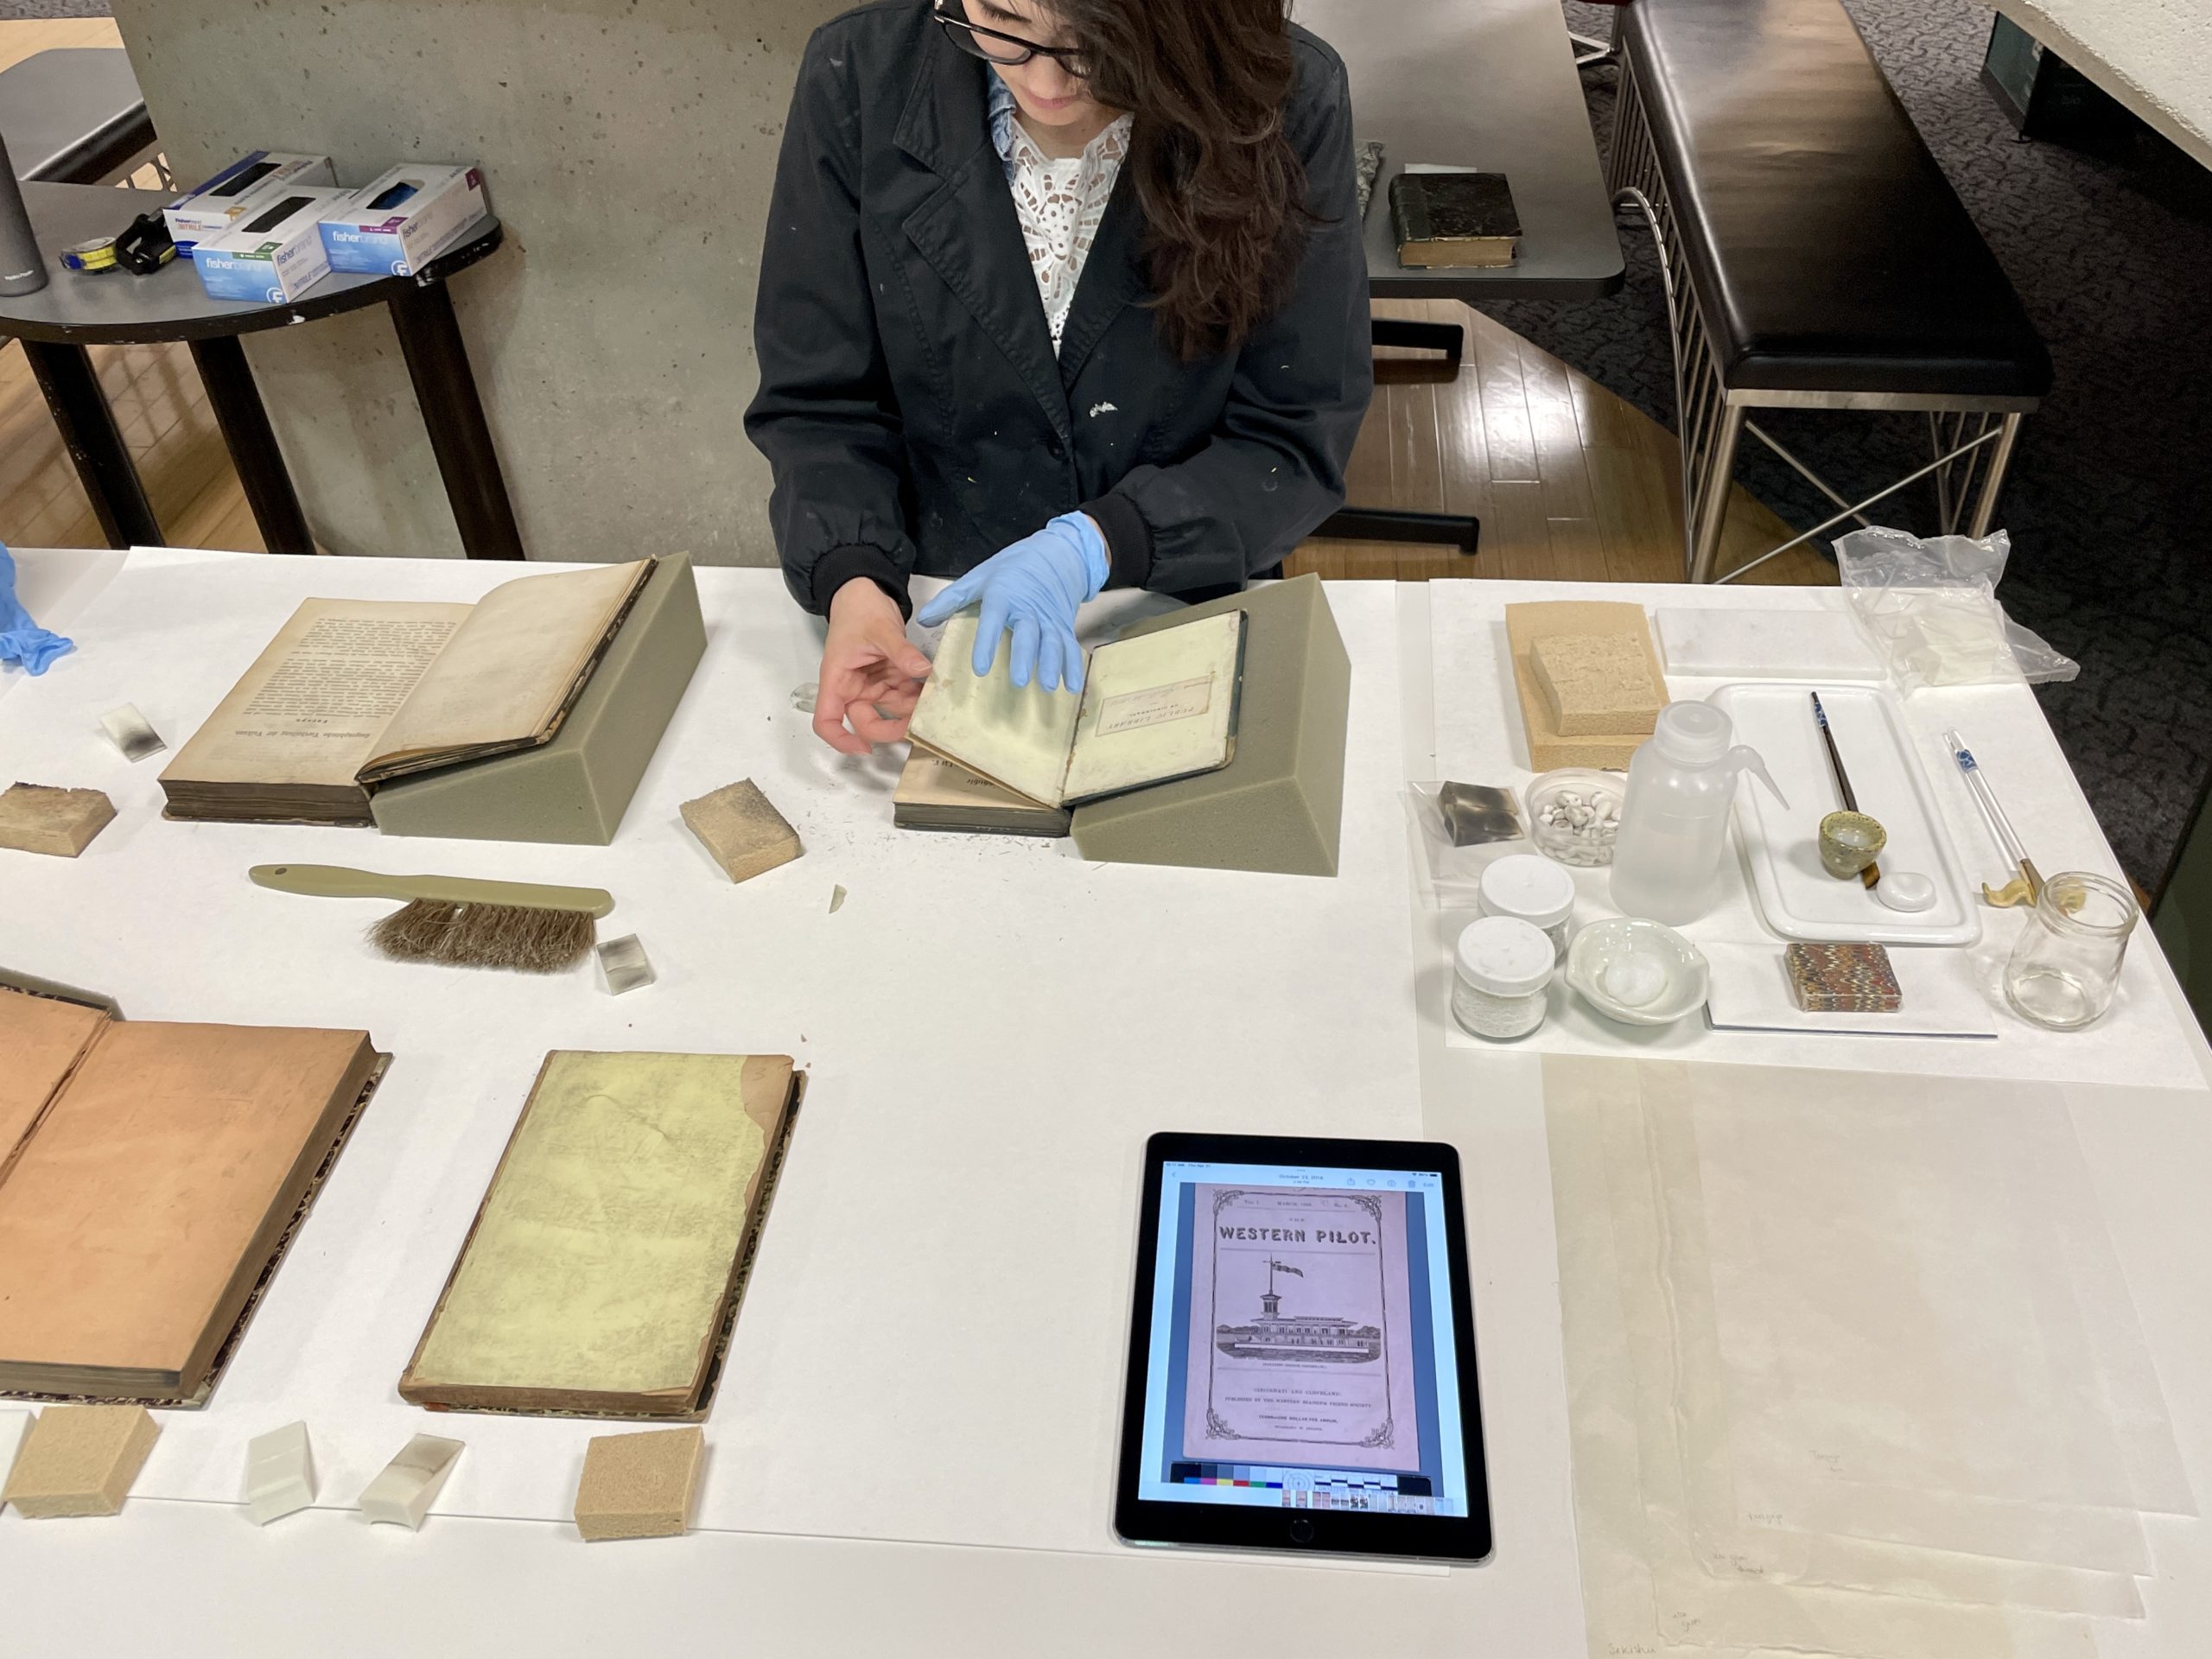
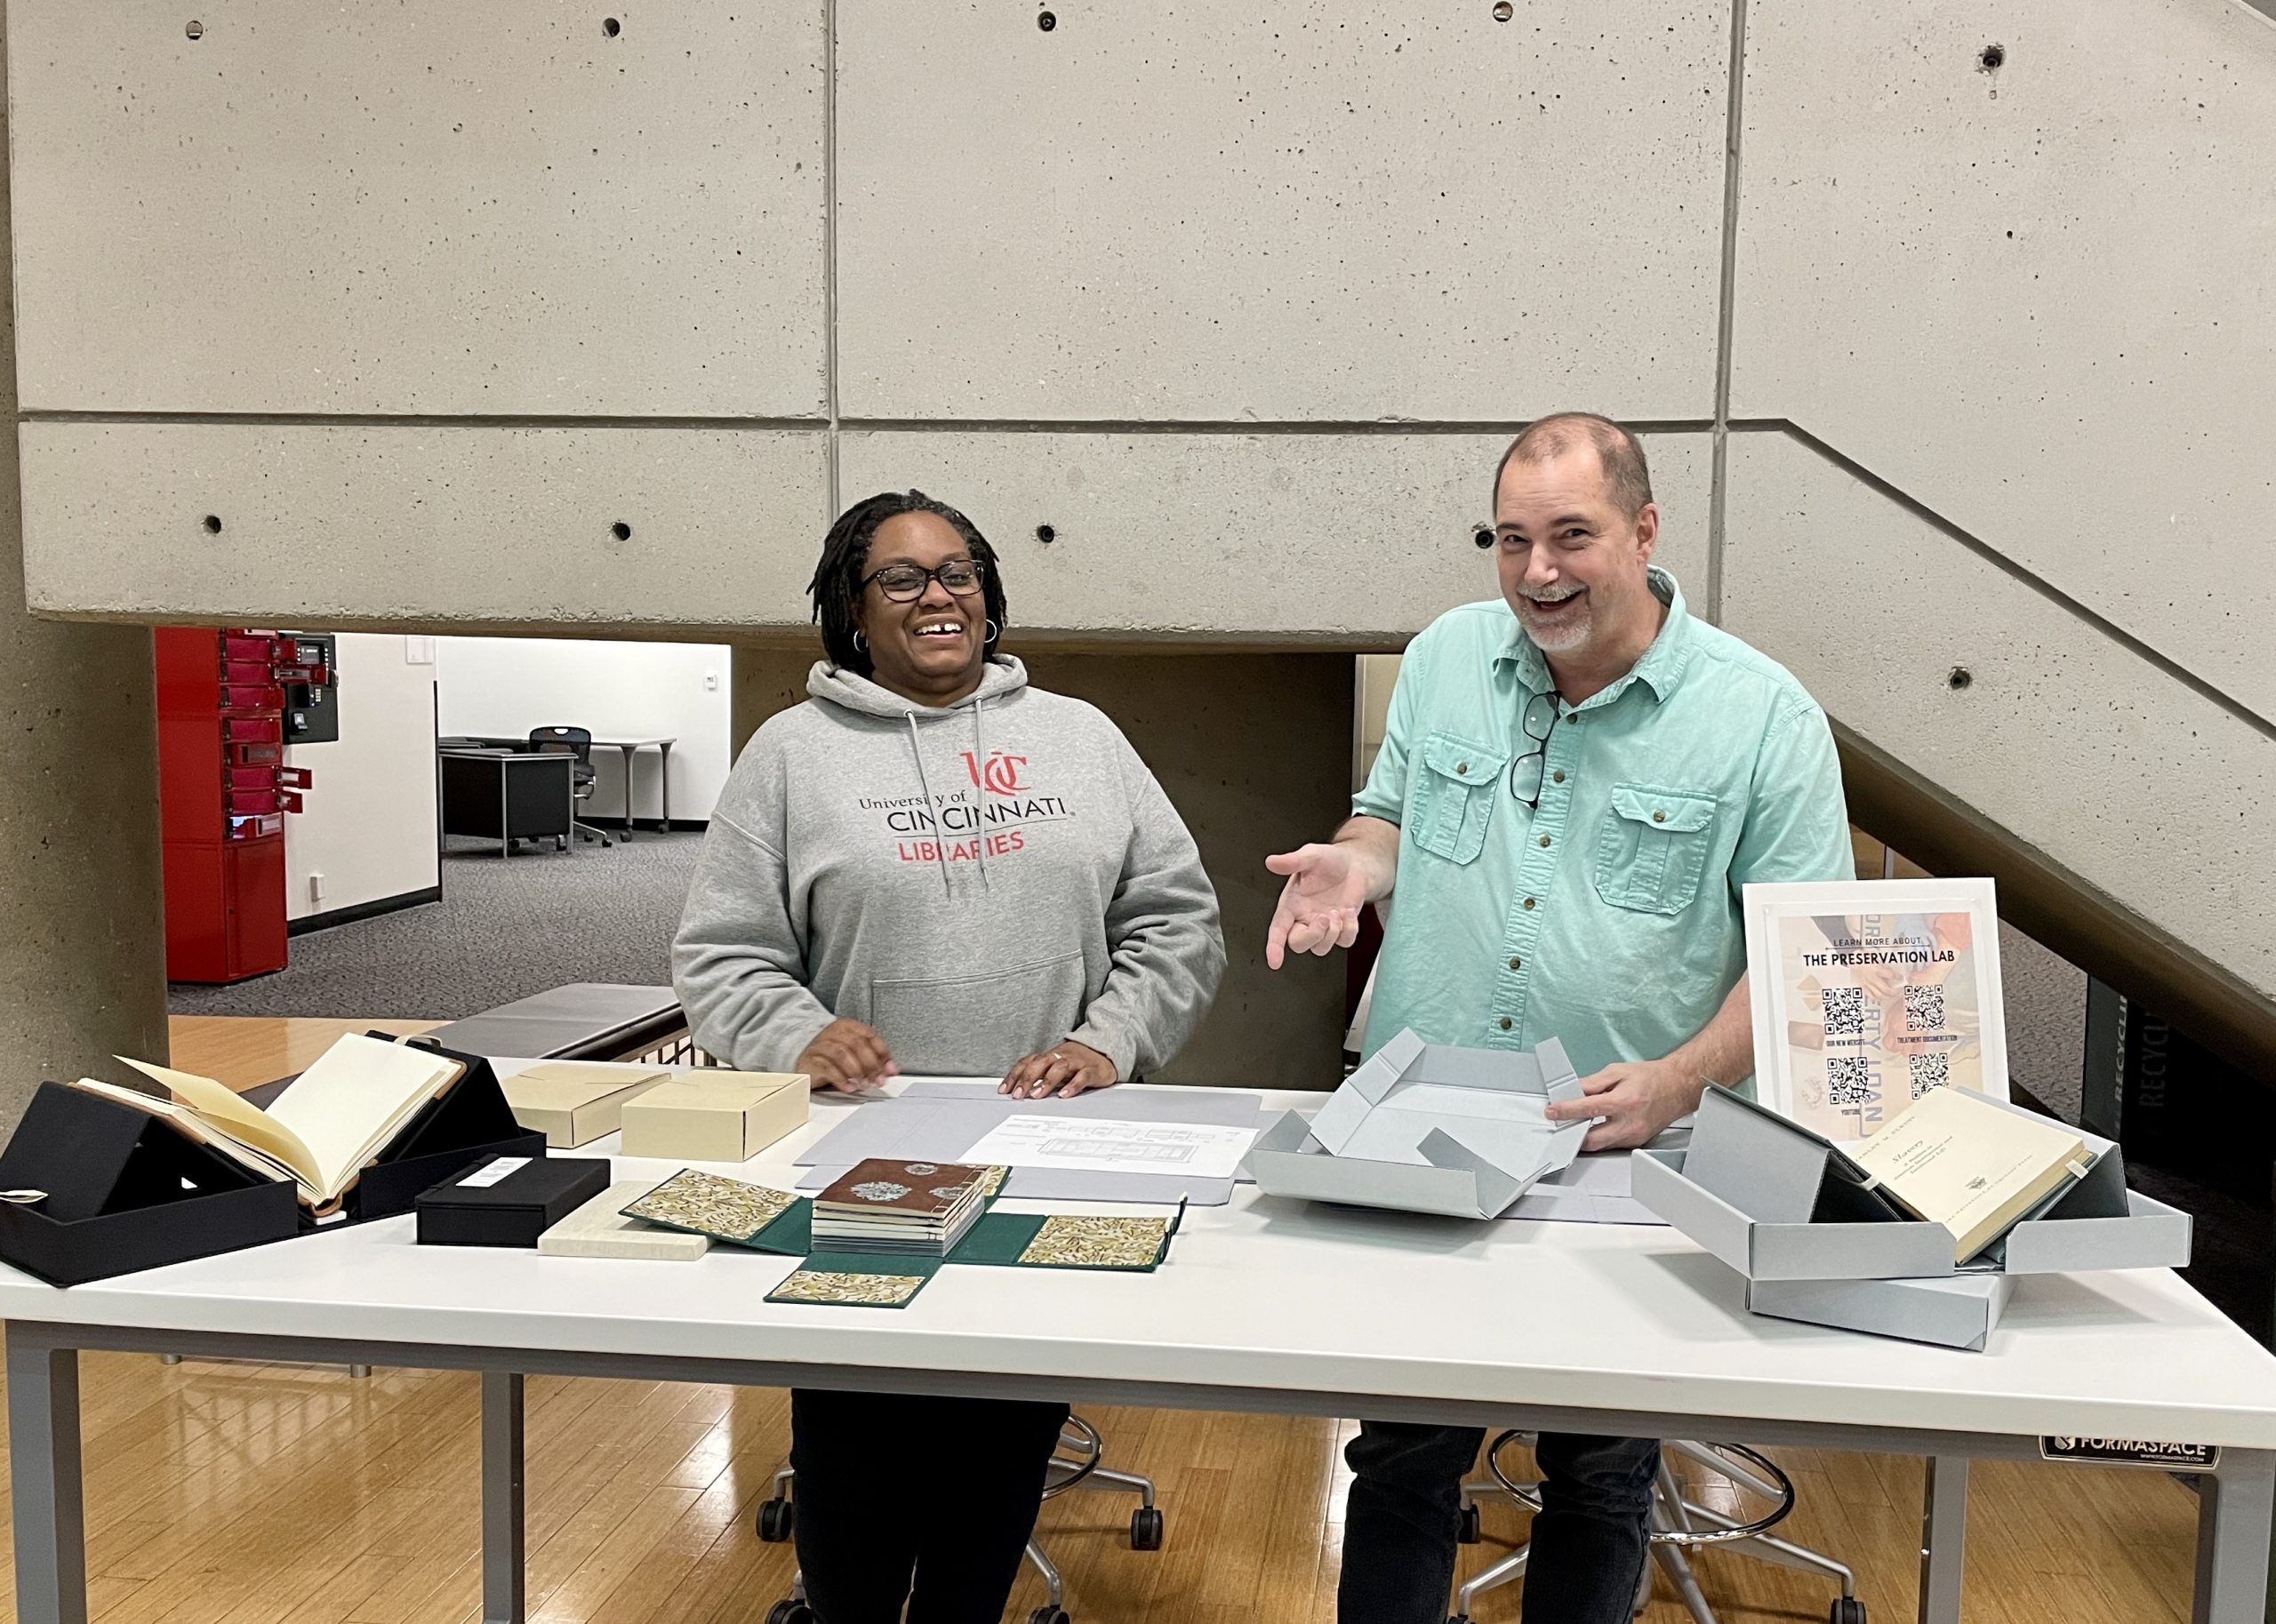
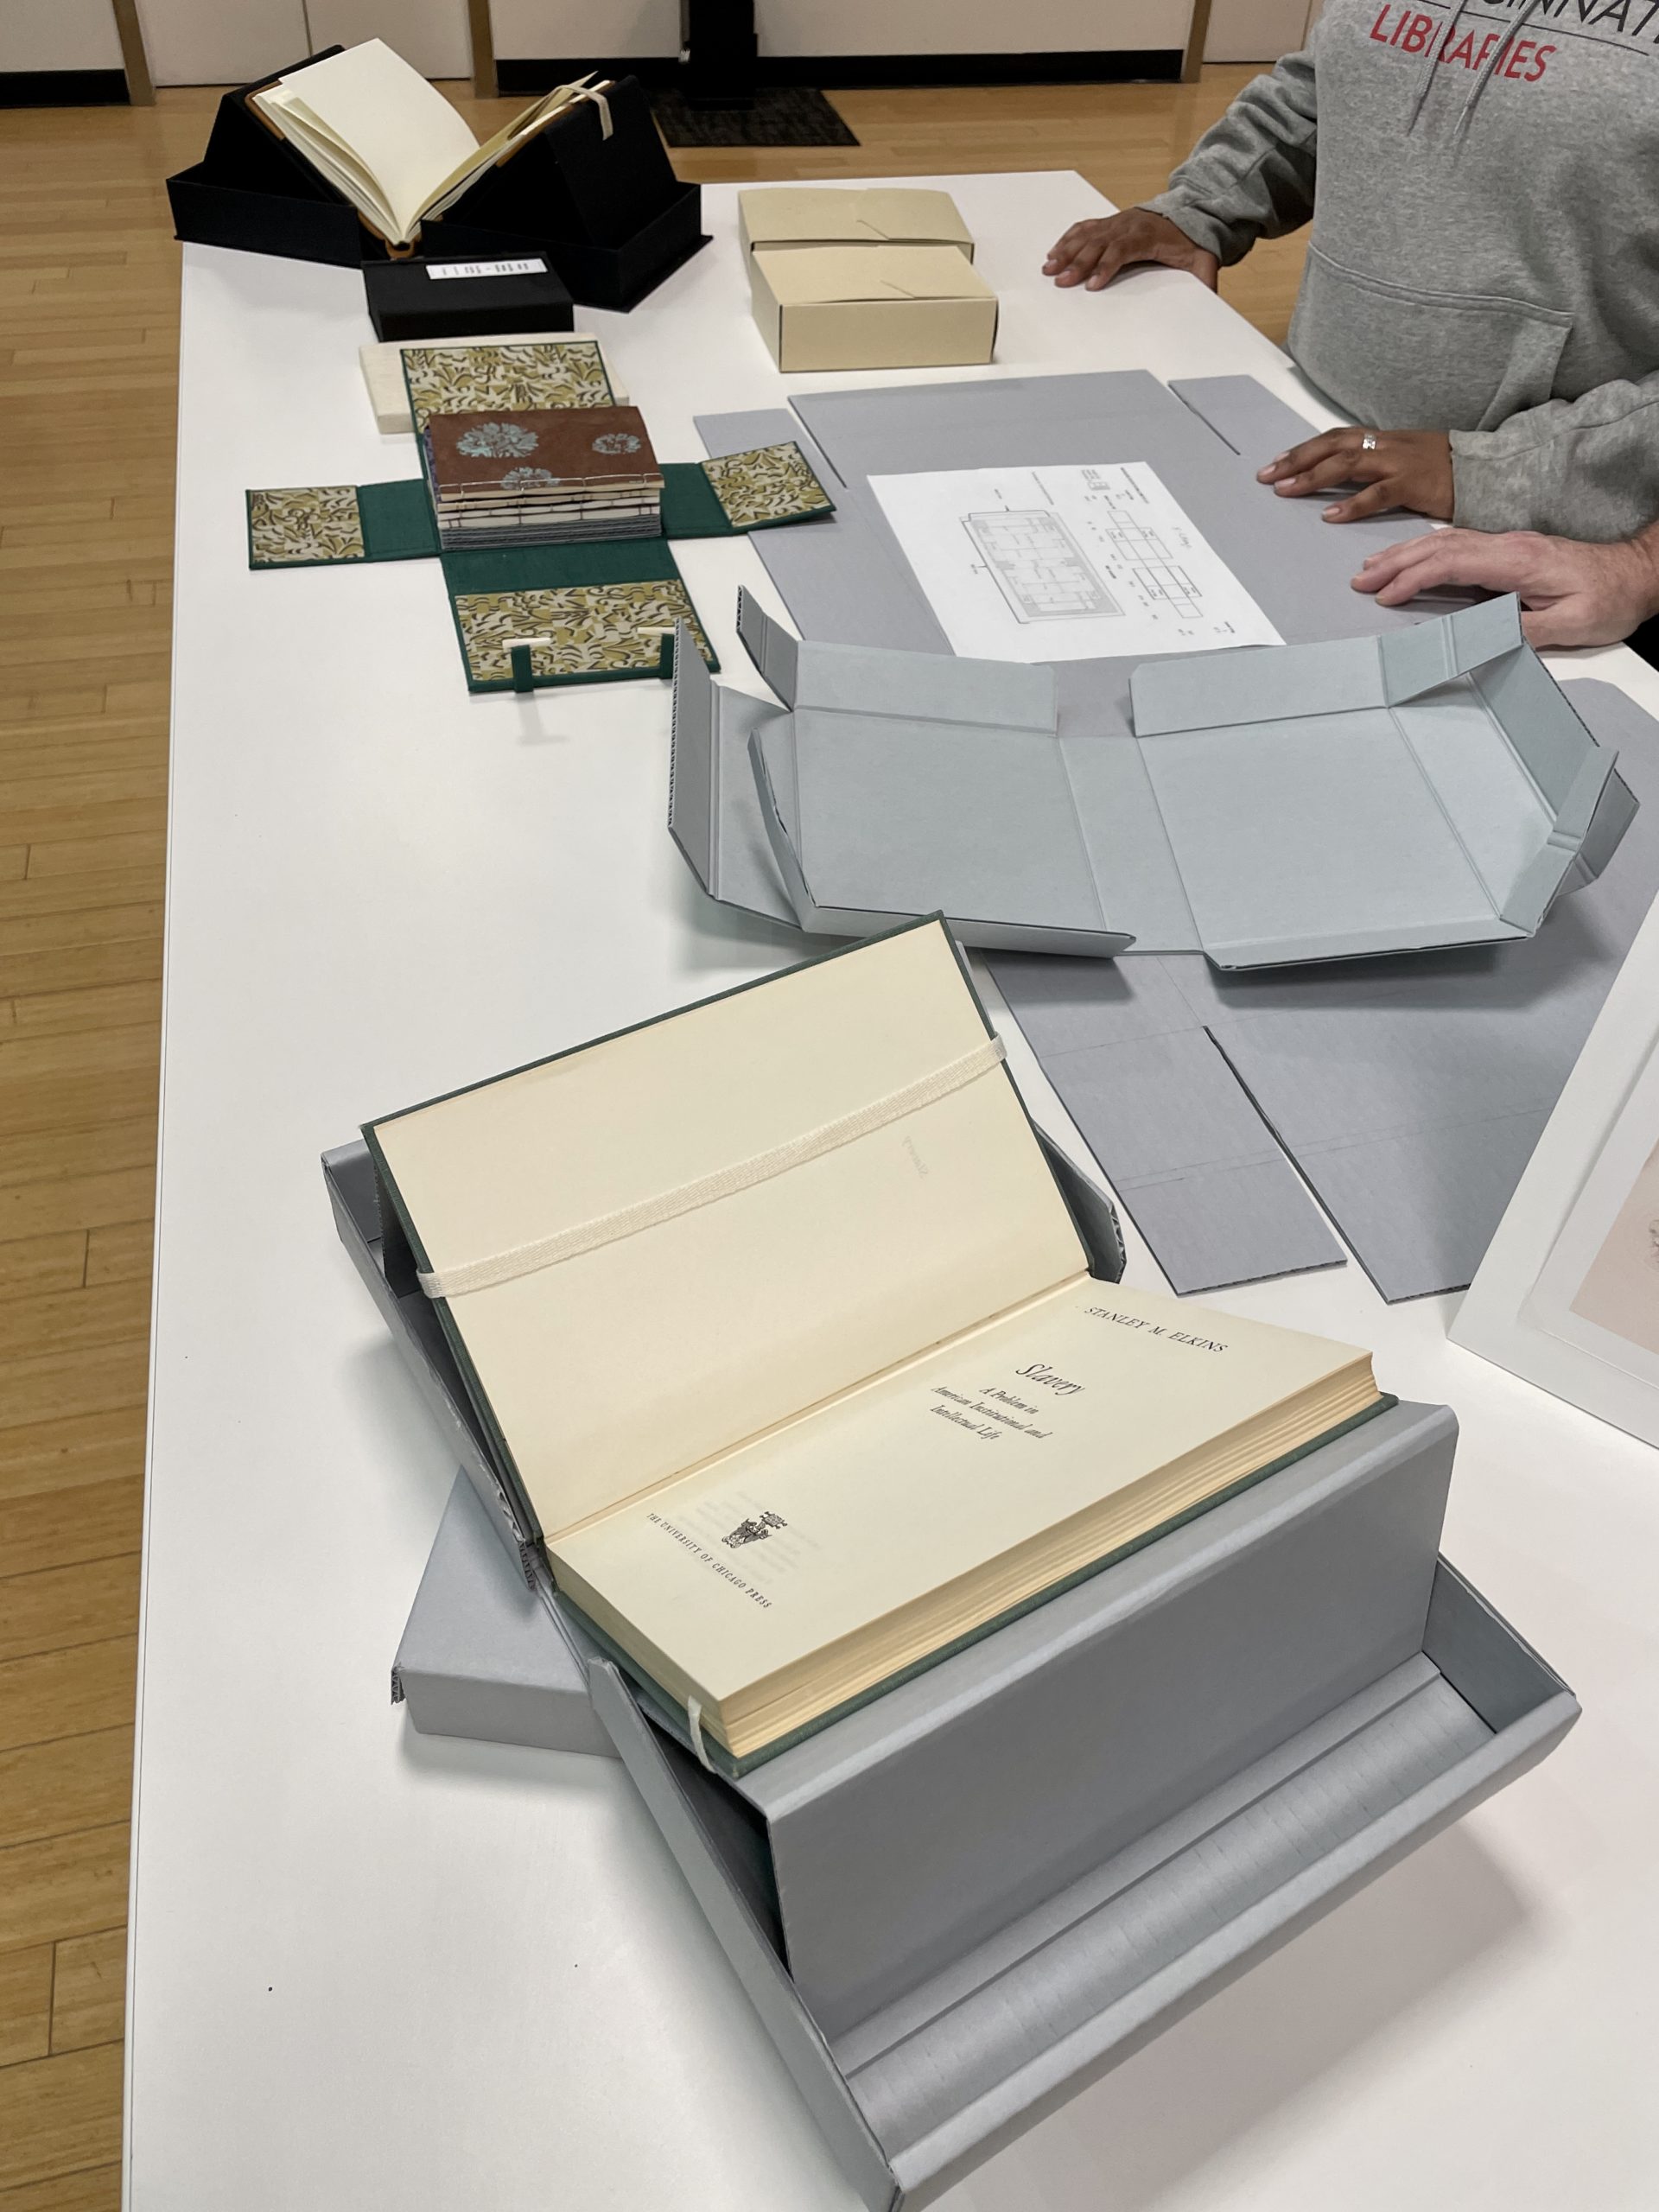
In the afternoon of the same day, Chris and Hyacinth showed the public a variety of enclosures and how they are made from beginning to end. There were corrugated clamshell boxes, one with an integrated cradle, cloth clamshell boxes, tuxedo boxes and a Japanese four-sided enclosure.
Chris also brought a corrugated clamshell in its early stages to show the public how the process of making a corrugated clamshell begins.
Chris and Hyacinth showing their display of models and enclosures.Hyacinth explaining to some UC students the different Japanese four-sided enclosure compared to other enclosures.The different enclosures that Chris and Hyacinth showed to the public. Hyacinth sharing with an interested public.
The crowd favorites were the elaborate cloth covered clamshell box made by Chris, and the beautiful Japanese four-sided enclosure made by Hyacinth.
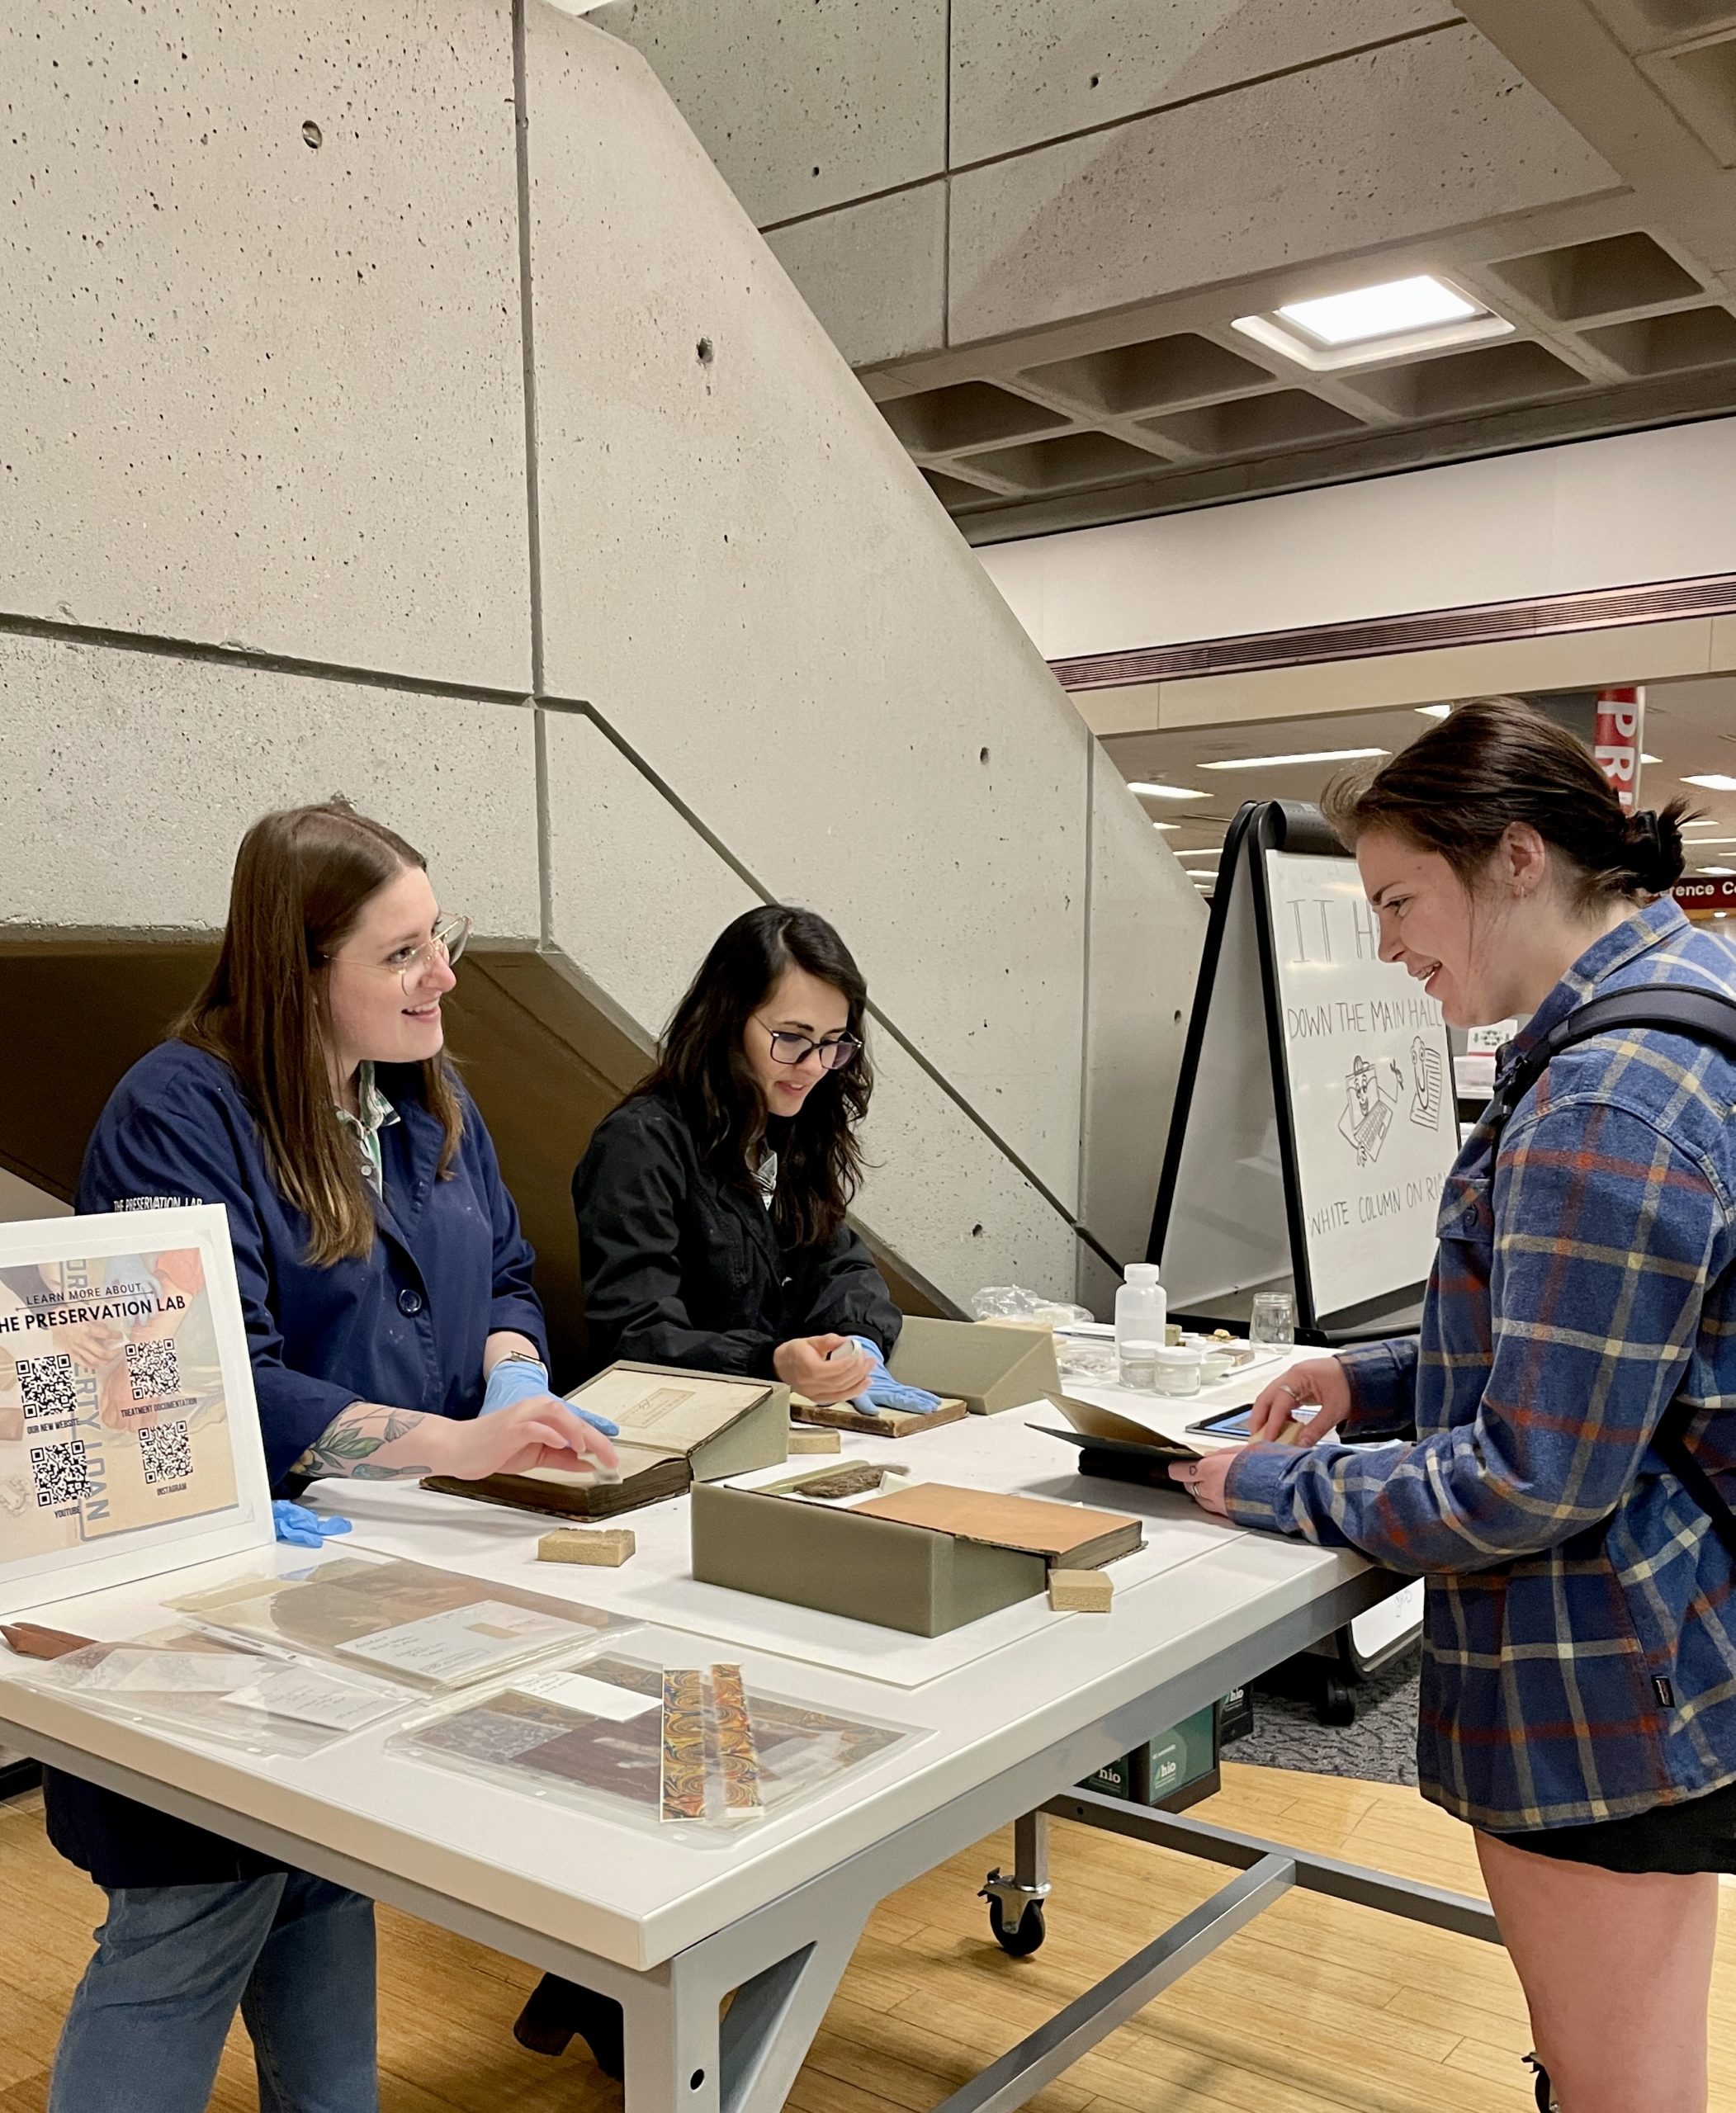
Even though this was a smaller event compared to our open house tours of the past, the event was a success; allowing the Preservation Lab staff to share with the UC community a peek into our daily work and explain what goes on in the Preservation Lab. But Preservation week is not done yet…
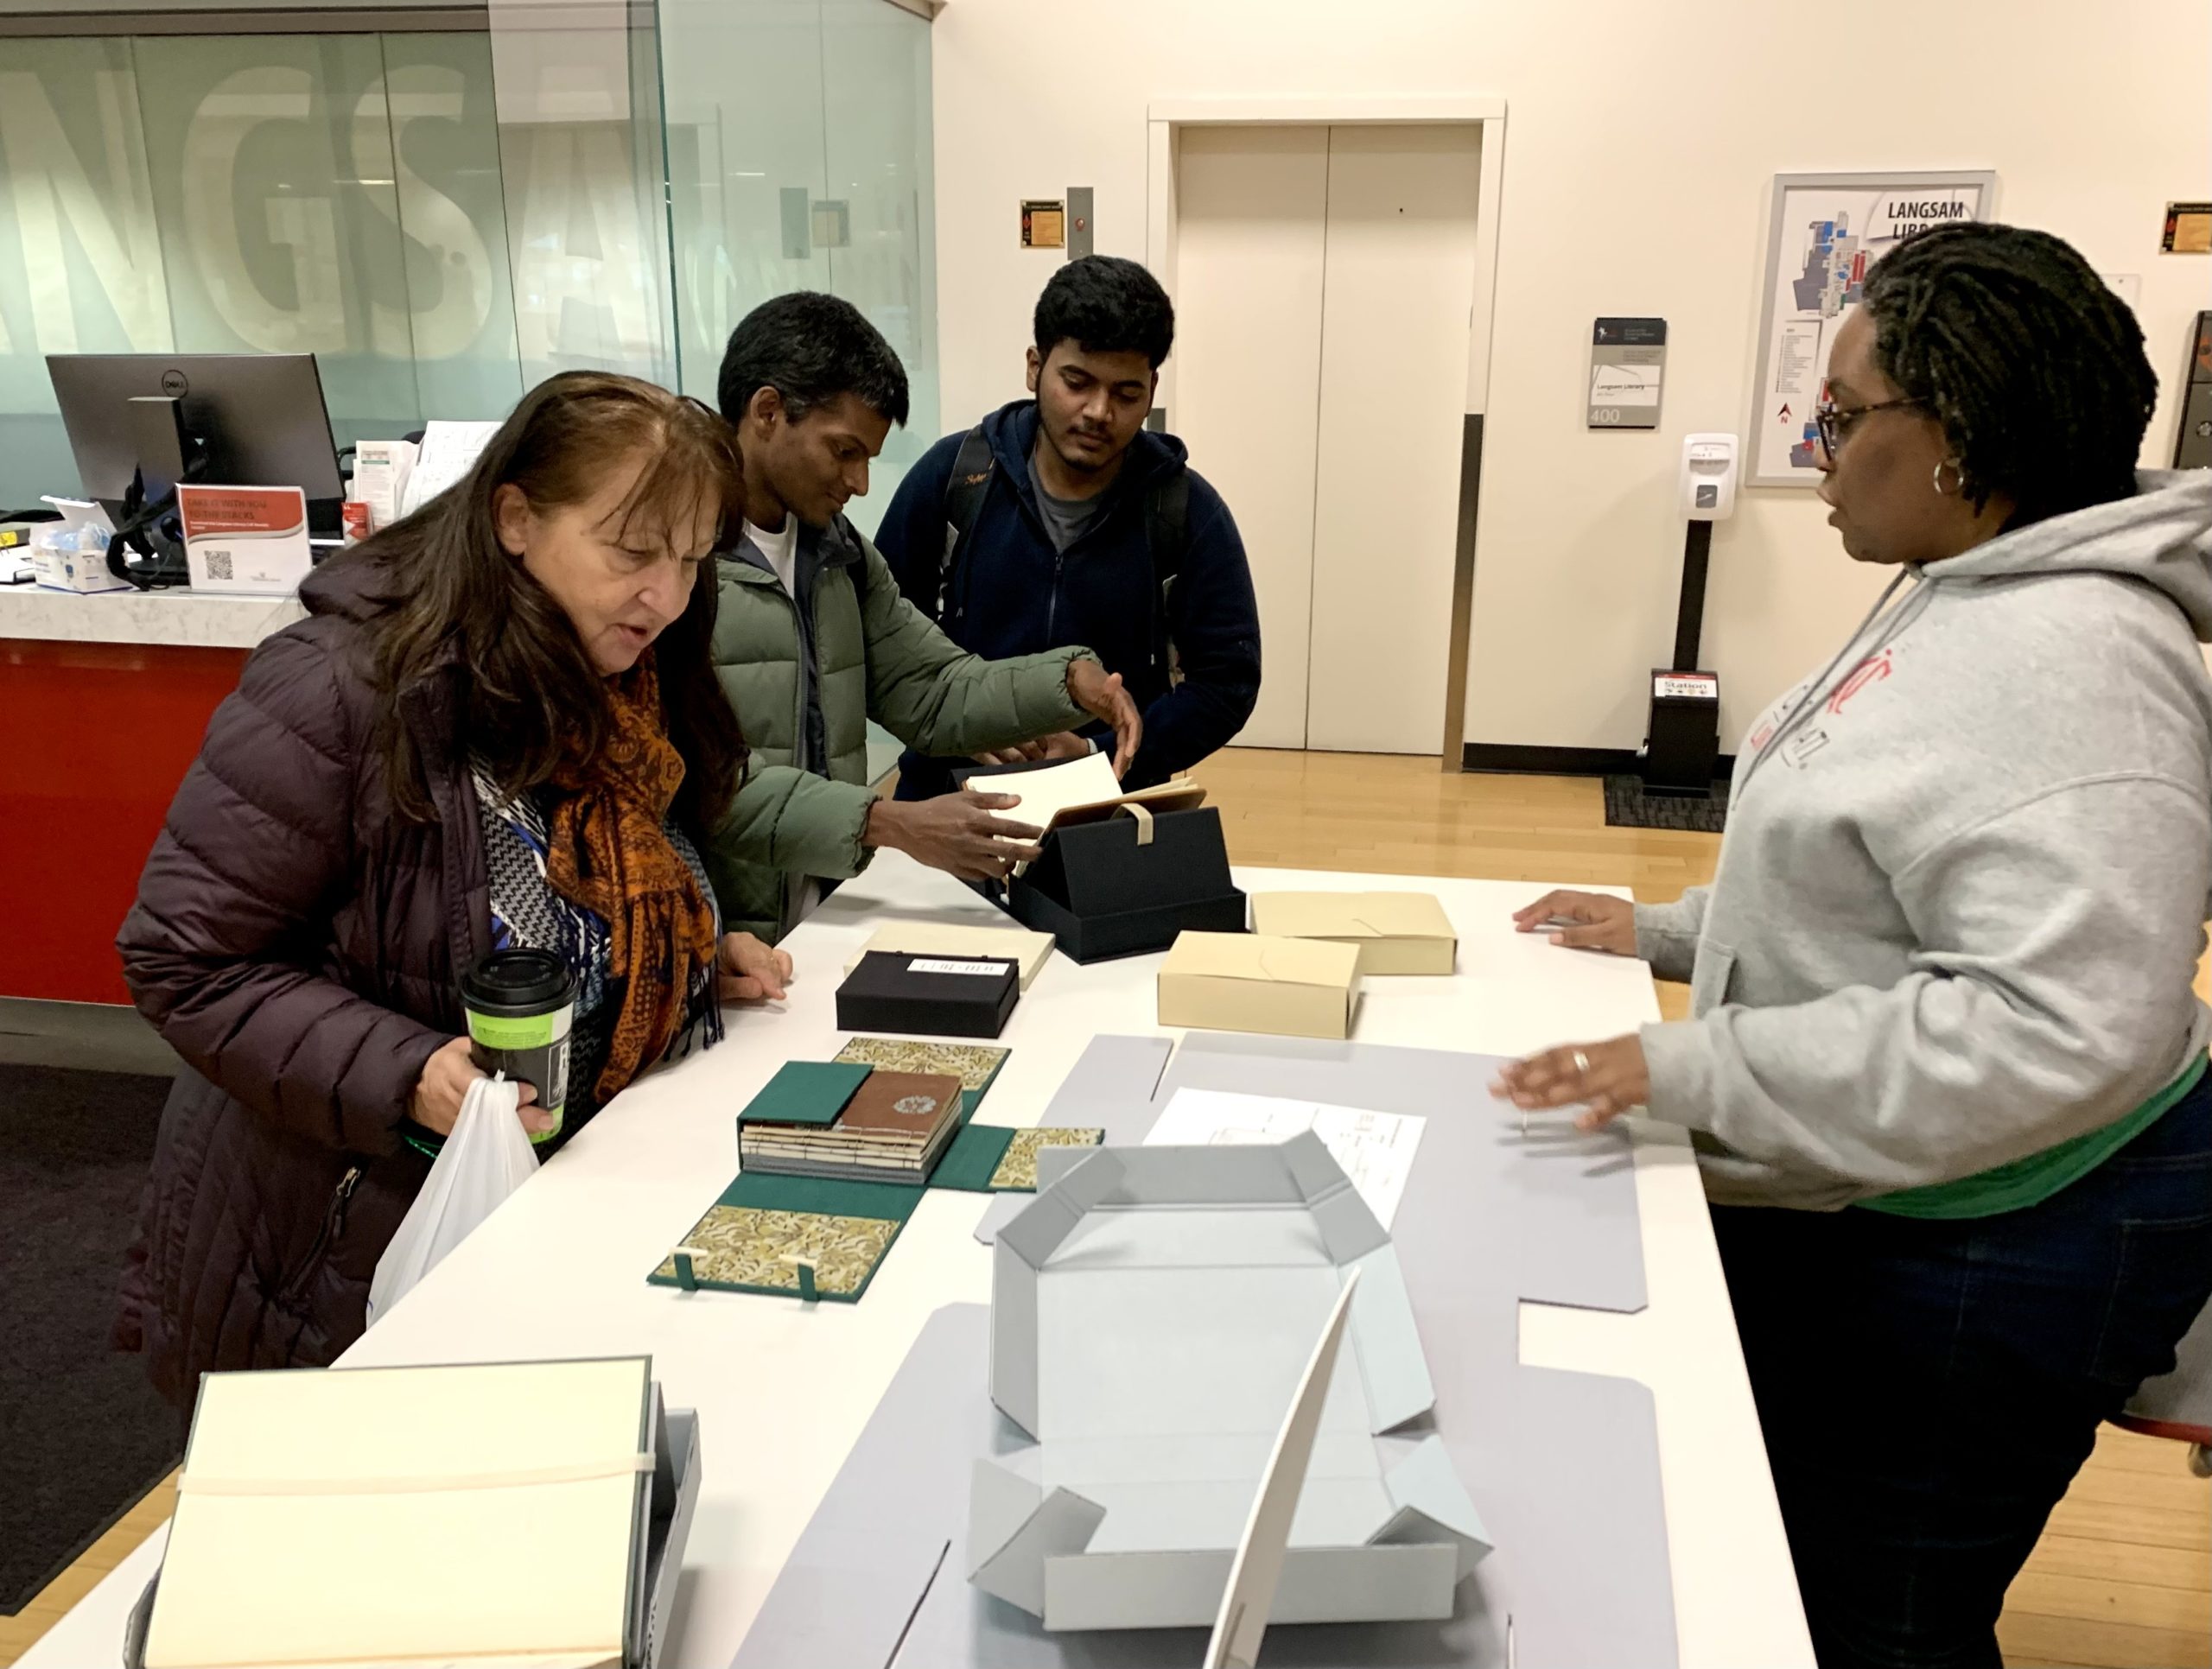
This upcoming Friday, April 29th at 1 pm, join Holly and Ashleigh at the Clifton Branch of the Cincinnati and Hamilton Public Library, .They will be showing some books models, explaining how books are made and what materials are used. You can find more details in the following link: https://cincinnatilibrary.bibliocommons.com/events/625422b5cd8e792f000bcfc5
In celebration of ALA’s annual Preservation Week (April 24th-30th), Preservation Lab staff will be offering live demos and show & tells this week and next, both at UC Libraries and the Cincinnati and Hamilton County Public Library:
Each session will be unique, with different staff members showing off different aspects of preservation and conservation!
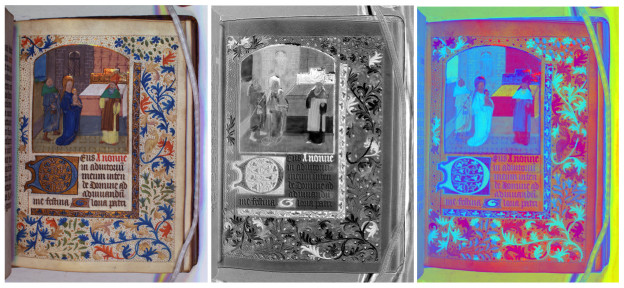
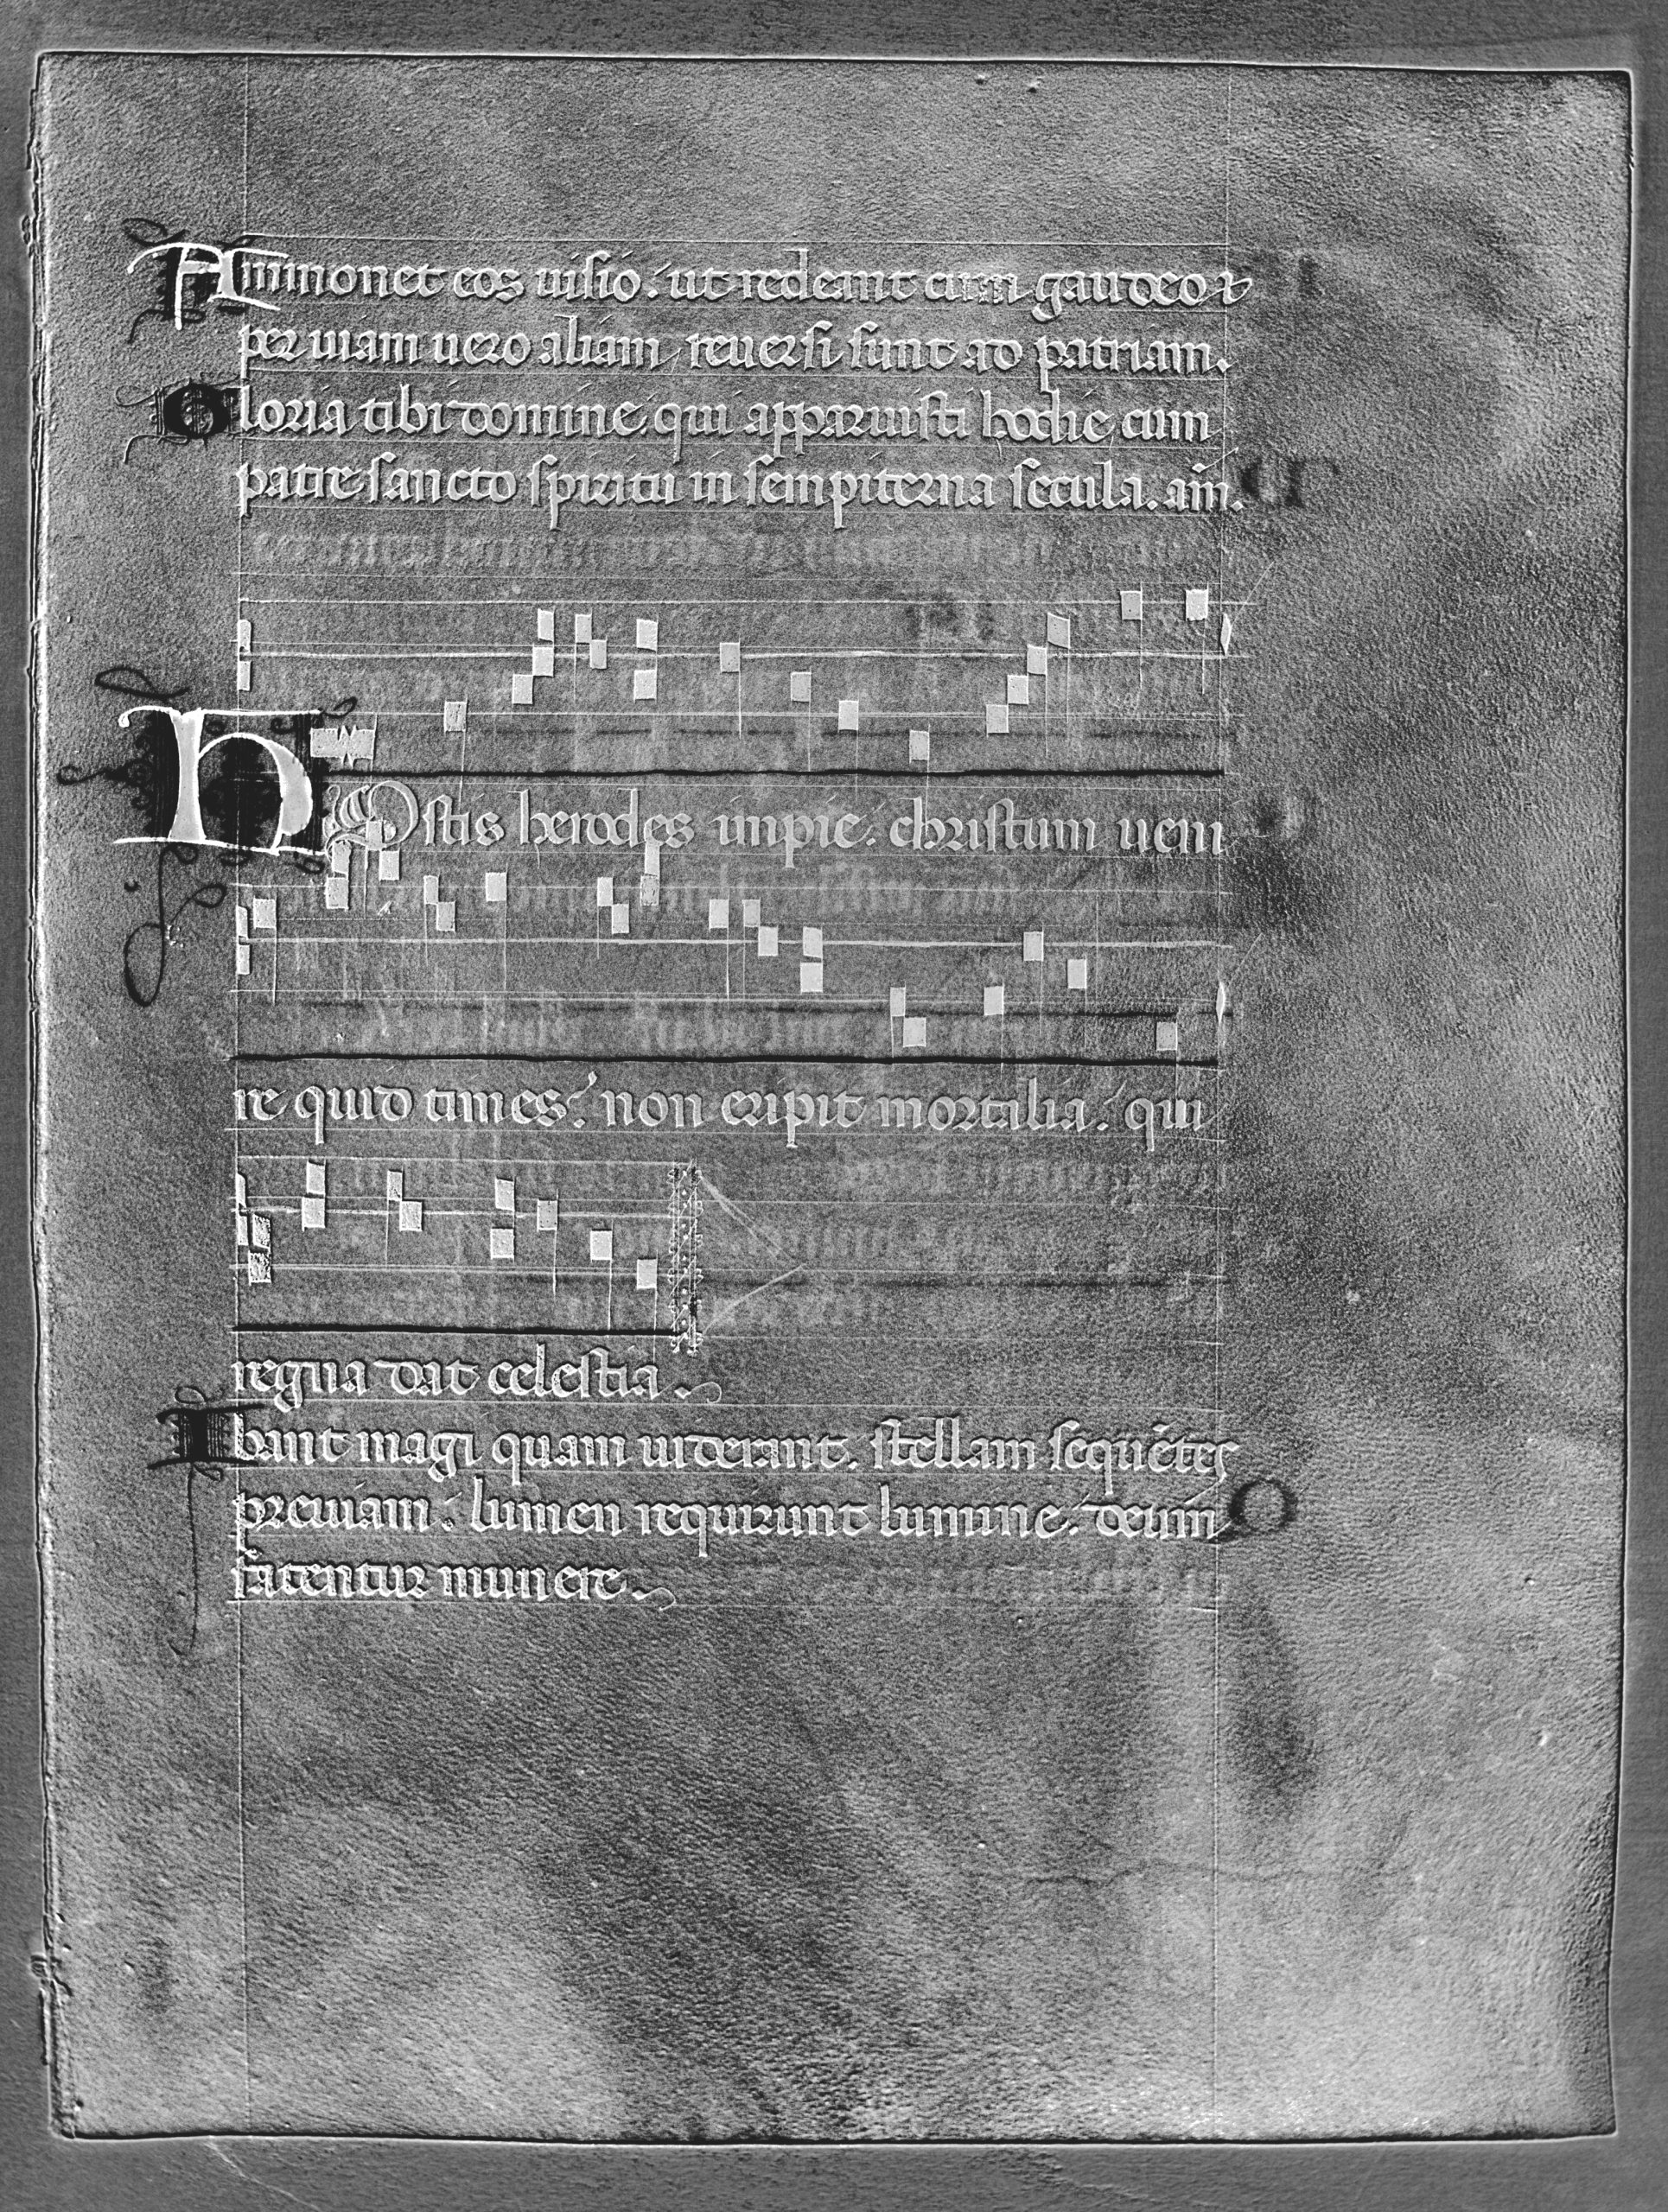
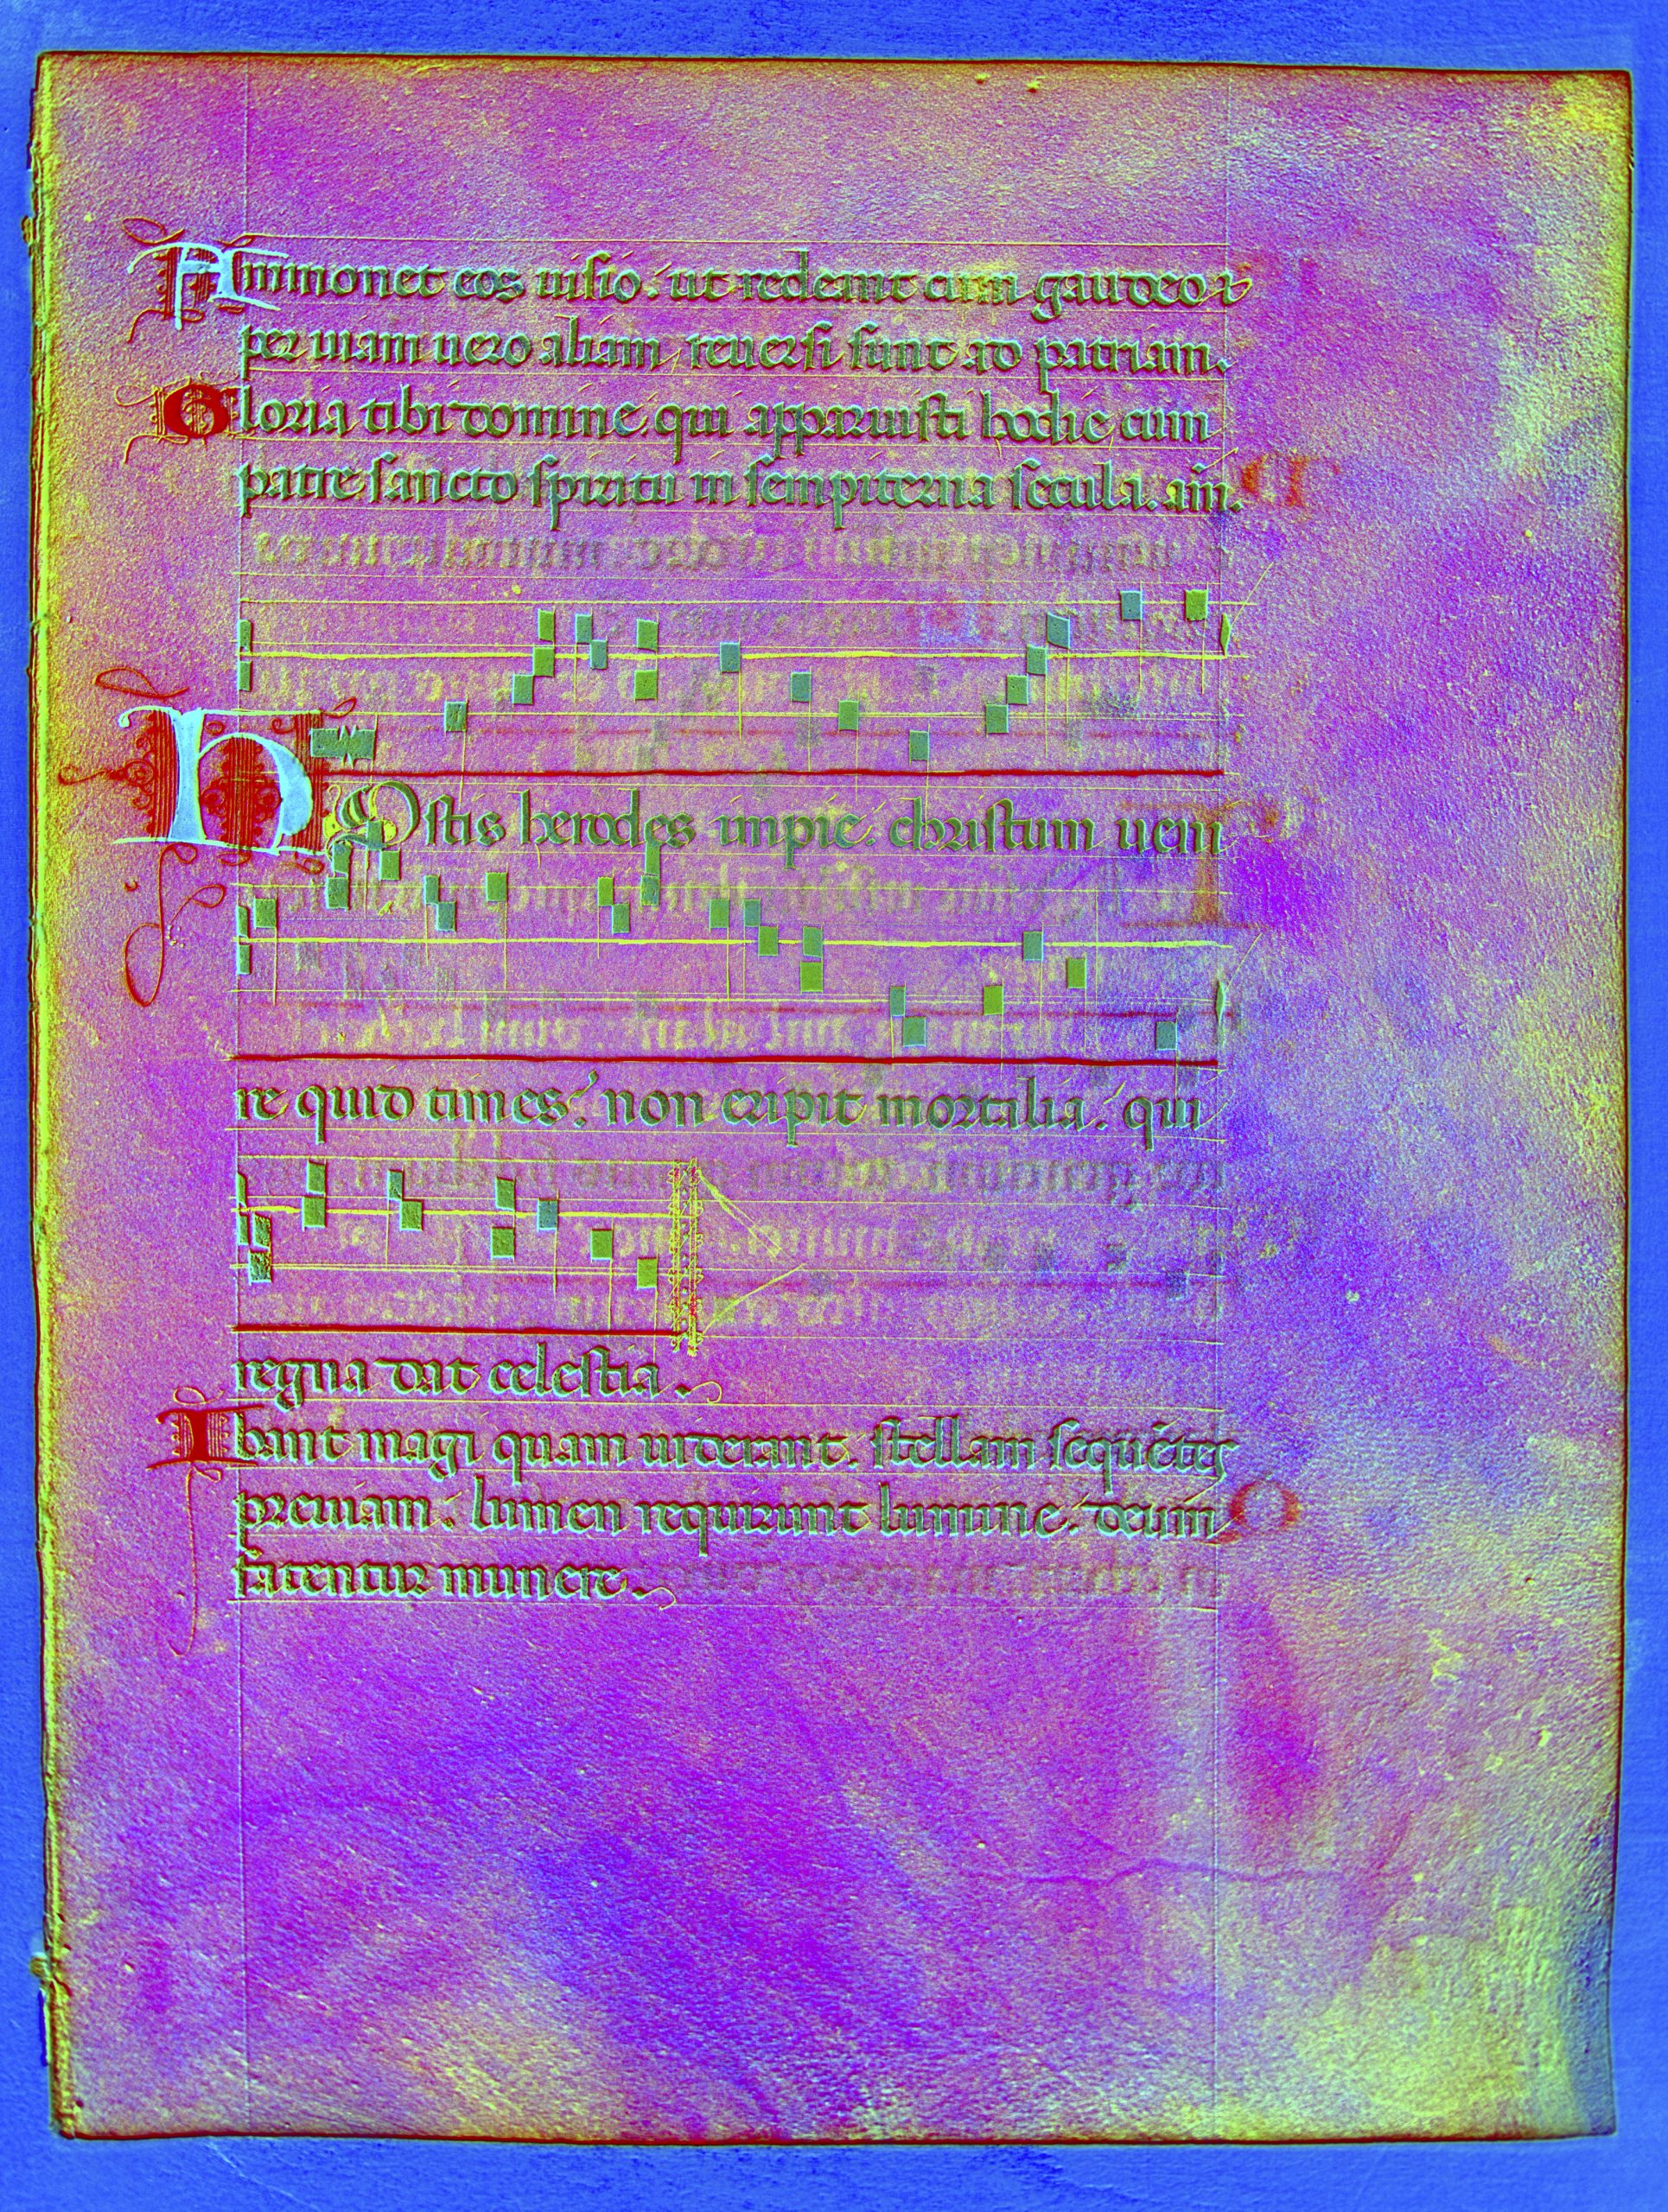
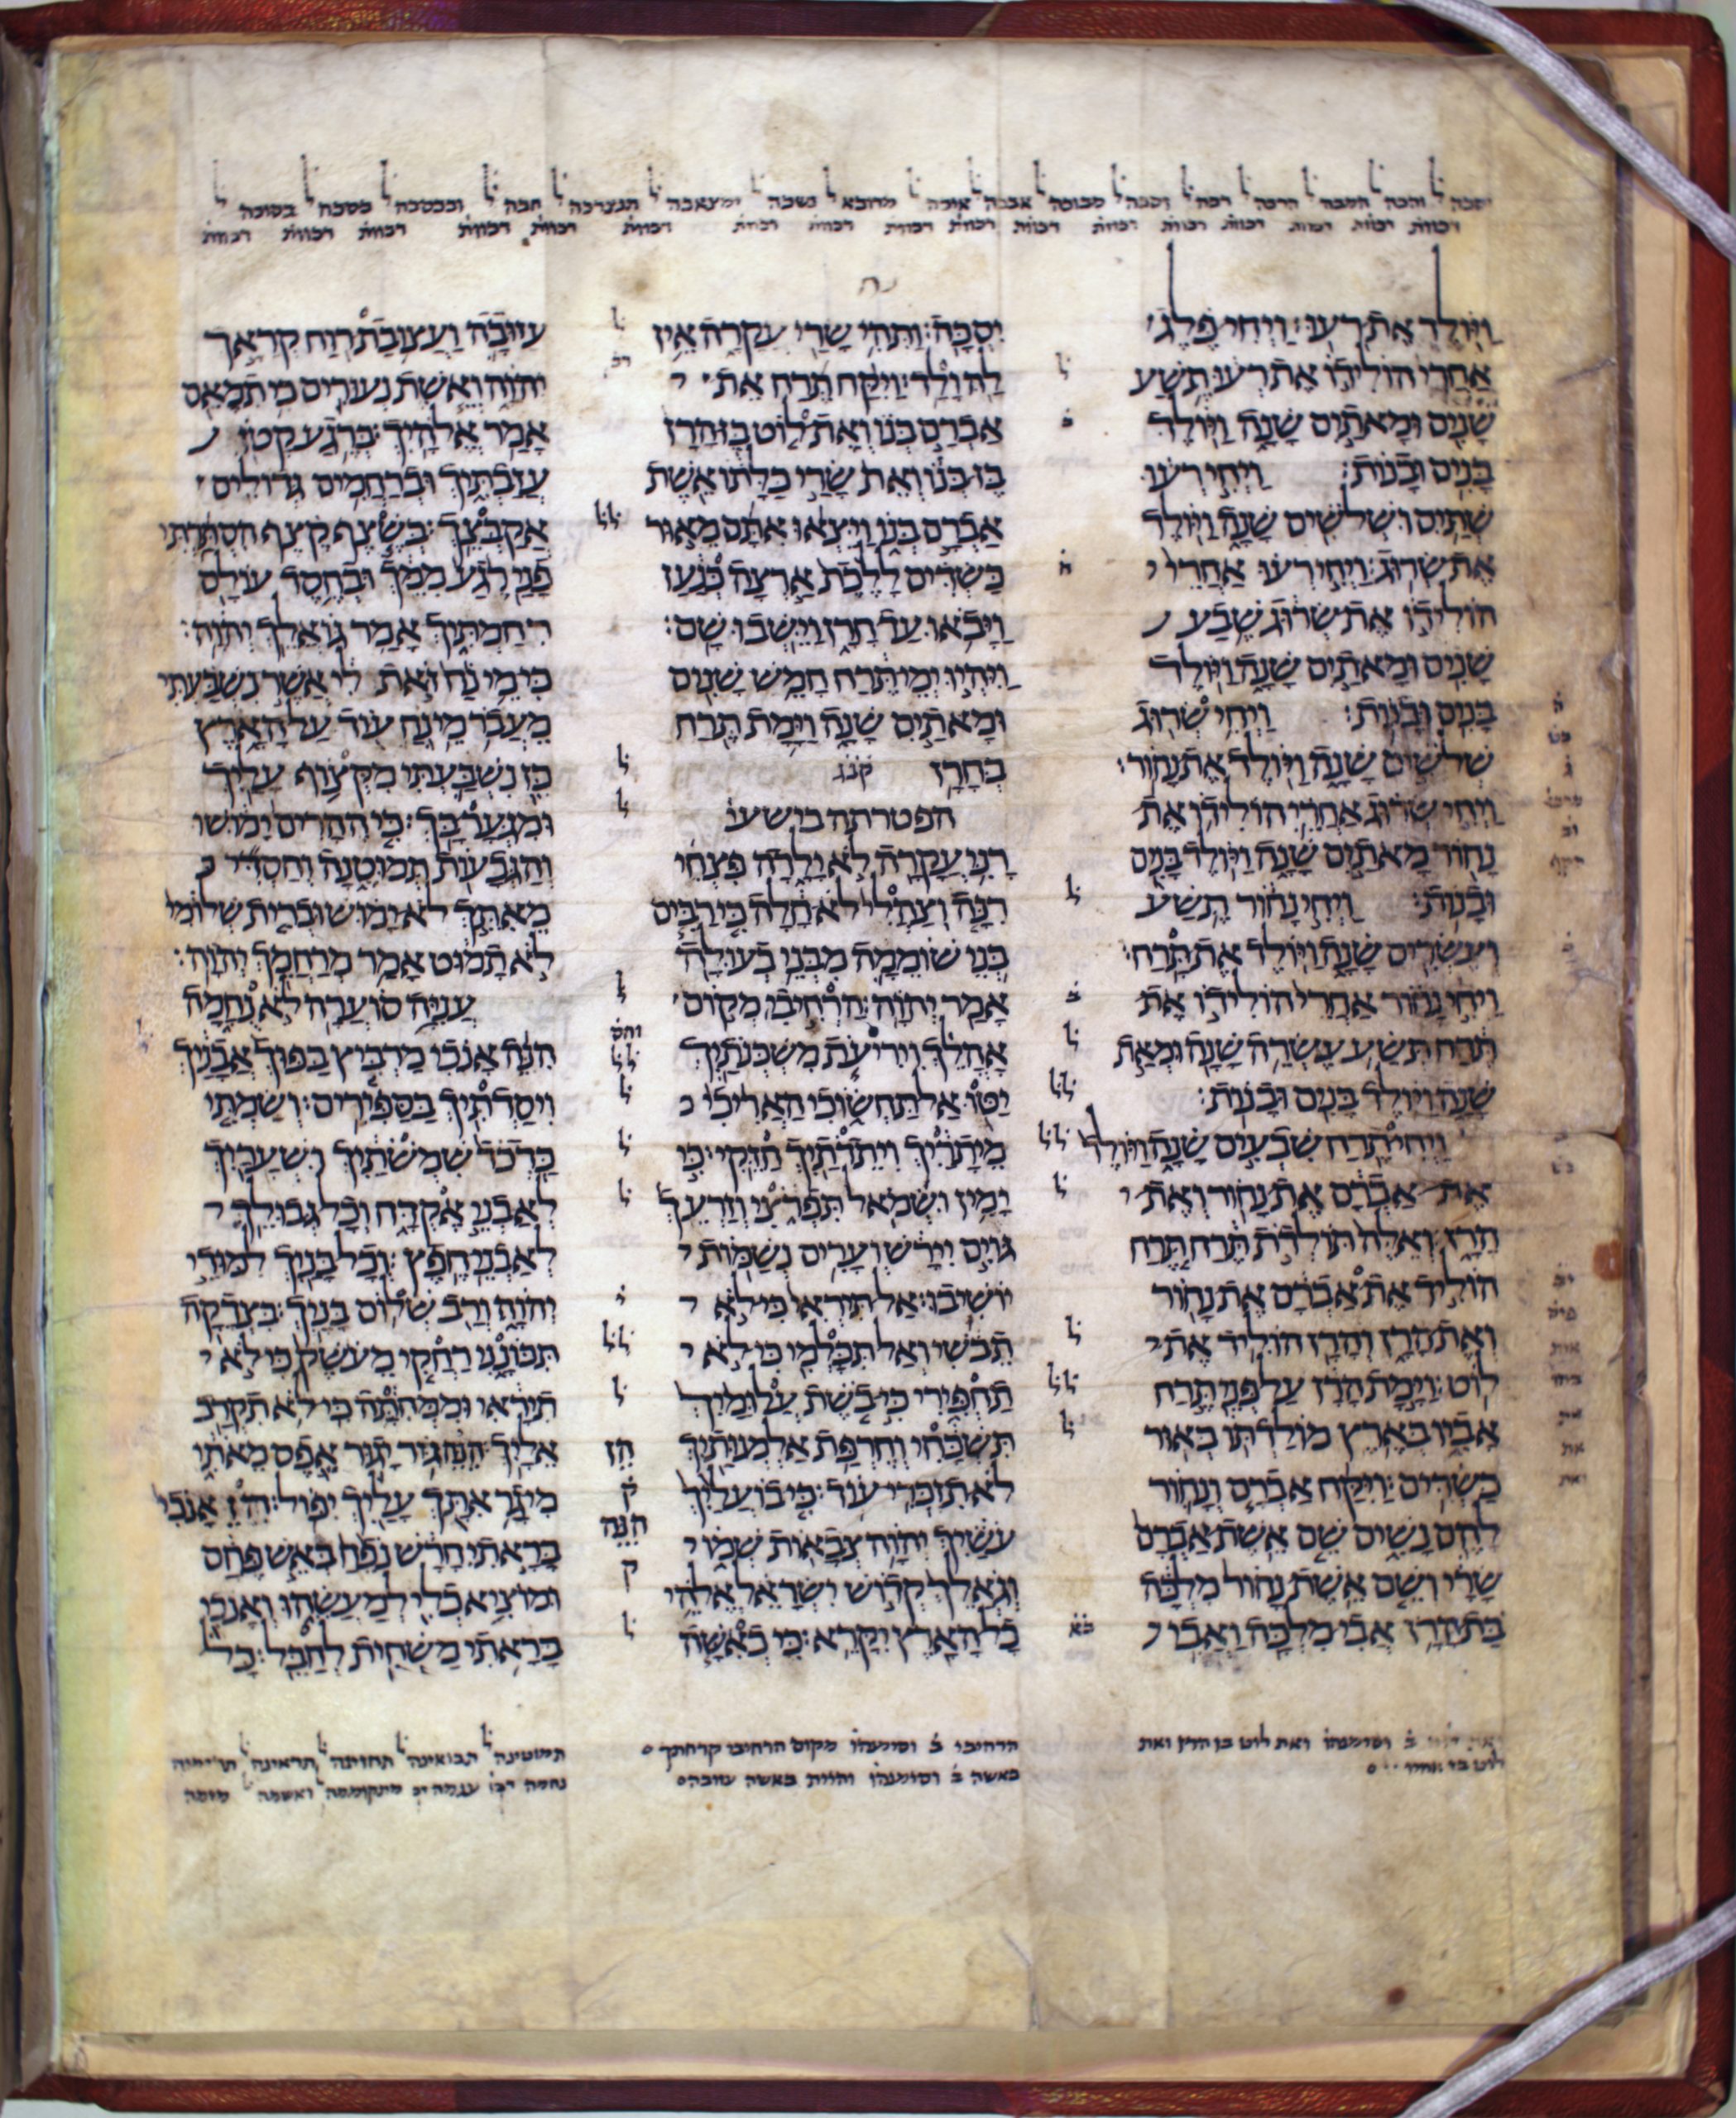
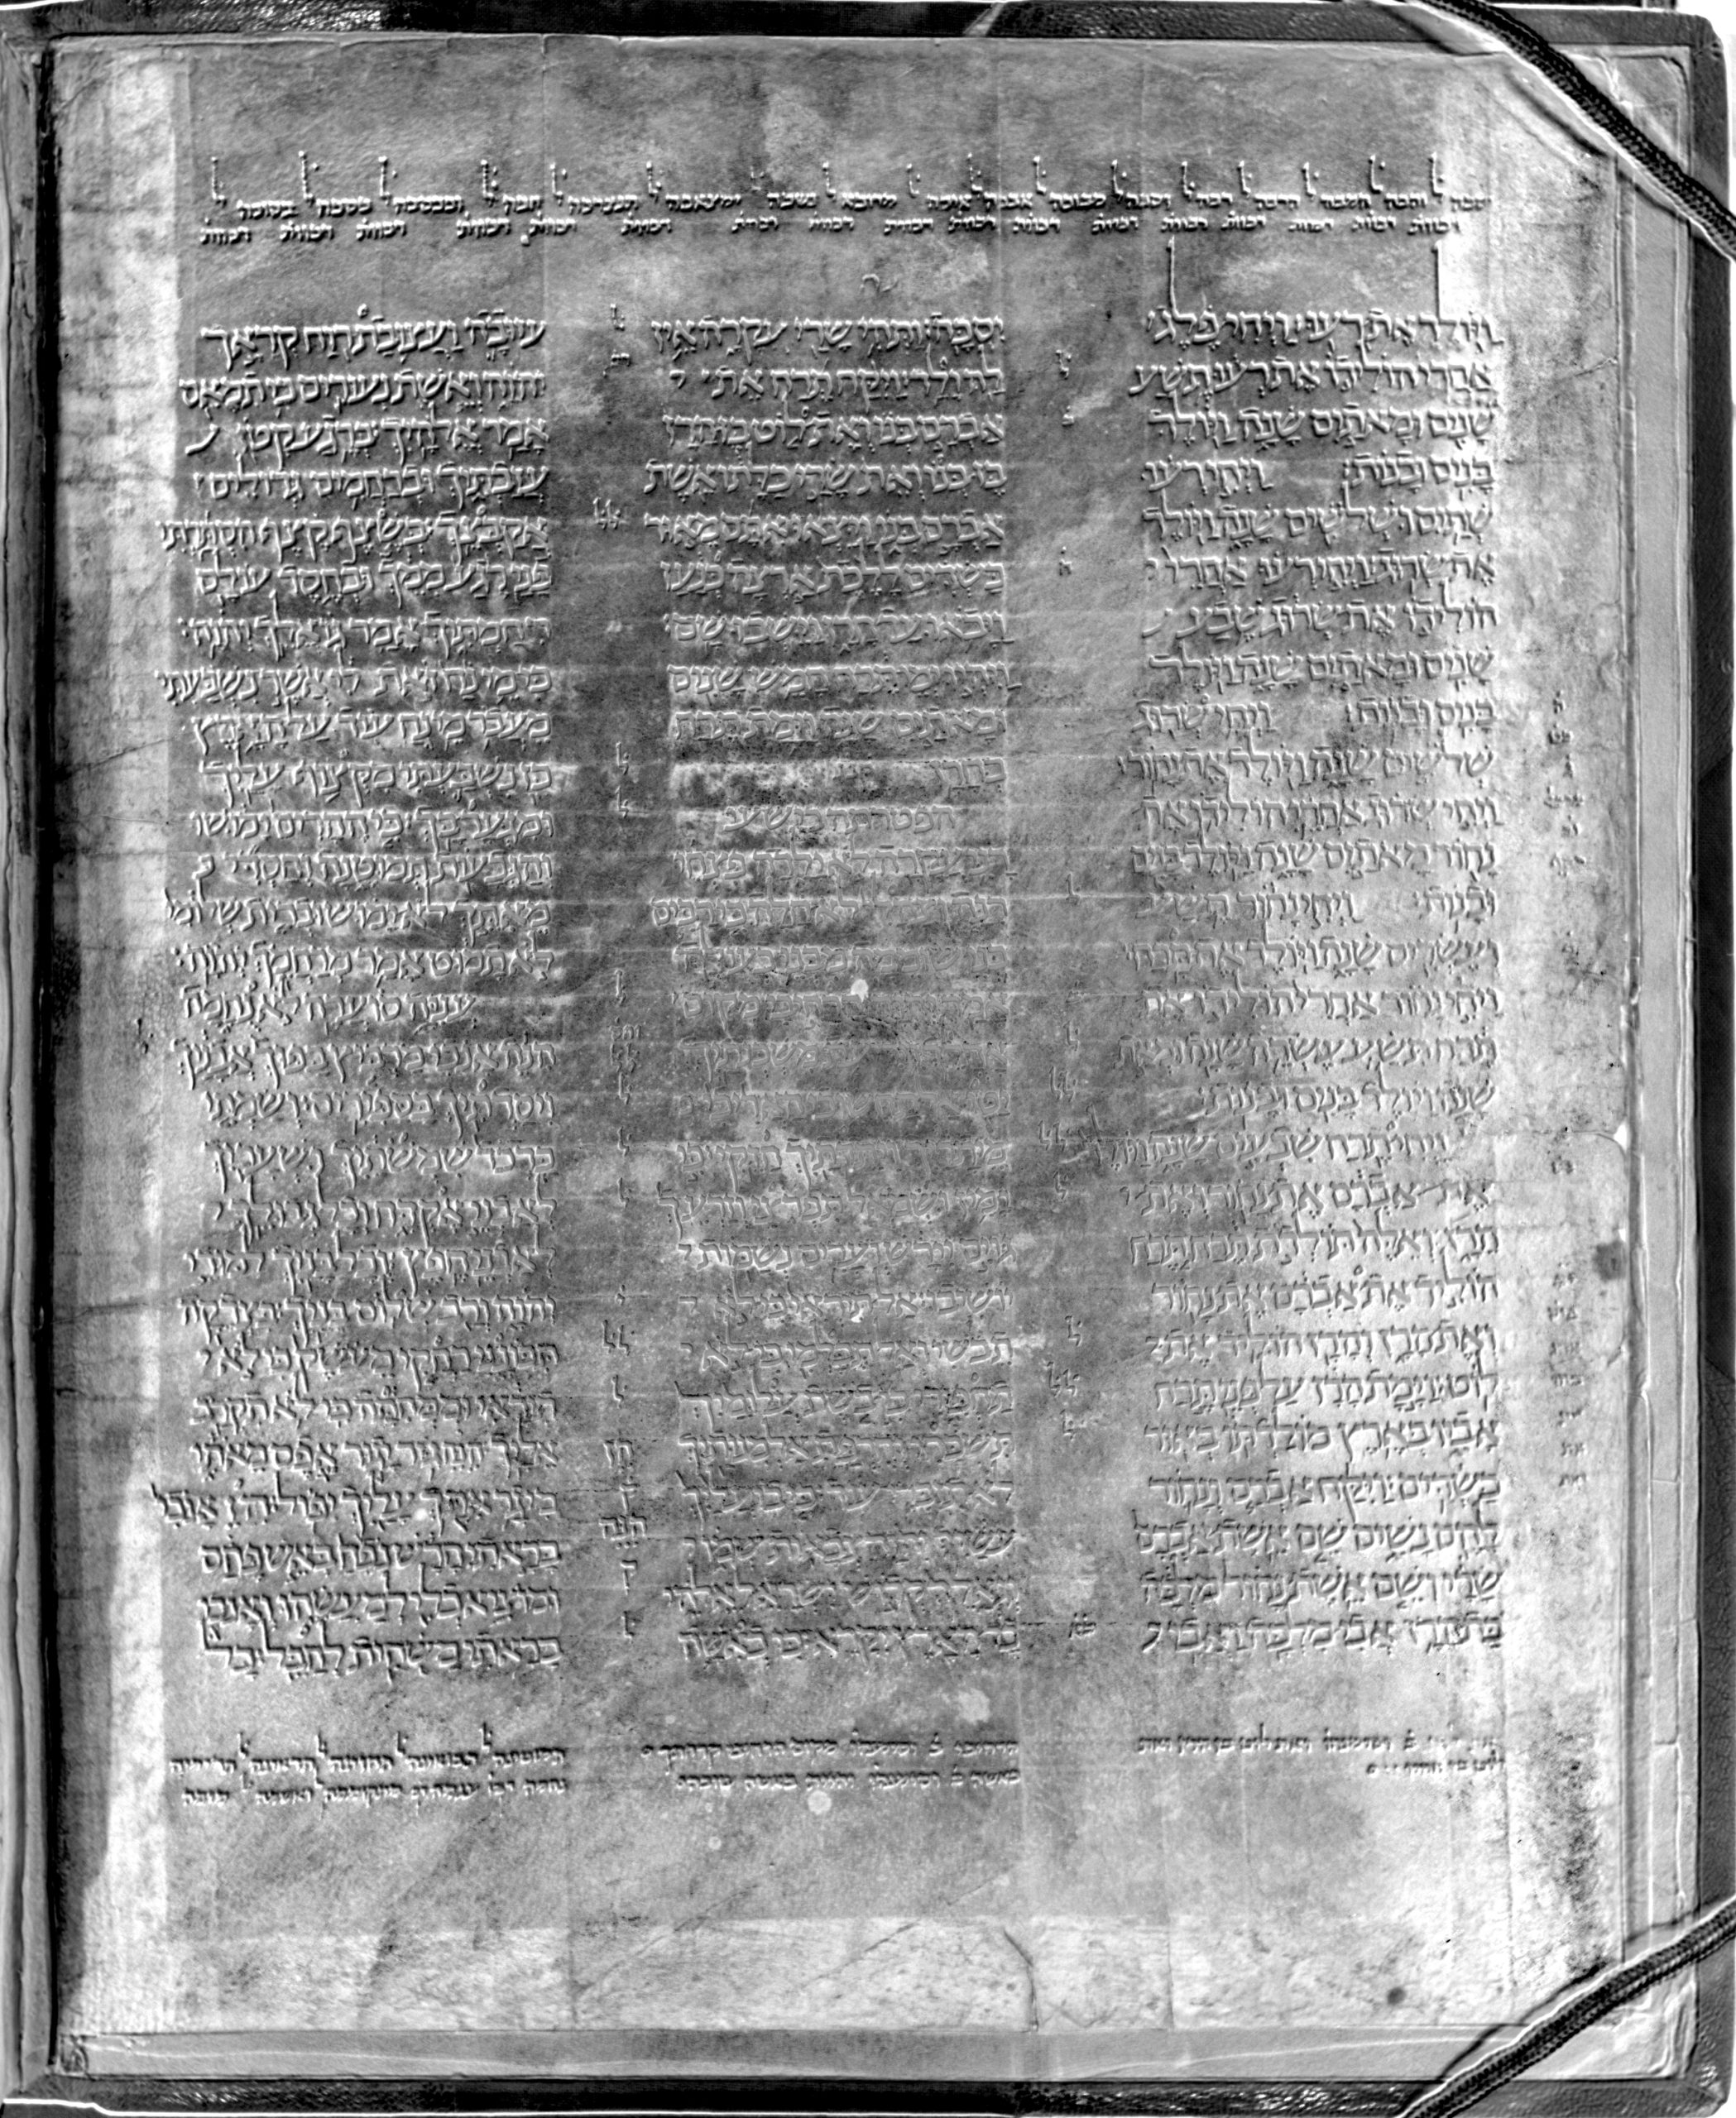
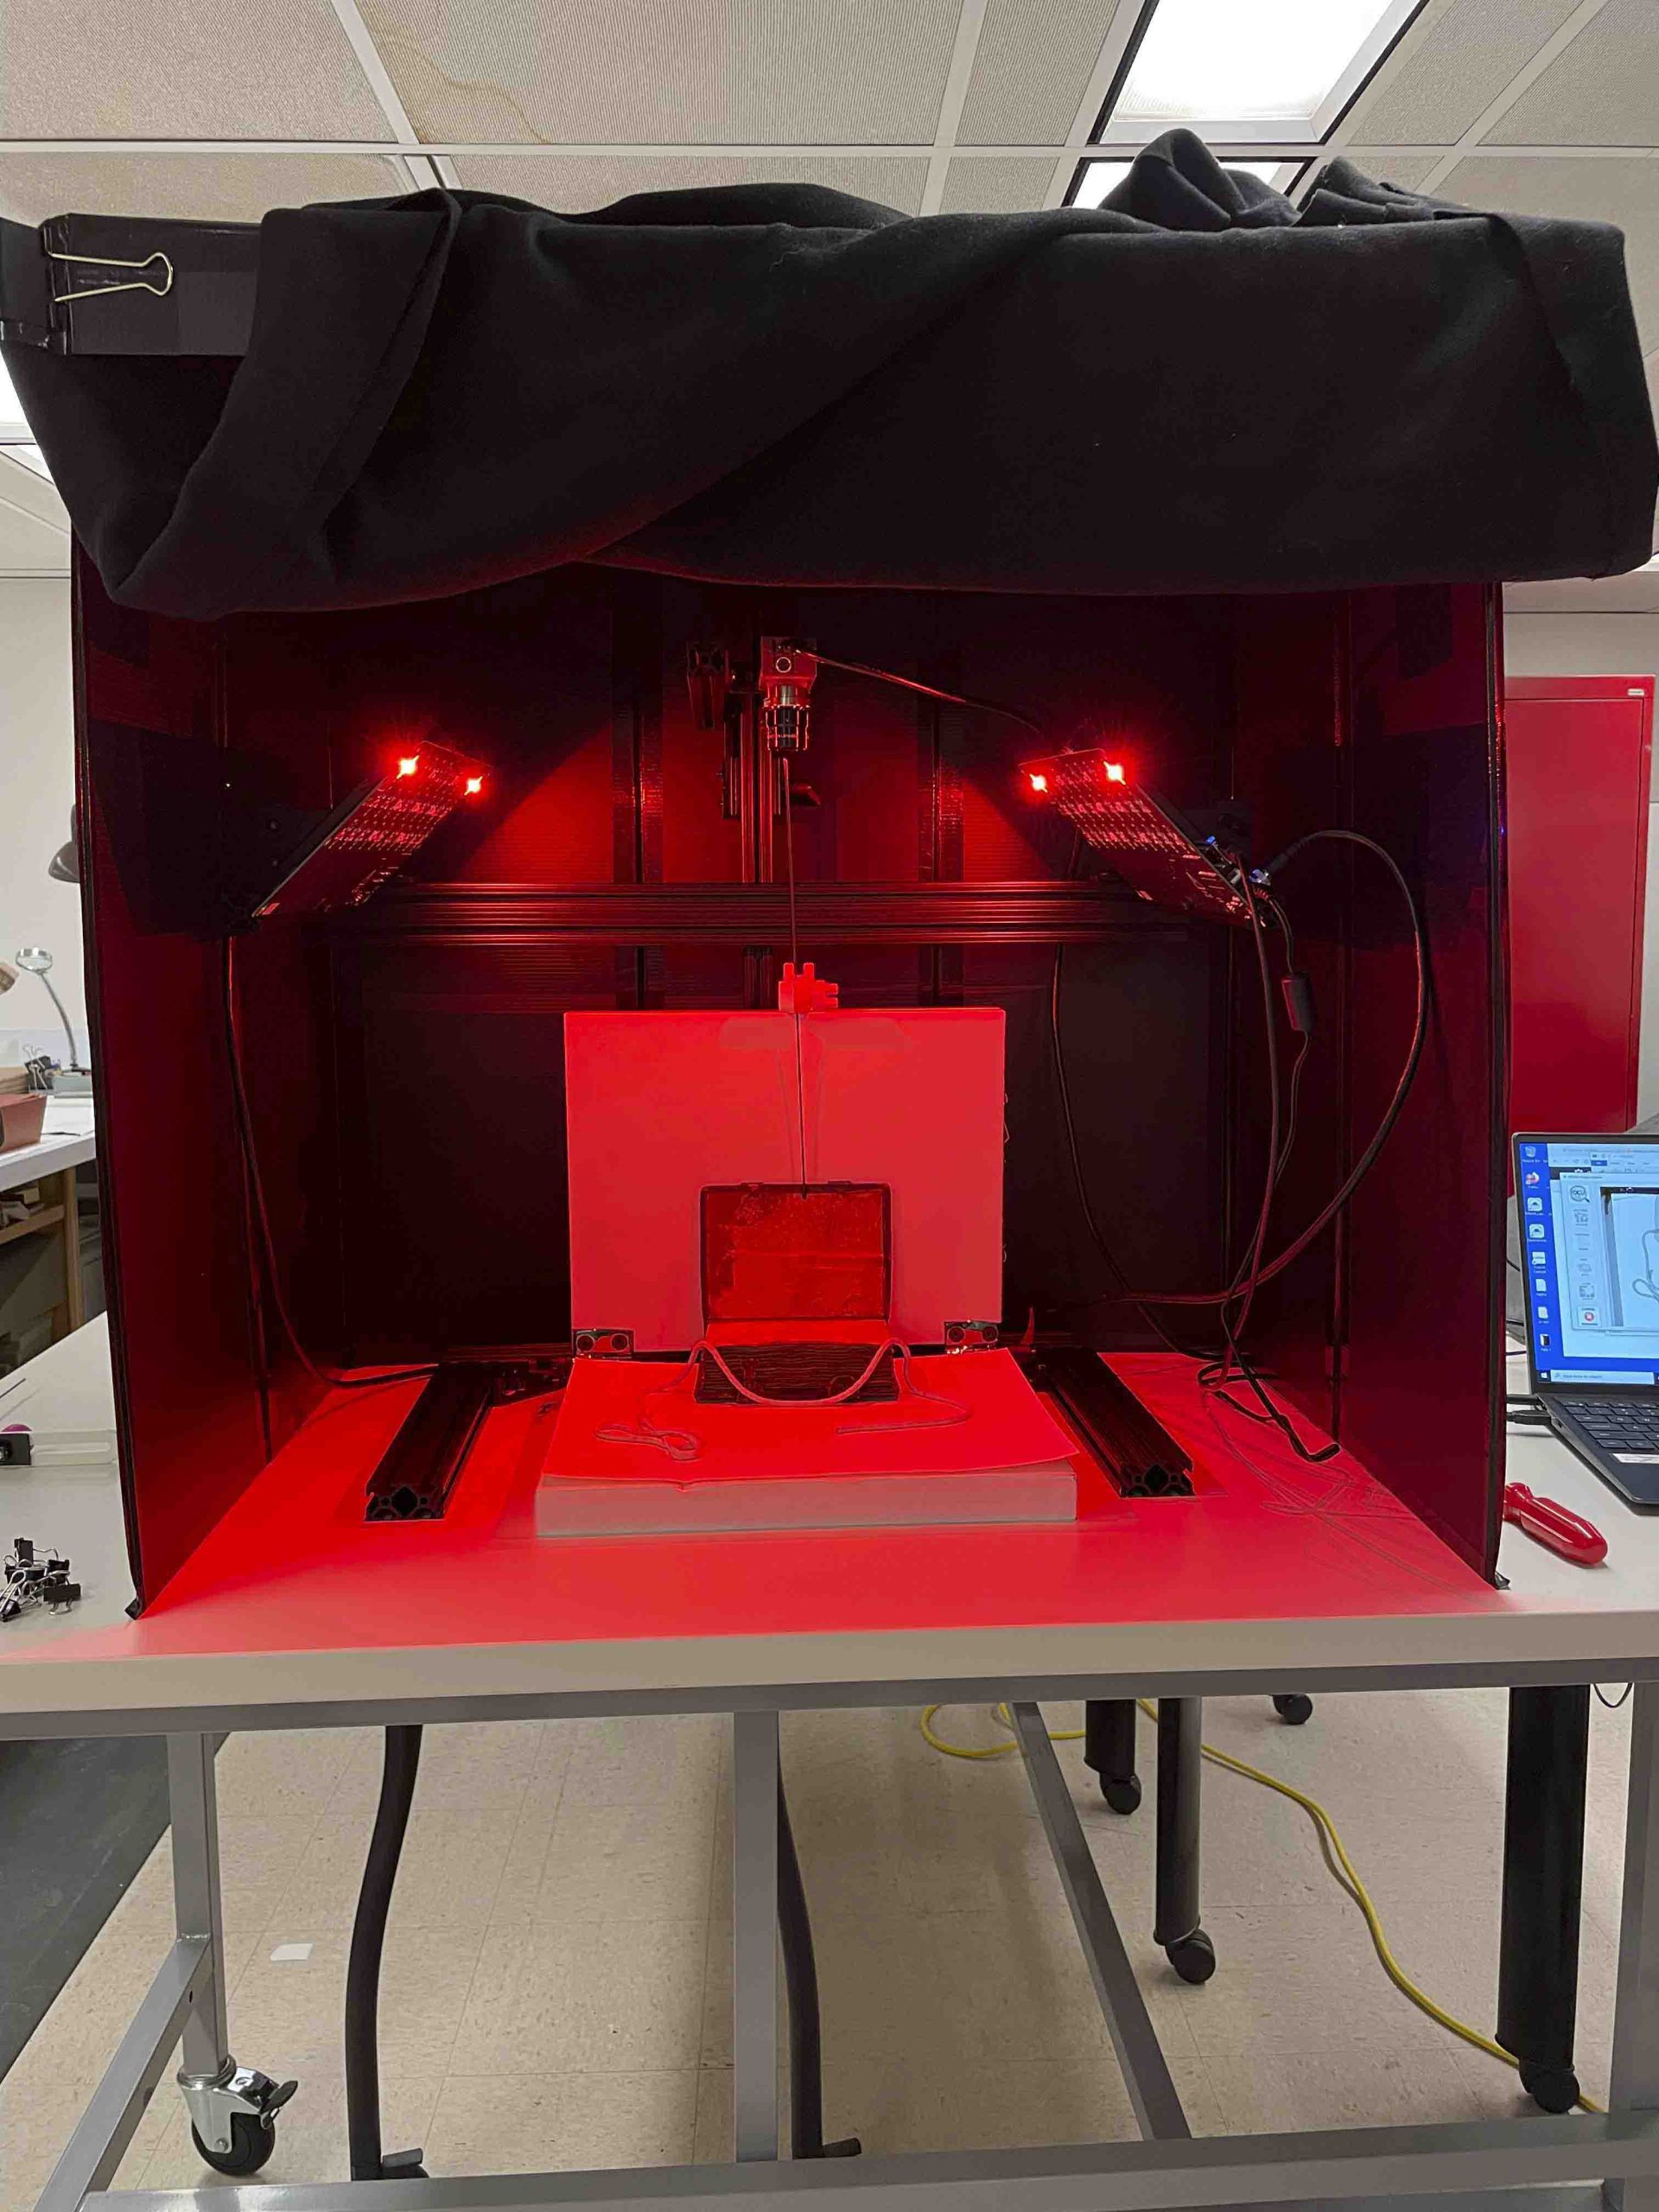
As mentioned in a previous blog post, Andrew and Naomi from Case Western Reserve came to the lab in late February to demo the MISHA portable multispectral imaging system, made possible by a National Endowment for the Humanities (NEH) Research Grant awarded to the Rochester Institute of Technology. In total, Naomi and Andrew imaged five objects from the Public Library, UC Libraries, and one of our third-party institutional clients. Imaged books included, one Otto Ege item, two Book of Hours, one undated Latin music manuscript, and a Pentateuch volume from Hebrew Union College. In all, thirteen separate capture sessions were carried out for the five objects. Afterwards, the raw data from the capture sessions was shared with the Lab via OSF (Open Science Framework) so that I could process the data in the NEH grant supported open access RCHIVE (Rochester Cultural Heritage Image processing and Visualization Environment) software.
RGB representationBand 5 with the MNF (Maximum Noise Fraction) algorithm applied and the Gaussian enhancement appliedA false color representation
The image gallery above shows the recto of leaf 32 from the Public Library’s copy of Fifty Original Leaves from Medieval Manuscripts, Western Europe, XII-XVI century, by Otto Ege.
While each of the capture sessions took only two minutes to complete, I found that processing the raw data took me a bit longer to figure out. Processing the data felt very similar to using CHI’s RTI Builder and Viewer software. However, in this situation I did not have a week-long training opportunity to learn the ins and outs of the software and its functions. For the Spectral Analysis App, I had only a couple of brief documents to refer to, so the learning curve was a little steeper. I also experienced some issues with the software while processing the data with the flatfield files provided from the capture session. But in the end, the processed files seemed fine without the flatfield data, so it all worked out.
RGB representationBand 3 with the MNF (Maximum Noise Fraction) algorithm appliedA false color representation
The above image gallery depicts a leaf from Hebrew Union College’s Pentateuch Ms. 1 with adhesive staining, tape, and prior repairs.
What I discovered through processing all the MISHA data and then comparing it to the existing specialized imaging done in the Lab was that the suite of imaging we do in the Lab is very well rounded and, in general, suits our needs and our clientele quite well. In many cases, our results were at least comparable, if not better (specifically within the UV wavelengths) than the results accomplished using the MISHA. And, especially with our UV workflow, though our current capture time might be slightly longer than that of MISHA, the data processing time is significantly shorter and, in the case of UV especially, the side-by-side results of the accurate normal illumination next to the full color UV image(s) is ideal for our purposes.
RGB representationand 2 using the Maximum Noise Fraction (MNF) algorithm with the brightness adjusted
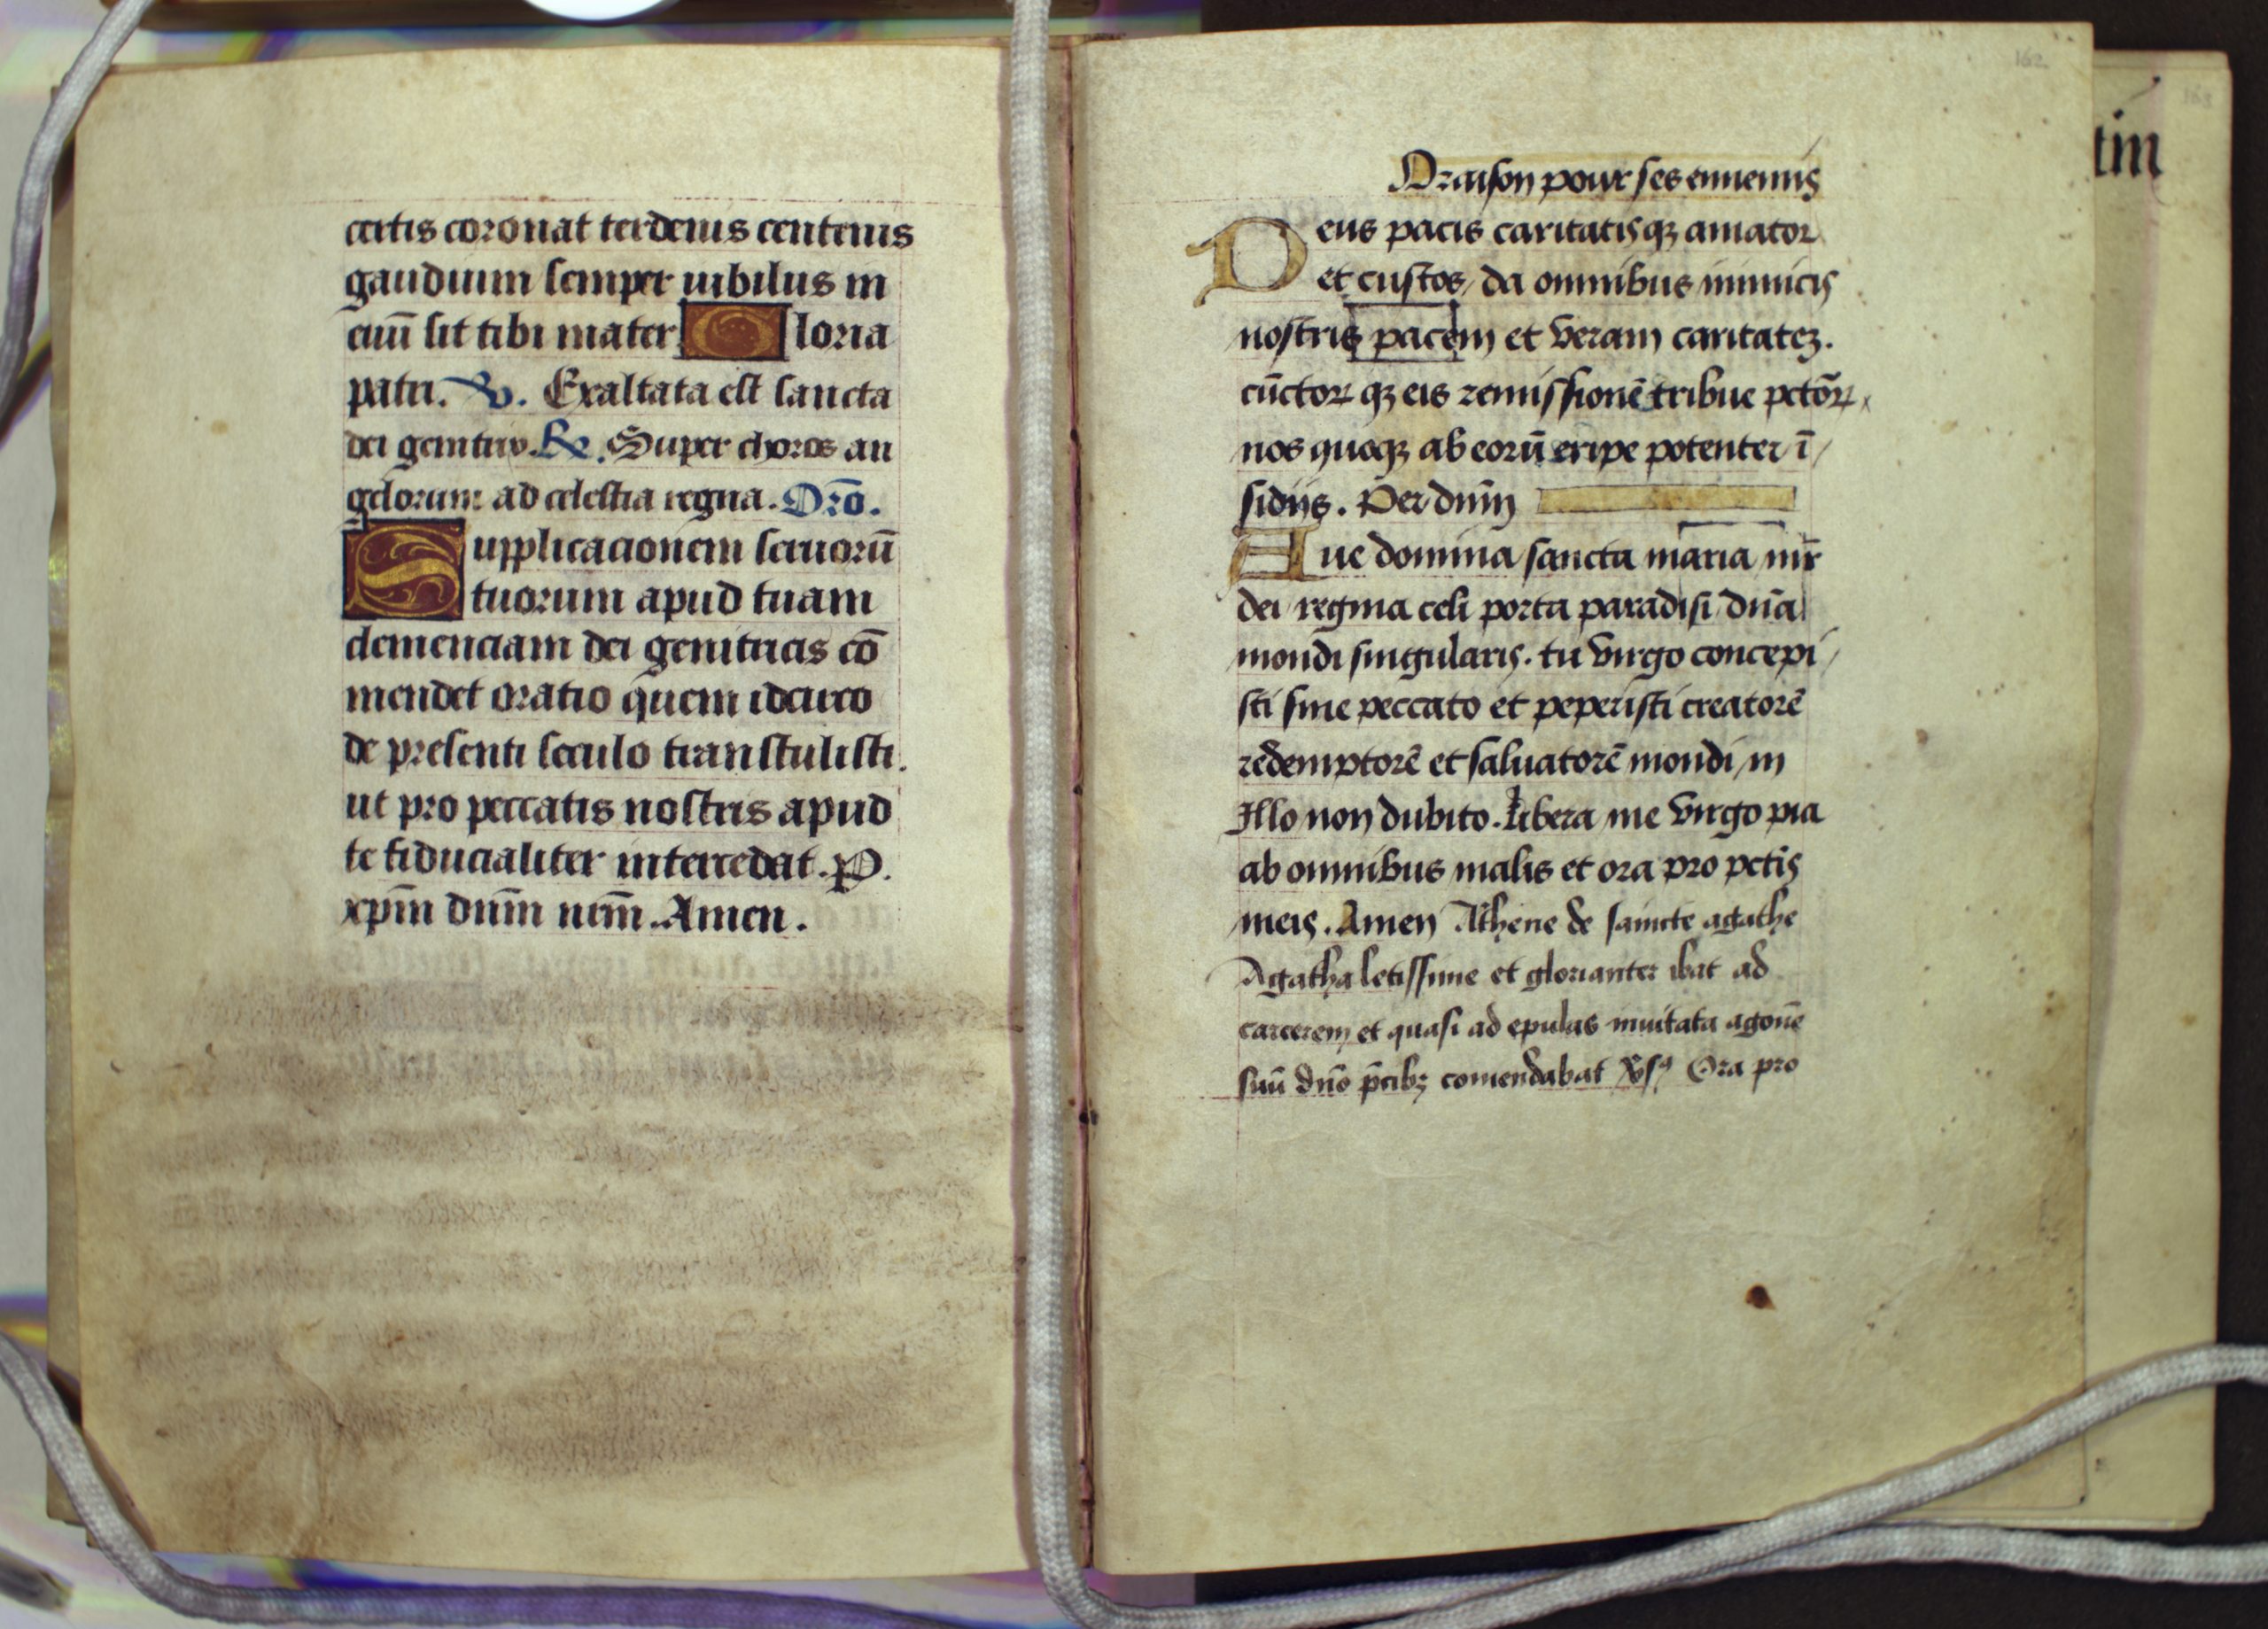
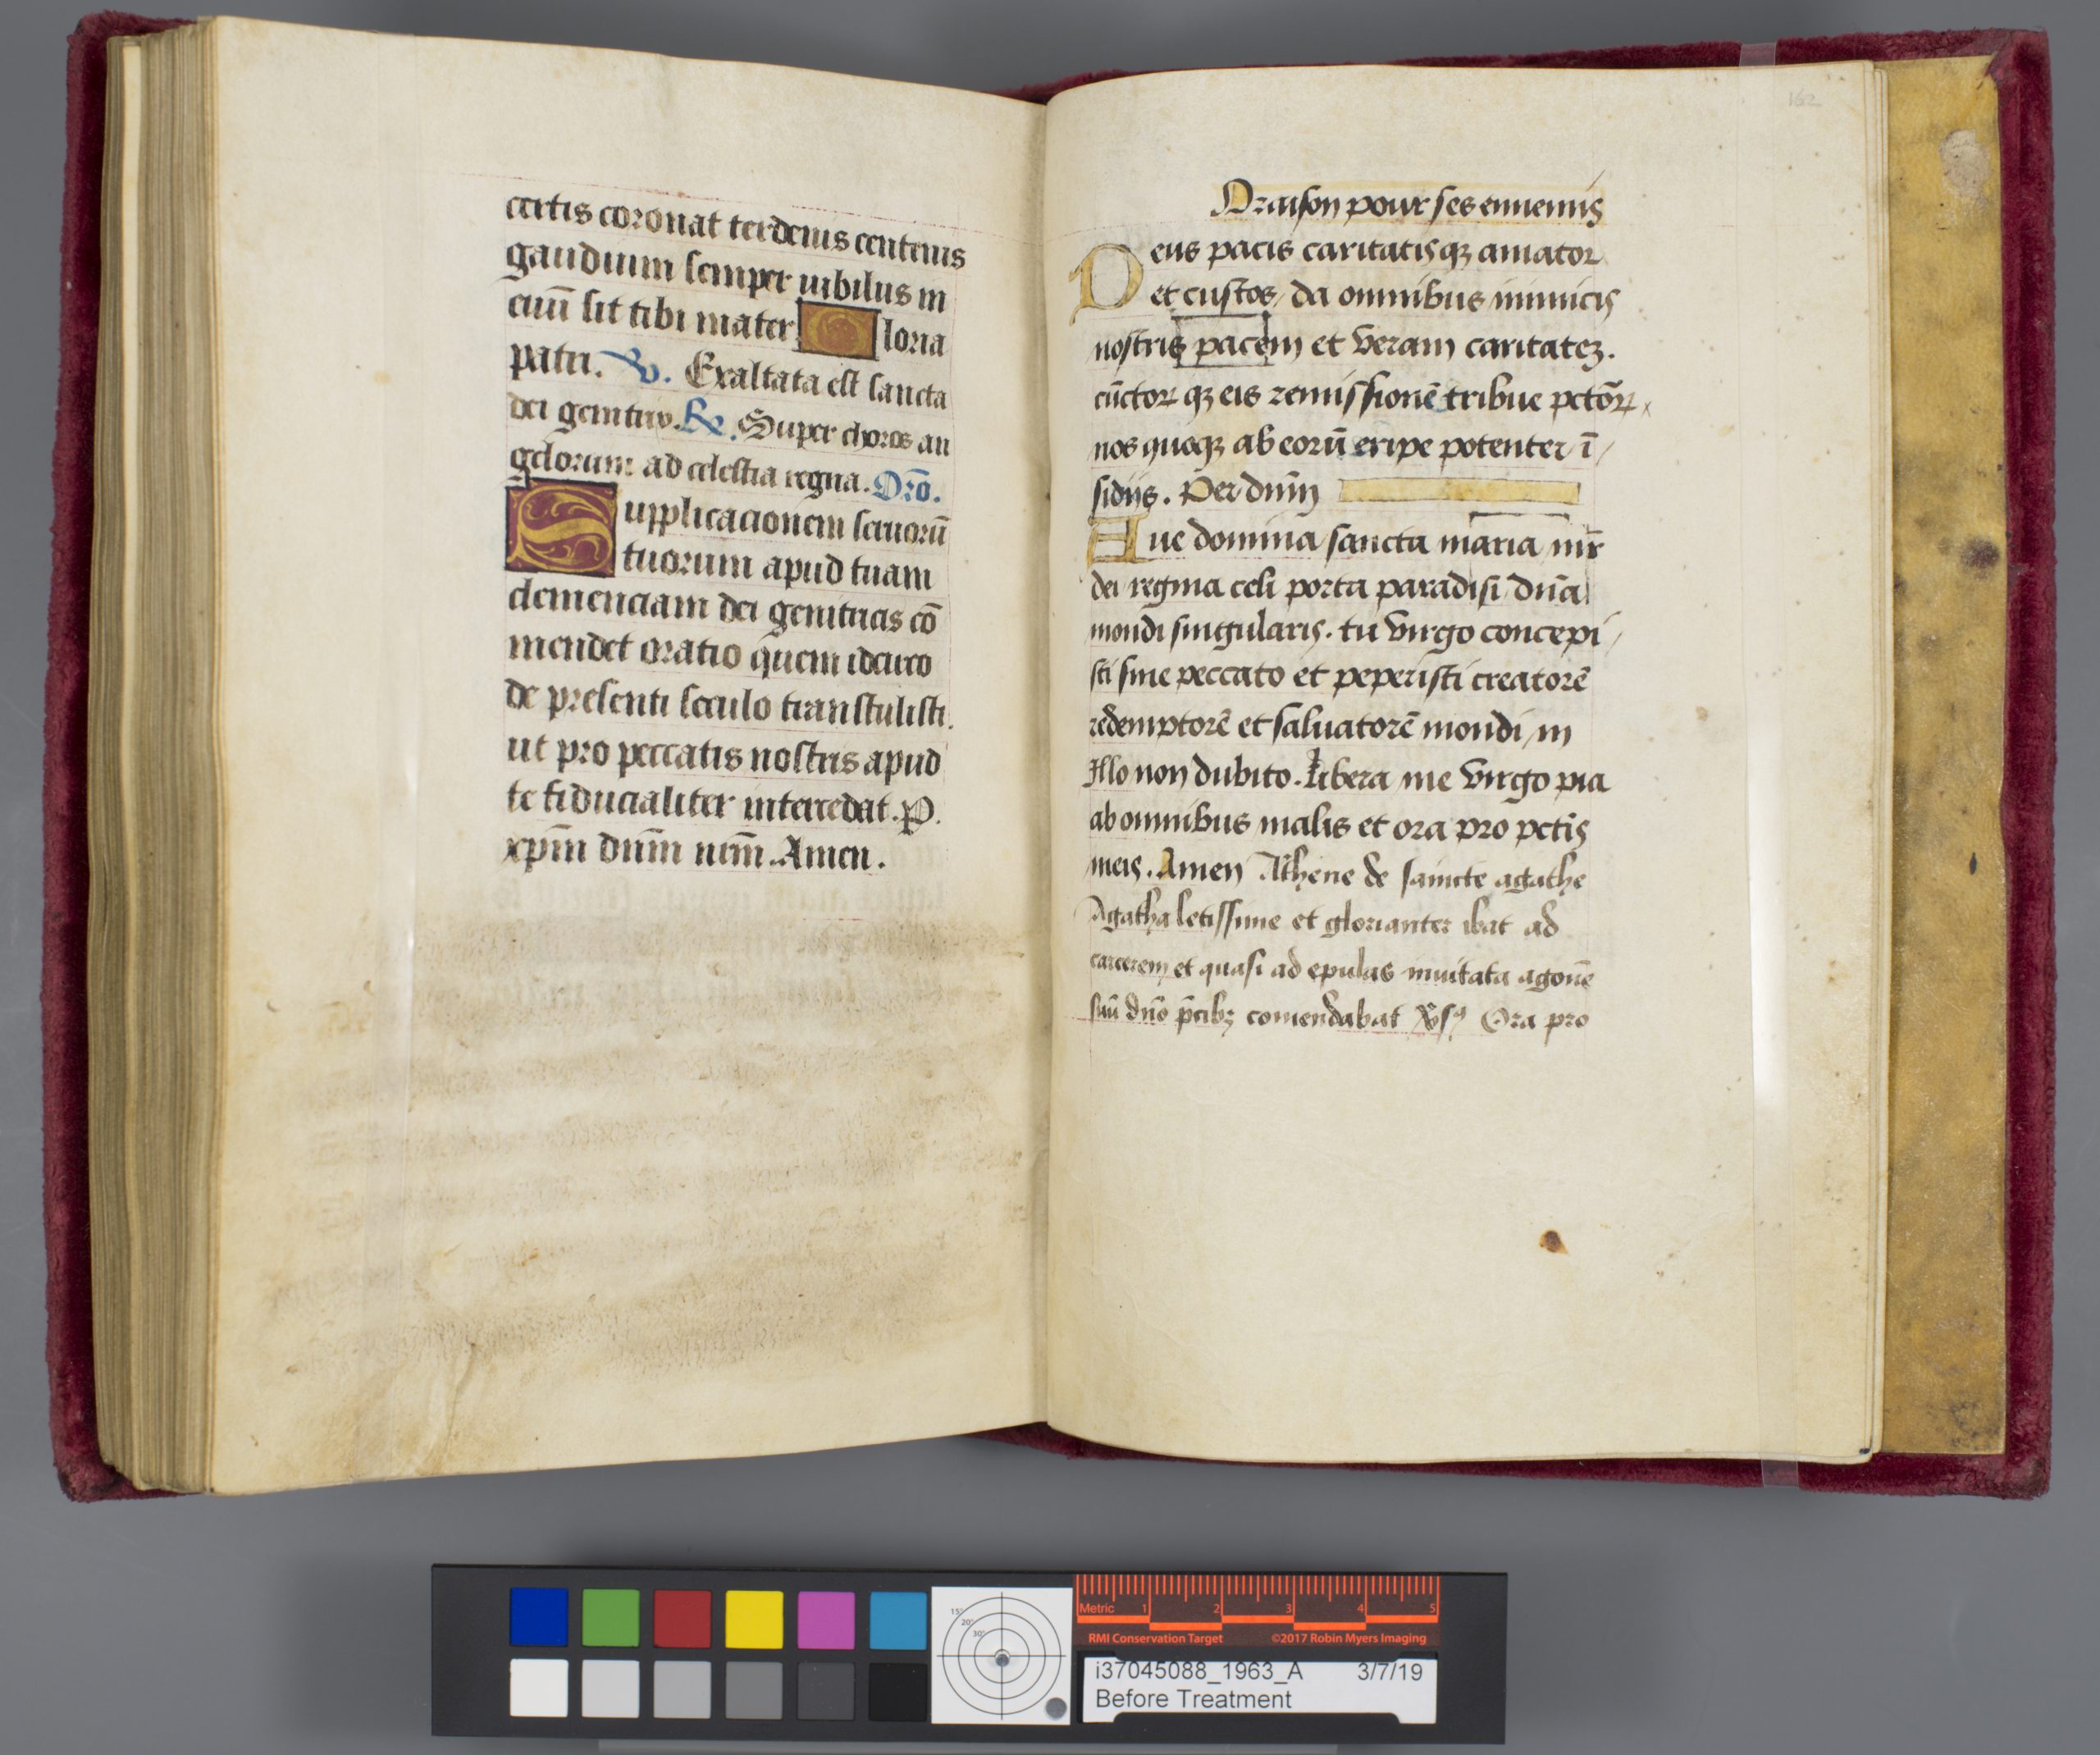
The images above show an example of scraped text on parchment from UC Libraries Hours of the Virgin from 1475, currently in the Lab for treatment. Compare these MISHA generated images to the documentation performed by Catarina Figueirinhas and myself using the Lab’s equipment and processes below.
Normal illuminationUV image (using our old setup without the UV Innovations target)
That said, I am fully aware that not everyone has access to the equipment/training that I have been fortunate to curate/experience over the last five plus years. Also, not everyone uses their finished data exactly how we do. For instance, the needs and expectations of a conservation lab and cultural heritage institutions can be very different. Even within the conservation field, how we use the data provided by specialized imaging in our hybrid book and paper lab is quite different from the kind of data needed by a fine arts conservation lab. Ultimately, I think the core audience for a system like the MISHA system is an organization looking to expand their suite of imaging services, or an institution with no multispectral imaging infrastructure interested in imaging collections in a quick and easy manner. Though for the latter, I would say that there is a big learning curve in manipulating and processing the data, but if greater focus is put into making the software and processing steps user-friendly, especially to novice users, it is completely manageable. And if this step is taken, I think the system could help a lot of institutions dive deeper into the materiality and history of their collections.
RGB representationBand 5 with the PCA (Principal Component Analysis) algorithm applied, inverted with brightness adjustedA false color representation
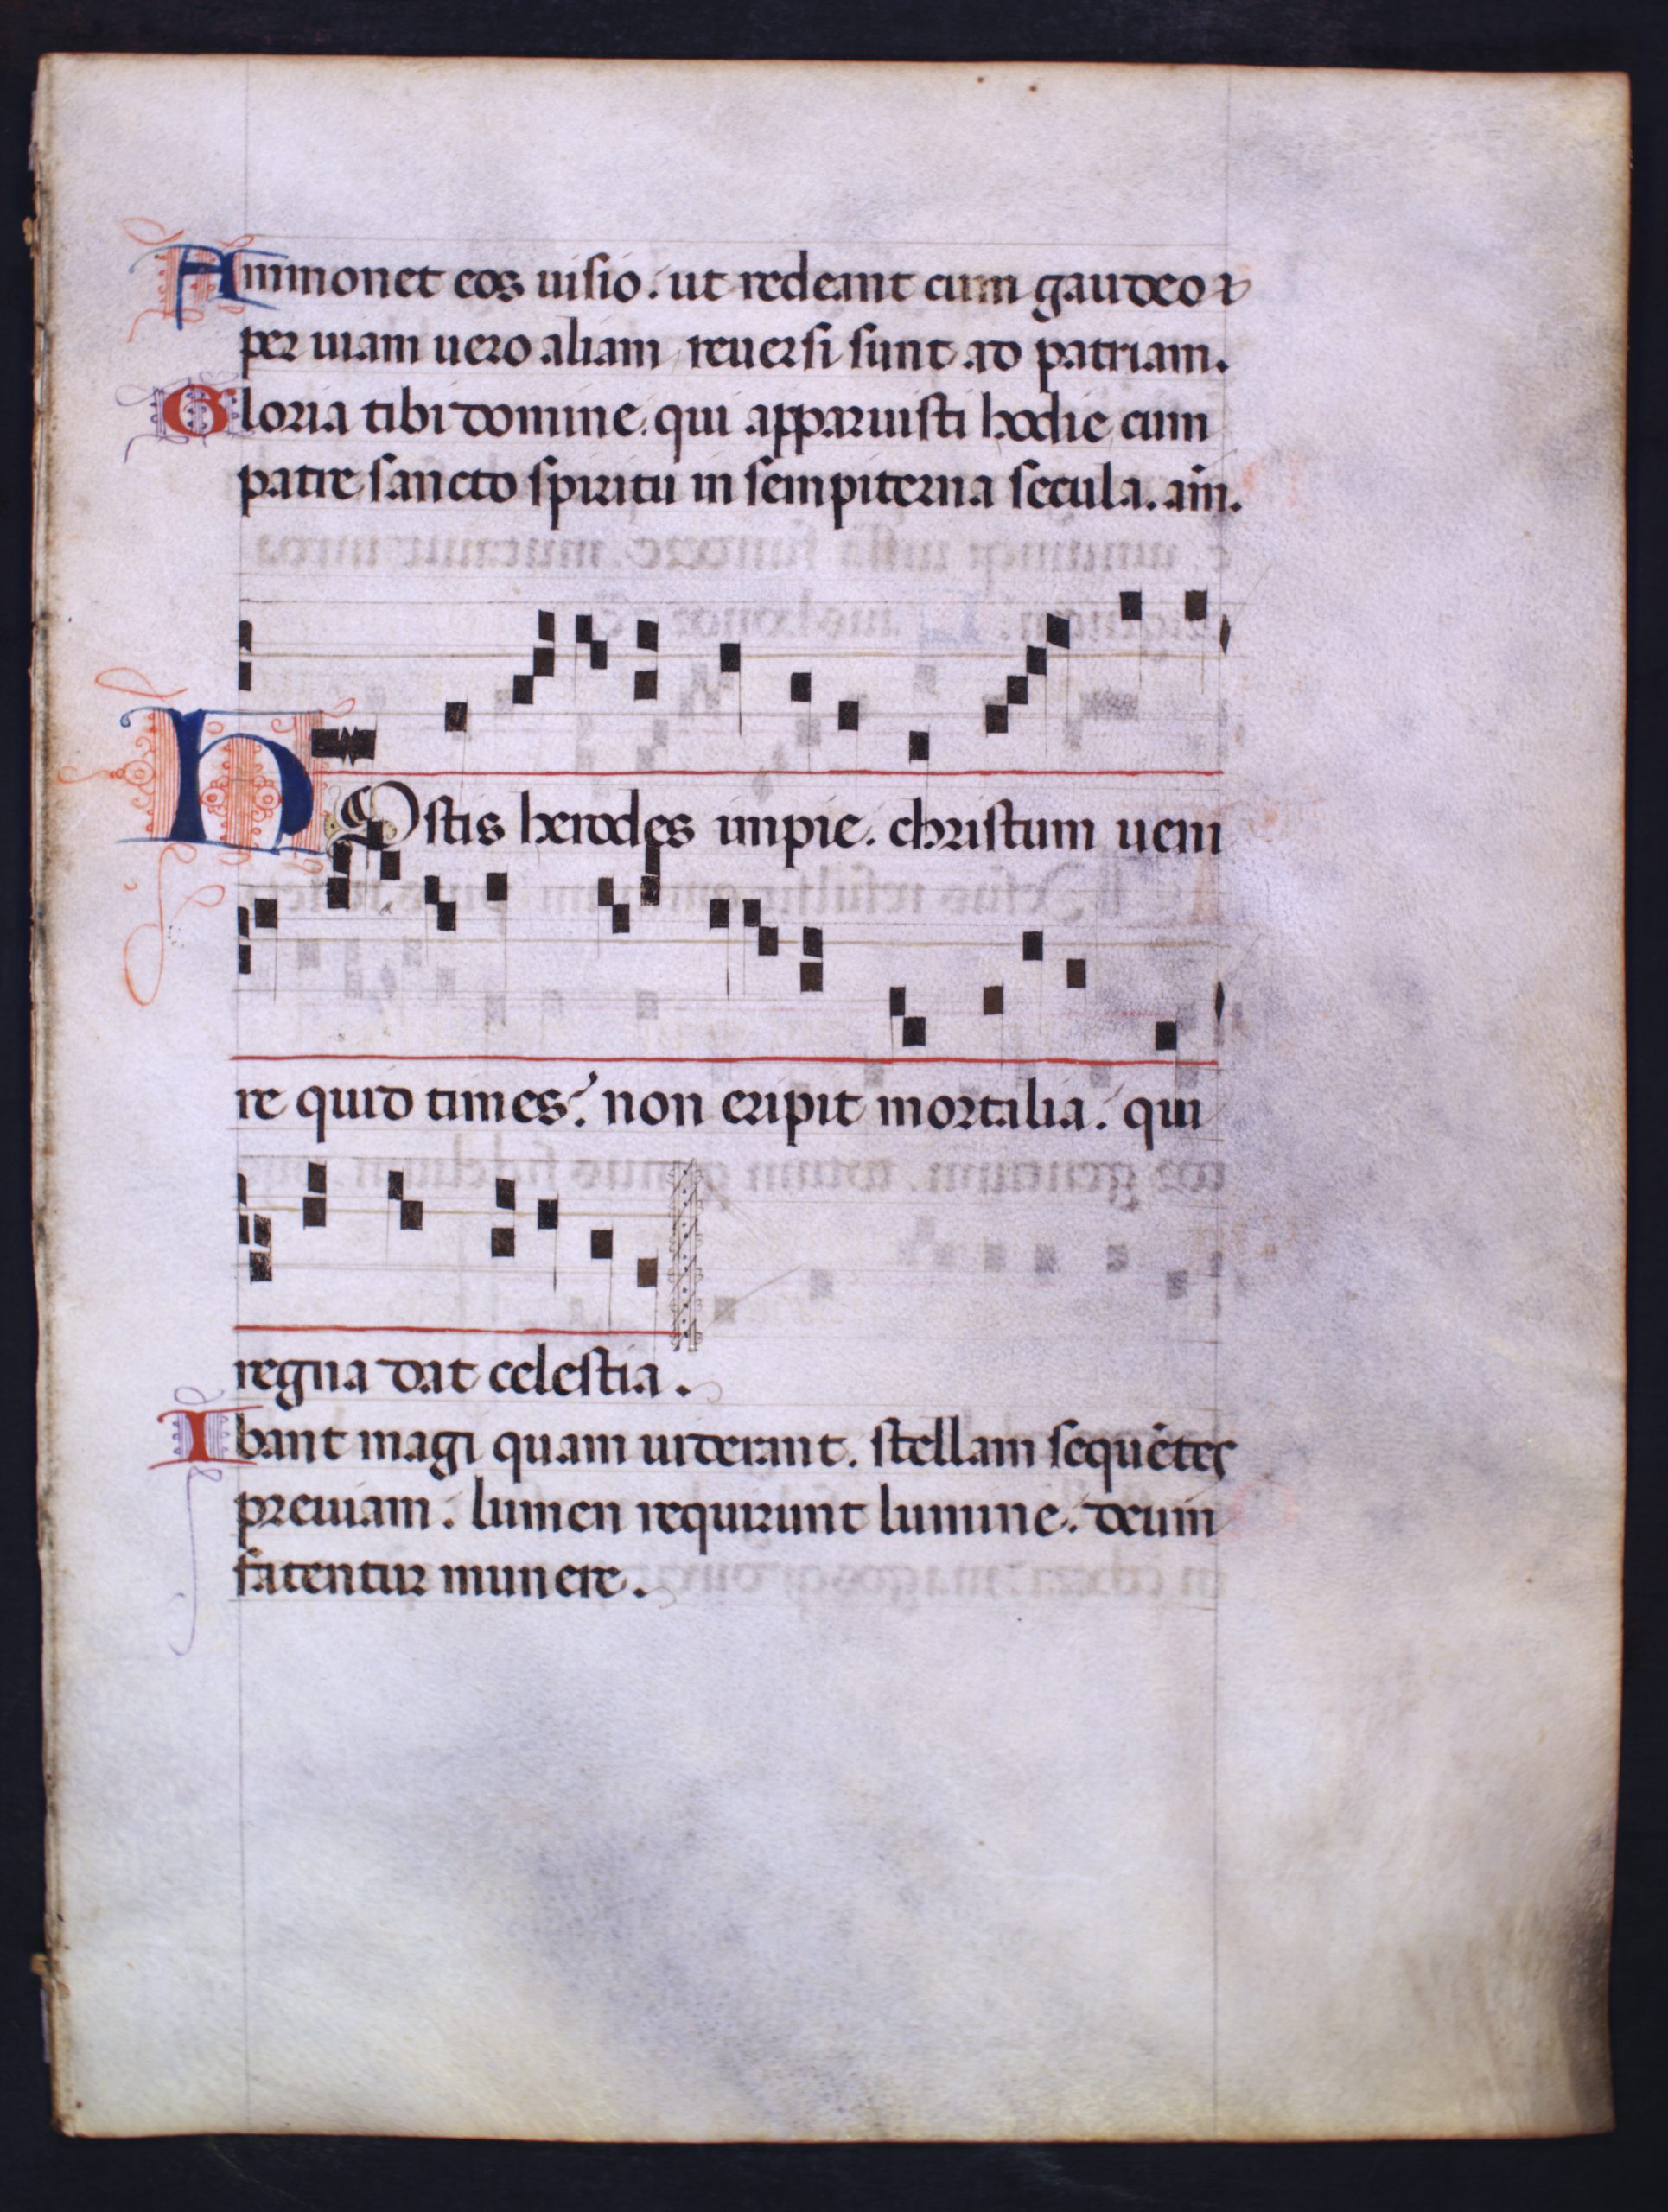
The images above depict another example of faded, scraped text. This flyleaf is from an undated Latin music manuscript that is part of the Public Library’s collection. The images below represent imaging done by the Lab, both normal illumination and UV radiation, with the goal to increase the legibility of the inscription.
Normal illuminationUV radiation image using our current, standardized workflow that has been further enhanced to bring out the text.
In the end, multispectral imaging is just plain FUN! So, the idea of making it more accessible to a wider audience is extremely exciting and I think the work that NEH, RIT, and colleagues like Andrew and Naomi are doing to share the power and wonder of multispectral imaging is amazing. The idea of a portable multispectral imaging system with free processing software that does not take a PhD to use is boundary-breaking, and it gives us a glimpse into a future of accessible and exciting imaging, which thus allows us to see and understand more of the past. I will always be an advocate for that kind of imaging!
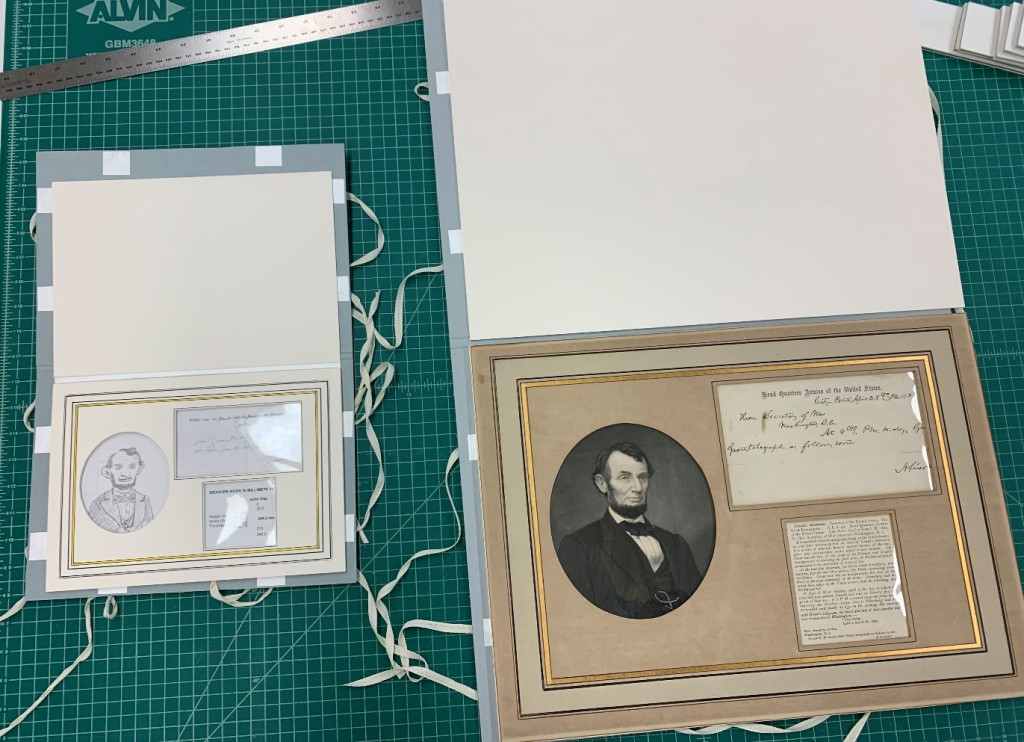
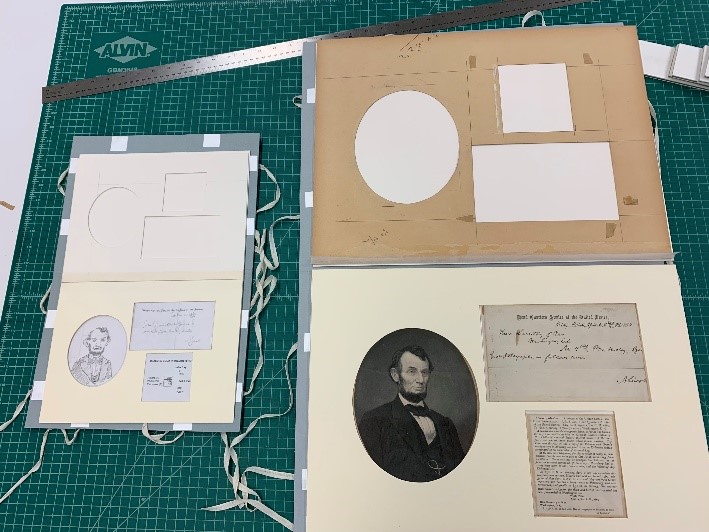
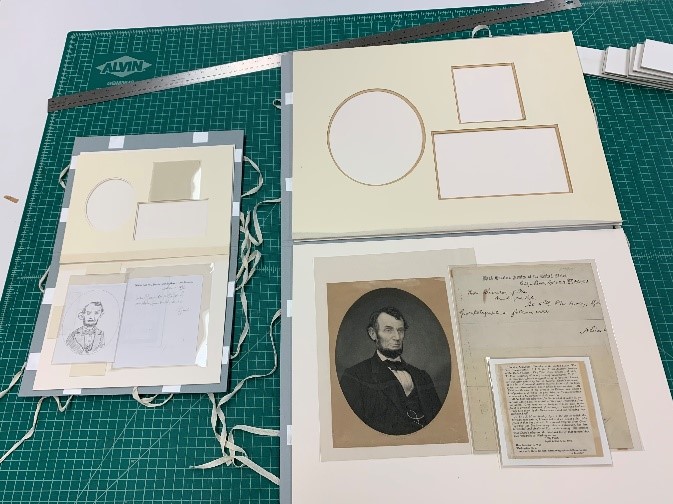
I love matting projects! Matting is an elegant way to present images and documentation for exhibition. We received a collection of letters and images from Abraham Lincoln in the lab from the Cincinnati and Hamilton County Public Library (CHPL) for preservation and conservation. After our conservator Ashleigh Schieszer completed the preliminary work of removing the artifacts from all the acidic and harmful elements they were previously in contact with, we collaborated on the matting choices. One cool thing I just love about this job is the opportunity to make tiny models of our intended work. Obviously, we can iron out some of the bugs and problem solve unforeseen obstacles with models, but making a tiny representation of my work is not only great to have as a future reference but is just really cool.
Matting model on left, original objects on right
So, for one of the previously matted compilations the curator suggested retaining the beautiful custom mat for the finished system. This presented a problem because of the acidity in the original mat. The solution we came up with was to create an archival buffer mat between the original mat and the artifacts. Easy-peezy.
To mount overlapping objects, we decided to secure them to different mat board layers. For example, the document on top will be attached to the back of the archival buffer with a polyester sling while the letter and portrait will be mounted to the backing board with edge strips or photo corners.
The archival buffer mat is hinged below the opened original mat.
View of the artifacts below the archival buffer mat. Parts are mounted to different layers in the model.
We also added a custom portfolio for transportation and long term housing.
Yesterday we had the pleasure of a visit from Case Western Reserve University Library staff, Andrew Mancuso, Preservation Officer, and Naomi Langer, Digitization Technician.
They are currently winding up a whirl-wind month-long tour, traveling around the state to test a portable (and affordable!) multi-spectral imaging system as part of a grant from the National Endowment for the Humanities (NEH).
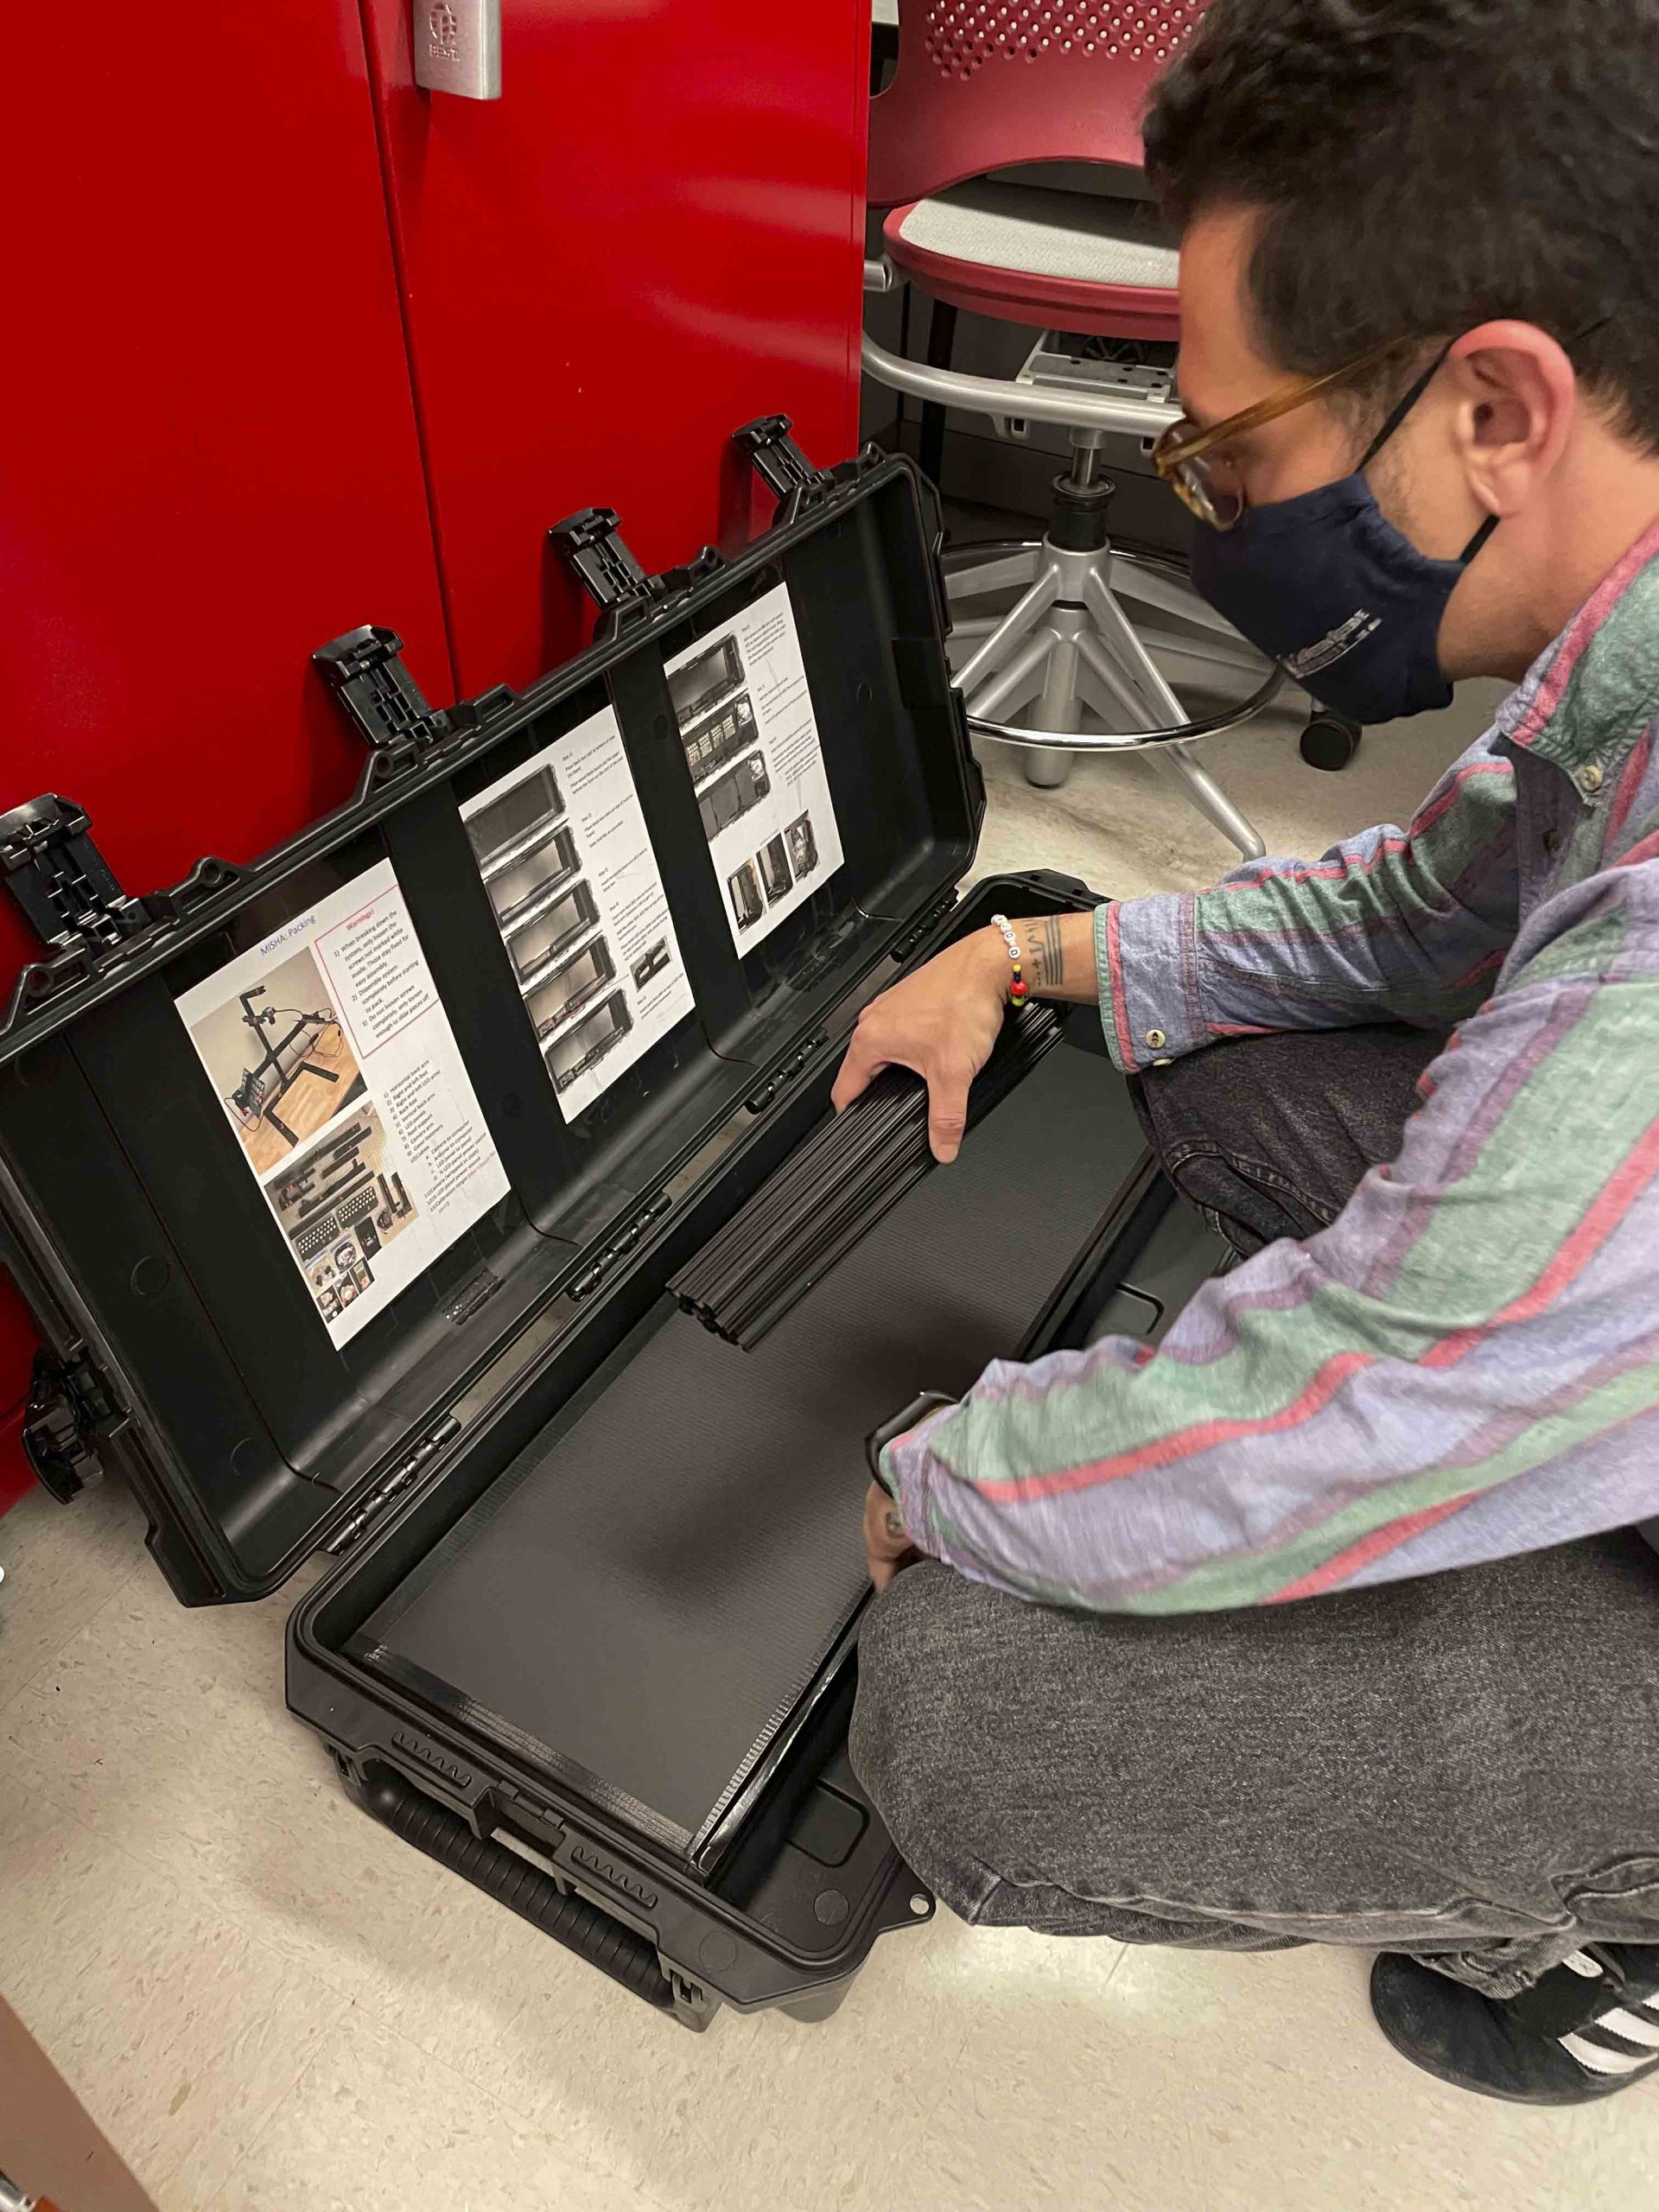
Andrew and Naomi unpack MISHA
Detailed setup instructions
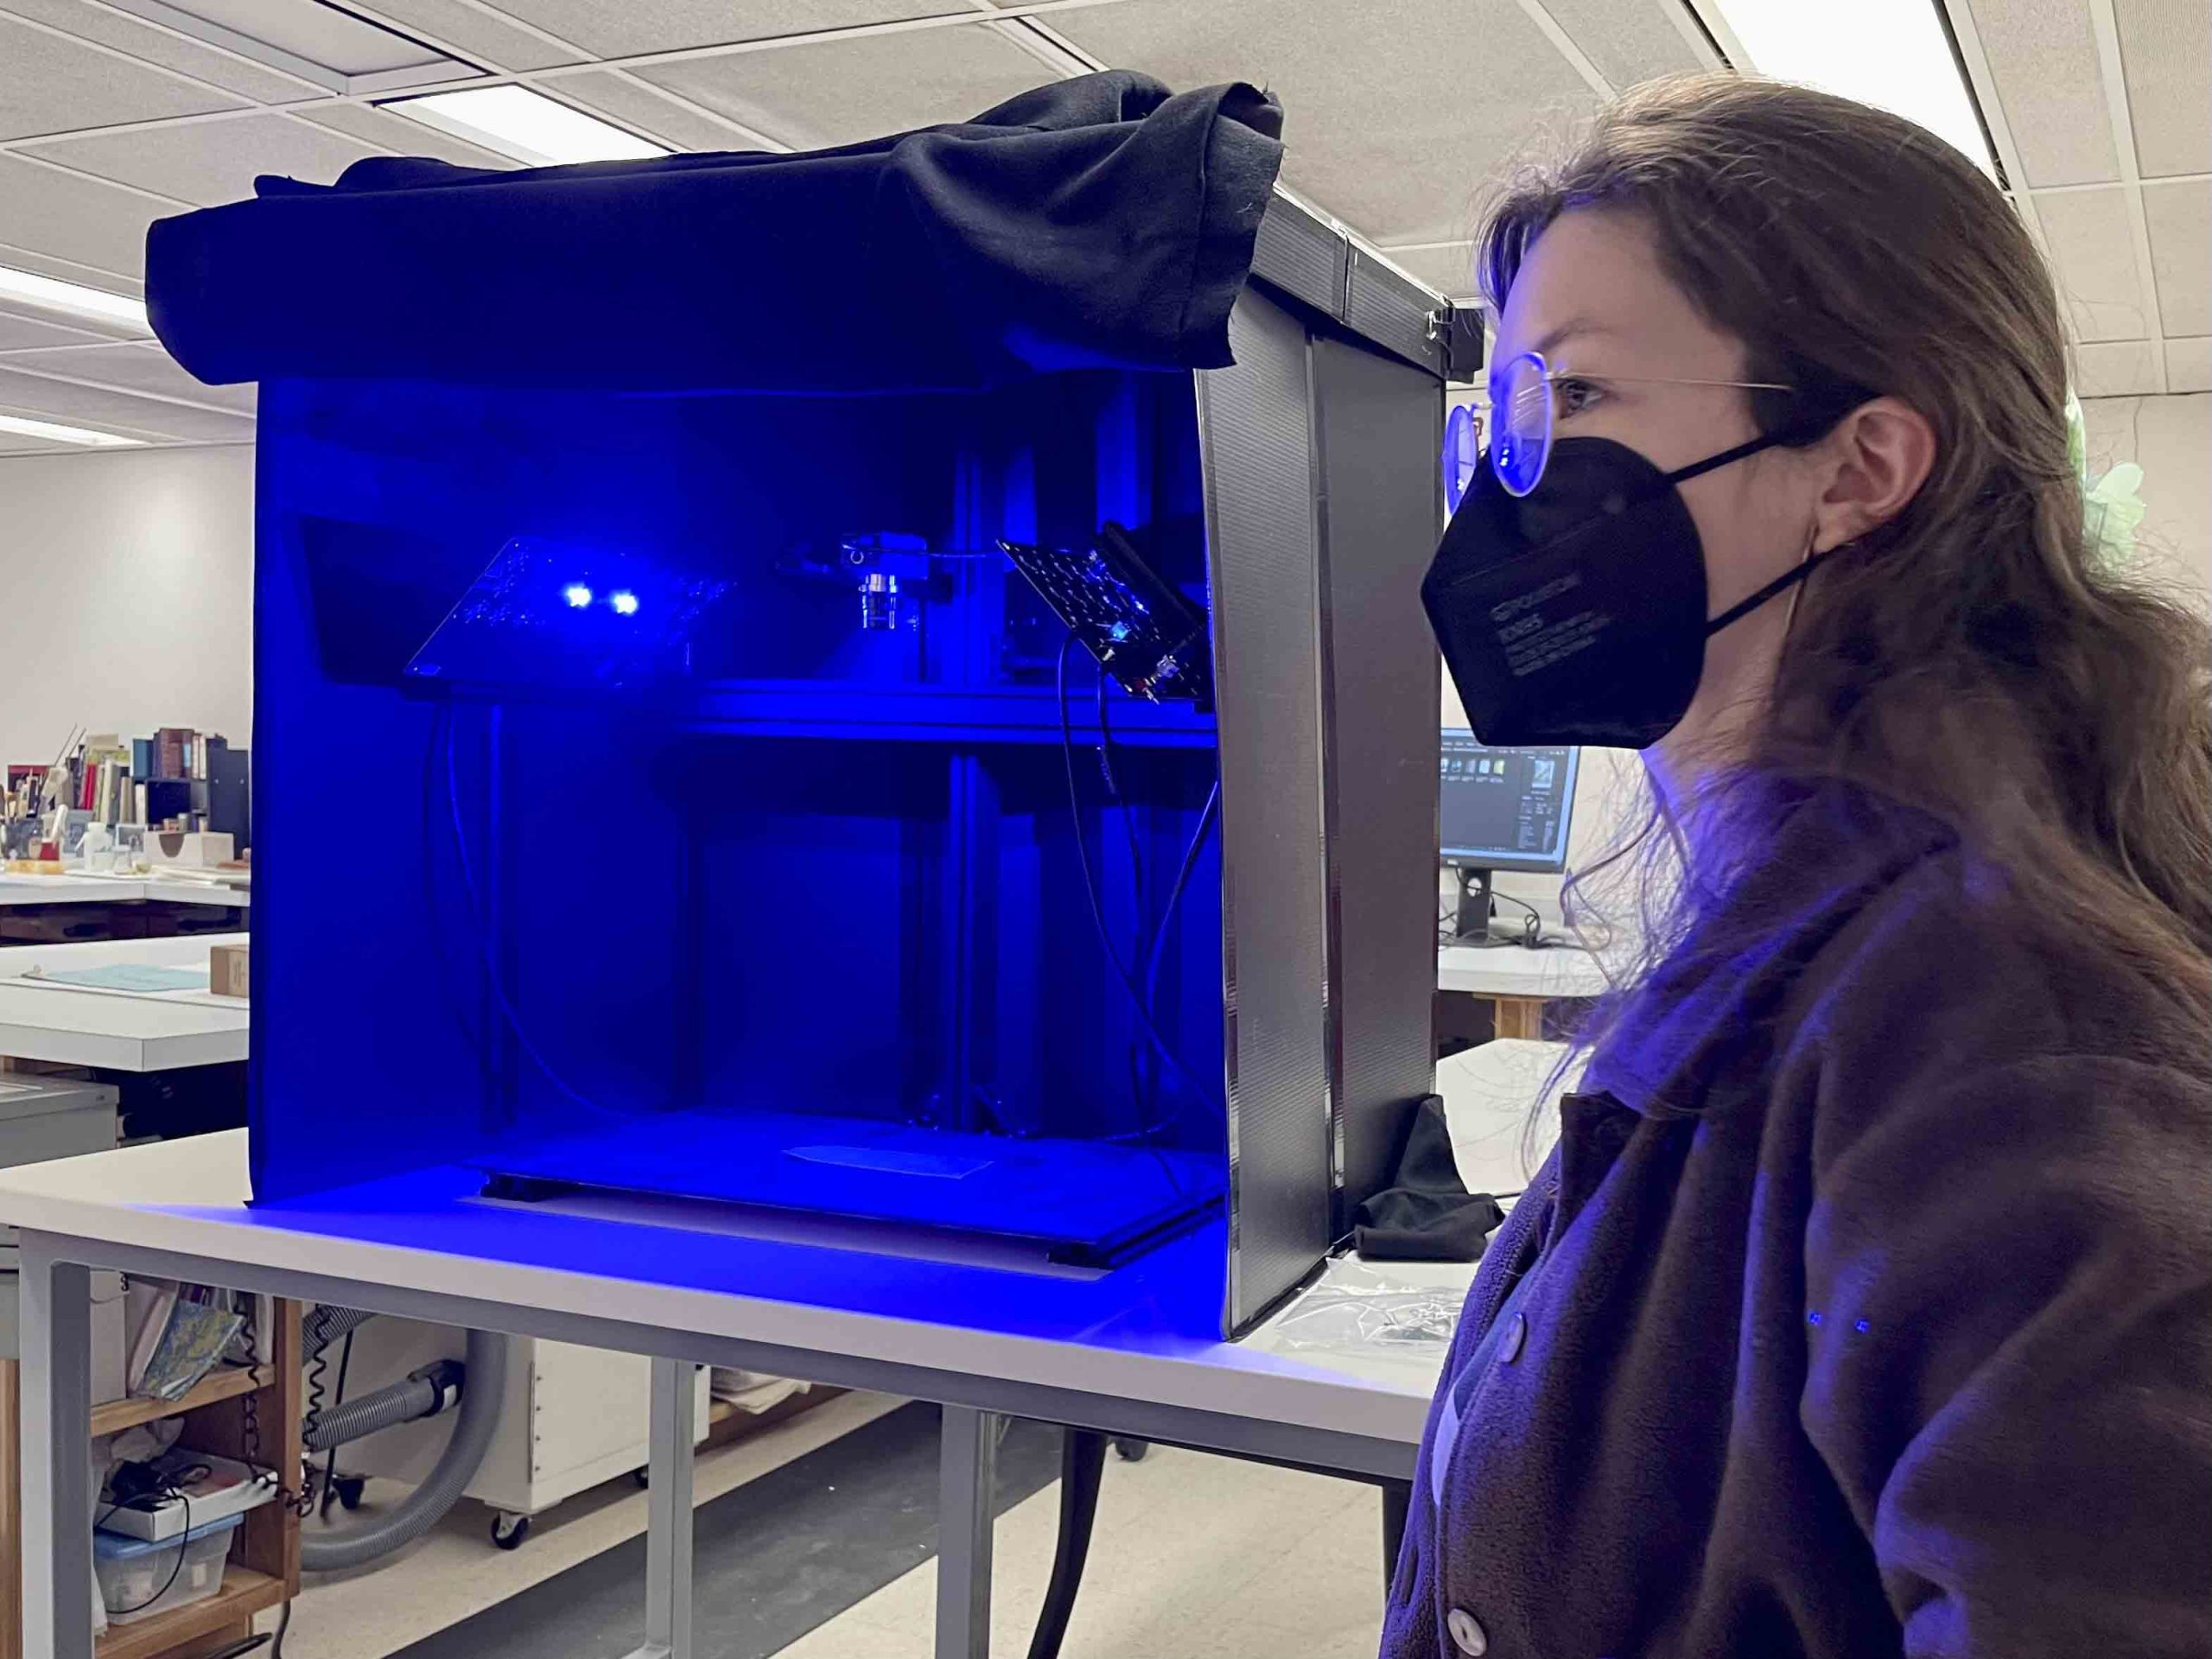
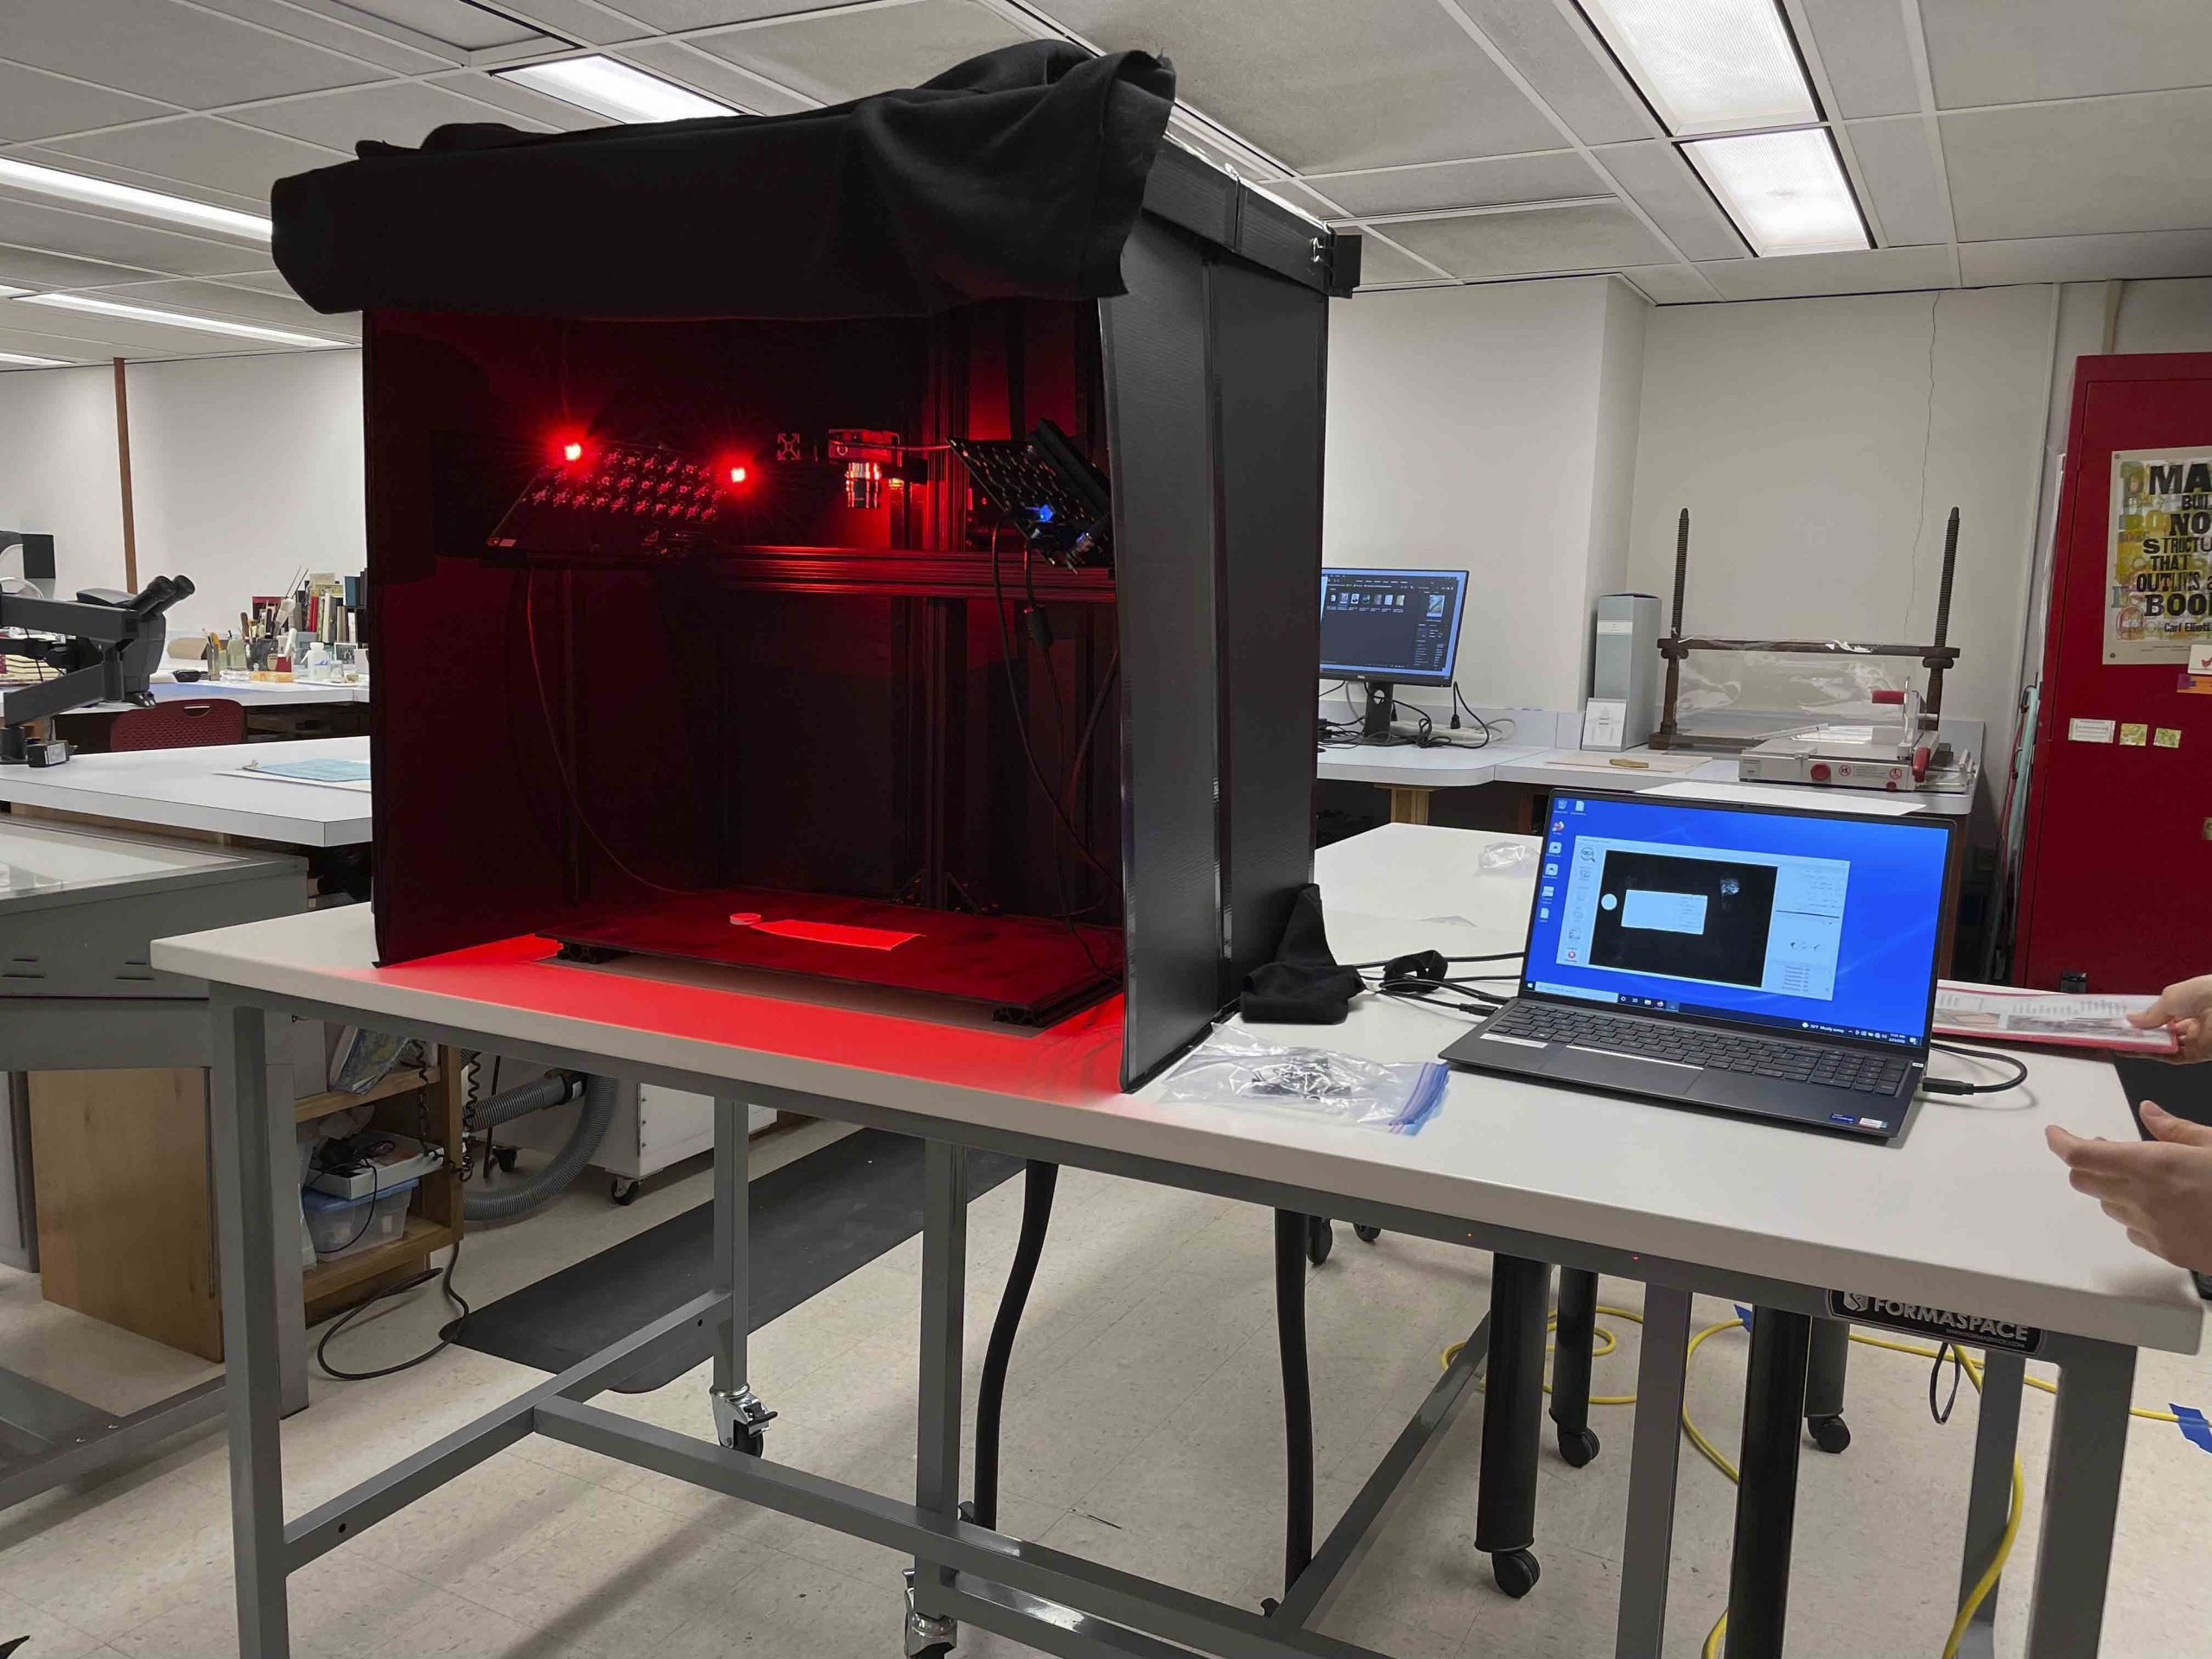
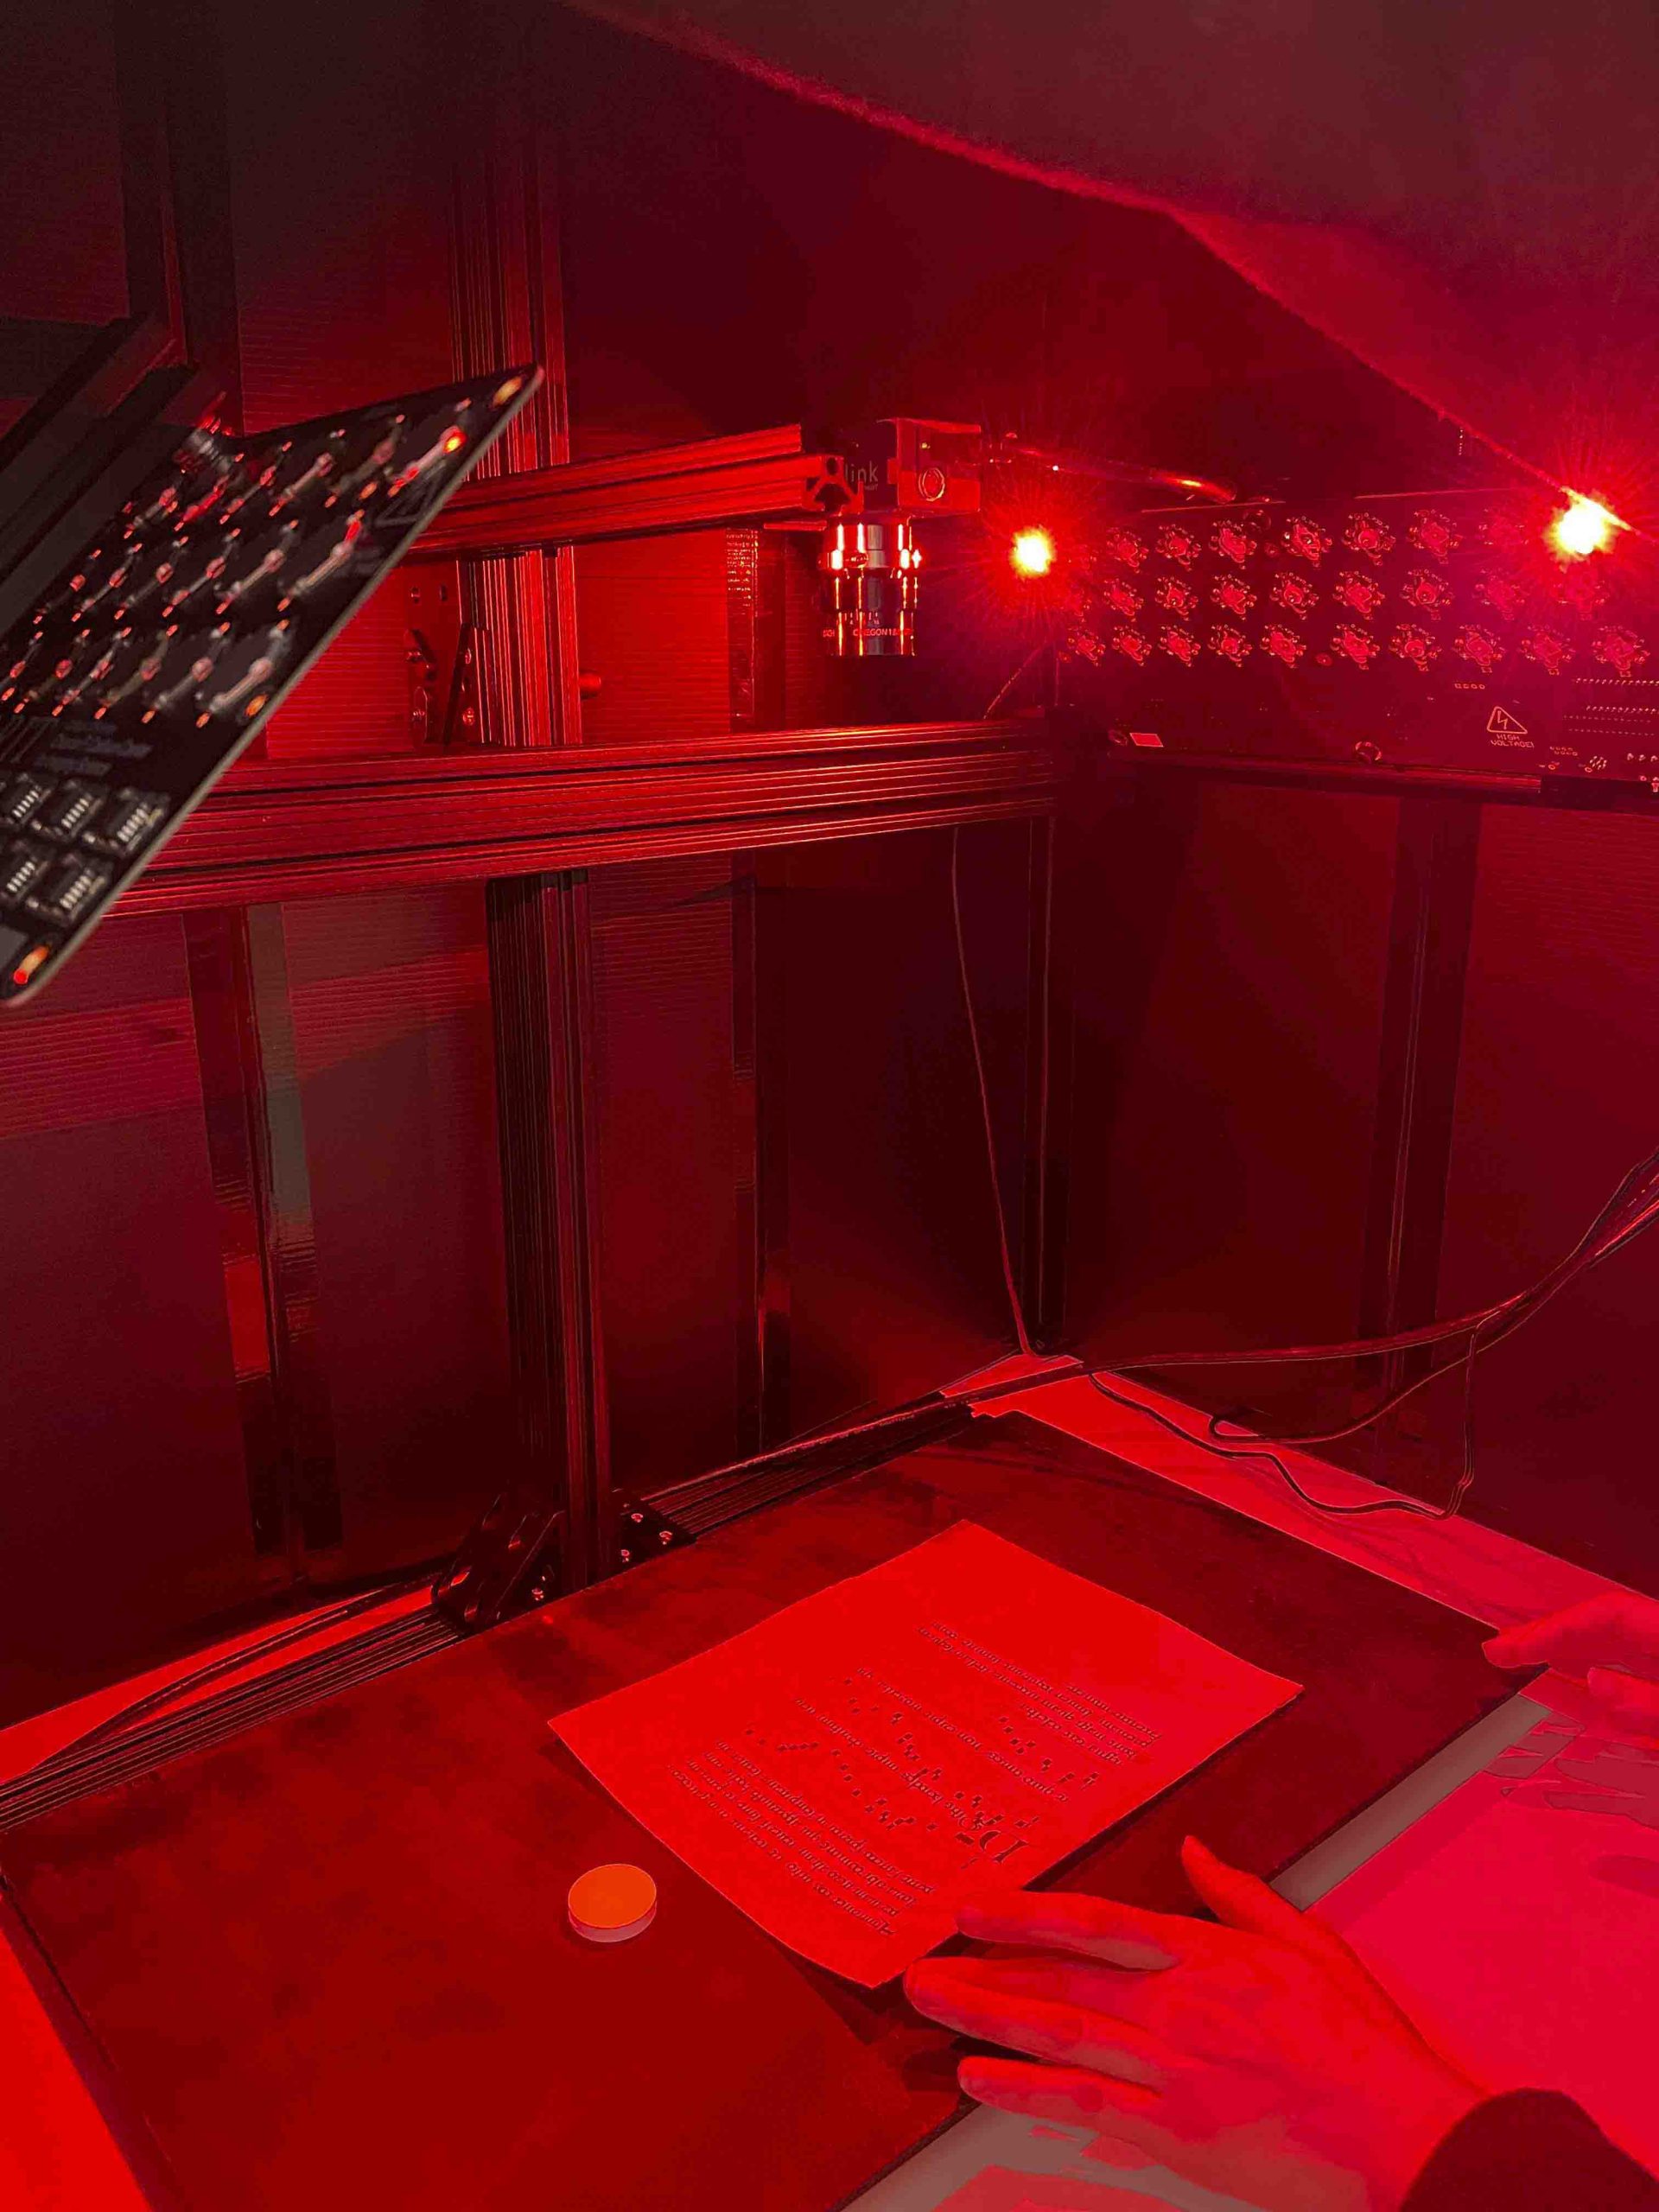
This unique system is called MISHA, which stands for Multi-spectral Imaging System for the Humanities and Archives. The imaging system and software can be used to recover obscured and illegible text on historical documents, such as scraped-away writing:
Lost manuscript writing on a CHPL Book of Hours is a good candidate for multi-spectral imaging
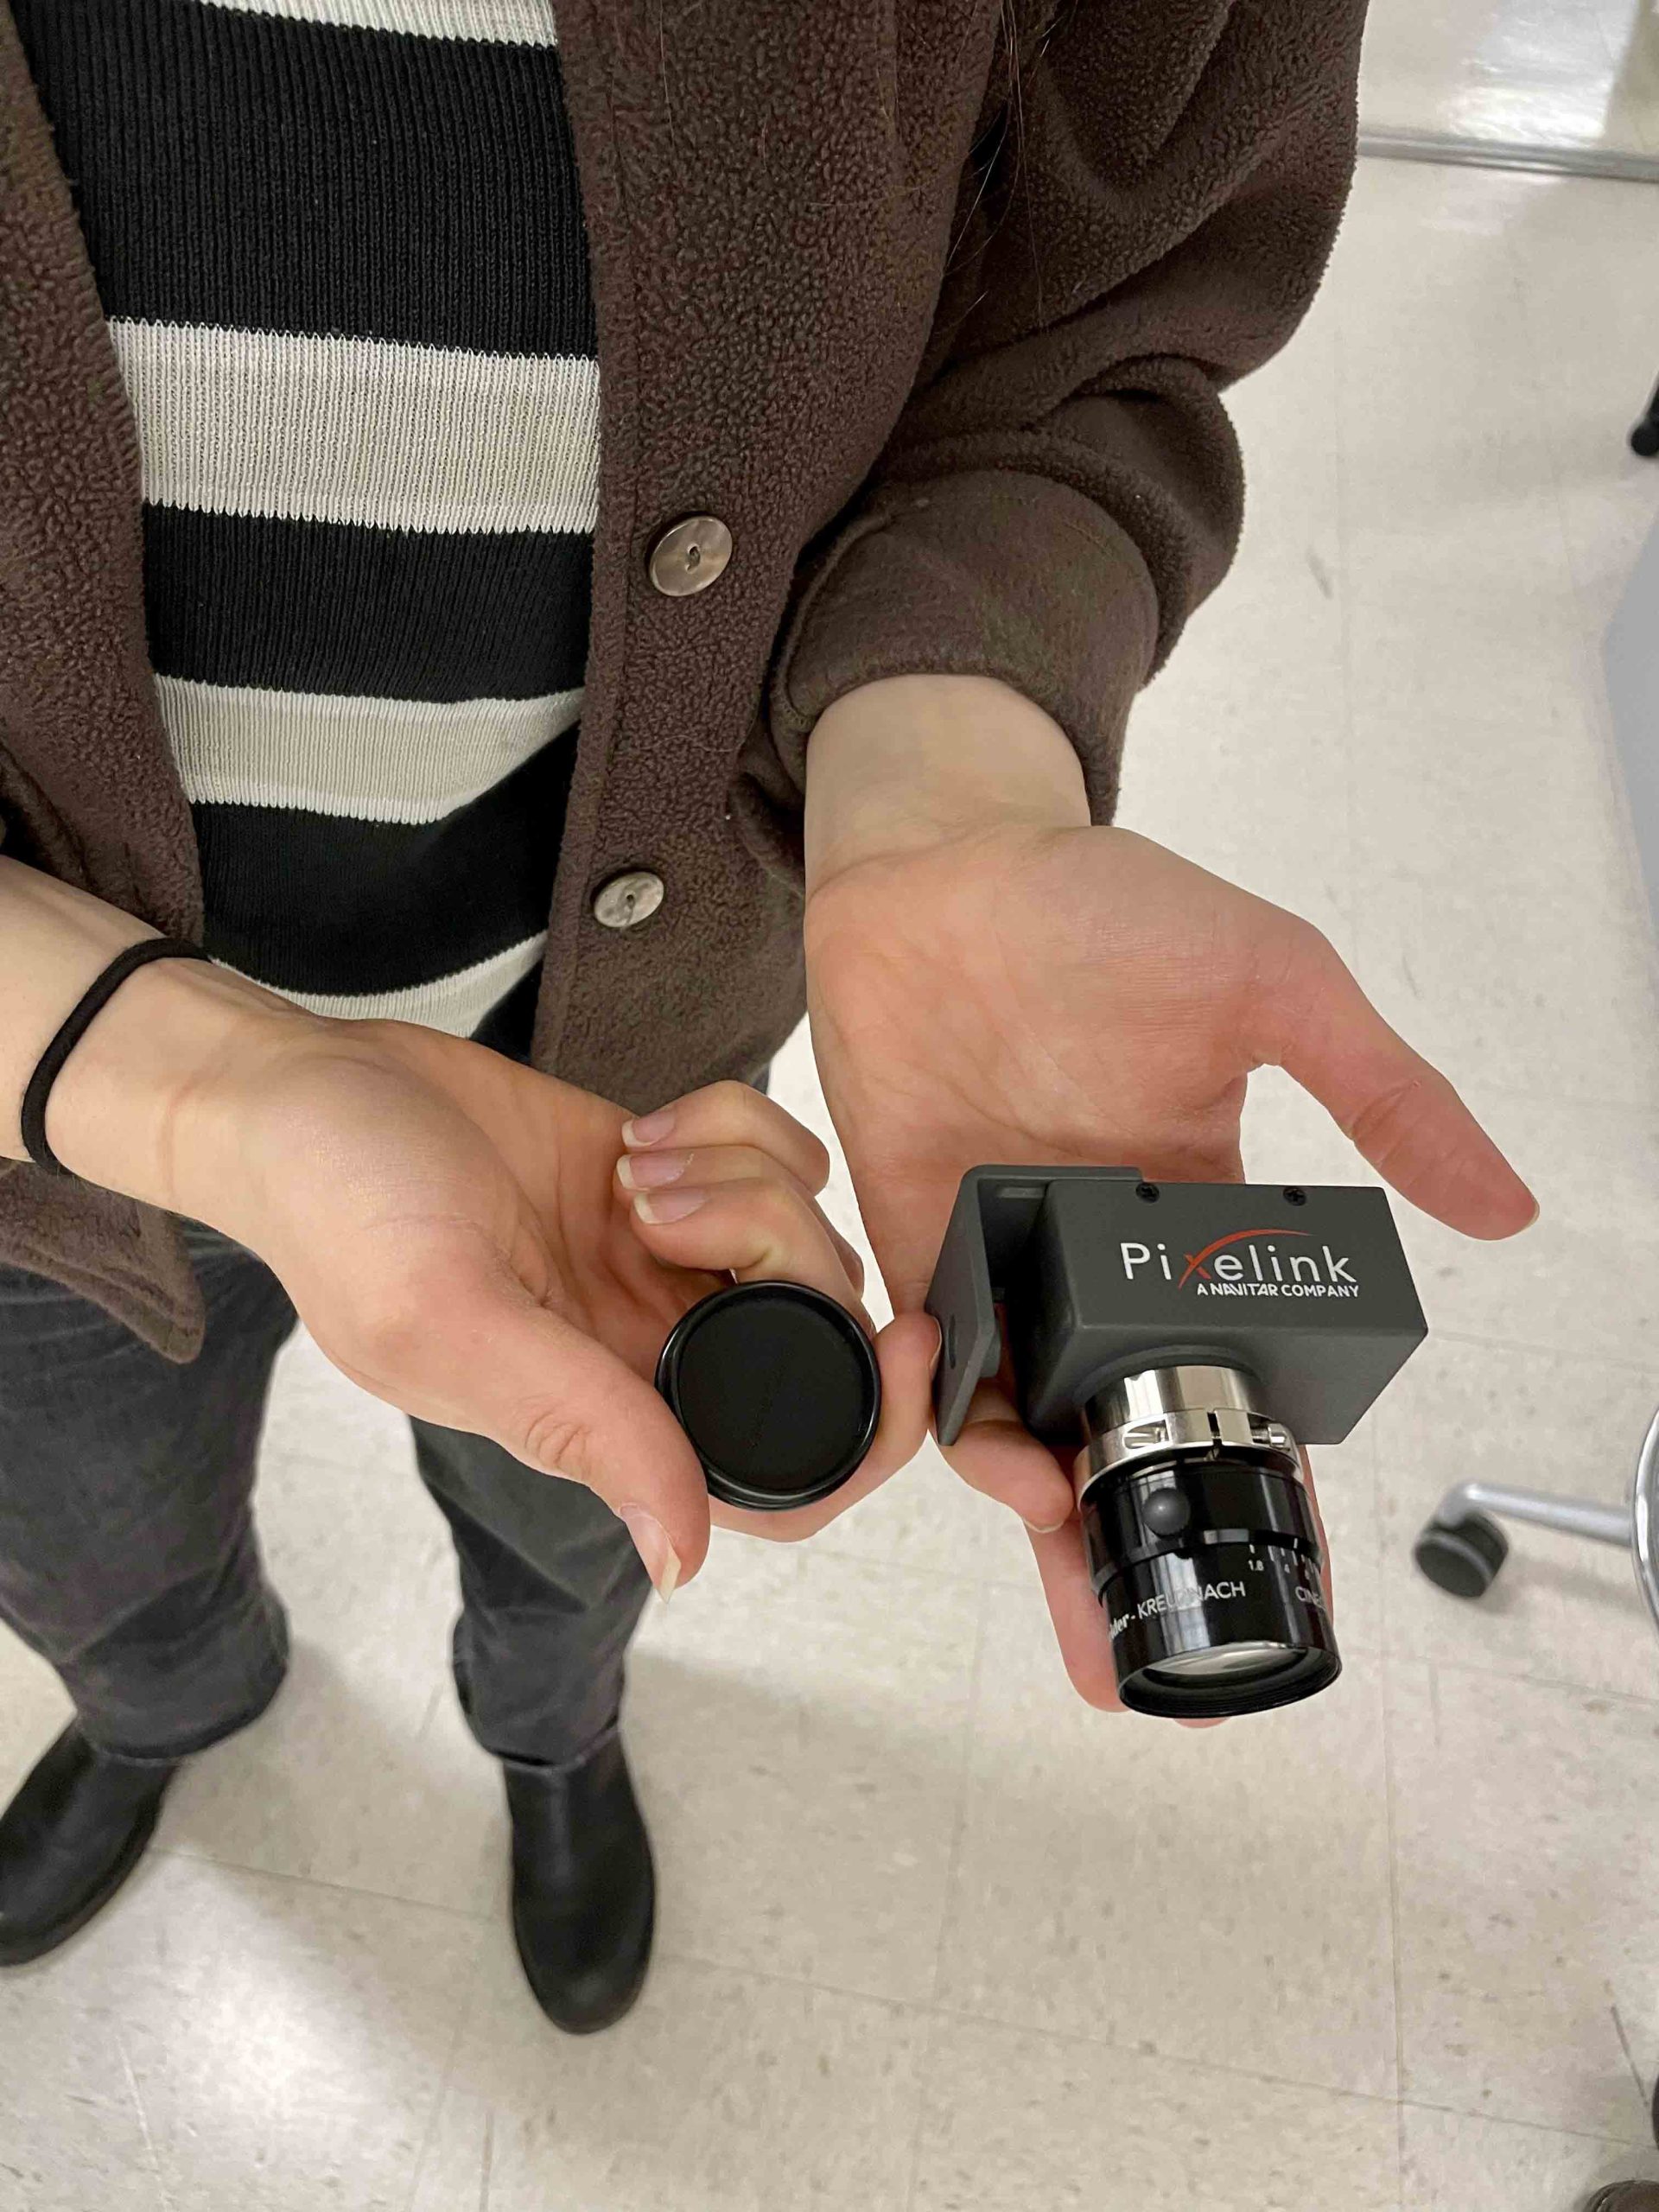
If you’re familiar with multi-spectral imaging systems, you might be wondering, “How much is ‘cheap’?” Roughly, the entire system cost under $5,000 to create – with the monochrome camera and light boards making up the bulk of the price tag.
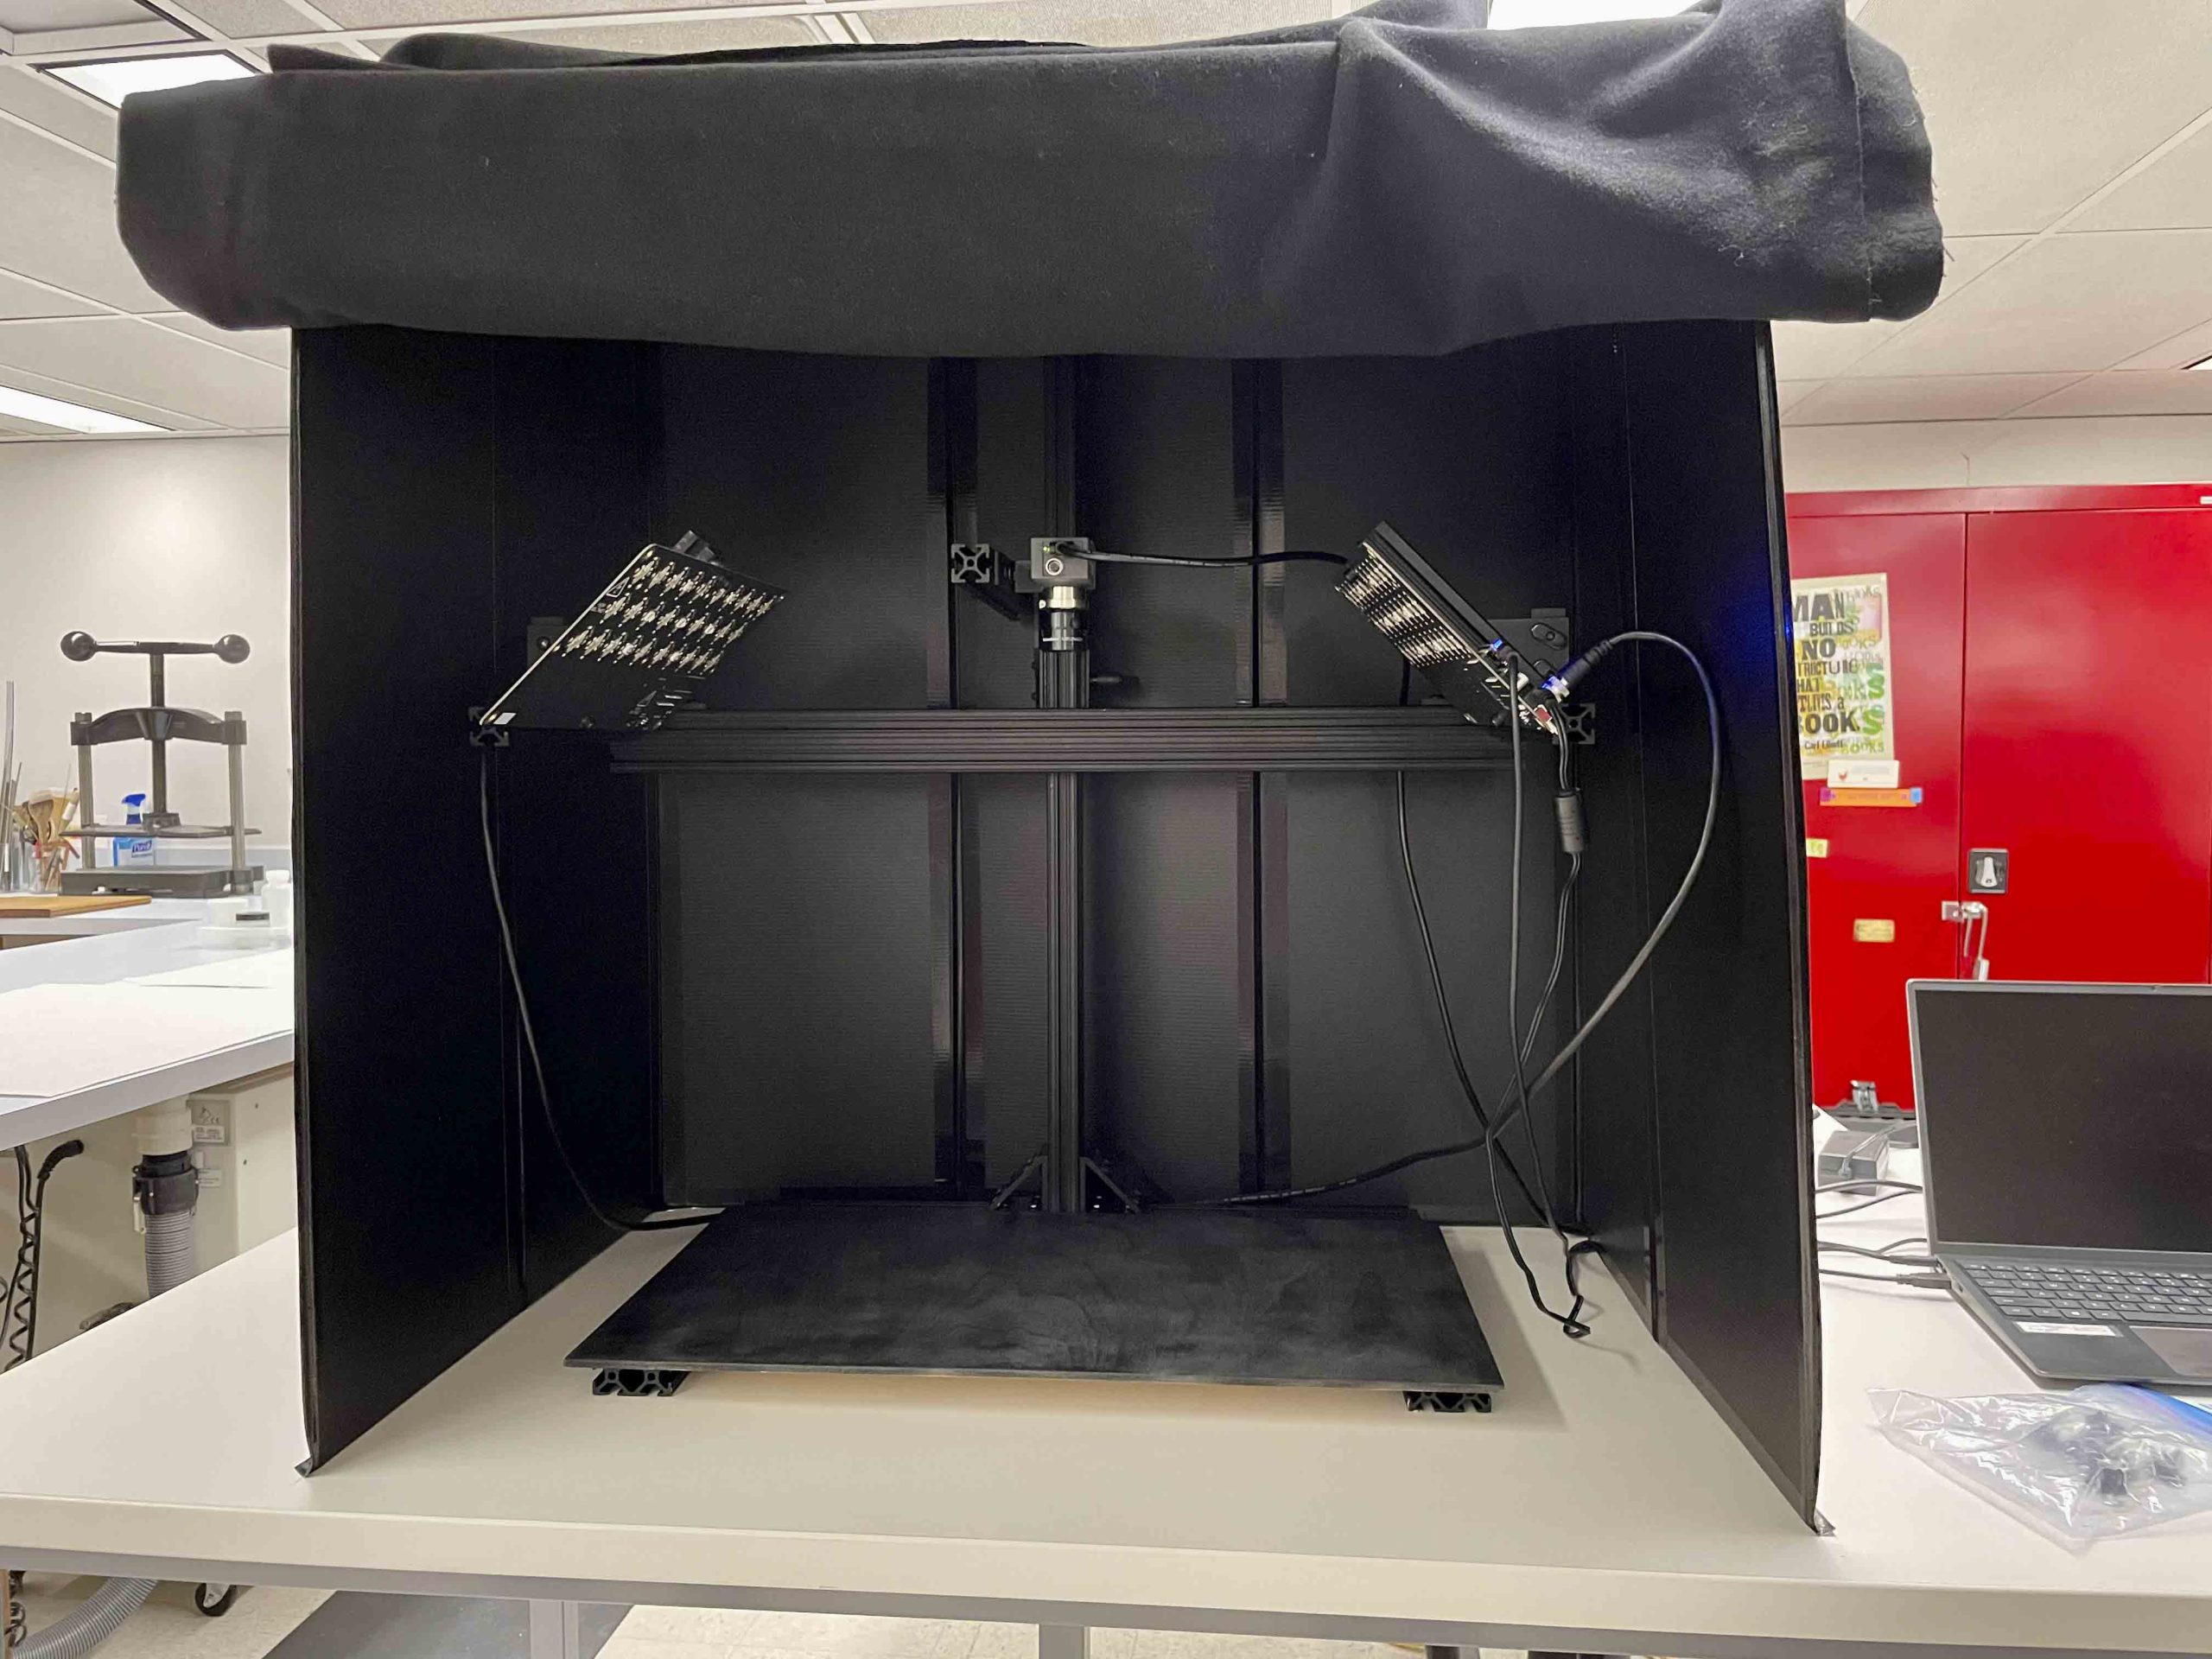
Monochrome camera fits in palm of hand
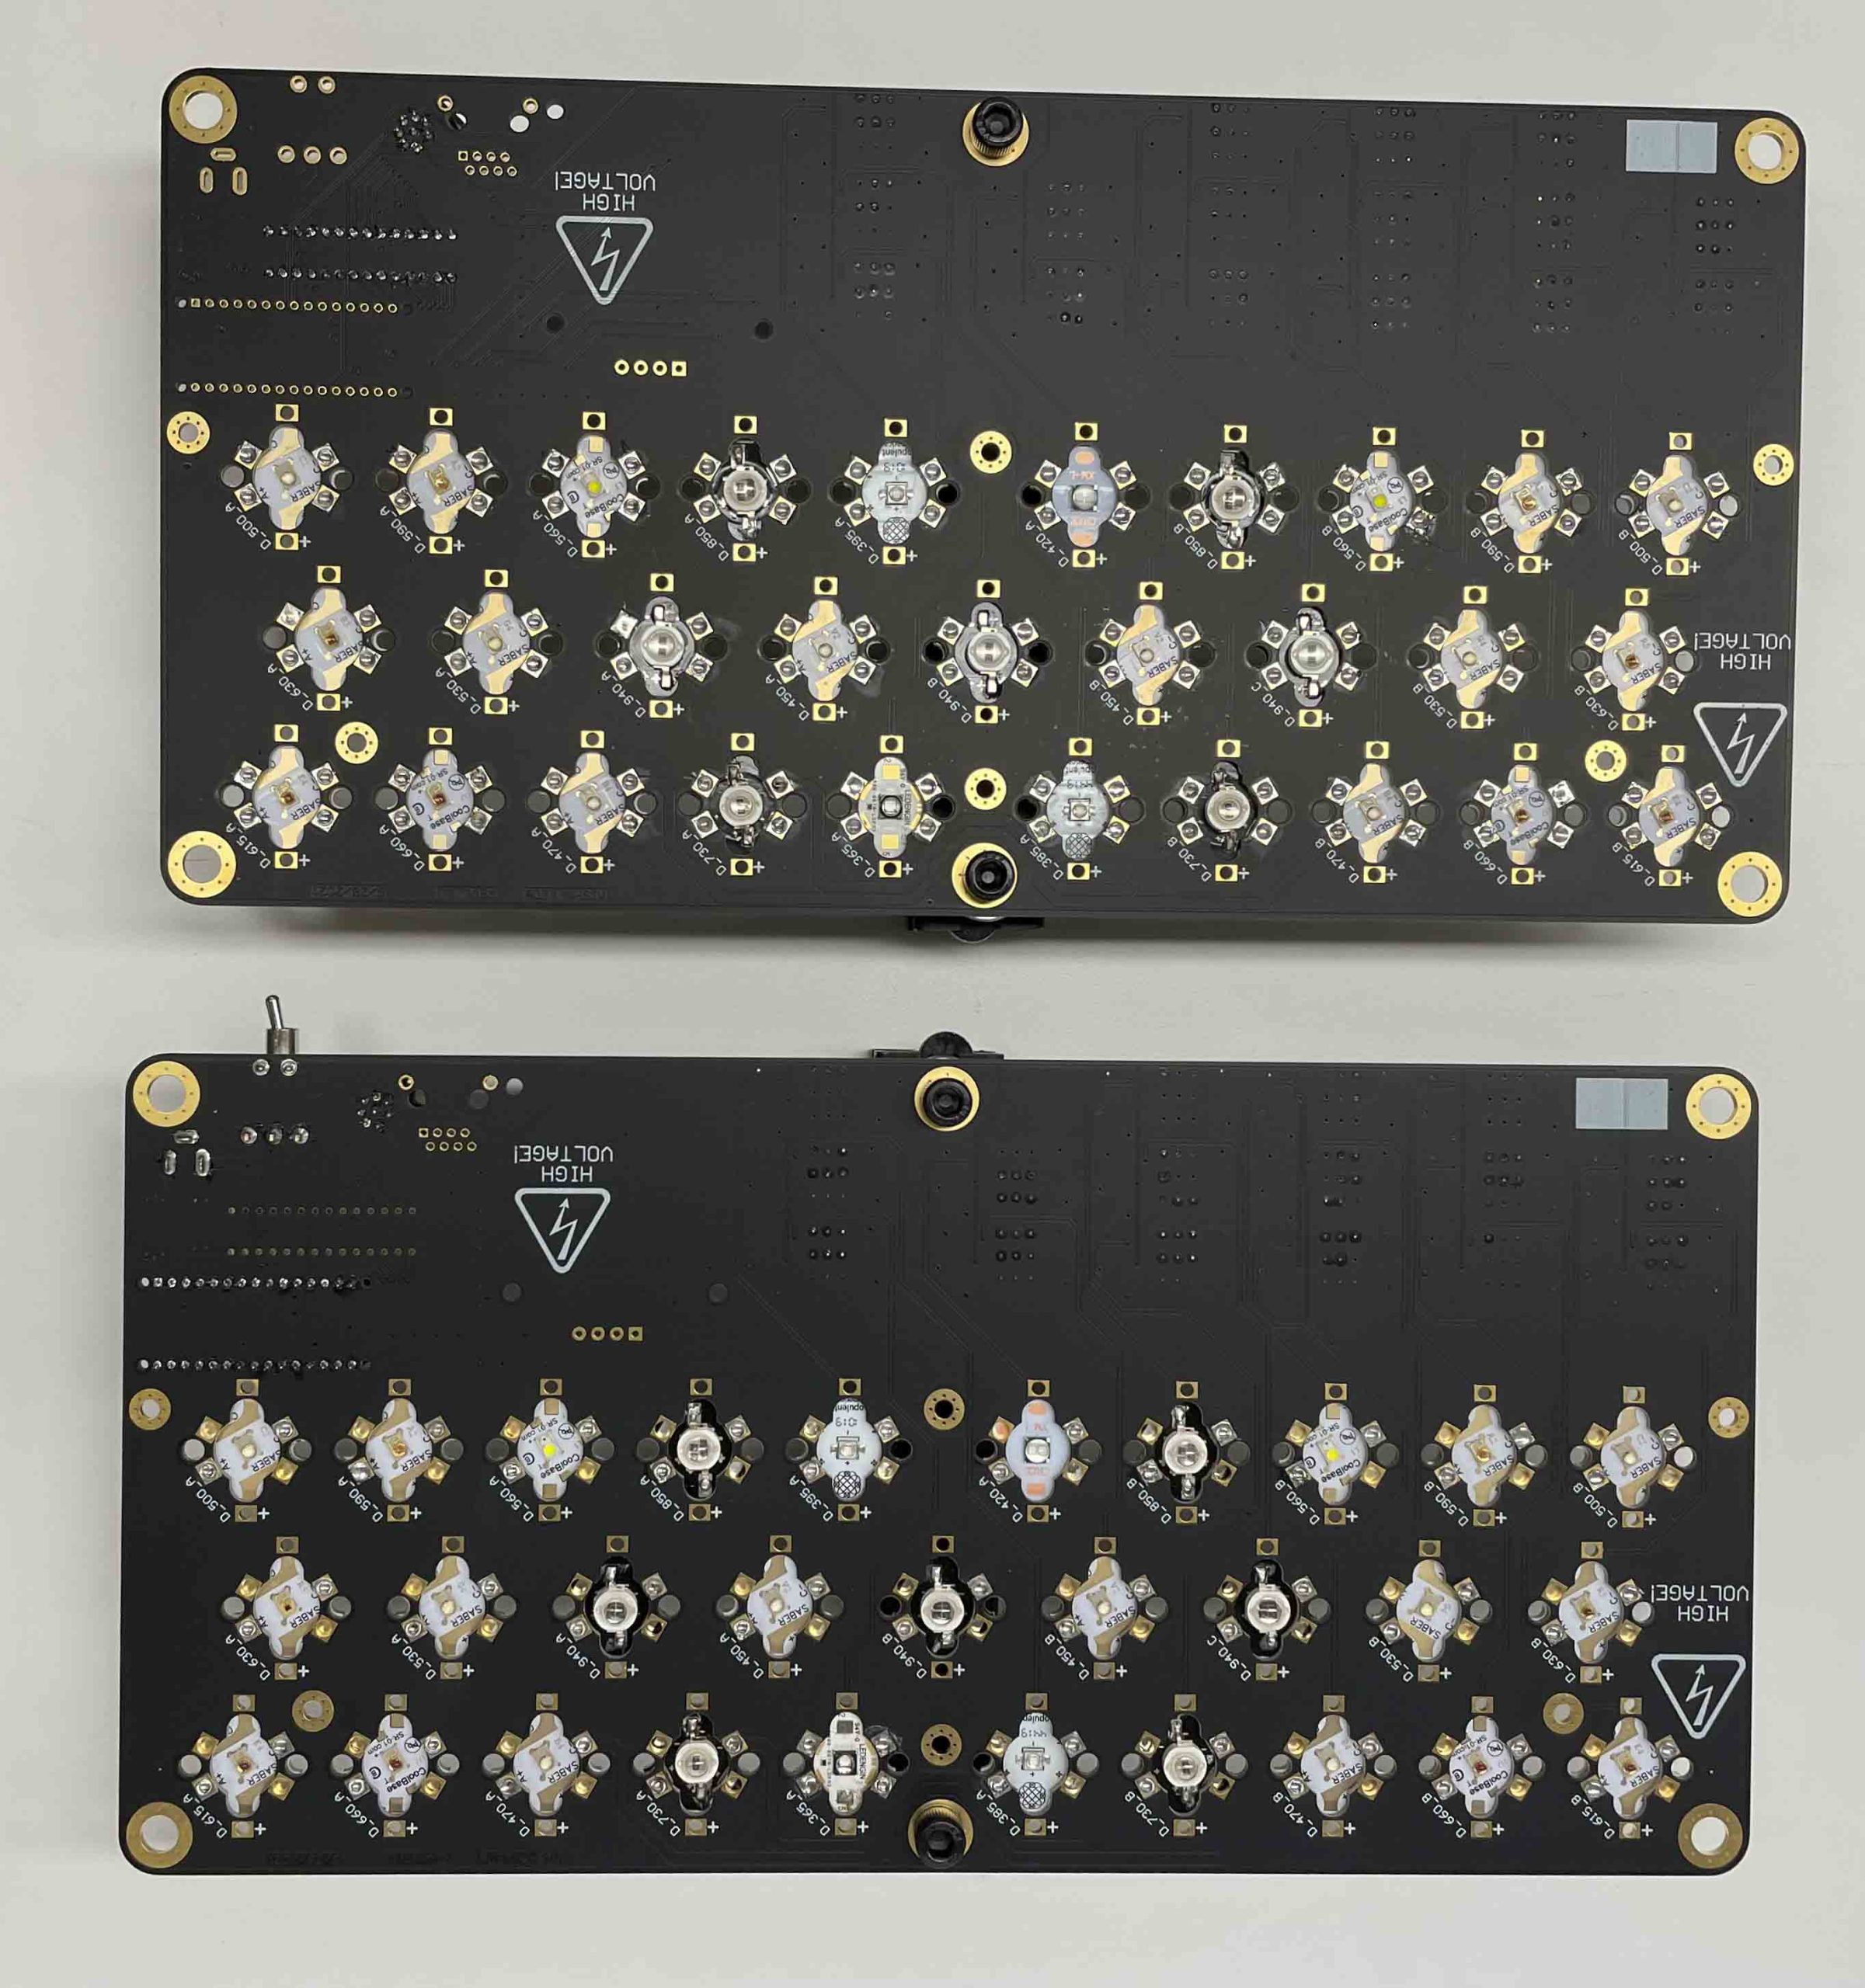
LED light boards built by RIT Chester F. Carlson Center for Imaging Science
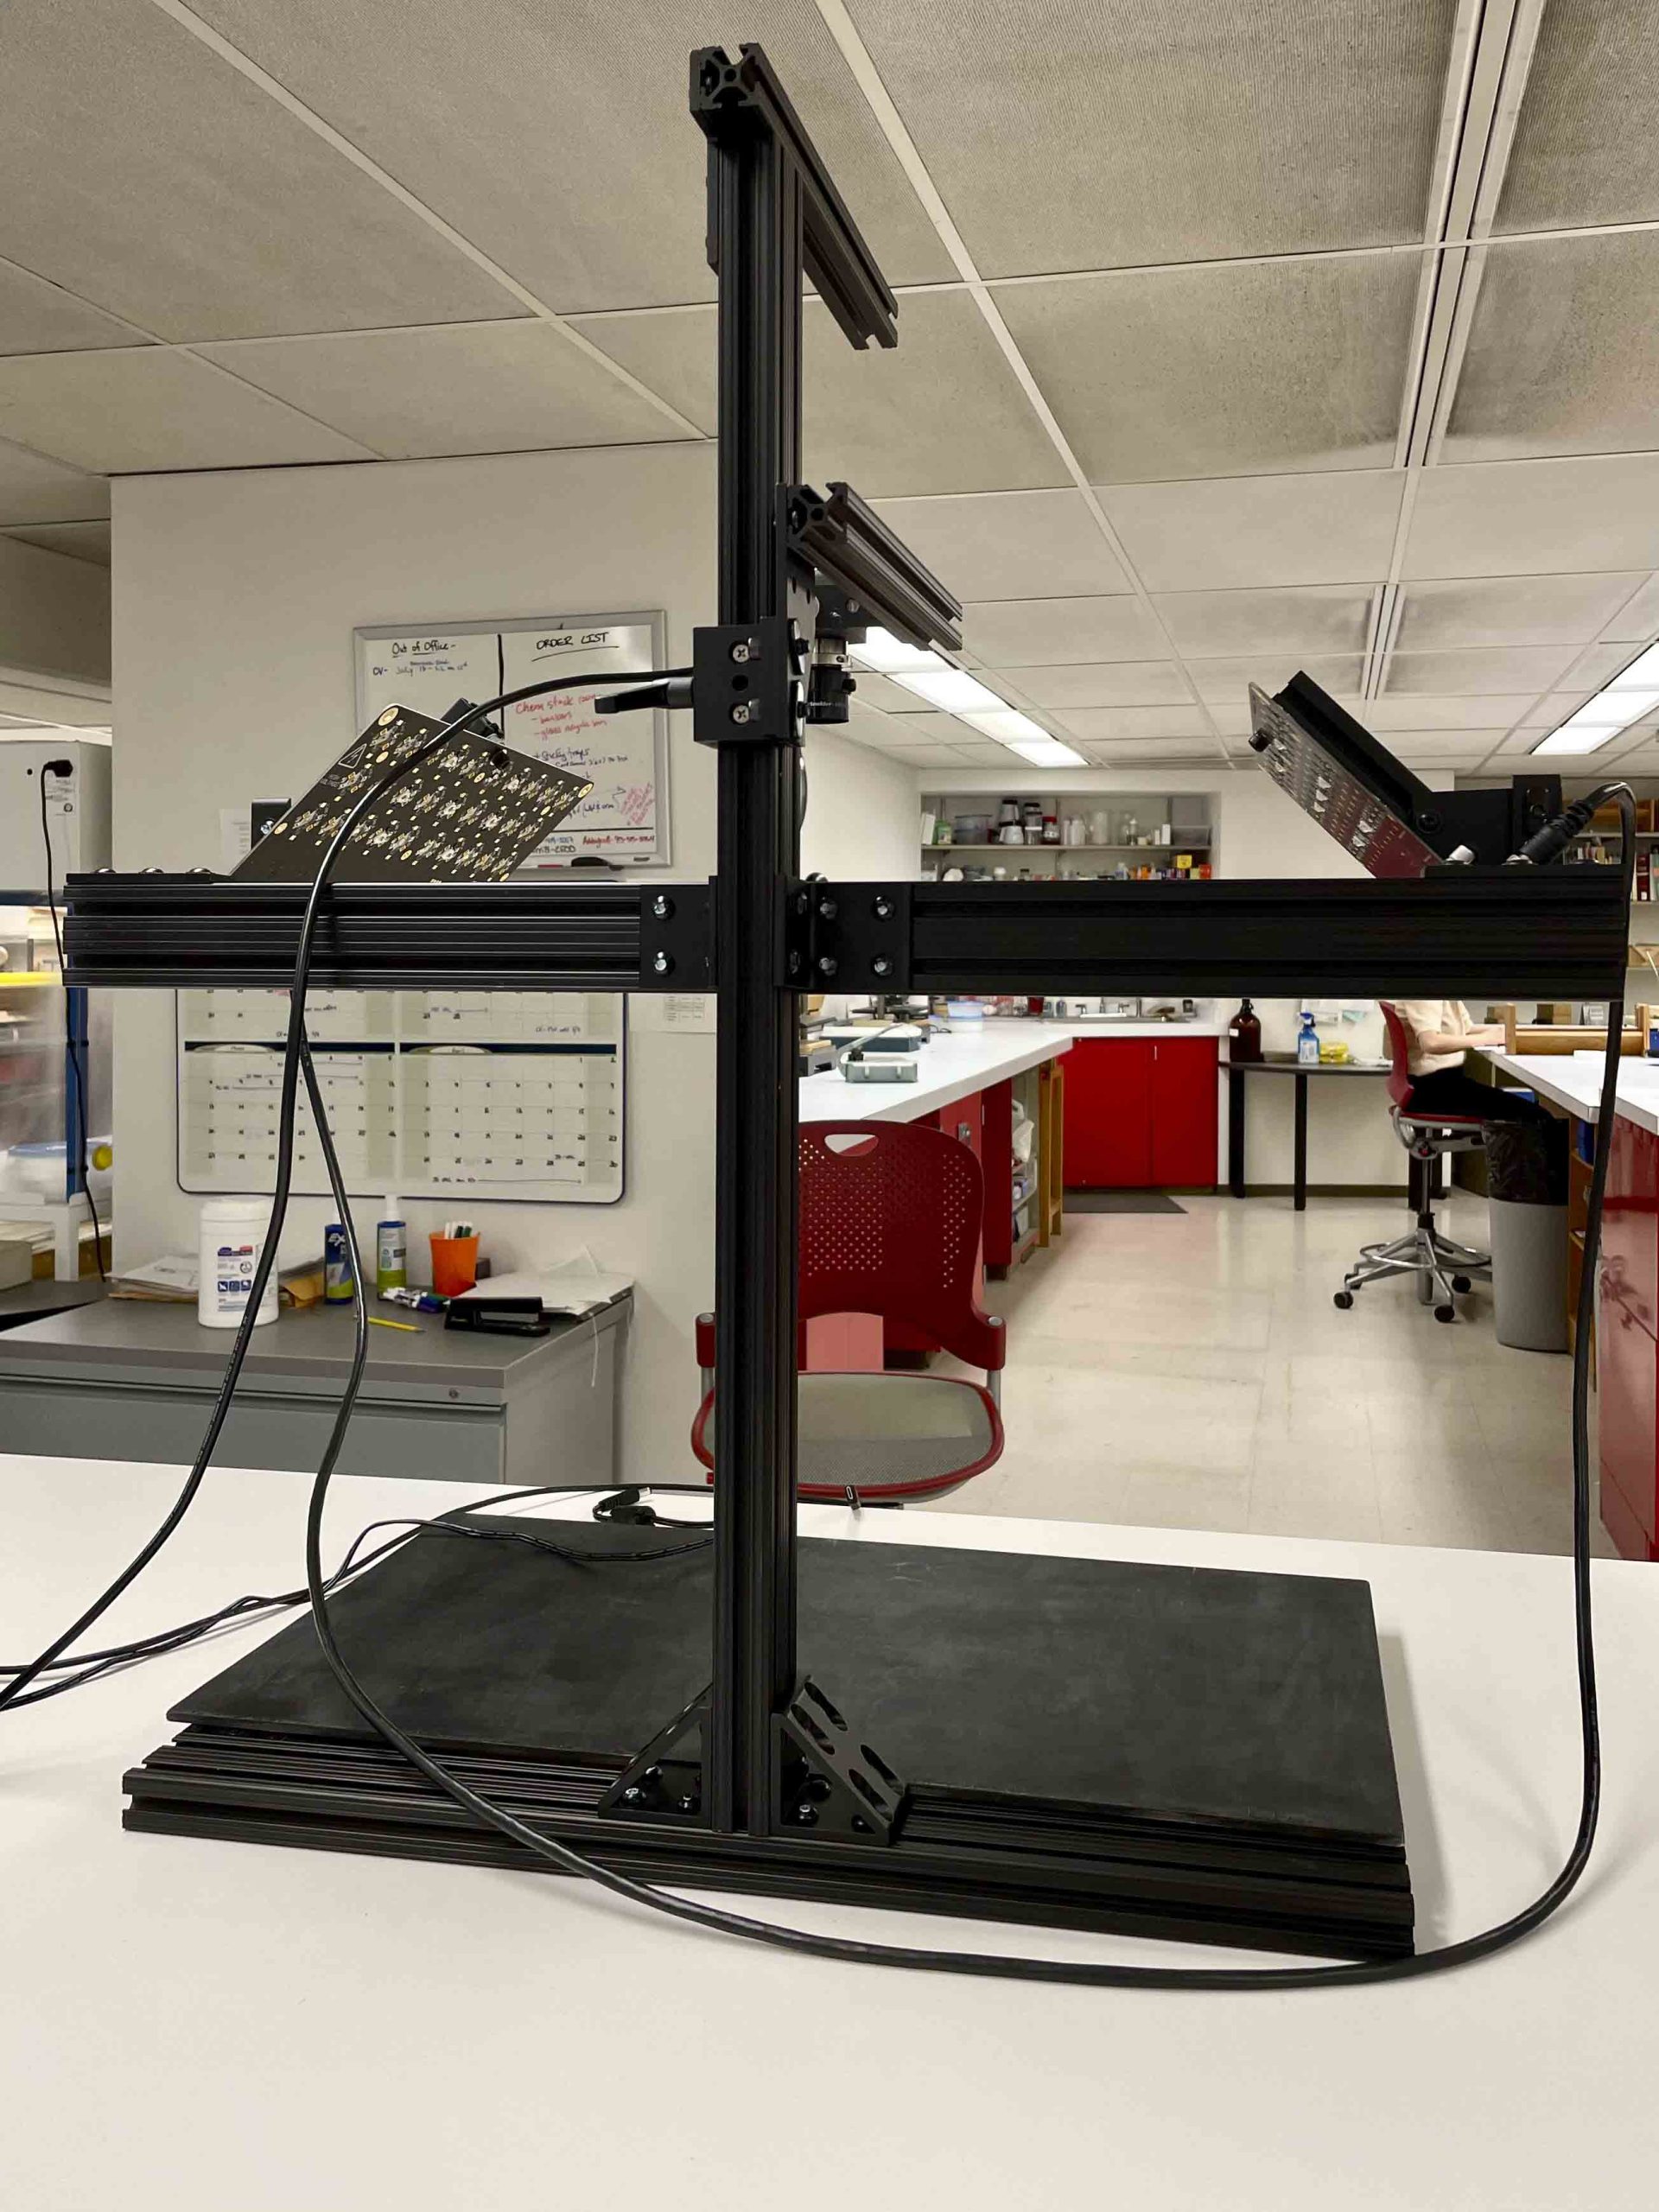
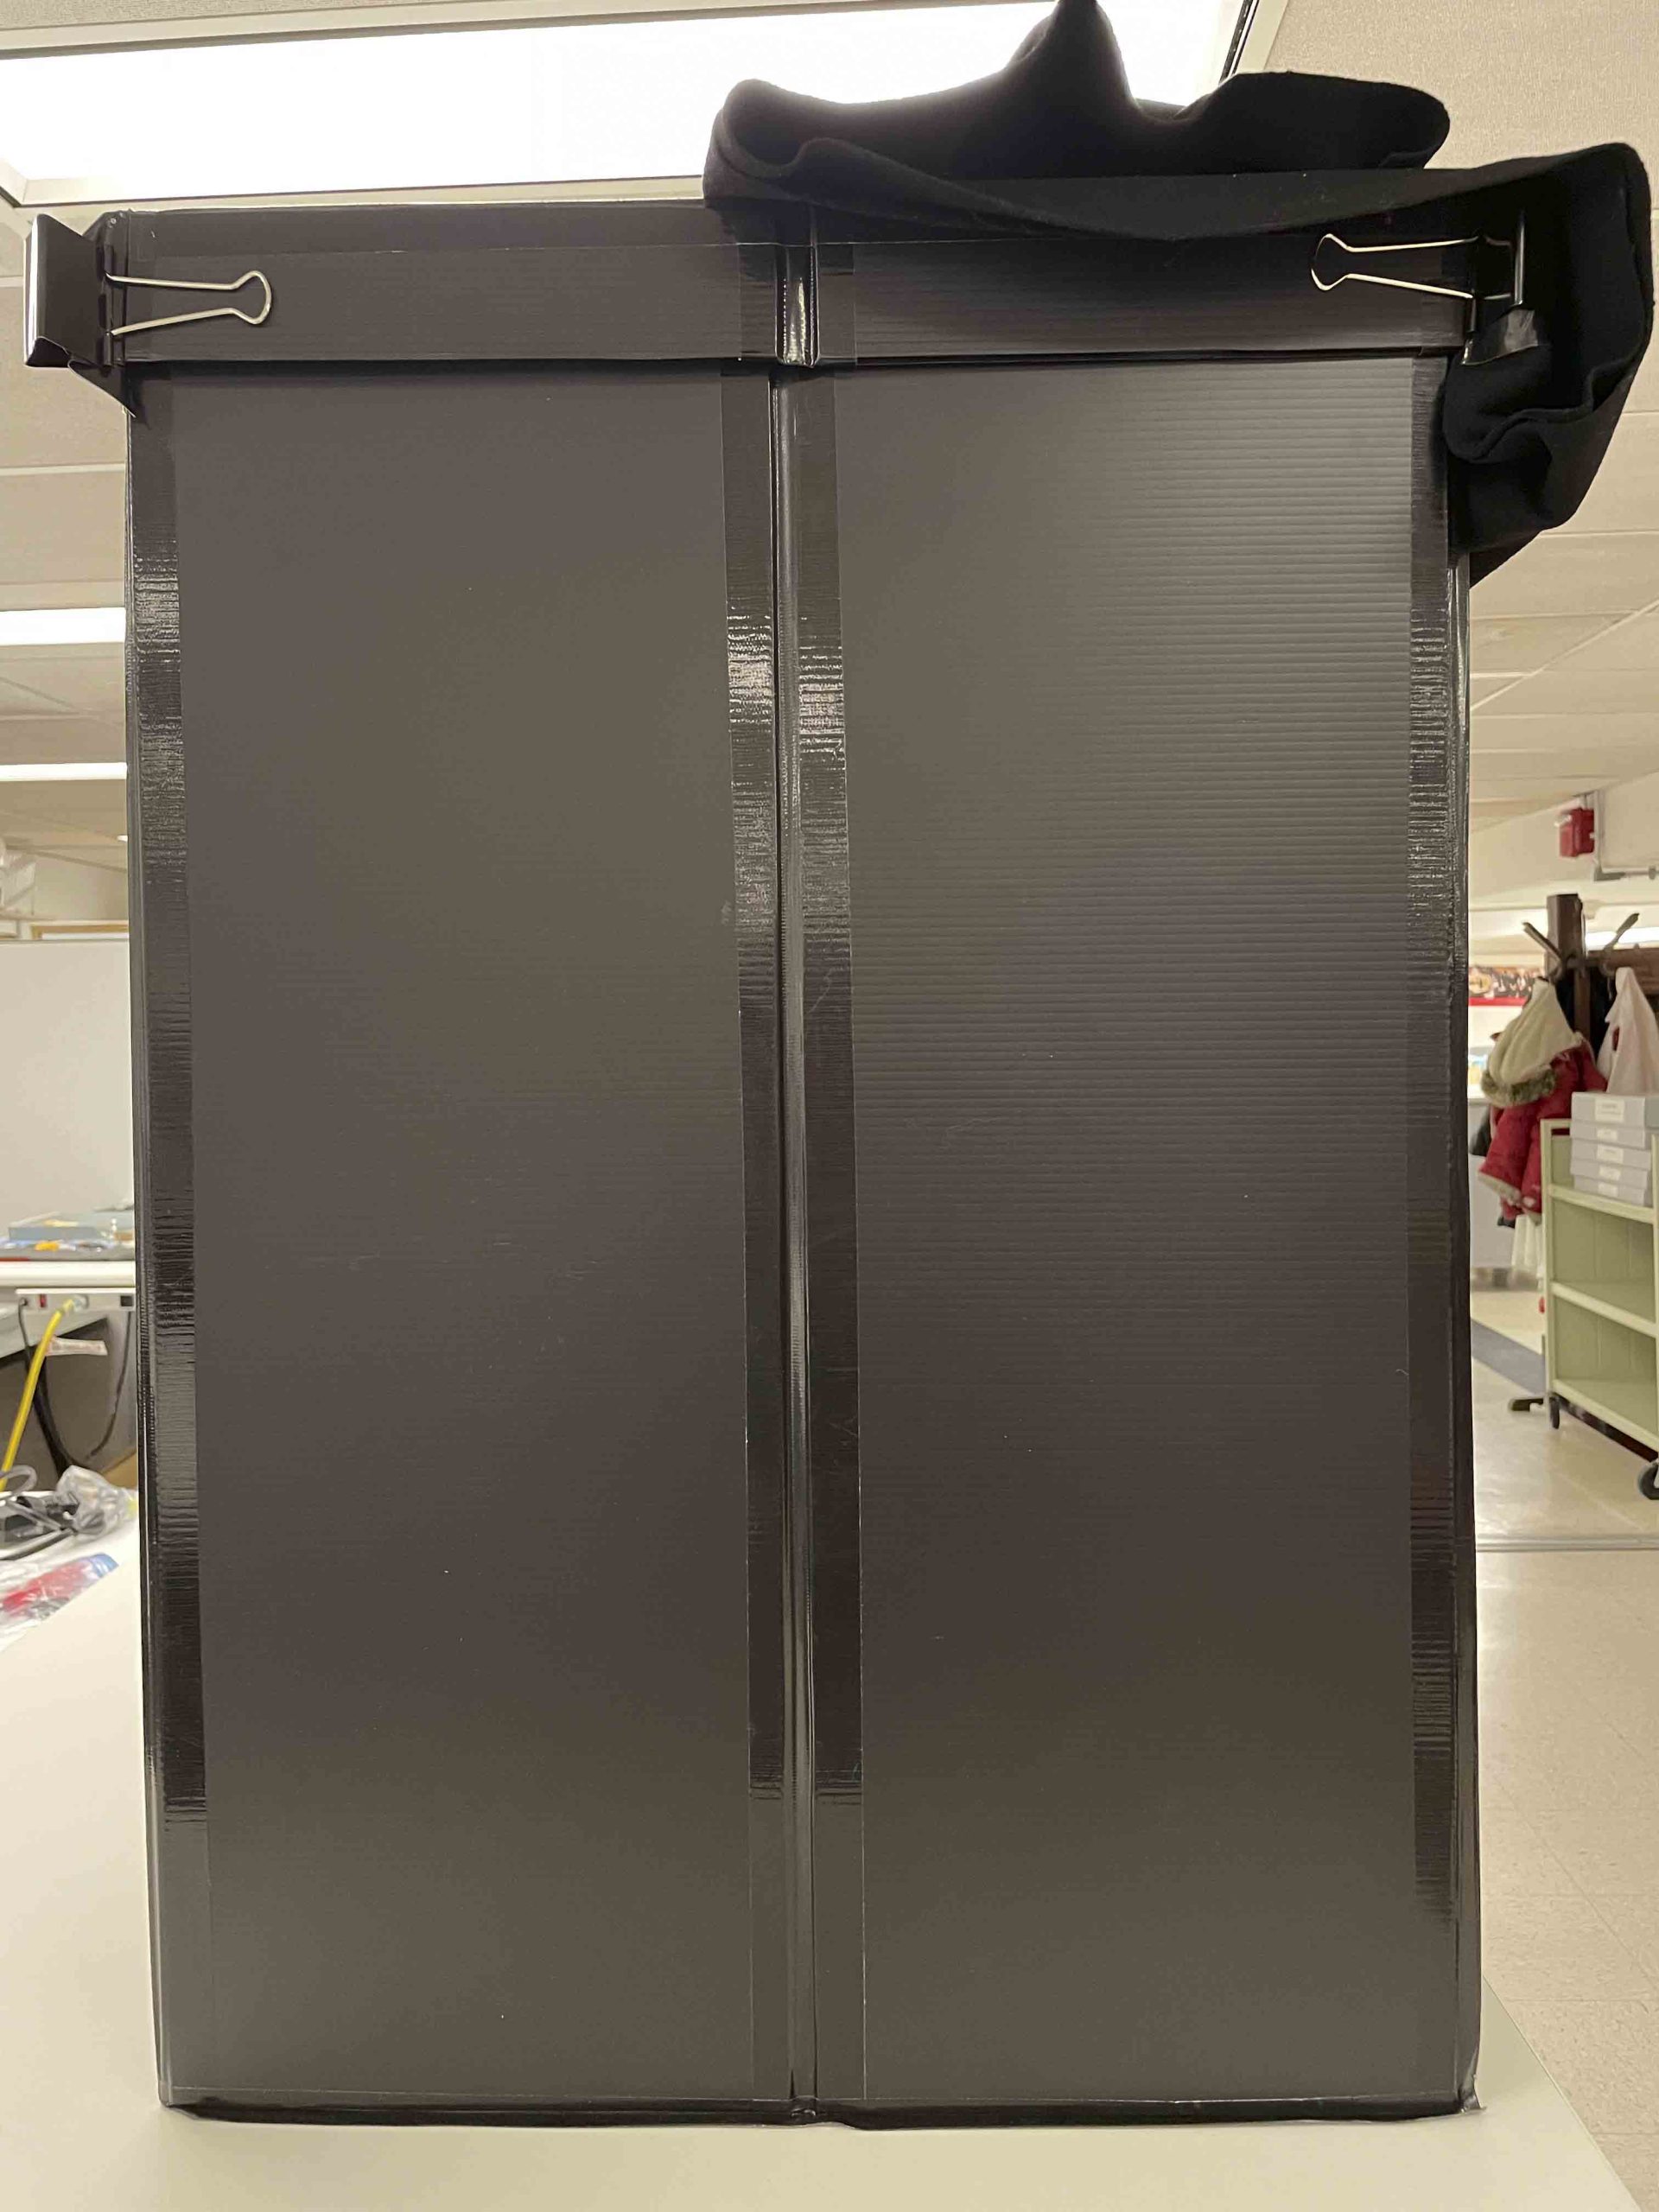
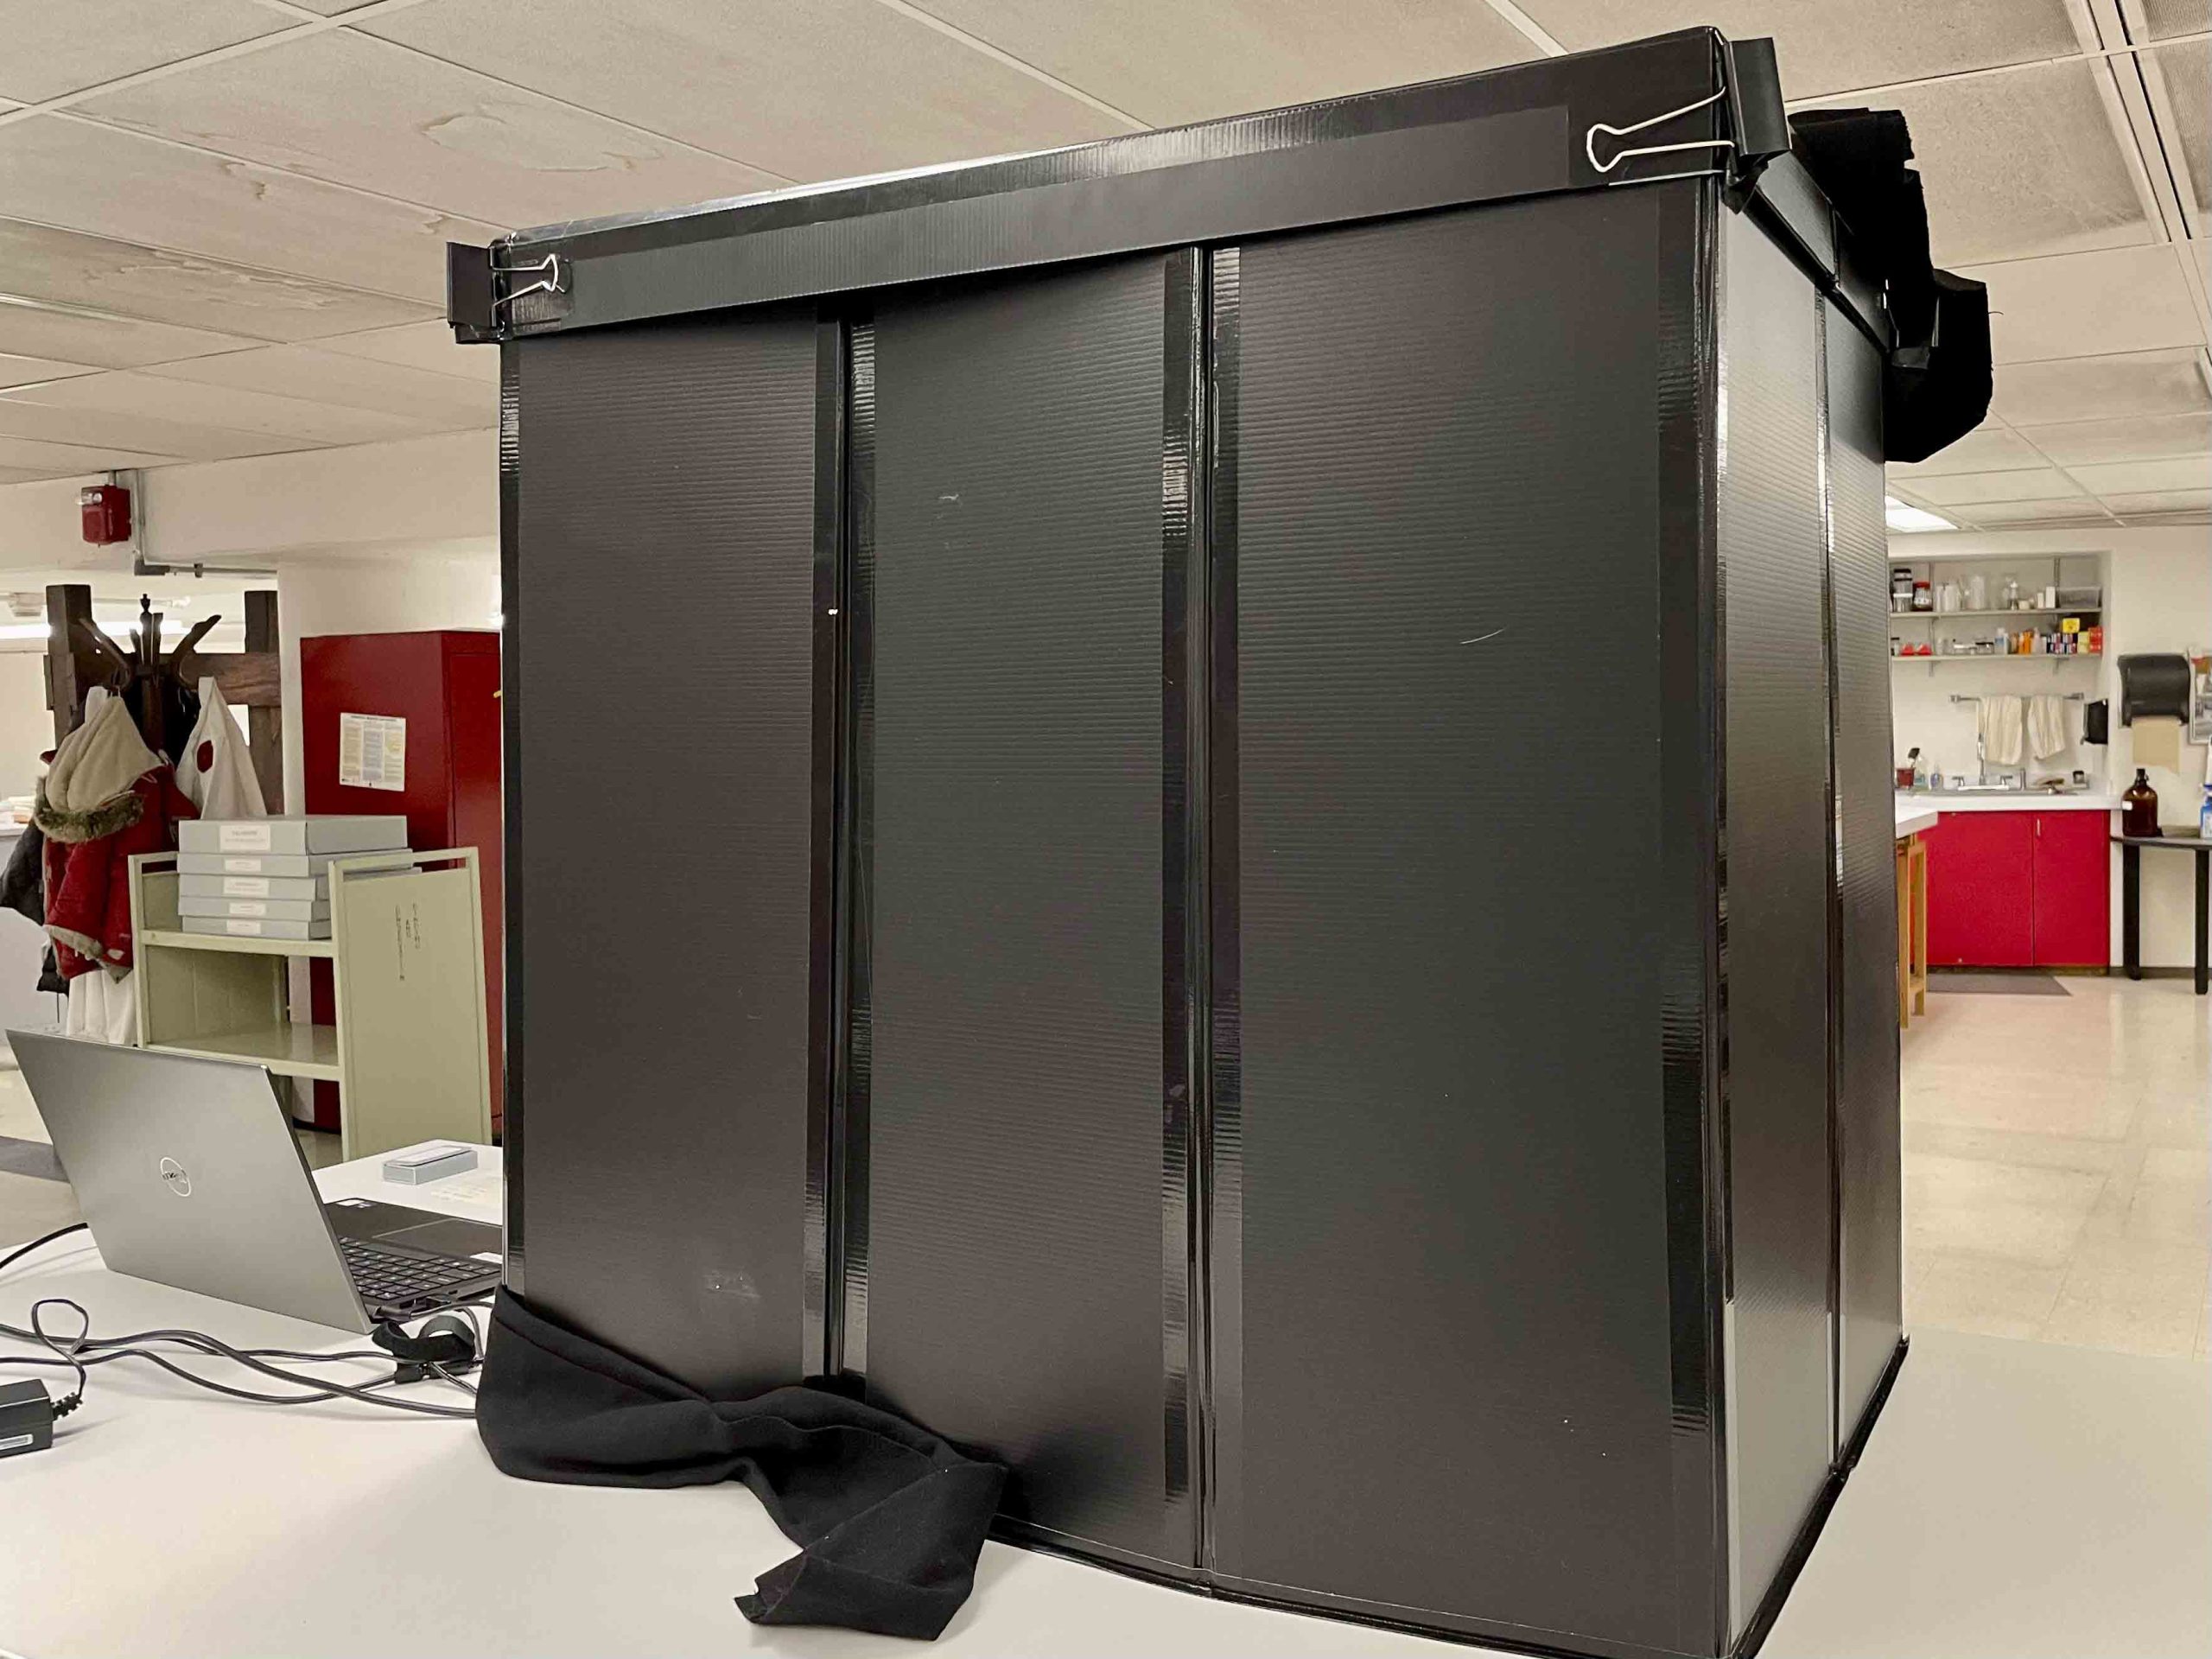
Copy stand consists of T-slot aluminum framing and black painted wood board base
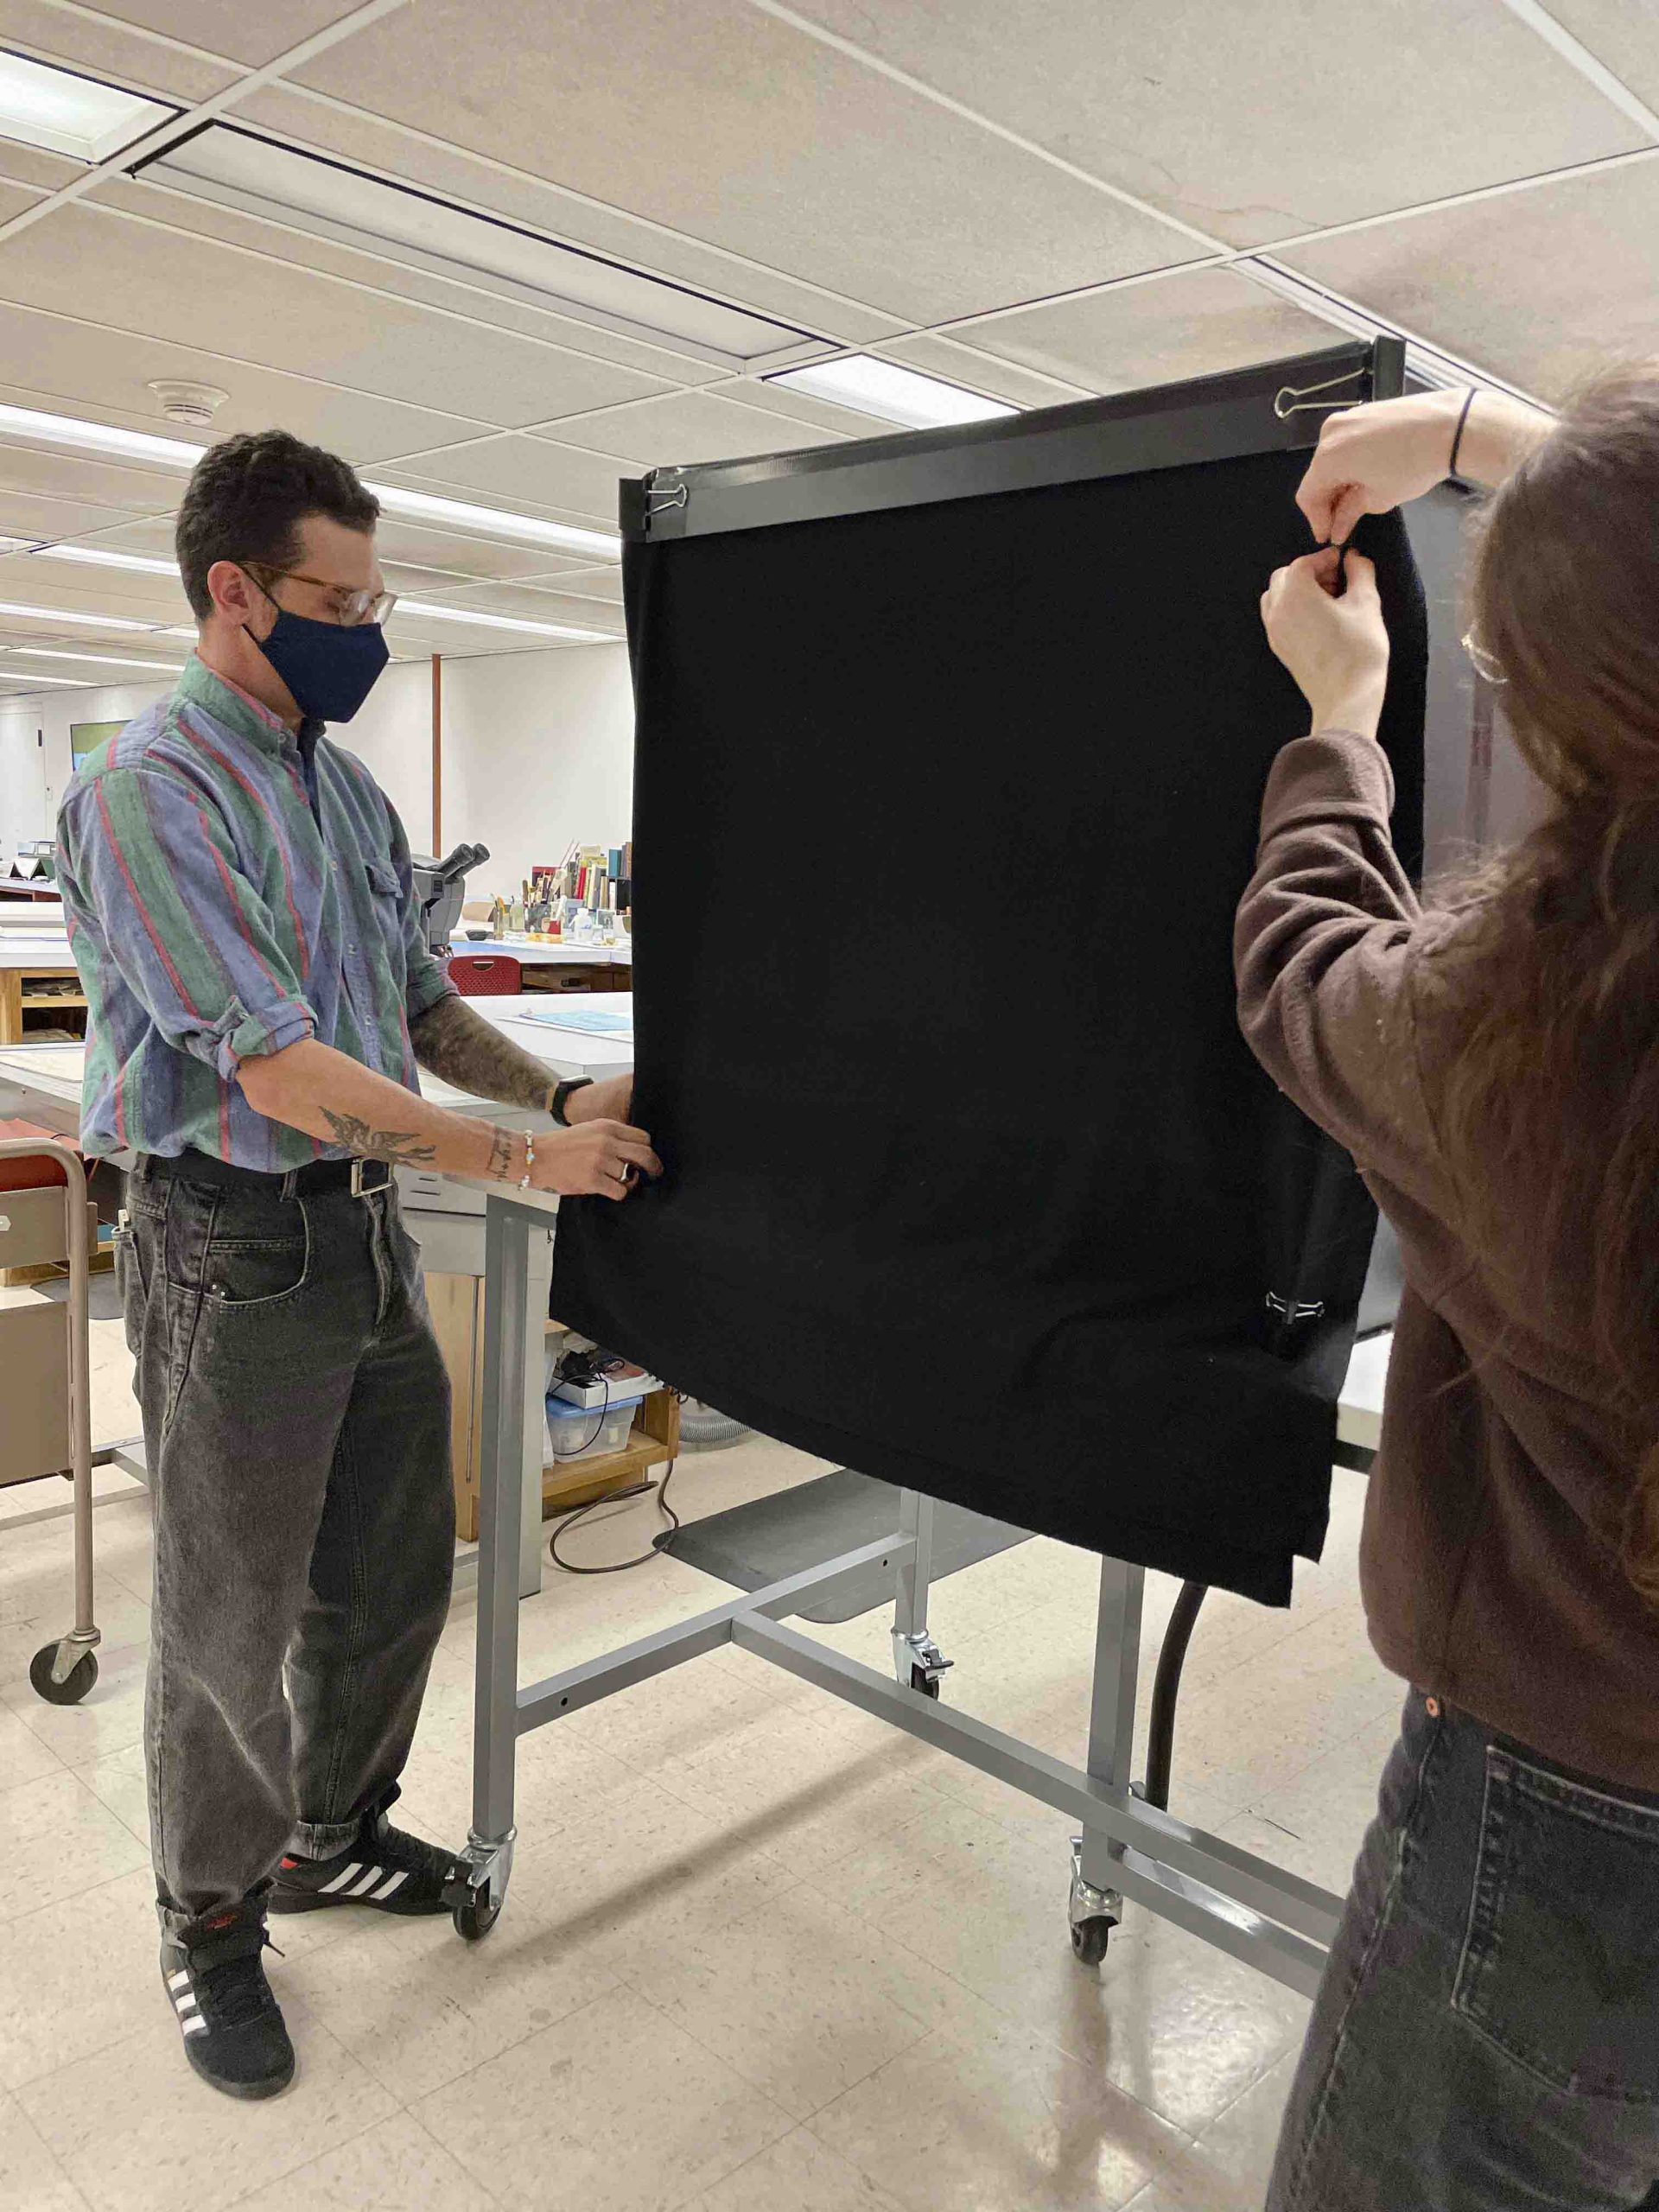
As you can see, the black Coroplast, duct tape, felt, and binder clips make up a very small portion of the budget, however, they are instrumental for using the system in a room that cannot be fully darkened. We also observed that the lights were extremely bright, and the light shield made it easier on our eyes.
Felt is clipped with binder’s clips to keep out light
To test the portable system, Ohio institutions with medieval parchment documents from Otto Ege collections were asked if their manuscript leaves could be imaged on-site with this equipment. With the entire glamour shot studio fitting into a 40-pound rolling suitcase, Andrew and Naomi traveled to various cities from Cleveland to Cincinnati, making our photographic imaging dreams come true!
This tightly fitting suitcase has packing instructions to protect all the parts.
Since the Cincinnati and Hamilton County Public Library (CHPL) own multiple Ege collections and a variety of other worthy imaging candidates, the Preservation Lab was fortunate enough to participate. In the CHPL collection, manuscript 32 (of Fifty original leaves from medieval manuscripts, Western Europe, XII-XVI century) was thought to be the most promising to reveal hidden information.
Naomi demos the imaging procedures to lab staff
Images are captured at 16 different wavelength bands ranging between 365 nm – 940 nm
A white MA CLP2036 99% reflectance disk is placed in every image to aid in image processing later
CHPL music manuscript is cradled for imaging by an adaptable book conservation support (ABCS)
Now that the photographic capture is complete, we’re looking forward to processing the images next with the open access software called Hoku, provided by the Rochester Cultural Heritage Imaging, Visualization, and Education (R-Chive) community.
We were thrilled to see how easy this equipment was to set up in person. And special thanks to Andrew who brought his handy adaptable book conservation support (ABCS) to cradle our bound collections. Everyone should have one!
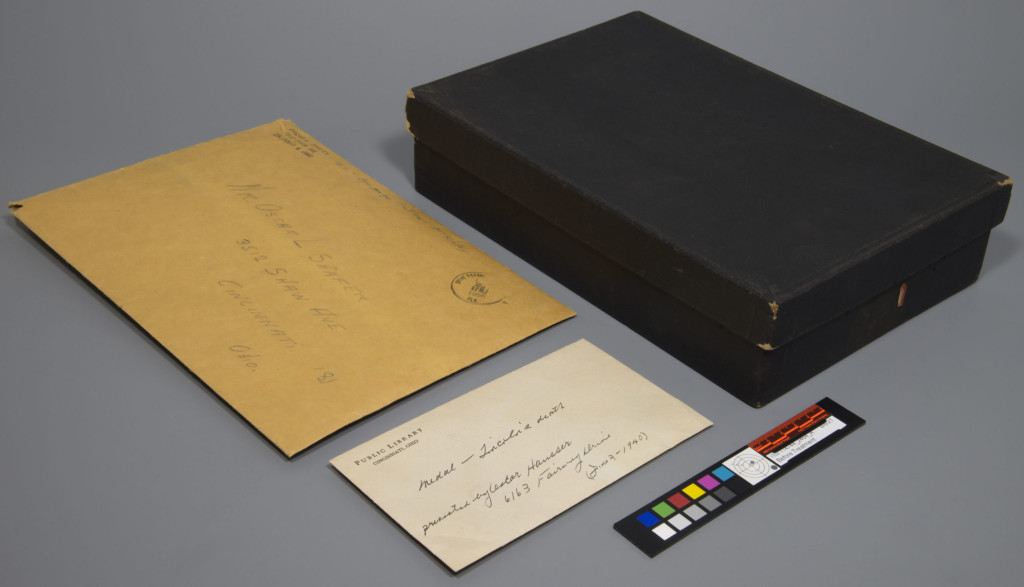
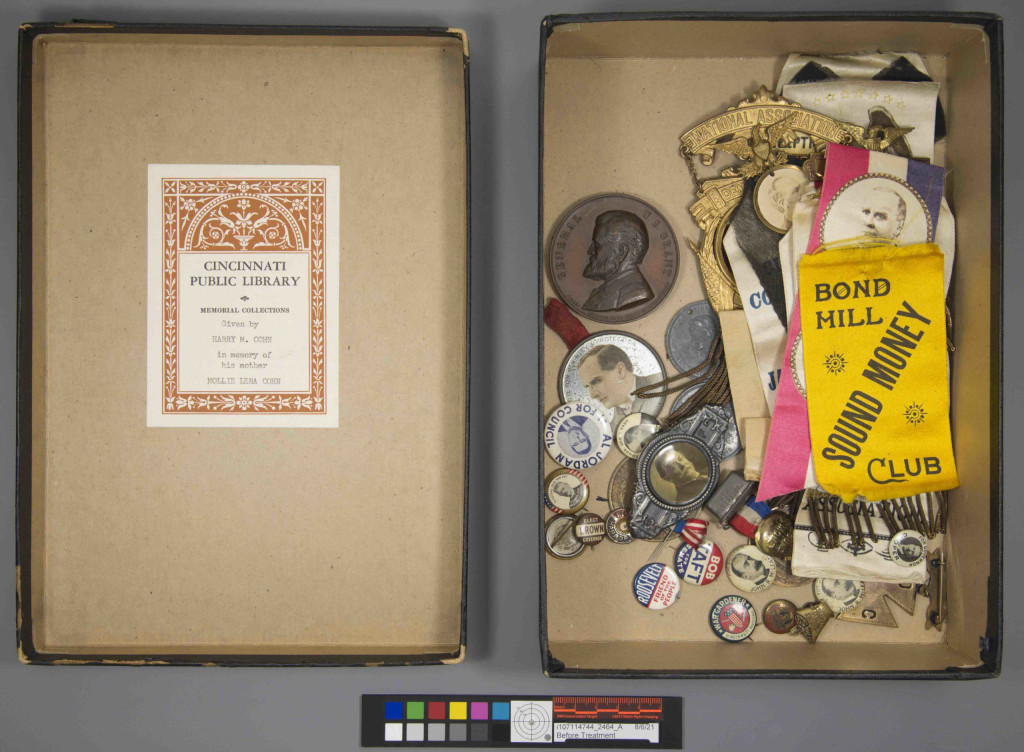
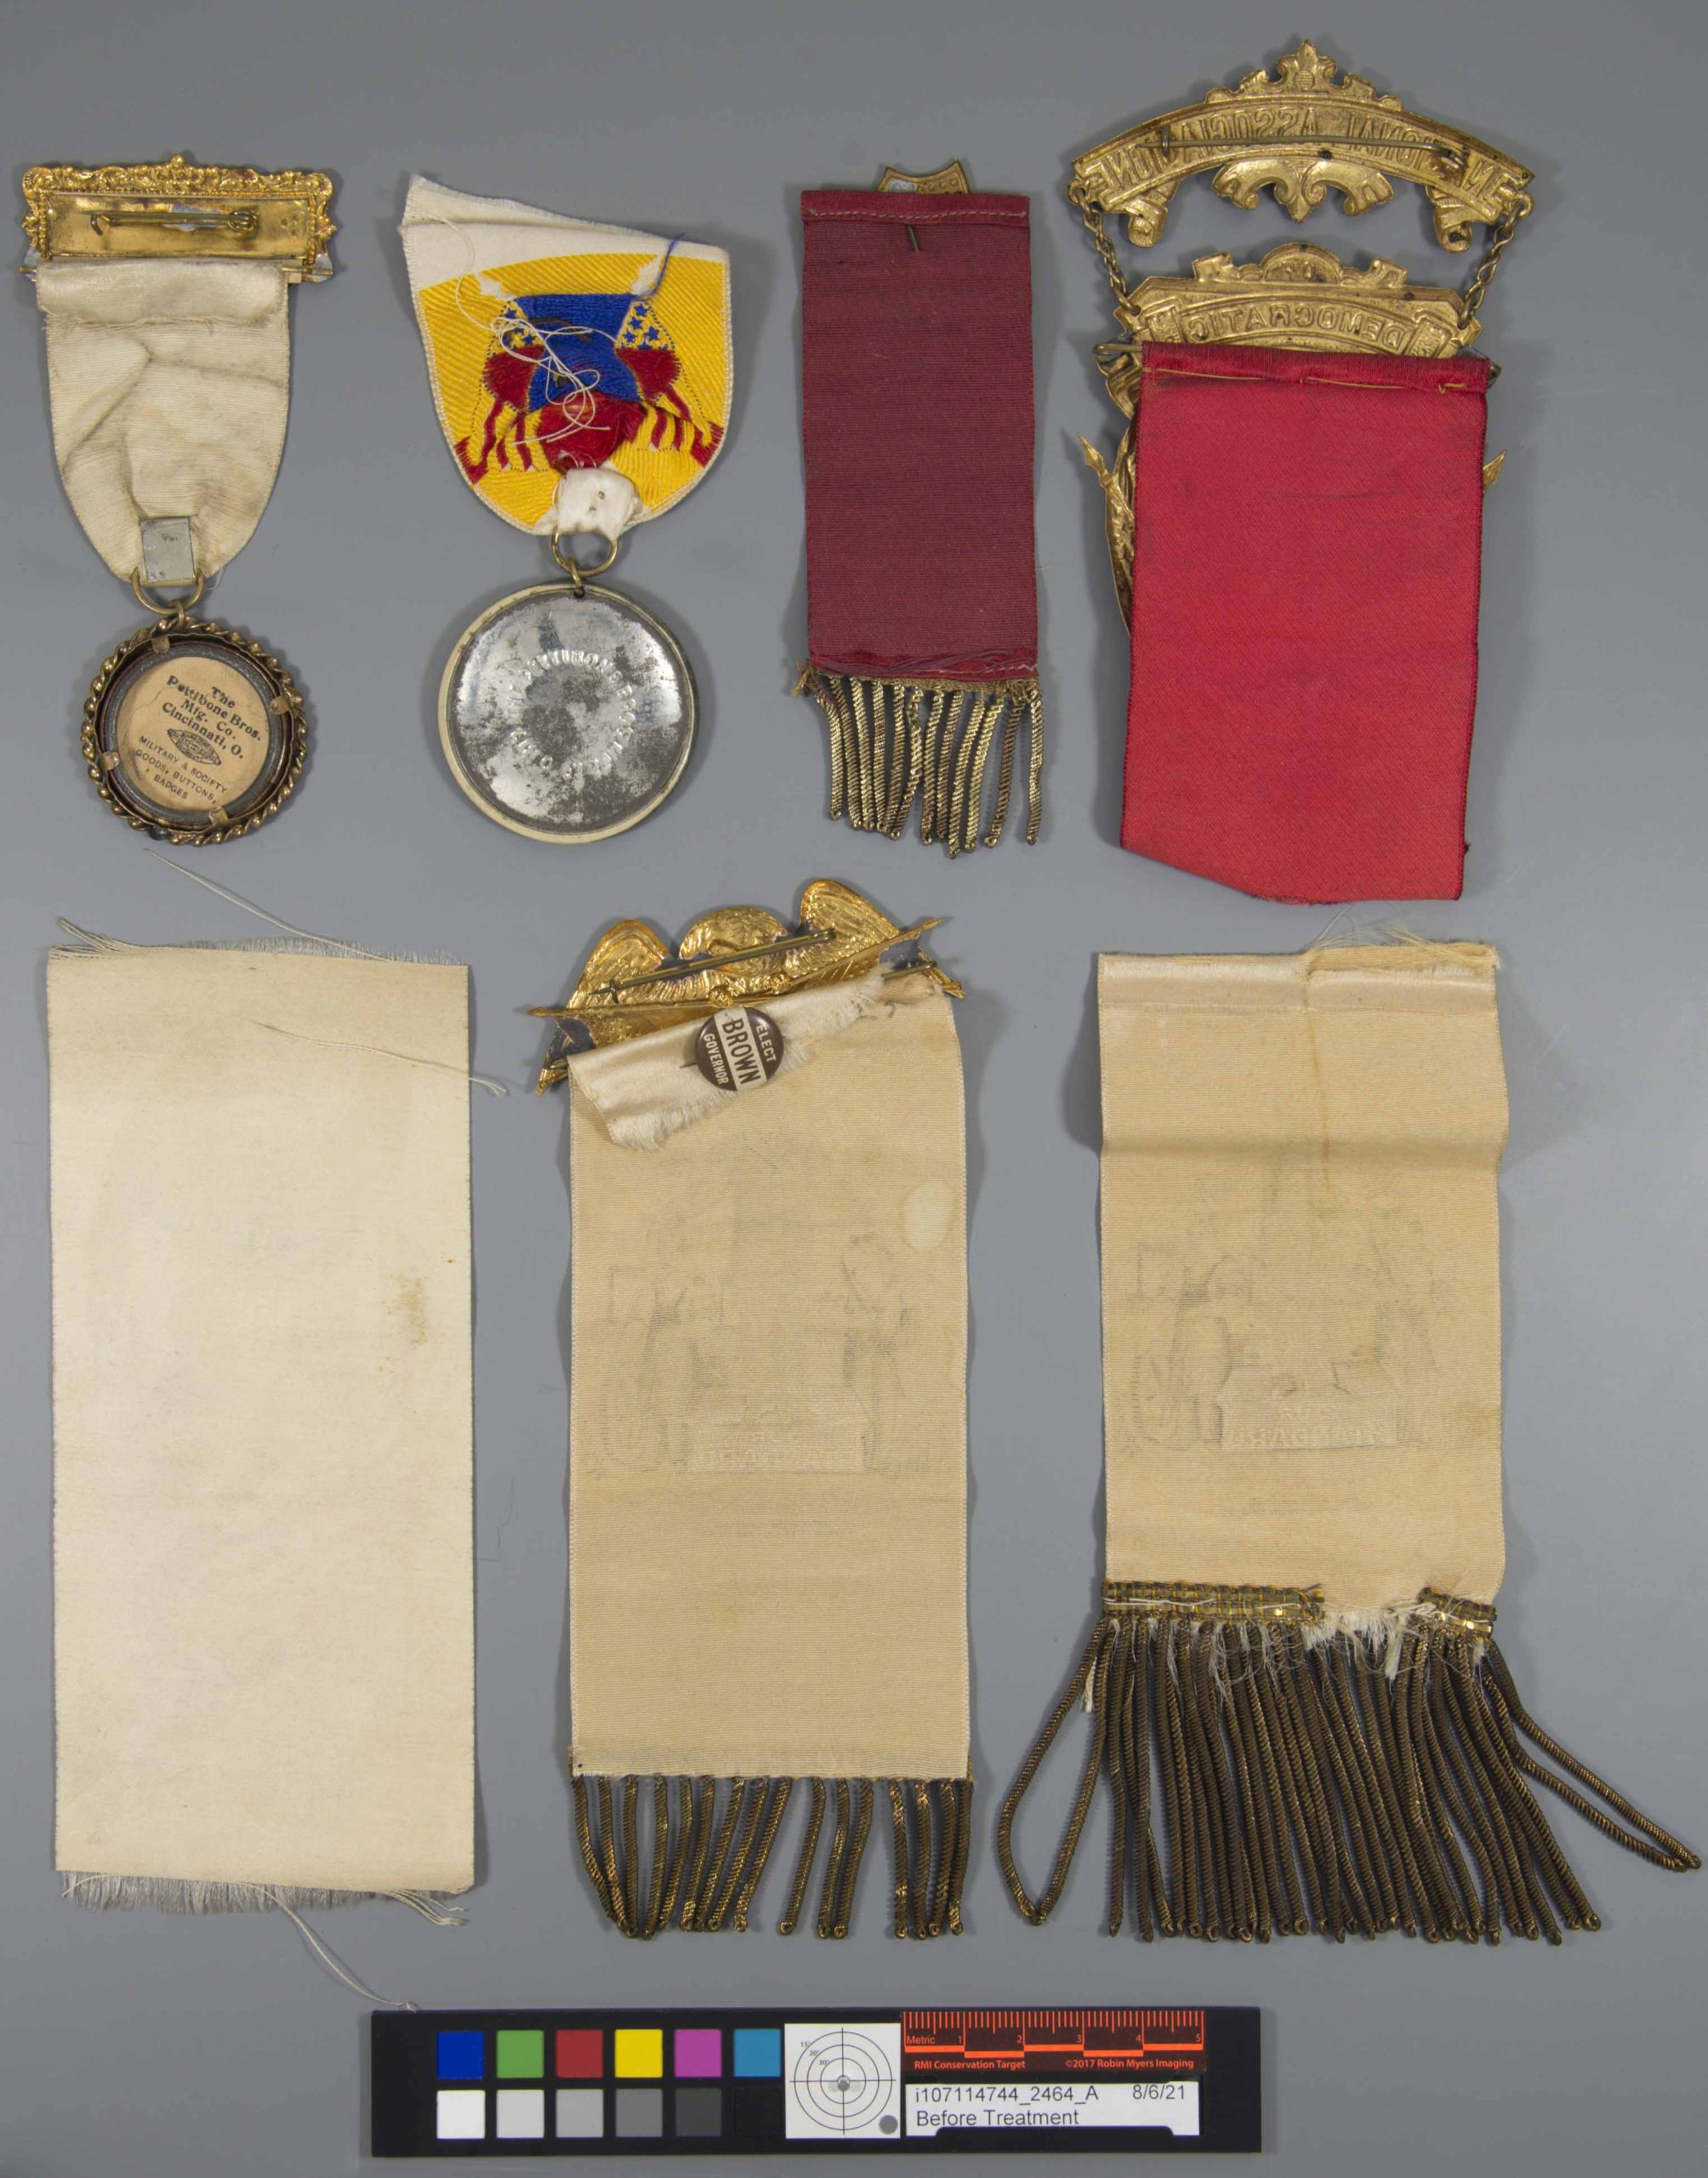
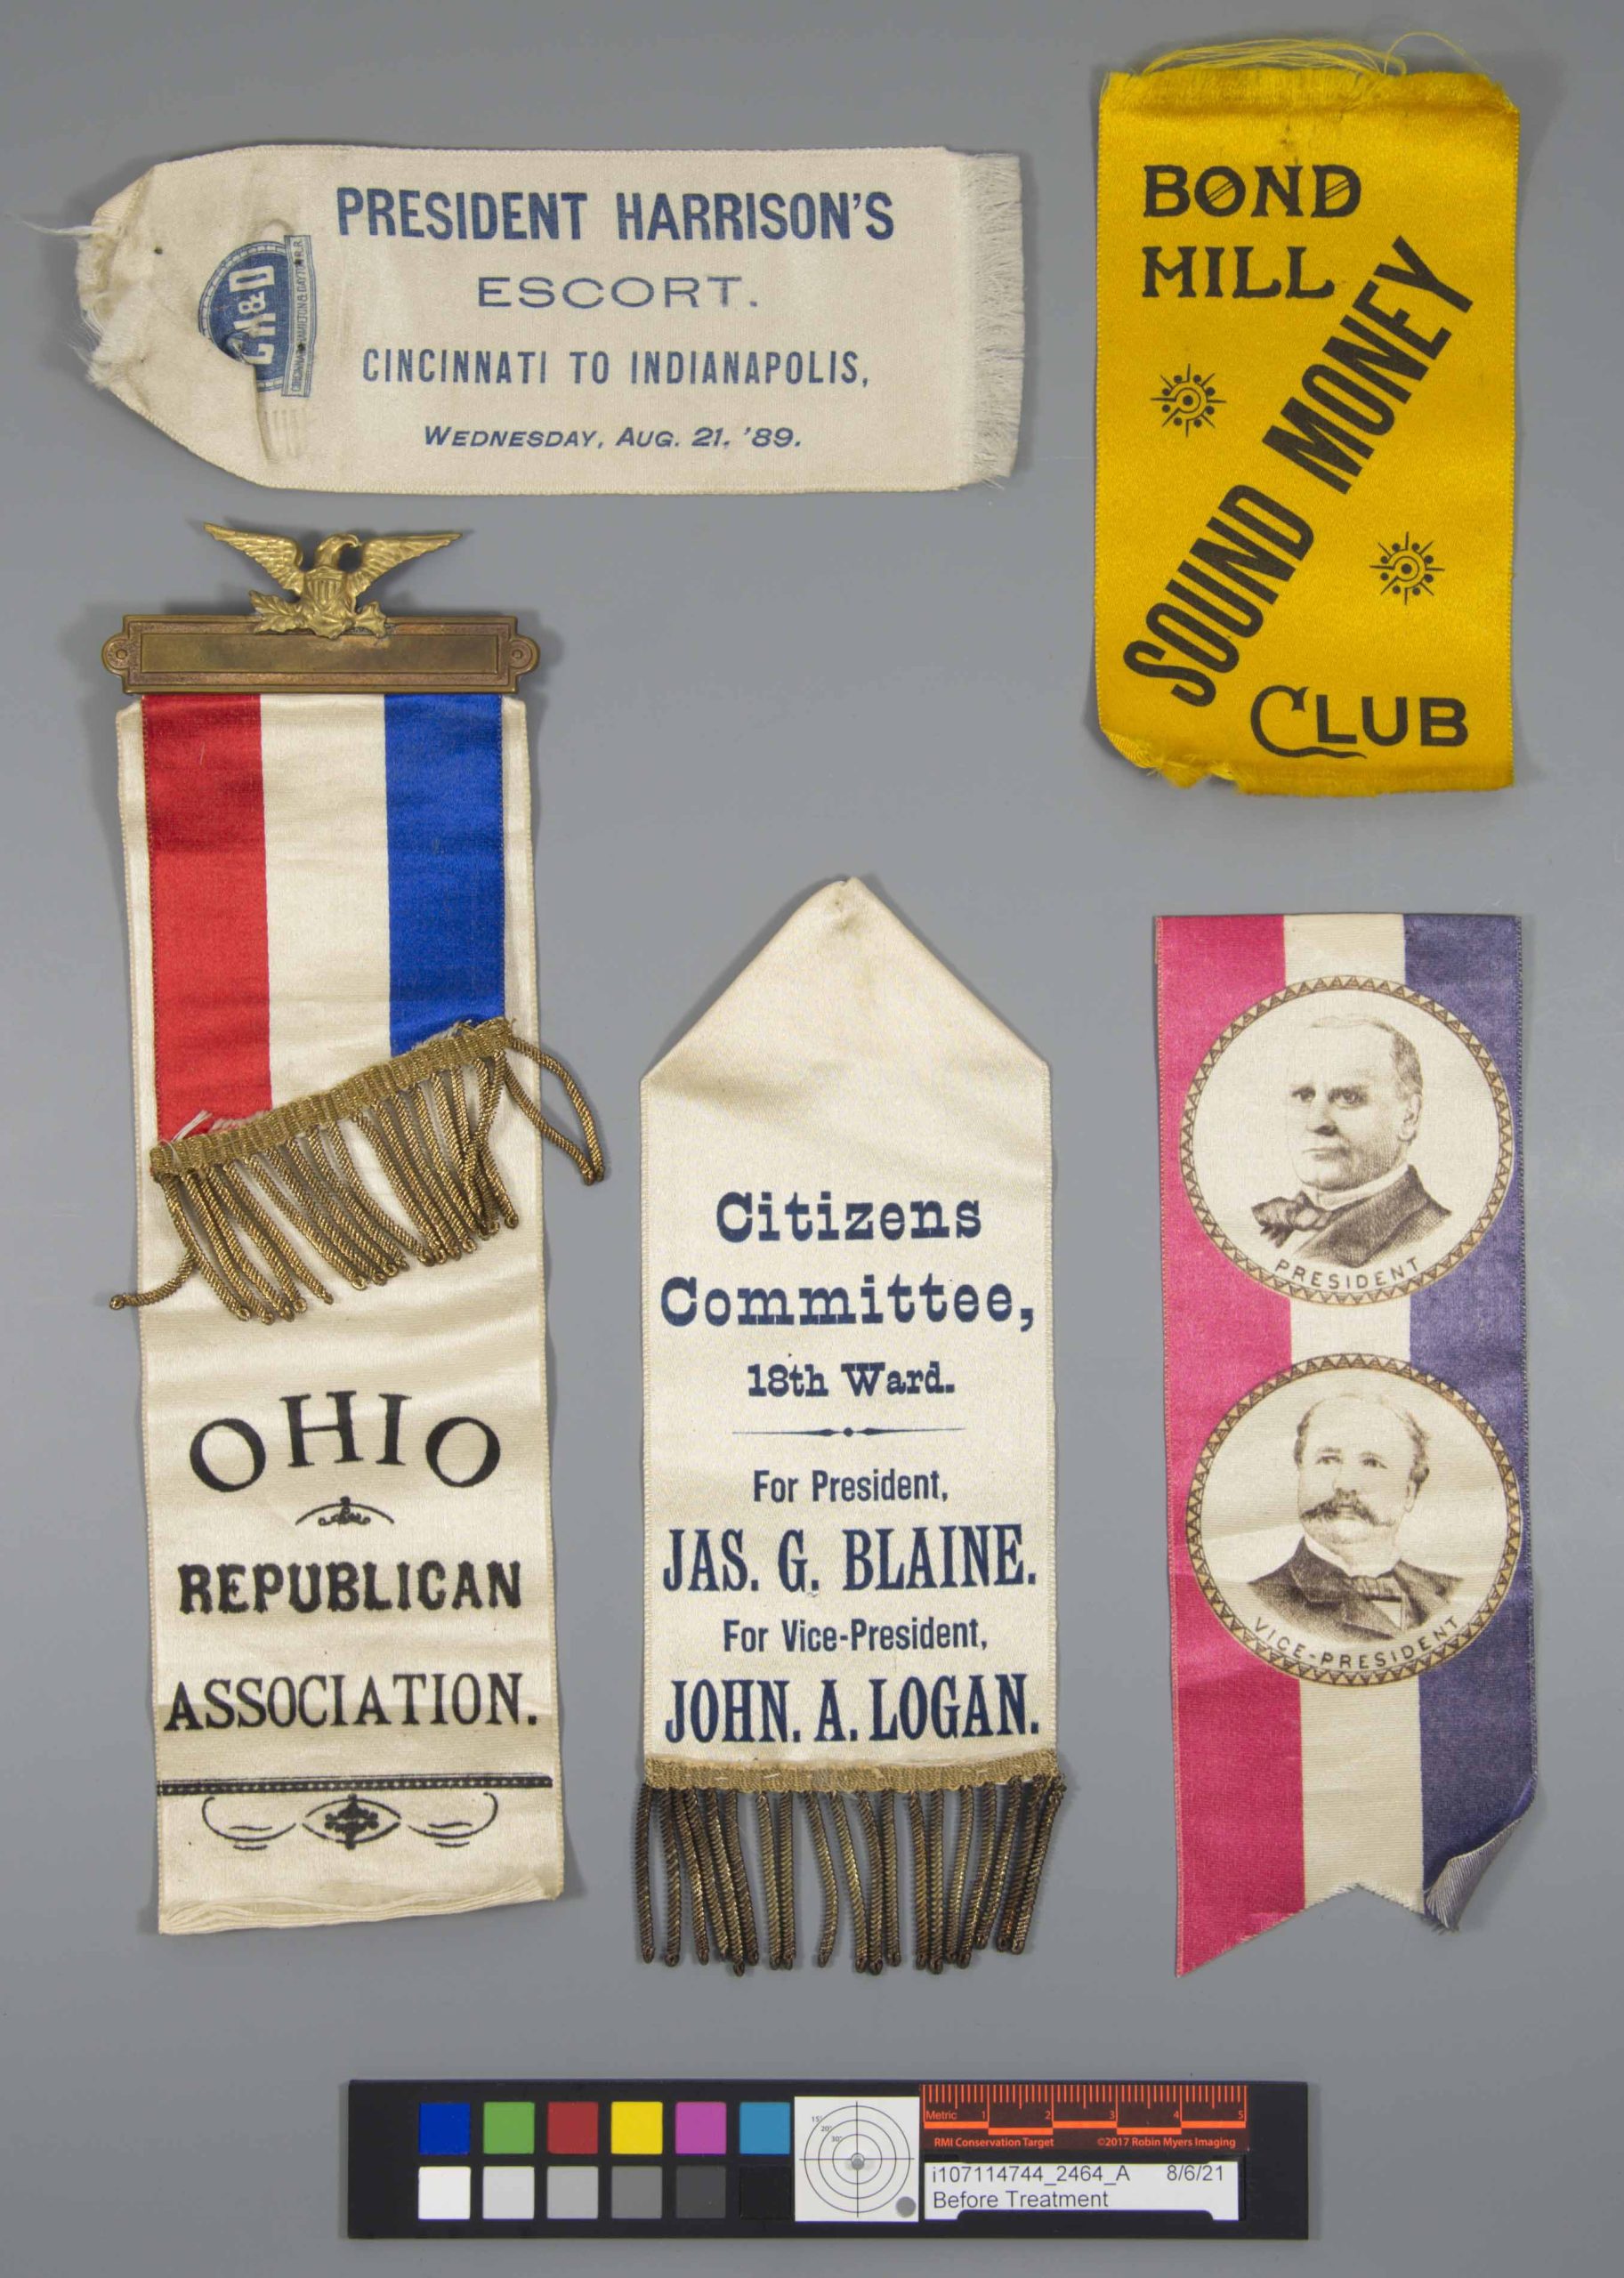
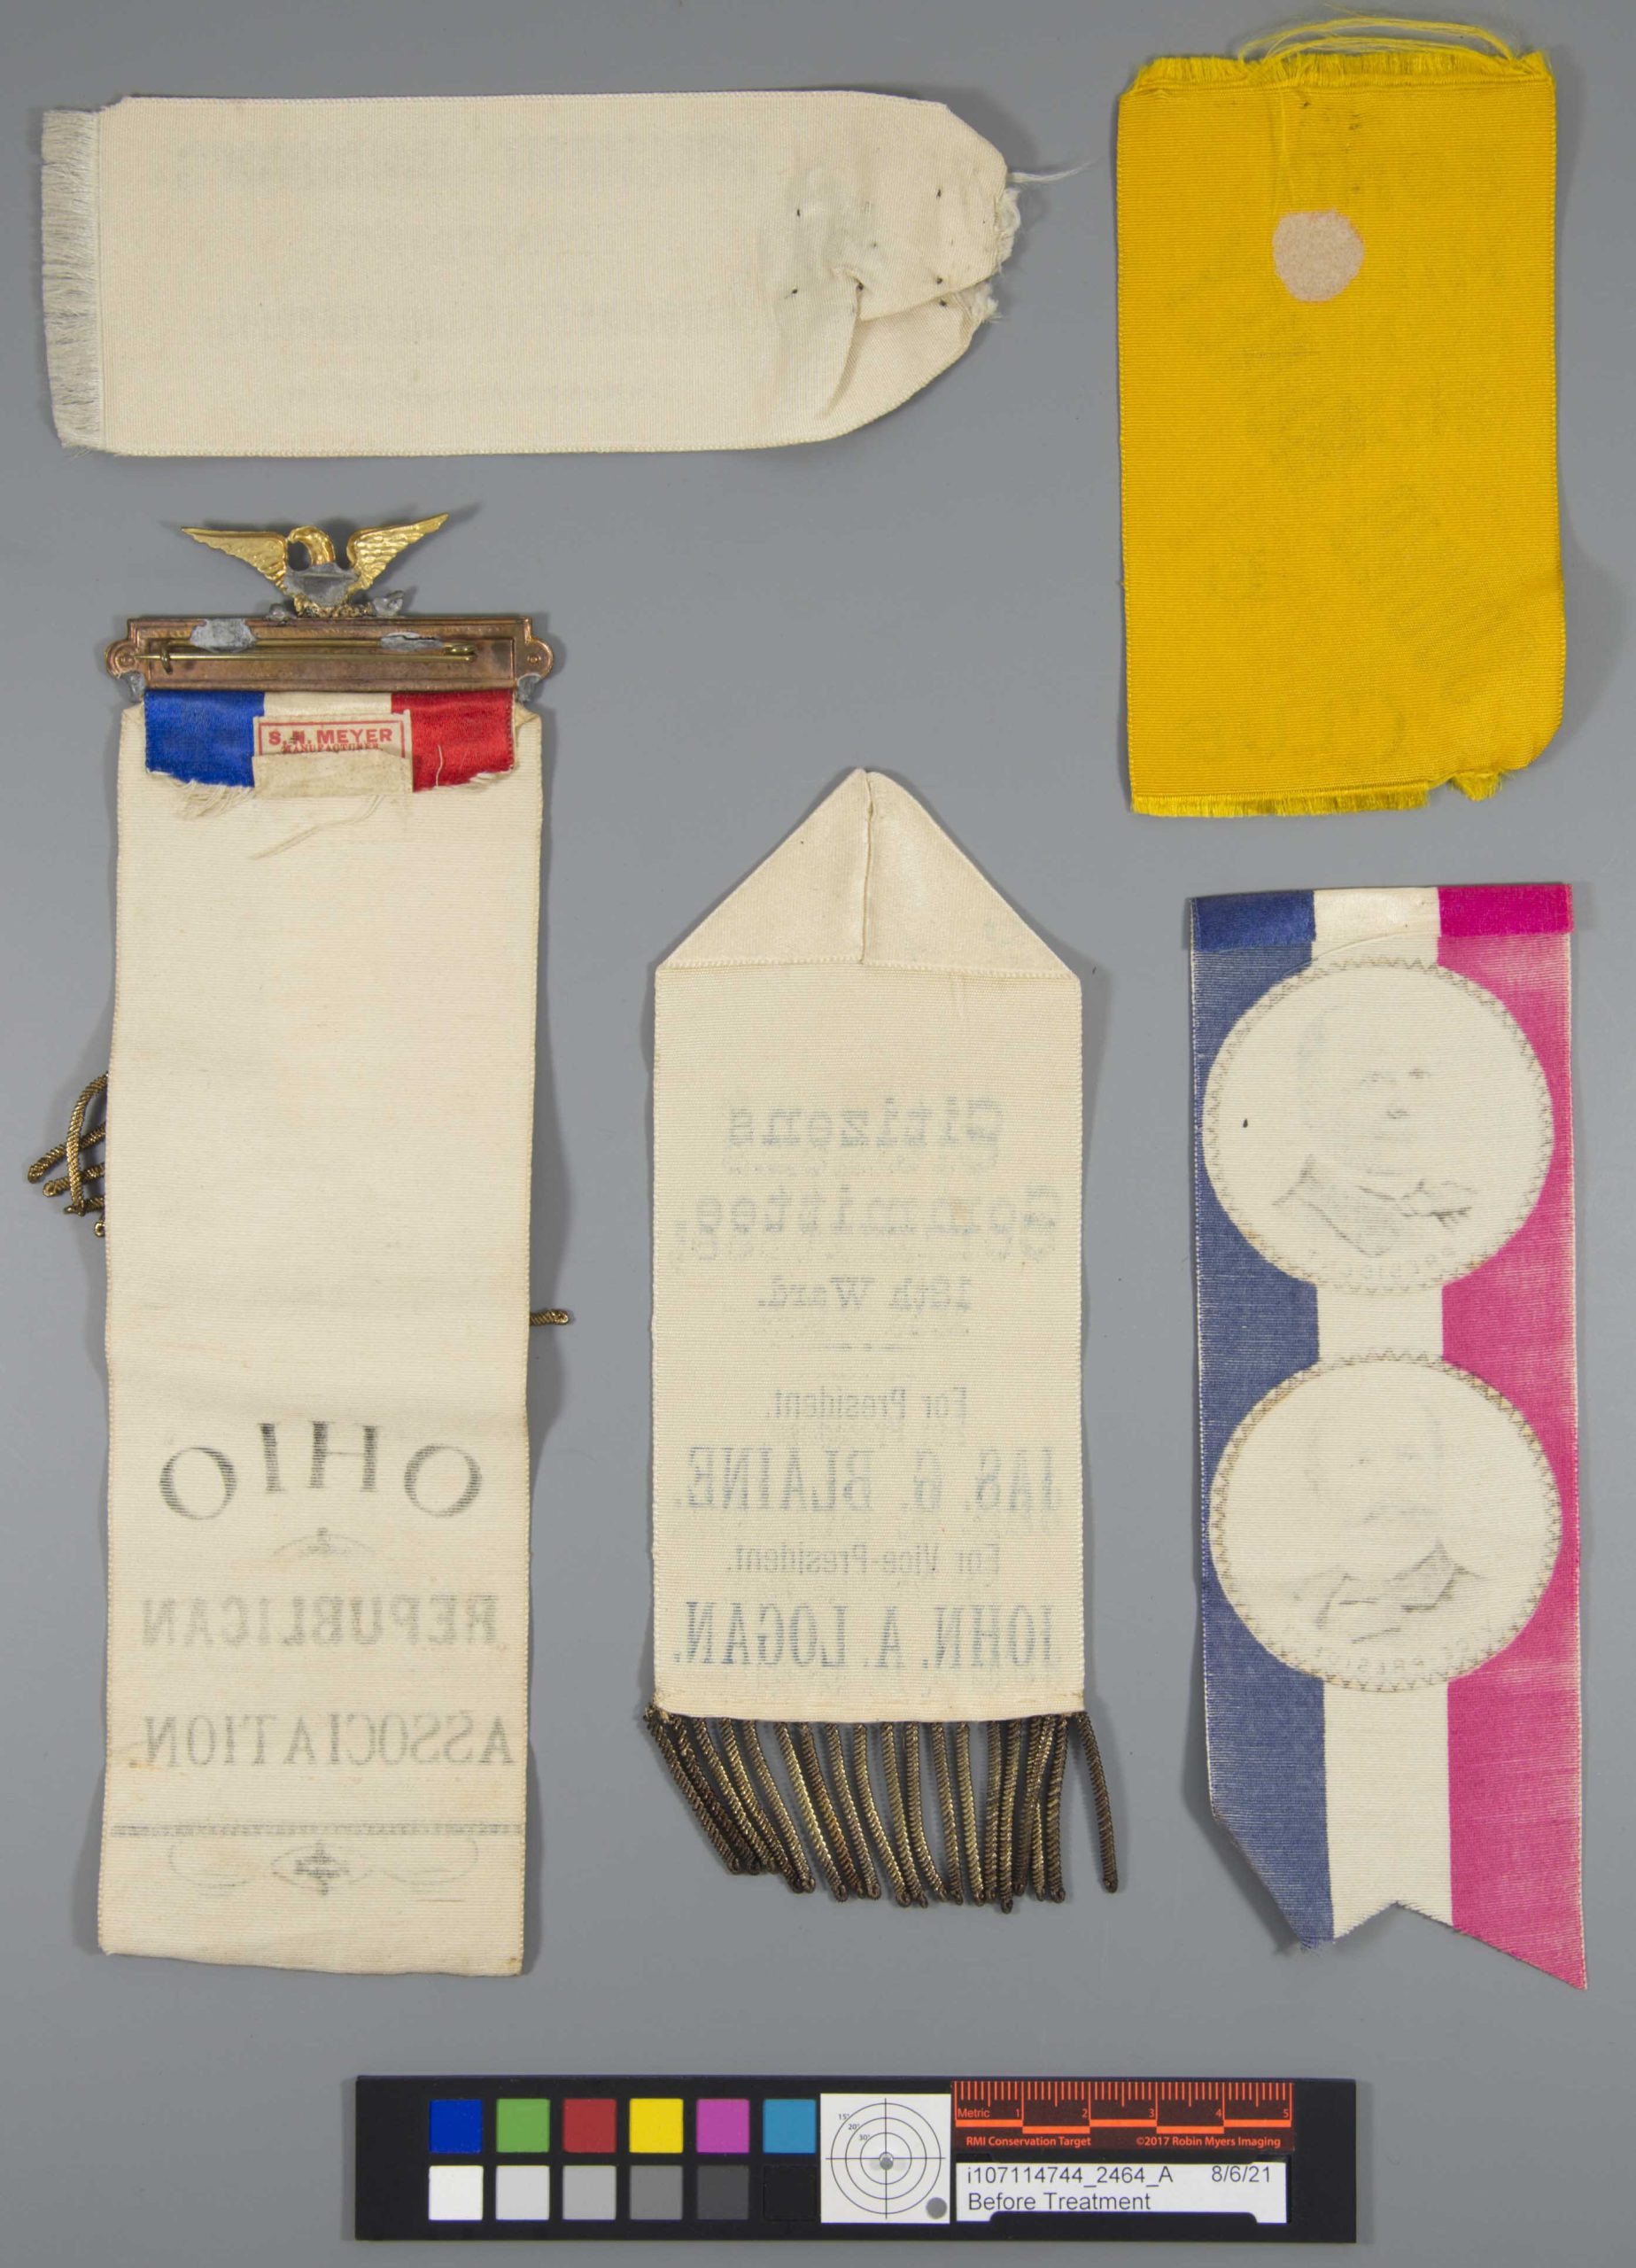
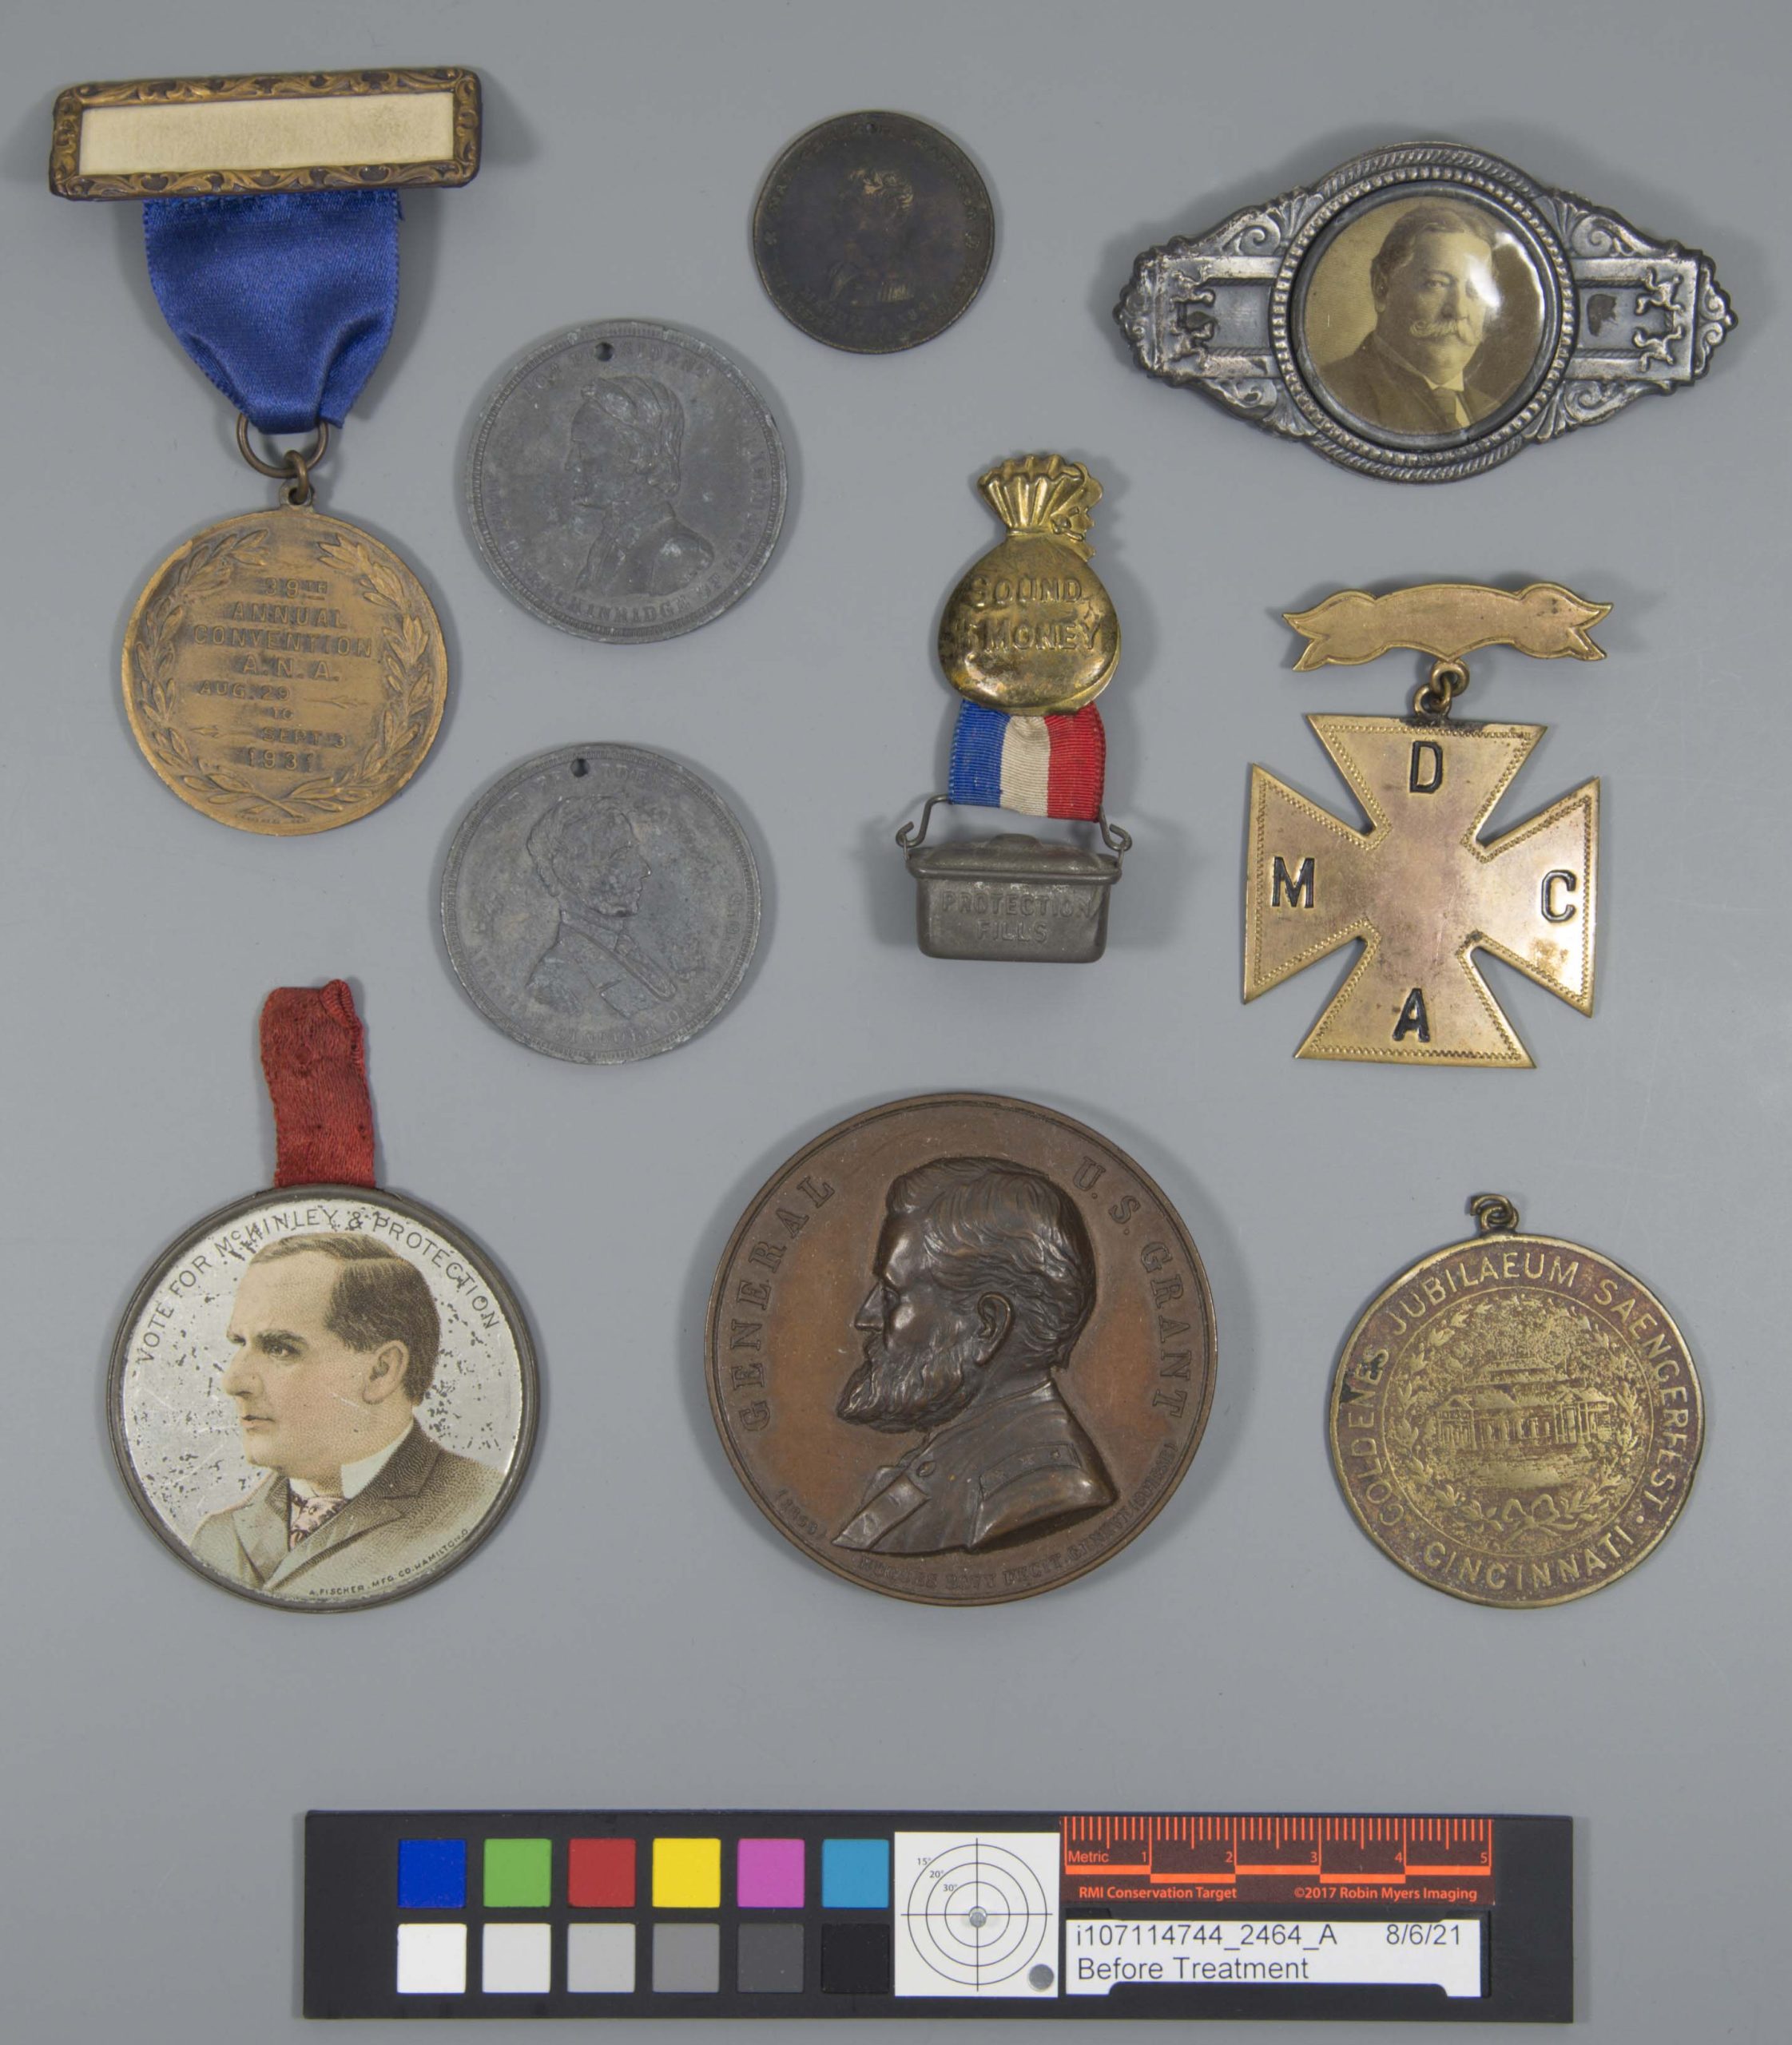
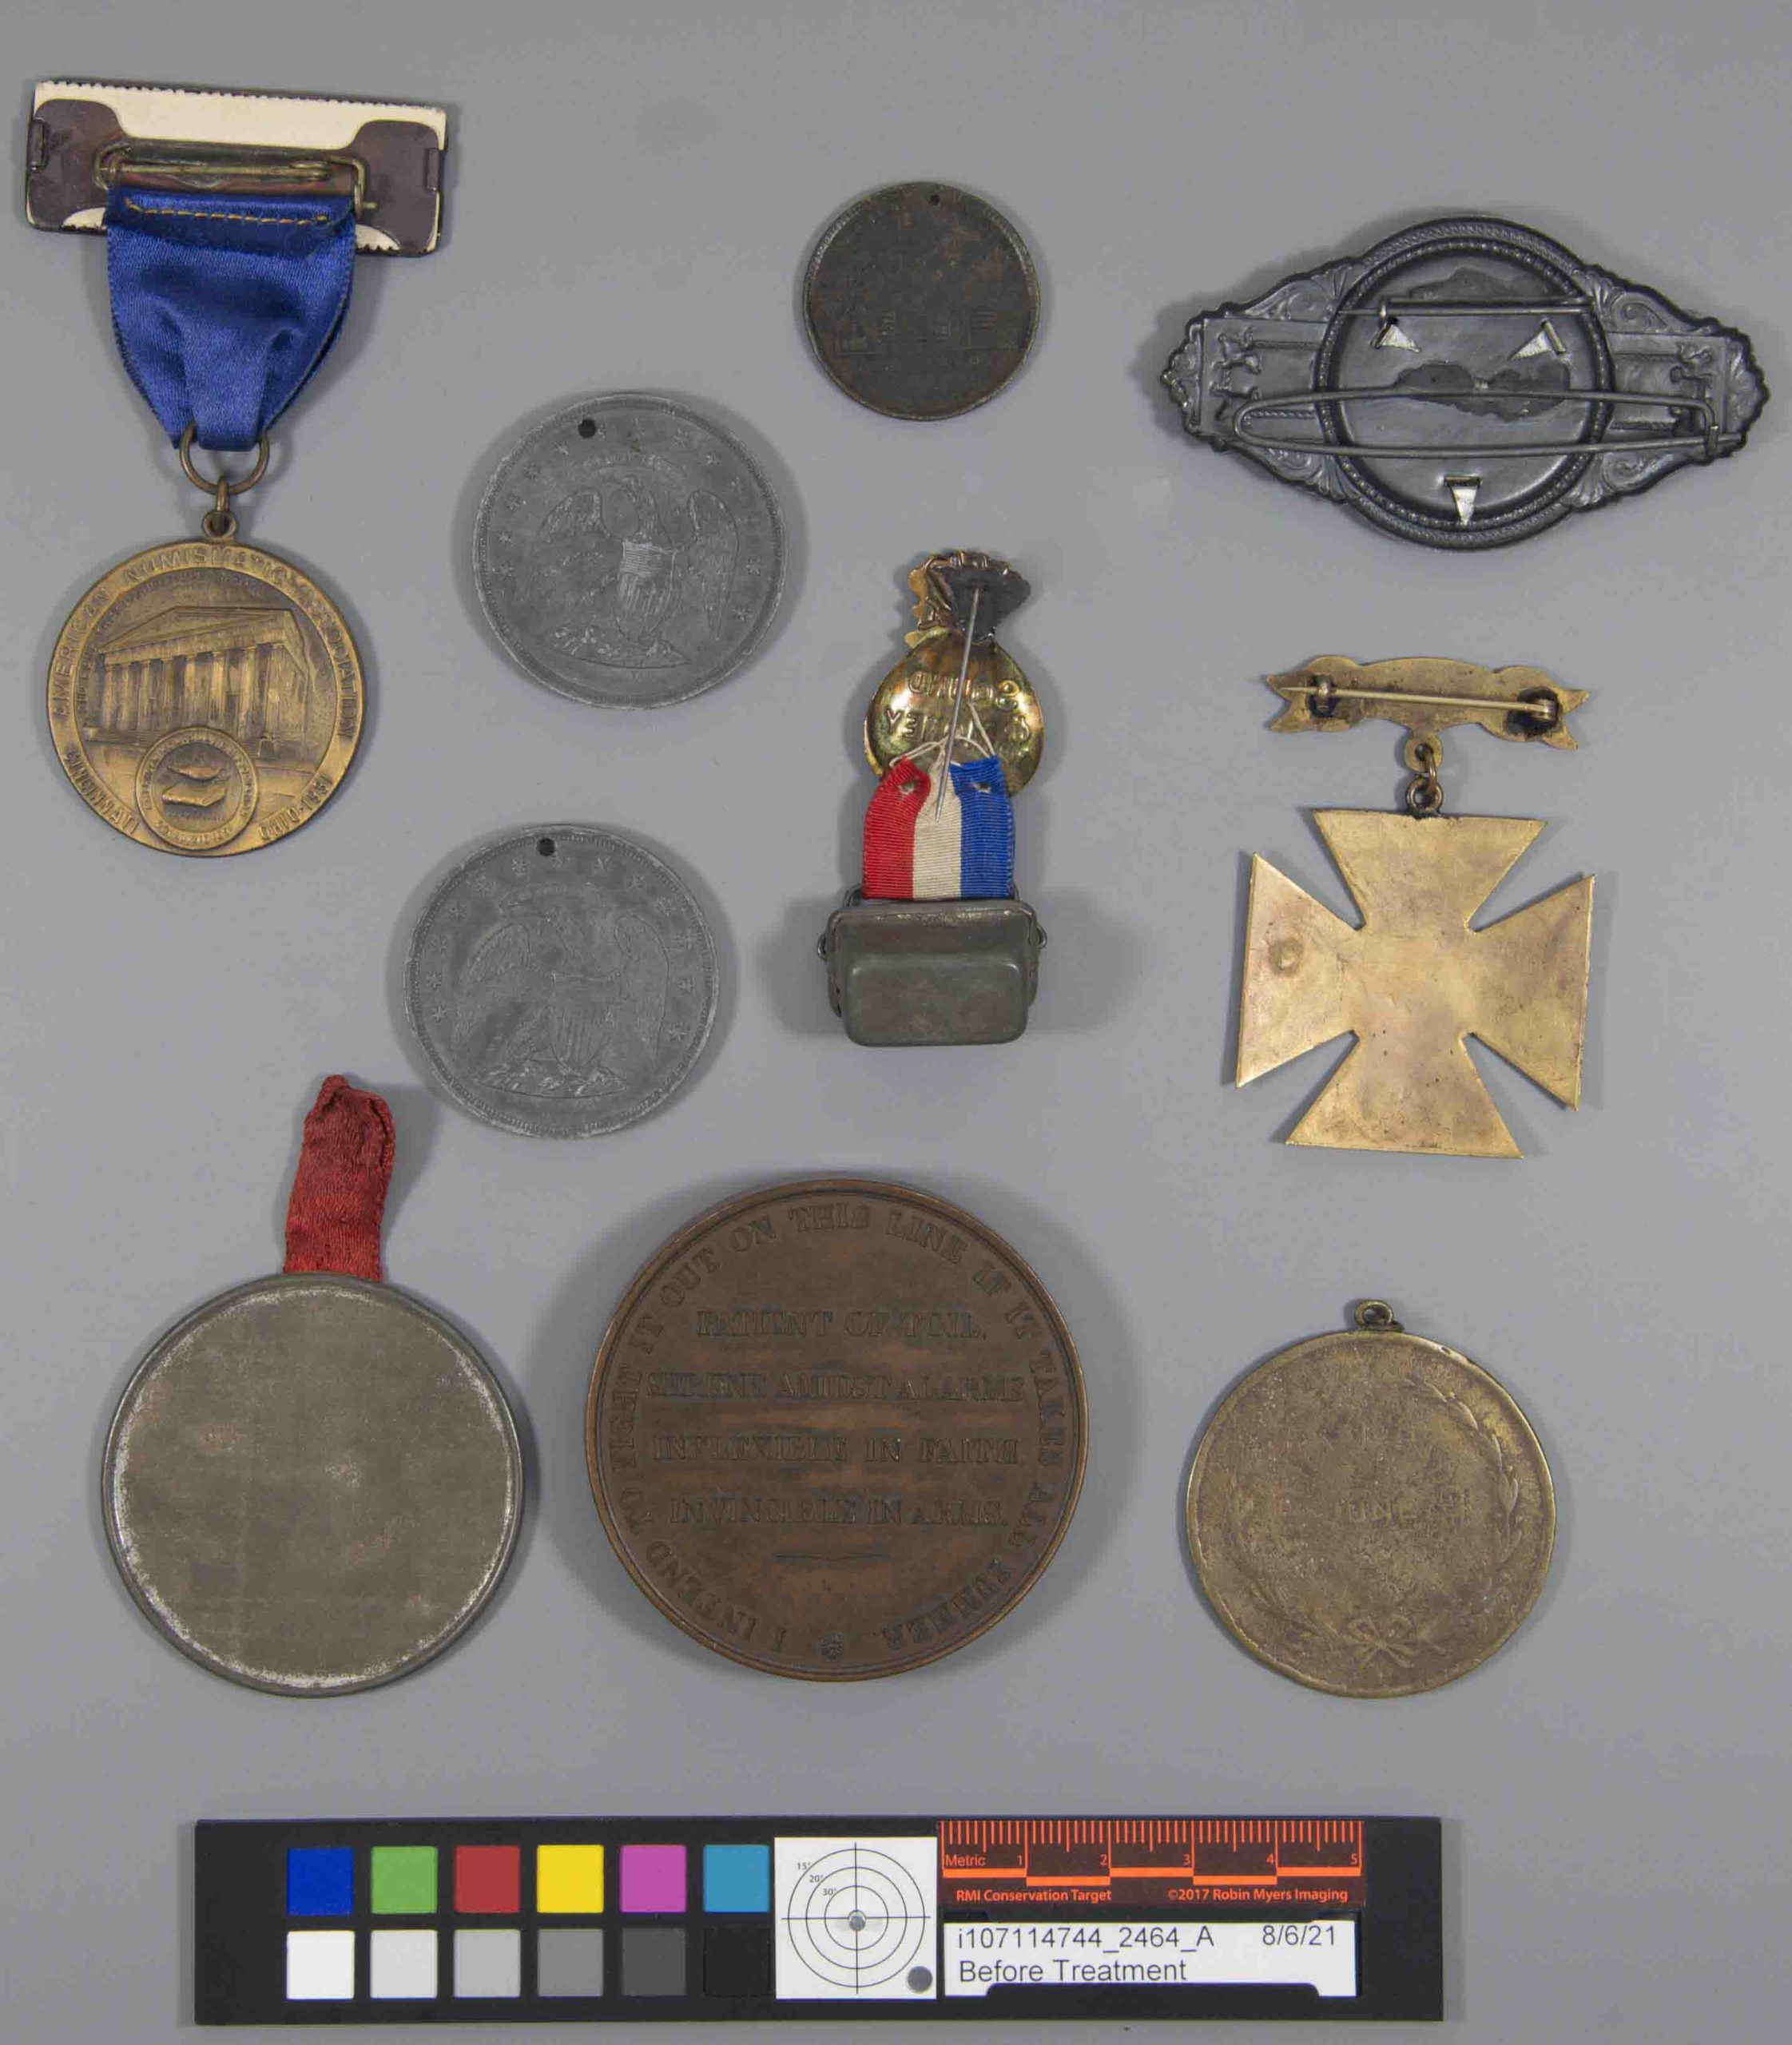
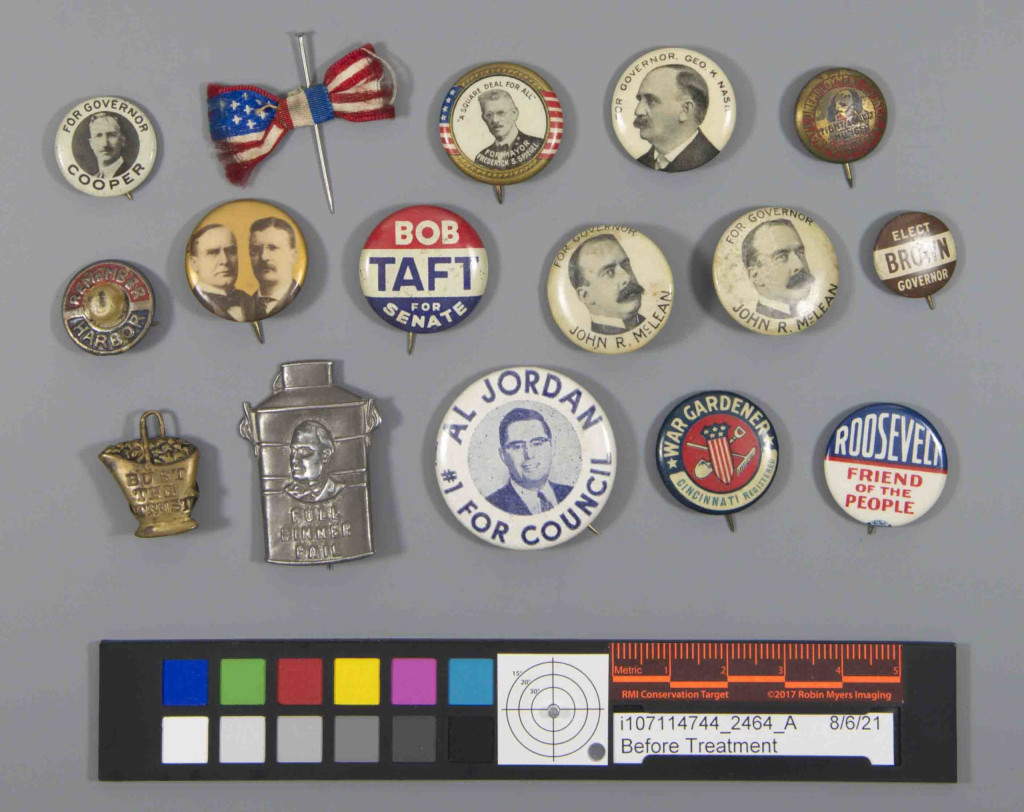
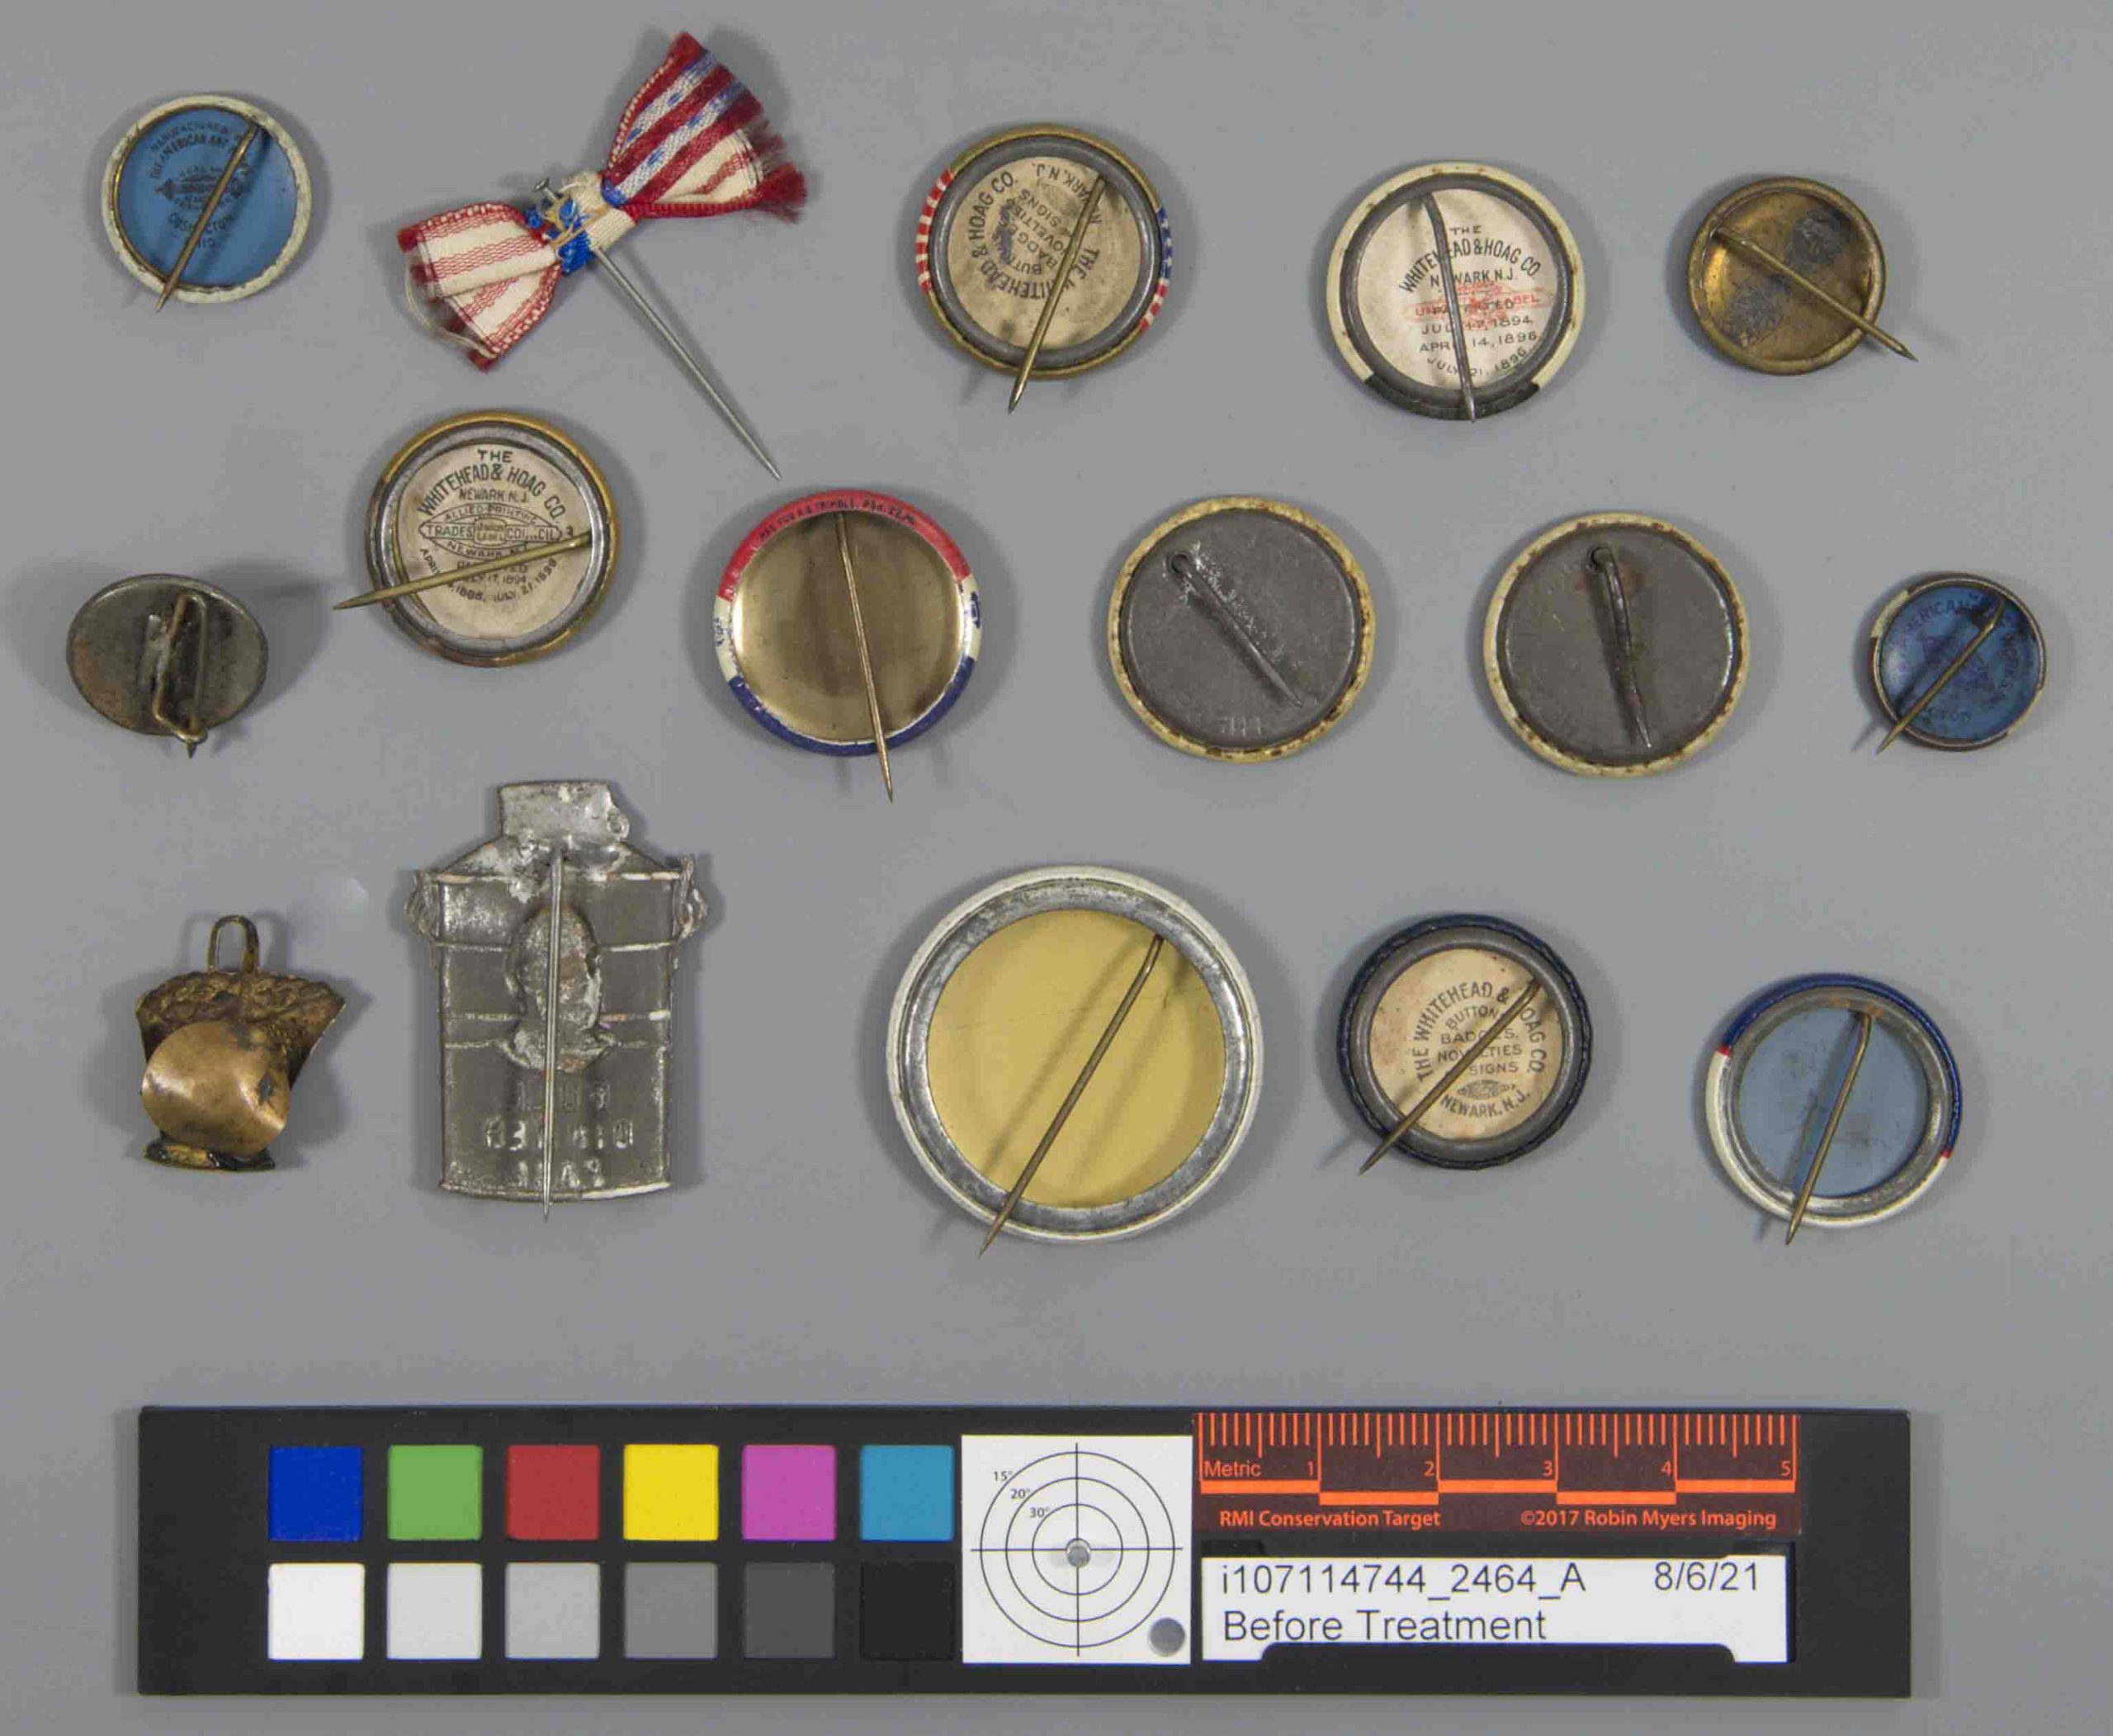
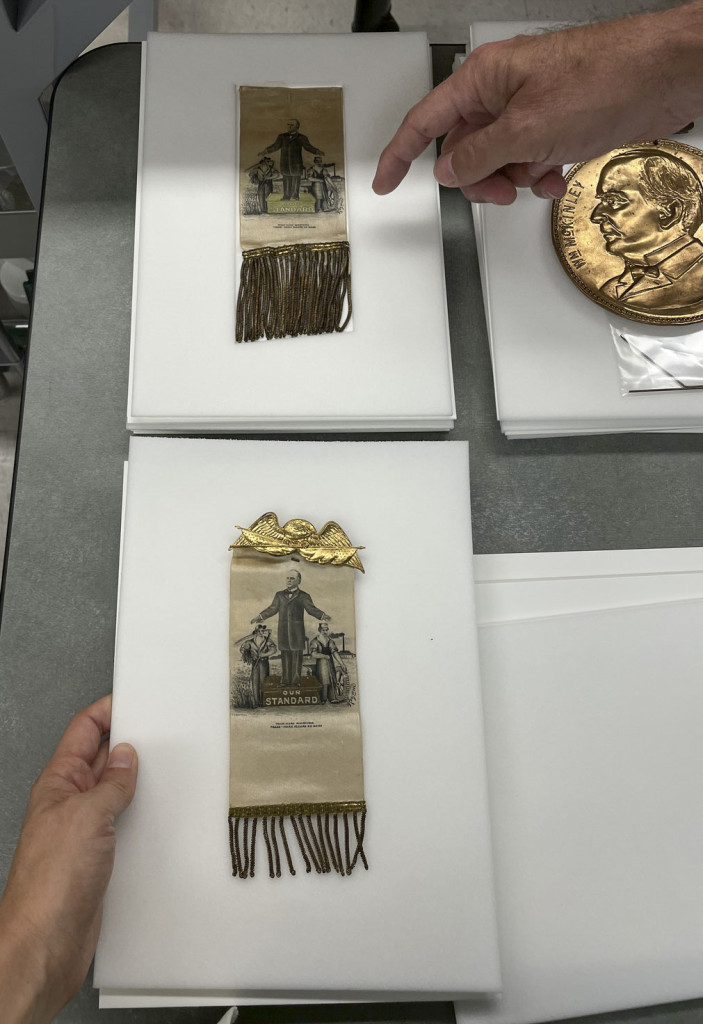
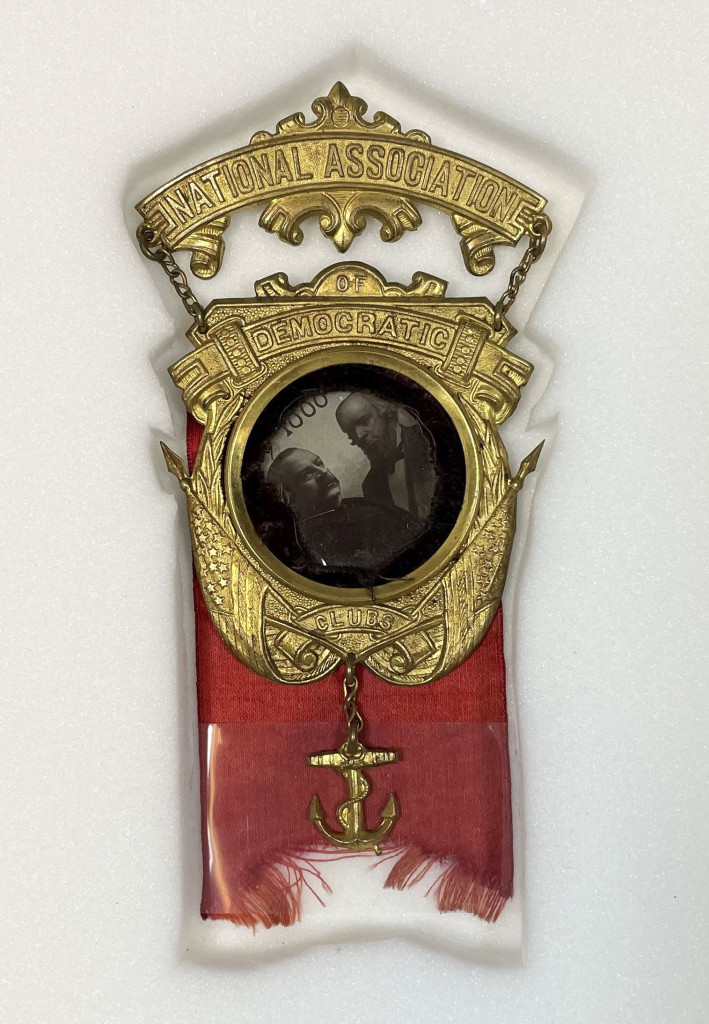
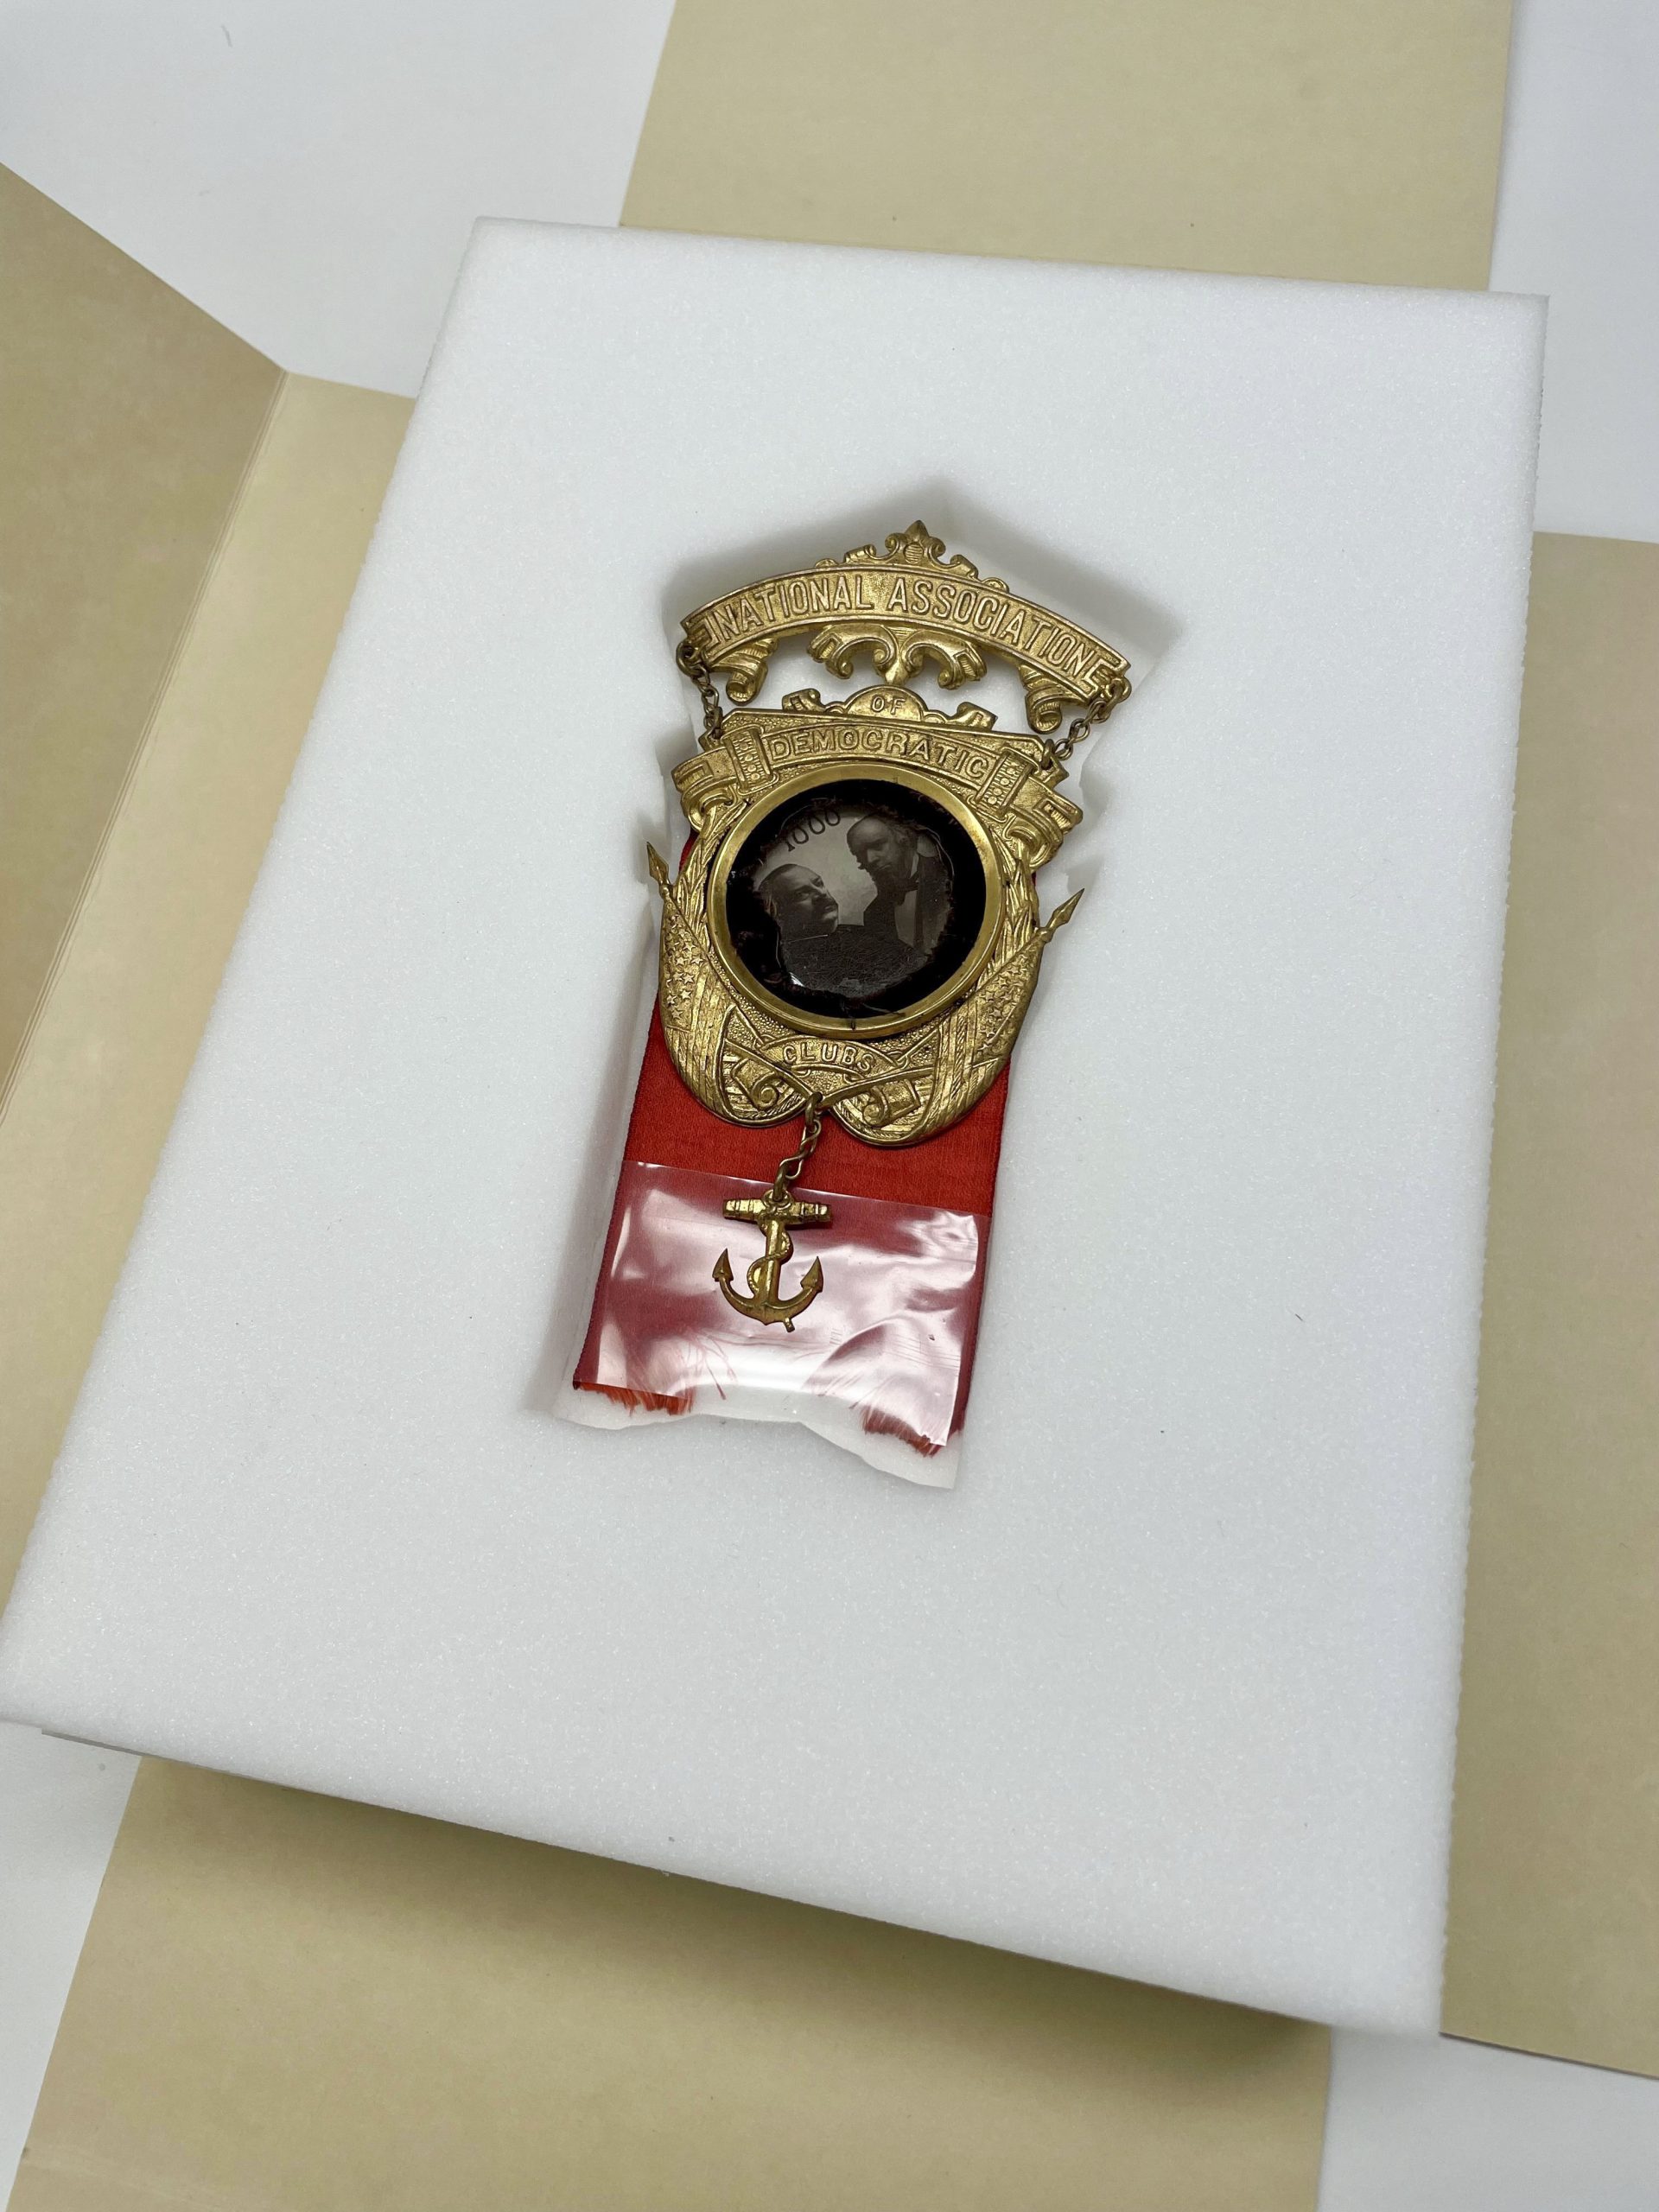
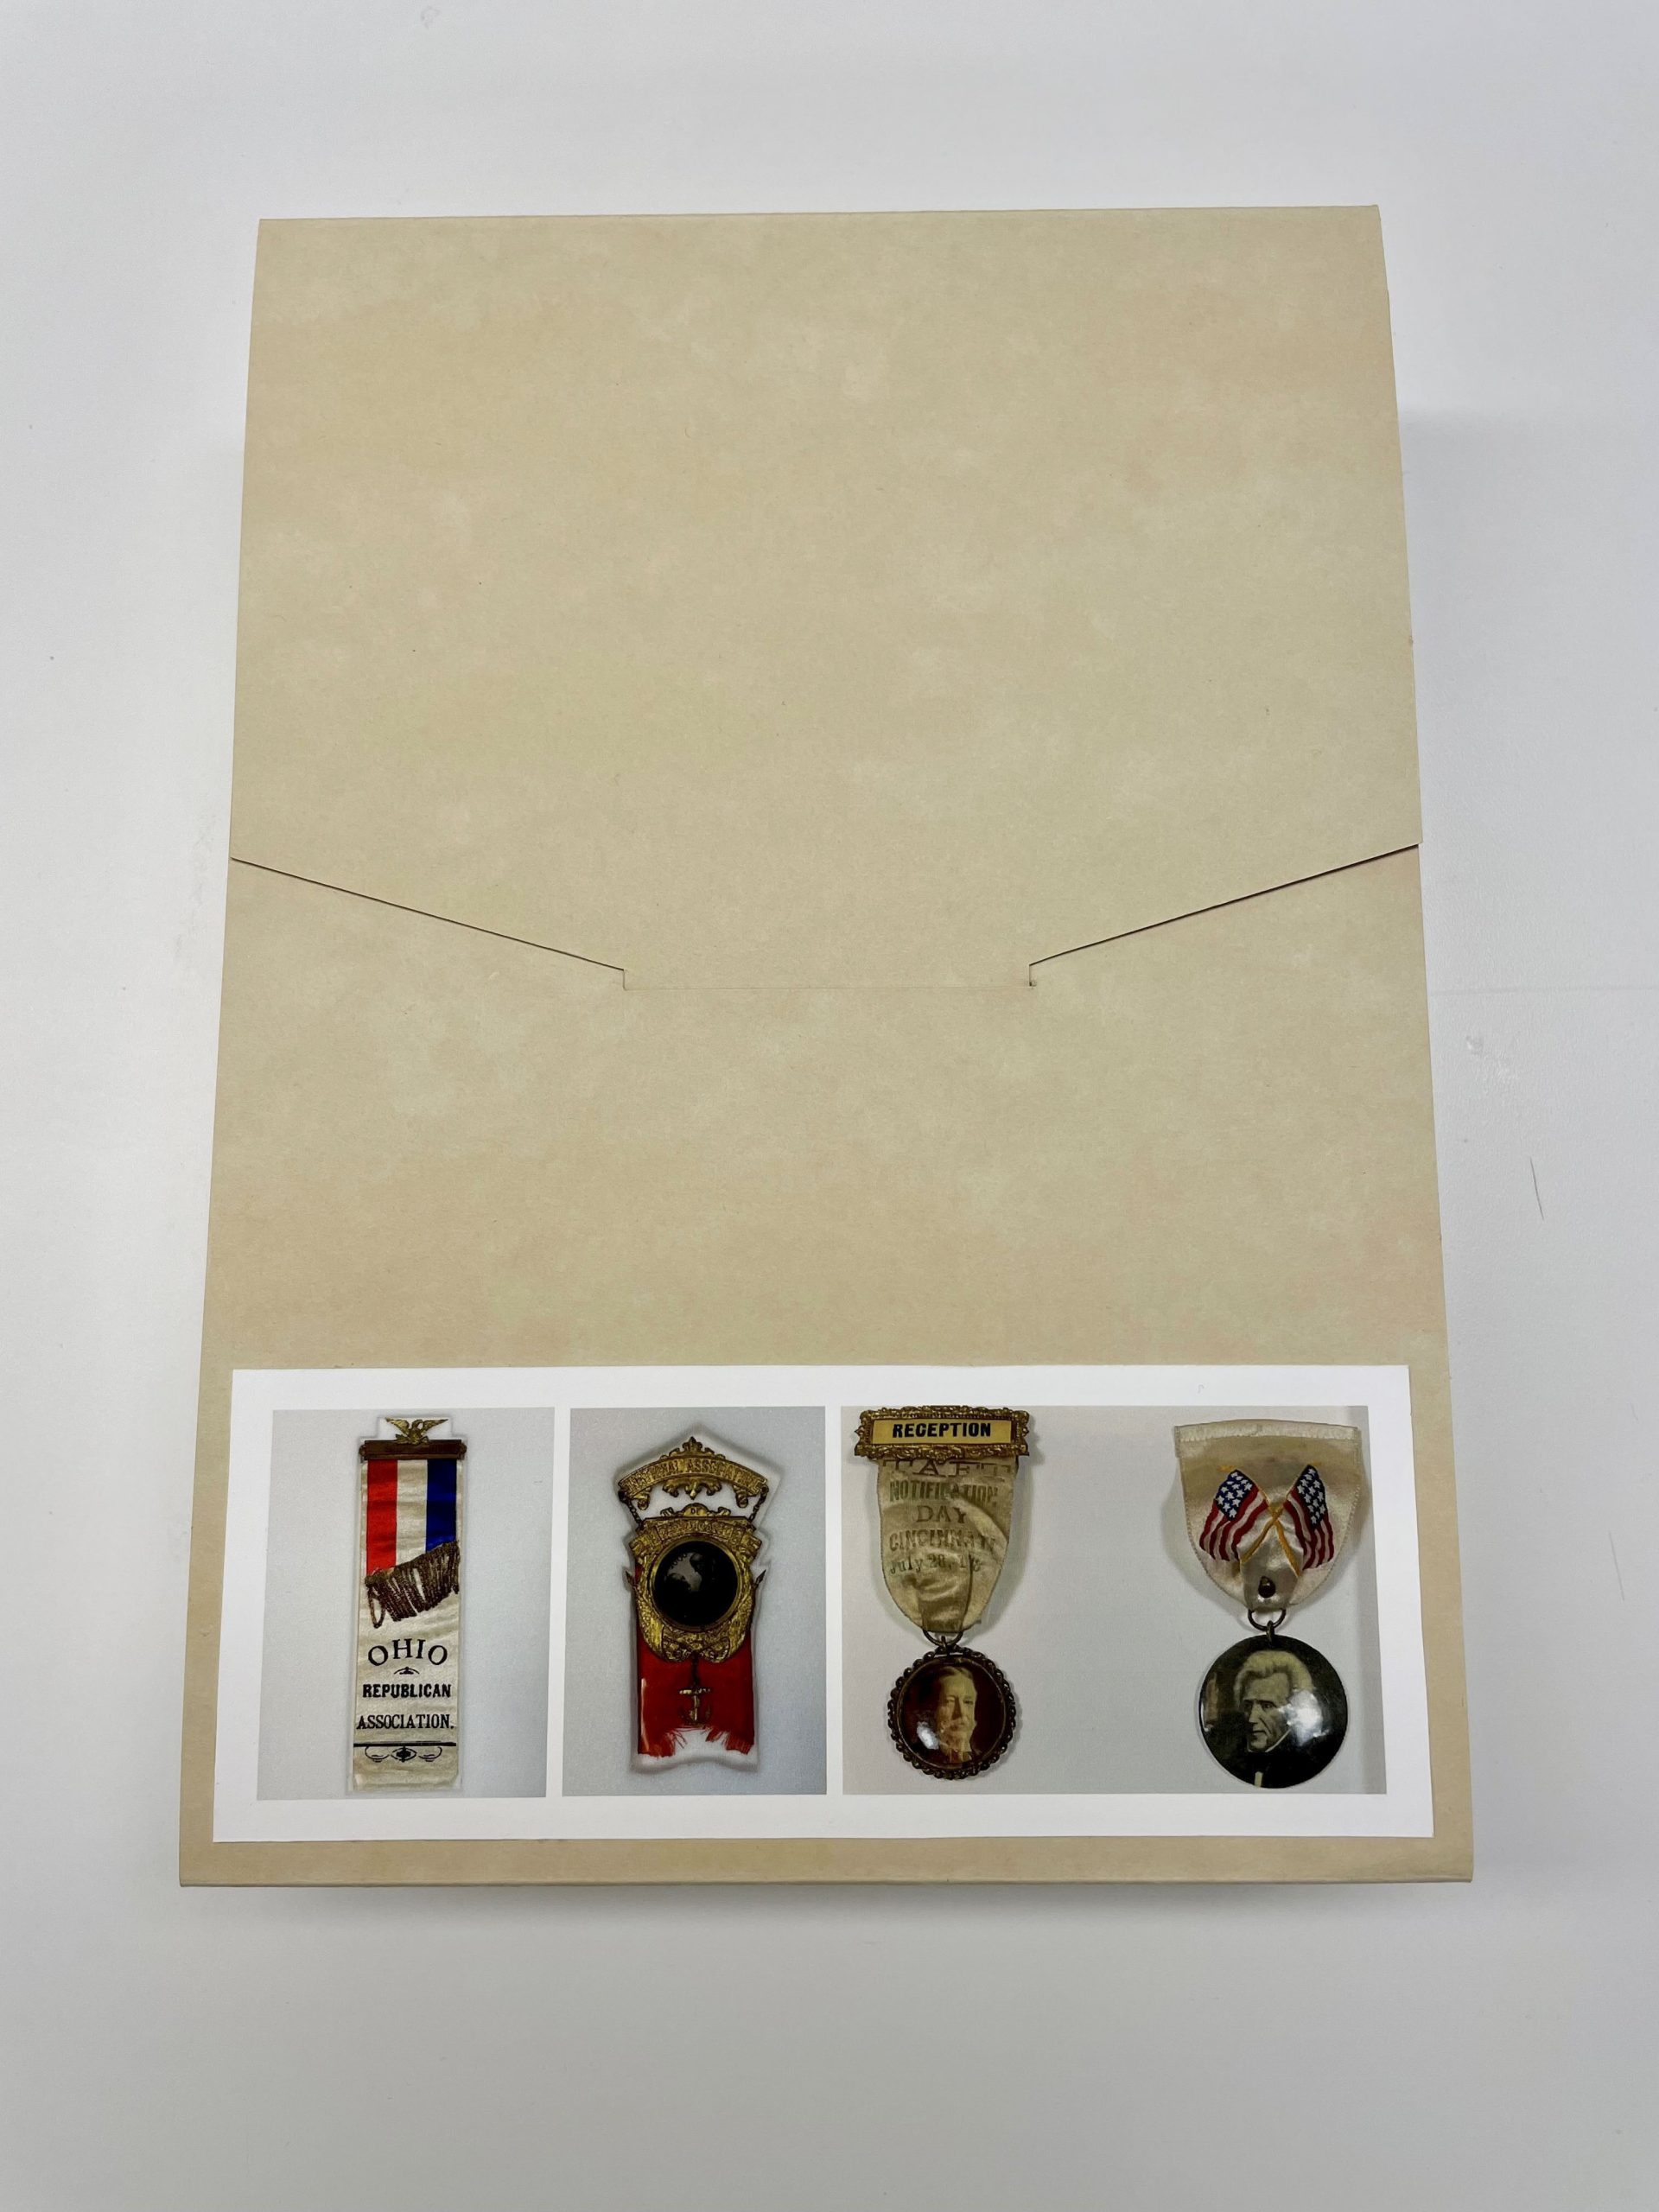
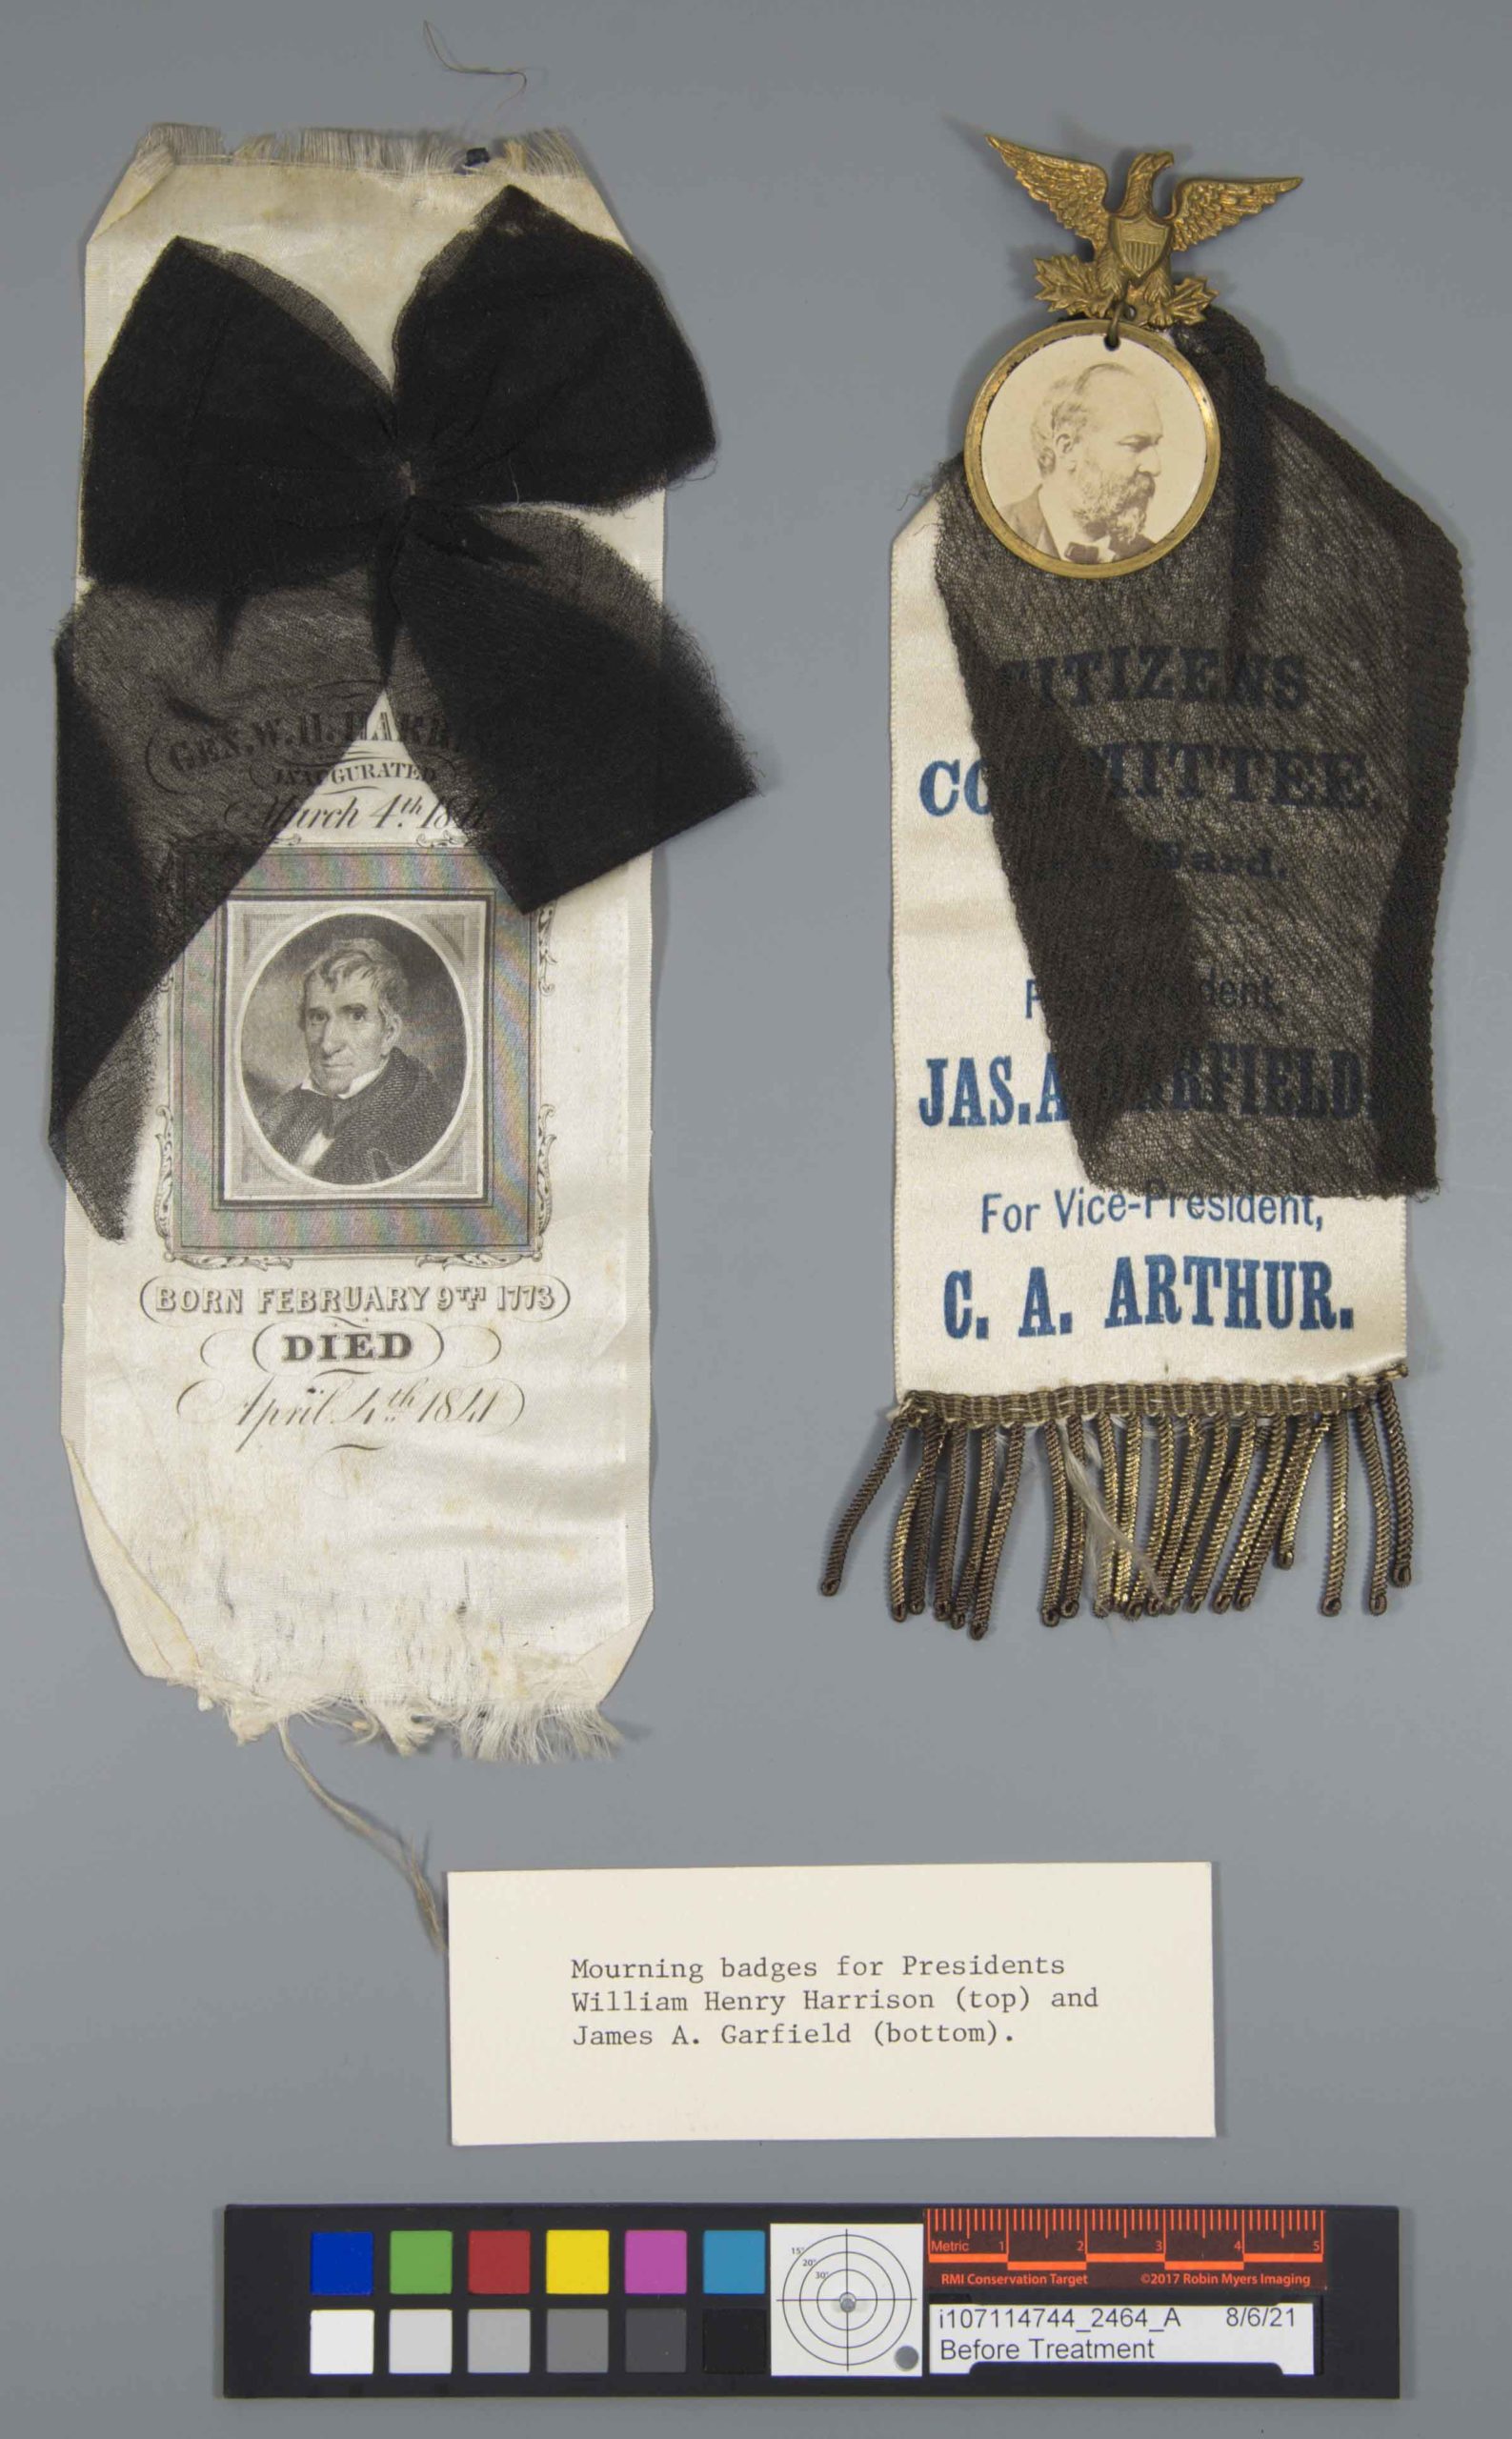
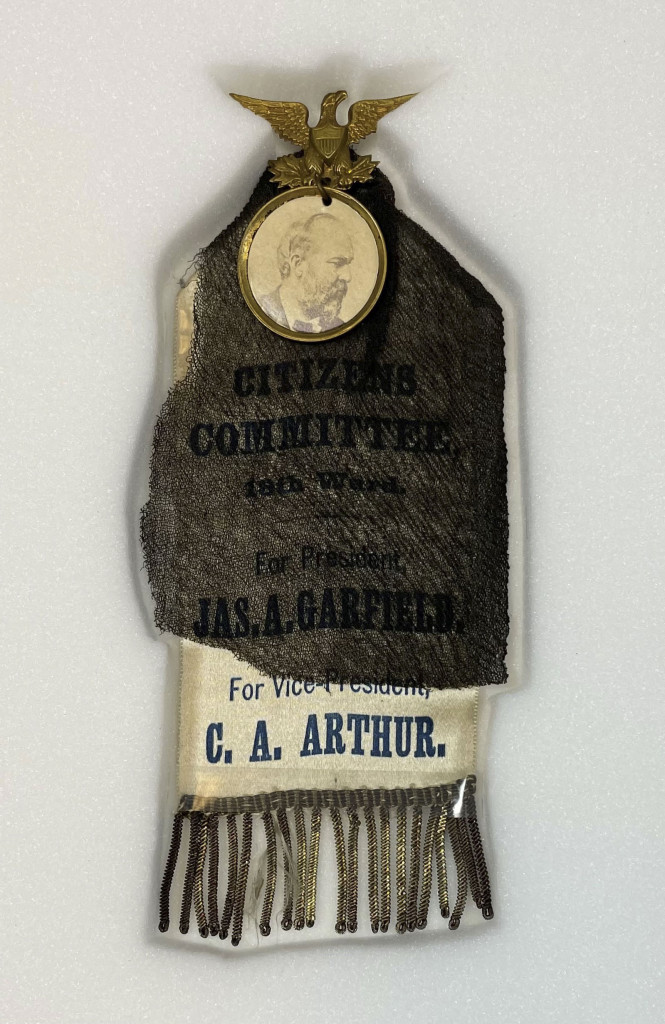
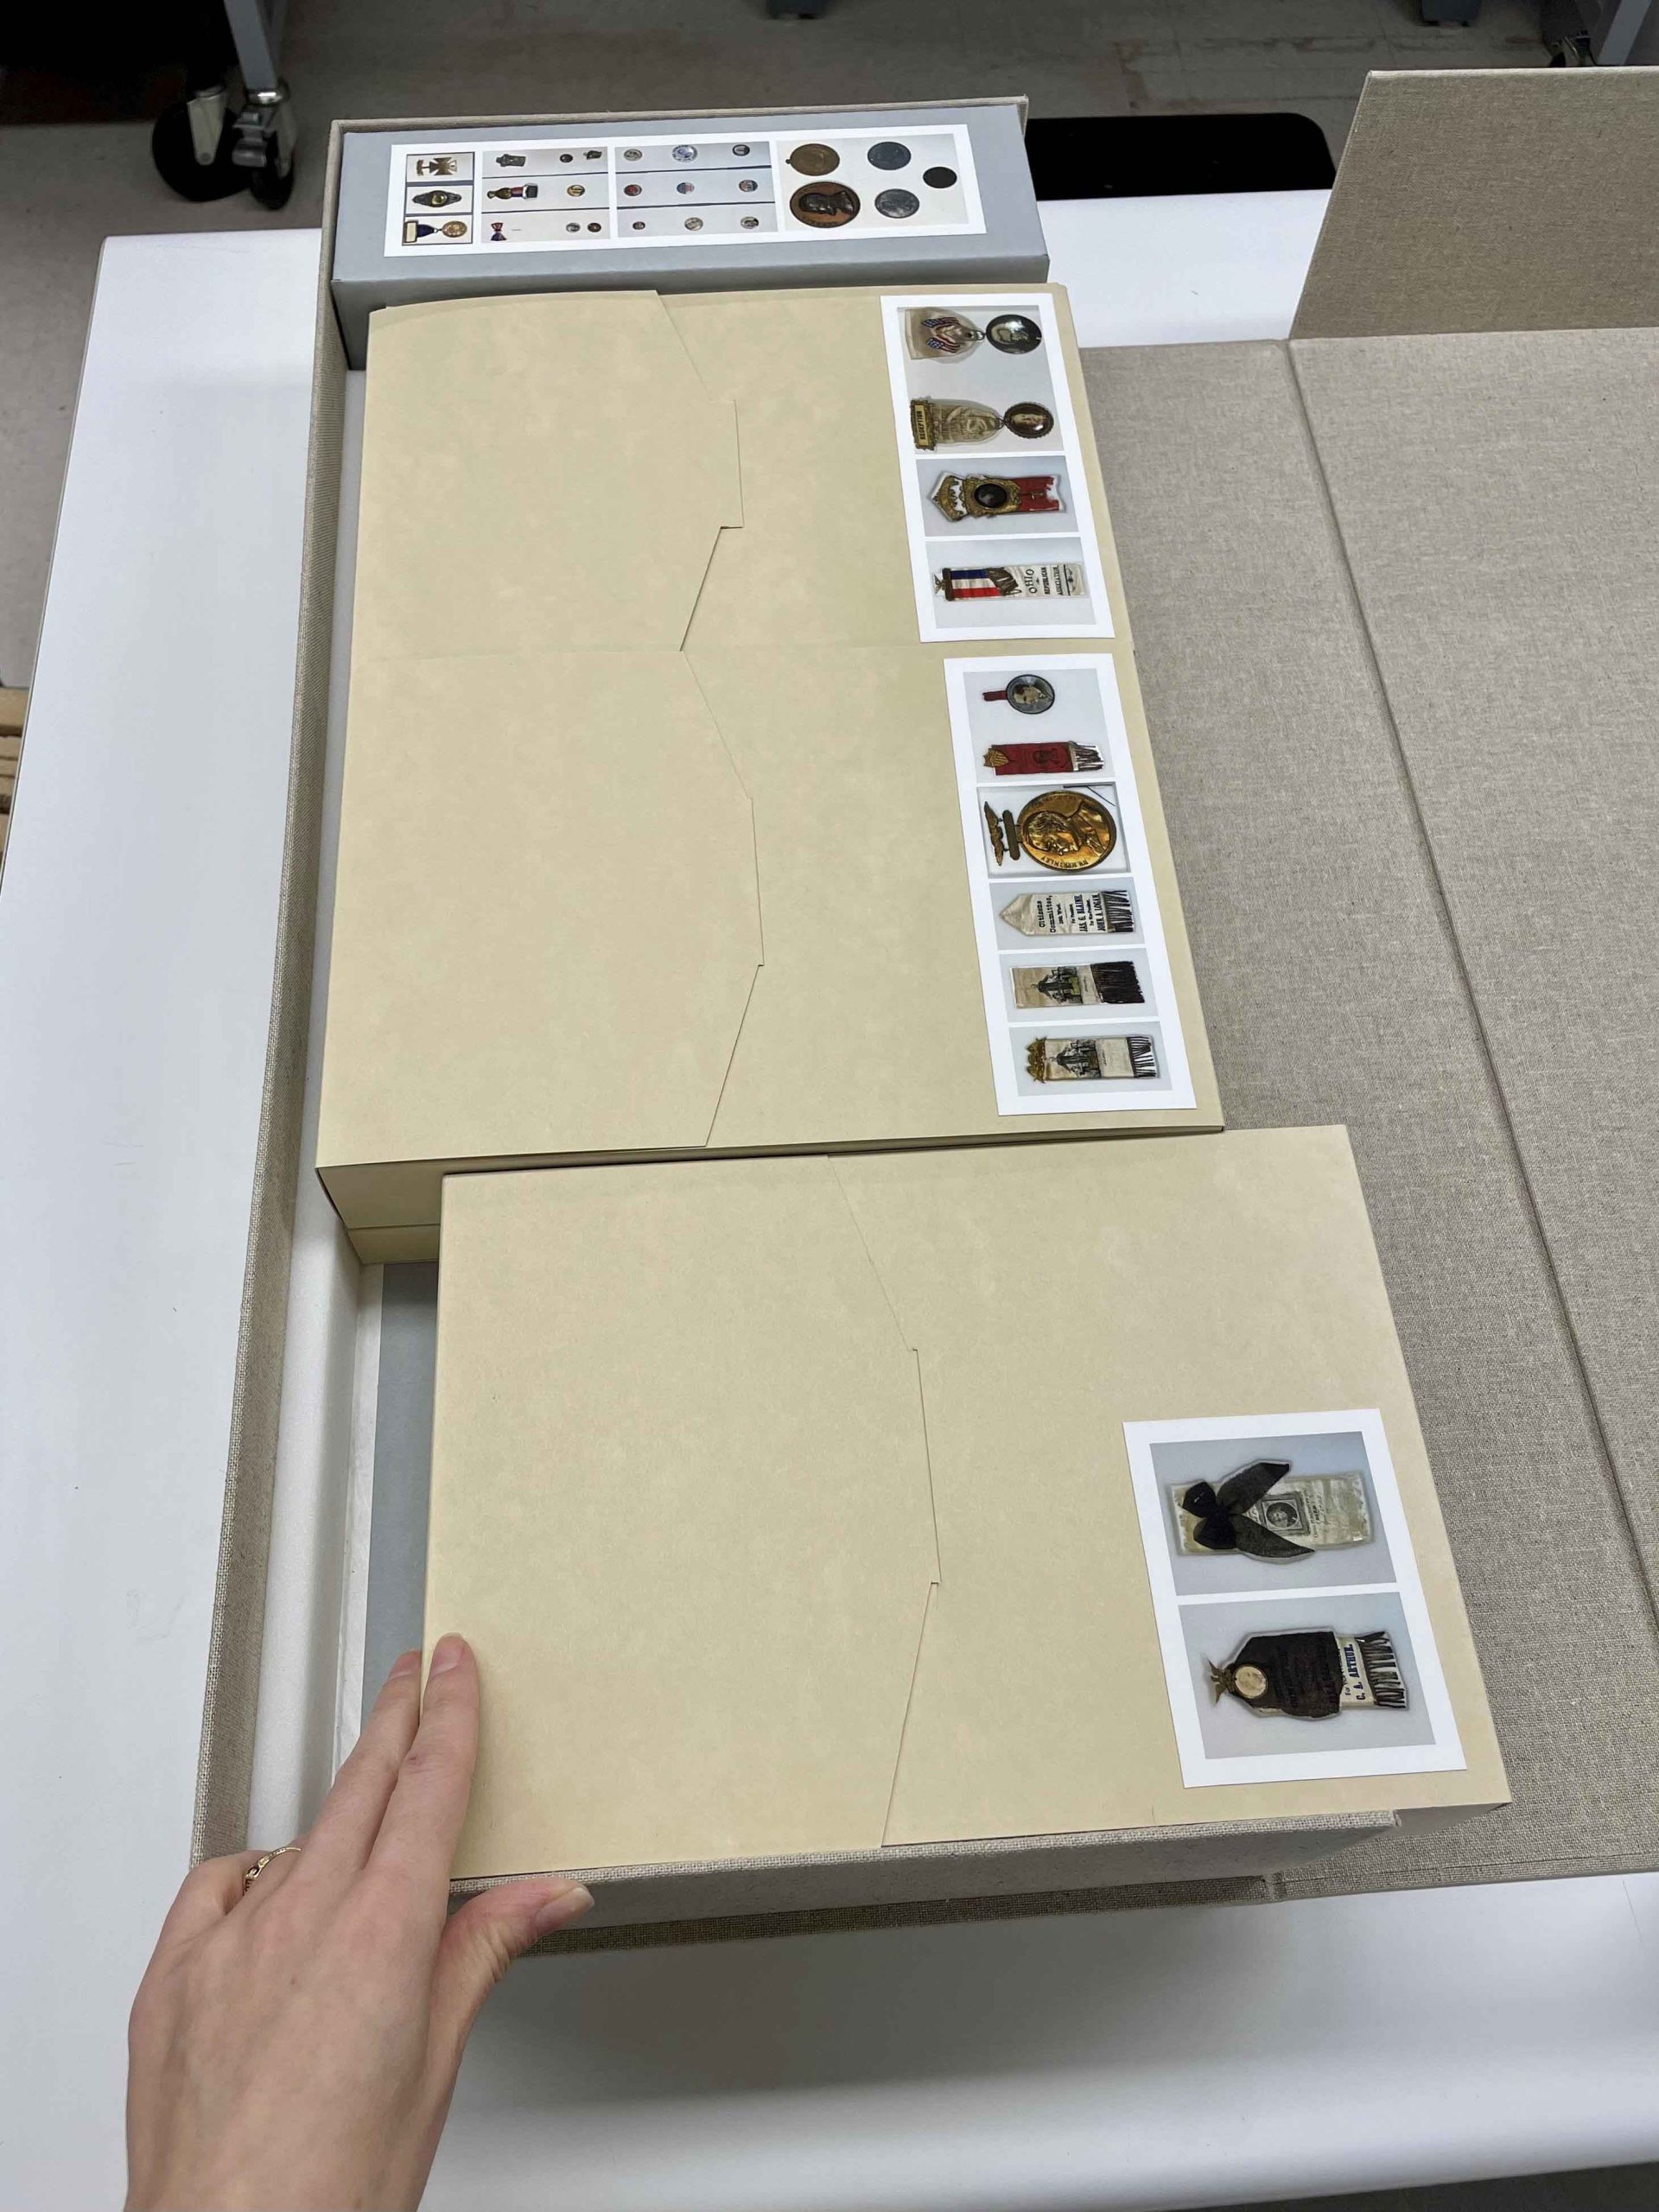
In libraries, we traditionally house rectangular, book-shaped materials. So when a collection of buttons, ribbons and medals entered the lab from the Public Library, our eyes widened as we peered inside the chaos filled box! Initially, we were unsure of how to make order of all the parts for better storage.
Collection of political ephemera before preservation housing, call number 737.242097 C6971 1841
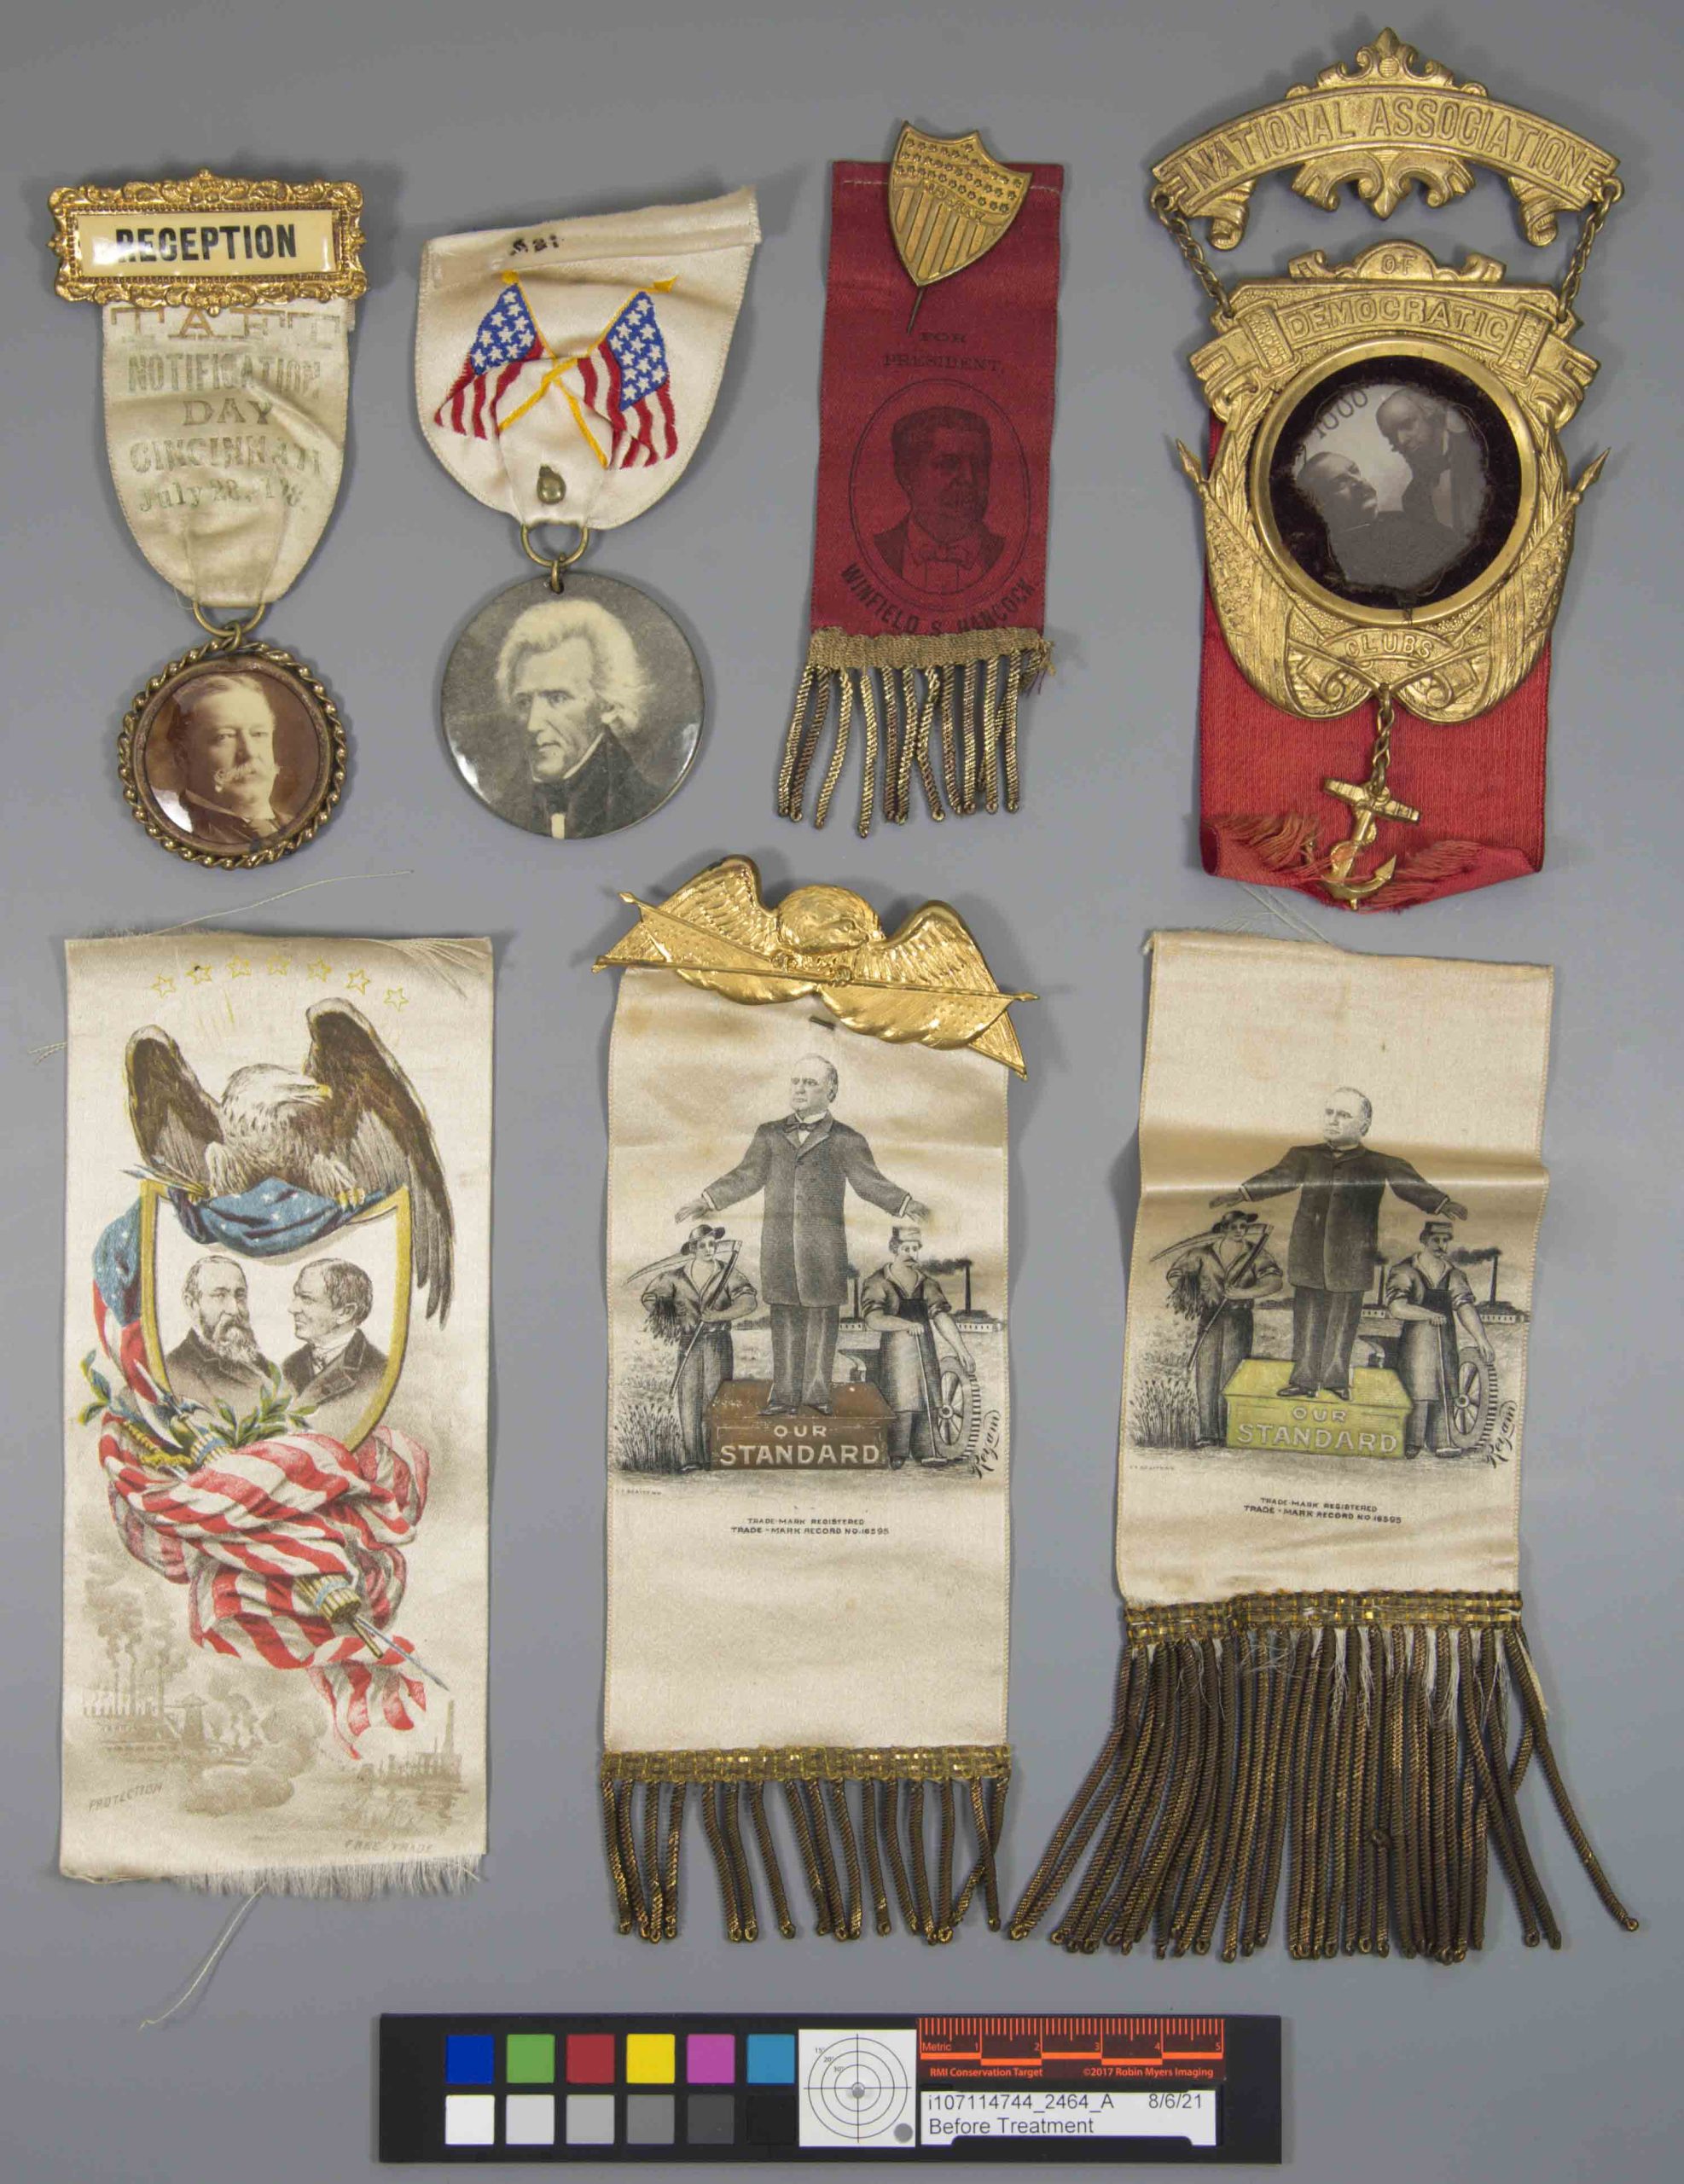
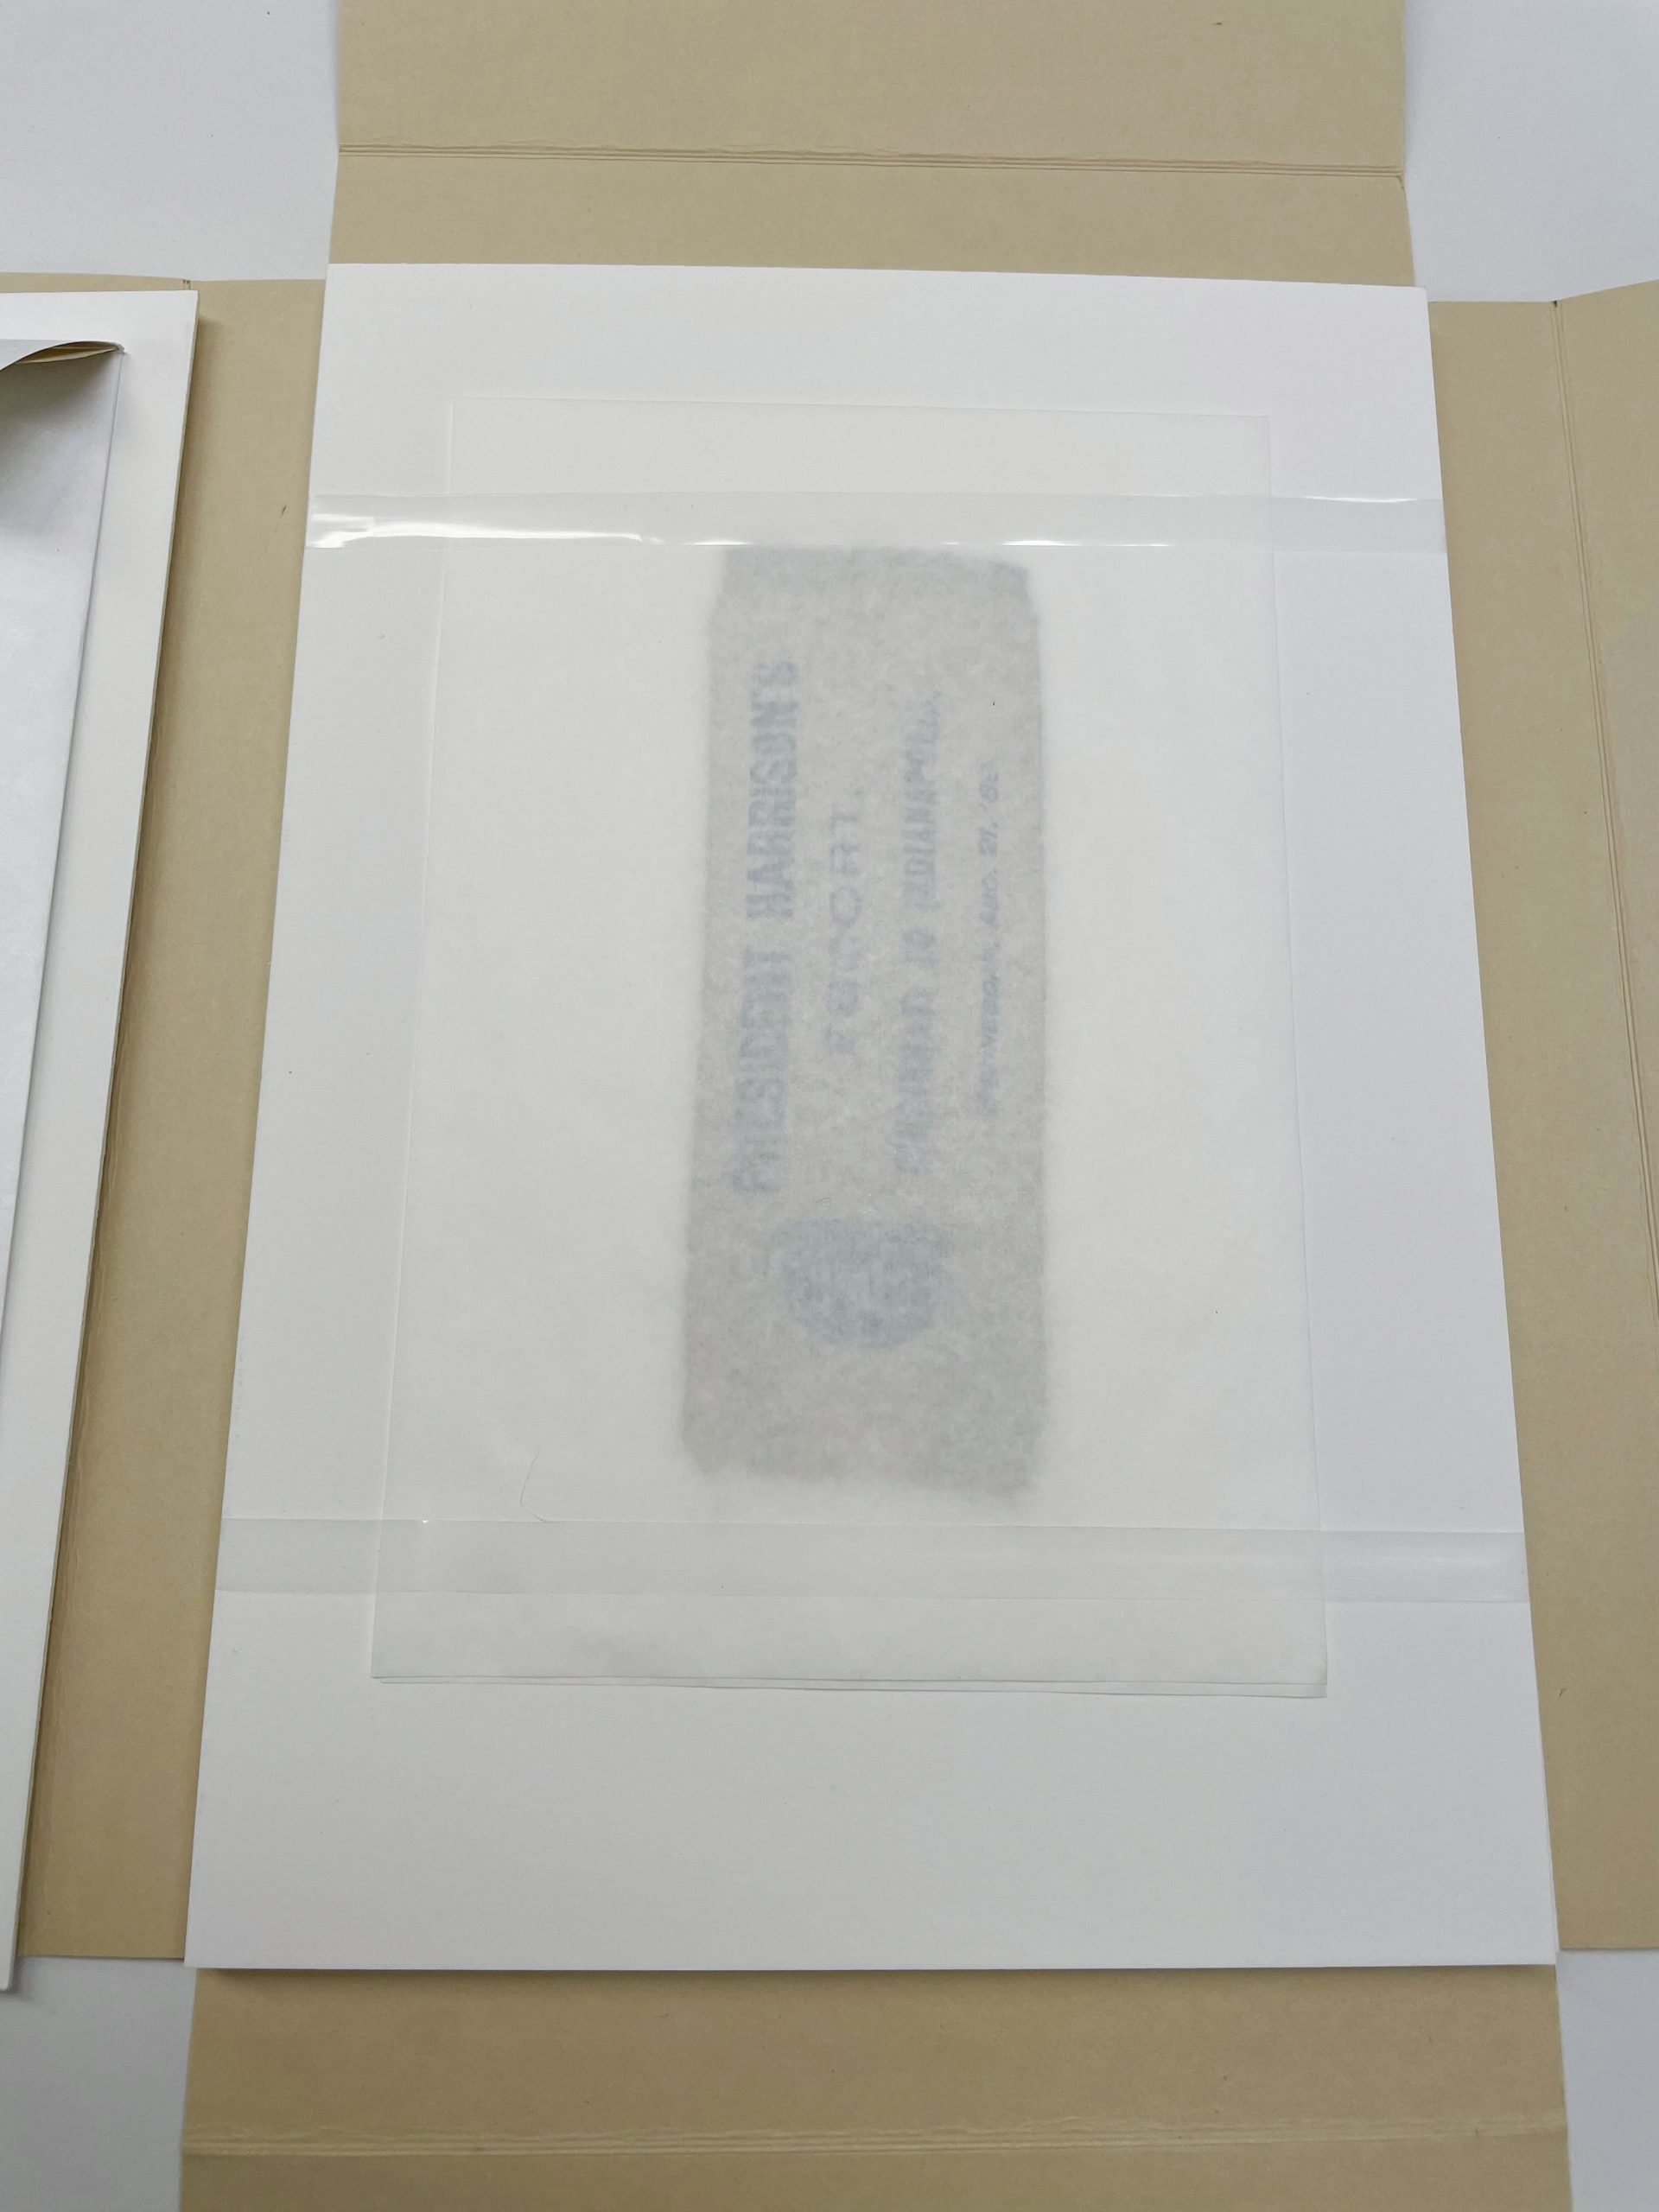
This collection of political ephemera was received in a non-archival black banker’s box. It consisted of approximately 13 ribbons, 17 pinback buttons, and 9 metals dating to the late 1800’s and onward.
In the late 19th century, political ephemera like this was once prolific and cheap to produce. It wasn’t until the rise of the celluloid (plastic) button that political ribbons fell out of fashion. After many years of storage, the ribbons were creased, crumpled and interspersed with heavy medals, sharp pins, and acidic envelopes. All components were in need of archival storage containers for long-term preservation, to separate the parts to keep them from damaging each other and to make them easier to handle.
Ashleigh and Chris took on the challenge of housing these non-traditional library materials so as to facilitate future display and exhibition.
Evaluation
Being a book and paper conservator (not an objects or textile conservator!), Ashleigh first started by brainstorming housing options:
Prior storage solutions by the lab were referenced, such as:
Medals mounted with polyester strapping to a cloth covered mat
A collection of steamboat keys mounted with ties to corrugated board supports
A pin mounted to a cloth covered support, stored within a pamphlet binder
After consulting with the Cincinnati Art Museum textile conservator, Obie Linn, Ashleigh quickly ruled out placing silk ribbons into polyester sleeves or bags since static cling issues could be detrimental to fragile fabric. Storing the items within foam recesses was suggested as an alternative.
Some of the buttons and medals were magnetic, so magnets were considered to prevent parts from sliding (such as how tin type photographs can be non-adhesively mounted with rare earth magnets).
Other components that were not magnetic could be secured with ties or straps.
Small metal buttons without fabric (that could easily become lost!) were candidates to store in baggies, similarly to how the University of Kansas Libraries describe housing this collection of pins on their blog.
It also became clear that minor treatment was needed including surface cleaning and humidification to reduce creasing in the ribbons and to encourage proper orientation of the parts during storage. This would also help prepare the items for future exhibition.
Since many parts had varying needs, the items were first grouped by size, type, and if they were magnetic. Once grouped, standardized mount sizes were determined so that no matter what size the ribbons were, they would all fit together inside the same sized box. Additionally, a few ribbons were grouped together on one mount to save space.
Items being evaluated and grouped into standardized support sizes
Rudimentary plans were drawn to decide how the groups and parts would eventually be configured into one enclosure. For example, what would make more sense for library storage on a shelf – to orient the final enclosure as a rectangle or square? We went with a rectangle since many shelves at the library have a narrow depth.
Custom Mat Board Mounts with Foam
Chris’ first task was to cut sink mats made with custom Plastizote and Volara polyethylene foam spacers to protect the ribbons from shifting during storage. Ashleigh had previously mounted a few ribbons to museum rag mat board as models, giving him a head start and model for packaging the remaining ribbons. After adhering the polyethylene foam to the mat board with PVA, the mounts were pressed for over a week allowing them to off-gas and dry flat.
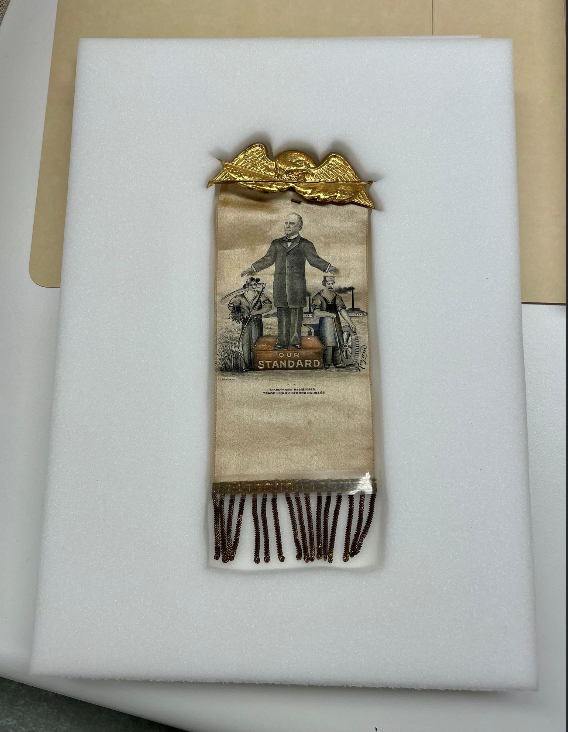
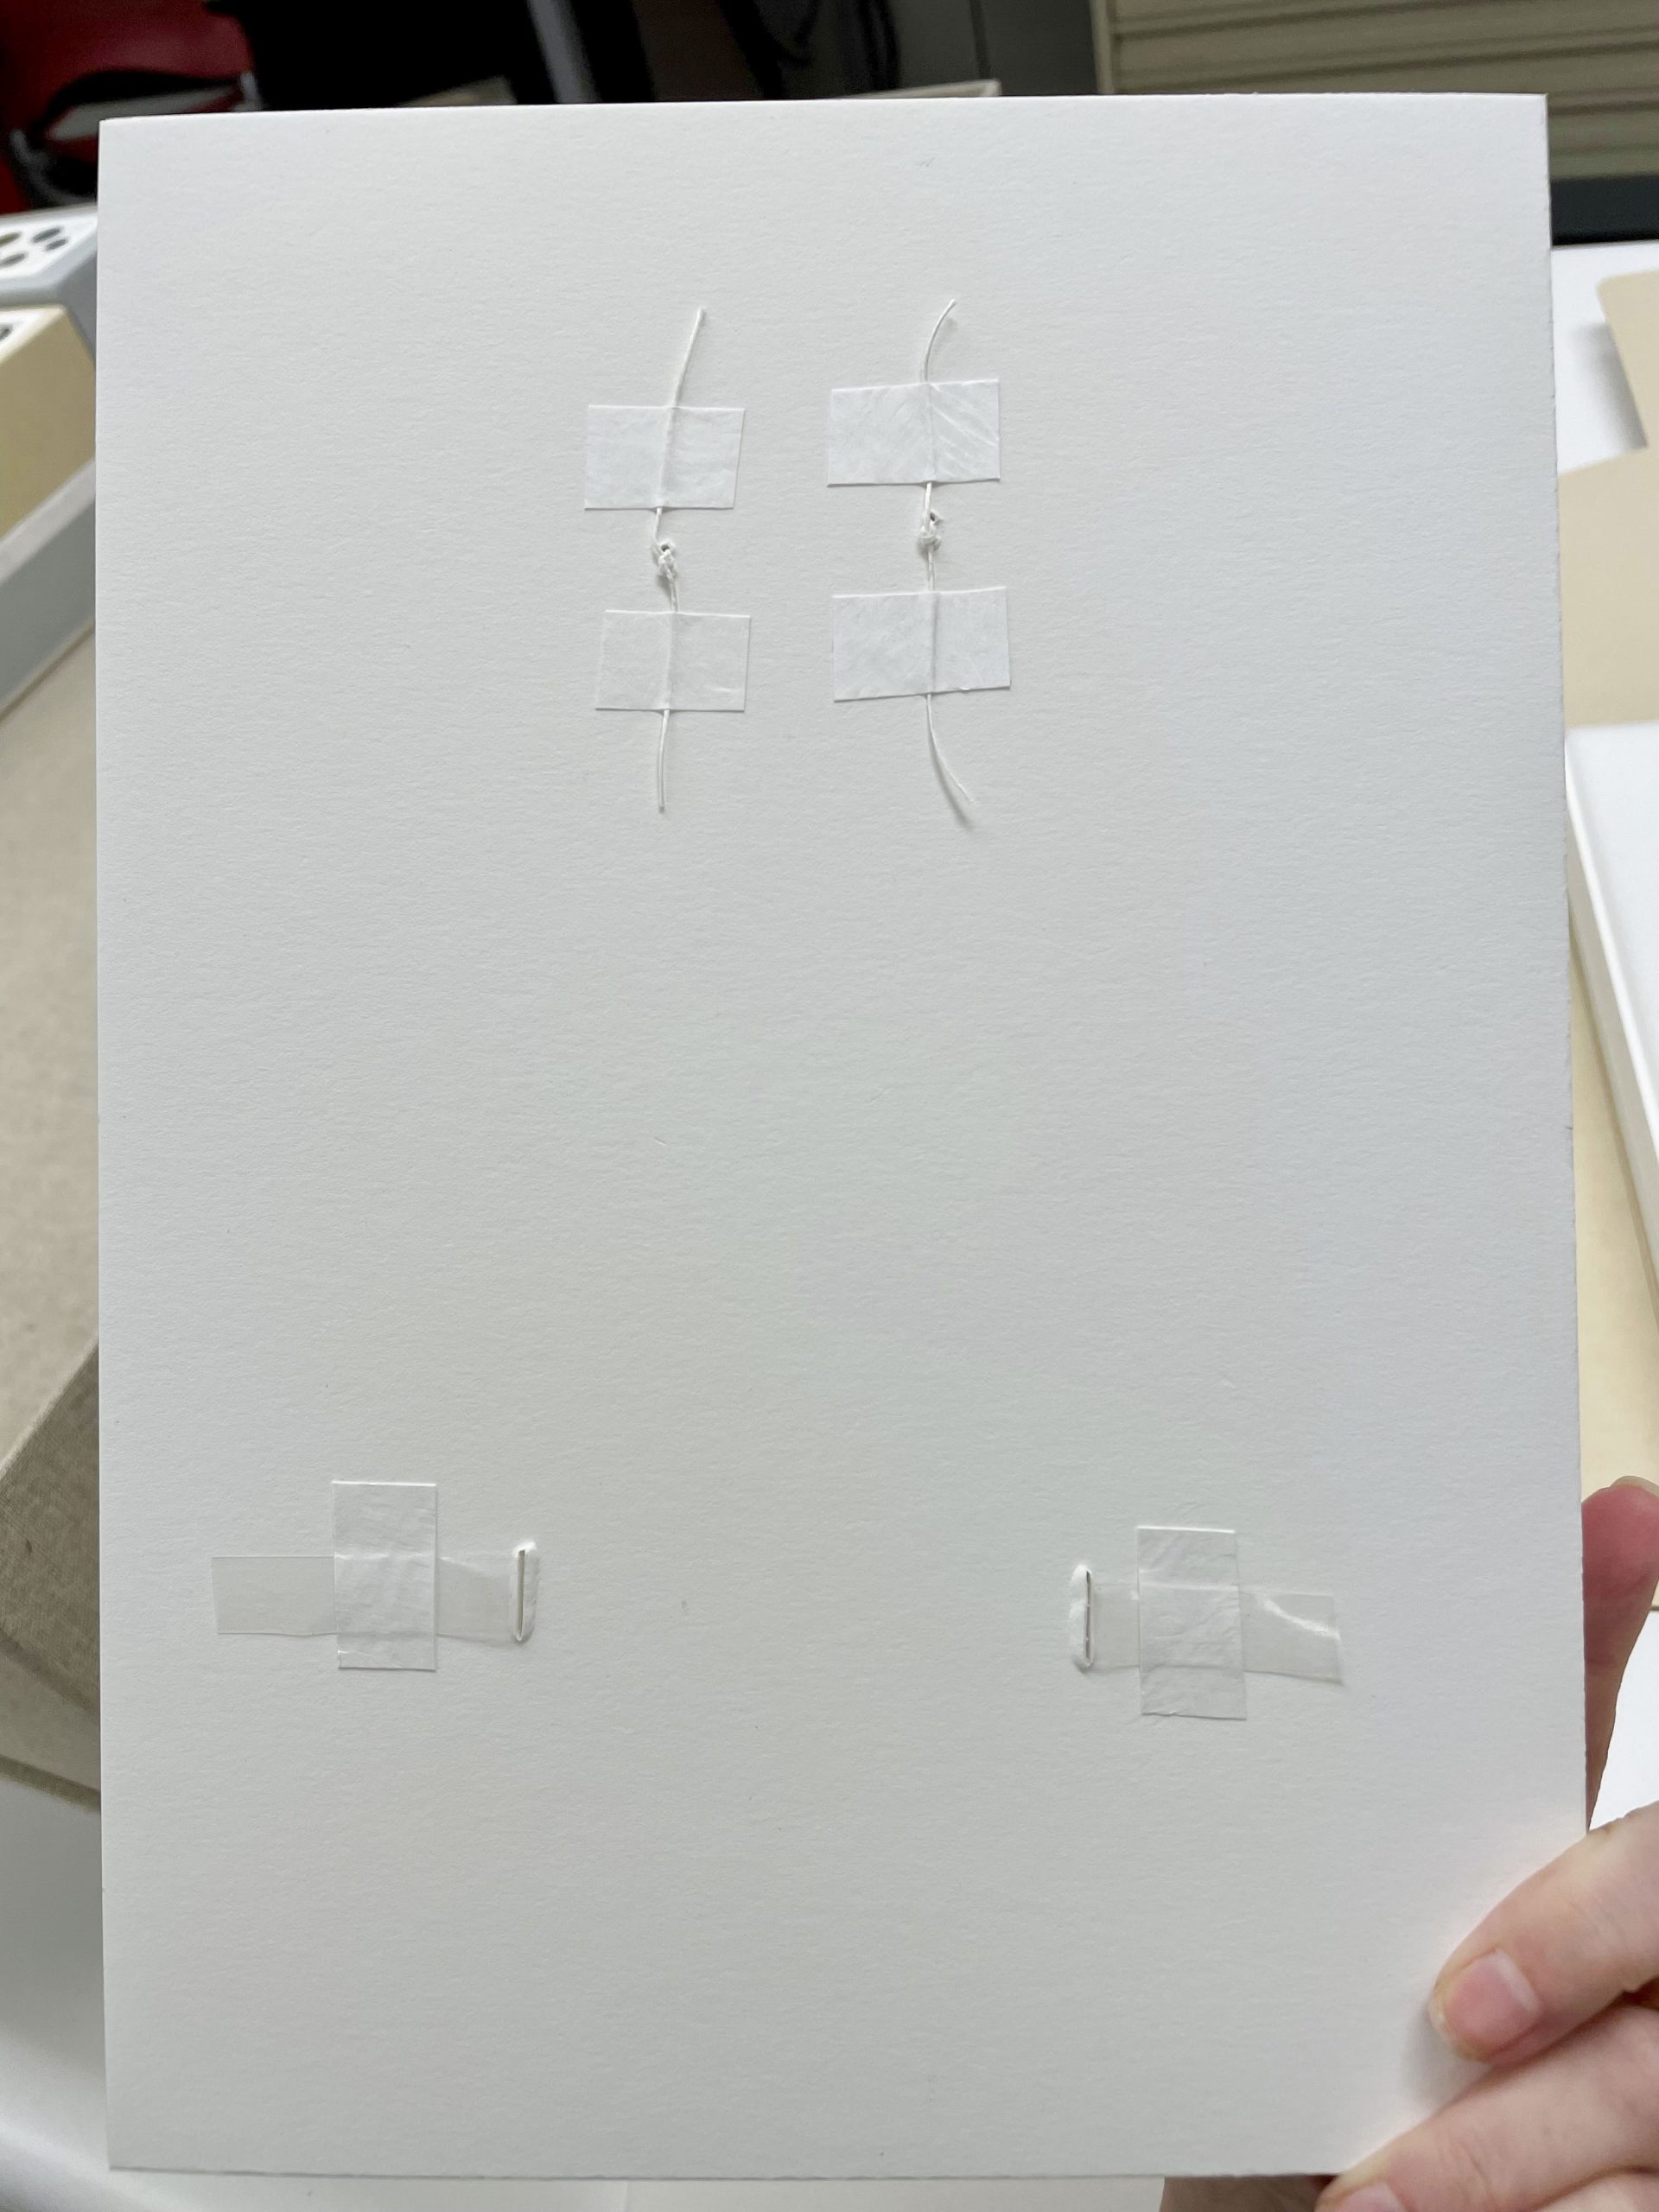
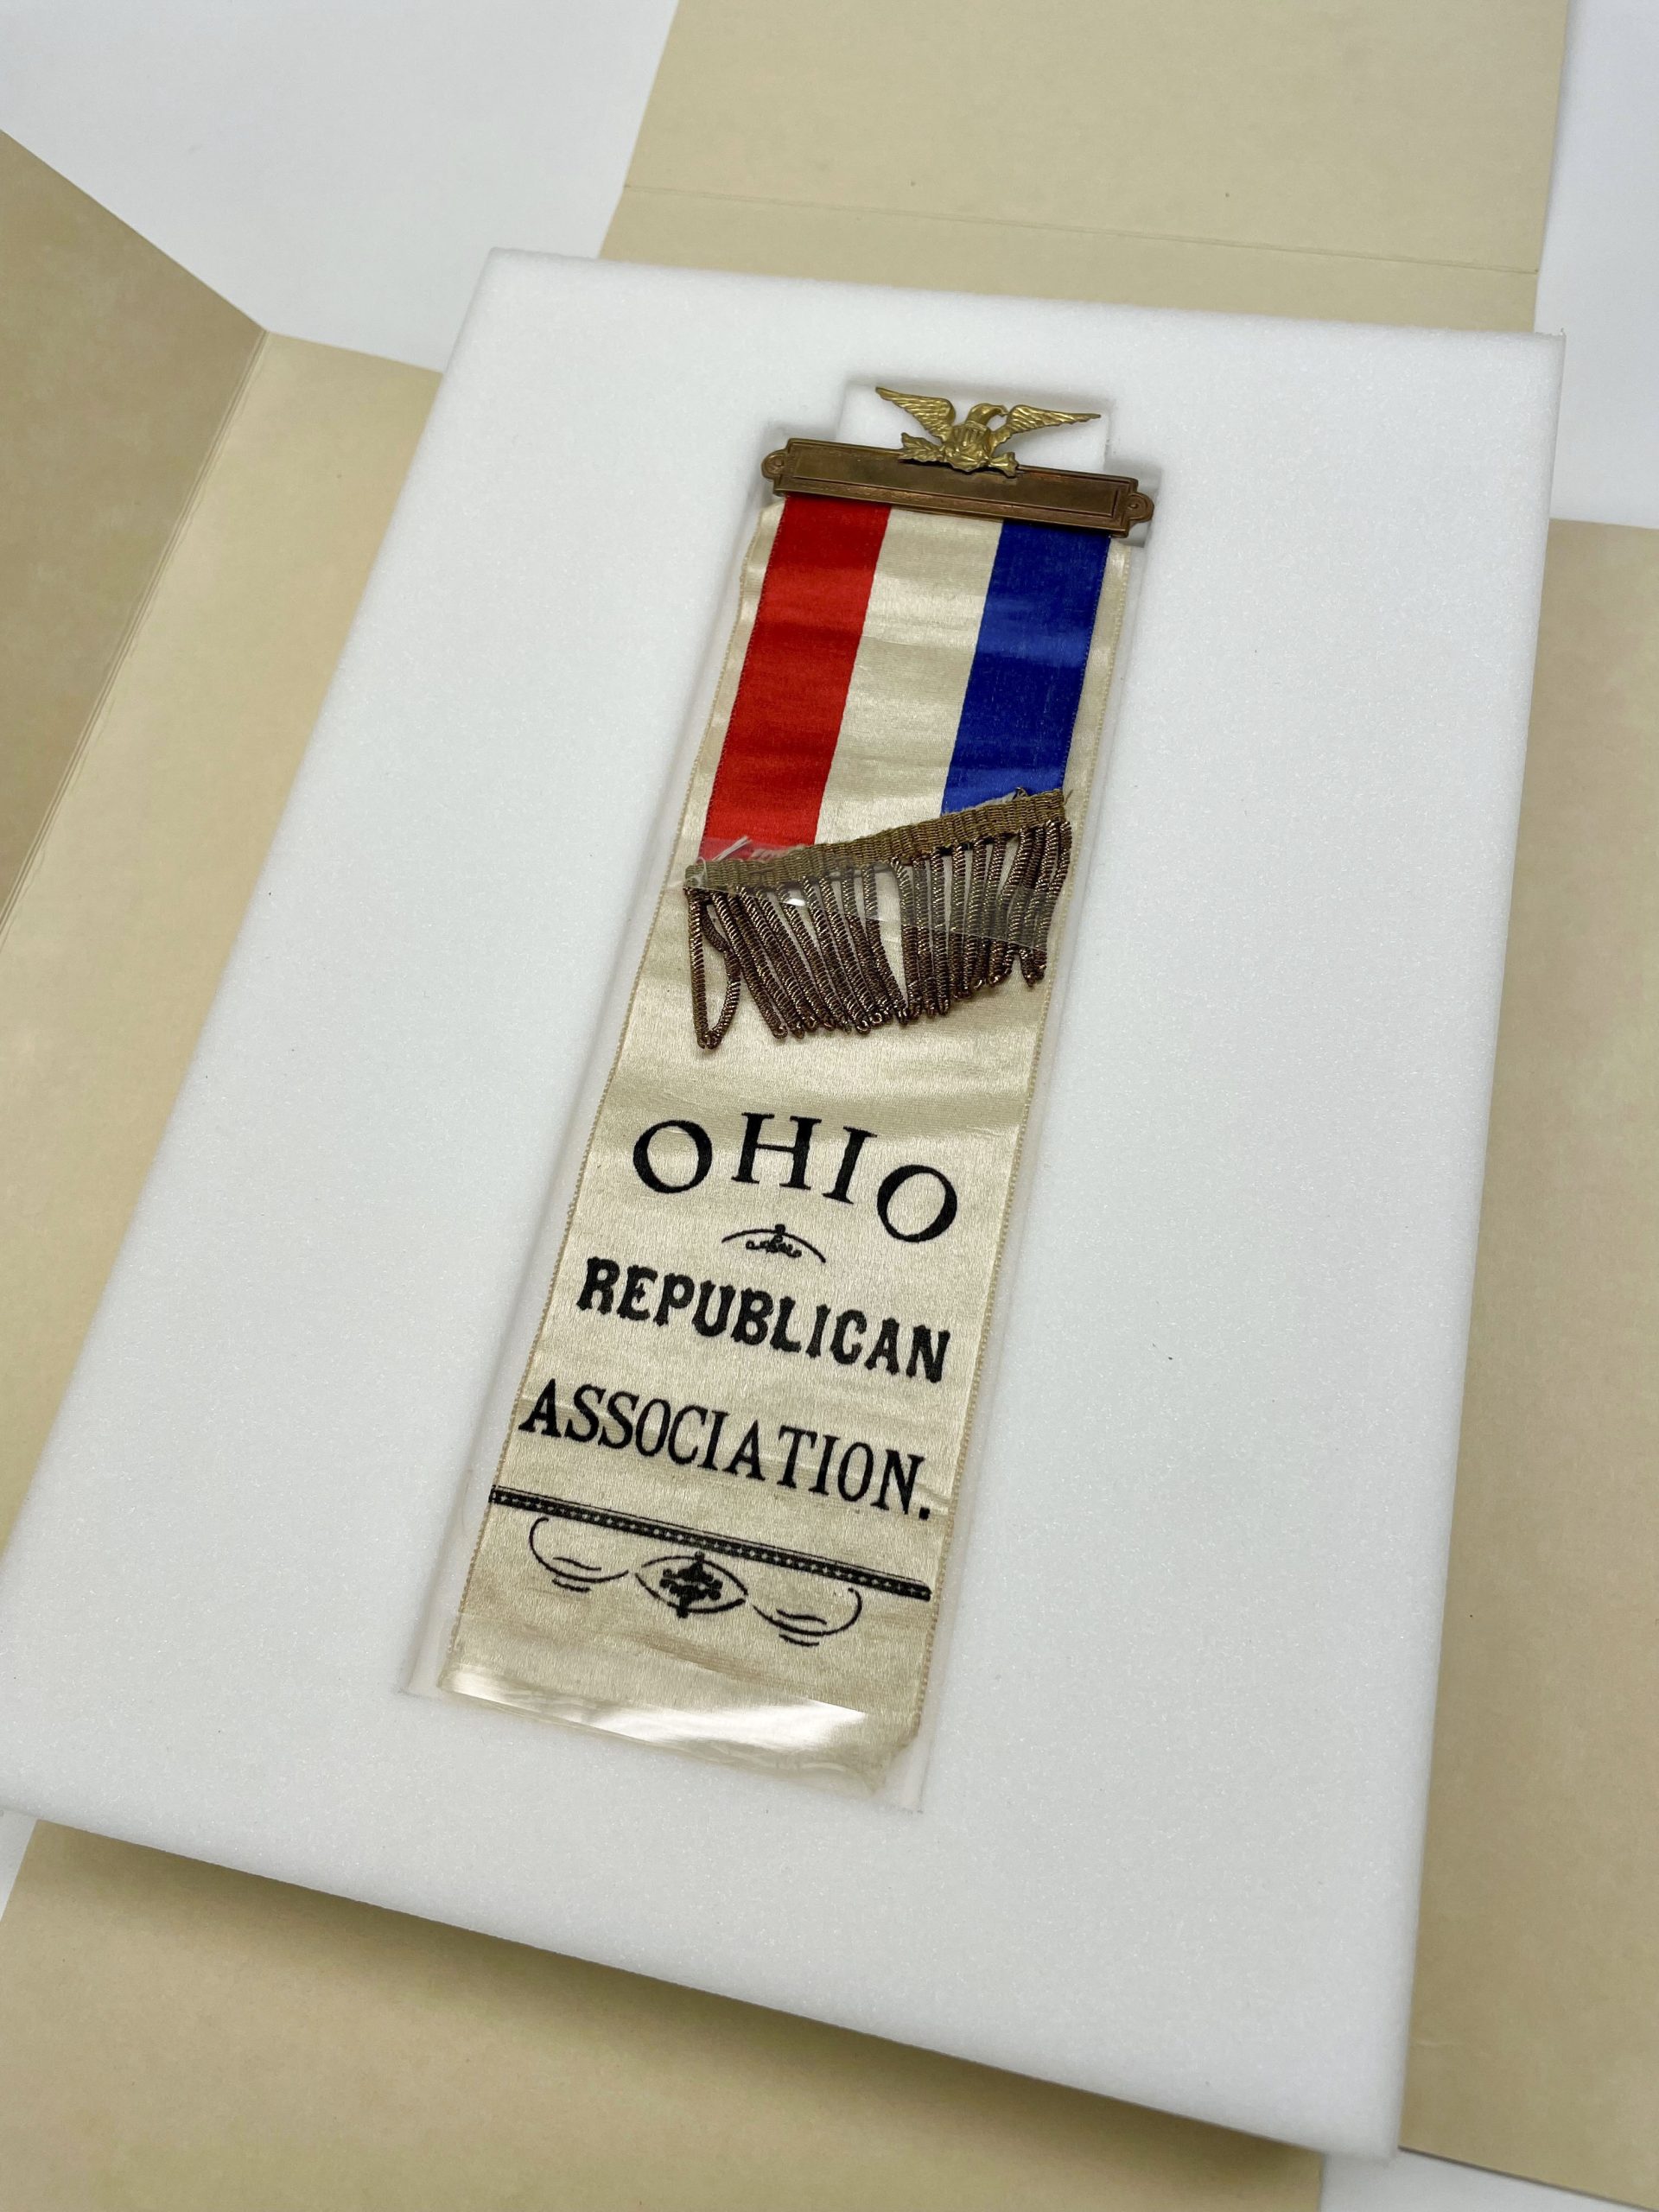
Many of the ribbons were adorned with metal parts such as metal tassels, anchors, eagles or portraits embossed on discs like coins. Using the Our Standard ribbon as our standard for mounting (see image below), the ribbons were stored similarly, but with slight variations. Our Standard was first protected within a polyethylene foam custom cut spacer. The metal eagle pin was then secured to the mat board backing with 18/3 linen thread. After looping around the pin, the thread was threaded through holes punched in the mat board backing. Tyvek tape sealed the thread knot at rear. To hold the unruly metal tassels securely to the mat, a 3/16 inch polyethylene strap was inserted into slits cut into the mat board backing and was secured on the back with Tyvek tape.
‘Our Standard’ ribbon used as a guide
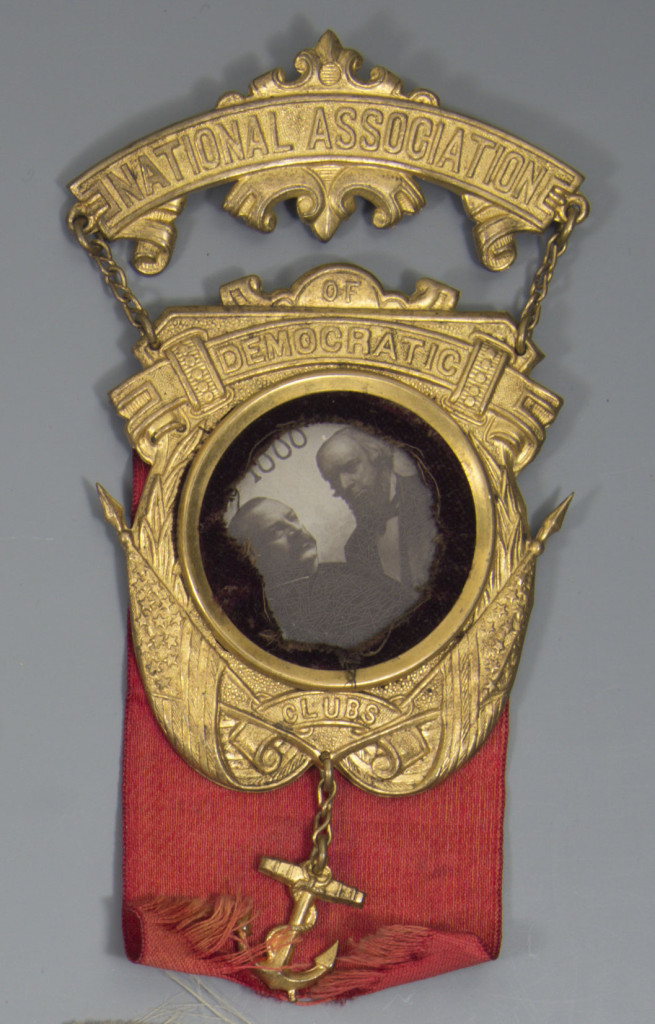
Similarly, Chris mounted a Democratic metal with an anchor using 18/3 linen thread tied to the mat board mount. In addition, a scrap of a CoLibri jacket was repurposed and customized into a large polyester strap. It was placed between the metal anchor and ribbon to prevent abrasion as the anchor is affixed by a small chain and swings freely upon the ribbon.
This frayed ribbon needed protection from a metal anchor attached to a chain.
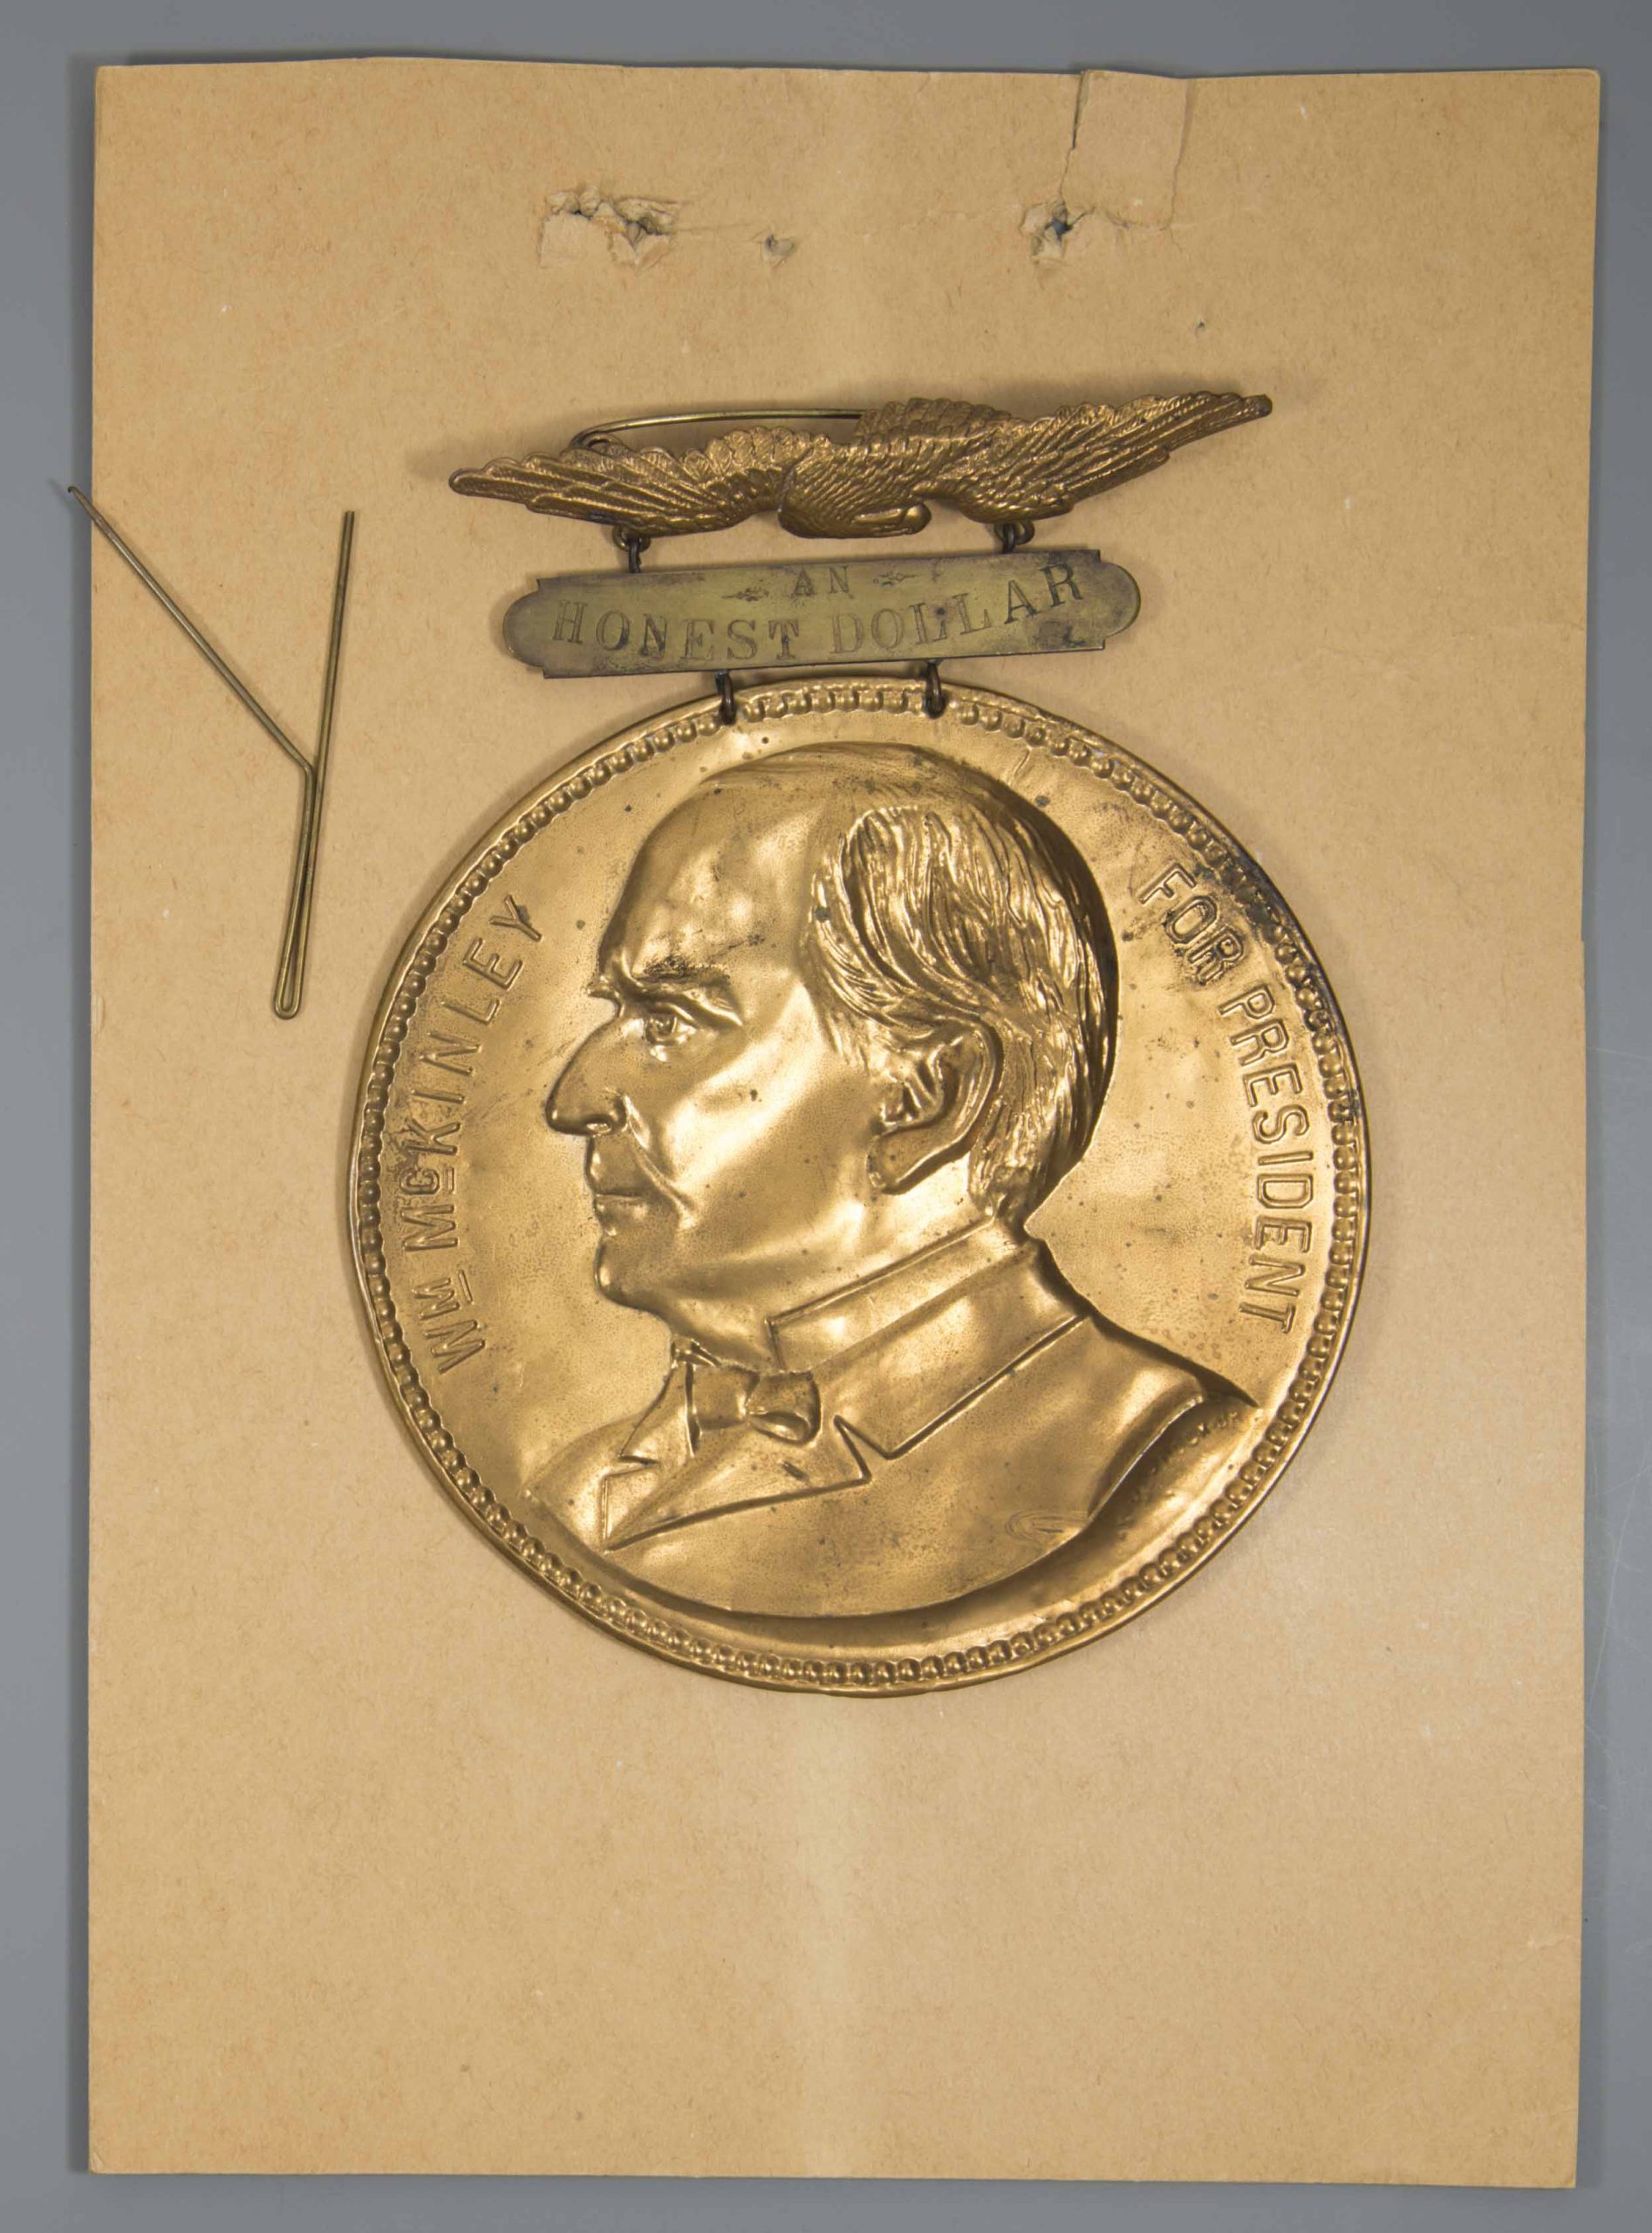
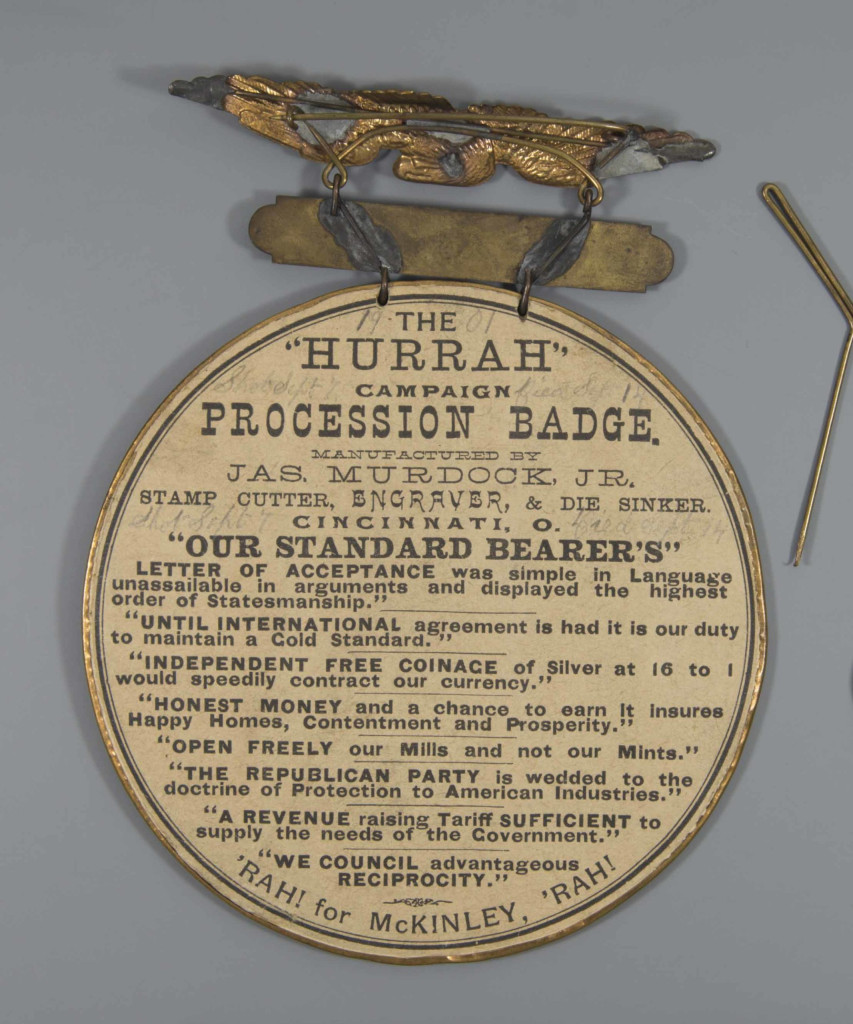
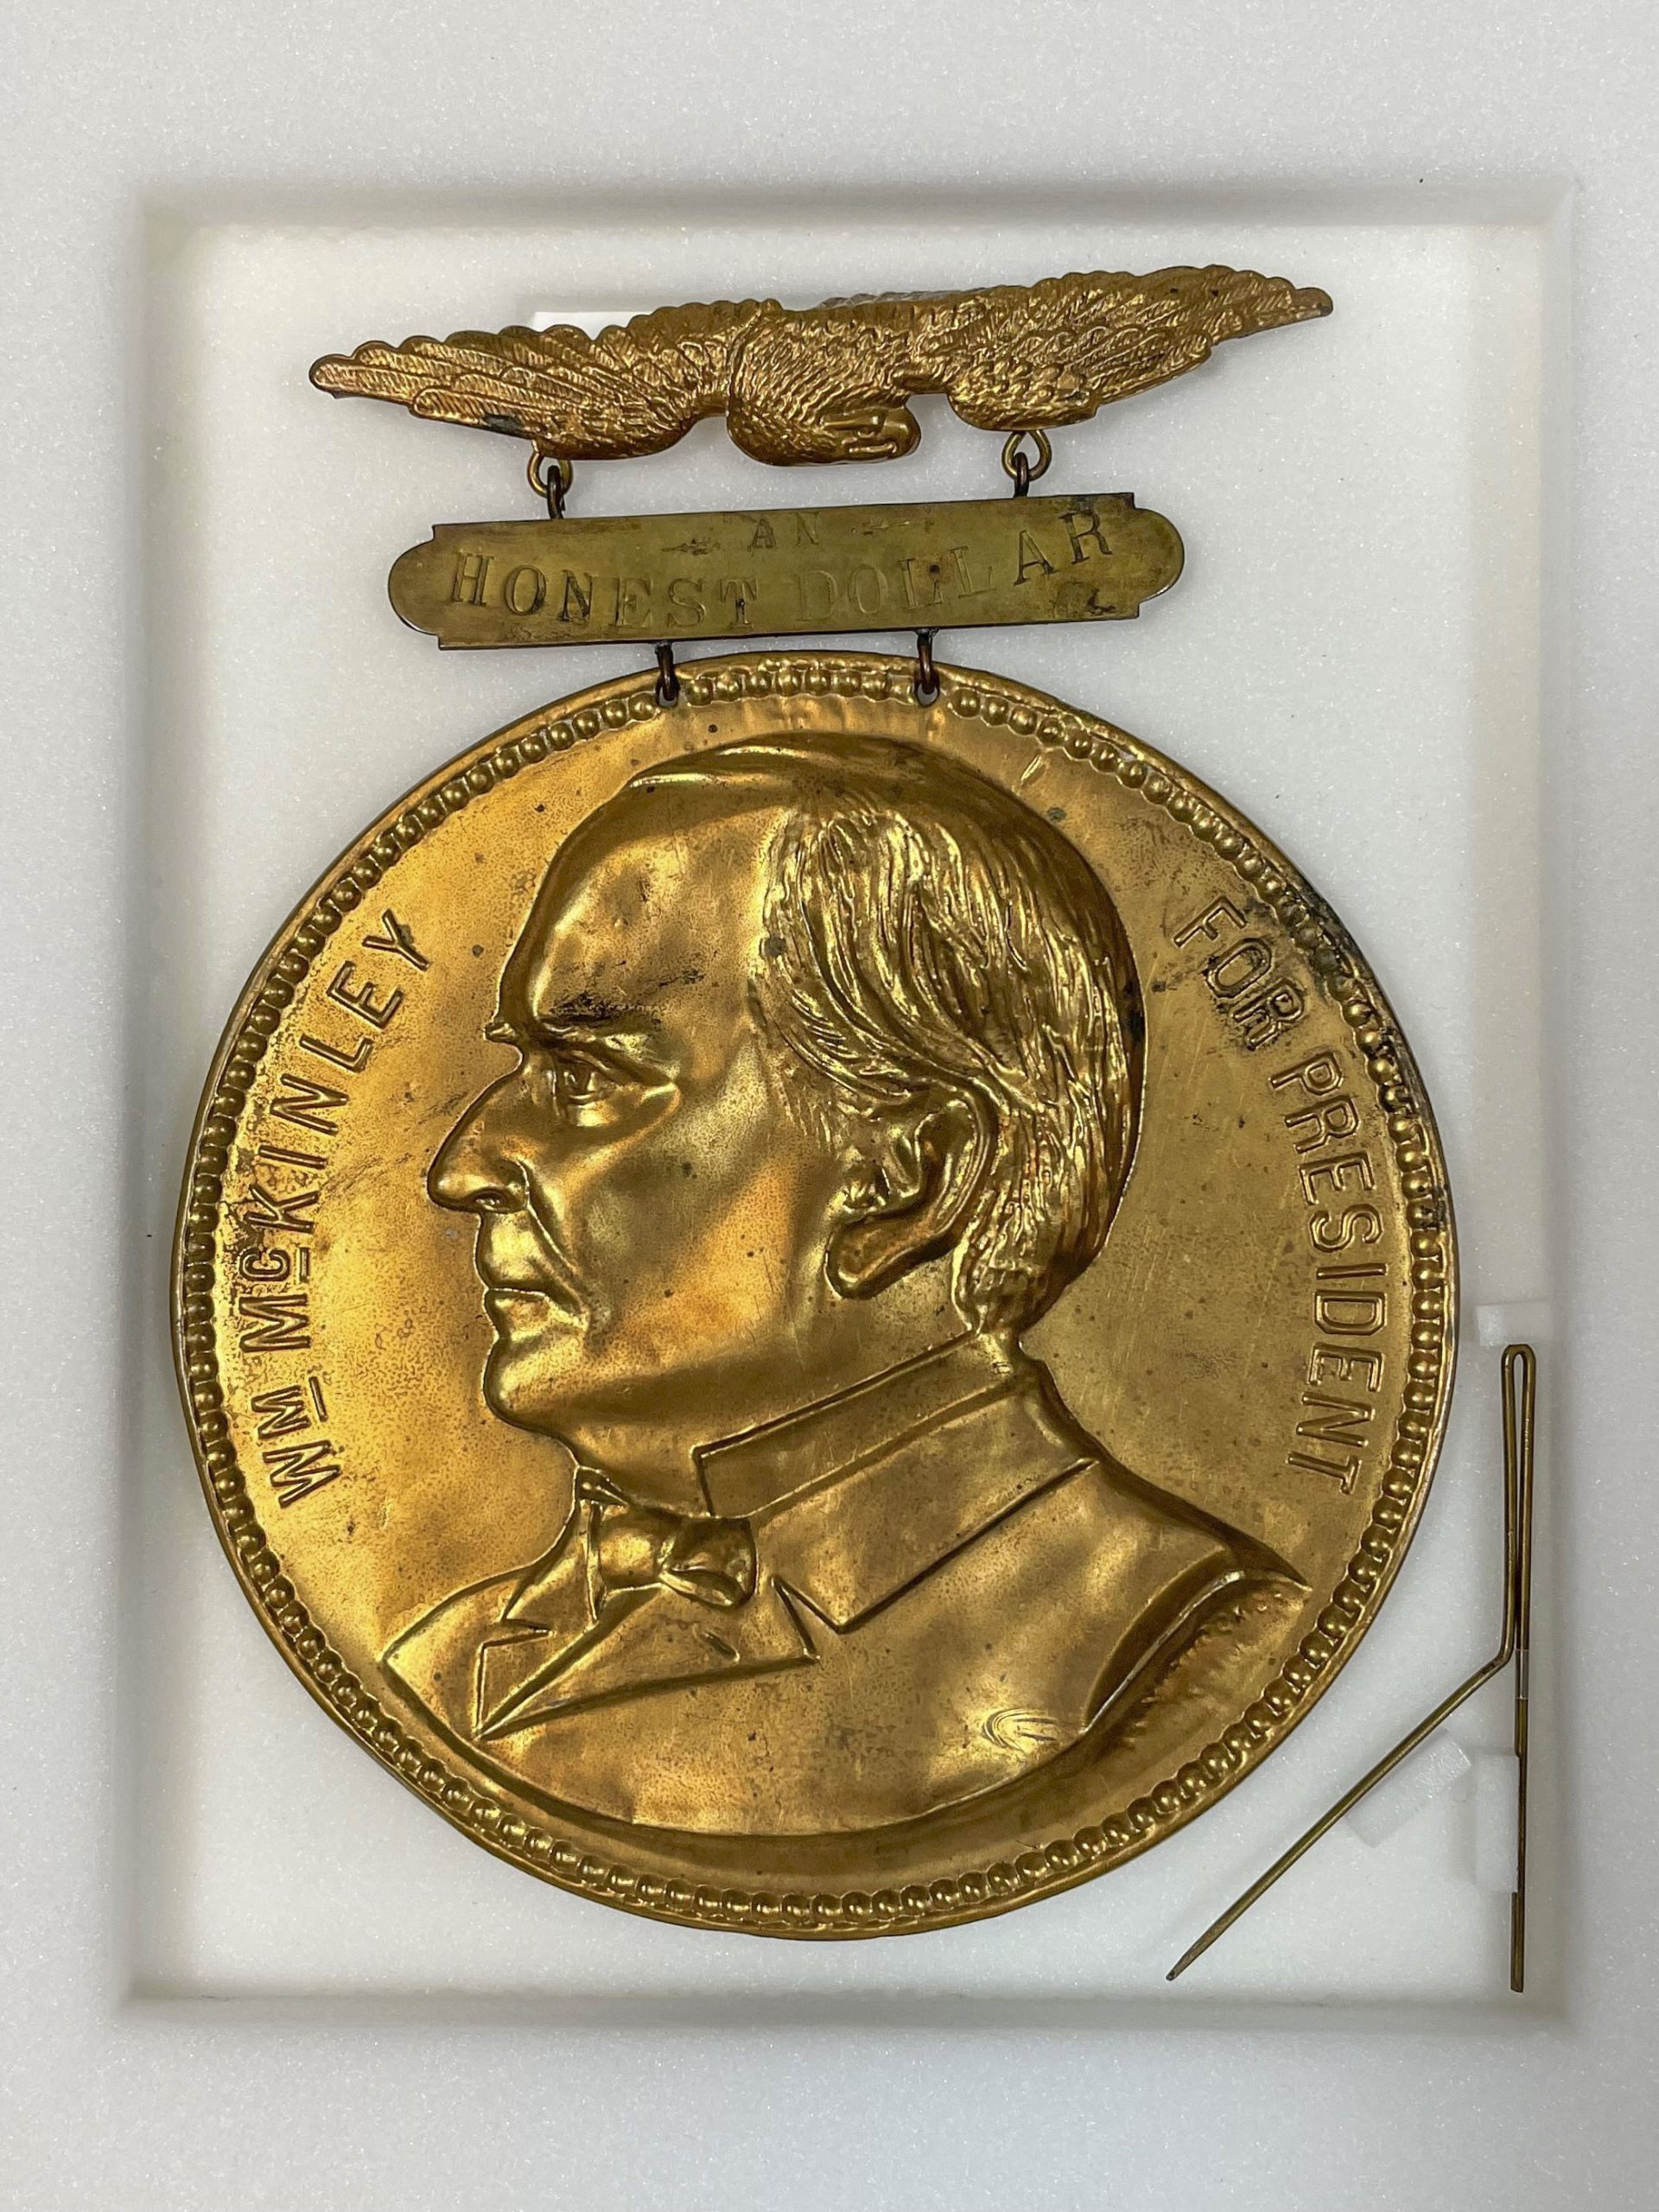
The largest item, a six-inch diameter coin with the bust of McKinley, was sewn to the mat board as previously described; however, this big old coin also came with a detached pin. Chris creatively added it to the corner with tiny spacers and polyethylene straps.
Before mountingAfter mounting
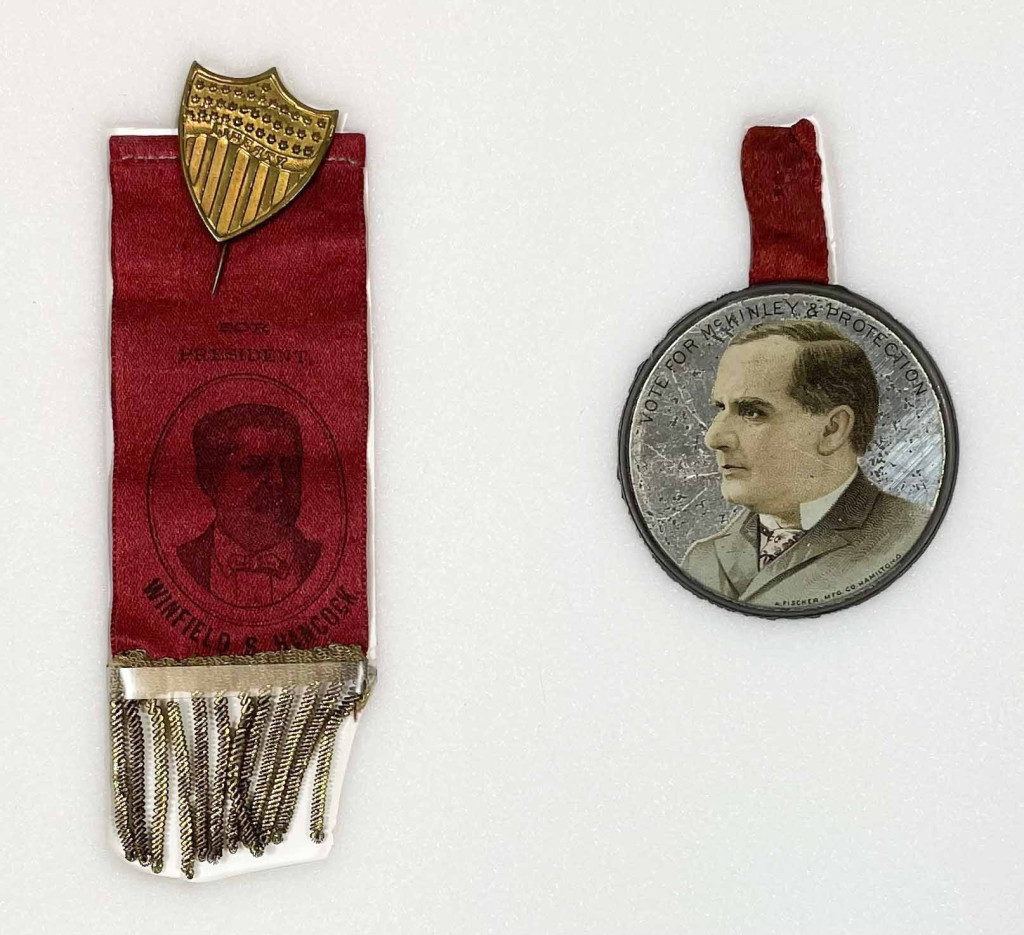
A smaller McKinley medallion was tension mounted alongside another small presidential ribbon. No other mounting solution was needed for this round object other than a circular cut-out in the foam that held the object snugly in place.
The round McKinley medallion was secured with tension inside a circular foam cutout.
Flat Ribbons vs. 3-Dimensional Ribbons
Flat silk ribbons without any added pins or components were stored flat within folders of unbuffered interleaving tissue. The folders were placed on top of unbuffered rag mat board for storage. To prevent the folders from sliding off the mat board when handled, polyethylene strapping was wrapped around the boards and adhered to itself with double stick tape (similar to strapping a book). In the future, the ribbons could be pulled out of the folders and exhibited on the provided mat board supports with the strapping.
Flat ribbons were stored in unbuffered interleaving.
Ribbons with dimensionality were stored with extra layers of foam surrounding them. The foam was built up to the height of the highest point of the object to prevent them from getting knocked during storage. Ribbons also needed interior supports to keep their shapes over time, and to prevent the fabric from flattening. In these cases, unbuffered interleaving tissue was inserted below cloth badges with pleated cloth. Rolls of polyester film were also inserted inside the loops of a black cloth ribbon. The rolled polyester film is intended for storage and can be removed for display.
Extra supports were added to badges with dimensional fabric parts.
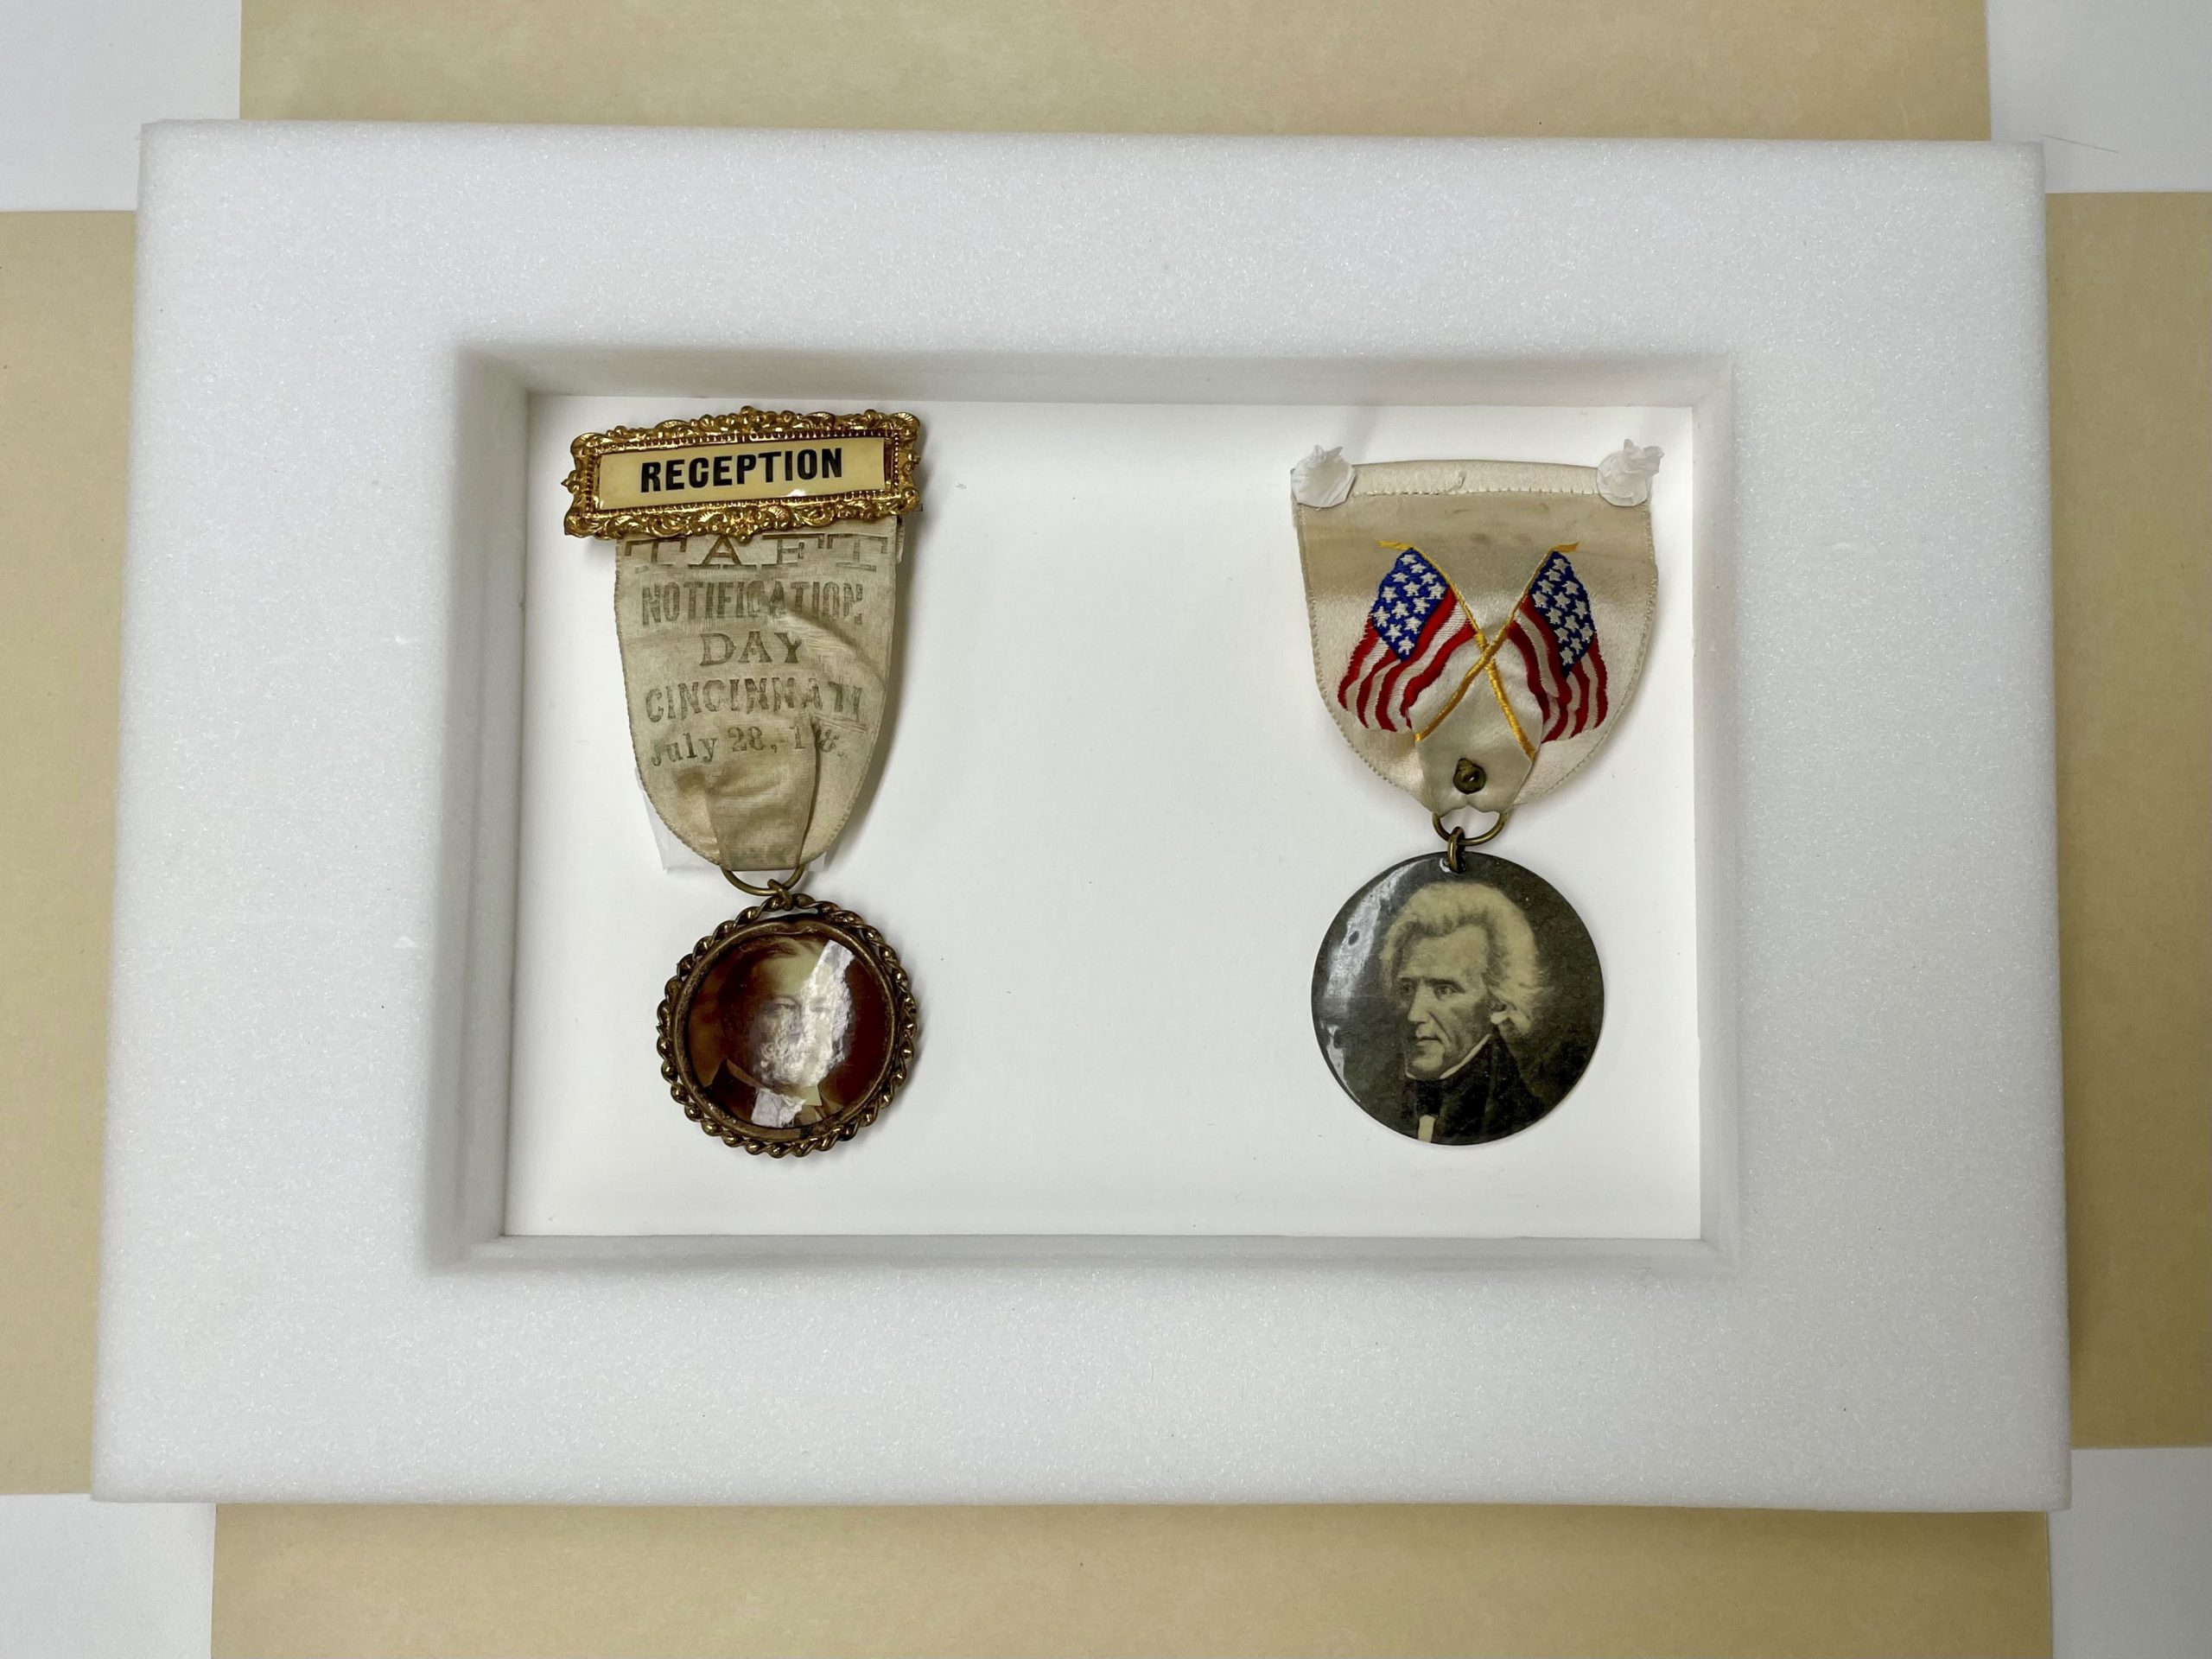
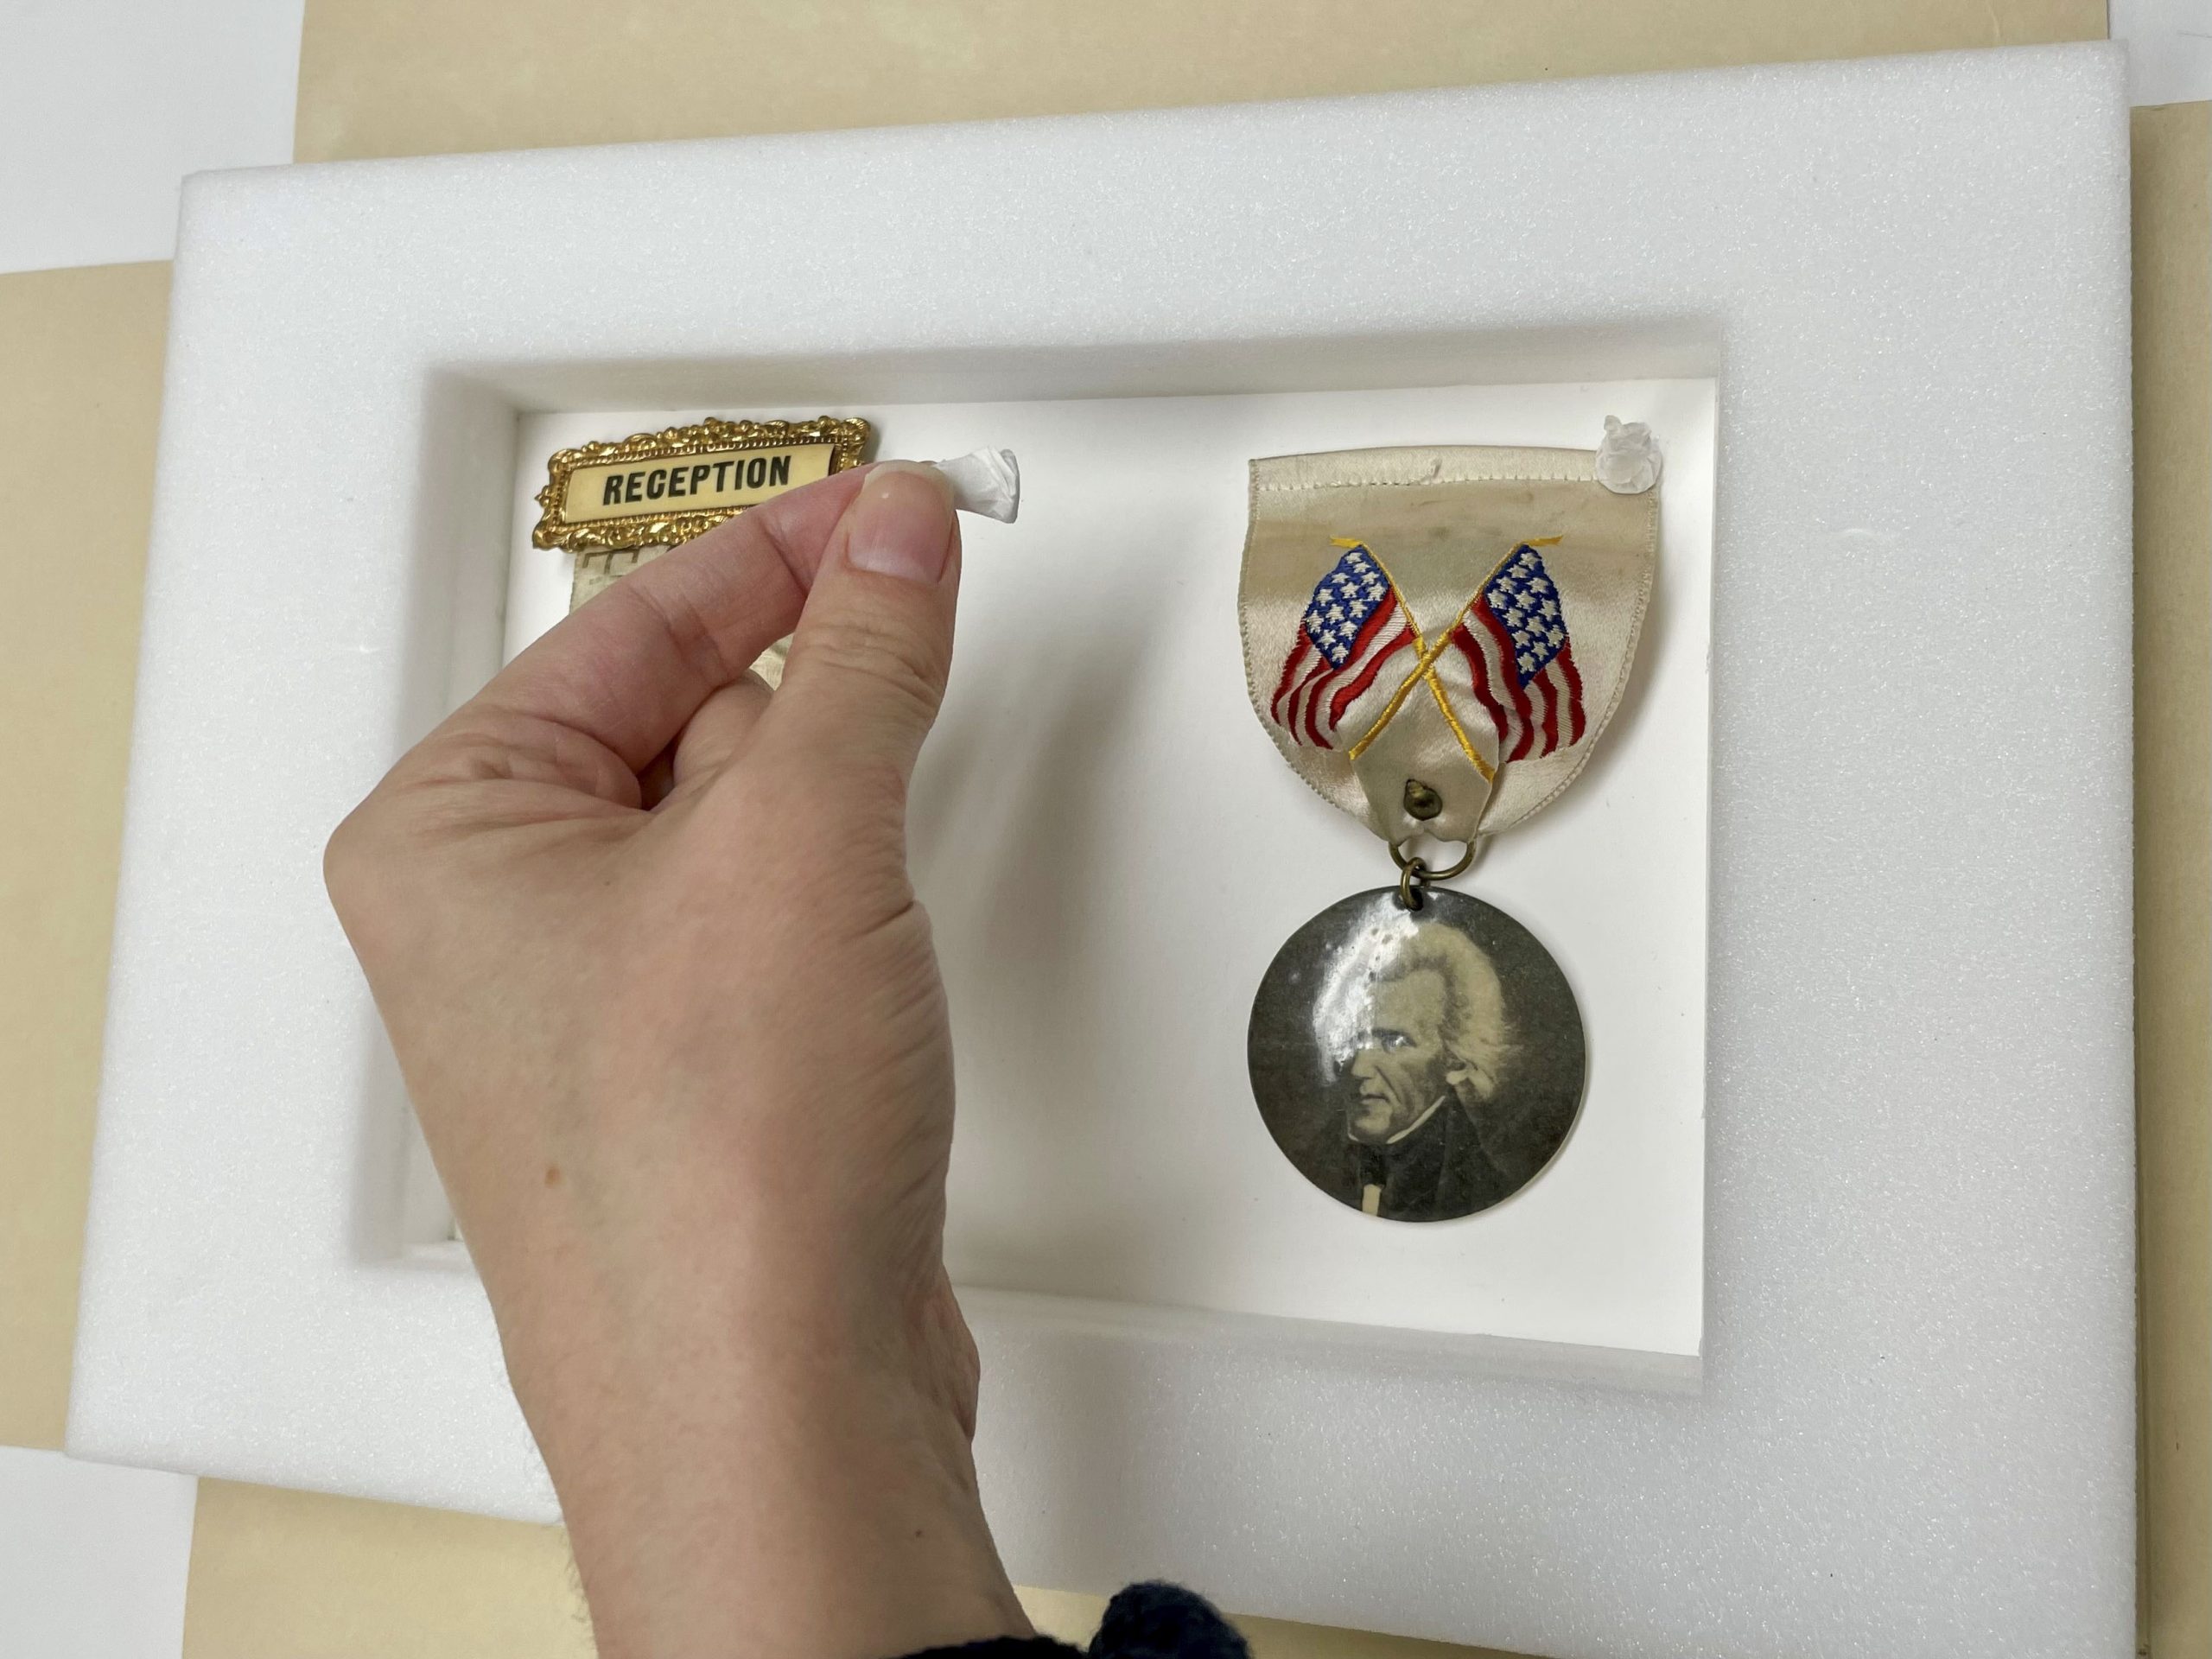
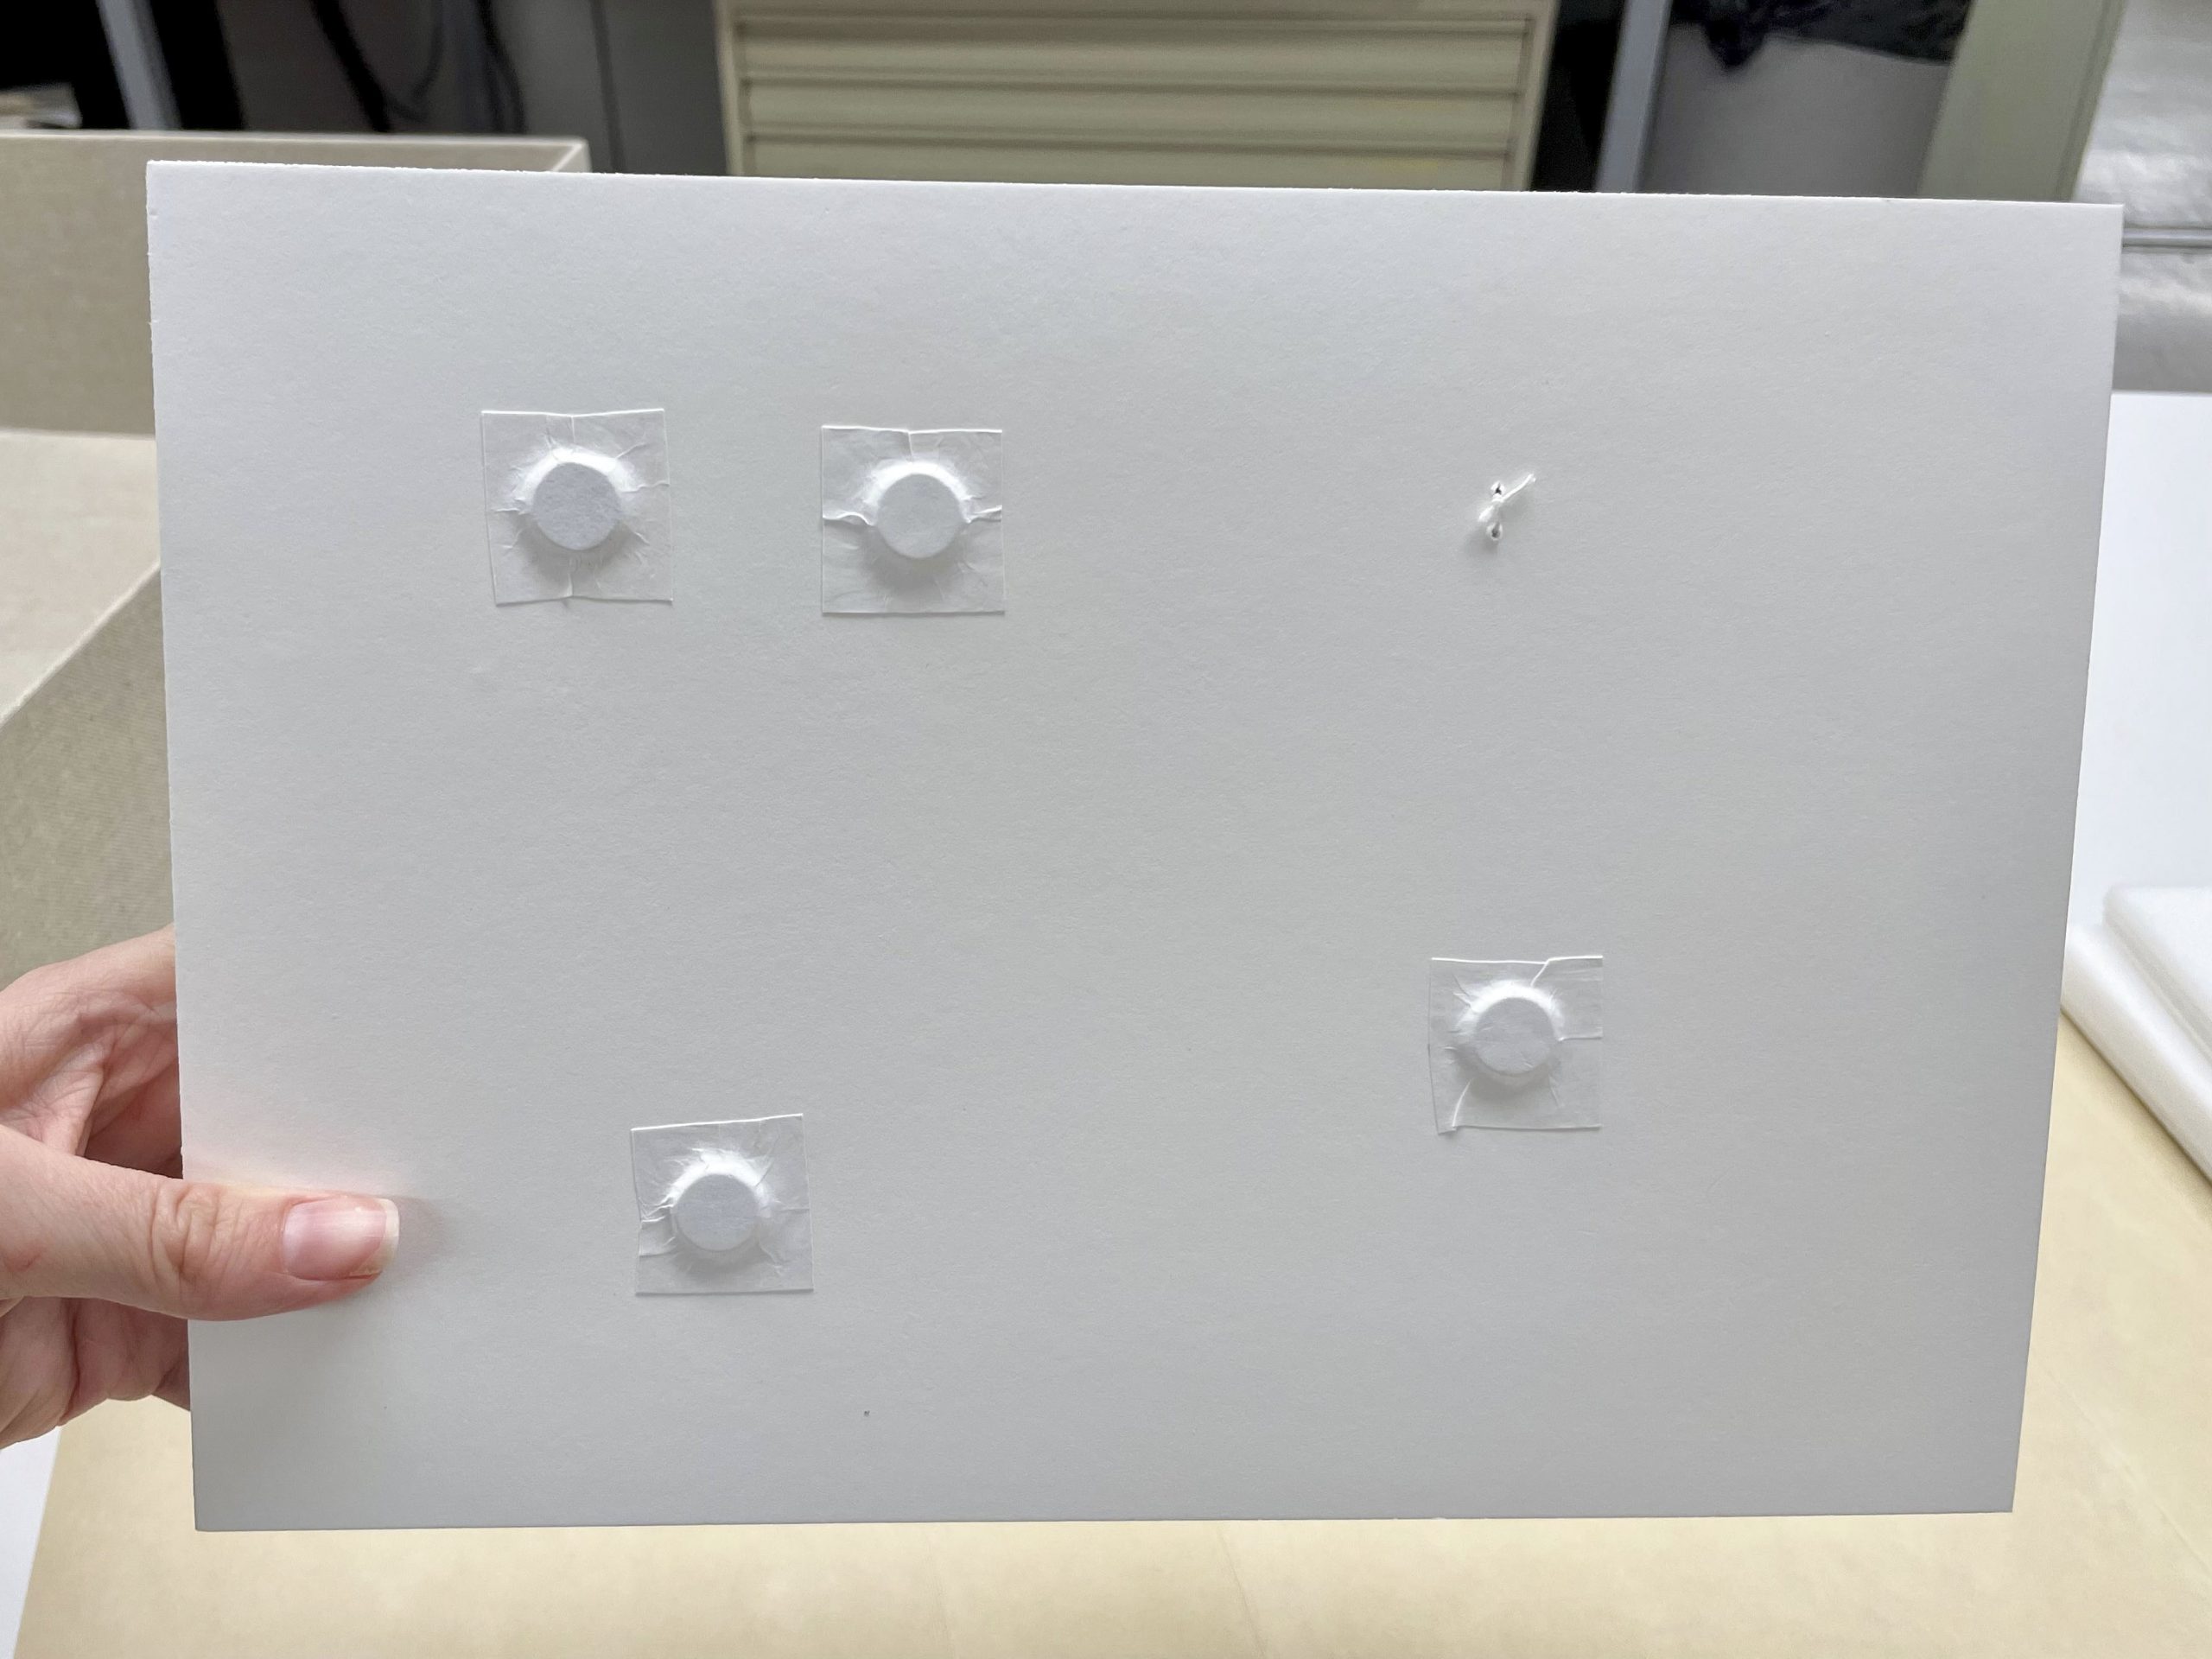
The set of badges with extra dimension were also challenging to mount. They did not have convenient places for strapping or tying with thread. Instead, rare earth magnets were attached to the back of the mats to hold the parts in place. Weak rare earth magnets were also used on the front of Andrew Jackson’s badge. The magnets on the front were wrapped with unbuffered interleaving tissue to provide handles for lifting that can easily be removed for exhibition. Magnets on the back were covered with Tyvek tape. These magnets gave just enough hold to secure these in place for storage.
Magnets helped hold this group of badges to their support.
Buttons
In addition to ribbons, this collection had many buttons, coins and trinkets such as these:
These parts were not matted. Instead, the loose metals and coins were sealed individually in polyethylene bags. Within the bags, the pins and coins were given support with thin cardstock. Because metal objects and photographs share similar long-term preservation needs, buttons were pinned to unbuffered cardstock that is traditionally used for storing photographs. Once bagged, they were grouped together by size and type in preparation for the next phase of boxing.
Metal buttons and badges were pinned to cardstock and sealed from humidity inside baggies.
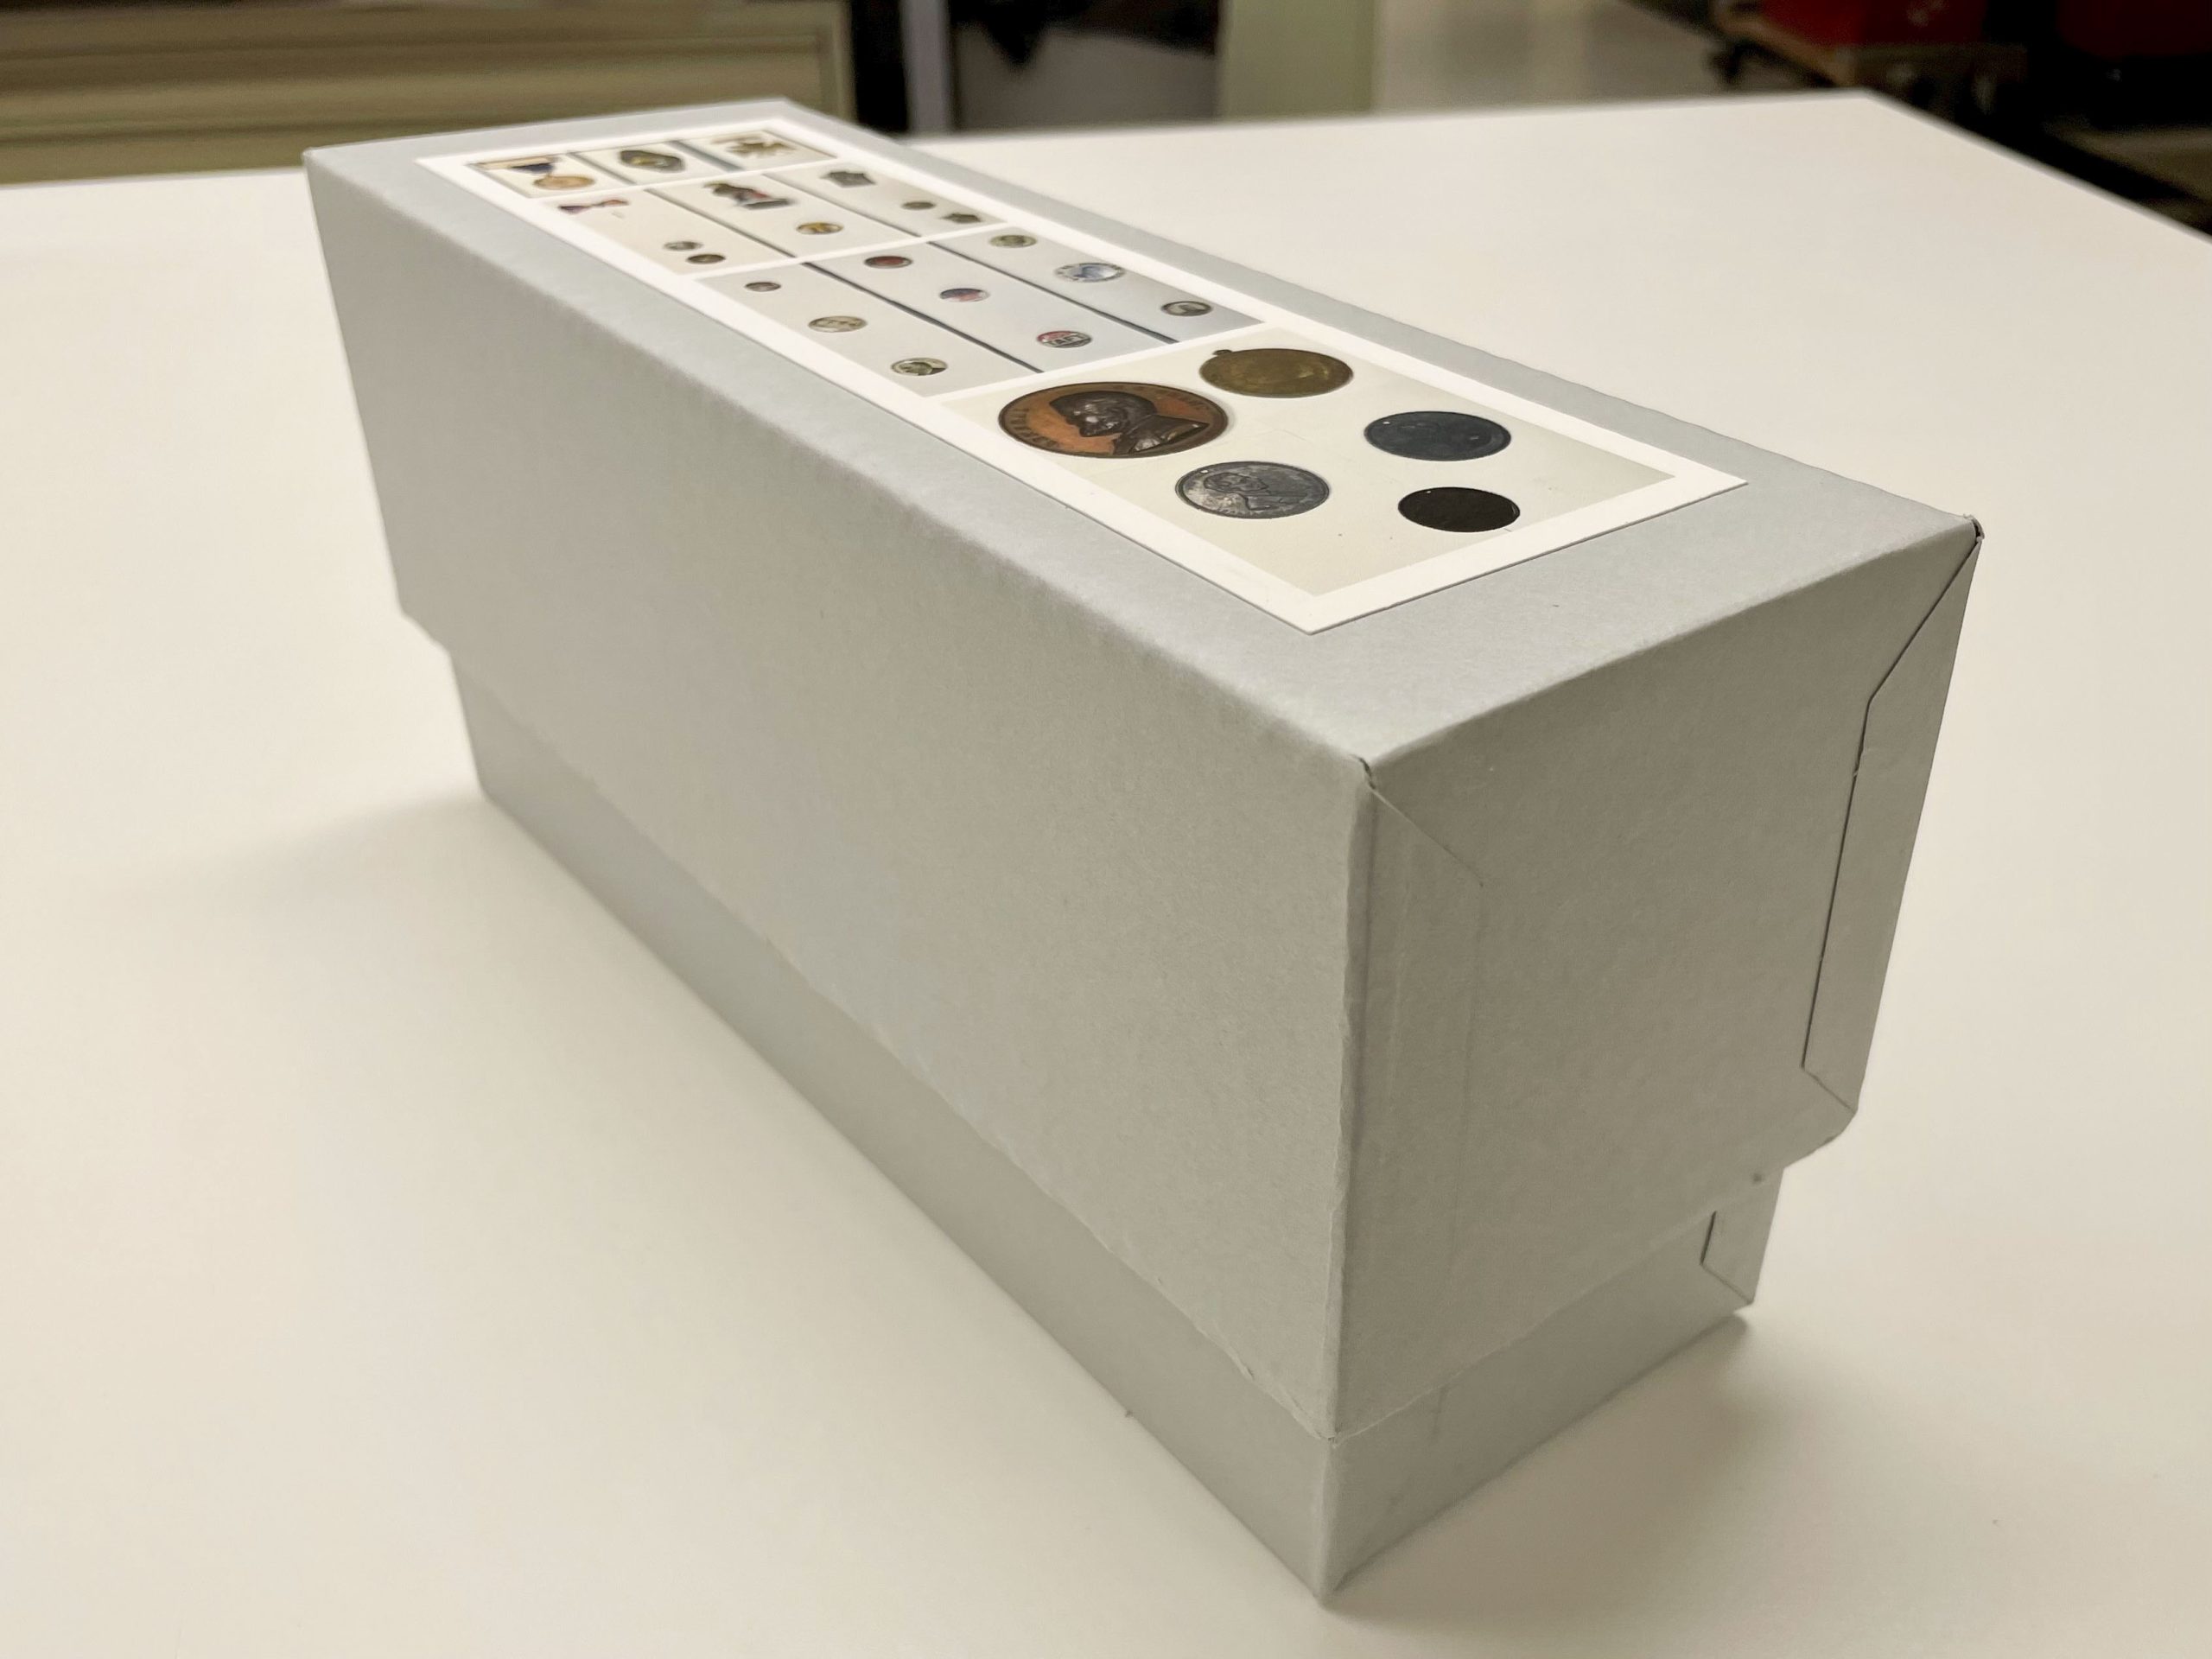
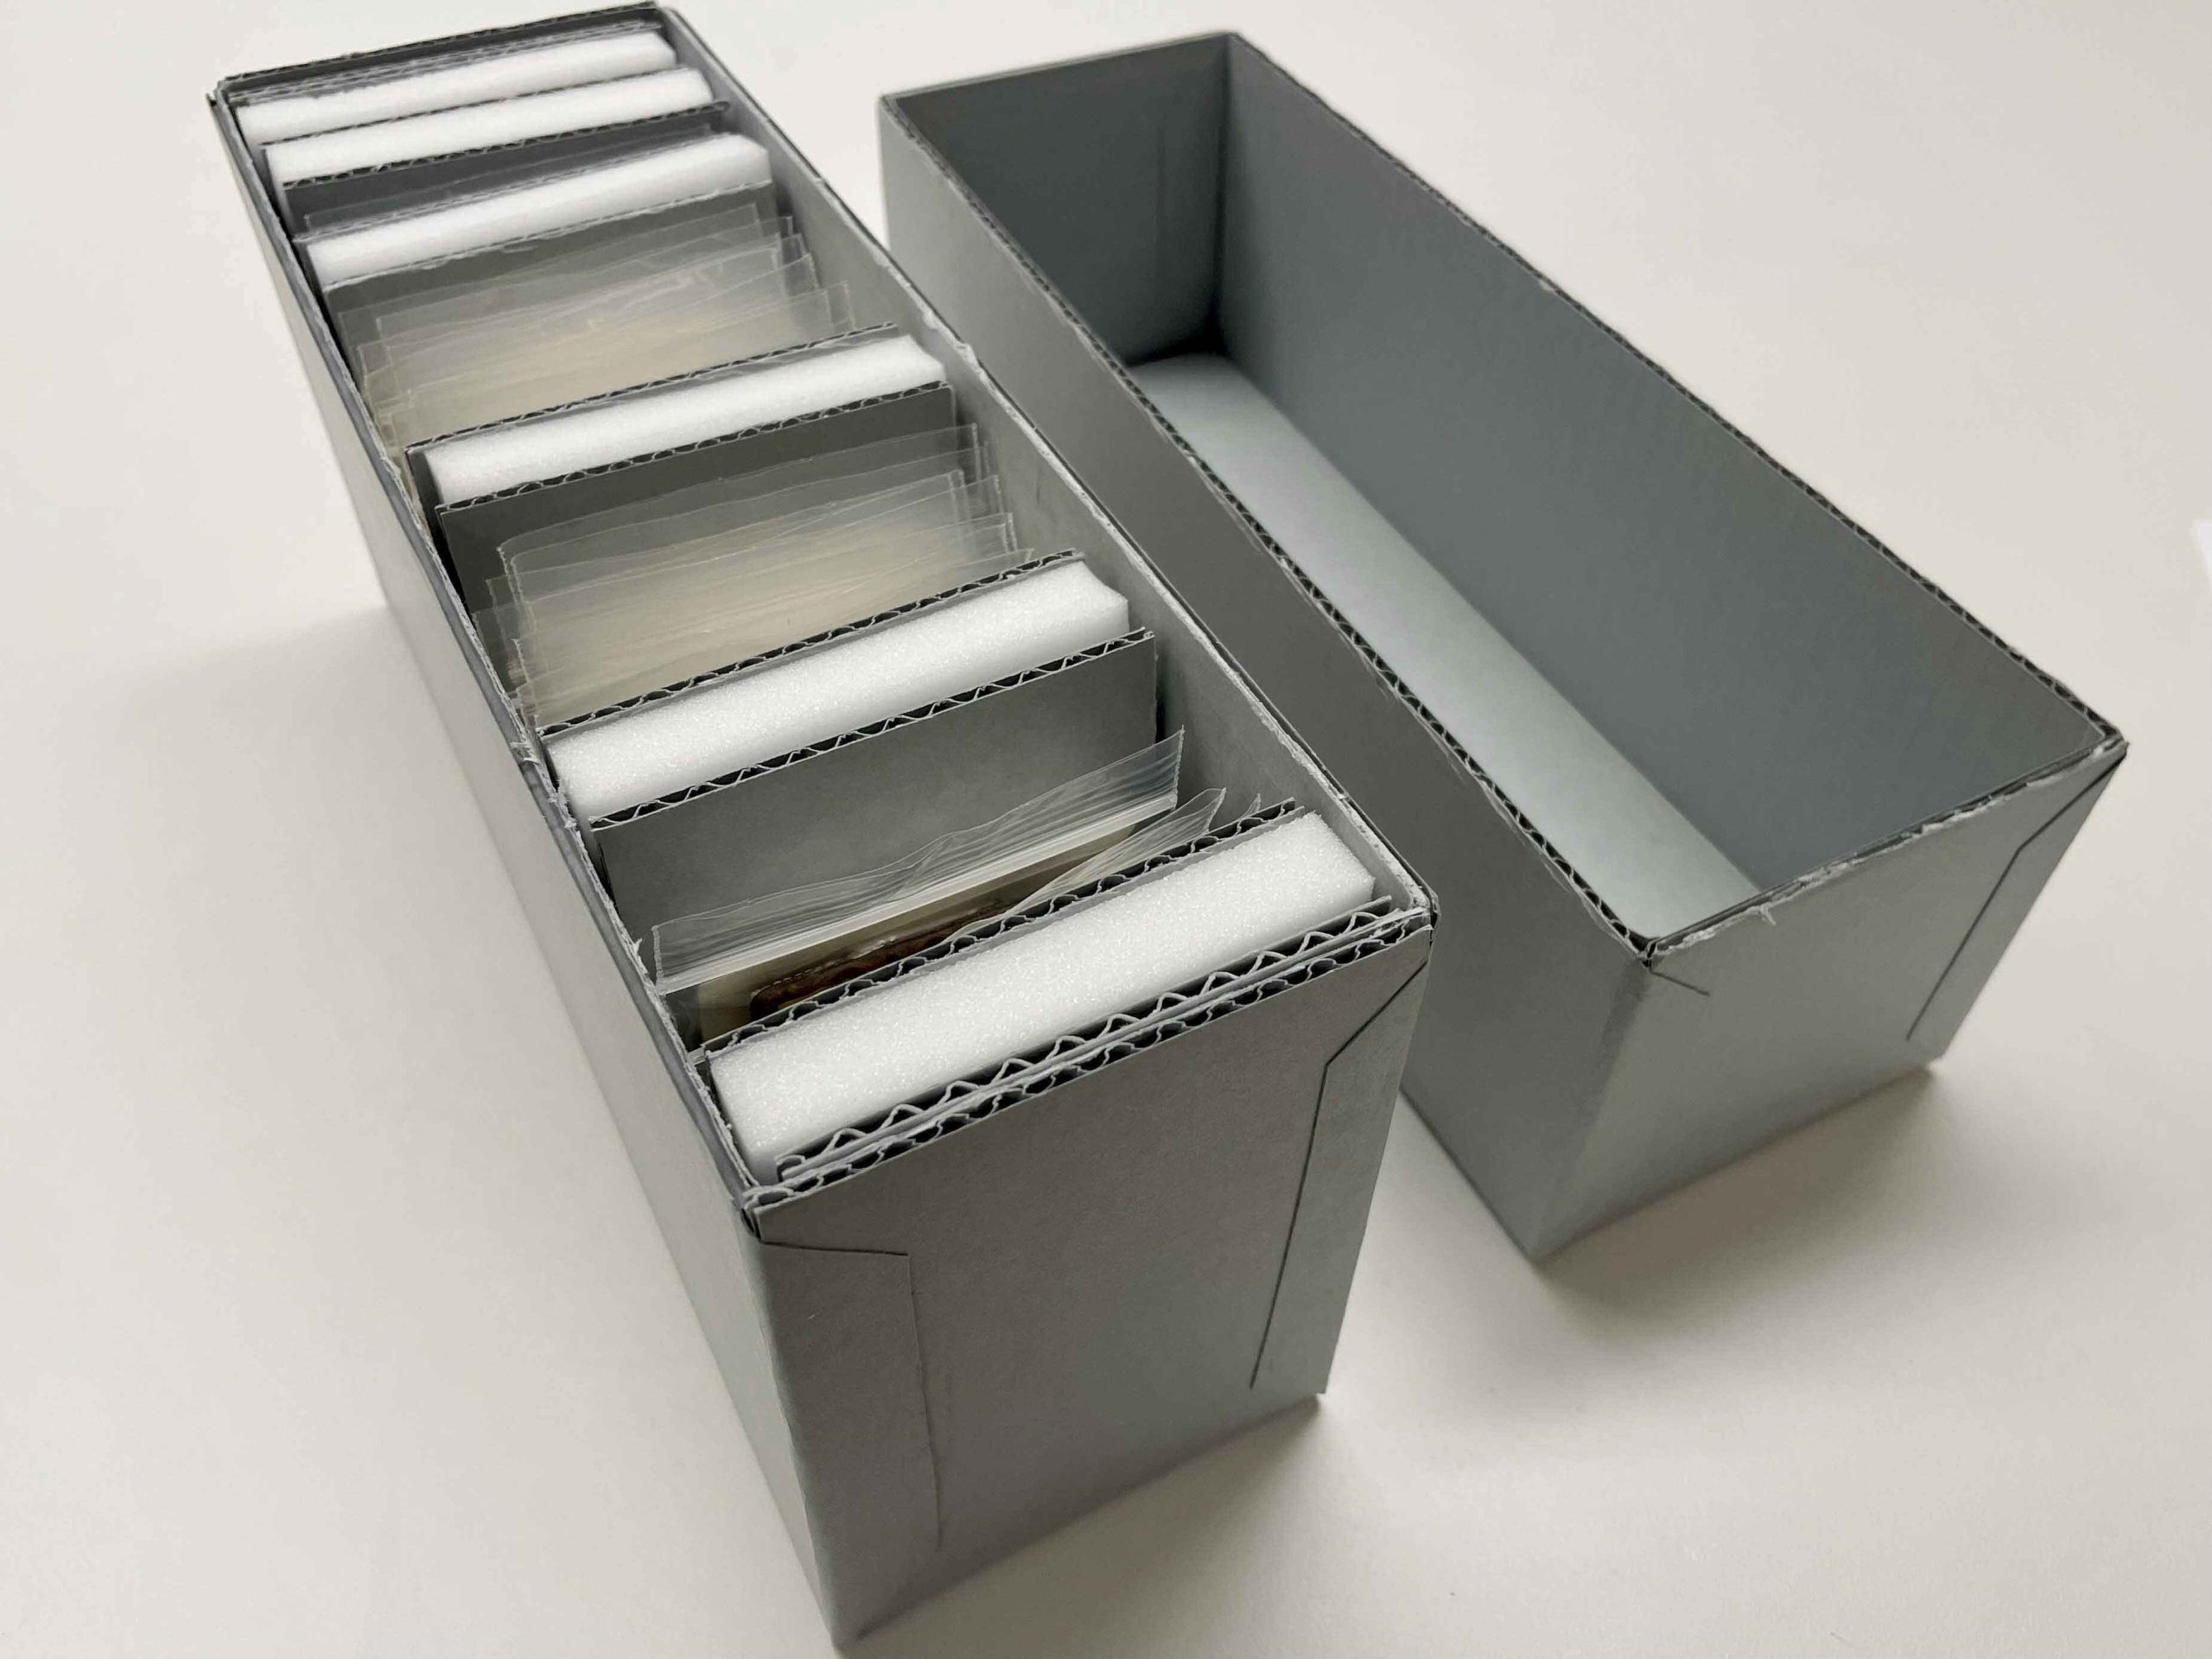
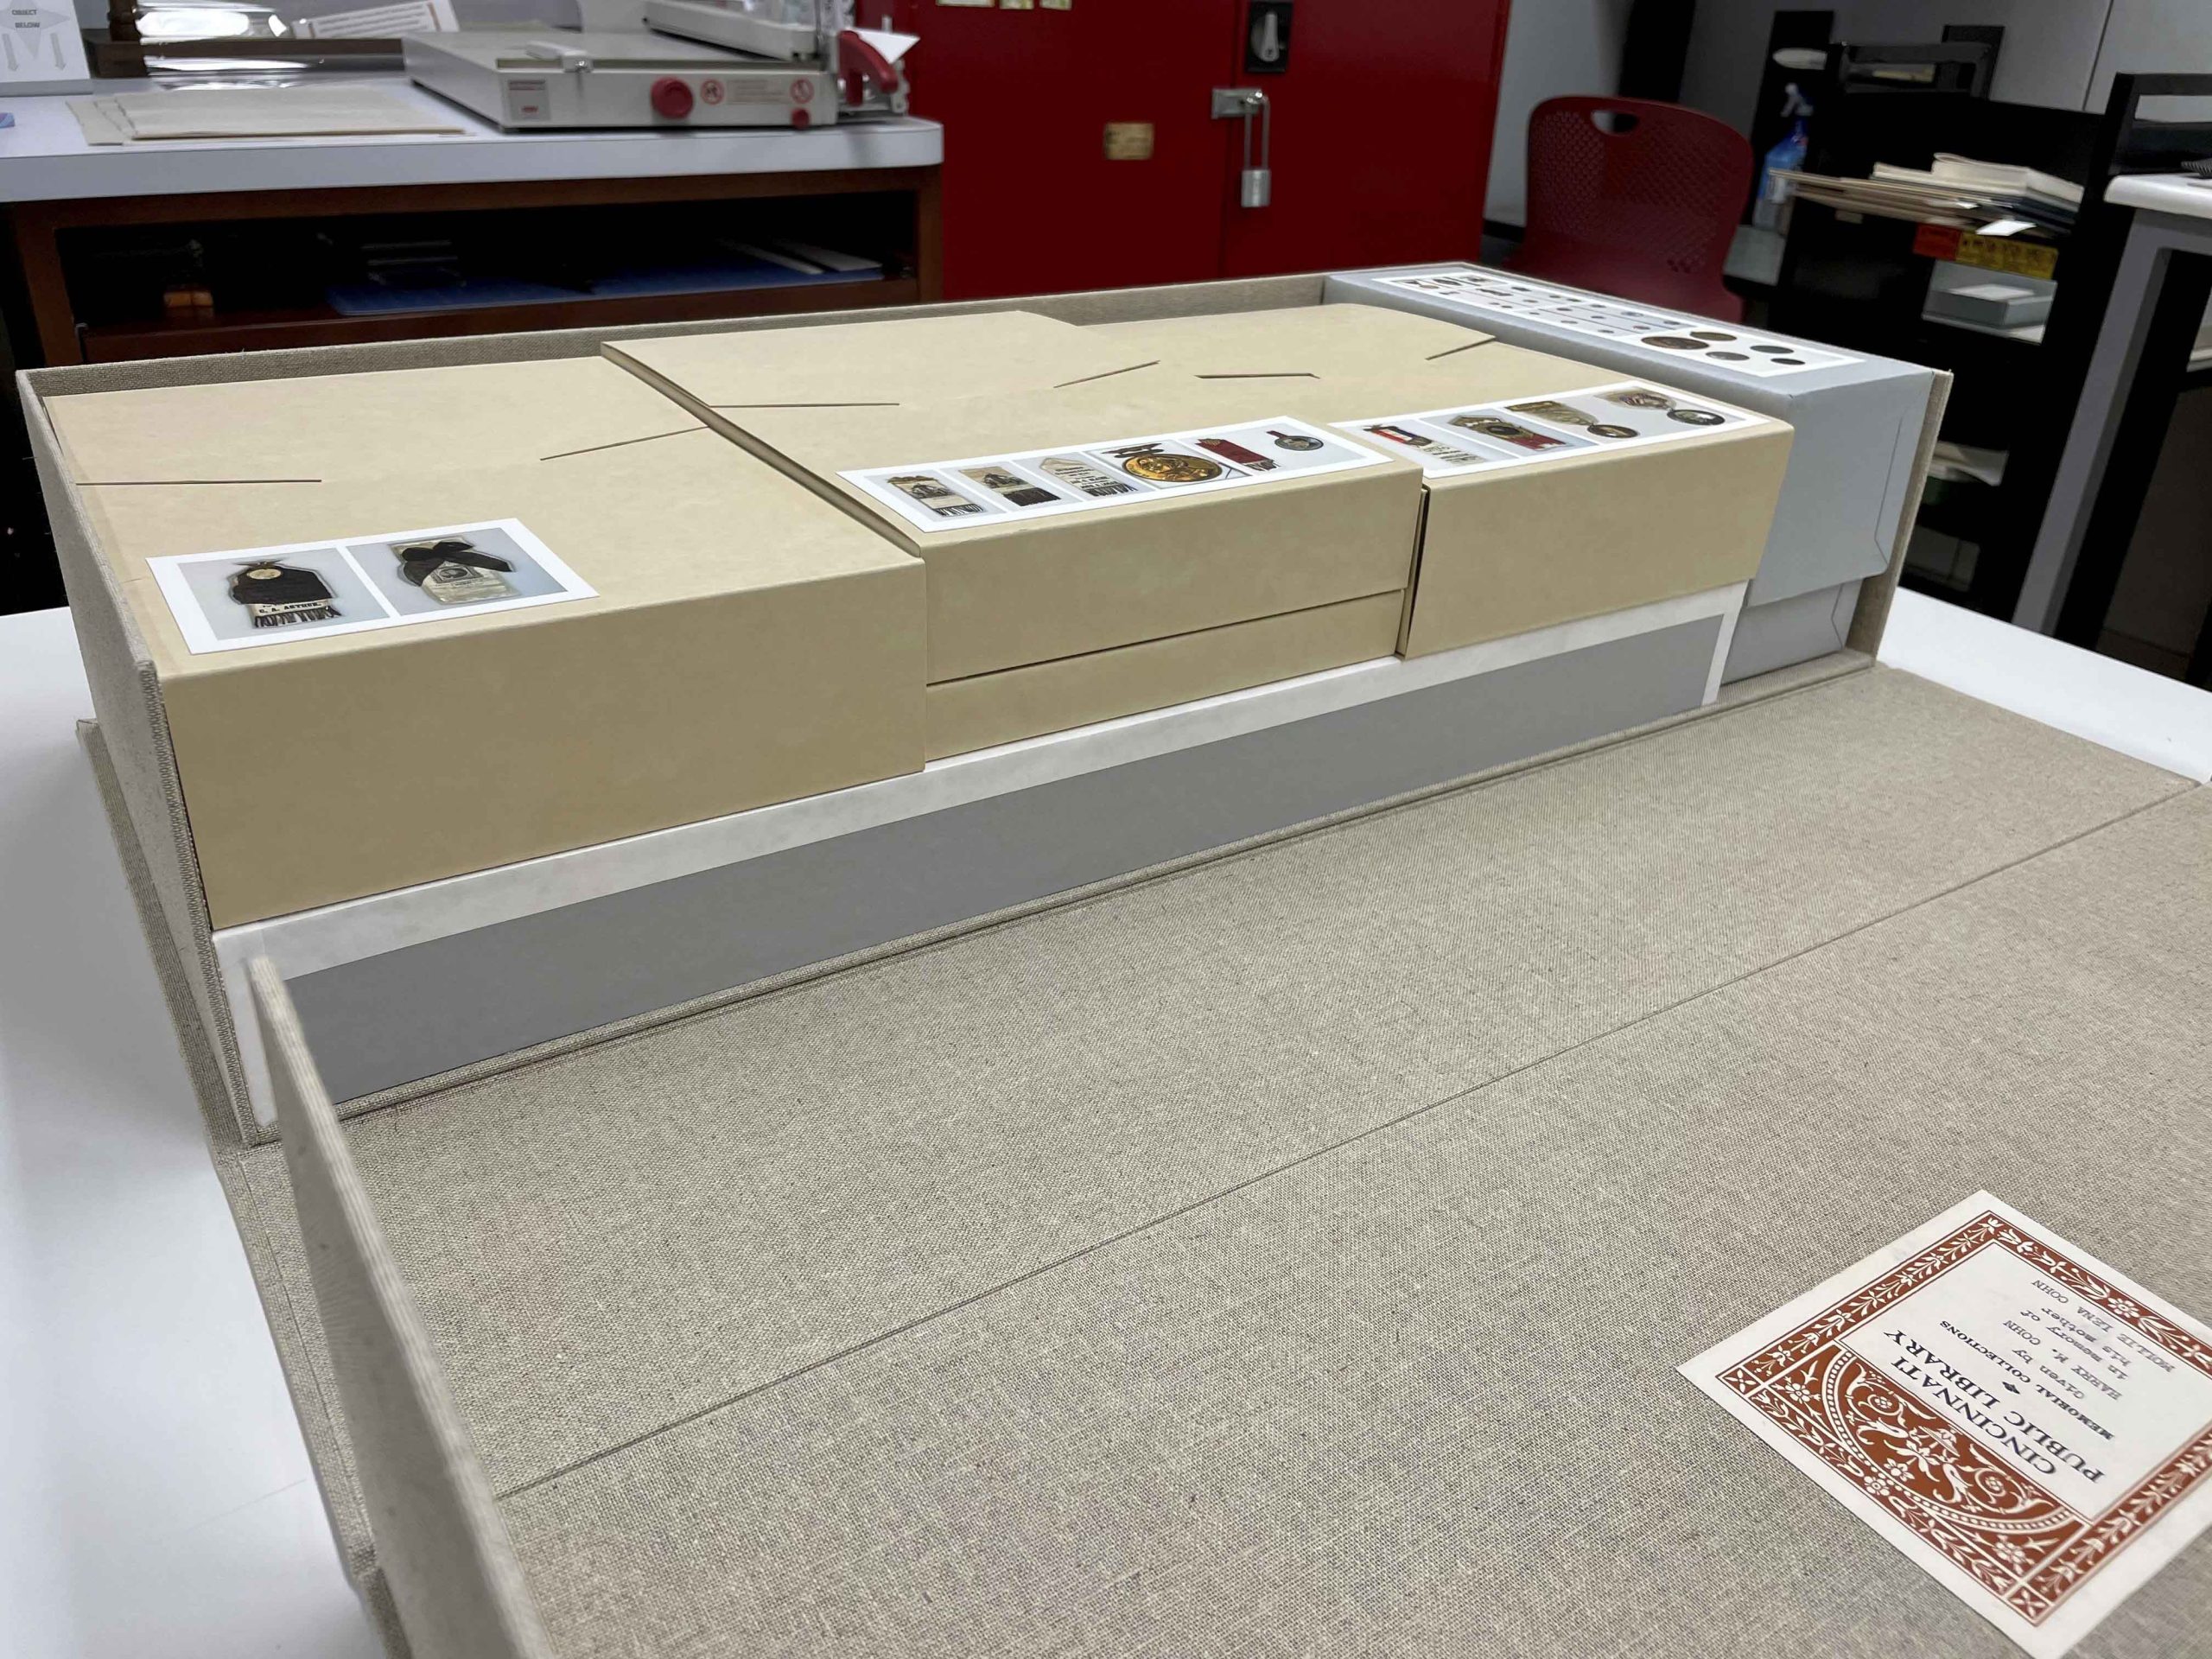
Putting It All Together As One Collection
Now that all the parts were individually protected for storage, it was time to group them together in boxes.
Ribbons were grouped together inside tuxedo boxes.
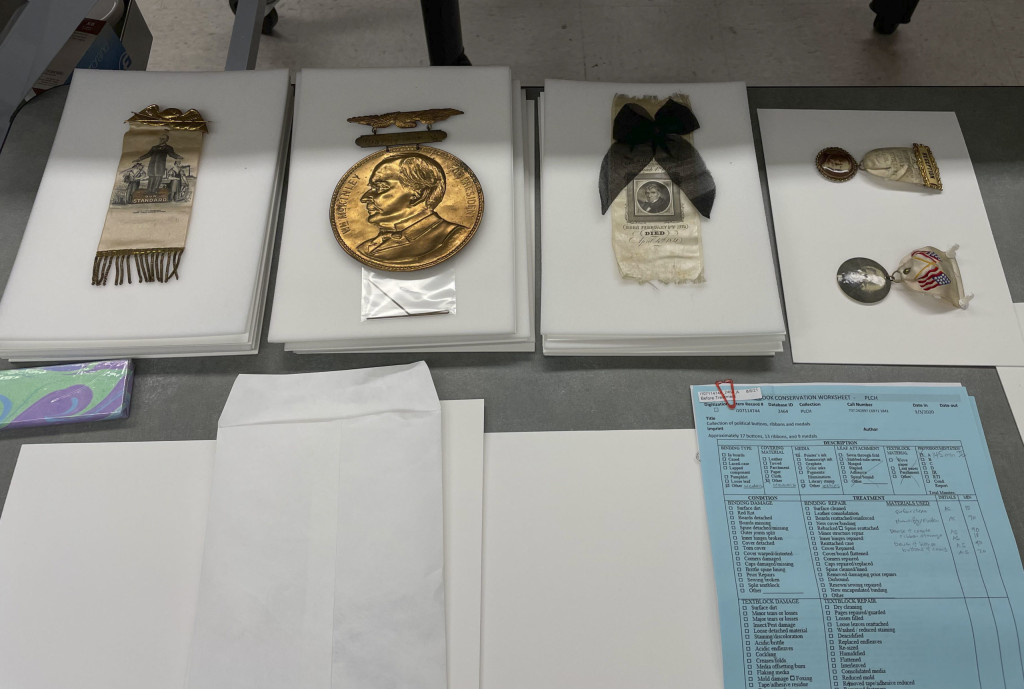
After TreatmentAfter Treatment
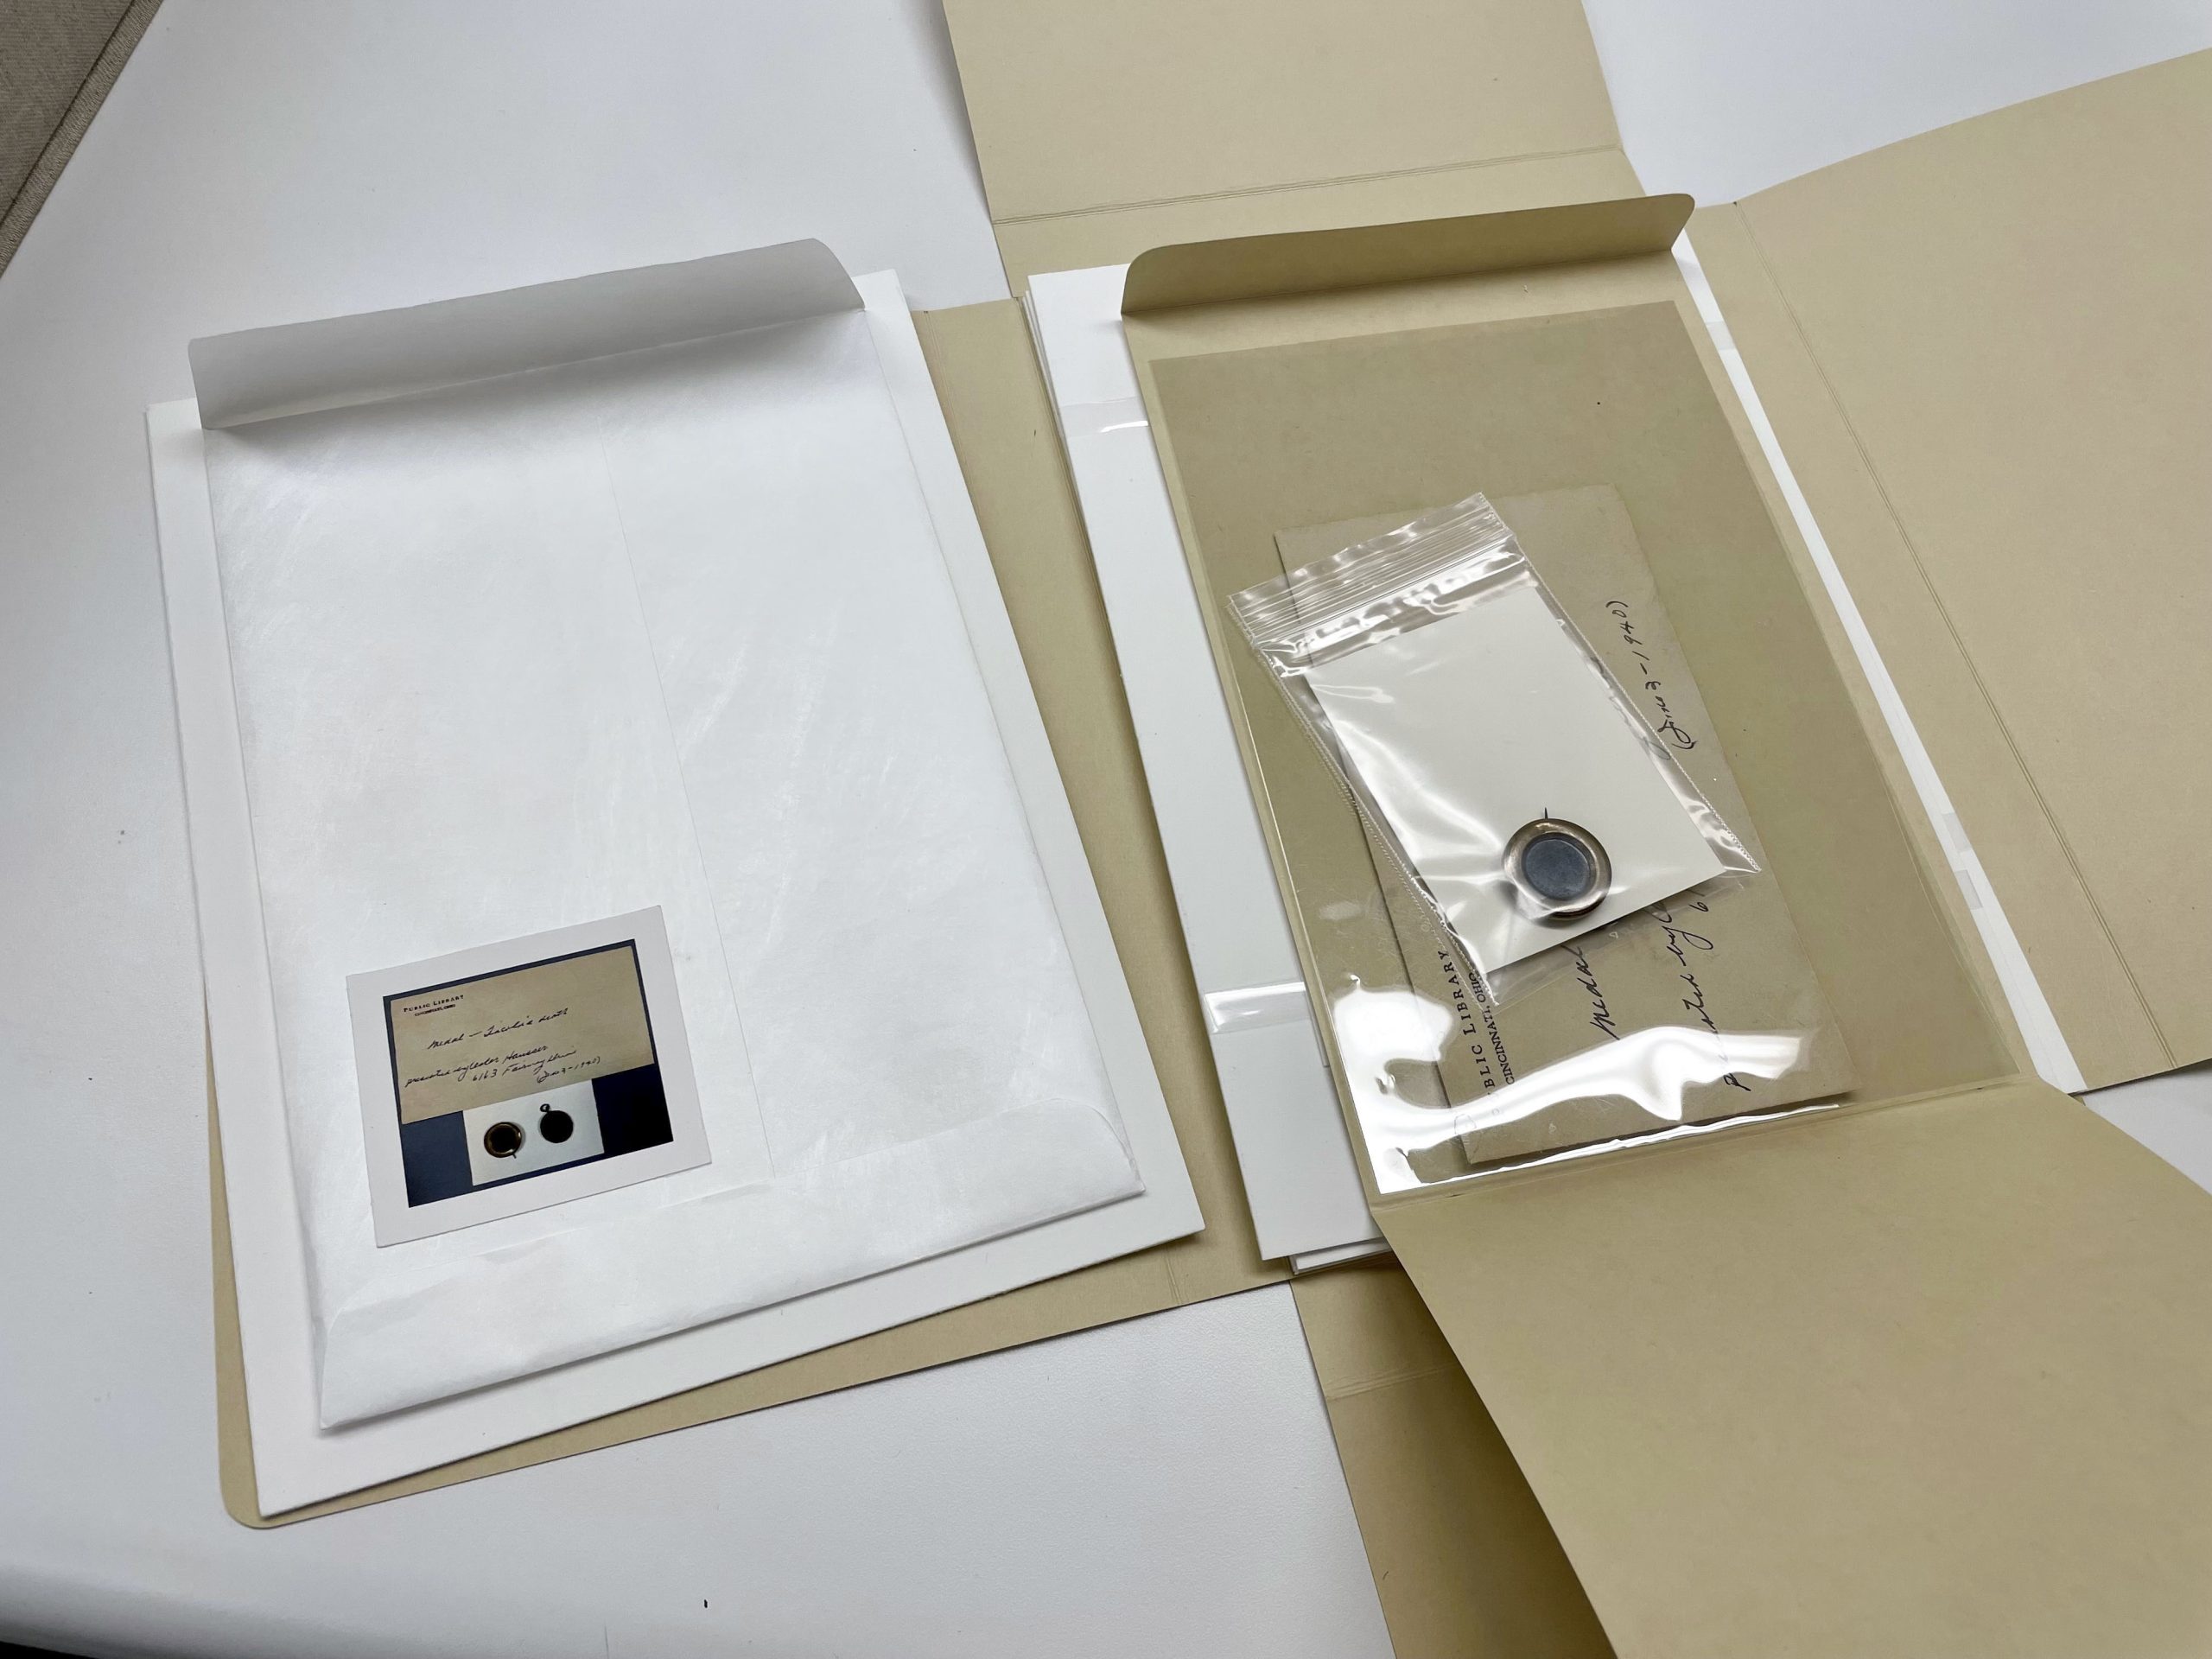
Mourning ephemera were housed together within a tuxedo box. Pins in honor of Lincoln’s death were stored in an envelope while ribbons were stored on mat board sink mats with polyester strapping
A corrugated banker’s box holds the bagged buttons and coins. Removable spacers make flipping and viewing the buttons easier.
A custom cloth covered clamshell holds all the parts together.
All contents of this collection were then assembled by Chris in a beautiful cloth covered clamshell. A foam bumper was added along the outer edge of the bottom tray to add space for hands to slide out the tux boxes.
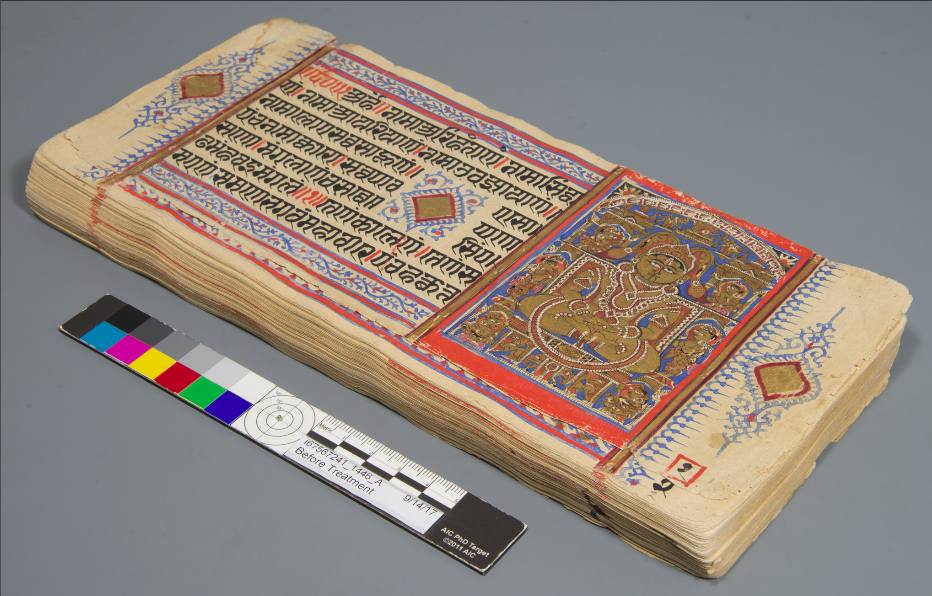
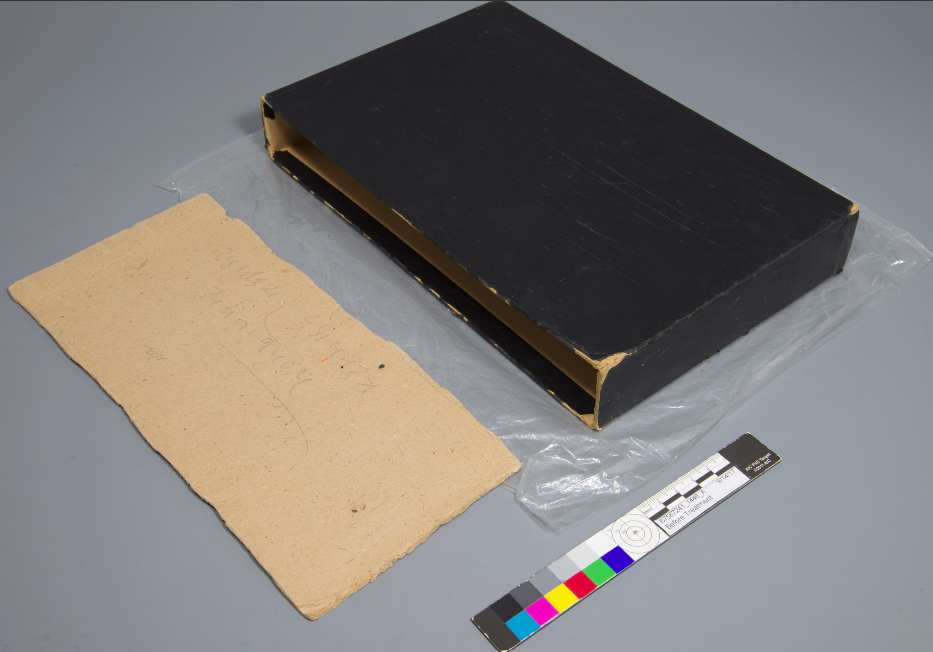
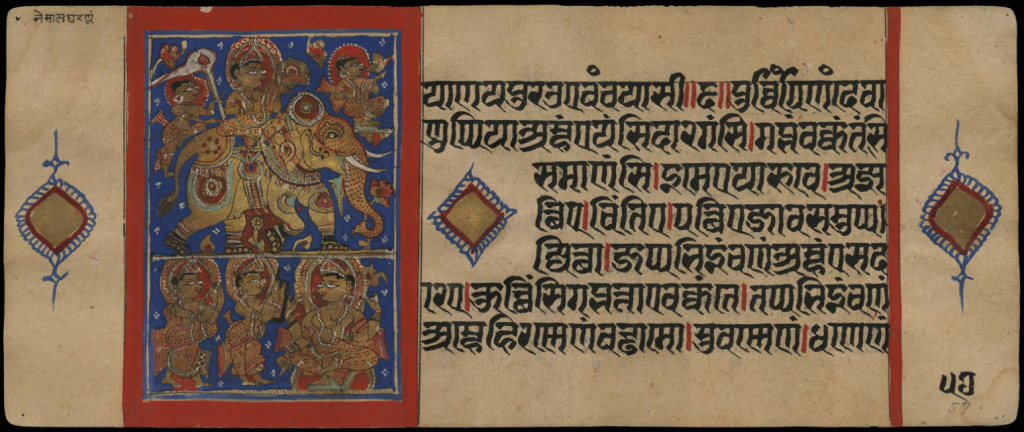
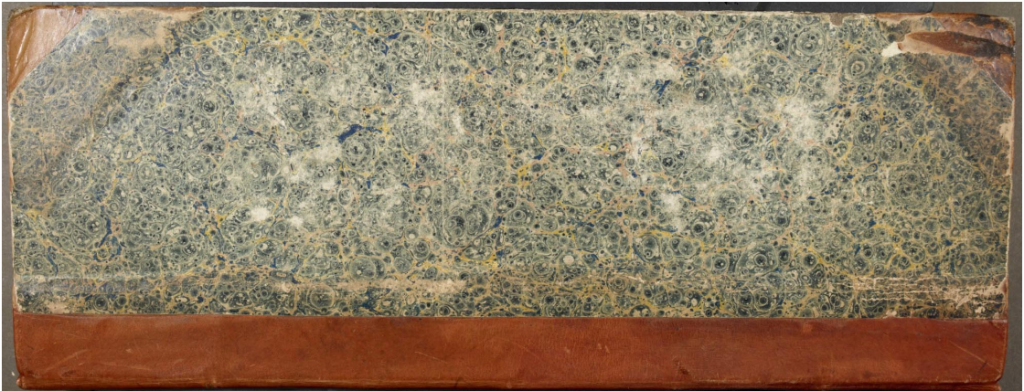
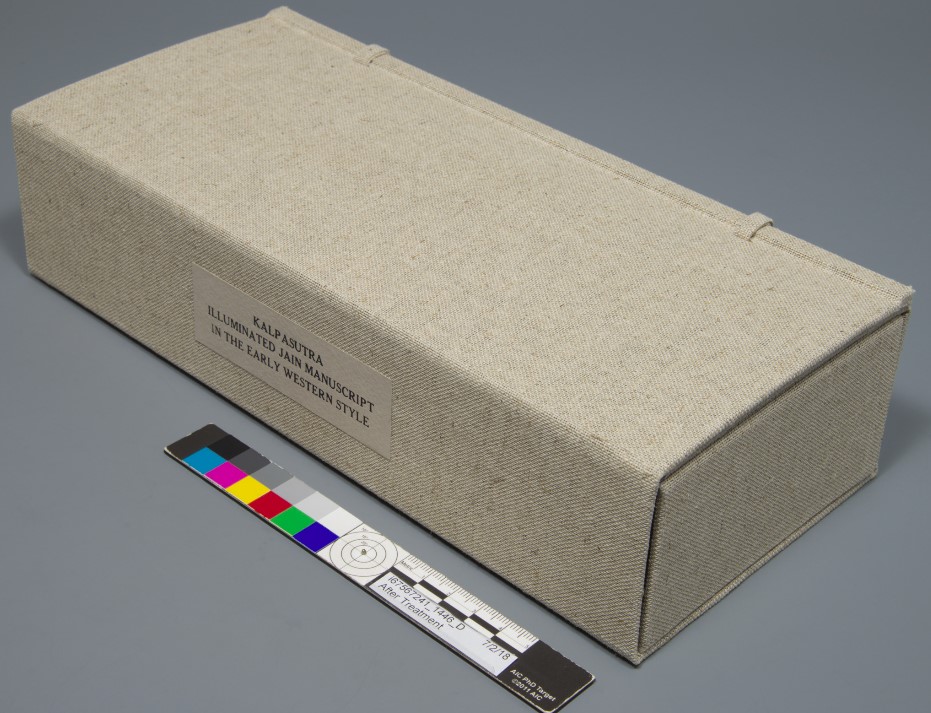
In 2017, an Indian religious text known as a Kalpa-sūtra entered the lab in desperate need for improved storage. Being unfamiliar with this type of religious manuscript I jotted down notes in preparation for housing the item and came up with a basic housing solution. I briefly familiarized myself with terminology, format, and condition needs. This is a summary of those findings with links to resources.
Cincinnati and Hamilton County Public Library sent their Kalpa-sūtra to the Preservation Lab to receive improved storage. The original storage enclosure was not archival and did not properly fit the manuscript. This left the manuscript vulnerable to damage.
Kalpa-sūtra
Kalpa-sūtra translates to “the Book of Ritual” that was meant to be read daily. It follows a 3-part textural structure. The first part consists of the ‘Lives of the Jinas (an enlightened human being)’ and describes the lives of well-known figures. The second section, known as the ‘String of Elders’ celebrates early teachers of Jainism. And the final section, referred to as the ‘Right Monastic Conduct,’ provides rules to follow during the rainy time of year. The ‘rainy season,’ as it is often referred to, is a time of year when the festival of Paryusan is celebrated and the Kalpa-sutra is heavily used.
Jainism
Jainism is an Indian religion that shares similarities to Buddhism and Hinduism, but is regarded as a separate religion. It’s believed to have originated in the 7th – 5th century BCE in the Ganges basin of Eastern India. Jains believe in karma, reincarnation and practicing non-violence to all living creatures. While learning more, I appreciated this article that described the Jain’s thoughtful practice of non-violence by explaining how Jains eat above-ground veggies but avoid eating roots of vegetables so as not to kill the plant.
Format
Earlier Kalpa-sūtra were written on palm leaves and stored in between decorated wooden covers. They were bound with rope or cord through holes punched in the center of the leaves and are read by flipping the leaves up, from bottom to top. To see an example of a palm leaf book, check out this one housed by the Preservation Lab in 2016.
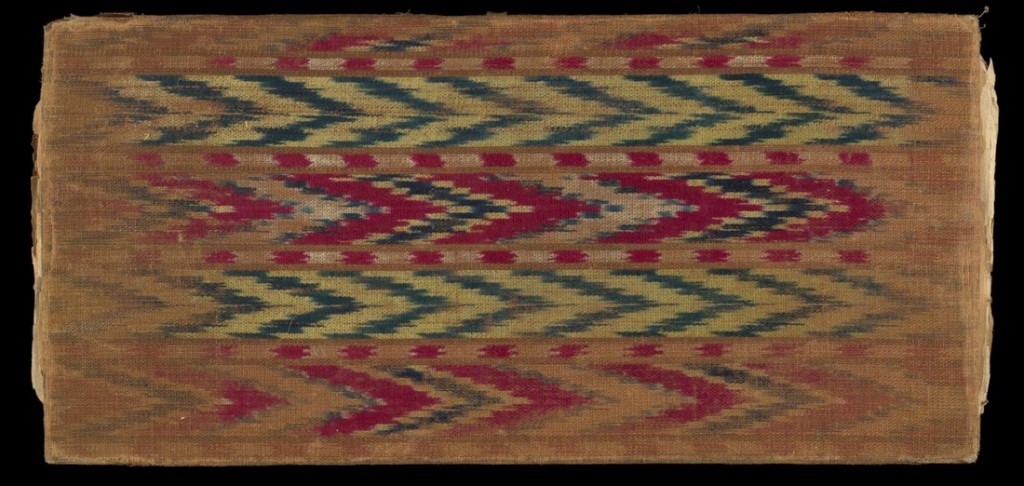
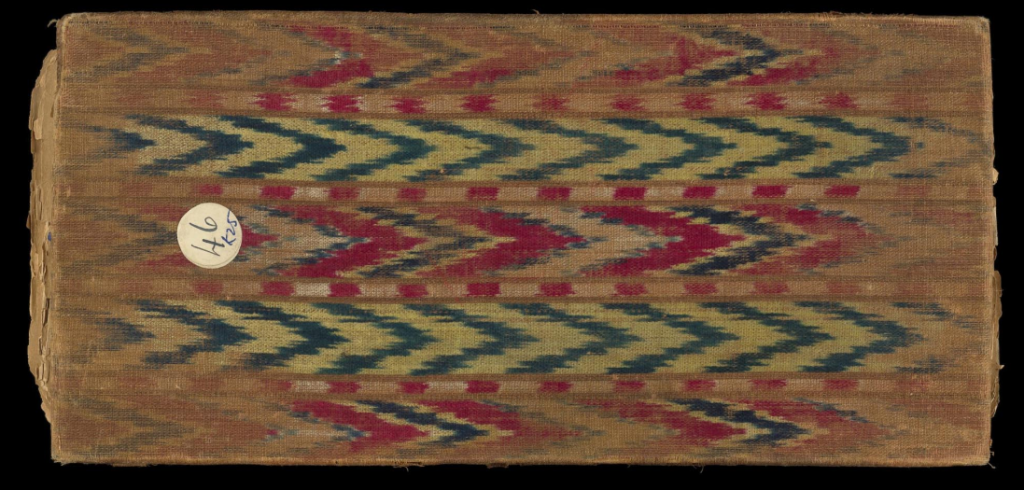
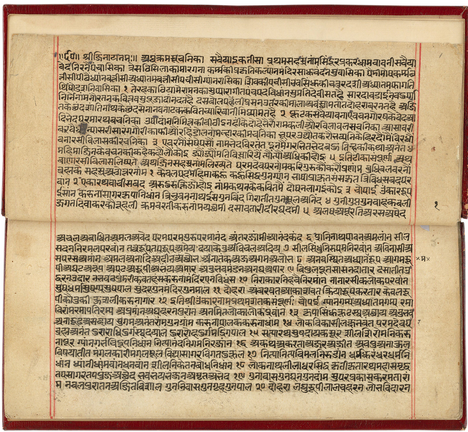
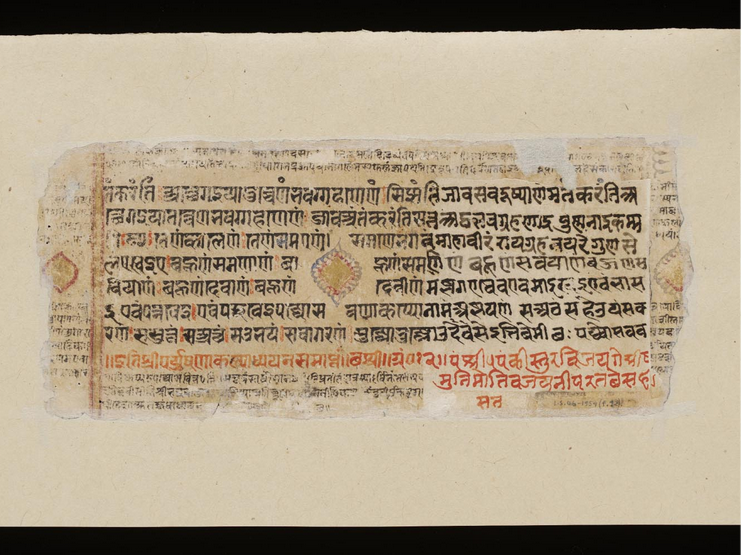
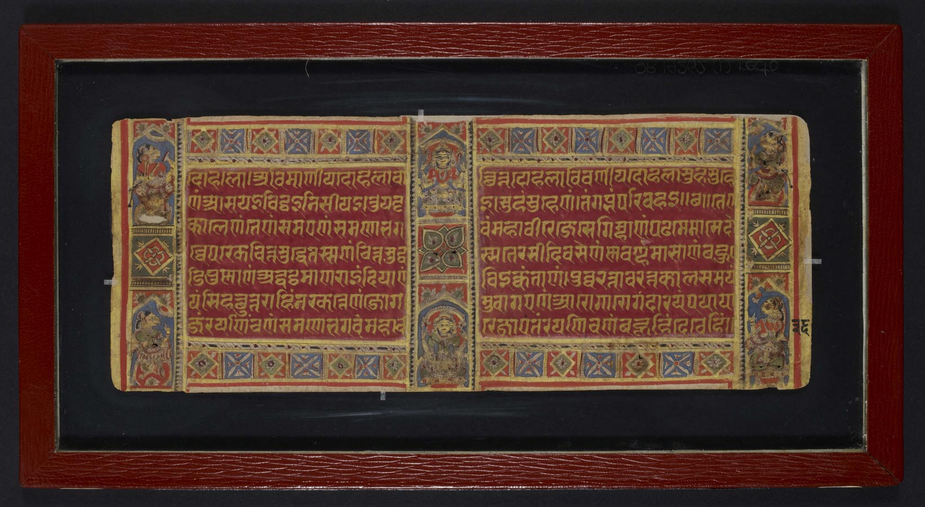
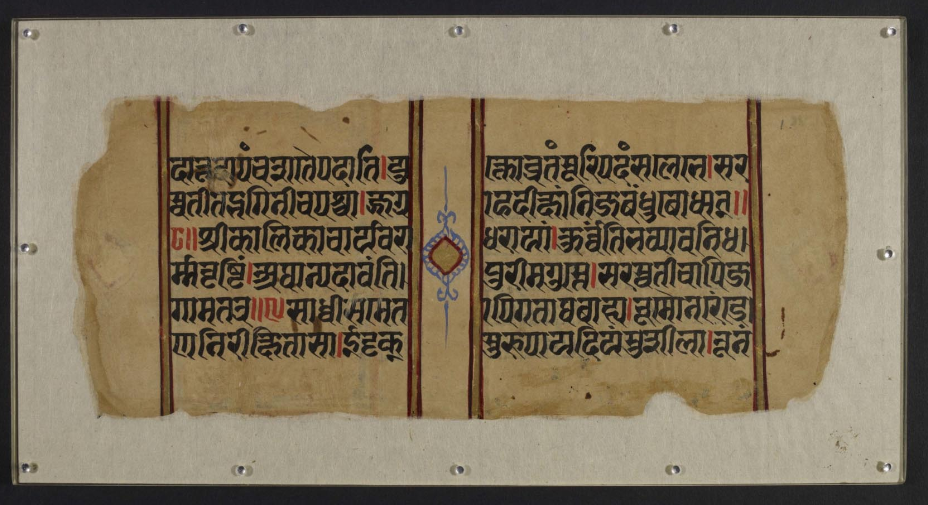
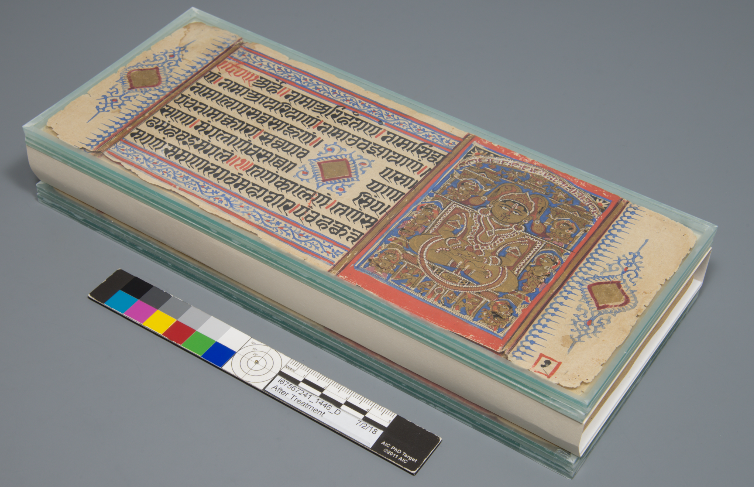
Later Kalpa-sūtra, such as this one owned and digitized by the Public Library, were written on paper beginning in the 14th century but still follow the same horizontal single-sheet format of the palm leaf. Often they were hand colored, illuminated in gold, and written in a black ink calligraphic style on laid handmade paper. Like many others, the Public Library’s manuscript contains 135 individual loose leaves that have never been bound. The leaves, also referred to as folios, were traditionally written on both sides with seven lines of text.
To learn more about formats of Jain manuscripts please refer to Jainpedia.org.
Decorative Themes
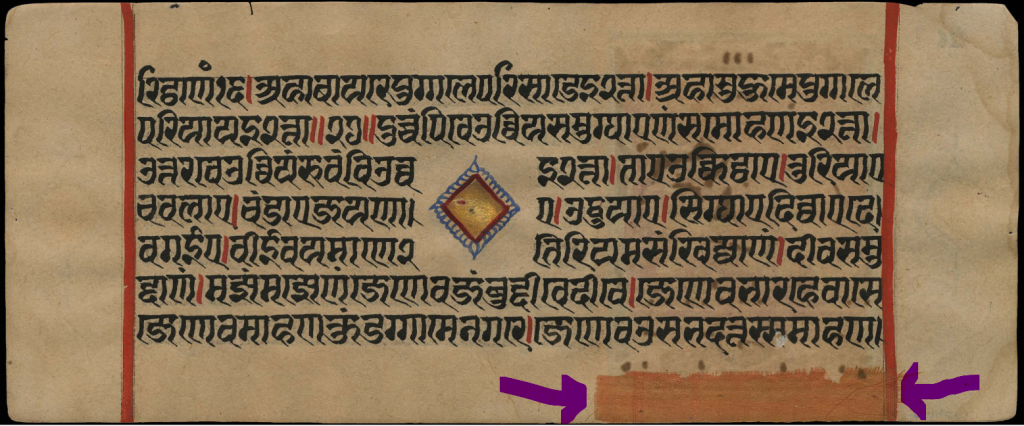
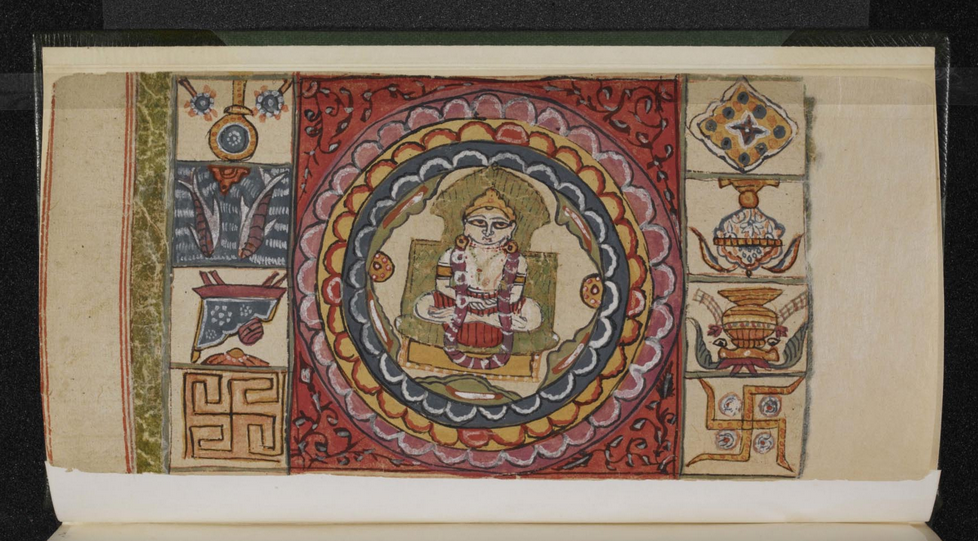
The Public Library’s manuscript is a good example of a traditional paper Kalpa-sūtra manuscript. Its decoration consists of left and right margin lines, and decorative diamond-shaped marks that interrupt the text. The diamonds (often found as circles in other manuscripts) descend directly from the tradition of punching holes in palm leaf books for binding. They are located in similar locations to palm leaf holes and are predetermined when the text is written. On the recto of leaves there are three gold decorative diamonds, one located in the center and one each along the right and left margins. (The V&A refers to these decorations as “central and marginal string holes that are not pierced.”) The verso of leaves contain only one decorative diamond in the center. The religious manuscript is paginated on the recto in both calligraphy and graphite.
The three diamond shaped decorations descend from the tradition of punching holes in palm leaf books for binding. Palm leaf books were bound with strands of cord.
Public Library illuminations consist of red and blue opaque watercolor and gold illumination. The very base of the paintings are a thin open weave cloth attached directly to the handmade paper. On some leaves, you can see where this thin cloth is folded over onto the other side of the leaf.
Purple arrows point to a cloth that is wrapped around from the front of the manuscript folio.
In my research, I tried to understand how paper Kalpa-sūtra were traditionally stored. It is noted on Jainpedia.org that Jain manuscripts appear to have been stored within decorated covers of paper, cloth, and wood.
From what I can gather by surveying a collection of digitized manuscripts, loose sheets appear to have been stored within chemise-like covers, sometimes with multiple flaps, such as this one from the British Library (Or. 13950) andGamma 453 where a loose manuscript is stored within a cloth cover:
I also discovered some Kalpa-sūtra that had been treated in western traditions. Below are a few examples that include where one is tipped along the bottom edge and bound into a western style half leather binding. Another, MS 22393, appears to be bound along the top edge at the British Library. A third yet, MS 34, at the Royal Asiatic Society is bound in half leather with marbled paper:
Others found online have been inlaid into larger sheets of paper, such as the one below from the Victoria and Albert Museum. Manuscripts heavily illuminated and likely suffering from pigment corrosion have been encapsulated between sheets of plastic or glass, such as these from the British Library (Or. 14262 and Or. 13950). One manuscript has been both inlaid into paper and encapsulated:
There does not appear to be a conservation standard for storing Kalpa-sūtra manuscripts.
Storage solutions vary widely and are specific to how they will be displayed or handled.
While I appreciate the western tradition of binding loose pages to prevent them from becoming lost, I knew the Public Library preferred to house the manuscript with as little reformatting as possible in order to preserve cultural traditions.
While I came across a few examples that appear to be stored unbound within covers, it was unclear as to the date of the covers, when they were added, and how they might have been formatted. No images were provided of the sides of the covers.
Even though heavier than plastic, glass was likely used for encapsulation to protect the flaking and corroding illuminations from the static charge of plastic.
Conclusion
The housing solution selected at the lab is one of many options and provides a stop-gap until a more traditional format can be explored.
The most severely corroded leaves at the front and back of the text were encapsulated between glass while the rest of the leaves were left loose. This allowed the most vulnerable leaves to be protected from humidity while avoiding the weight of encapsulating the entirety of the manuscript.
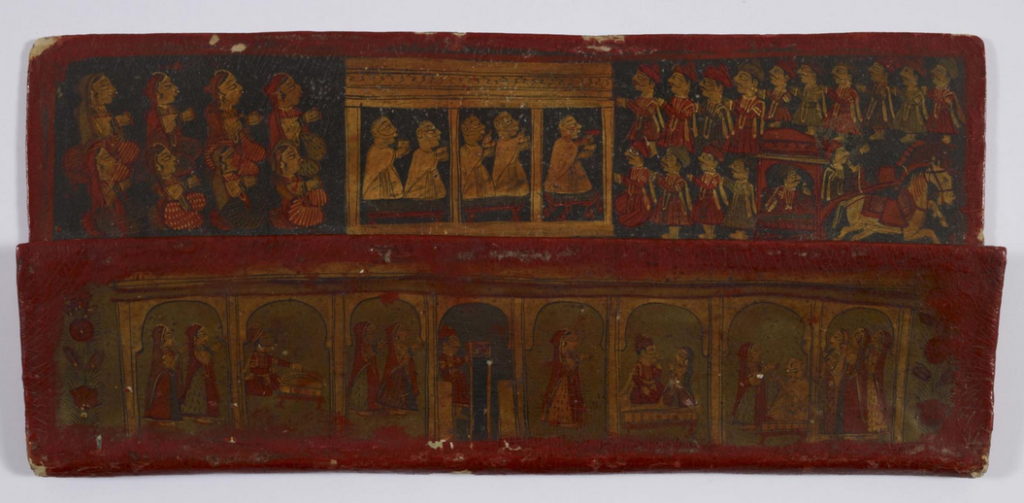
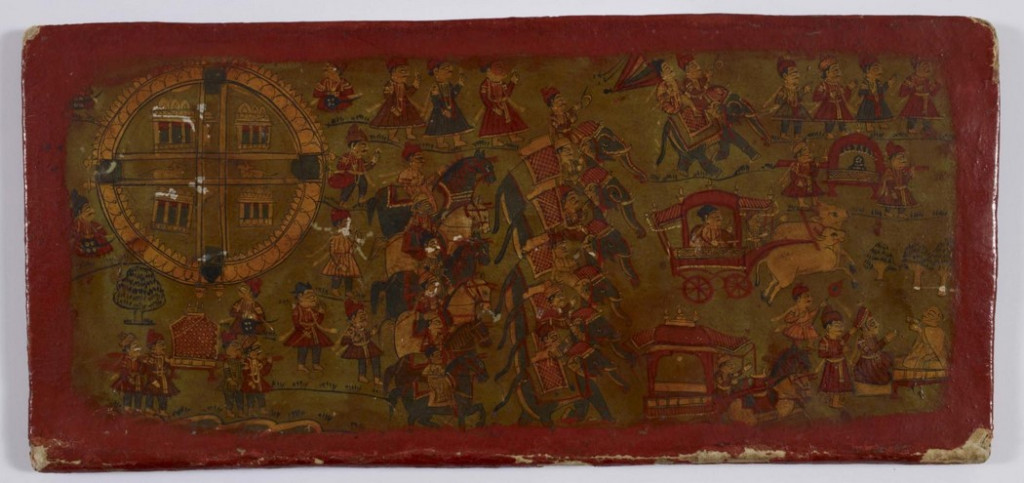
The encapsulated and loose manuscript leaves were then stored together (the outer encapsulated leaves helped serve as de facto covers). An Asian four-flap enclosure with bone clasps was custom made to provide structure and stability, as well as perhaps provide a format more sympathetic in style to a Jain holder than a European style enclosure.
Damaged outer leaves are encapsulated while inner leaves are stored in a two-flap paper chemise
Further Research
There is much ripe for future study:
I hope to experience a historic Jain manuscript cover in person to learn the format and structure.
There are downsides to using glass that should be reconsidered in the future: 1. Glass is heavy and breakable. If the glass breaks, it could cause tears in the fragile paper. 2. Glass deteriorates in humid conditions. The alkali will eventually leach out and could cause staining in the paper. This storage solution should be considered a temporary solution until the pigments can be studied and safely consolidated.
Since there is a pigment contributing to corrosion and paper drop-out in the manuscript, it is likely that pigments in the Public Library manuscript contain copper. I would be interested in developing a plan to analyze the pigments to better understand their composition.
As a library book and paper conservator, I am less familiar with fine art painting traditions on paper, particularly Indian painting. This was my first experience with observing an open weave cloth used as a base for illuminated manuscripts. This initial research has me captivated to learn more about the traditions of Indian miniature painting and how they are connected with early stylized Kalpa-sūtra paintings, and if their implications for inherent condition issues can be extrapolated.
The word ‘sutra’ is literally interpreted as “thread” in Sanskrit. Different manuscripts contain the word “sutra” in their title, such as the Indian Kama Sutra, or Asian Buddhist sutras which are not to be confused with the Kalpa-sūtra. Is it possible that because these manuscripts were historically bound with cords or wrapped with ties give rise to the word sutra?
Interesting Side Note
I learned that The Diamond Sutra owned by the British Library is considered the oldest block printed book in existence AND it has been analyzed to find the scroll’s yellow plant dye extract, Berberine, is toxic. It’s possible the toxin can be absorbed through the skin (so those handling should wear gloves!) as mentioned in the Vol. 21, Number 4, Nov. 1997 Abbey Newsletter under the heading Peril in Old Paper.
The Preservation Lab has enjoyed our involvement in the Vesalius lecture series and exhibits including preparing the loan agreements, leading and assisting with photographic documentation, and providing spectral and computational imaging to the Vesalius researchers and lecturers.
Some of this work made a guest appearance on the FoxNews 19 segment, starring Dr. Stephen Joffe, on the three rare books that had been on view in December in the Winkler Center.