Tag Archives: Nicole Browning

Addressing the Pre-program Problem: The Preservation Lab’s Commitment to Cooperative Education

Libraries are known as places of learning, but what if that education came not just from the material within the books, but from the material of the books?  The Preservation Lab, with its management by the University of Cincinnati, is in a unique position to provide its renowned book and paper conservation as well as training and experience for prospective students interested in the many fields involved therein. This summer, I had the incredible opportunity to work with the lab through the university’s co-op program, where I was able to bridge the gap between learning and doing, furthering my own career in an opportunity that is unfortunately rare for the field.

What is Cooperative Education (Co-op)?

The University of Cincinnati claims the invention of the co-op, which combines traditional academic learning with career-relevant workplace experience, with a strong emphasis placed on paid opportunities. For me, a student getting a degree in Art History, I was given the option to opt into the program after my first year. I’m expected to complete 2 career relevant co-ops during my next few summer semesters, which seems like a win-win situation to me; getting paid in money and course credits? Sign me up! There’s just a little problem I was only briefly aware of as someone intending to pursue a higher degree in art conservation: pre-program opportunities are rare, competitive, and frugal.

You see, conservation seems to have a bit of a pre-program problem when it comes to education; a graduate degree from an accredited university is a basic credential required for most professional conservator positions. However, many programs (such as the University of Delaware’s Winterthur program, for instance) require at least 400 hours of practical conservation experience to apply to their program. So, if you need the degree to get experience, but need the experience to get the degree, how does anyone proceed? The Preservation Lab is the perfect opportunity for such experiences, and I feel incredibly lucky to have had the honor of being their first co-op student. With a large supply of general collection items with minor conservation needs, the lab is uniquely equipped to provide hands-on experience to students like me without the liability of having some college student handle a precious piece of history.

Traditional Learning Paired with Workplace Experience
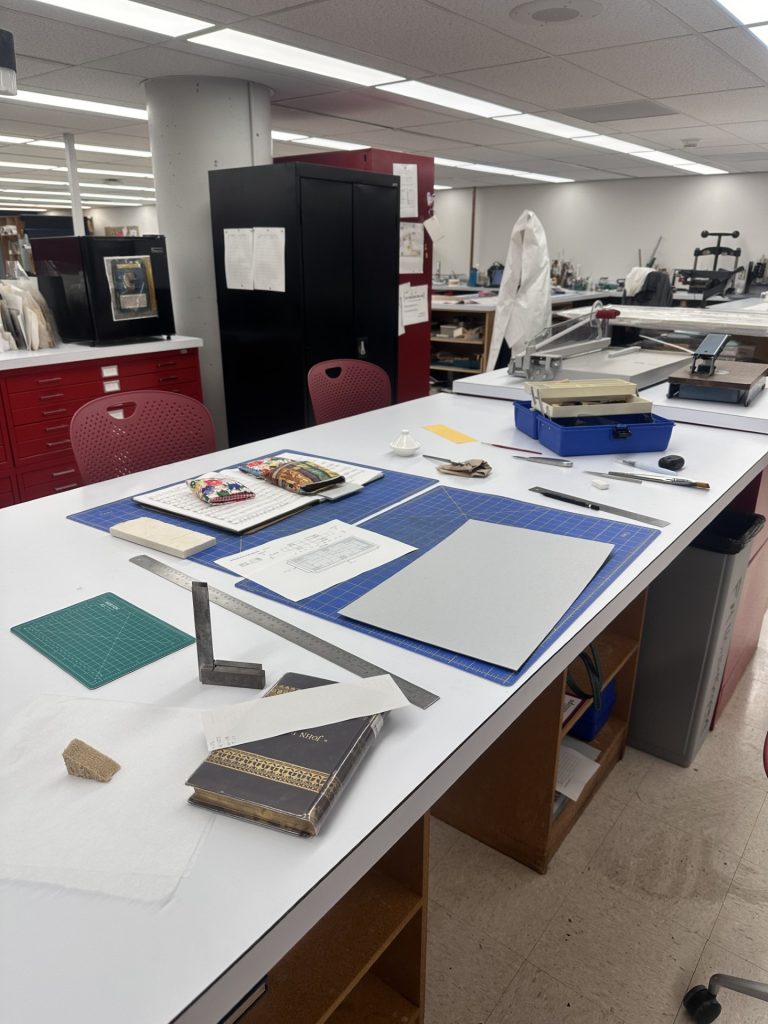
Student conservation bench with tools, books, and an enclosure being made.
Often, having the student bench to myself meant my things were all over!

My day-to-day work with the Preservation Lab involved a lot of, well, books! If you’re new to what the lab does, we help stabilize and preserve the various media which circulates throughout the University of Cincinnati’s libraries, as well as to other cultural institutions in a smaller capacity. From 15th century choir books, to the plethora of DAAP student projects, you might be surprised with how many unique items come through the lab! We may be called a book and paper conservation lab, but the cabinet full of objects being currently worked on argues the true scope of the lab.

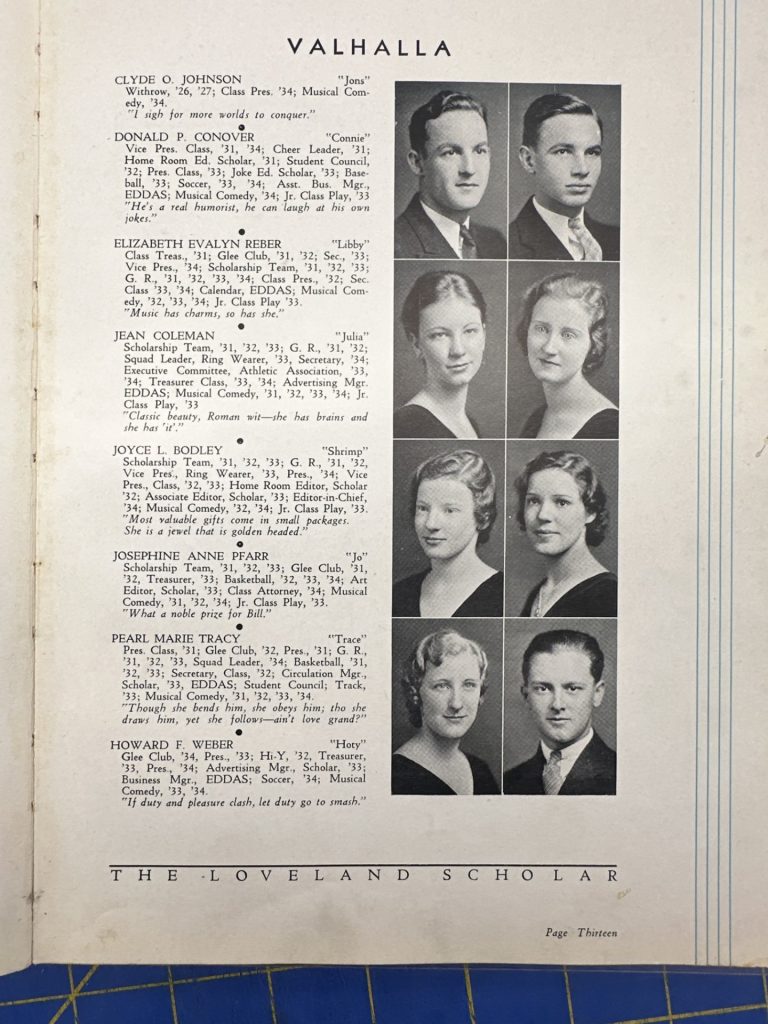
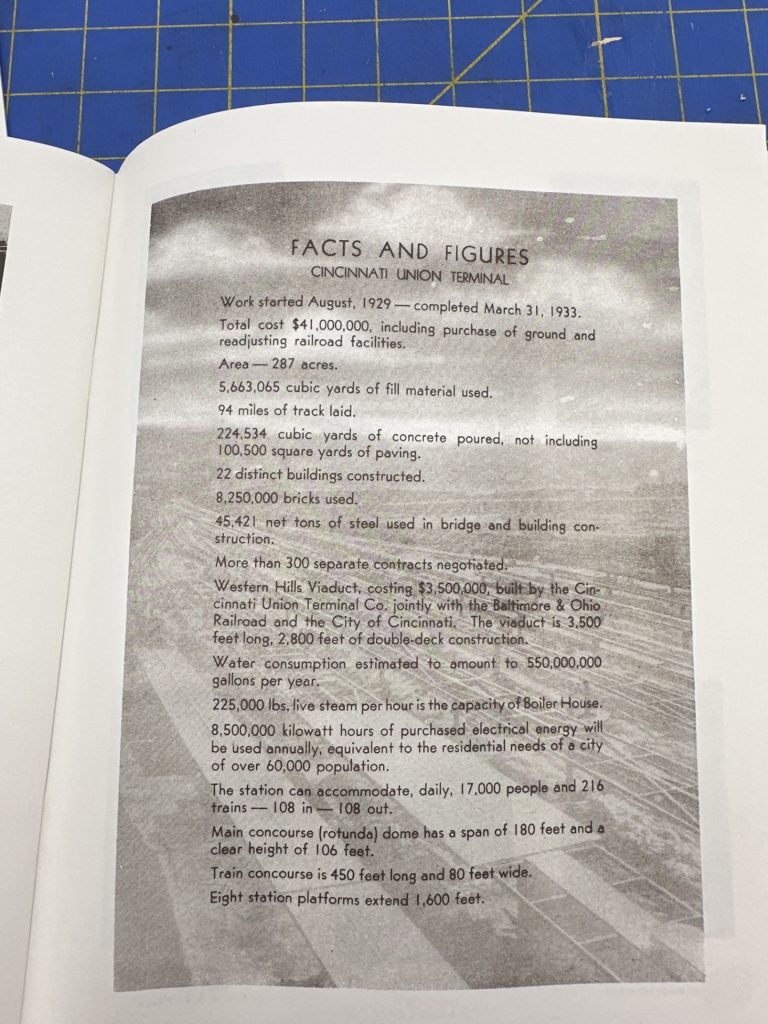
Of course, as a student, I’m relegated to the projects which are much less delicate. Which is definitely a good thing, since even handling those special collection items is harrowing to me (you really don’t want sweaty palms when holding something older than your country). Instead, I work primarily with the general collection – more modern books which are pulled from shelves for minor TLC. The bulk of my work has been making custom enclosures for these books – pamphlets, jackets, and boxes which protect the materials in various ways – a very satisfying work, as I get to make a snug little home for these worn editions which are so obviously loved. In fact, in my roughly 250 hours of work over the summer, I’ve created over 280 custom enclosures! Gives you a little glimpse into the volume of items which come through the lab. You may think that being in the general collection means these items are much less interesting than the special collection, but if you’re a sentimental little person like I am, you may just find yourself crying over a local high school yearbook from the 30’s (specific for no reason, of course). The UC libraries are chock-full of interesting history, and with the majority of it being local, I find myself developing even more love for my home city of Cincinnati. My interest in conservation was sparked by a love for the smaller stories, the personality which hides in everything created by humans. These books are the epitome of that.
The True Benefits of the Co-op Model

My summer has, truly, been absolutely packed with learning. Whether it was making the various enclosures the lab uses to protect books, or reading the history of books/paper making, there wasn’t a single day where I hadn’t anything new to go over. Being in an open lab environment was also a great boon. I often spent my time gawking at some of the special collection items being worked on and loved being able to pick Jessica or Nicole’s brain in their decision-making process. Cat would bring me over to look at bugs caught in the lab’s pest management traps under a microscope (creepy!) and Matt demoed matting systems with me, each contributing to this atmosphere of learning and camaraderie that I could only hope for.  I never felt like my status as a student put me underneath any of the staff, and this allowed me to understand myself as a conservator already. No longer was I hoping to get into art conservation, I was here!
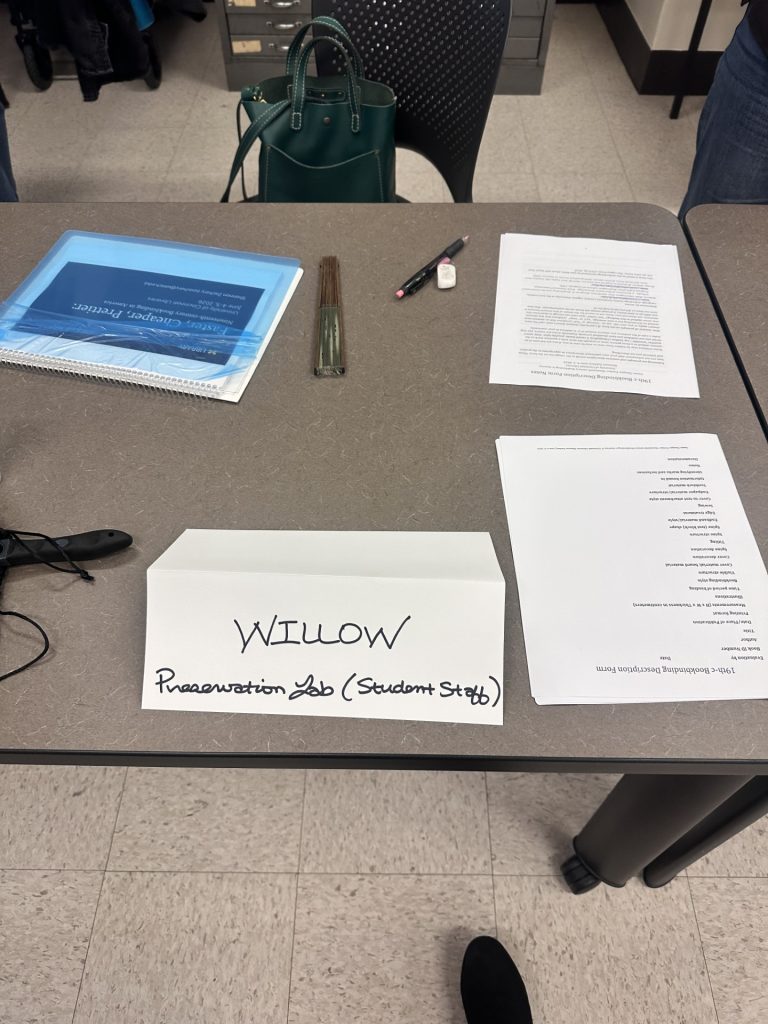
Willow table at the workshop with her binder and nametag.
My workshop seat. Professional development indeed!

One of the highlights of my summer was participating in a workshop on identifying 19th-century books taught by Shannon Zachary. Only a few weeks into the co-op, the opportunity to learn with the rest of the lab left me with a strong sense of belonging among them, one that contributed heavily to the actualization I mentioned earlier. This was the moment where I really realized just how effective co-op learning was. It’s not just about getting the opportunity to gain relevant skills, but to participate in a field I thought would take several years to get to.

The End of Summer

And so, all things must come to a close. With the end of summer meaning the end of my co-op, I feel the transition back to my academics easier than it’s ever been; I’m so much more motivated and energized! I’m so relieved that I don’t even have to say goodbye to the lab, as I’ll be continuing my work with them throughout the rest of my time at UC. Who knows, maybe I’ll even be back for my next summer co-op?

Writing this all on my last day has me quite sentimental to tell you the truth. I’m so appreciative for this opportunity, and I feel I’ve truly fallen in love with the Preservation Lab. I can’t believe the solution to my Pre-program Problem came in such a meaningful opportunity.

Until next time – Willow Haitch (Co-op Conservation Student)

Sources:

Check out Willow’s day-in-the-life reel on the Lab’s Instagram:
Textiles Conservation at the book and paper lab!

The week of July 18th, the Preservation Lab hosted textile conservator Howard Sutcliffe for a workshop. Howard owns and runs his own textile conservation private practice, River Region Costume and Textile Conservation, based out of Arley, Alabama, and Nashville, Tennessee. We spent four days with Howard learning the basics of textile conservation, with a heavy focus on mount making and sewing skills. This introduction of new methods was eye-opening for us, and many of us are already thinking about ways we can implement the new skills we learned with Howard. 

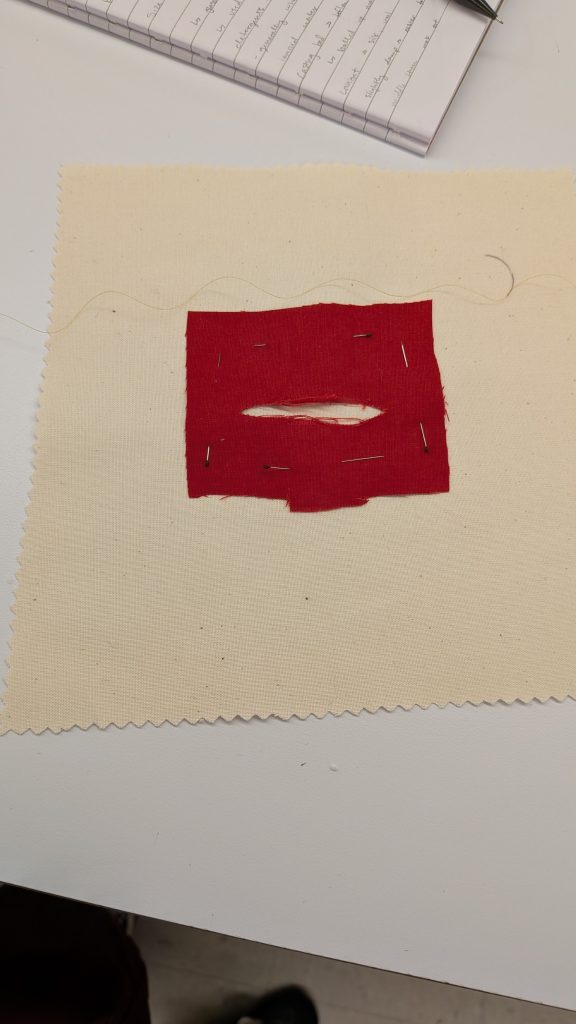
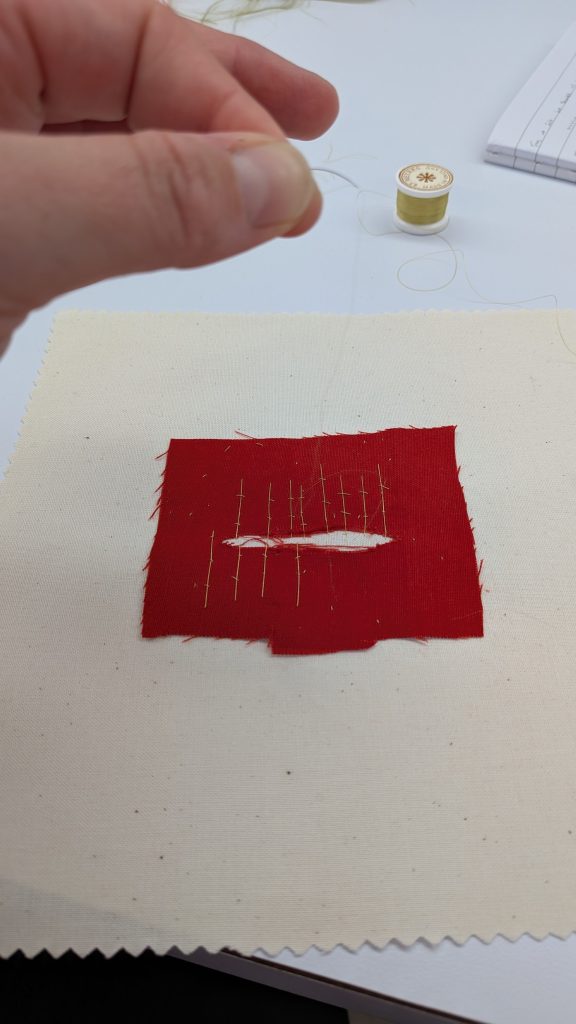
To kick the workshop off, we spent the first half of the day learning about Howard and his practice and seeing the amazing work he’s done on costume pieces, tapestries, and even hats! After the morning lecture, we then went over different types of materials that Howard commonly uses for textile conservation, from silk organza, which we plucked threads from and used to sew delicate stitches, to nylon net and cotton broadcloth that is used for mending and stabilizing. We then learned some basic stitches that are used for mending tears in fabrics, and practiced on our own ‘objects,’ which were pieces of scrap fabric Howard created tears in. 

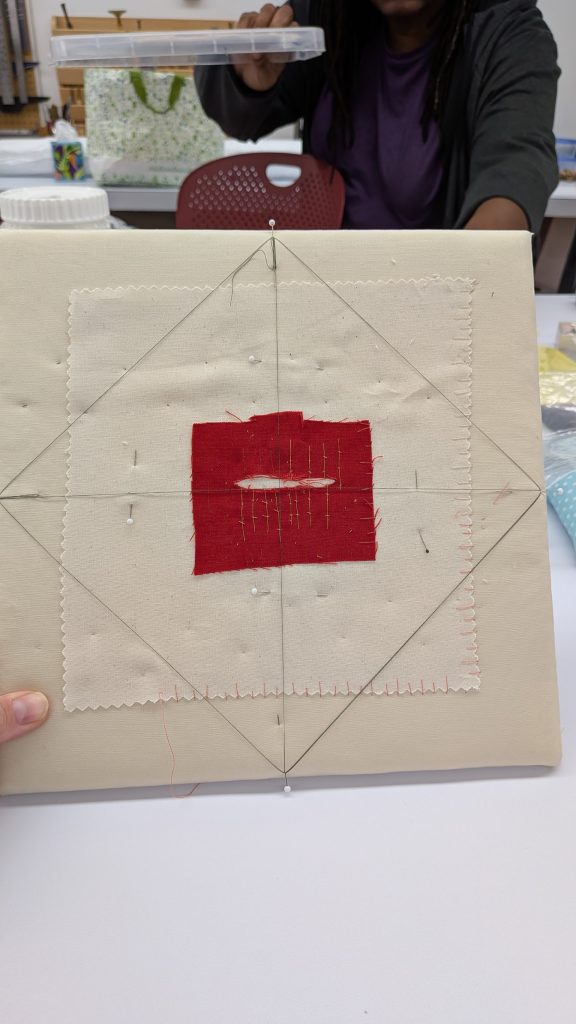
As you can see from the finished product picture, four pins at North, South, East and West on our padded boards were threaded and connected to help us center the object onto the padded board. Typically, after your object is mounted you remove this thread. The padded boards were created by layering corrugated board, batting, and a neutral-colored fabric that we sewed our object onto. Miniscule zig zag stitches were used on the inner part of the object to hold it in place, then the border was sewn with long and short stitches to help reinforce it. While you can see most of the threads in my sample, when working on an object being conserved the thread would be color matched to the item, making the tiny stitches practically invisible. 

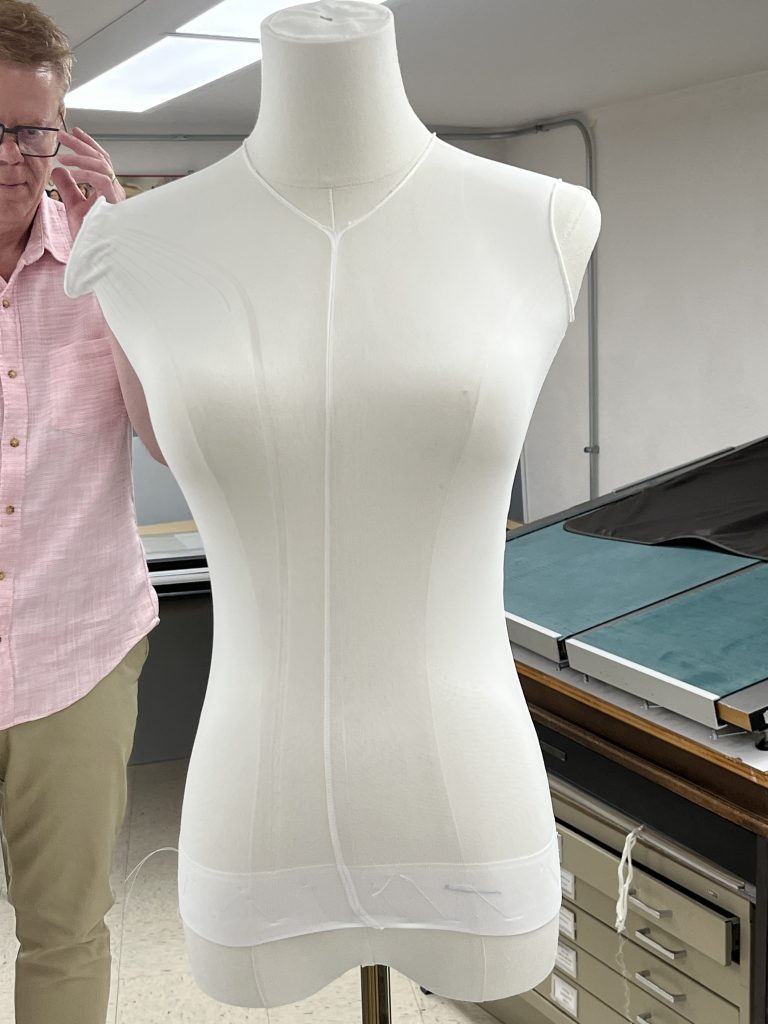
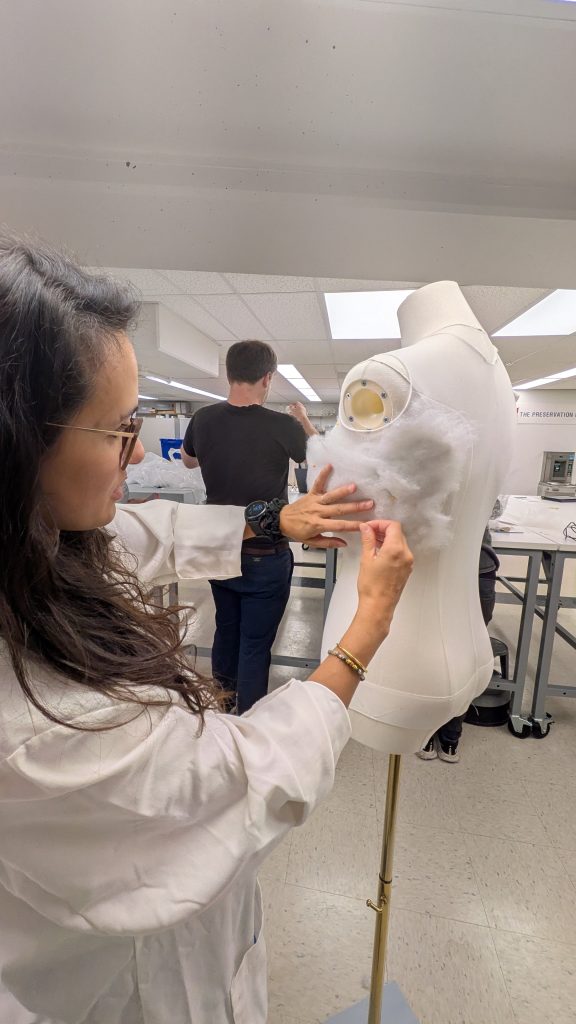
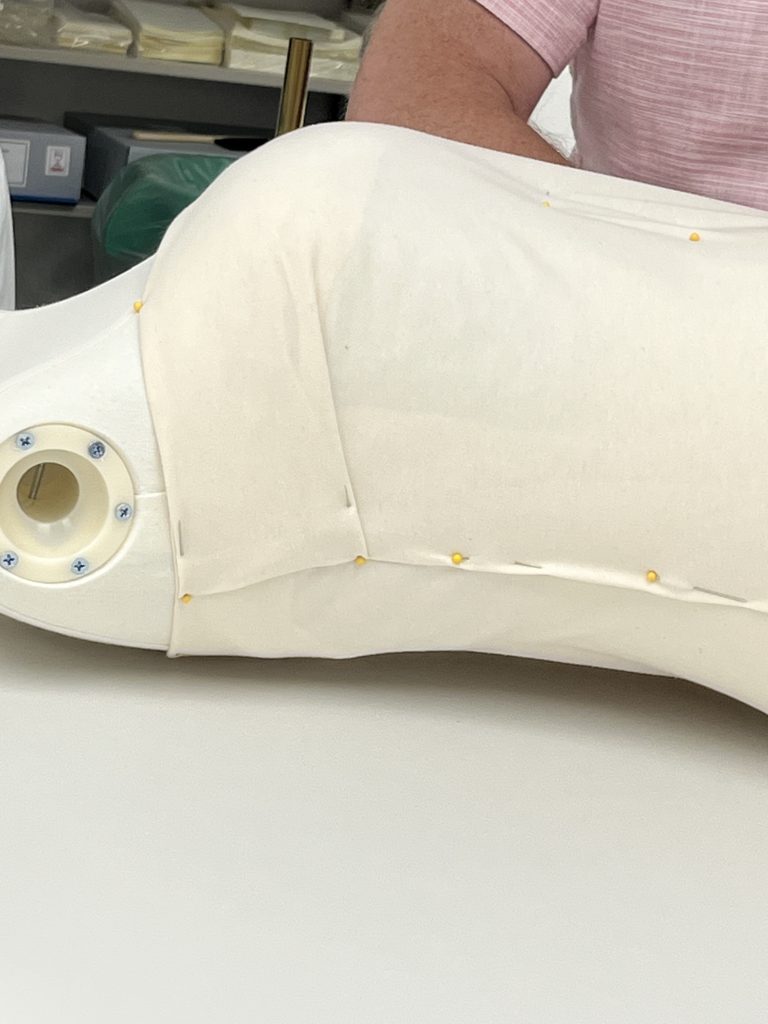
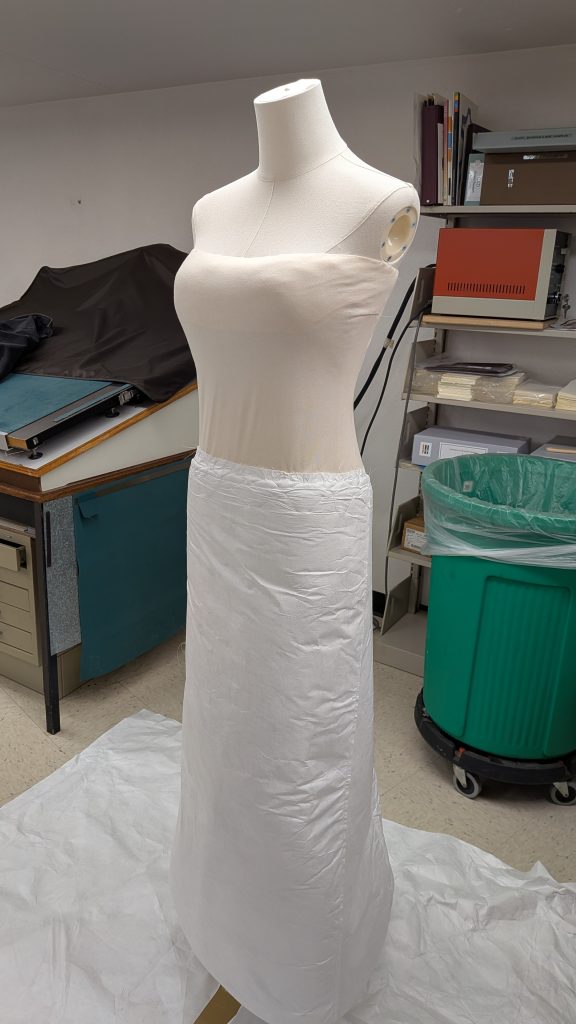
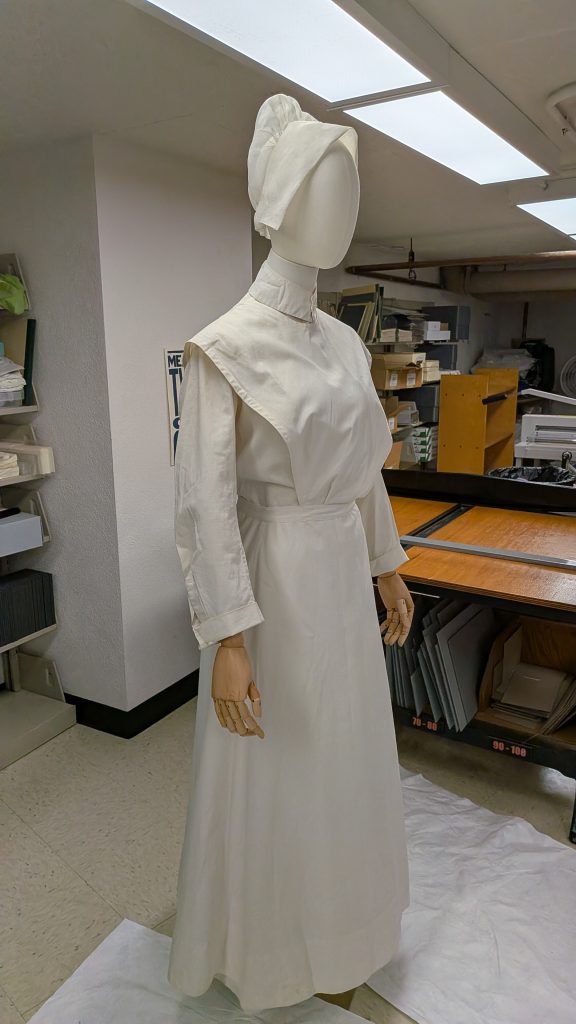
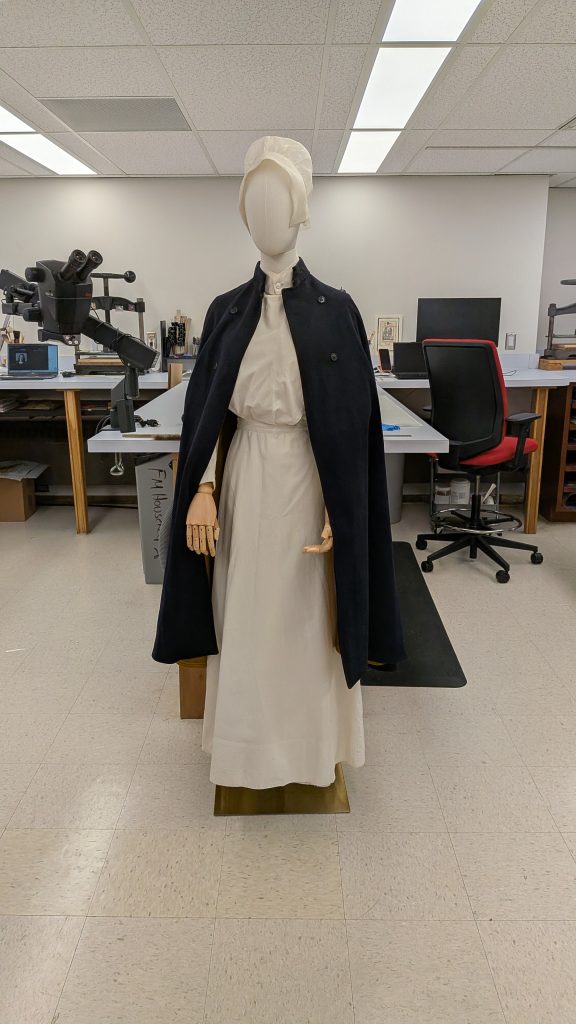
The next three days were primarily dedicated to creating a mount out of a mannequin and batting for a nurse’s uniform we had from Winkler Center for the workshop. We first put the uniform on the mannequin to see where it needed more support, then the dress was removed and a base layer to sew onto was created using a pair of cotton tights.  

Textiles Conservation at the book and paper lab!
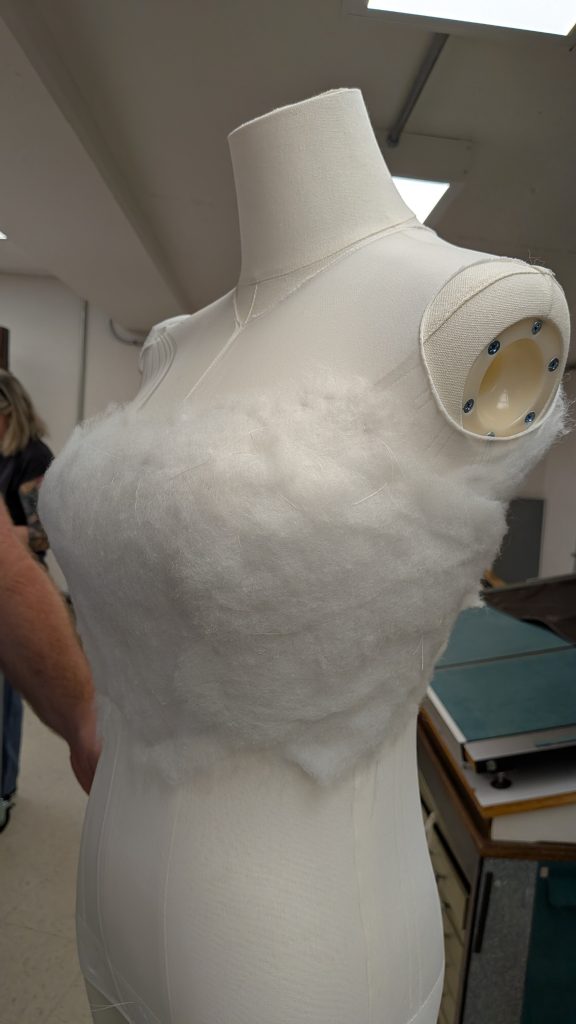
Mannequin covered in cotton tights, legs and gusset cut out to create arm and neck holes.

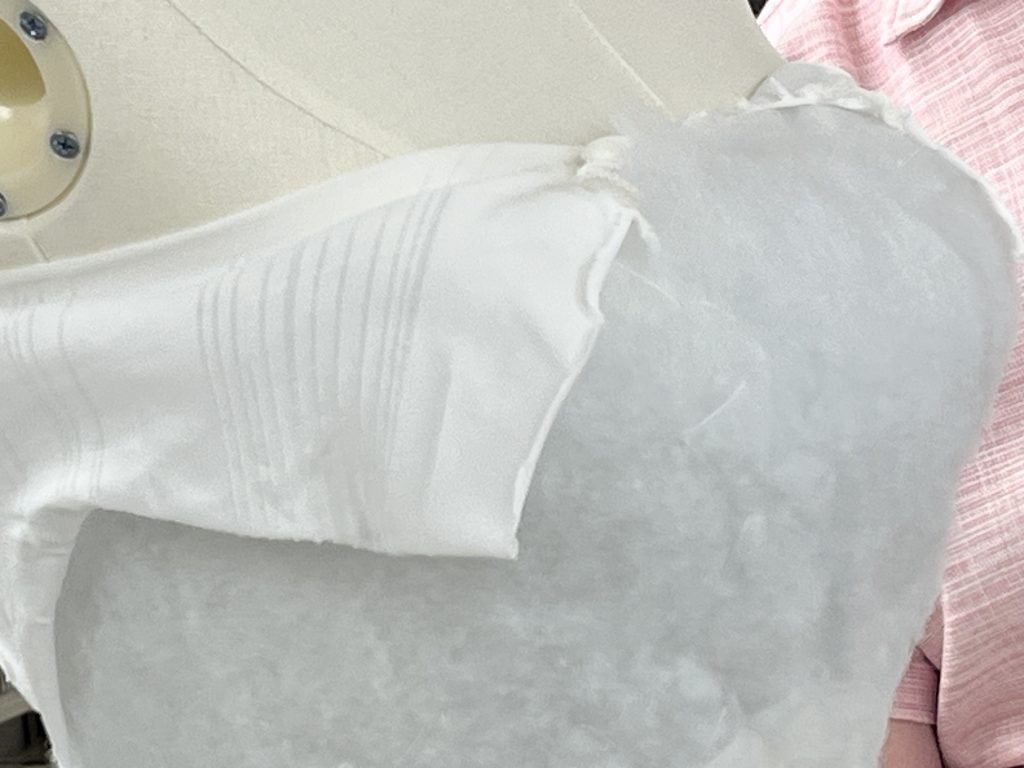
From there, we built up the bust of the mannequin using batting and zig zag stitches. The dress fit the waist well, so we didn’t add anything to the waistline of the mannequin. We layered batting through the bust and the sides to fill out the shape, so it better supported the garment. 

Once the bodice was sufficiently filled out with batting, we cut the tights at the top, folded them down and over the batting, and covered the bodice in cotton jersey to hold it all together. The sides of the jersey were stitched up using a channel stitch. 

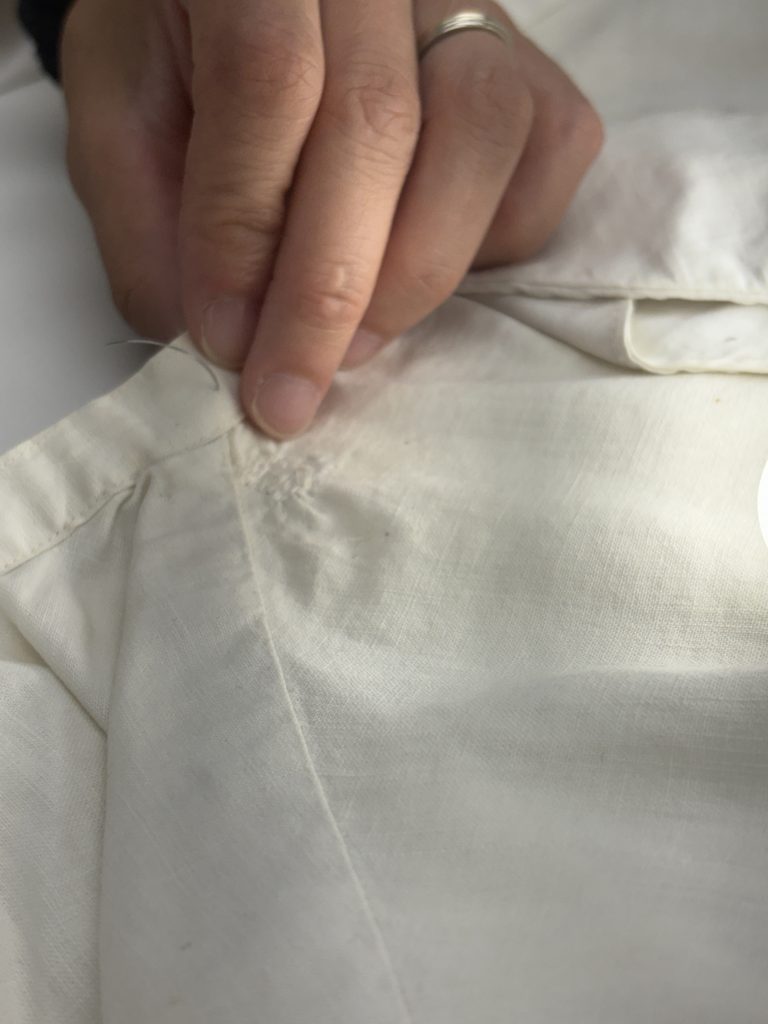
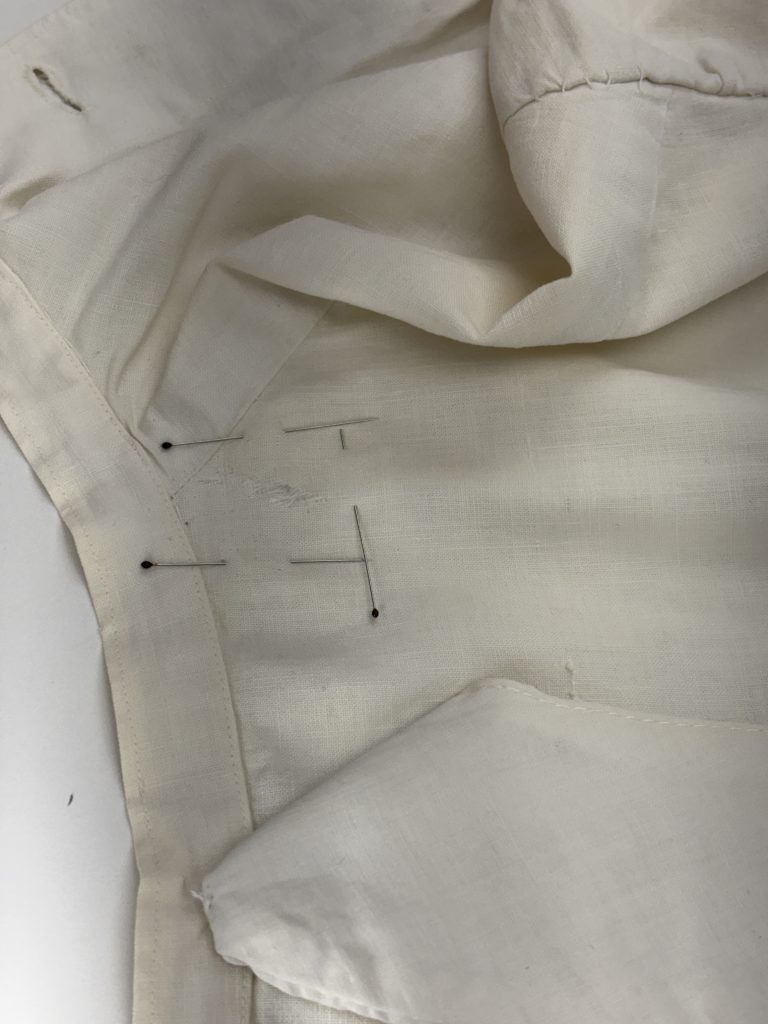
While the conservation technicians and specialists were working on the bodice of the mannequin, the conservators were working to patch some minor holes and slight damages to the nurse’s uniform using the stitching technique we learned on the first day. The dress had three significant holes, two at the top around the collar, and one in the skirt of the dress. 

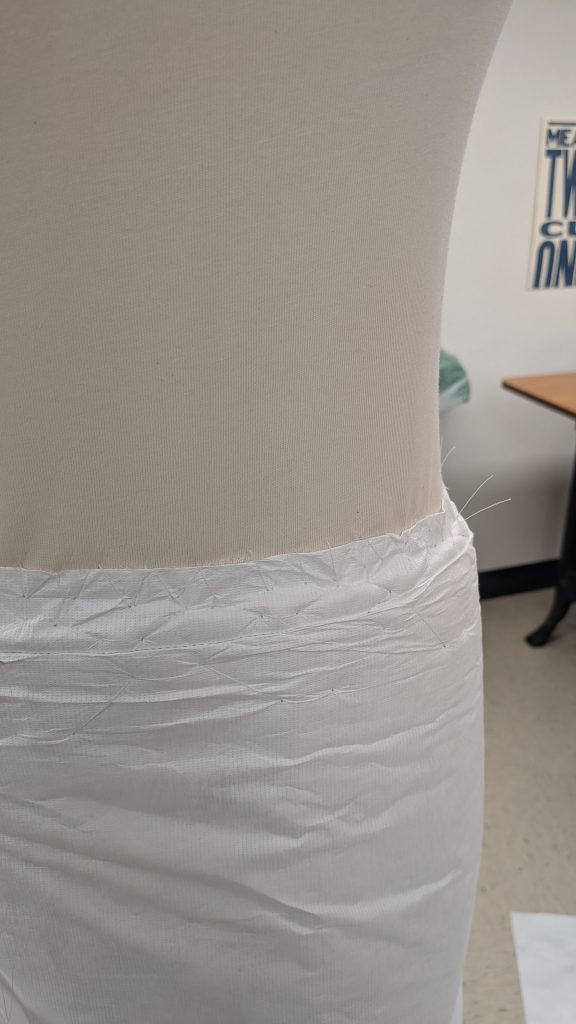
The final step for the mannequin was to create an underskirt to help support the skirt of the dress. This was created from felts sewn between two pieces of Tyvek, which was then sewn beneath the waist of the mannequin. We used zig zag stitches to hold it in place, then more zig zag stitches at the top of the felt to push it down and make the transition a little smoother between the bodice and the skirt. 

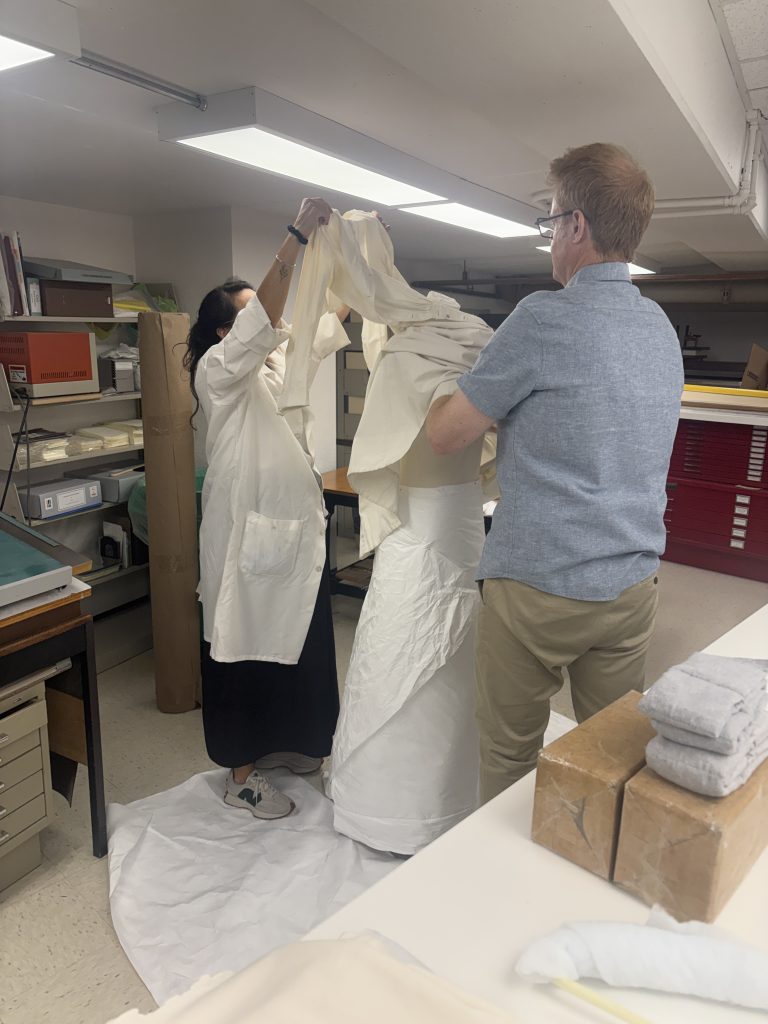
After the skirt was attached, we worked on sewing the legs of the tight around the wooden arms of the mannequin and securing them in place with double-sided tape. Once the arms were complete, it was time to put the dress on! It took two people to get the garment onto the mannequin – one to support the shoulders, the other to lift the skirt over the top. 

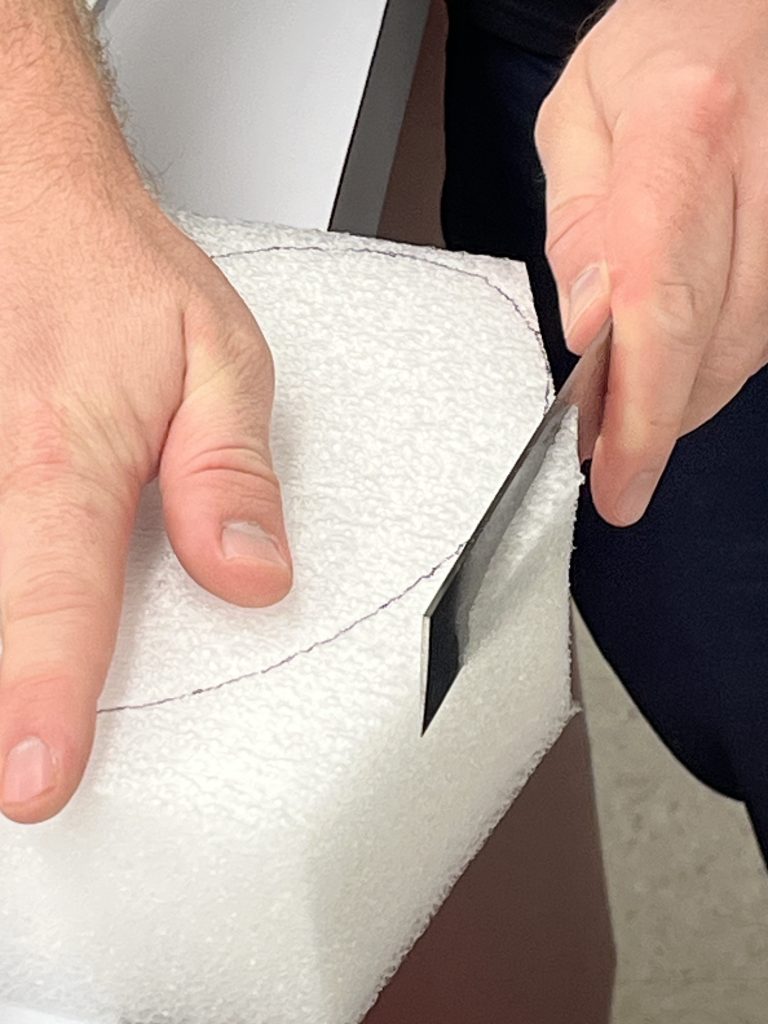
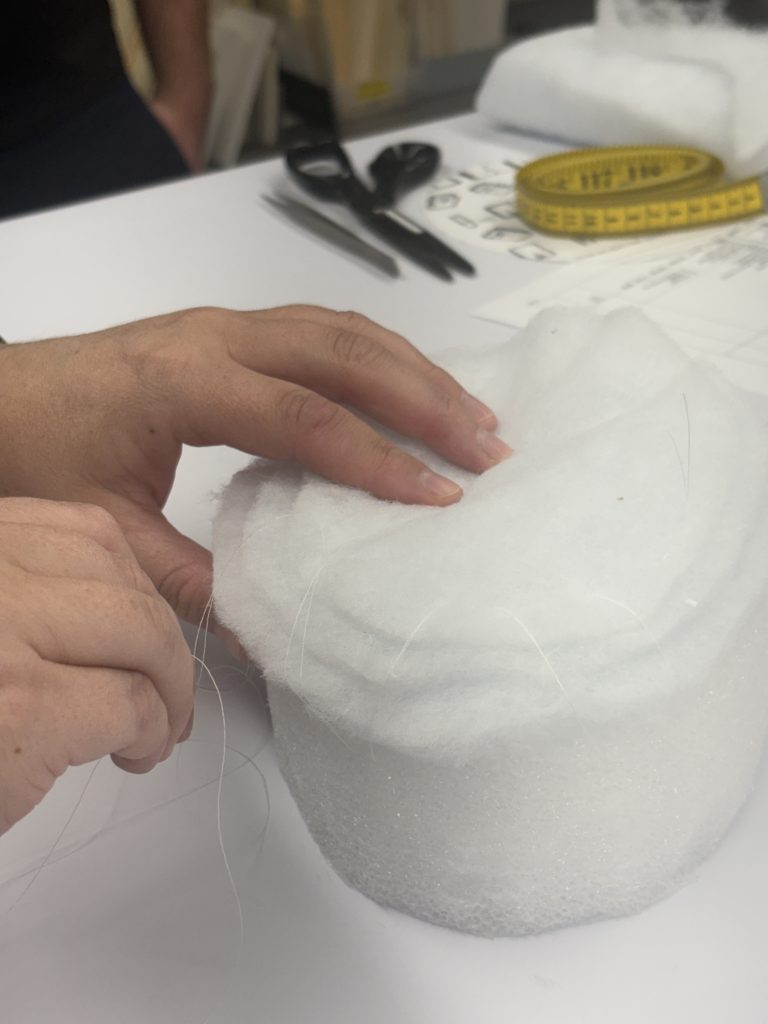
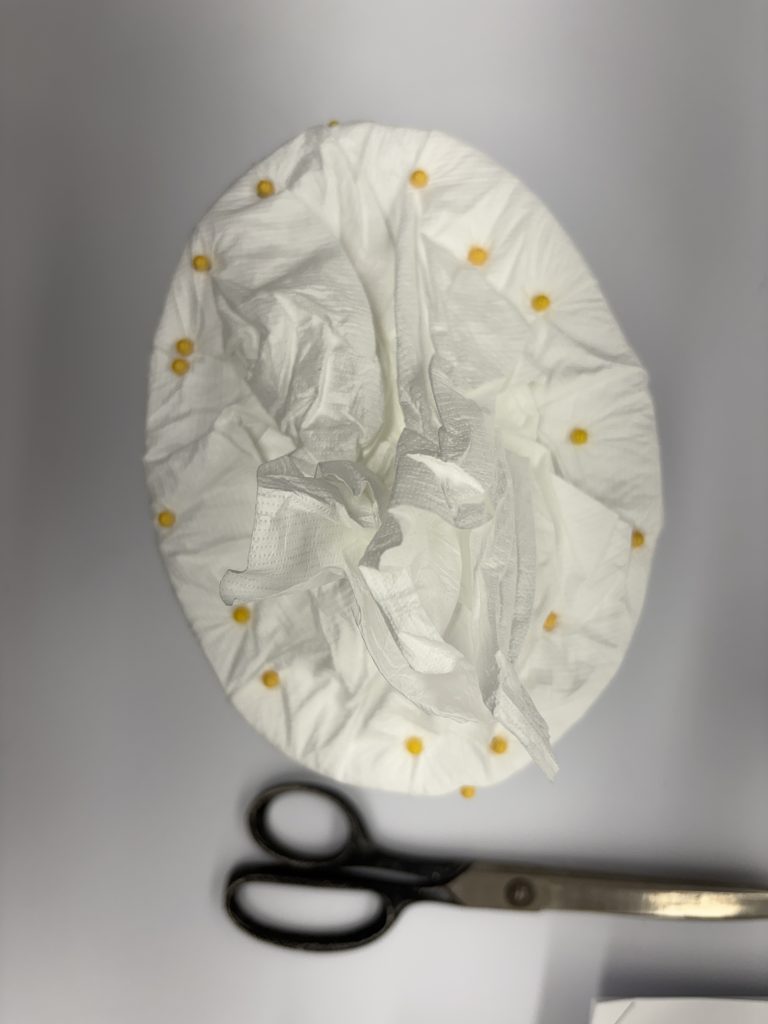
Another type of mount Howard taught us about was hat mounts. We have multiple hats in the lab, and were unsure of how to support them, so Howard showed us how we can sculpt ethafoam and cover the top with batting and wrap the whole thing in soft Tyvek to create a soft mount for hats to sit on.  

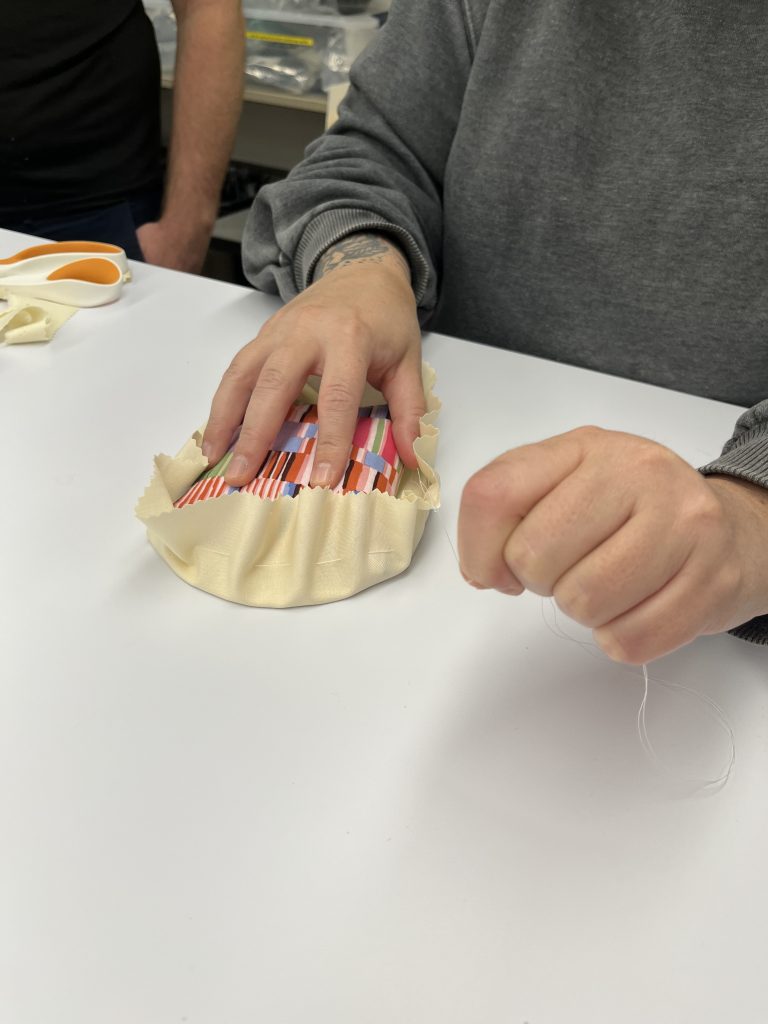
Once the batting and Tyvek were secured onto the ethafoam, a base of mat board was covered in broadcloth, which was stitched on using a running stitch. A blind channel stitch is then used to attach the base to the Tyvek, securing the whole mount together. 

Cloth being cinched around an oval mat board the shape of the base of the hat mount.
Sewing the broadcloth onto the mat board base using a running stitch.

Howard also taught us about adhesives and how to create heat set netting and silk, which can be applied without stitching and using only heat. He also worked with the conservators on dyeing netting and fabrics, and on how to wash textiles to remove stains. 

Our time with Howard was extremely rewarding, and we learned plenty about textile conservation, which for me personally was a branch of the field I knew very little about. Bringing in experts from other parts of conservation helps us to expand our practice, and each of us walked away with a new technique to try that we previously hadn’t thought about using for paper conservation. 

Preservation lab staff and Howard Sutcliffe with the dressed nurse mannequin.
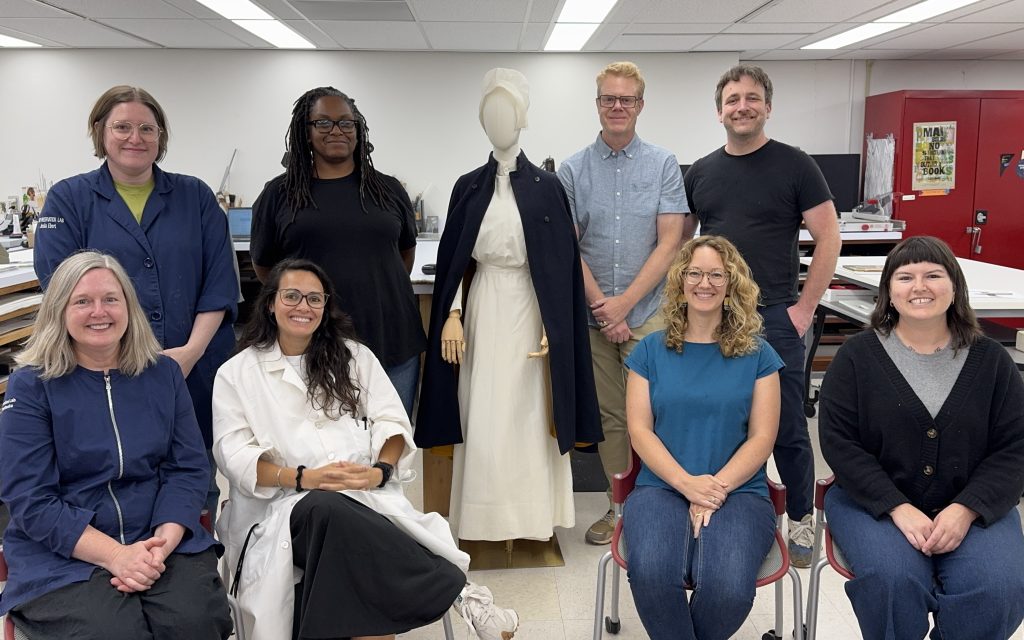
All of the lab members with Howard Sutcliffe and our completed nurse’s uniform.

Nicole Browning – Library Conservation Specialist

Images by Nicole Browning, Jessica Ebert, Hyacinth Tucker, and Holly Prochaska

Digging into a Family Bible

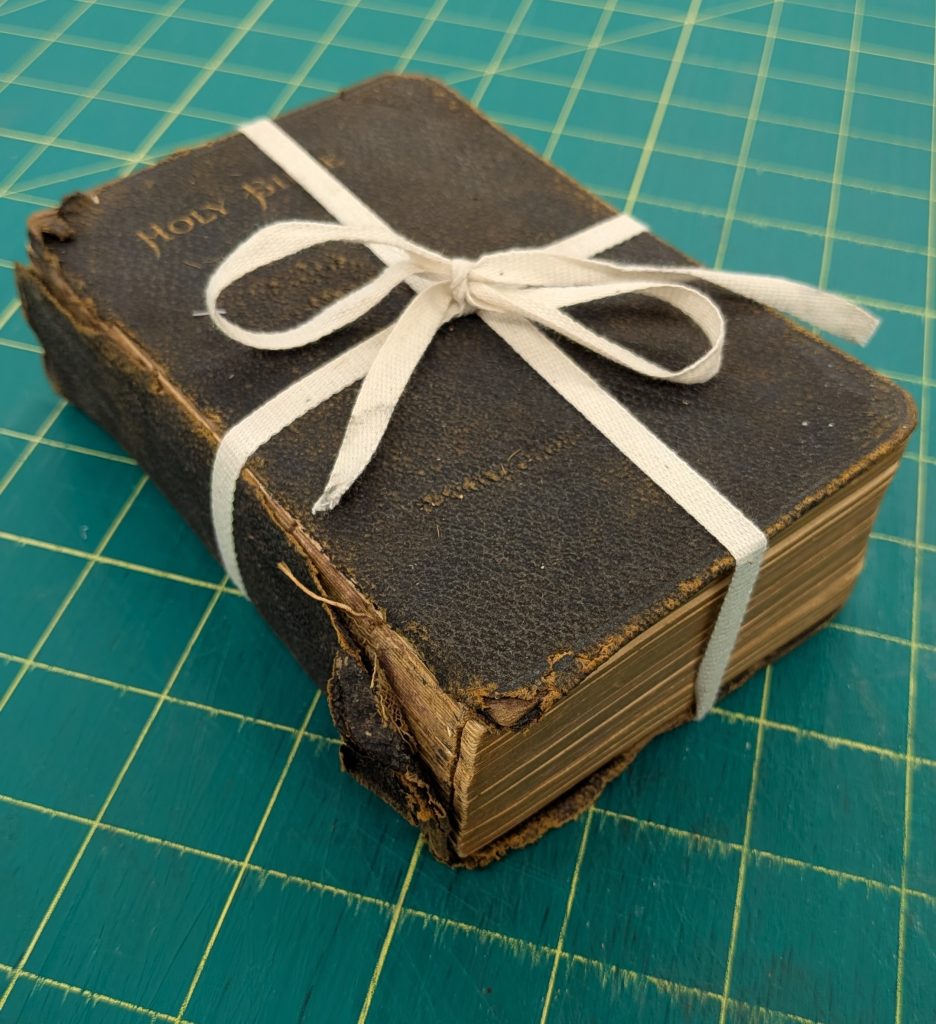
I picked this tattered Bible up off the shelf where it had been waiting for an enclosure thinking it would be a quick and easy project. All it seemed to need was a corrugated clamshell and a pocket for some ephemera – easy enough. What I wasn’t expecting was for the ephemera inside of this book to be human hair. Multiple locks of it.

A card that accompanied the bible from Kenton County Public Library said that the family listed in this Bible (last name of Gegner) seemed to be more Cincinnati-based than Northern Kentucky-based, and it ‘contained lots of interesting items within.’ And ‘interesting items’ was an understatement!

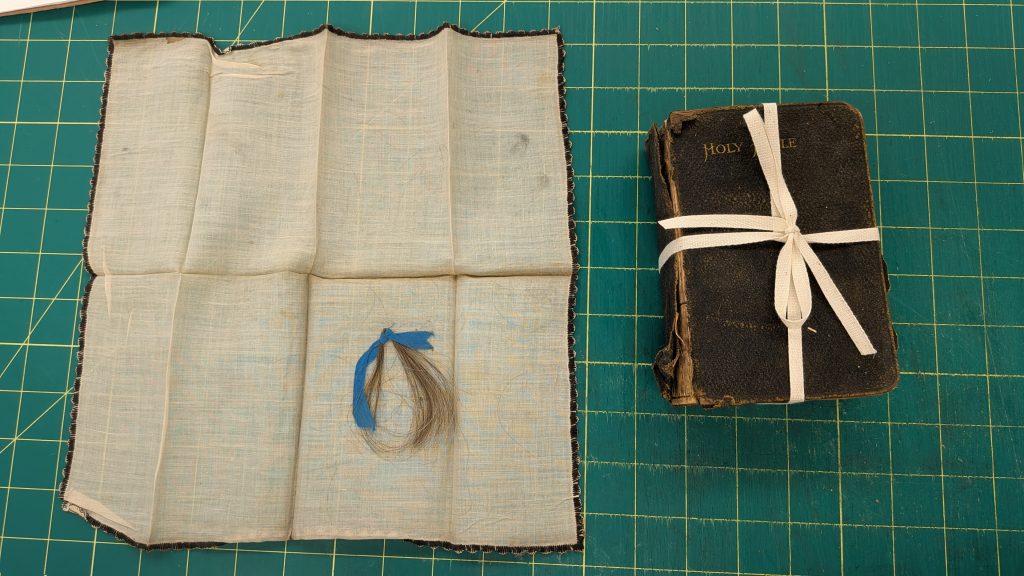
Along with the Bible was a folded handkerchief, which, when unfolded, contained a small lock of hair tied with a blue ribbon.

Unfolded handkerchief with a small lock of hair tied with a blue ribbon, sitting next to the cloth bound bible, tied with cloth string.

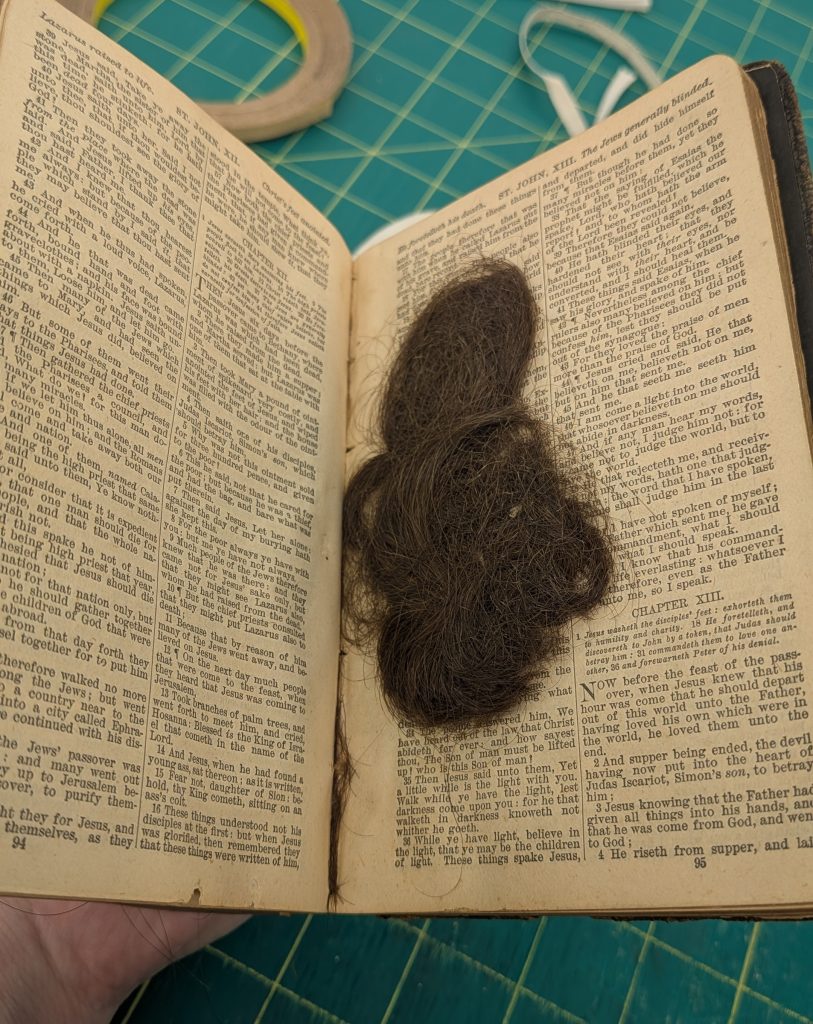
I thought this was the interesting items mentioned but decided to untie the Bible and peek through it as well. Imagine my surprise when I came across another lock of hair tucked within the pages! But it didn’t stop at one – I ended up uncovering three locks of hair, three pressed flowers, and one icon of Jesus and the Sacred Heart that seemed to be hand embroidered.

Another lock of hair pressed between the bible's pages.

After talking to some people about the Bible at our annual open house, it came to my attention that this Bible is probably a family Bible, used to keep family records. I also was made aware that typically in family Bibles, deaths, births and marriages are recorded on the pages between the Old Testament and the New Testament. Lo and behold, when I opened this Bible to the New Testament, sure enough there were birth and death dates!

Handwritten inscriptions of birth and death dates written in the bible.

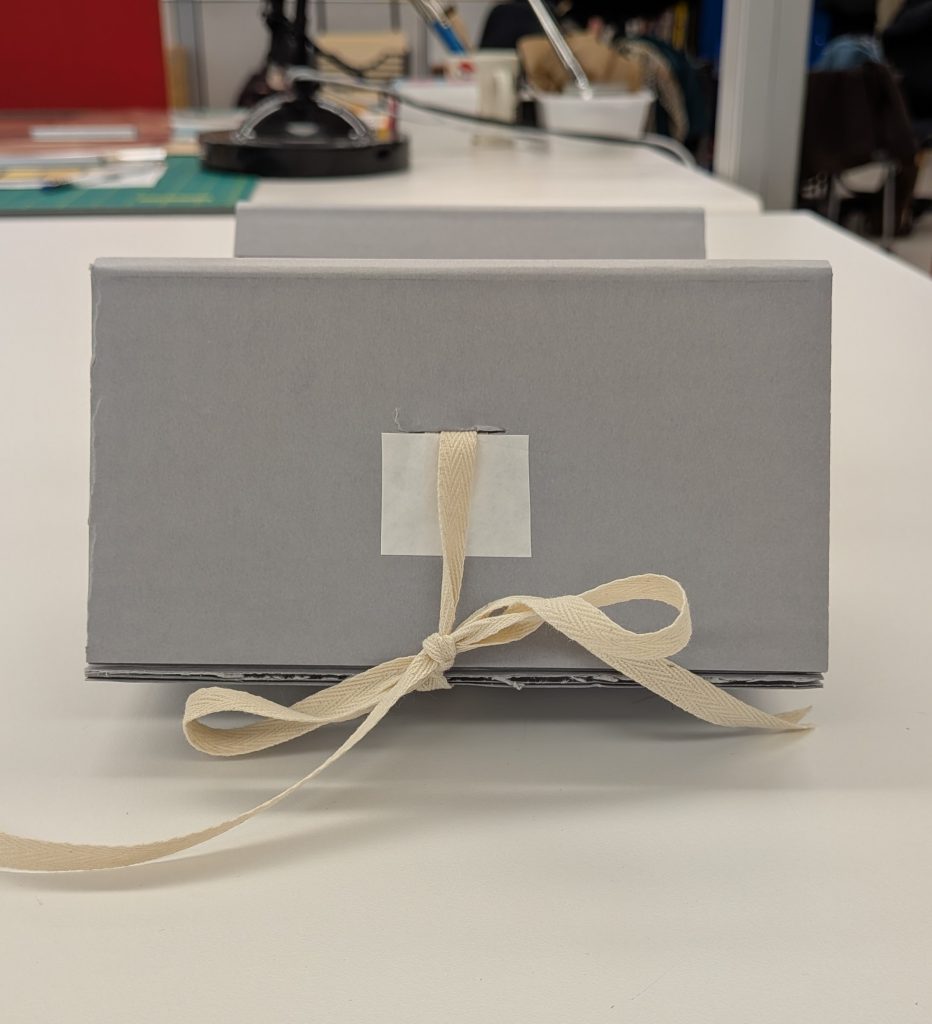
As mentioned above, this Bible wasn’t in for any major treatment – it received a corrugated clamshell with some fill to make it 5” x 7” so it doesn’t get lost on the shelves, and a pocket was made and attached to corrugated board to keep the handkerchief and the card from Kenton County Public Library. Additionally, the newly discovered items inside the Bible were also placed in polyester sleeves, in order to protect the pages, and then laid back in where they were found. These efforts will help to keep the Bible stabilized on the shelf, so it will be useable for longer.

While this Bible isn’t connected to any famous names, it’s still amazing to know that we are helping preserve local history. Hopefully, we can help future generations get a glimpse into their past relatives’ lives by preserving something like this Bible.

Nicole Browning – Conservation Specialist

Creating a Cradle for Frankenstein

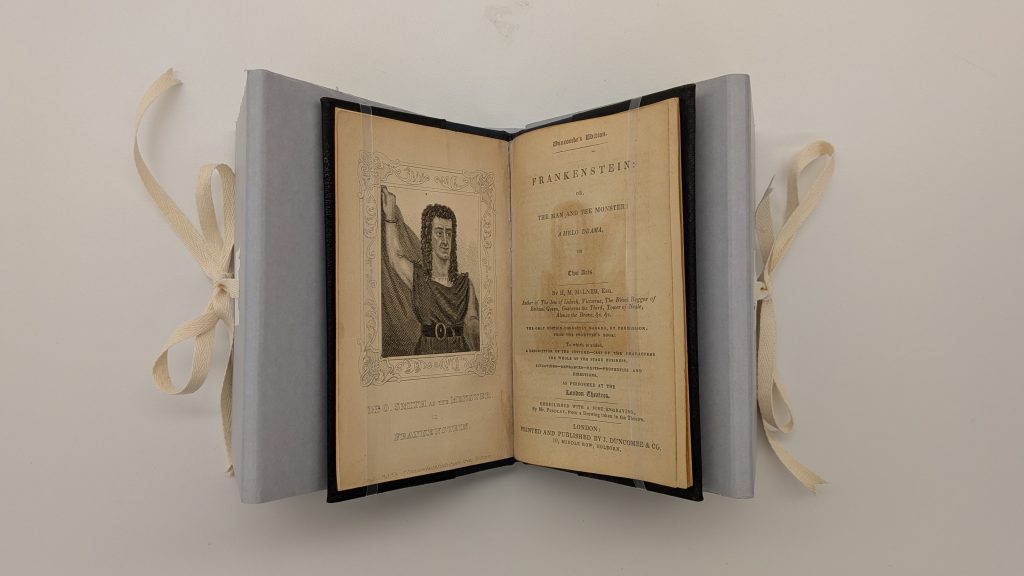
When a copy of Frankenstein: the Man and the Monster came into the lab from CHPL, Catarina asked me to make an enclosure for it – easy enough. What I didn’t imagine was how tricky a book this little can be. This book measured around 6 inches tall by 4 inches wide and maybe a quarter of an inch thick – small, thin, and not very heavy at all. 
The problem wasn’t the box, but the integrated cradle, which is essentially a few pieces of corrugated board adhered together to create a rest so the book can open with less stress on the spine. With a book as small and lightweight as this one, the pages and cover weren’t heavy enough to weigh down the arms of the cradle, therefore I needed to figure out a way to keep the arms of the cradle down so the book could open fully.

To achieve this, I used linen tapes to hold the two halves of the arms together so they stayed firmly down without needing the book to weigh them. The tape on the outer part of the arm is tied into a bow with another piece of tape that is attached to the base of the cradle. 

Aerial view of a small book strapped in a corrugated cradle.

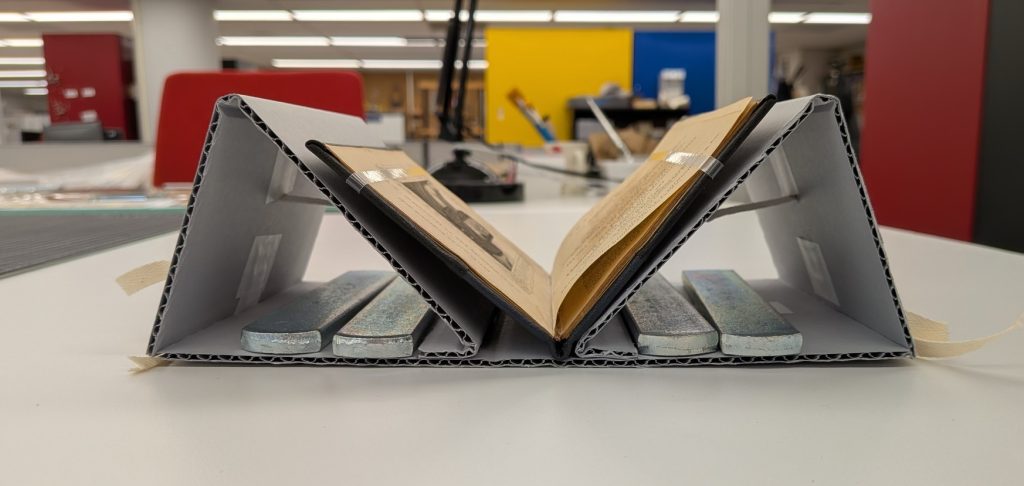
Furthermore, to keep the cradle from opening too far, I used more linen tapes on the interior of the arms to hold the arms at the exact width I wanted them from the spine of the book. This helped the cradle keep it’s shape, and created tension for the ties.

View of a small book strapped in a corrugated cradle with weights in along the base to hold the cradle in place.

Nicole Browning – Conservation Specialist

A Timeless Tale – How Inscriptions Tell Stories

It’s amazing the different ways books can tell us stories. There’s the obvious: the words that are written on the page and create the story the author wanted to tell. But there’s also what lies beneath the surface — the wear and tear of the book, how it was bound, what materials were used to make it. There’s the outright story a book was meant to share, but there are also context clues, and deeper ways we can dive into the history of a book.

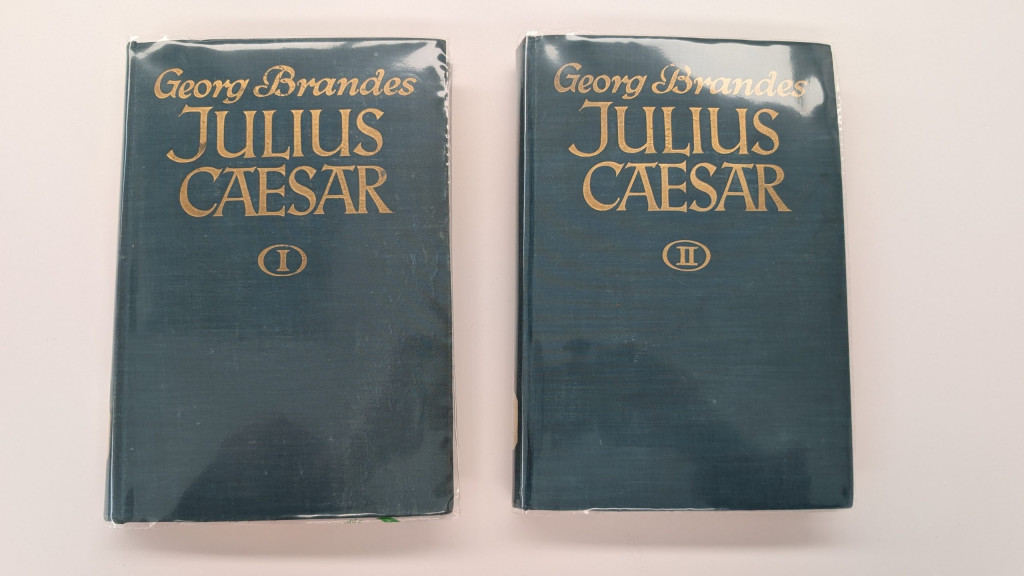
Sometimes, a book just outrightly tells its story through notes left by previous owners. A handwritten message about where it was bought, a book plate of whose library it came from, or an inscription with notable information about damage to the tome are all ways prior owners can document what the book has been through. This latter suggestion is the case for a two-volume set of Cajus Julius Caesar by Georg Brandes.

A Timeless Tale – How Inscriptions Tell Stories
Pictured: volumes I and II of Cajus Julius Caesar.

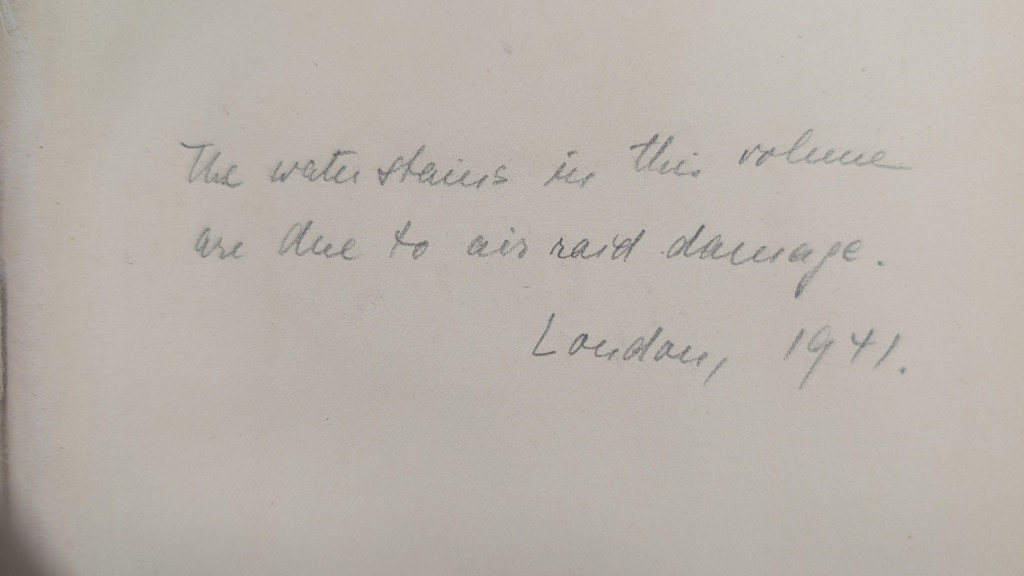
These books were published in 1925 by the Erich Reiss Verlag publishing house. On the fly leaf of both of these volumes is a handwritten inscription which reads “The water stains in this volume are due to air raid damage. London, 1941.” In graphite. What a big journey for two books, from Berlin, Germany, to London, England, and then to Cincinnati, Ohio!

A Timeless Tale – How Inscriptions Tell Stories
Pictured: inscription in Julius Caesar Volume I.
Inside of both volumes, open to the first blank page, where the inscription is visible on both books.
Pictured: inscriptions in Julius Caesar Vol. I and II
Two volumes stacked on top of each other with the bottom of the text block visible. The text block is stained brown on the lower right corners of both volumes due to water damage.
Pictured above: signs of water damage on the book.

The water damage to the books is there but it isn’t too drastic. There is some obvious staining and cockling to the pages, as well as some warping of the covers. These books were treated with v hinges on the front and back fly leaves to prevent further separation of the cover from the text block and were also put in Colibri covers to help keep them protected on the shelves and during use.

One of the books with the front cover open and the text block under weights while being repaired.
Pictured: both volumes of Julius Caeser being treated with v hinges.

These books needed minimal treatment, and then will return to their home at the Classics library. With some care from the preservation lab, these two volumes can continue to tell their story for years to come.

Nicole Browning — Conservation Technician

Fun with Copying Technology

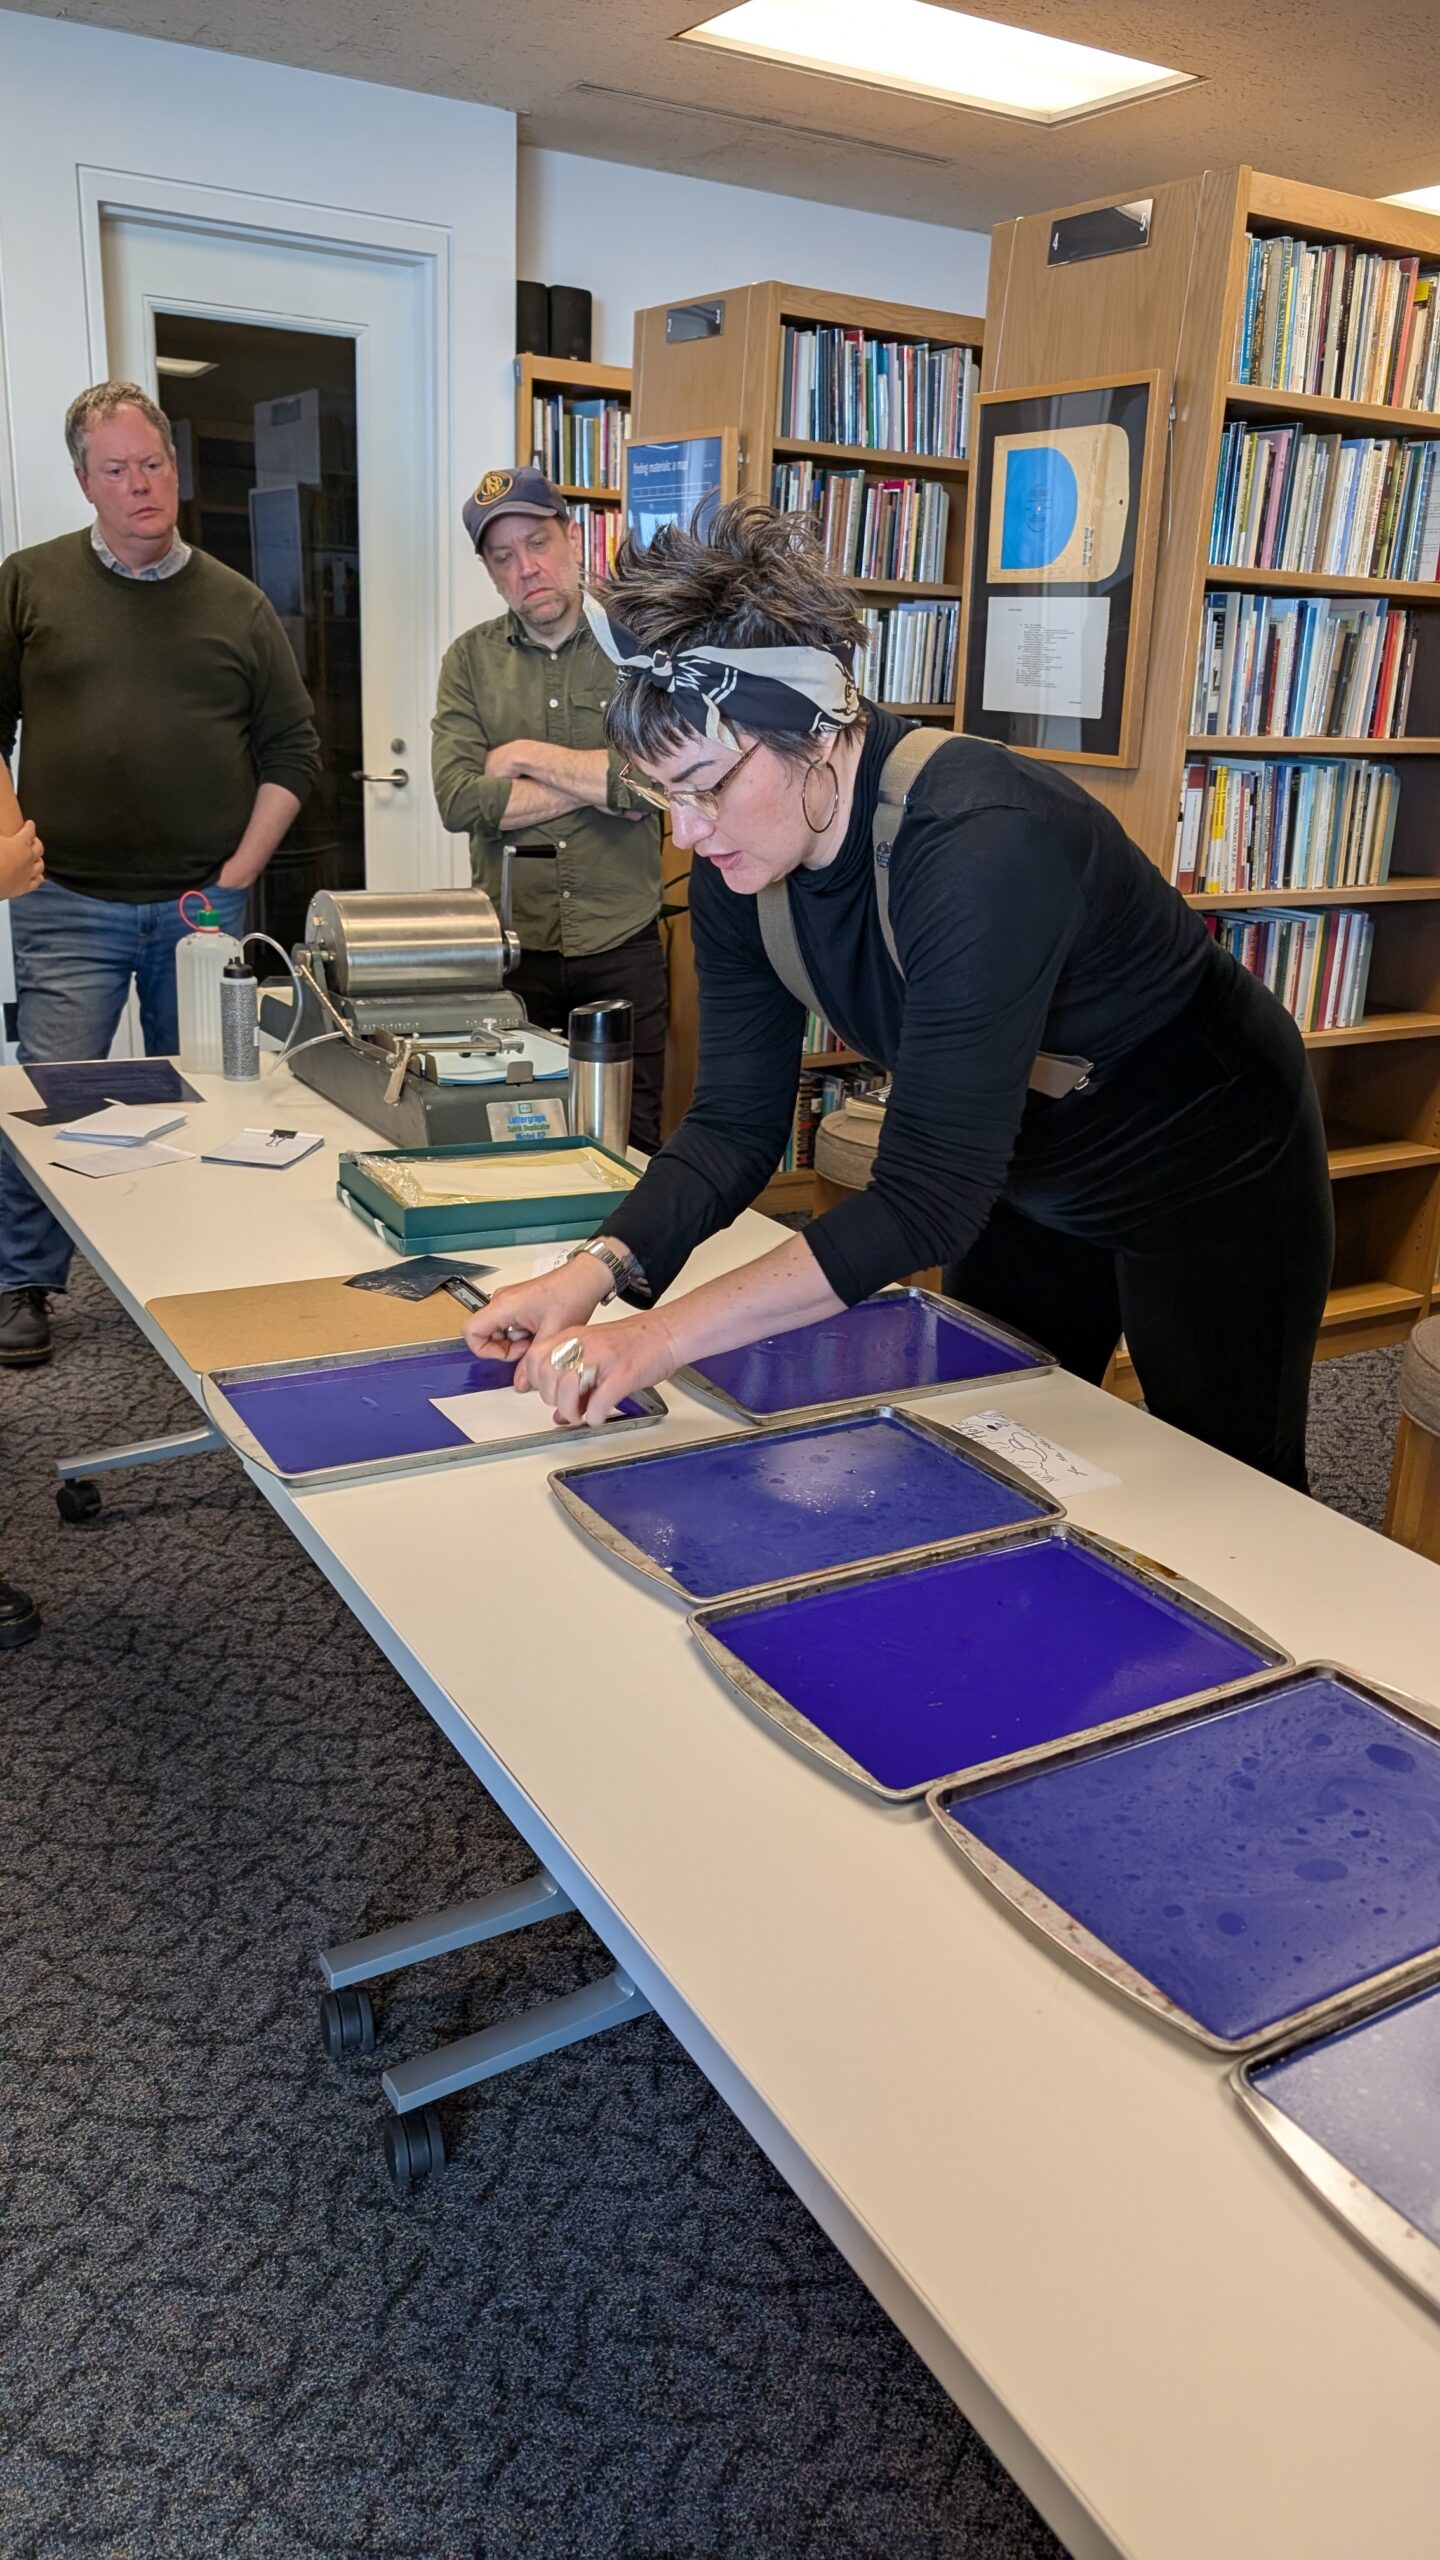
On Monday, April 7, the Archives and Rare Books Library along with the Elliston Poetry Room hosted a workshop with Rich Dana. Rich is a copier artist and founder of Obsolete Press, and he teaches at the University of Iowa Center for the Book and the Center for Book Arts in New York. The workshop covered obsolete duplicating technologies, which covered the mimeograph and hectograph.

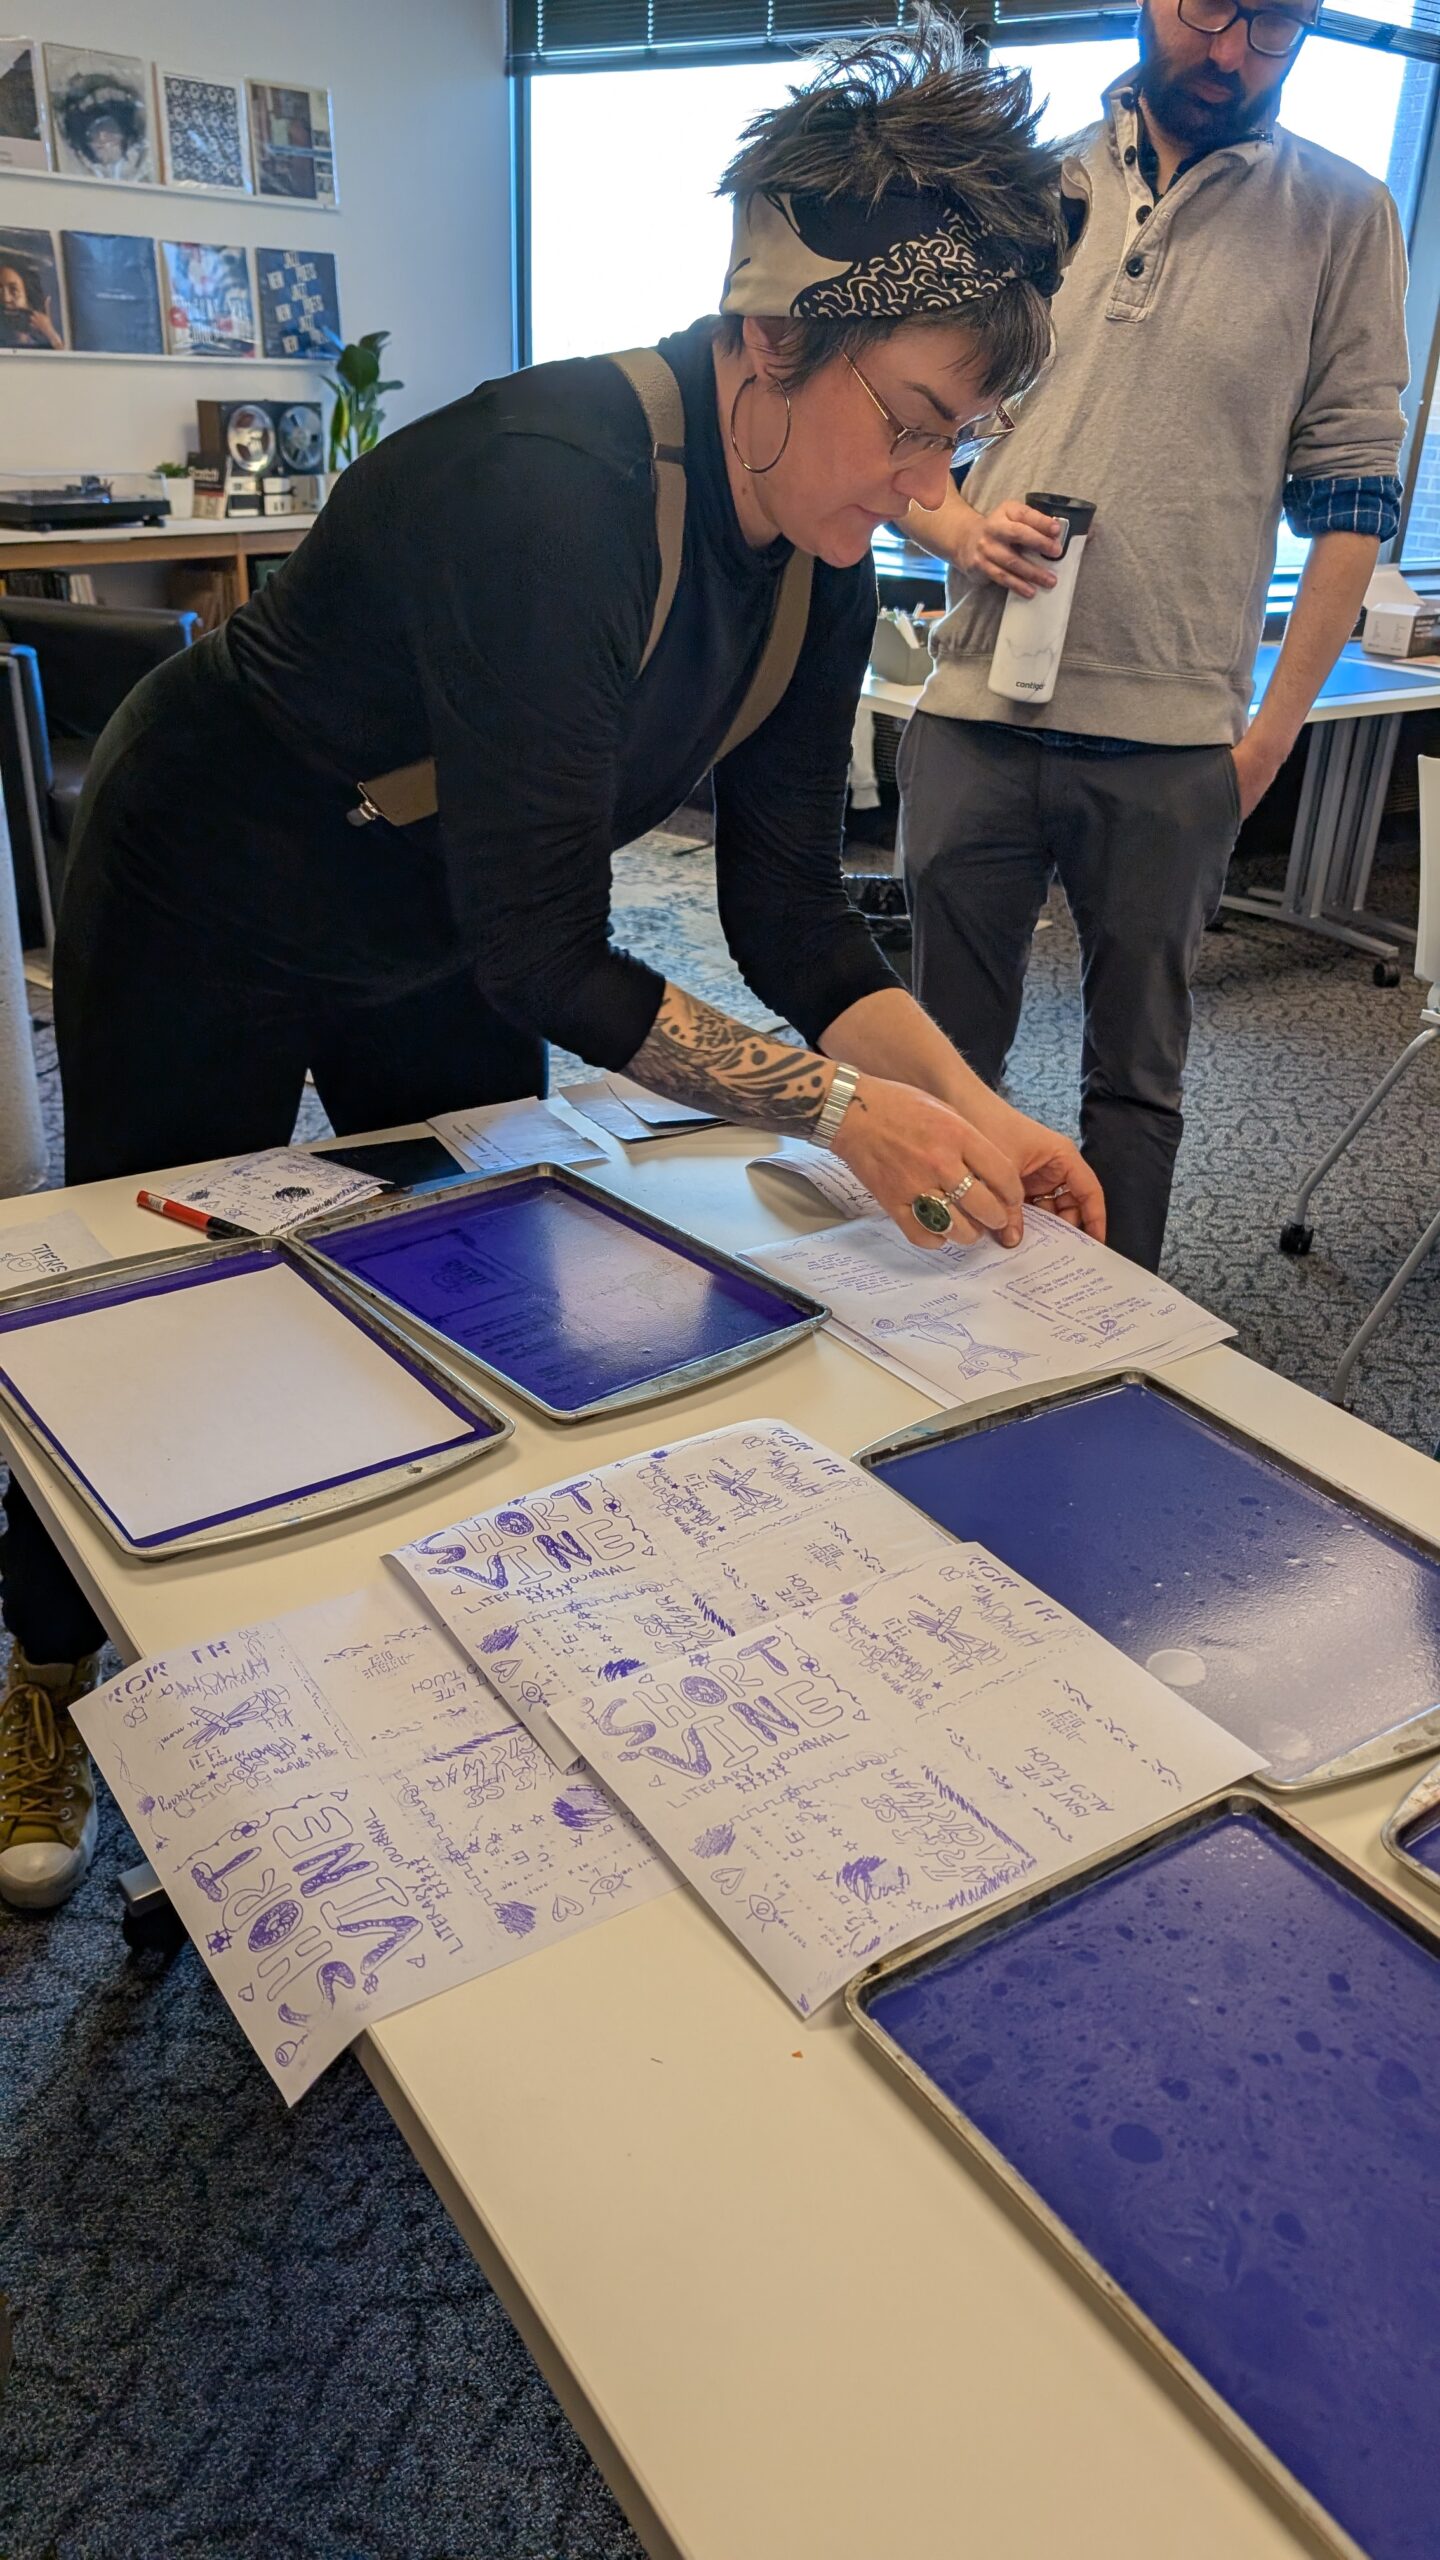
Along with his assistant Leisha, a performance poet and publisher herself, Rich talked us through how to use these machines. The hectograph, also known as a gelatin duplicator, used gelatin in trays as the matrix. Master copies were created using spirit tattoo paper, then the master was pressed to the gelatin matrix. Once the design was down on the gelatin, a fresh sheet of plain paper was pressed to the gelatin matrix, and the design transferred over to the paper. This method can be used multiple times — we made at least twenty copies off it, and the fading was minimal!

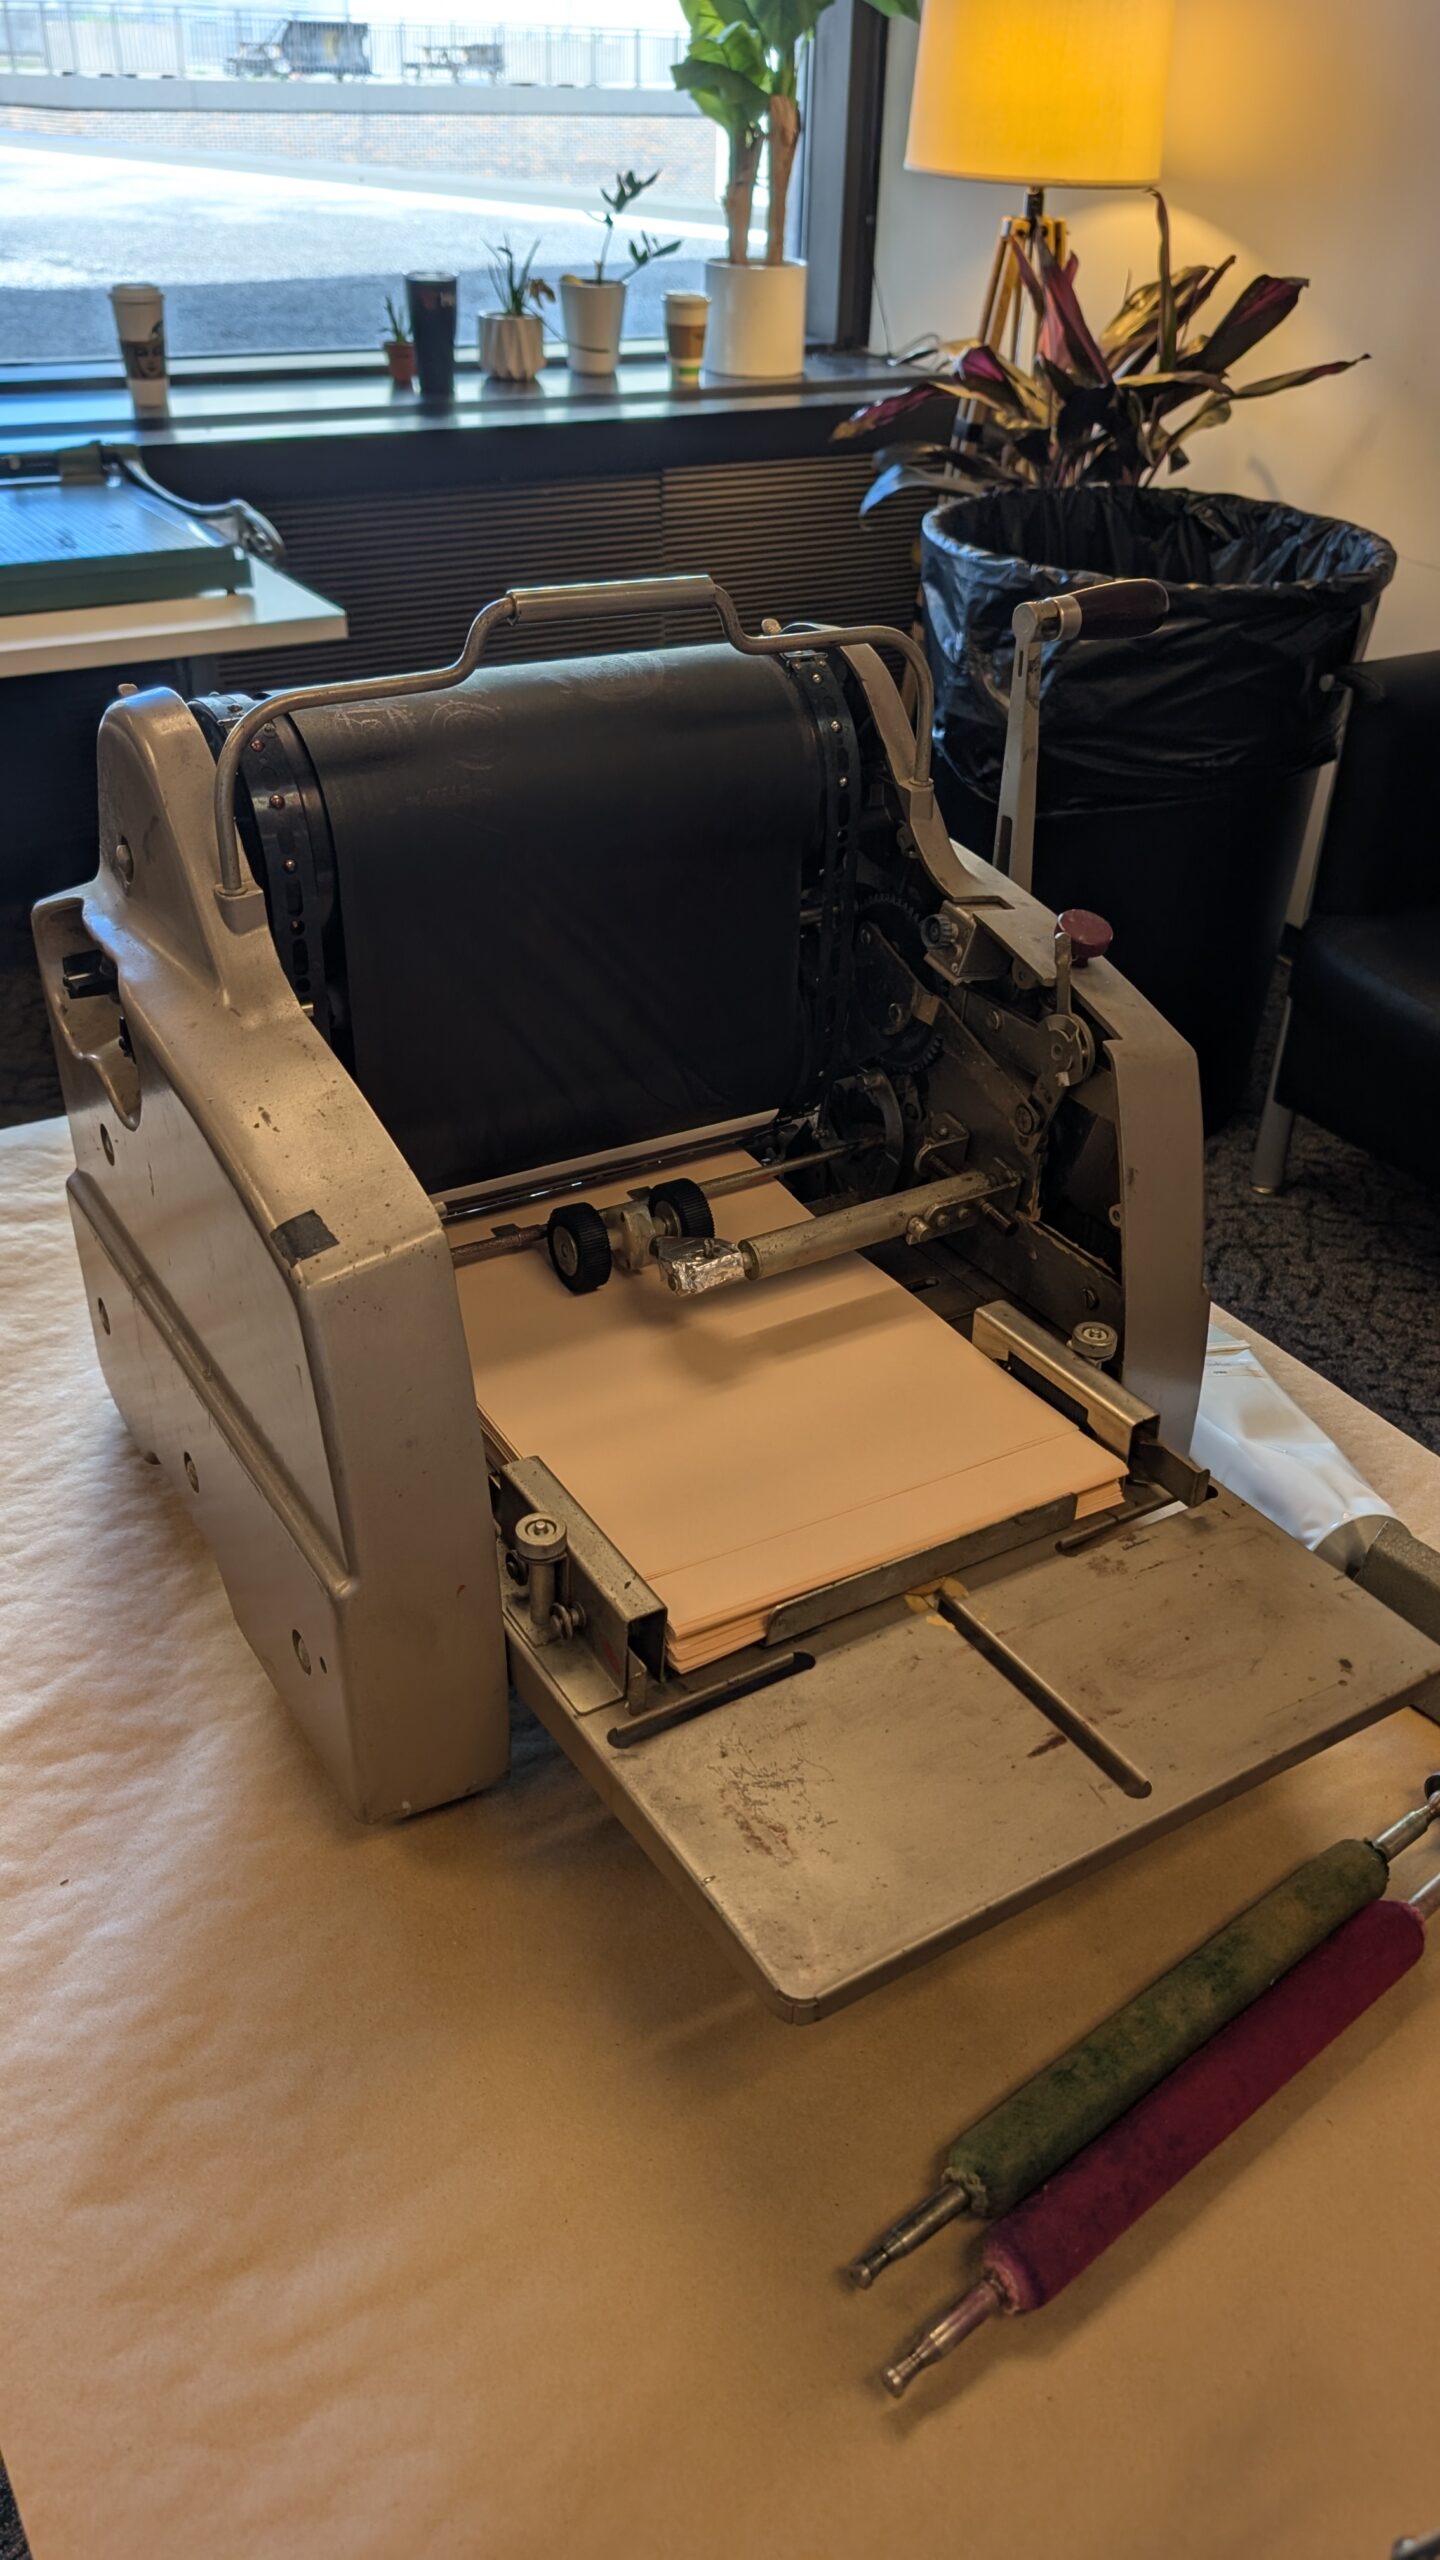
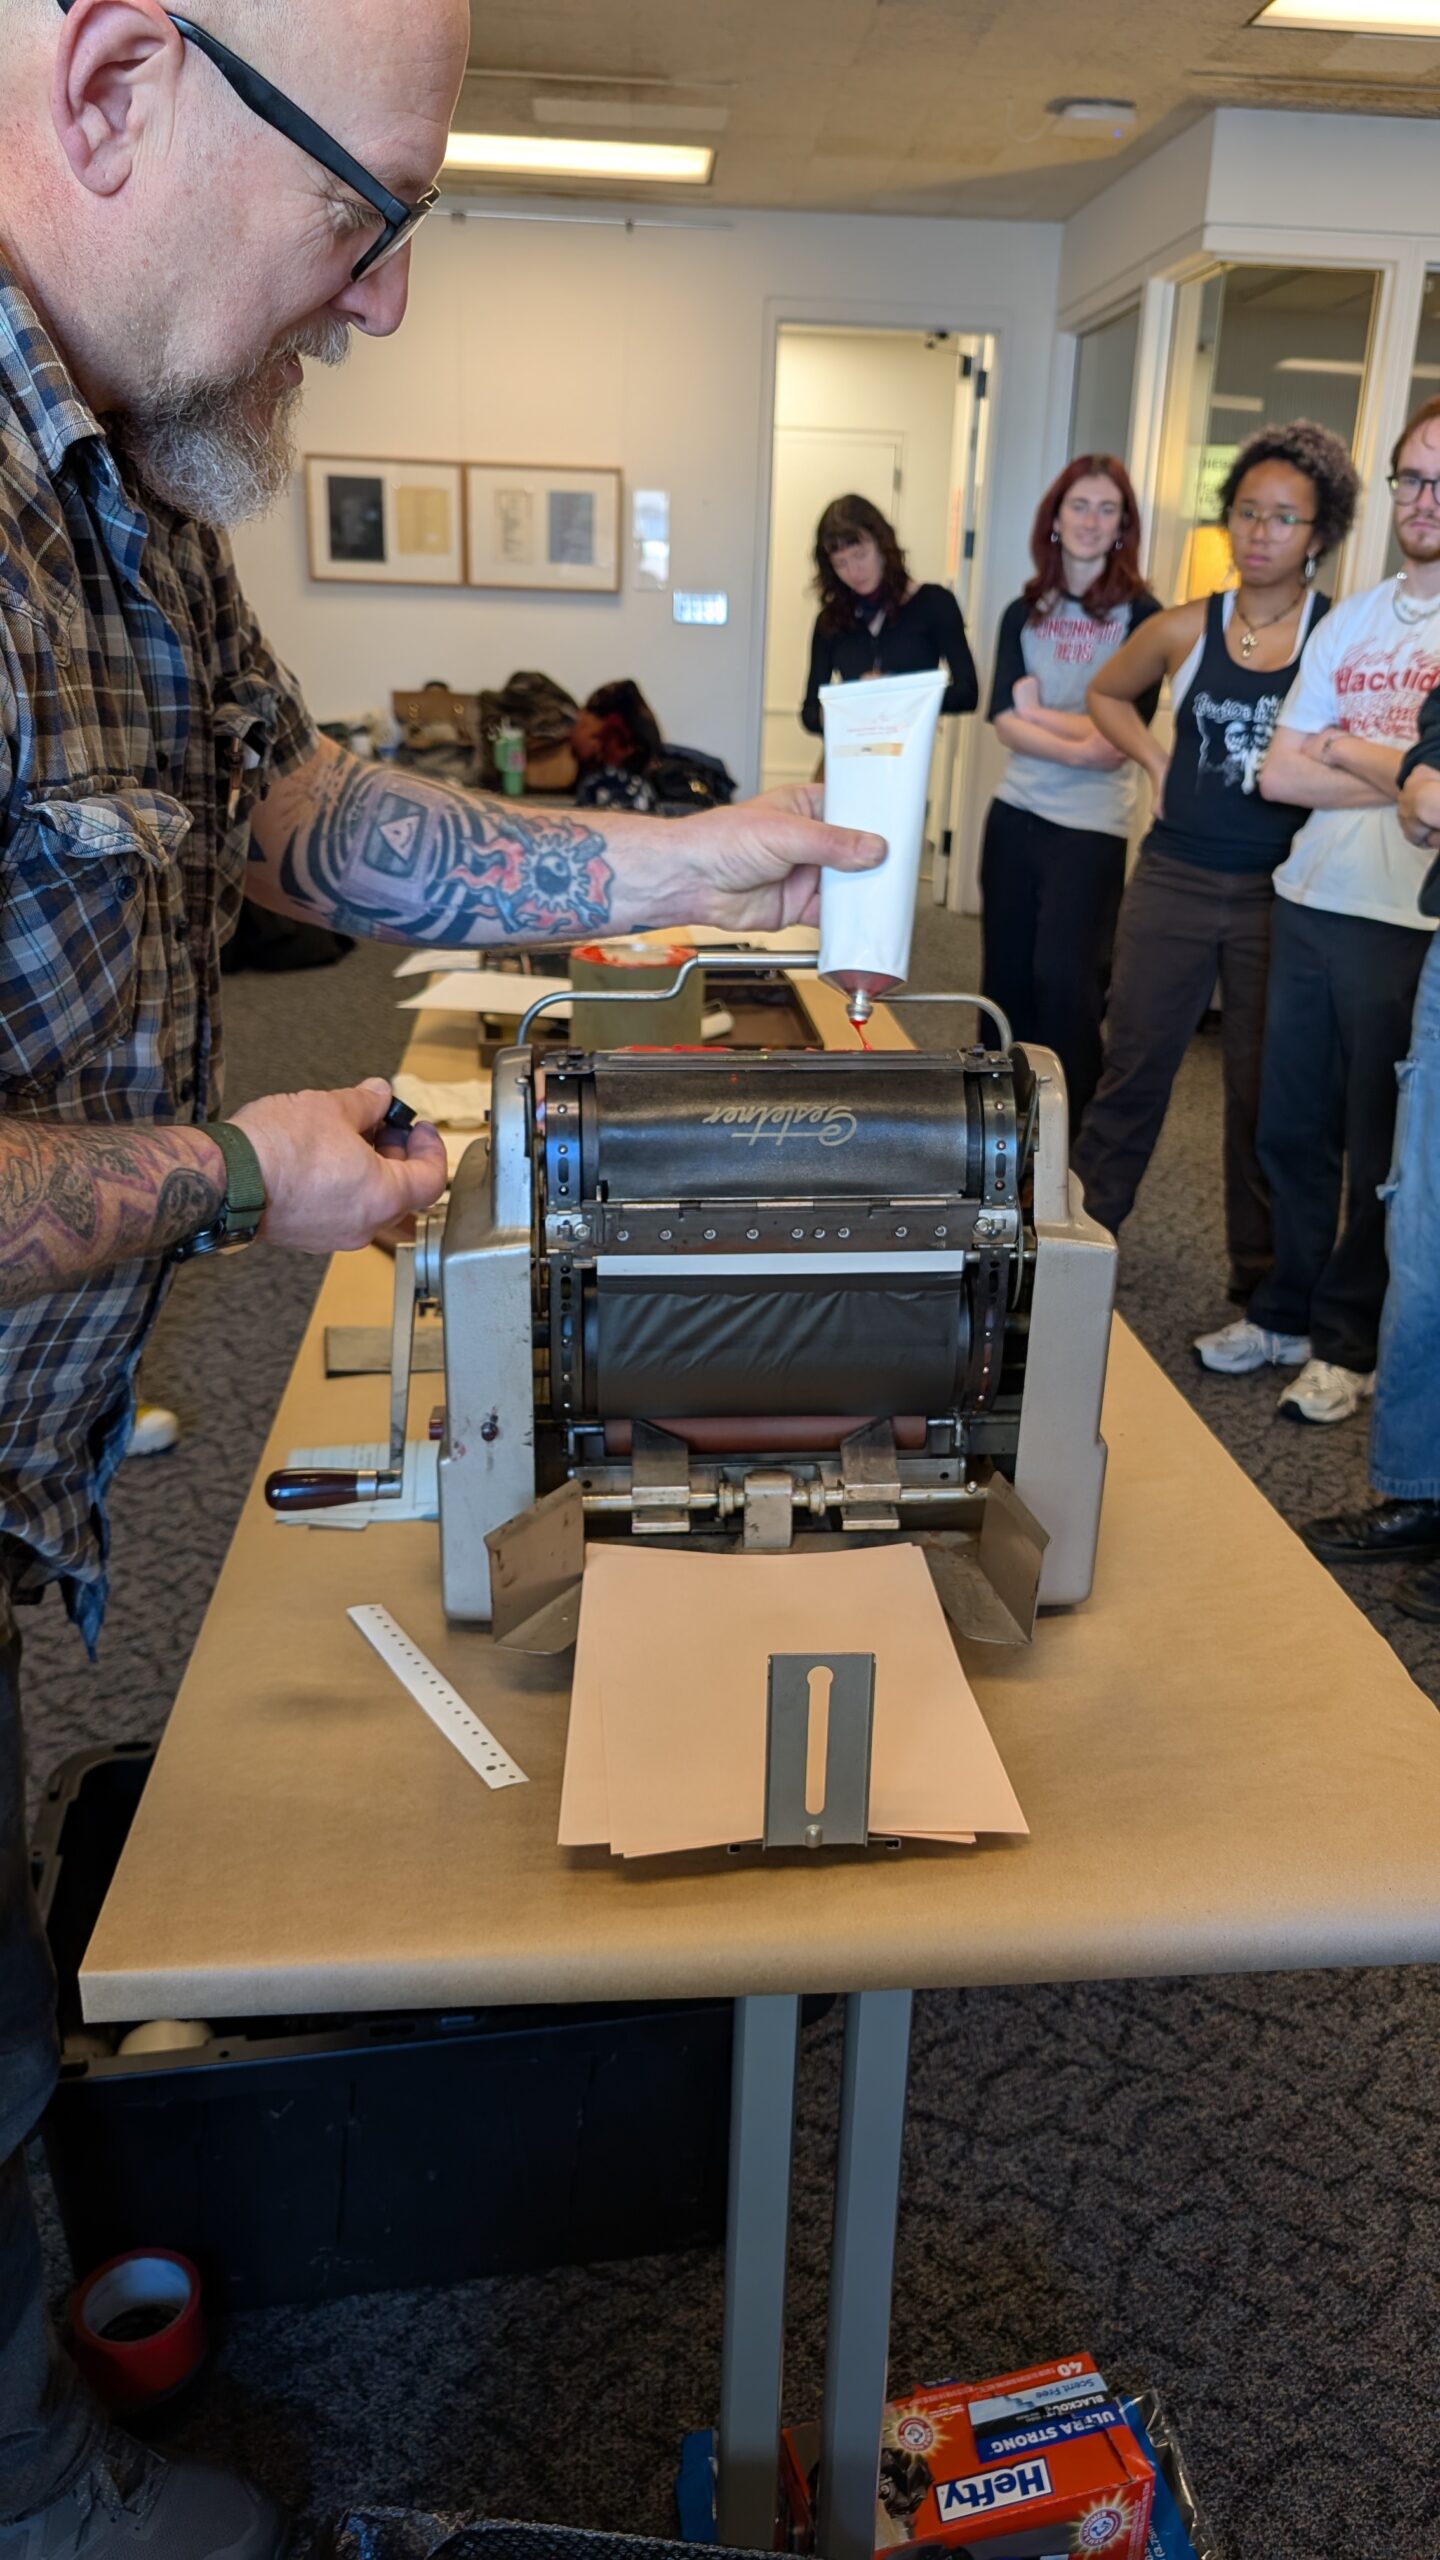
The mimeograph is an upright machine with a crank that picks up the paper and rolls it through the stencil. With a big roller that holds the stencil, the machine forces ink through the stencil and onto paper to create copies. The user must manually put ink on this machine before using it.

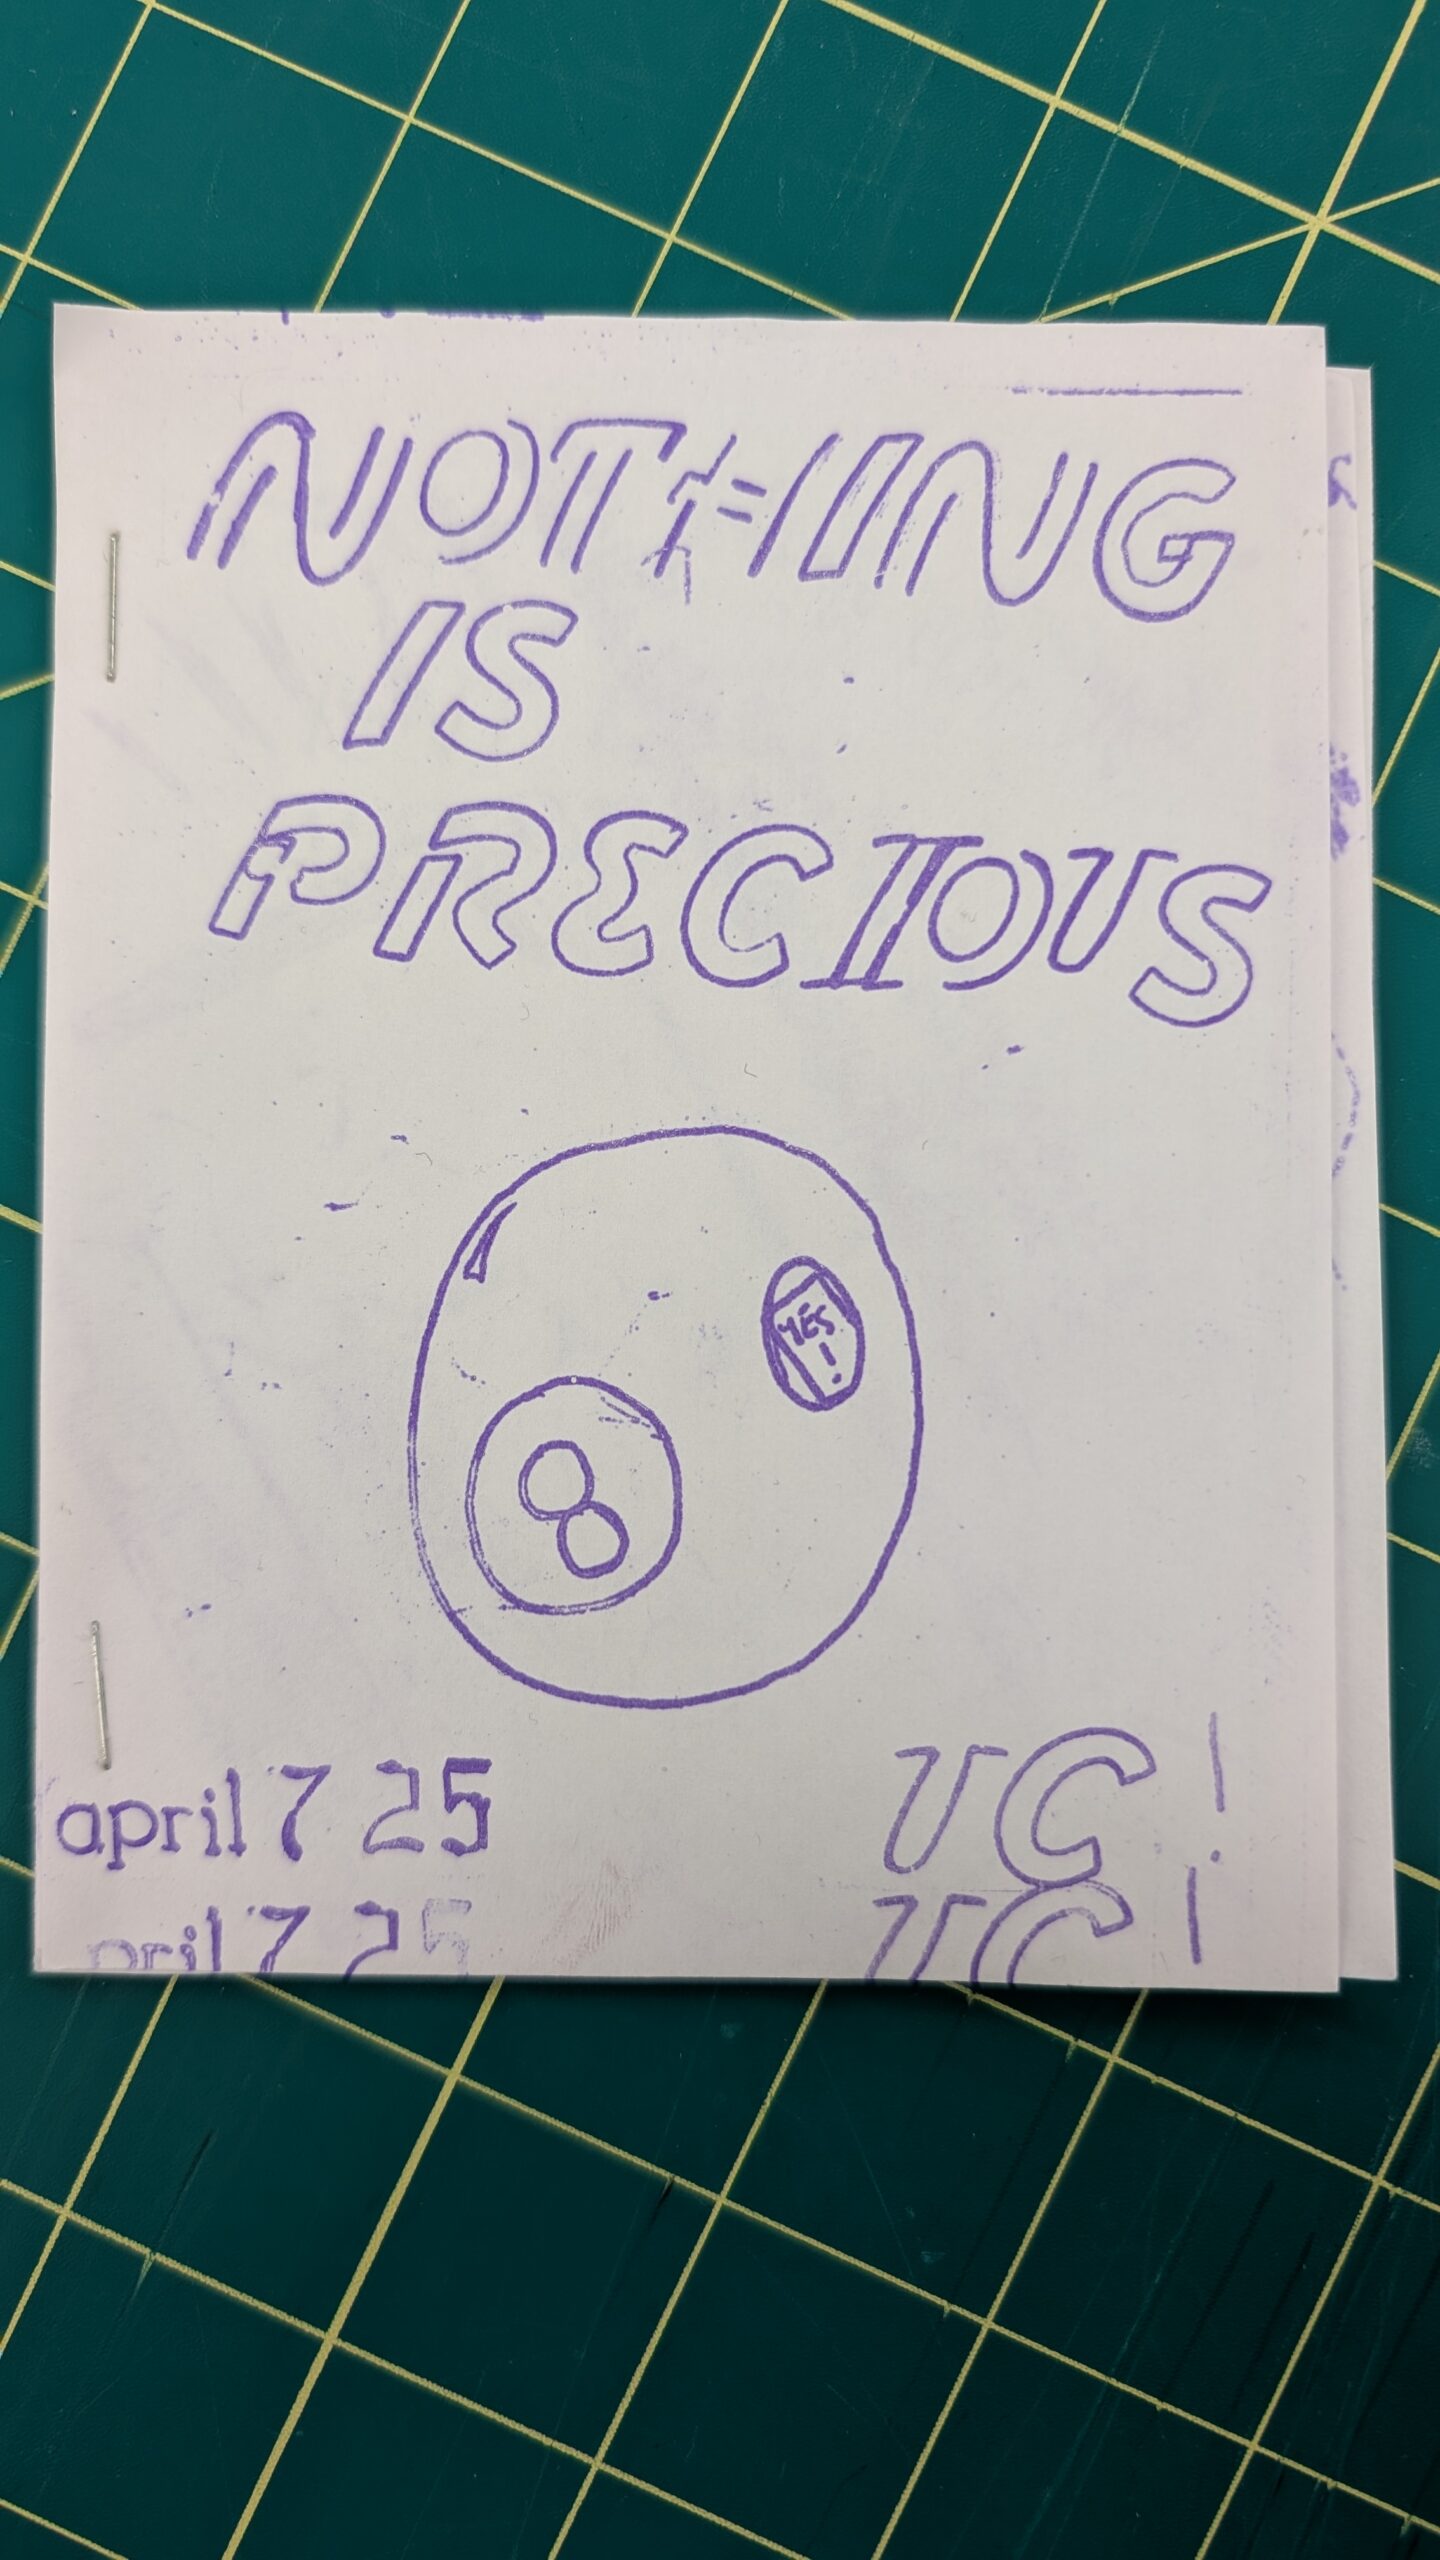
Getting to play with these two technologies was so much fun. We got to create our own stencils that we then made copies of and turned into a zine! We were able to use typewriters or styluses, stencils and our own creativity to create our stencils for these pages that we printed. It was amazing to see technology that’s not so modern still in use and working, and to play around with that technology and still use it to create was inspiring.

Image of the zine created by the workshop participants on the mimeograph machine.
The cover of the zine we created with the hectograph.

Nicole Browning — Library Conservation Specialist

Just Peachey: Jeff’s Conservation Hand Tools Workshop

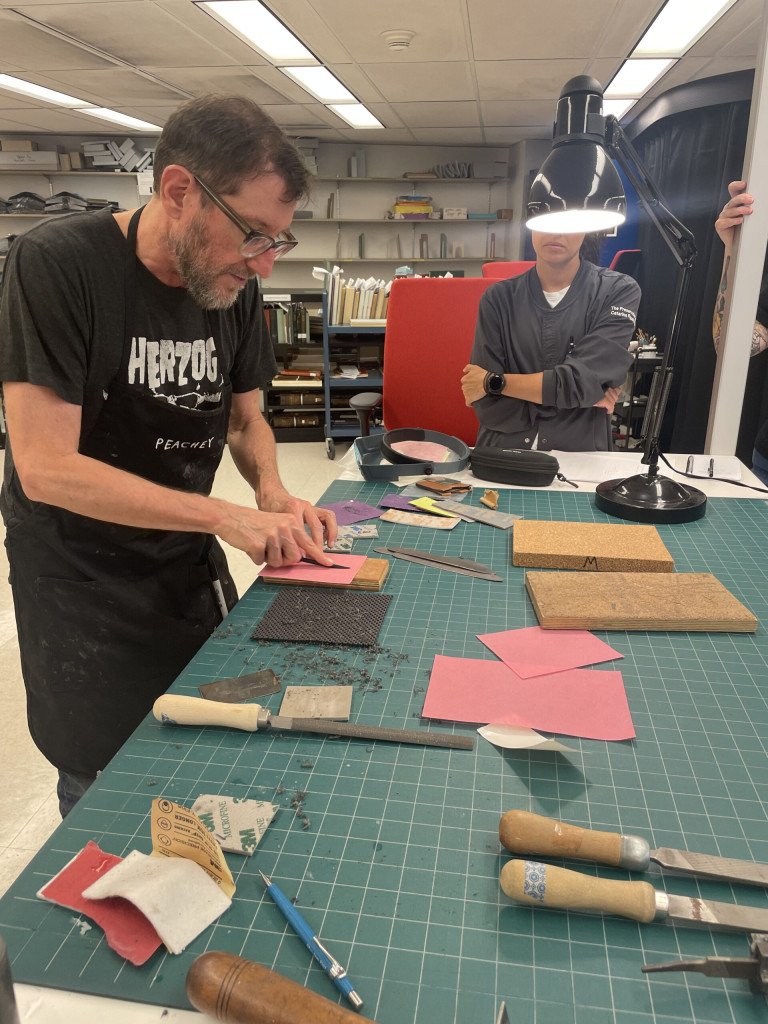
For one week in July, 2024, the Preservation Lab busted out belt sanders and opened the elbow grease to host a workshop taught by Jeff Peachey, learning all about making, modifying and maintaining our own hand tools. Jeff, a book conservator and master tool maker, brought all kinds of fun machinery and exciting tools for us to learn from and use. From hacksaws to pencil sharpeners, Jeff’s tool collection is inspiring, and we all left the week with some amazing new additions to our bench.

Just Peachey: Jeff’s Conservation Hand Tools Workshop
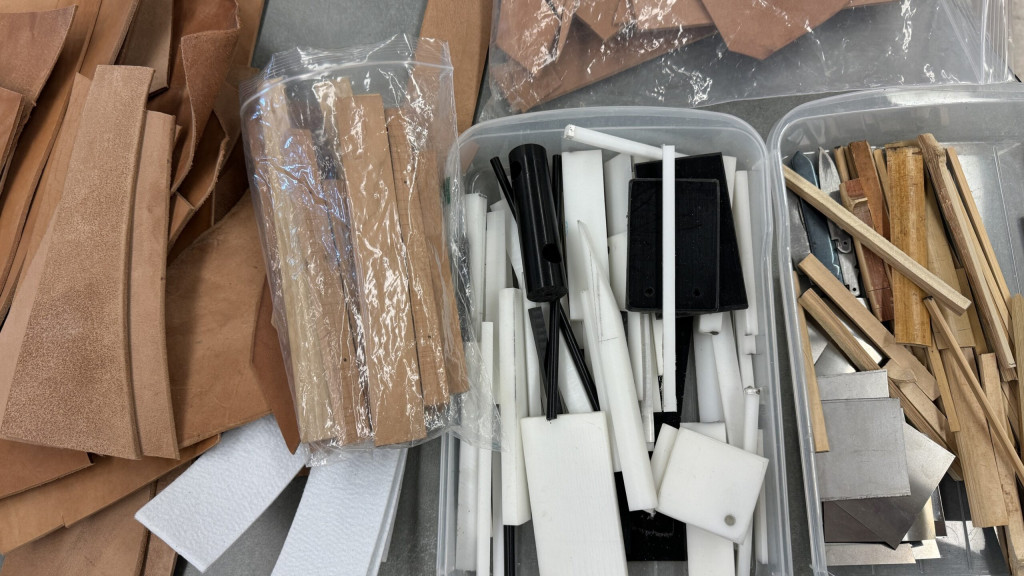
A set of raw materials each participant received at the beginning of the week to shape into their own personal new tool set! Credit: Jeff Peachey
Just Peachey: Jeff’s Conservation Hand Tools Workshop
Extra scraps of horse butt, cherry, pear and box wood, Delrin, and bamboo: materials we used and experimented with during our workshop. Credit: Jessica Ebert

Delrin

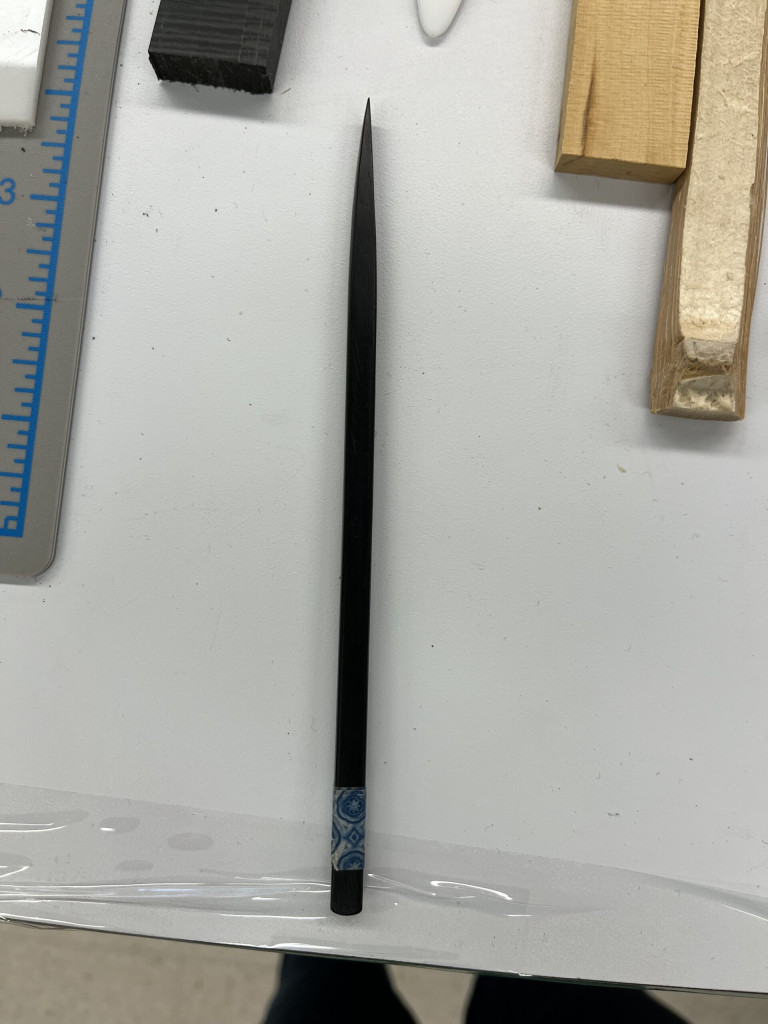
We started the week off working with Delrin. Delrin, an acetal homopolymer plastic that appears similar to Teflon, was easy to shape with saws, files, scrapers and silicon carbide sandpapers. We burnished with sanding pads and polishing paper.

We started off with Delrin rods that we shaped into delicate heras. Heras are thin tools with spatula-like ends that Jeff says are great for delicate prying, inserting small amounts of adhesive, and lifting tape to name a few of the uses for this handy little tool.

We made a rough cut of the shape we wanted with the bandsaw, then smoothed everything out by going through a sandpaper grit progression. Once we’d crafted these, many of us tried our hand at making versatile Delrin folders. With lots of filing and sanding, this malleable Delrin was easy to manipulate into a variety of tool shapes, and no two tools were exactly alike.

Just Peachey: Jeff’s Conservation Hand Tools Workshop
A Delrin hera created by Holly. Credit: Holly Prochaska
Just Peachey: Jeff’s Conservation Hand Tools Workshop
Ashleigh uses a saw to shape her Delrin. Credit: Ashleigh Ferguson Schieszer
Just Peachey: Jeff’s Conservation Hand Tools Workshop
Jeff demonstrates how to work with Delrin. Credit: Ashleigh Ferguson Schieszer

Knives

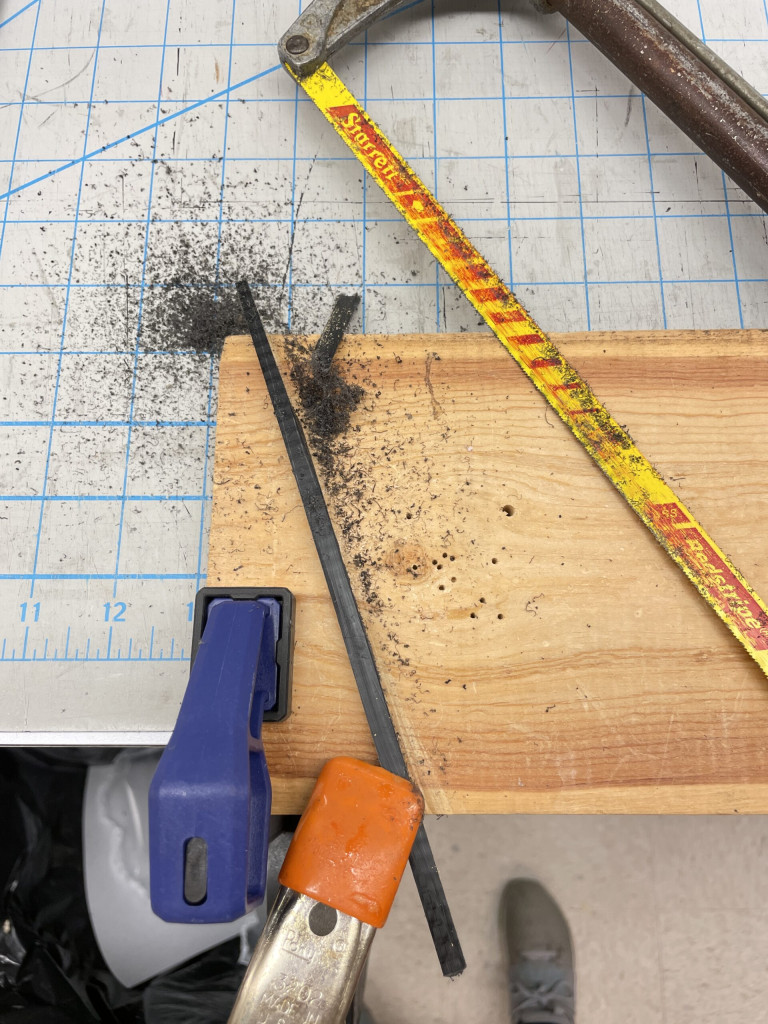
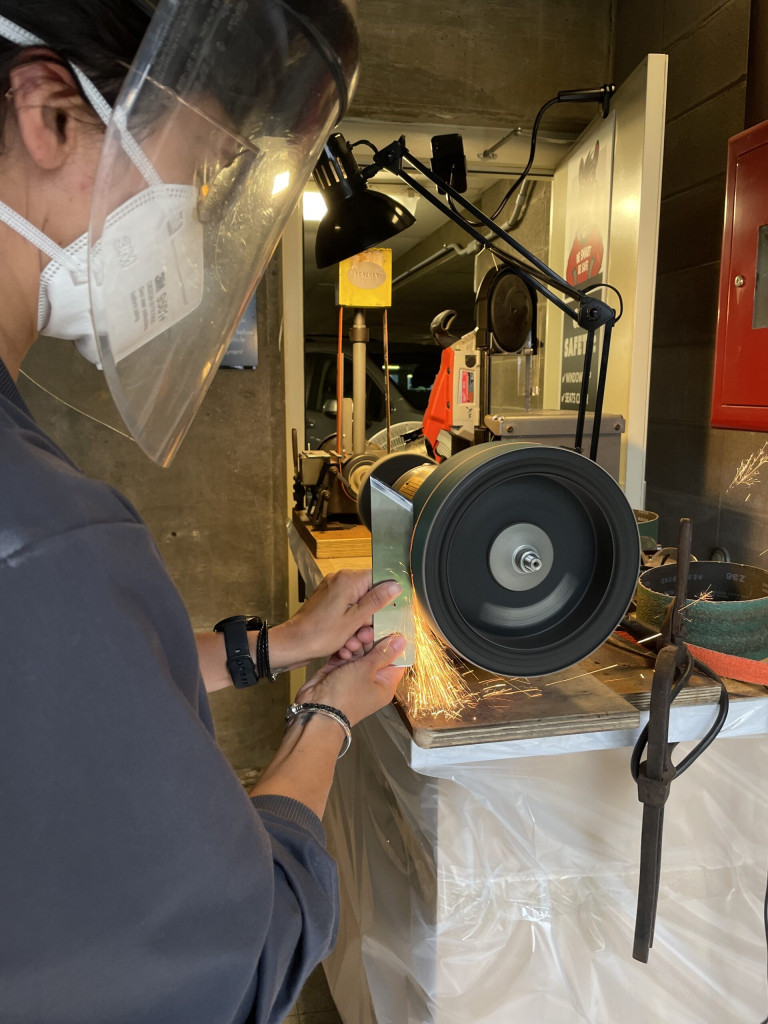
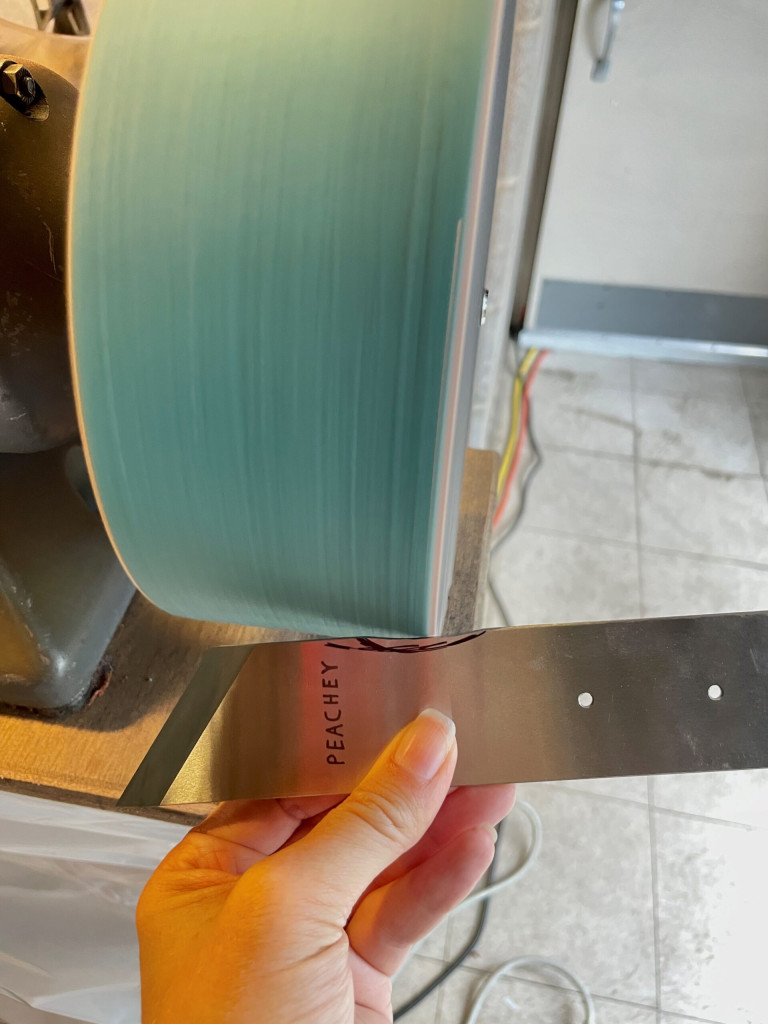
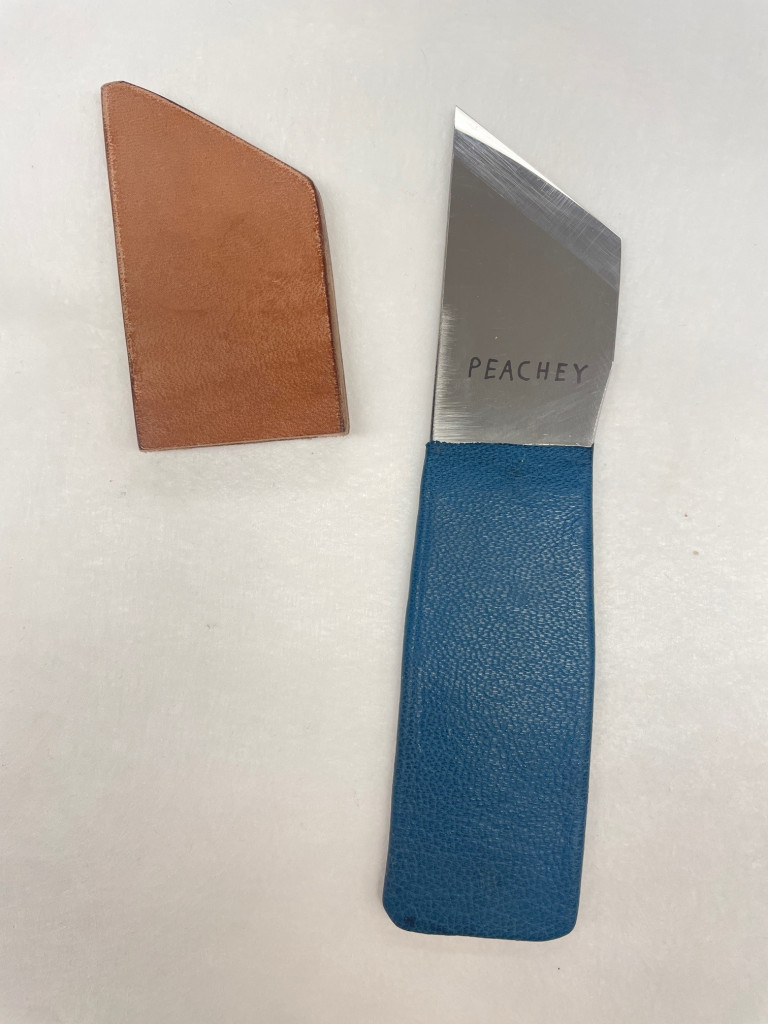
Our second and third days with Jeff were all about M2 steel knifes, both sharpening them and making them. We learned all about using Jeff’s sharpening system and honed down our own Peachey paring knife. We also made two lifting knives out of Starrett 32T hacksaw blades by grinding the blades down on a belt sander and then taking them through the sharpening system with microfinishing films to achieve a sharp edge.

Just Peachey: Jeff’s Conservation Hand Tools Workshop
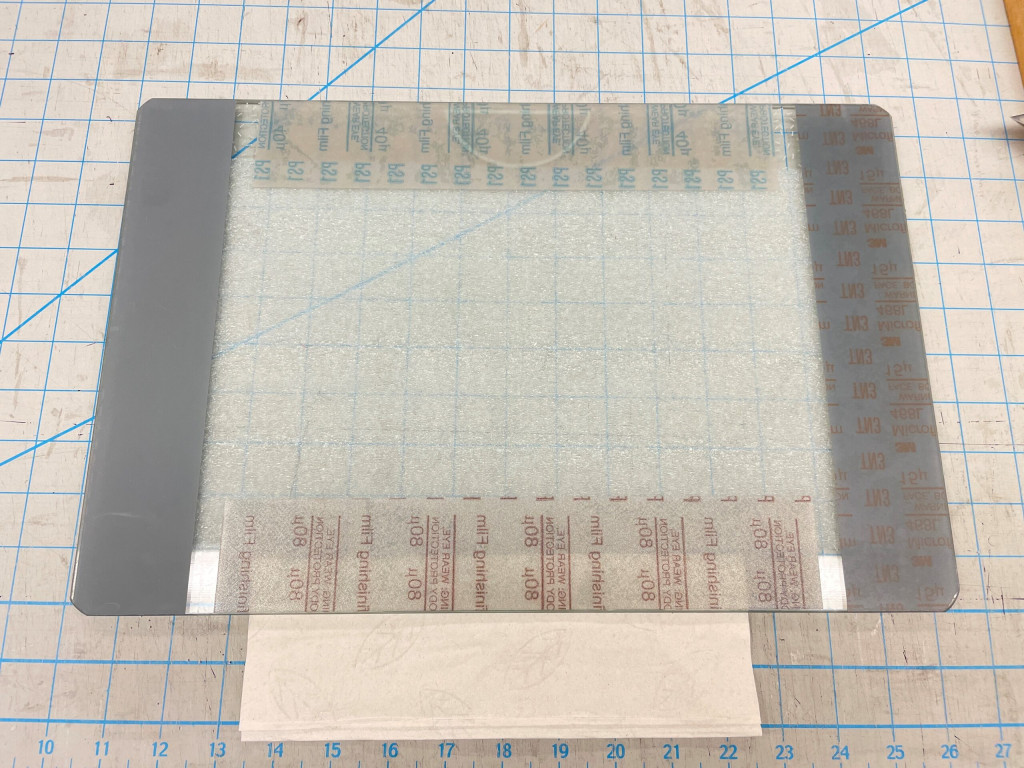
A progression of 3M Microfinishing Films adhered to a glass plate for sharpening. Credit: Ashleigh Ferguson Schieszer
Just Peachey: Jeff’s Conservation Hand Tools Workshop
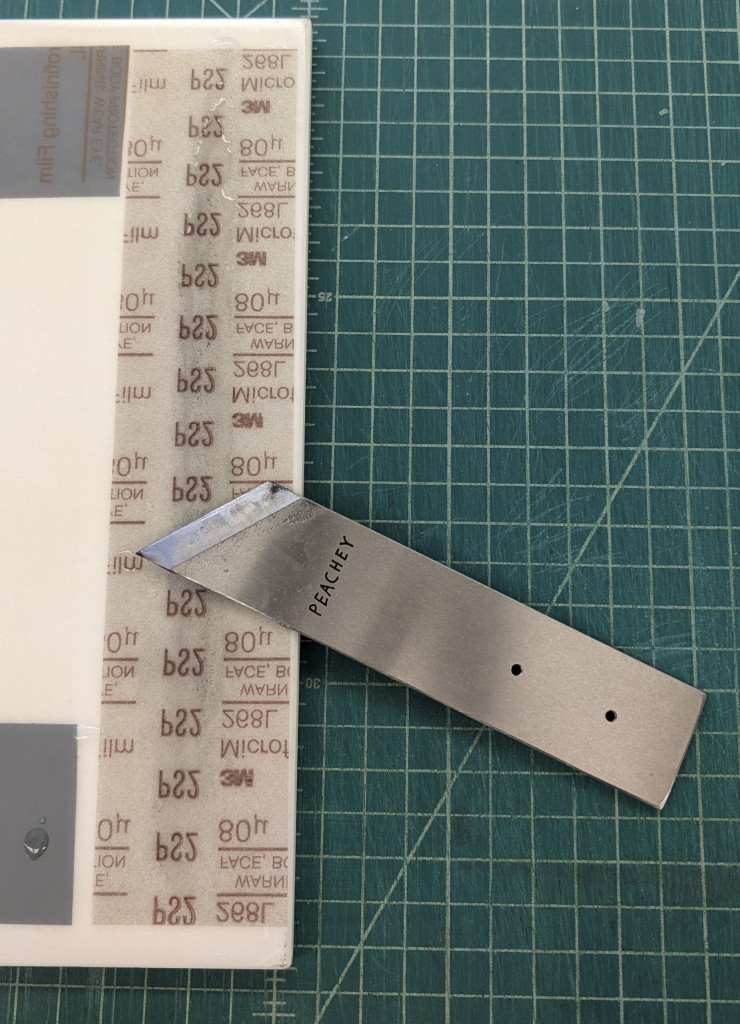
A Peachey knife next to a sharpening system on marble. Credit: Holly Prochaska

Sharpening knives turned out to be a complex process – a burr must be formed at each grit gradient before moving on to the finer grind, and if your hand position is off this could take some time. Furthermore, the wrong hand position could yield a bevel angle too big or too small on the plane of the knife. We aimed for an ideal bevel angle between 11 and 13 degrees.

Just Peachey: Jeff’s Conservation Hand Tools Workshop
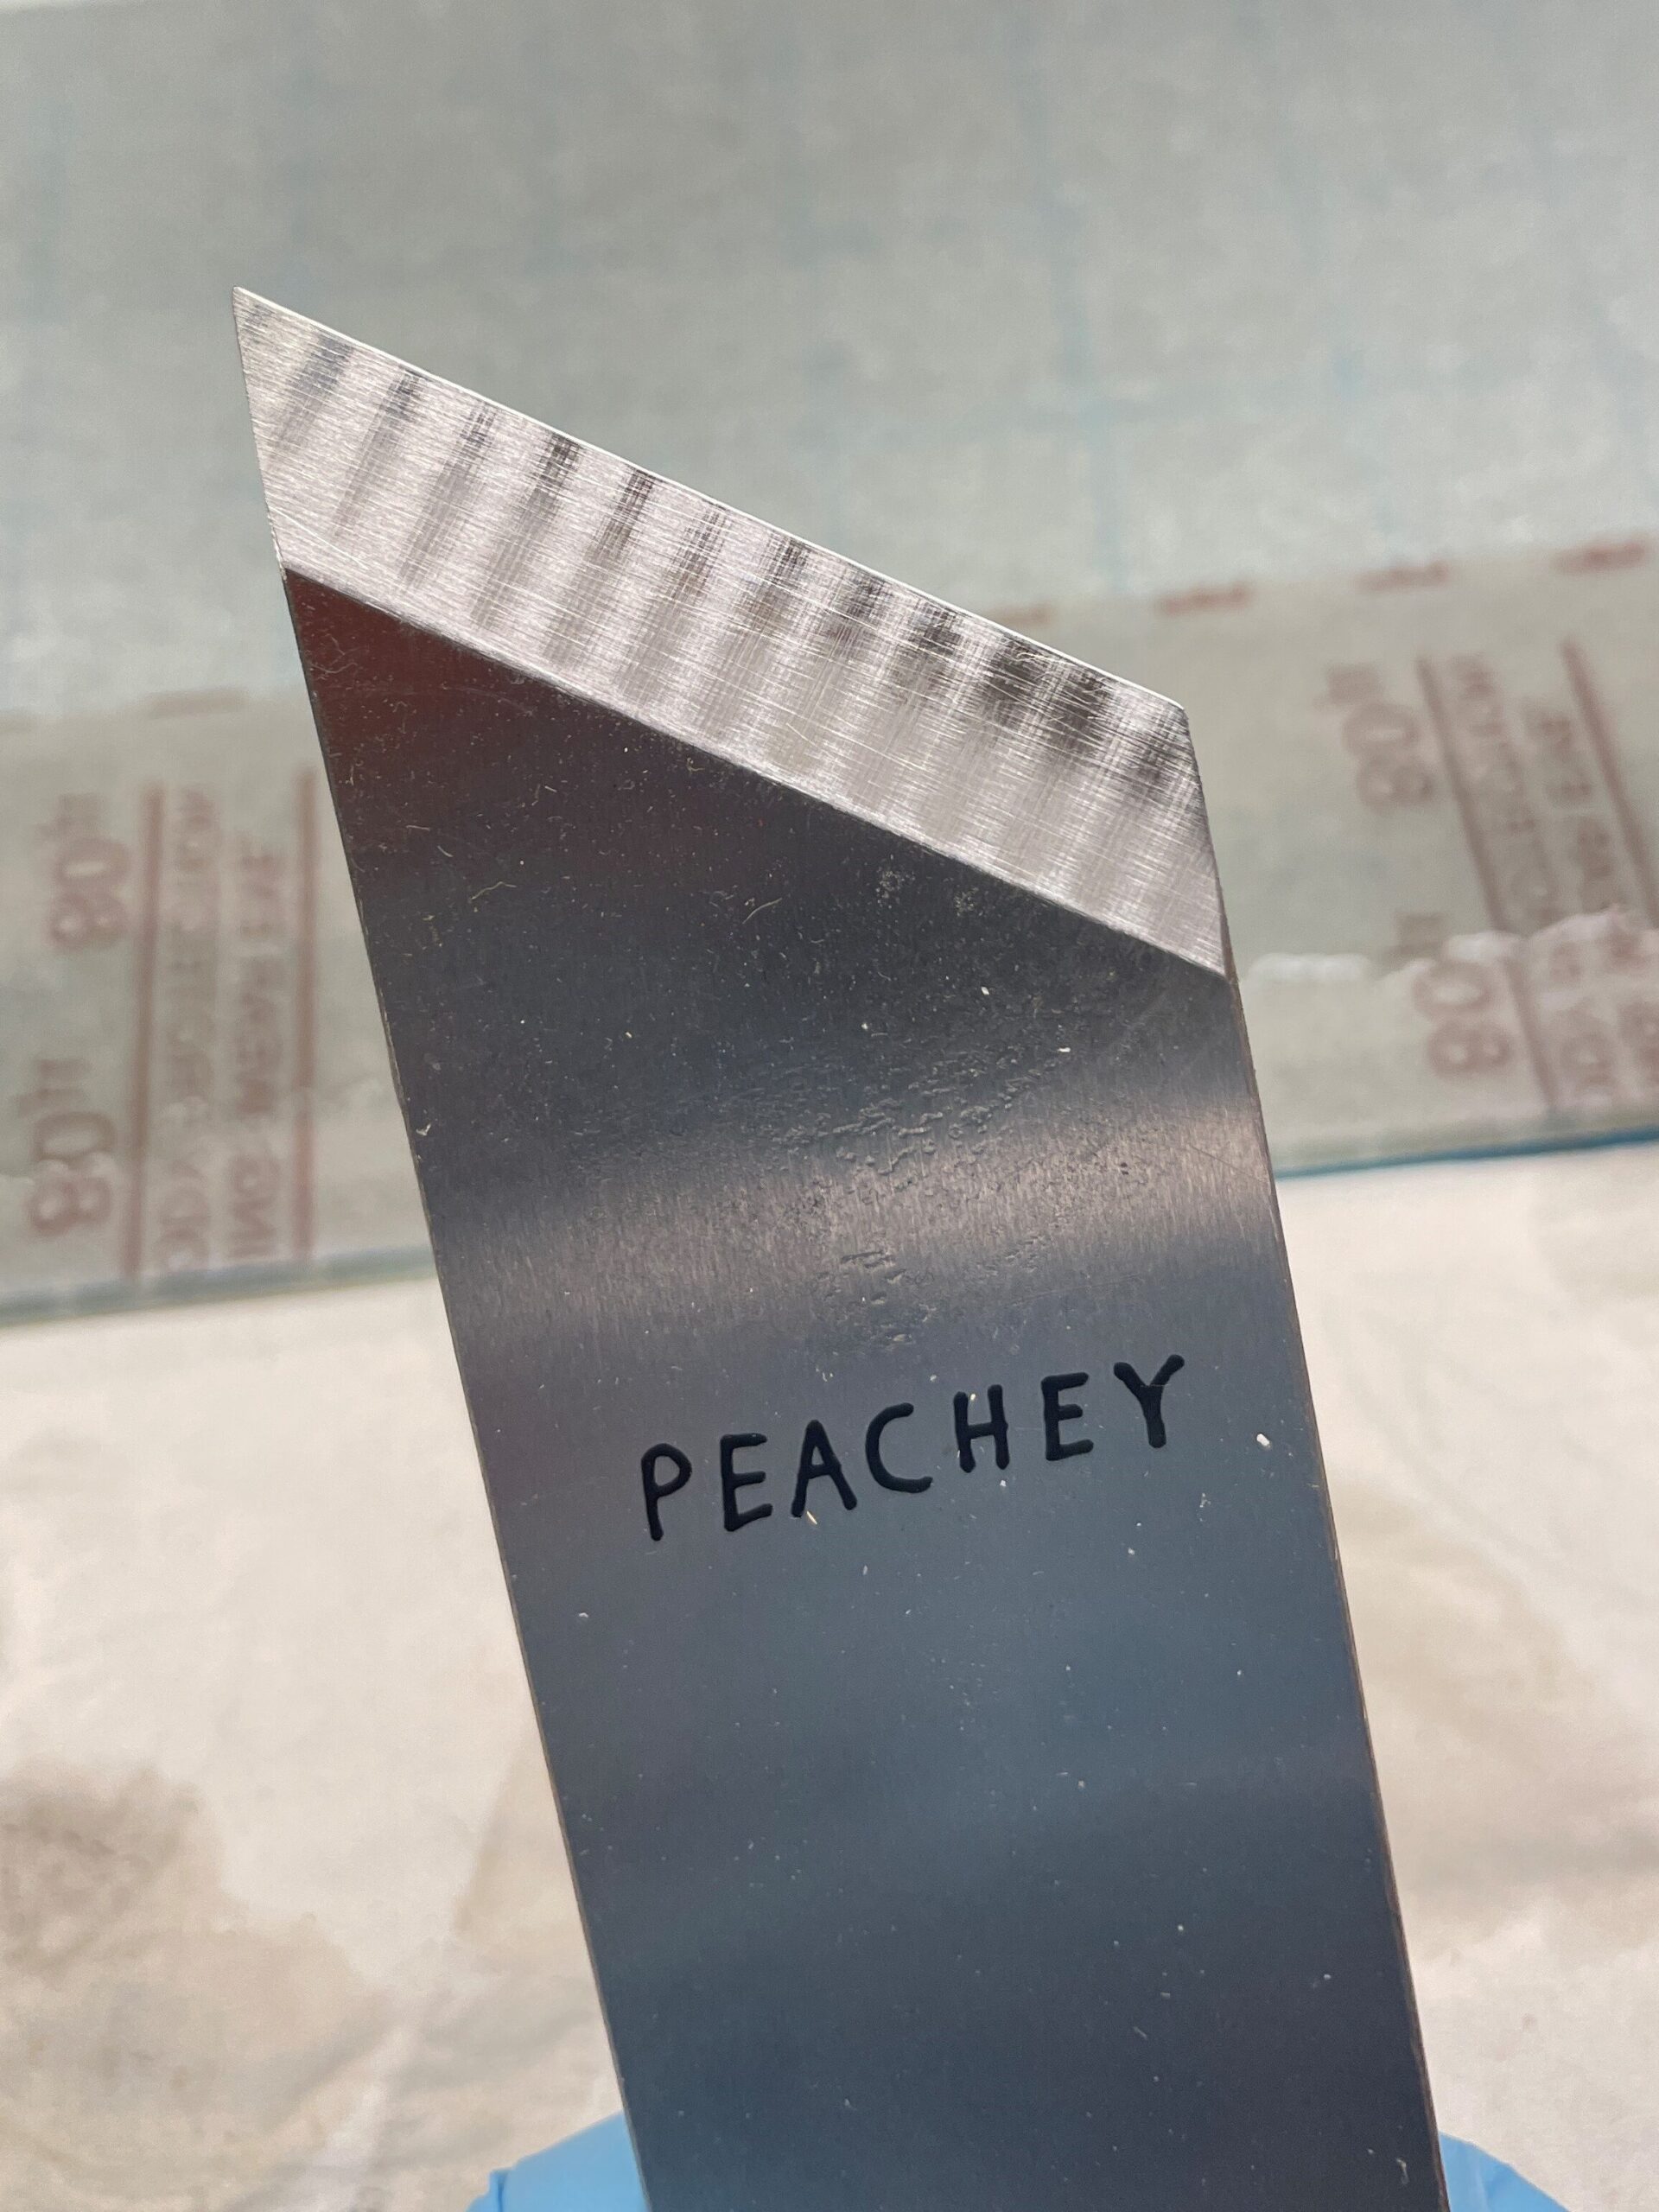
Specular light shows a raw bevel angle during sharpening, before it has been ground smooth on the first grit progression. Credit: Ashleigh Ferguson Schieszer

Additional Knife Features

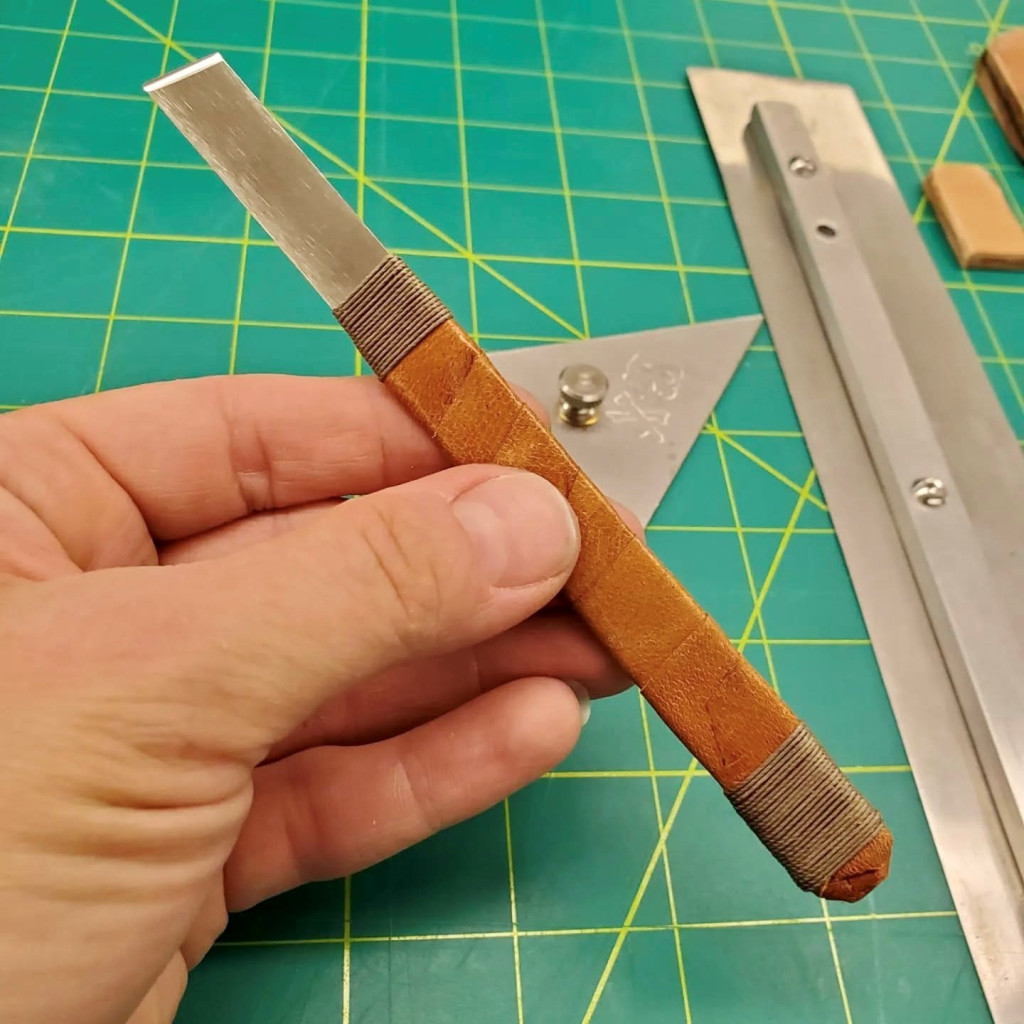
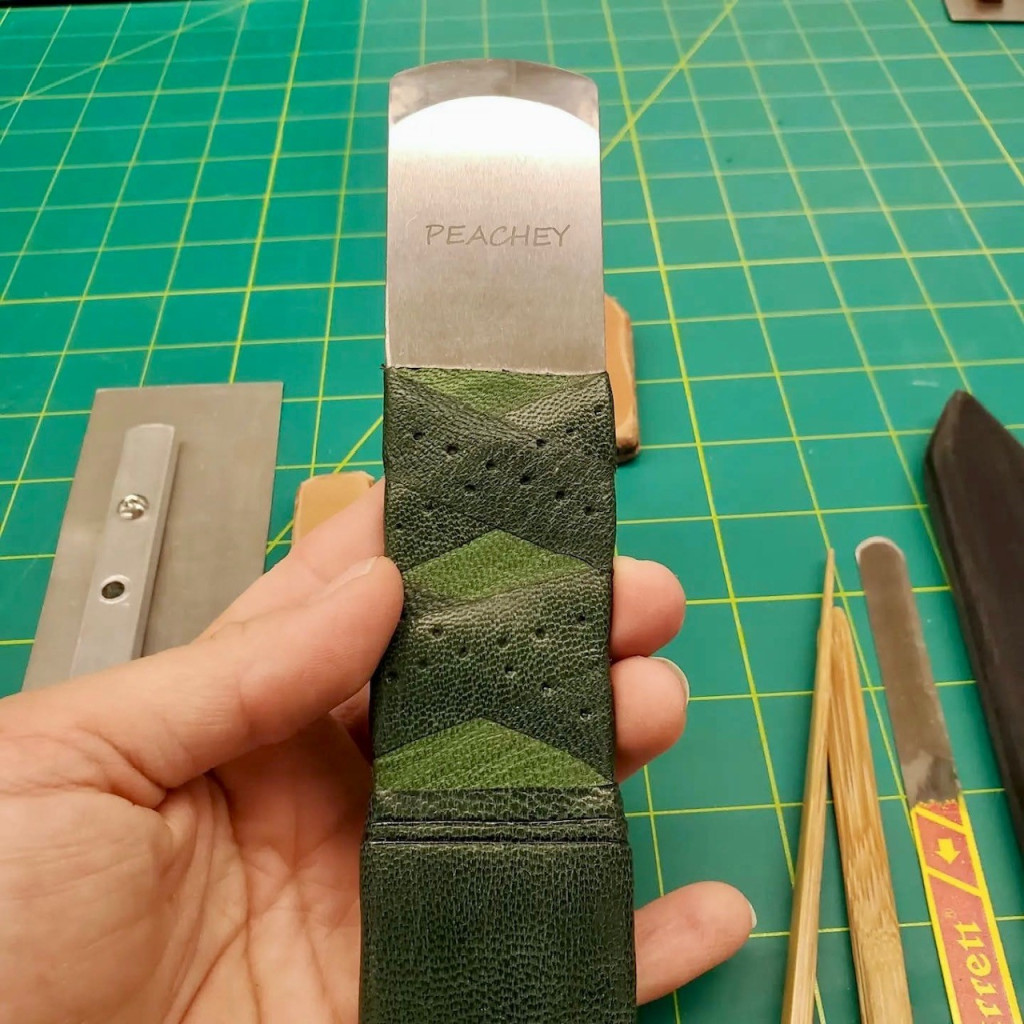
Some people chose to add grooves into the sides of their paring knives for a more comfortable grip; some of us chose to wrap our knife handles in leather and make horse butt sheaths for them. Matt was the bravest of all and mounted a custom carved wooden handle to his left-handed paring knife.

Grained Book Cloth

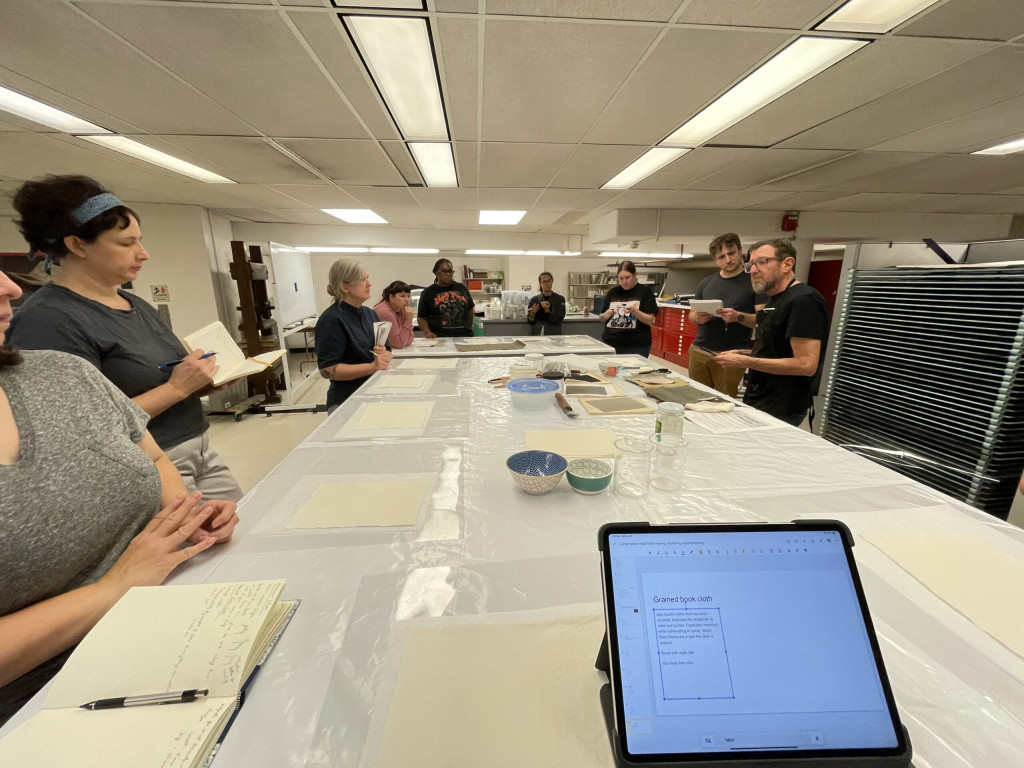
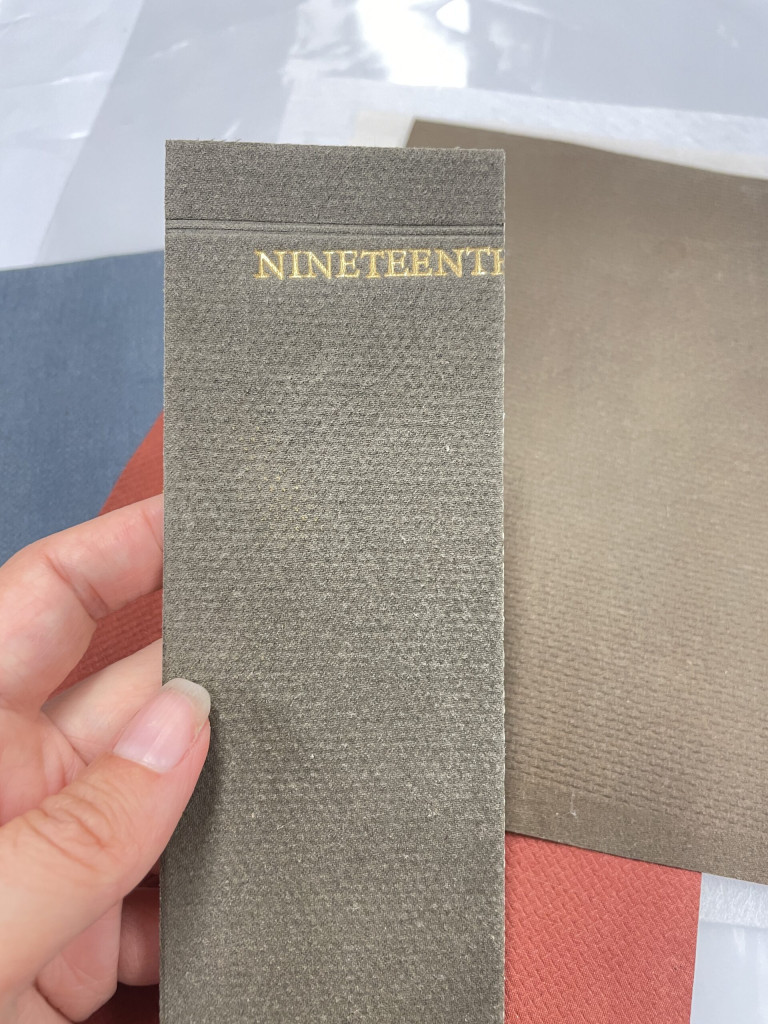
We also went over creating 19th century grained book cloth on our third day. Through toning, glazing, then pressing with a die that has your desired pattern, it’s possible to create book cloth that mimics the textures of 19th century book cloth. After going through the time-consuming process, the idea of making up large batches at one time became appealing.

Just Peachey: Jeff’s Conservation Hand Tools Workshop
Jeff demos coating a cotton muslin with acrylics and paste, pressing the coated cloth with screens to add a grain, then finishing with an egg glare. Credit: Ashleigh Ferguson Schieszer
Just Peachey: Jeff’s Conservation Hand Tools Workshop
Jeff’s samples he made ahead of the workshop

Wood and Bamboo

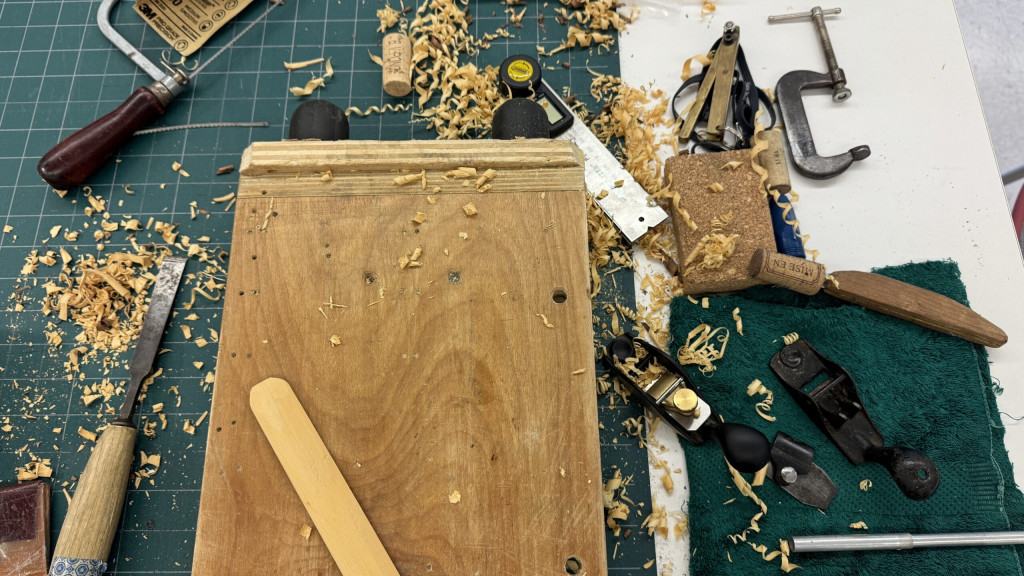
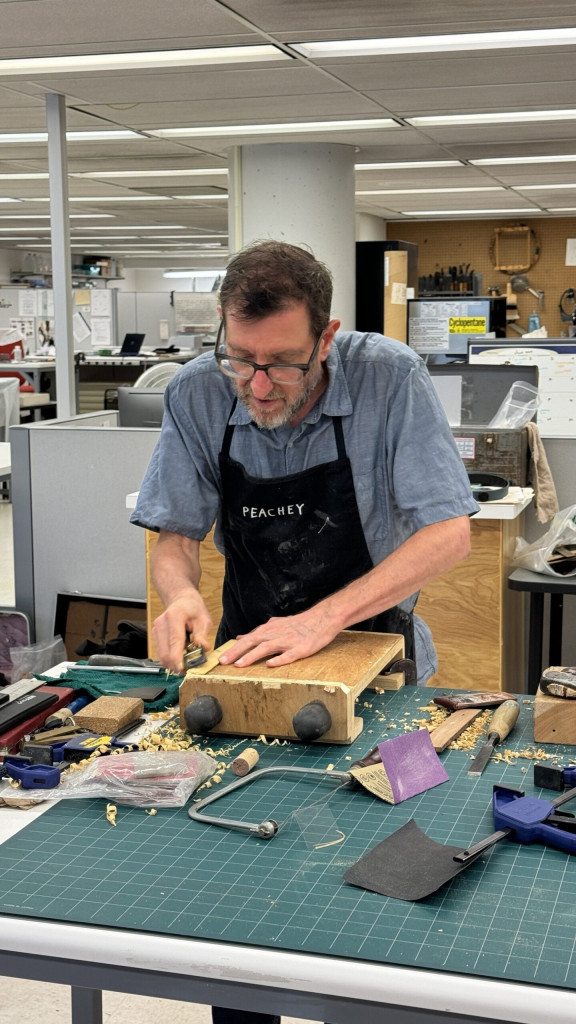
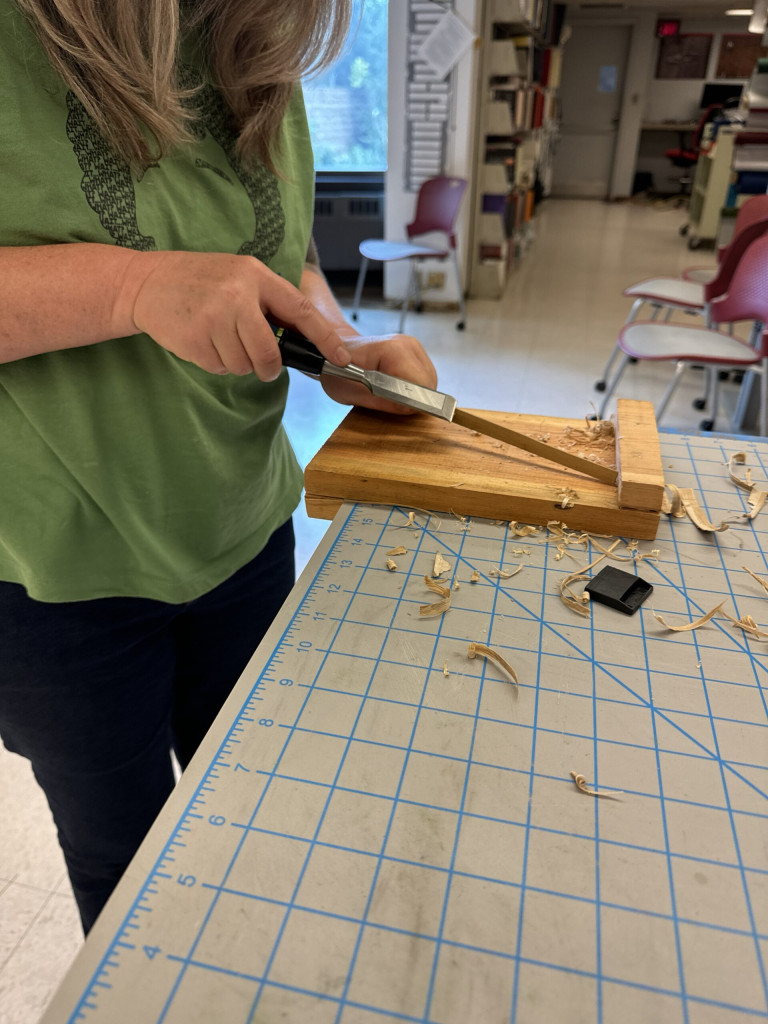
On our fourth day we learned all about wood and bamboo carving. Using a chisel, wood plane or hatchet, we created the crude shape we wanted our wooden tools to take. Then we got to work sanding until the wood was smooth, and created a more precise shape. A final finish with nose grease or wax was optional.

Just Peachey: Jeff’s Conservation Hand Tools Workshop
Jeff’s workbench after his wood carving demo. Credit: Jessica Ebert

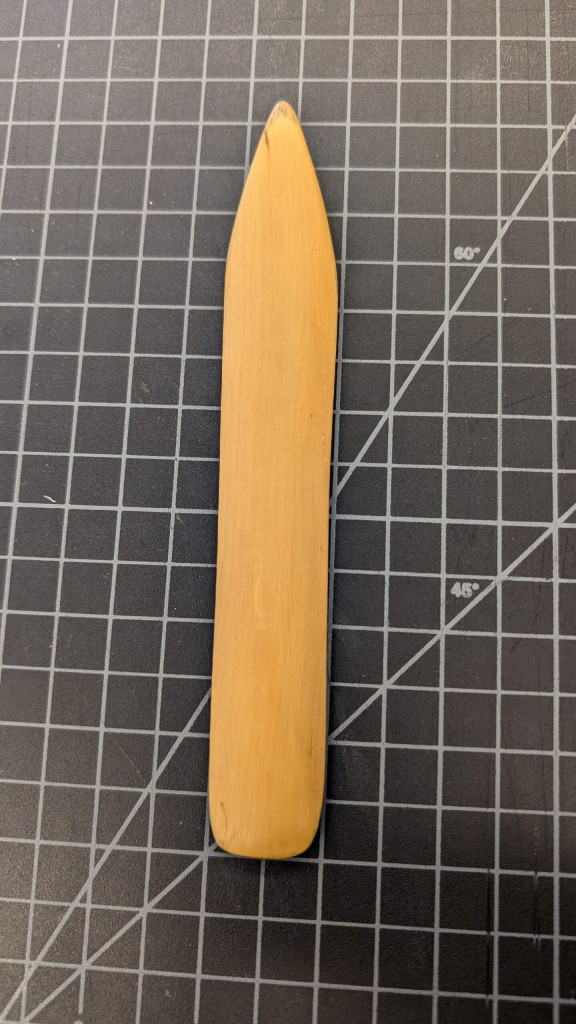
Bamboo is great for creating thin, flexible tools. With our pieces of wood most of us created folders, but a few decided to make wooden handles for their knives or straight edges. Personally, my favorite tool I created the whole week was my wooden folder I made, though it was probably the hardest to create. I had to shape it using a small hatchet, then sand it for quite some time before it took on the shape that I wanted.

Just Peachey: Jeff’s Conservation Hand Tools Workshop
Jeff demonstrating how to carve our piece of wood using his proprietary bench hook. Credit: Jessica Ebert
Just Peachey: Jeff’s Conservation Hand Tools Workshop
Holly chiseling a piece of bamboo using a generic bench hook. Credit: Jessica Ebert
Just Peachey: Jeff’s Conservation Hand Tools Workshop
My new wood folder. Credit: Nicole Browning

Stainless Steel

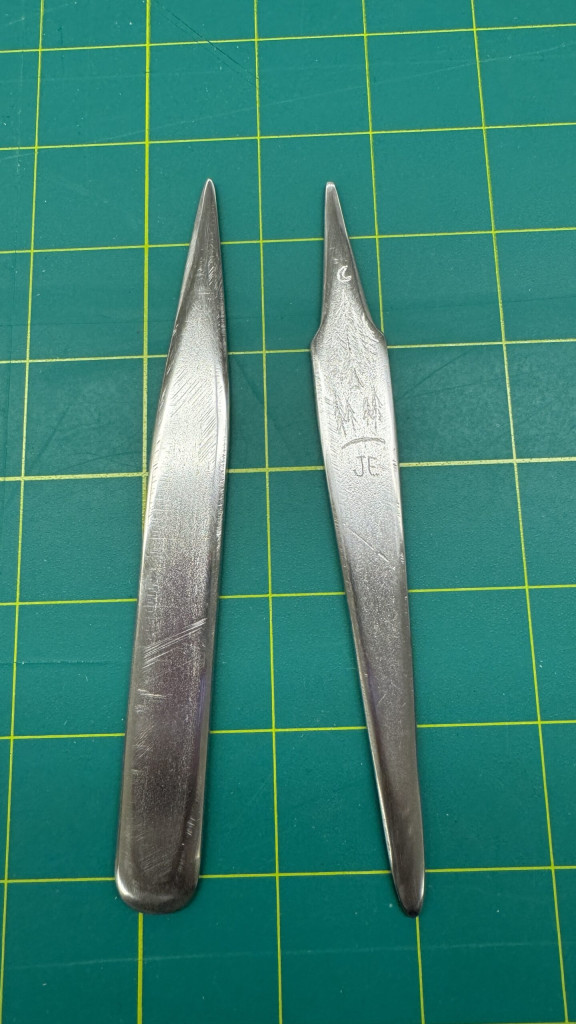
Our final day with Jeff was spent shaping stainless steel tools, which to me was the hardest material we worked with, as it took a lot of patience with the belt sander, and the metal was prone to heating up quickly and potentially burning our fingers. We created straight edges or 45 degree triangles, and even learned how to drill holes and attach small handles to these tools. We also had a thicker piece of stainless steel for creating a folder, which I found the most challenging of all. The stainless steel was harder to manipulate, understandably, and much less forgiving than the wood or Delrin.

Just Peachey: Jeff’s Conservation Hand Tools Workshop
Holly drilling holes in the stainless steel handle of her straight edge. Credit: Ashleigh Ferguson Schieszer
Just Peachey: Jeff’s Conservation Hand Tools Workshop
Two stainless steel folders made and engraved by Jessica. Credit: Jessica Ebert

We ended the week by testing the sharpness of our blades and doing a little show and tell of our favorite tools that we made. It was so amazing to see all the different tool shapes people were inspired to make based upon what they most used in their work.

Just Peachey: Jeff’s Conservation Hand Tools Workshop
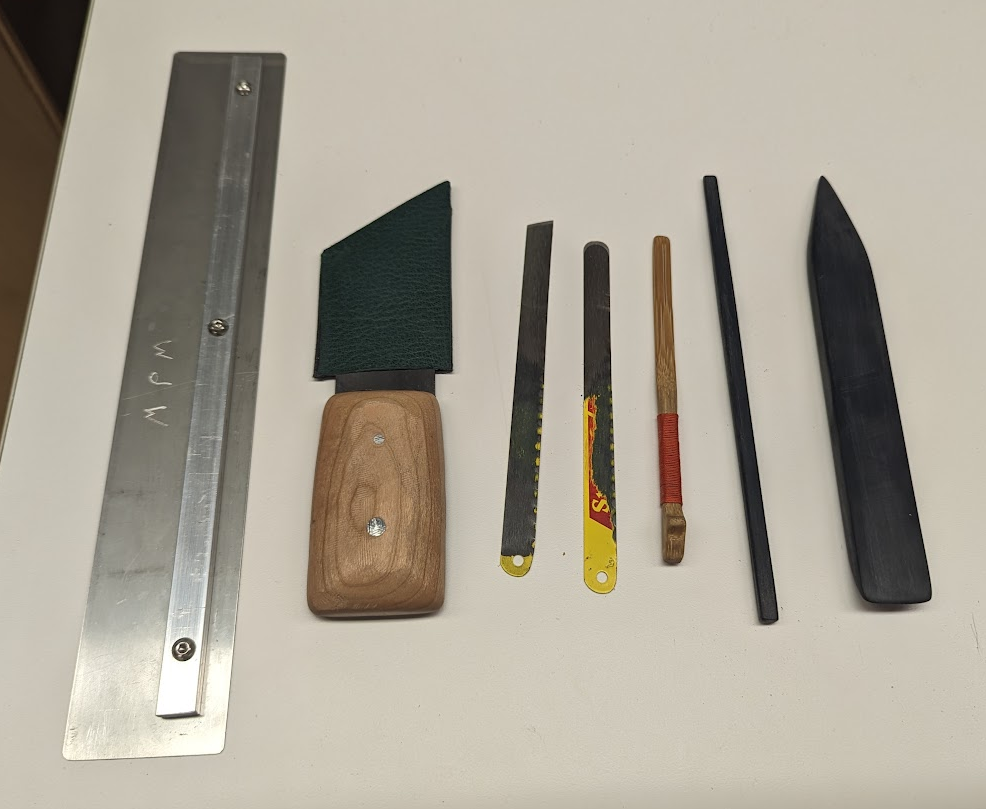
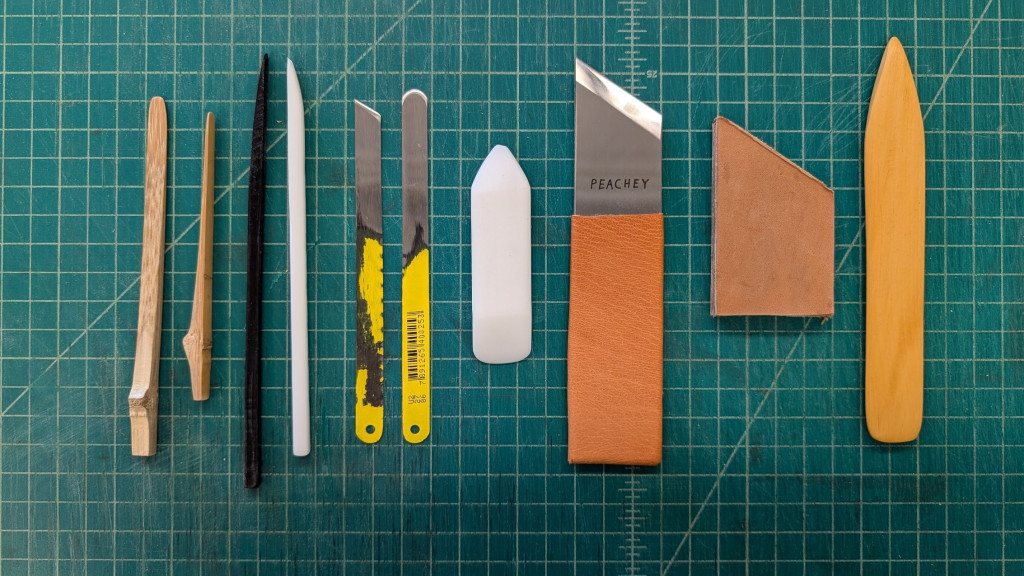
My assortment of tools I made at the workshop. From left to right: bamboo lifters, two Delrin Heras, two lifting knifes, a Delrin folder, a paring knife and its sheath, and a wooden folder. Credit: Nicole Browning

Learning from Jeff was such an amazing opportunity, and it was so eye-opening and world-expanding to learn that so many of these tools we use every day can be created from our own hands.

Jeff did a fabulous job tailoring his tool-making workshop to the the availability of machinery and other logistics of our facility. As a result, the actual tools made in our version of this workshop vary from other workshops Jeff has taught, empowering us to keep making tools with our space in the future. If you ever have the chance to take this workshop, we highly recommend it!

Be sure to check out this Instagram post by Jeff featuring all of us showing off our favorite hand tools we created!

Nicole Browning [CHPL] – Conservation Assistant

Learning the Basics

Hi! I’m Nicole, and I’m the newest member of the Preservation Lab.

Portrait of Nicole Browning
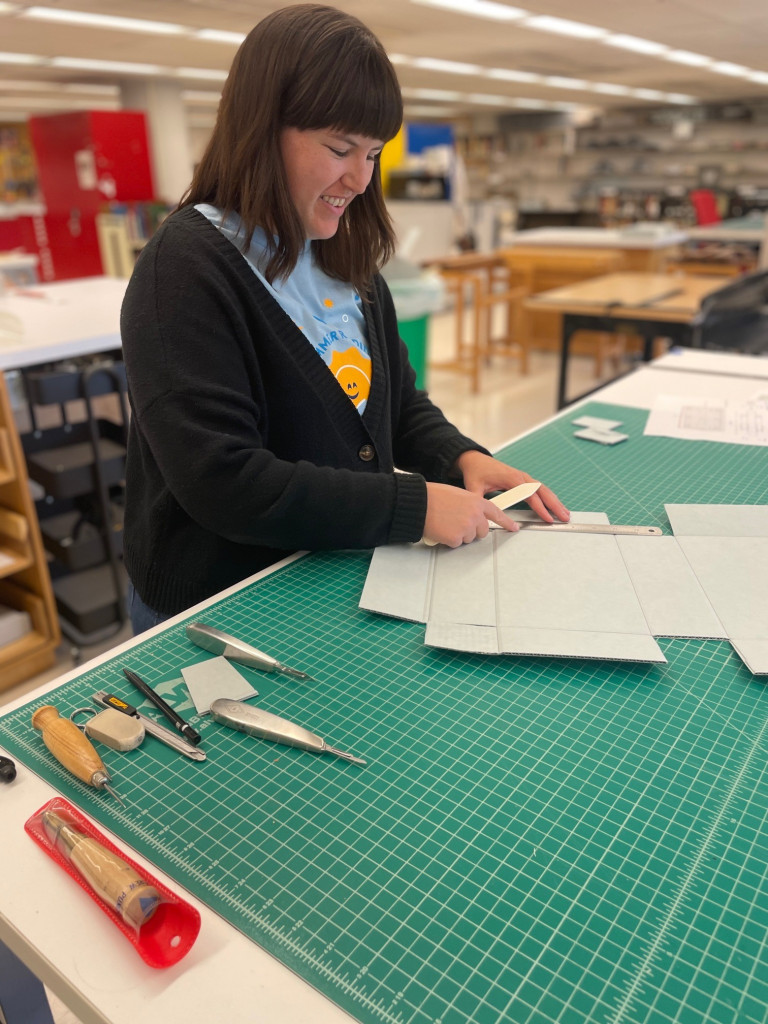
Nicole Browning makes a corrugated clamshell enclosures

When I was interviewing for the position of Conservation Assistant, I did a deep dive into what preservation and conservation really mean. I read through blog posts and perused the Lab’s Instagram, trying to get a grasp on what exactly the lab did. Little did I know, these snapshots into lab life hardly even scratched the surface.

Materials and Tools

My first week as a Conservation Assistant was full of learning, from what types of boards and paper supplies are available, to how to create a pamphlet binder and sew music scores. I had no idea there were so many types of paper out there, and I was ignorant about how many tools there exist simply to cut these pieces of paper. My hand skills were immediately put to the test with learning the stitches used to attach pamphlets to protective premade binders, which create a hard cover for these otherwise soft materials. I was also instructed in which methods of cutting are best for which practices and types of paper, such as board shears for larger pieces of Bristol or corrugated board, scalpels and Olfas for small, precision cutting, and even a corner cutter to clean up the corners of your pamphlet binders!

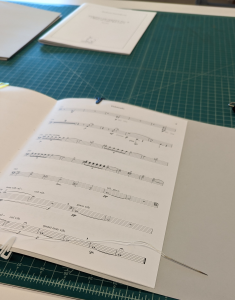
A music score lays on a bench with a needle and thread used for conservation sewing.
Sewing parts of a music score with a needle and thread.

Enclosures

Over the next few weeks, I was thrust into a whole new world of enclosures after learning about pamphlet binders and music scores. Enclosures are typically boxes that are used to keep a book or object safe from light, dust, and other environmental factors that can harm the item over time.

Tuxedo boxes

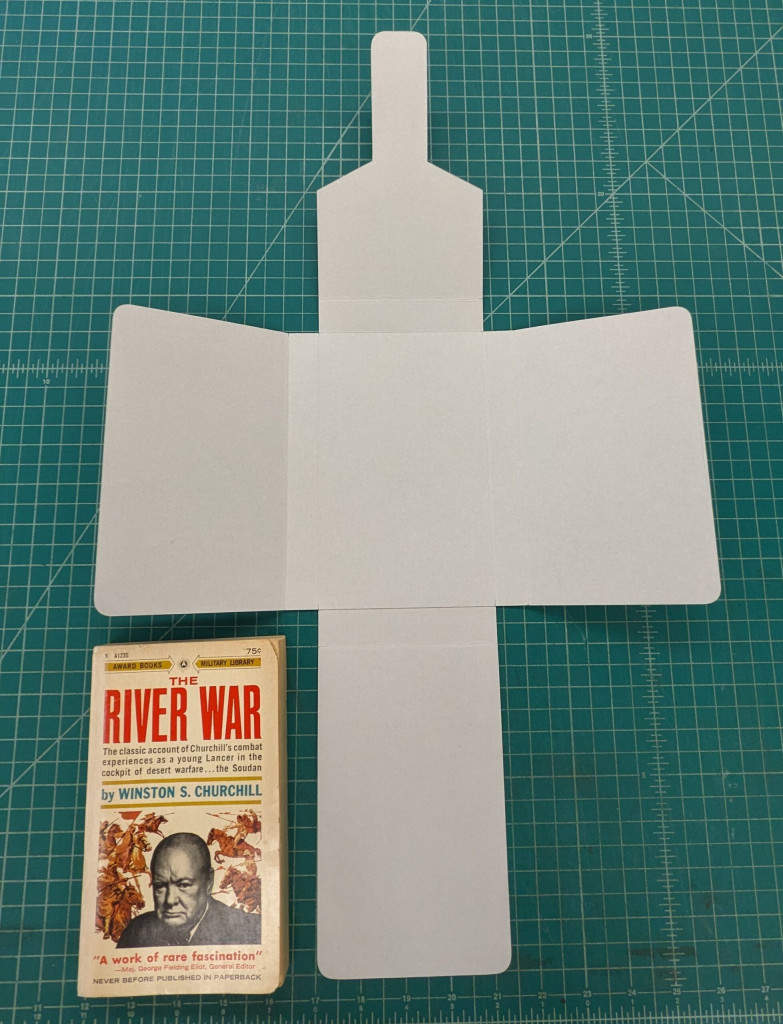
Creating tuxedo boxes was an exciting and fun challenge, as getting all the measurements right and being precise is so important. These boxes take a lot of focus to make, and attaching the two pieces of board can be daunting, as you must make sure not to overlap the folds and ruin the whole box.

Front view of a tuxedo box
View of a tuxedo box opened next to the book it will house.

A finished tuxedo box on the left, and the two pieces of an unfinished tuxedo box opened to show the full spread of the box on the right.

Corrugated Clamshells

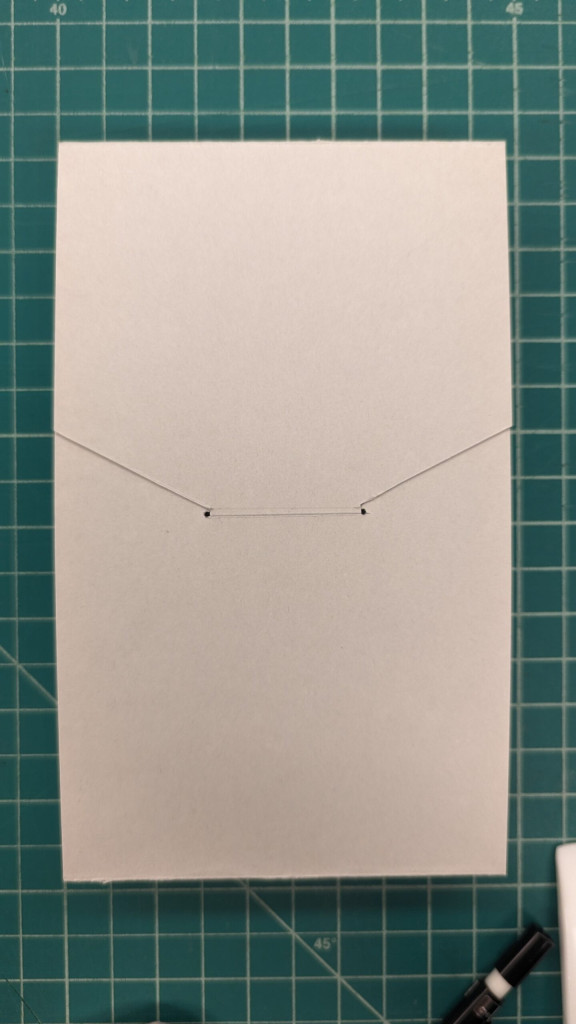
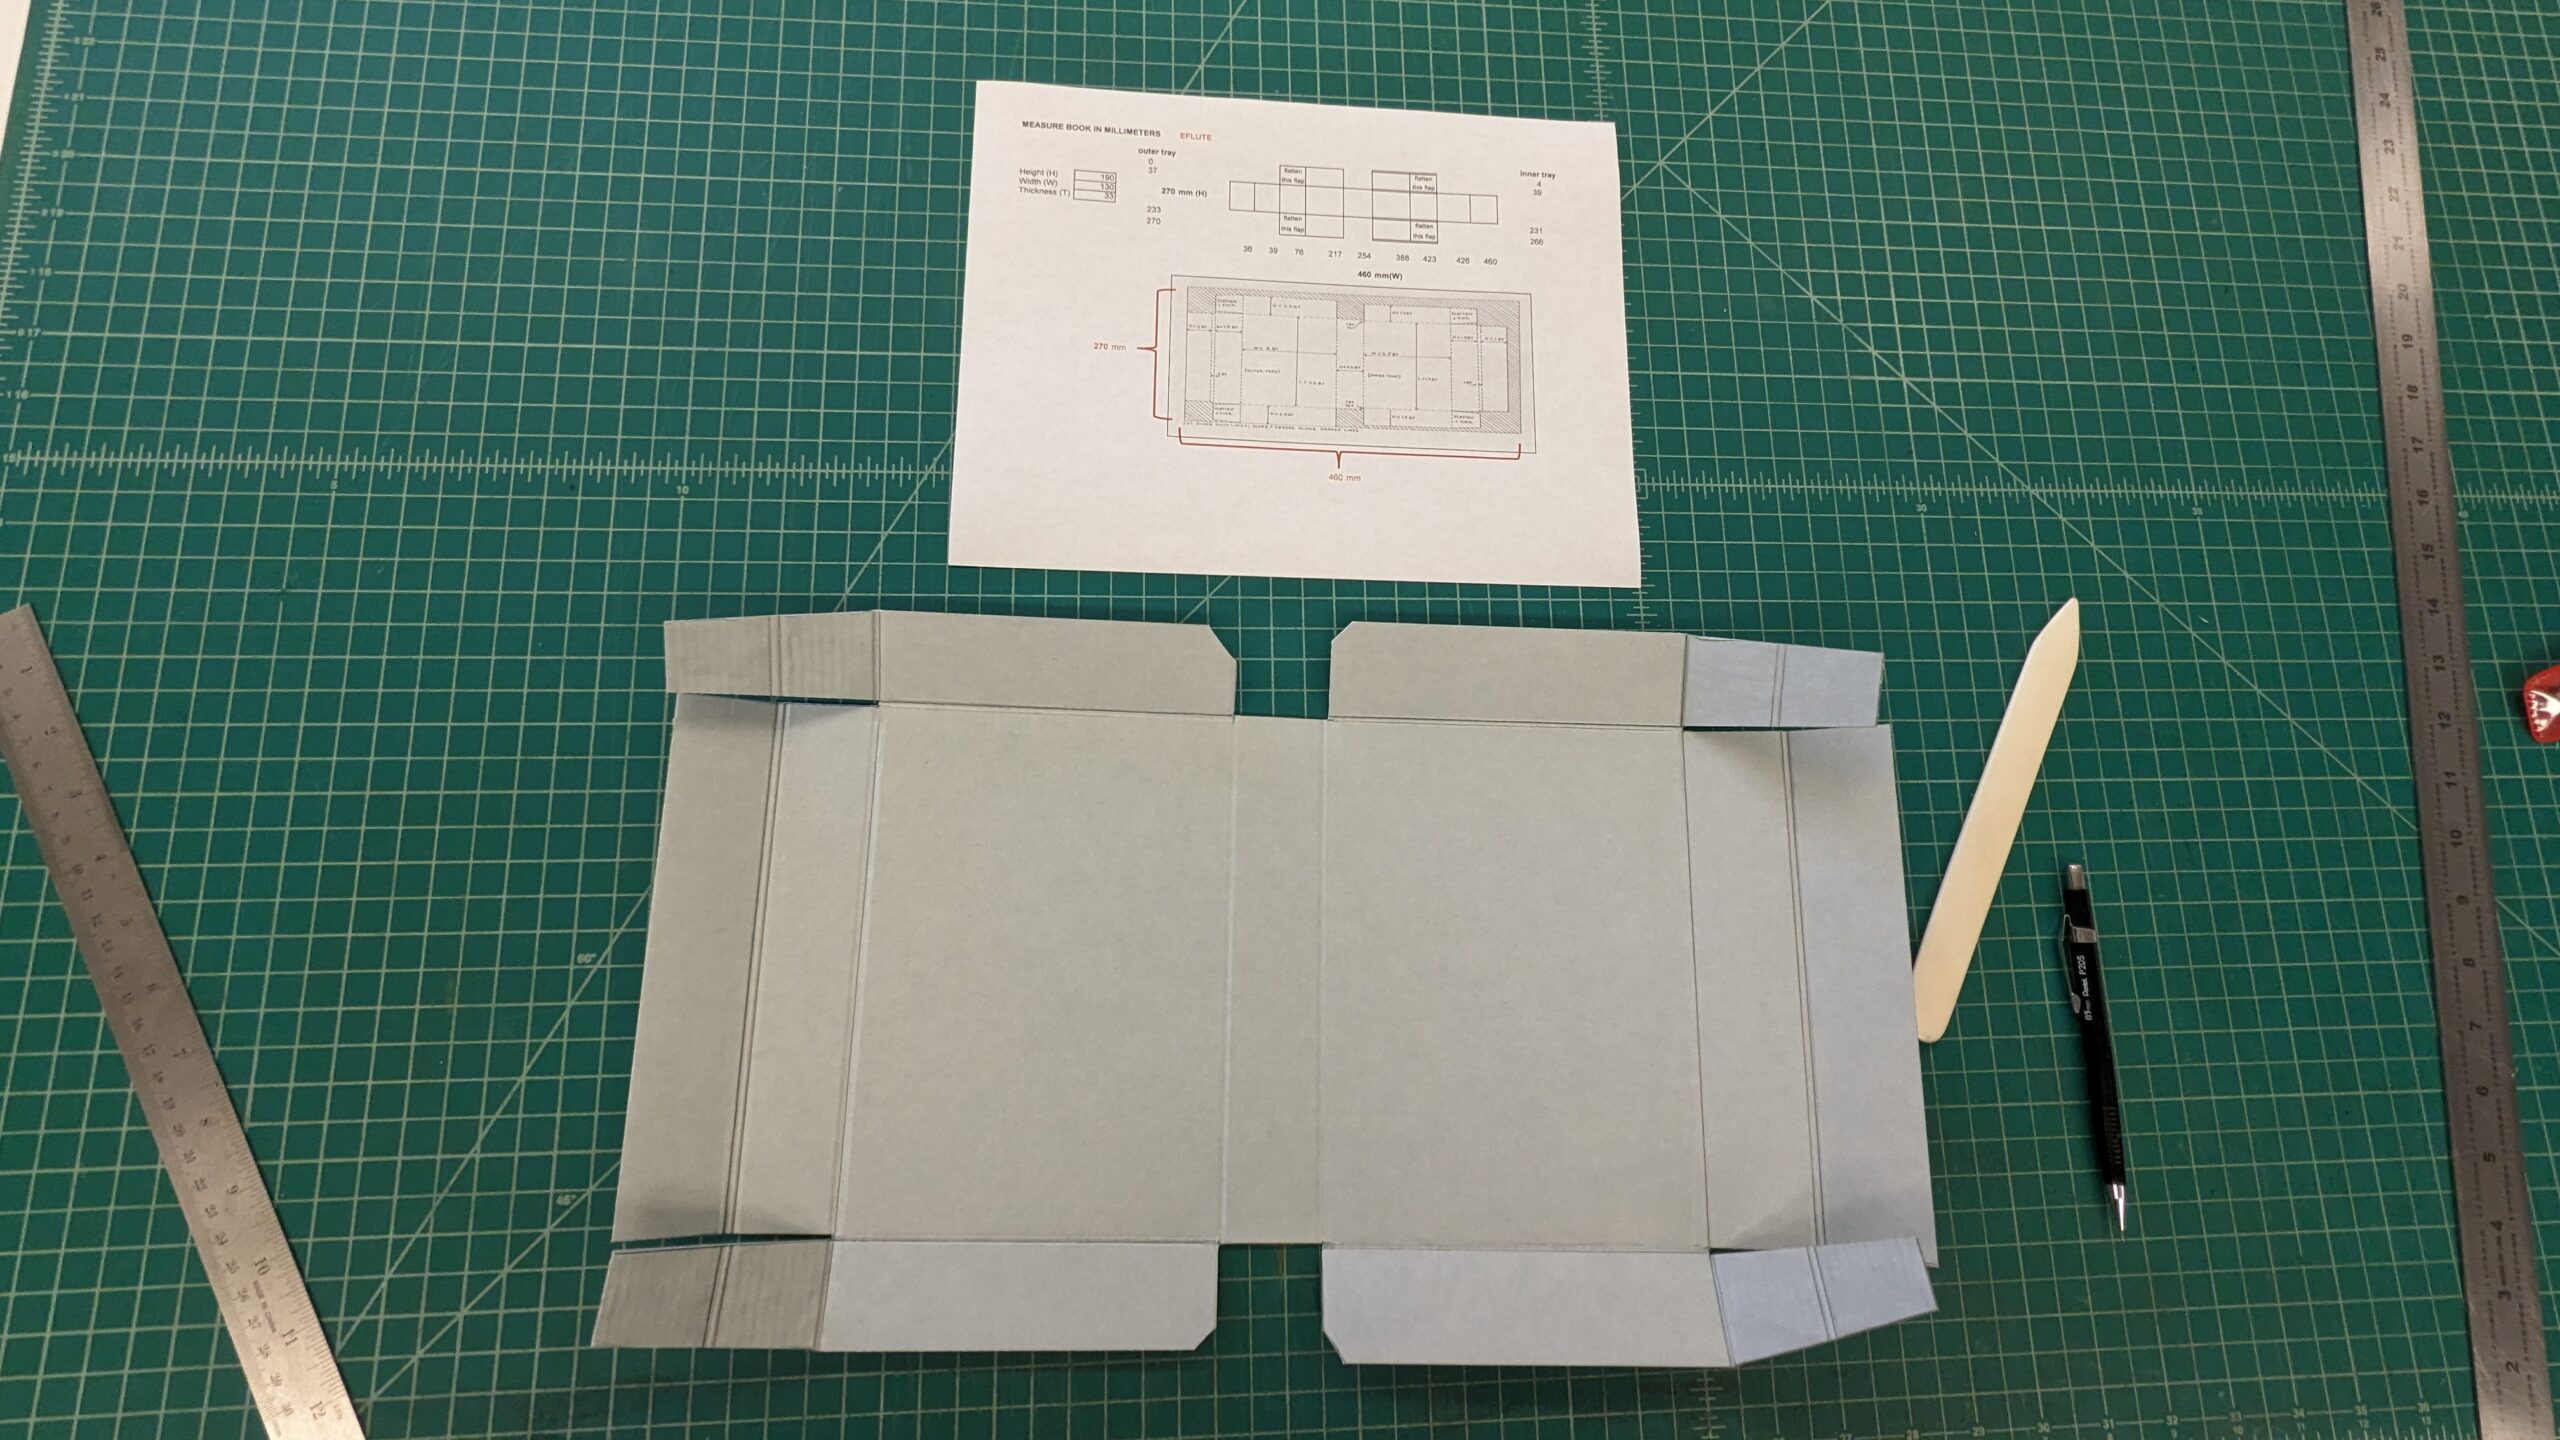
Corrugated clamshell boxes came next, with their in depth measuring and precision crimping and cutting. Like a tuxedo box, these boxes offer better storage from light and dust, and are a more structured enclosure. Where they differ, though, is they are made from corrugated board rather than Bristol board, and this offers more support to items that need a little boost of structural help. These boxes are made from one piece of board that is cut and folded into a clam-like box that opens on one end and is attached at the spine.

A flat corrugated blue board that has been cut and pre-folded, ready to form into a box.
A corrugated clamshell during the construction process. This clamshell still needs it’s ends glued in to create it’s box shape.

General Collections Treatment

My final big learning project was cloth tape removal, which was something completely different, making it very enjoyable to learn. Cloth tape removal is taking off old adhesive tape that has been applied to materials that is now falling apart. To remove cloth tape, a poultice of methyl cellulose is applied in thirds to the tape. Introducing moisture to the adhesive allows you to slowly and carefully use a Casselli microspatula to loosen and remove the tape, leaving behind only the original materials.

General collections treatment removing a cloth spine hinge with a methyl cellulose poultice.

An old pamphlet that’s been bound together with cloth tape in the middle of the removal process. Weights hold down pieces of Mylar to keep the pamphlet cover from absorbing any of the poultice. The cloth tape is the grey strip on the right of the pamphlet, and you can see where some of the tape has been removed and what still needs to be done.

Final Impressions

I’ve learned so much over my first month at the lab, but so far corrugated clamshells have been my favorite. It’s been so fun to grow my hand skills and to see how much of a difference one month can make, and I’m so excited to expand my horizons and learn more about the lab in the upcoming months!

Nicole Browning, Conservation Assistant [CHPL]