Tag Archives: matting system

Unfolding the Challenge: Conserving Folded Parchment Deeds with Wax Seals

When a group of four folded parchment deeds arrived at the Preservation Lab, I was immediately excited about the project. It is not often that we work with parchment, particularly on “flat” items such as parchment deeds. I use “flat” in quotation marks because these were anything but flat once unfolded.

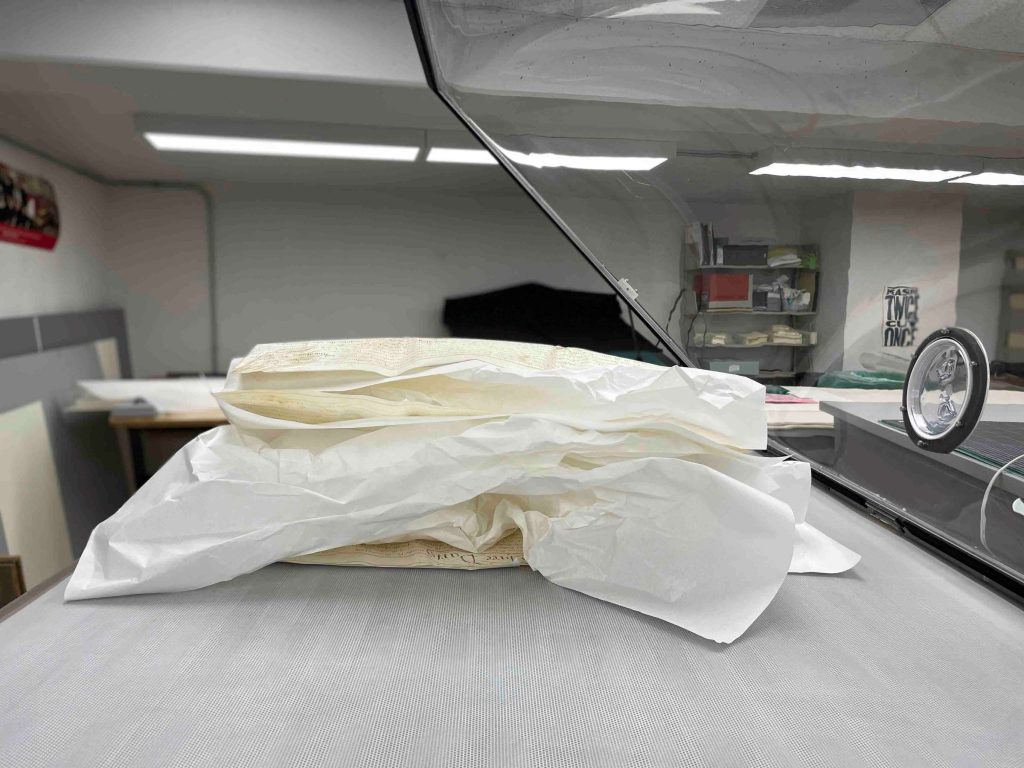
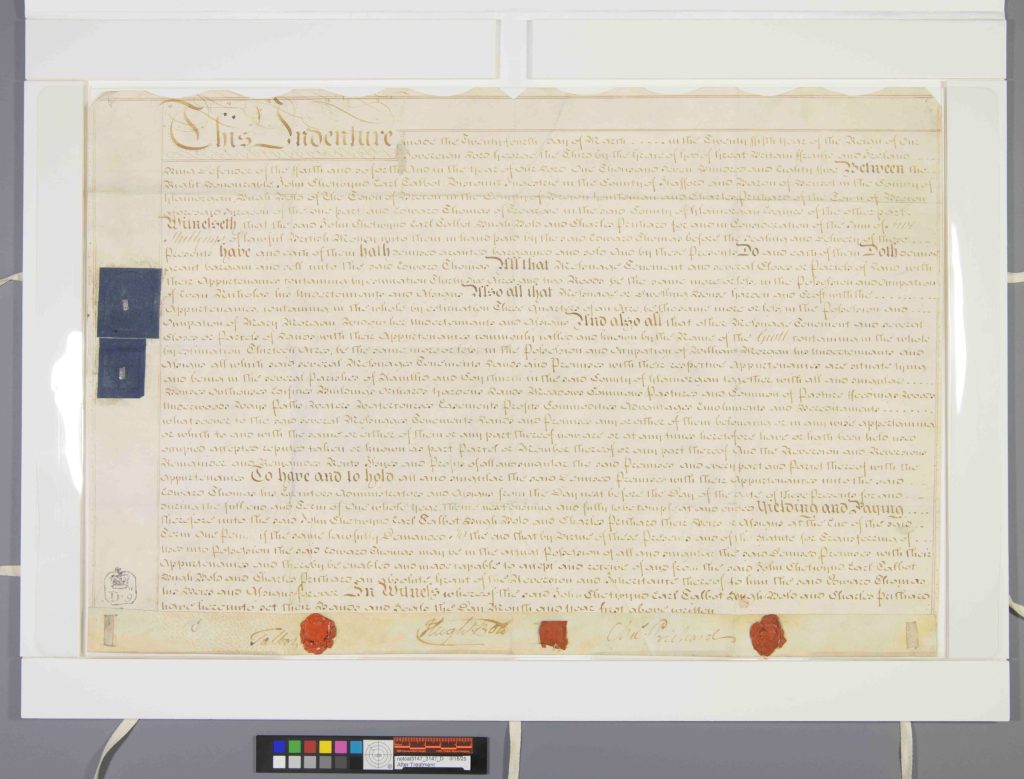
Four folded parchment documents stacked on top of one another for documentation.
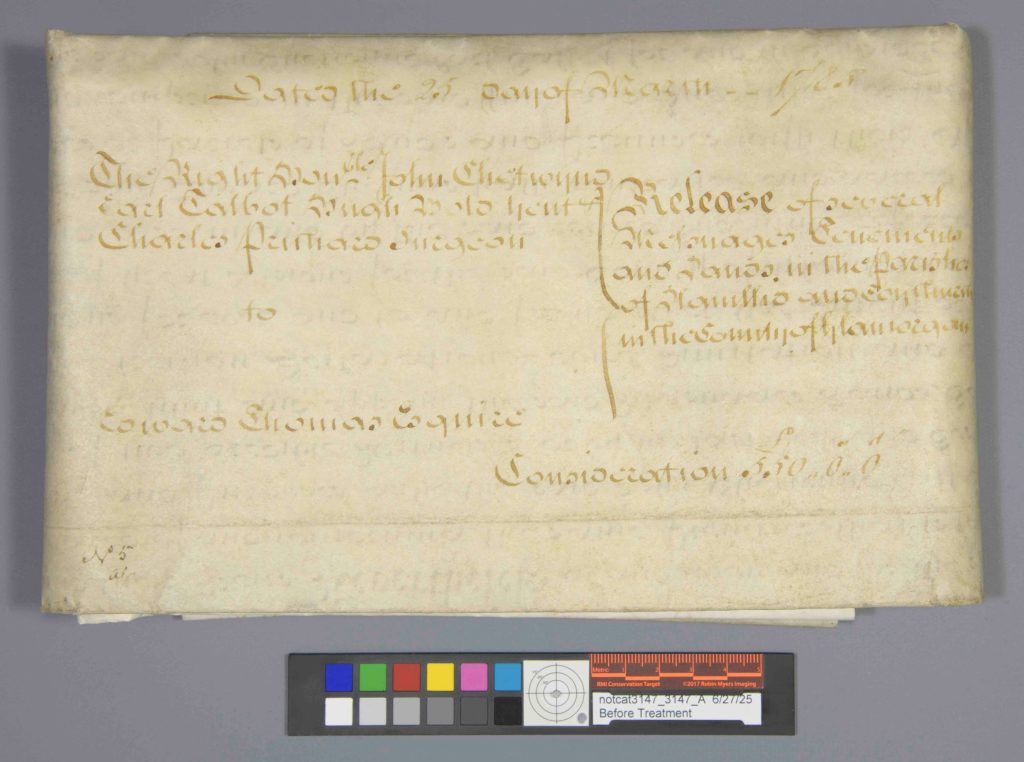
Before treatment photography – four folded parchment documents.

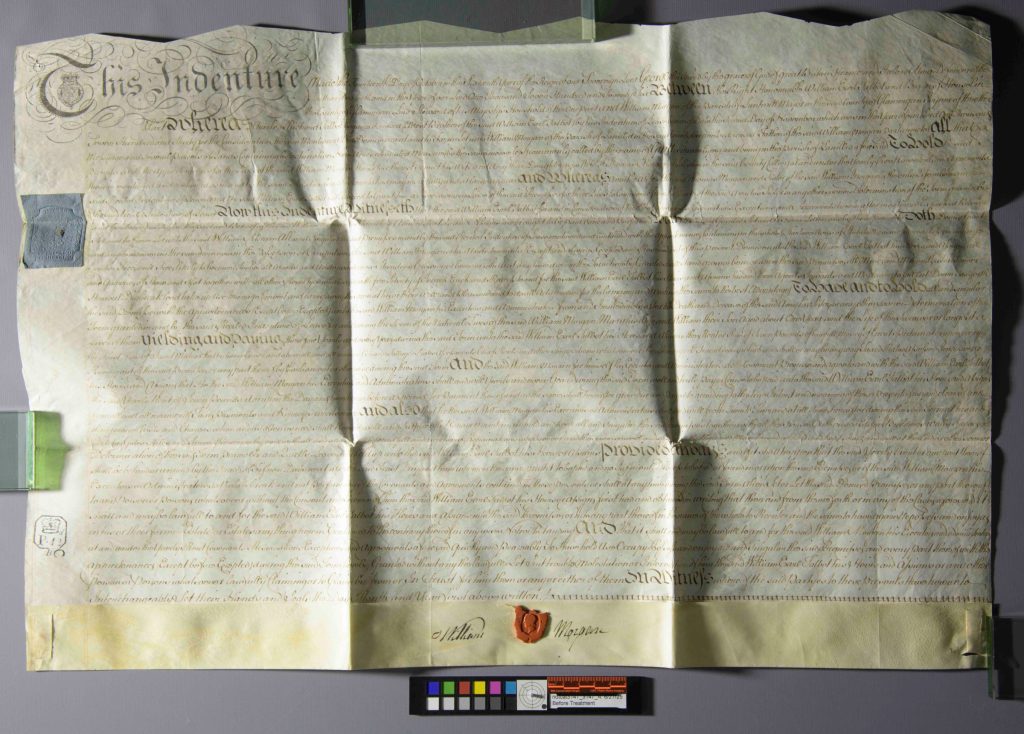
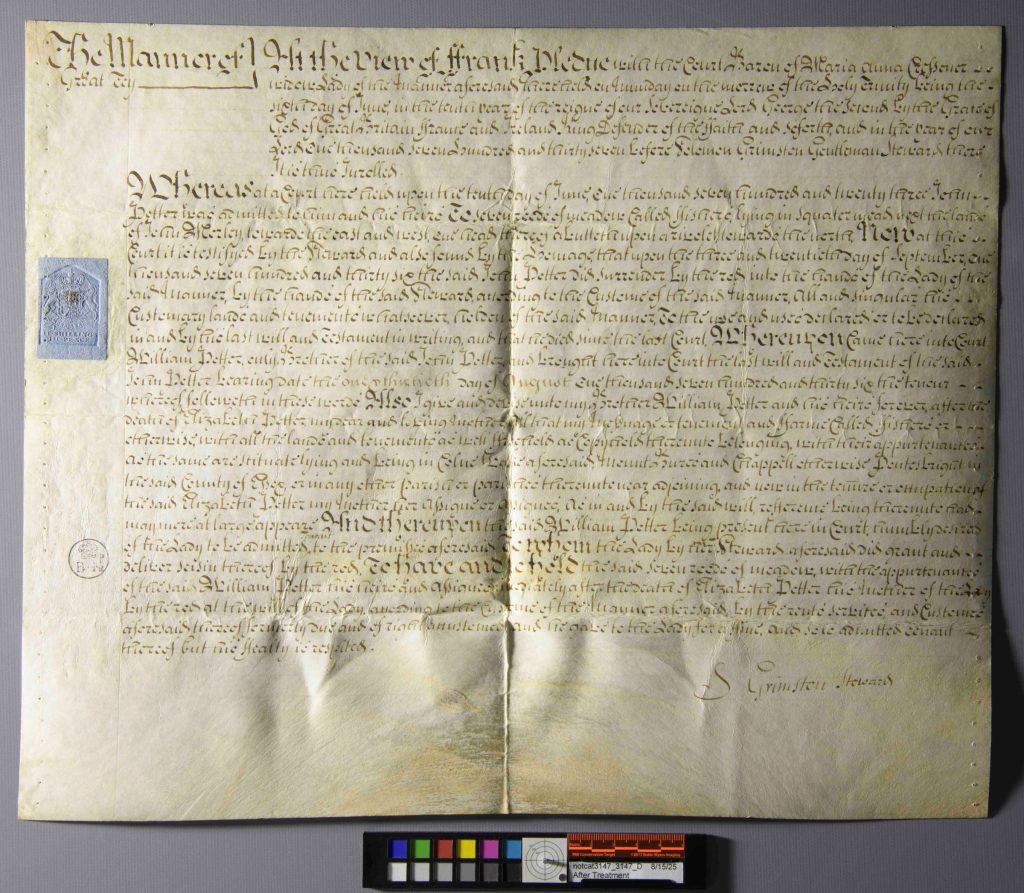
At first glance, they looked deceptively simple: compact, neatly folded, and quite small. Once opened, however, they revealed large, creased, and cockled sheets of animal skin, some with fragile wax seals and one composed of multiple leaves stitched together along the bottom edge. (Prior to treatment, each document was photographed as they were received in the Lab):

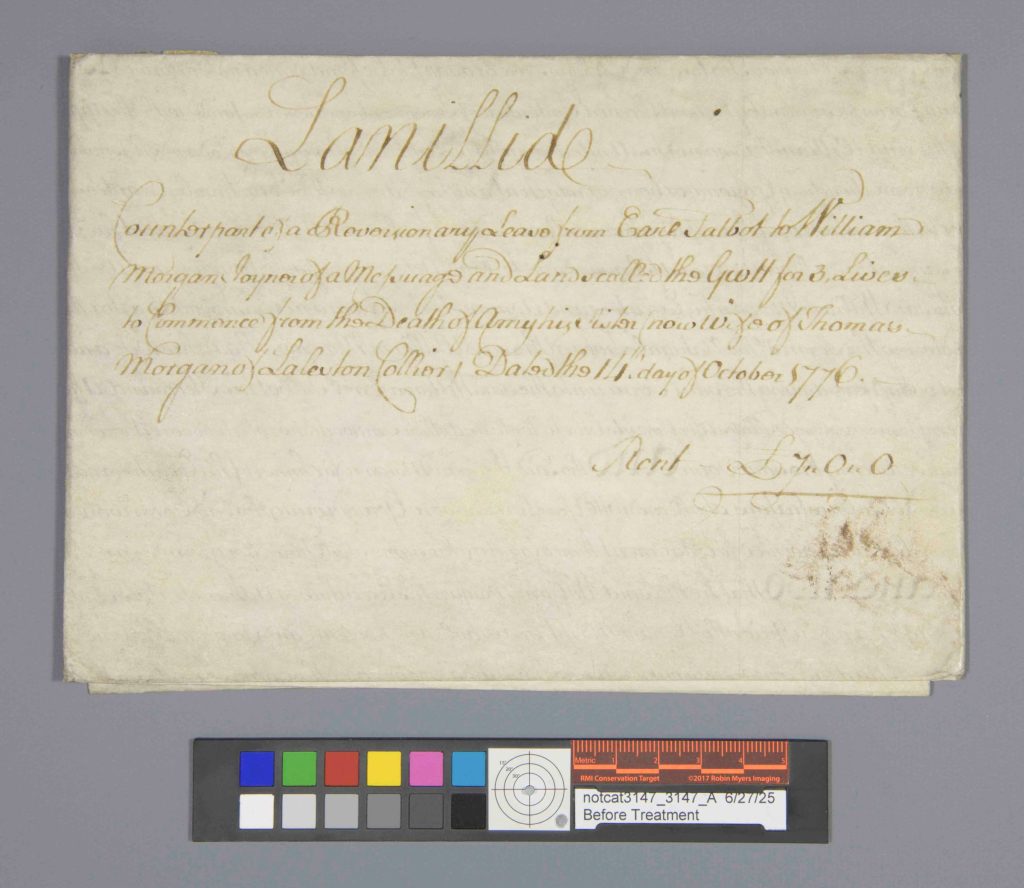
These 18th-century documents, part of the Archives and Rare Books Library, include three indentures consisting of single parchment leaves, and one composed of three parchment leaves secured with wax seals and parchment stays along the lower edge. They record land leases and property transactions.

The documents were brought to the lab for stabilization and improved access for teaching and research. In their folded state, they were difficult to handle, especially the multi-leaf example, which could not be fully examined as stored. Centuries of folded storage had clearly left their mark.

So how do we safely unfold and stabilize these items for handling, teaching, and research?

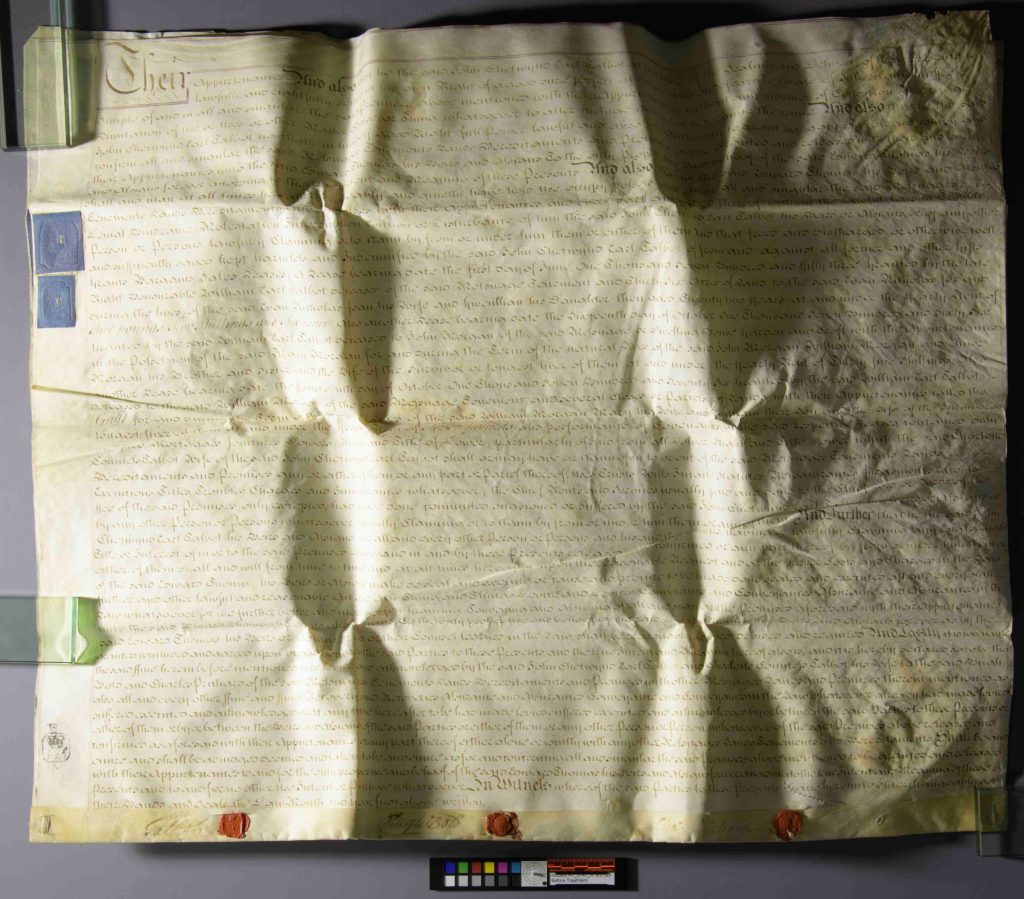
Parchment is highly responsive to humidity. It expands, contracts, cockles, and stiffens depending on environmental conditions. Long-term folded storage had left deep set creases, and exposed areas showed noticeable darkening. These distortions became even more apparent under raking light photography.
Treatment Approach

Flattening parchment is never as simple as adding moisture and pressing. Too much humidity risks gelatinization, while too little leaves folds unchanged. Wax seals add another layer of complexity since they are brittle, protruding, and highly sensitive to pressure. To begin conservation treatment, each document was first surface cleaned using a hydrophilic sponge to remove surface grime. Ink testing followed to ensure stability before any humidification. All inks tested were stable, and no iron gall ink was detected. With testing complete, humidification could begin.
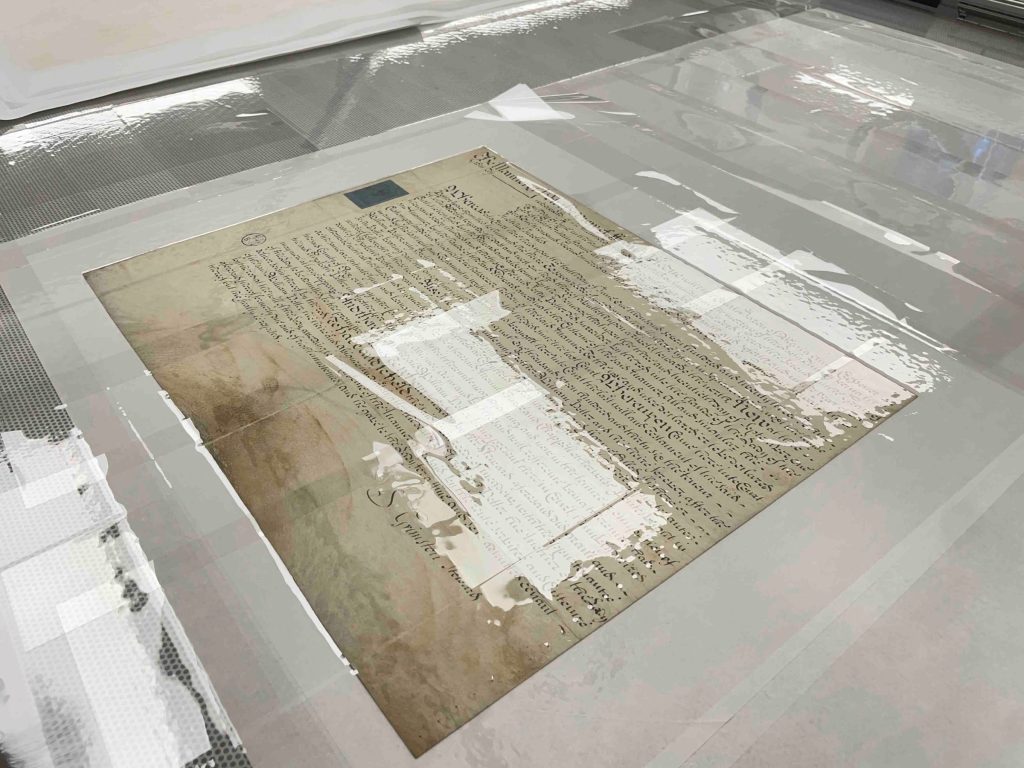
Parchment document under suction on a suction table.
Drying on the suction table.

The single-leaf documents were humidified in short cycles within a cold humidity chamber. After each cycle, they were dried gradually under felts, with pressure slowly increased and carefully kept away from seal areas. Drying methods were adapted depending on structure and condition. One single-leaf document without seals was dried under tension on the suction table, while the others were dried under felts and weights, again avoiding direct pressure on wax seals.

The Multi-Leaf Document

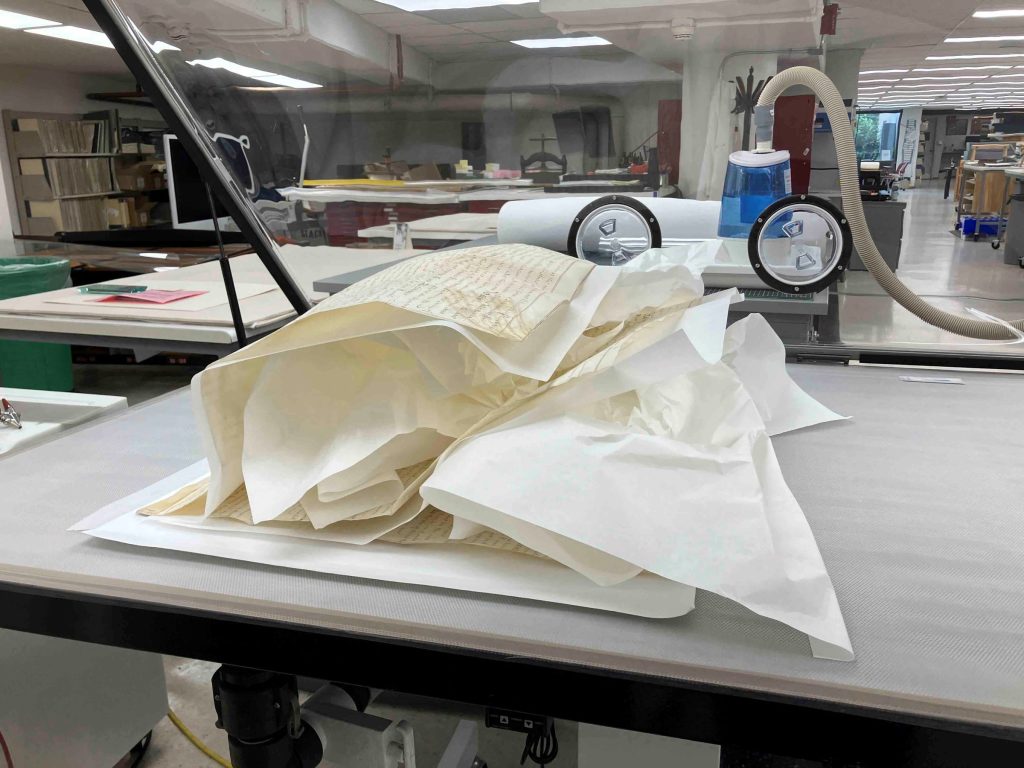
The multi-leaf deed required a more complex and iterative approach. It consists of three parchment leaves attached together, each responding differently to moisture. Initial humidification was carried out using an ultrasonic dome with a Gore-Tex barrier supporting the lower leaf. The upper leaf responded well, but the middle leaf remained resistant. To improve moisture distribution, unbuffered interleaving paper was placed between the leaves. Even so, the middle sheet required additional targeted treatment.
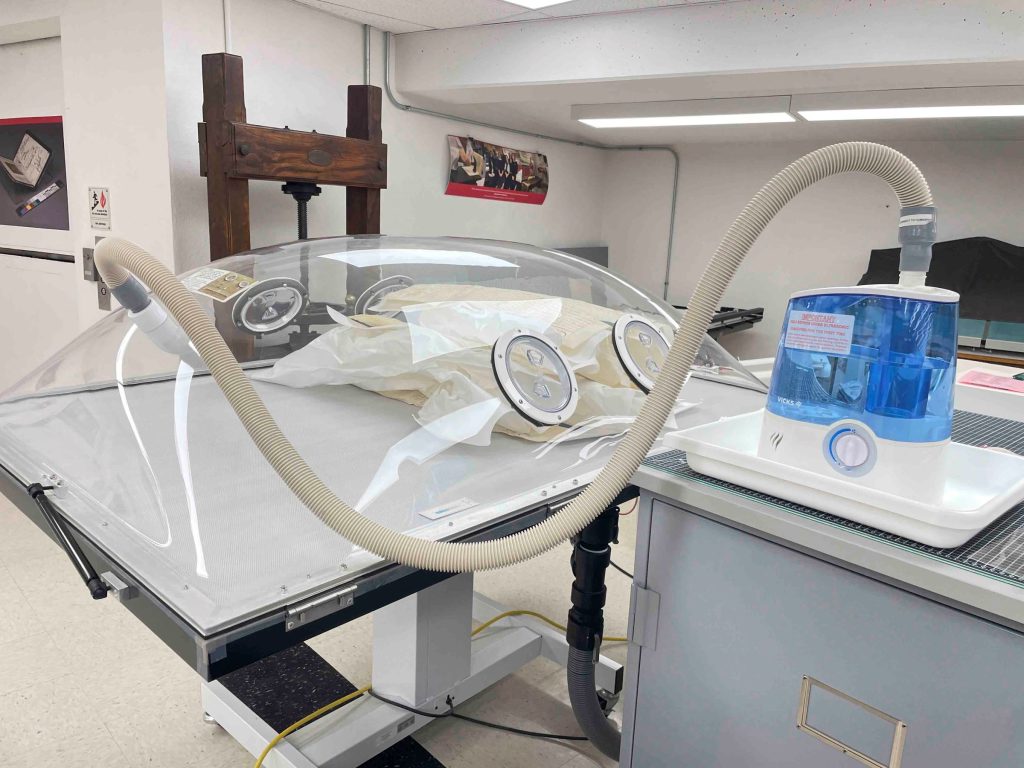
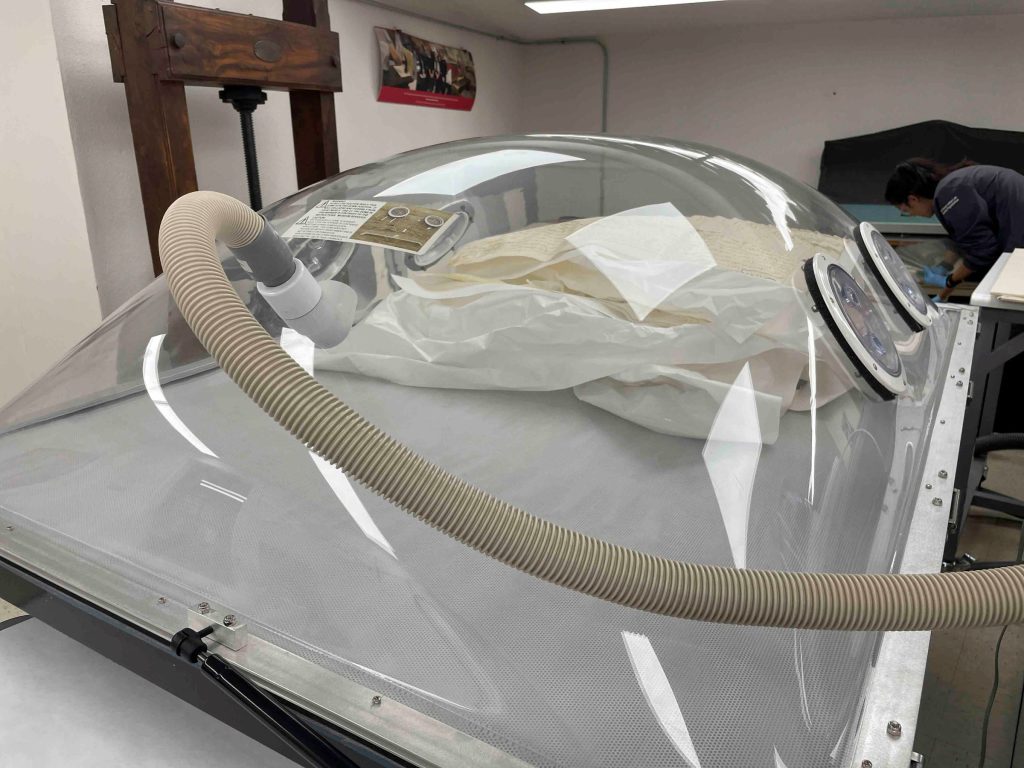
The most effective approach combined localized humidification with staged flattening. Each leaf was treated individually while the others were protected with polyester film and weighted mat board to prevent unwanted moisture transfer or movement. Stubborn folds were gently humidified using a localized ultrasonic humidifier and immediately set under pressing stacks of blotter and Hollytex, followed by gradual weighting. This allowed controlled relaxation of specific areas without over-treating the entire object.
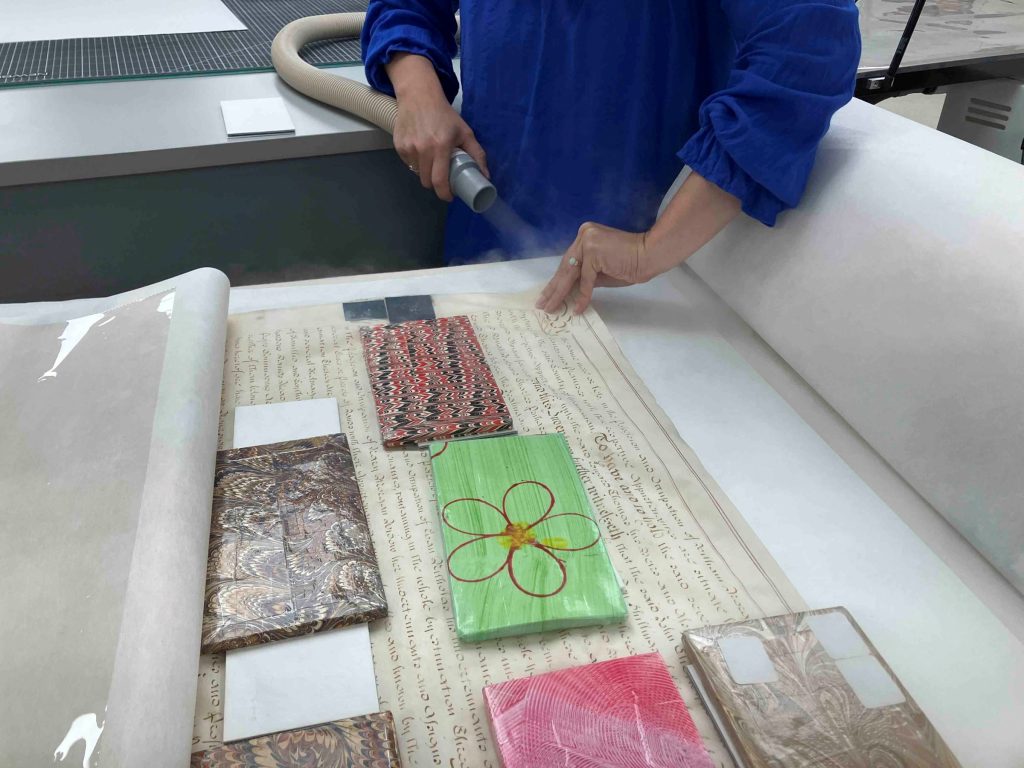
Conservator holding humidifier nozzle to locally humidify parchment document as it's being flattened on the suction table.
During treatment – localized humidification for the multi-leaf document.

The process was highly collaborative, often requiring two or three people working at once. One person applied moisture and guided the parchment while another adjusted weights and pressing materials in real time. Throughout treatment, wax seals were carefully protected using mat board barriers and spacing systems to ensure they remained free from pressure. Once fully relaxed, the document was dried under felts with weights in place, while polyester sheeting remained between the leaves to prevent adhesion or distortion.

Wax seals

Three of the four documents retain wax seals along their lower edges. These seals were structurally fragile and were consolidated using fish gelatin applied with a fine brush. During treatment and flattening, they were carefully isolated so that no direct pressure was applied.
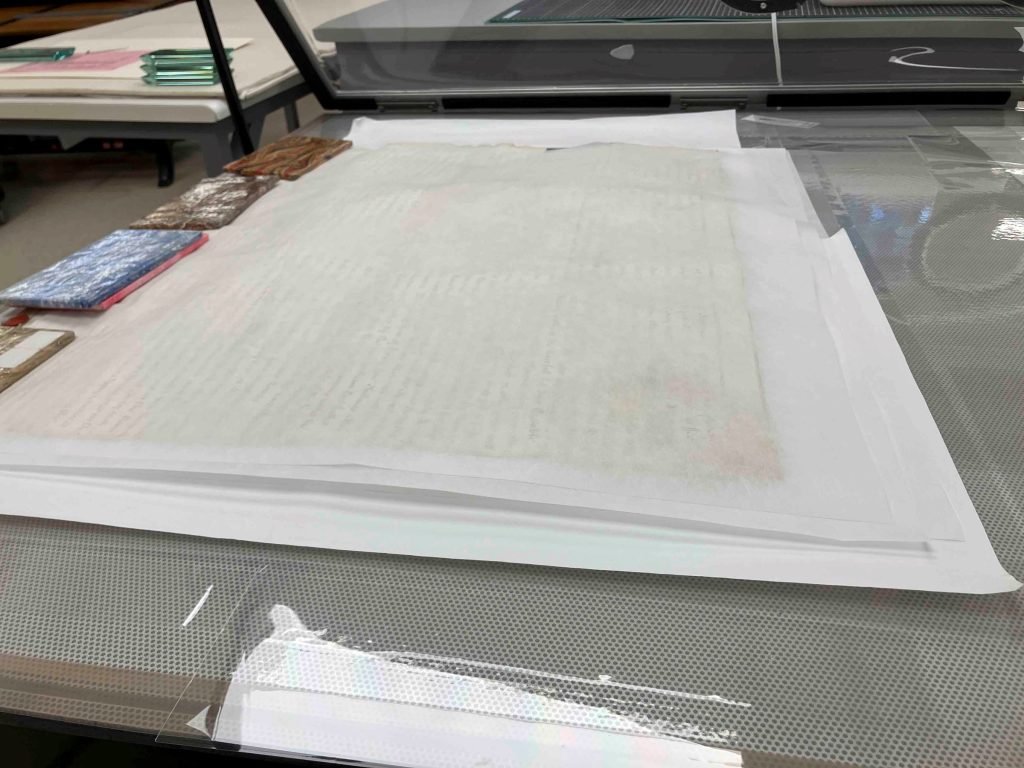
Parchment document under holly-tex, blotter and weights.
During treatment – multi-leaf document after humidification and flattening.

Housing for Support and Access

Following treatment, each document was rehoused in a custom sink mat system. Before constructing the full-sized enclosures, I made a small working model using a scrap piece of parchment to ensure that what I had in mind would actually function for these large documents in practice.
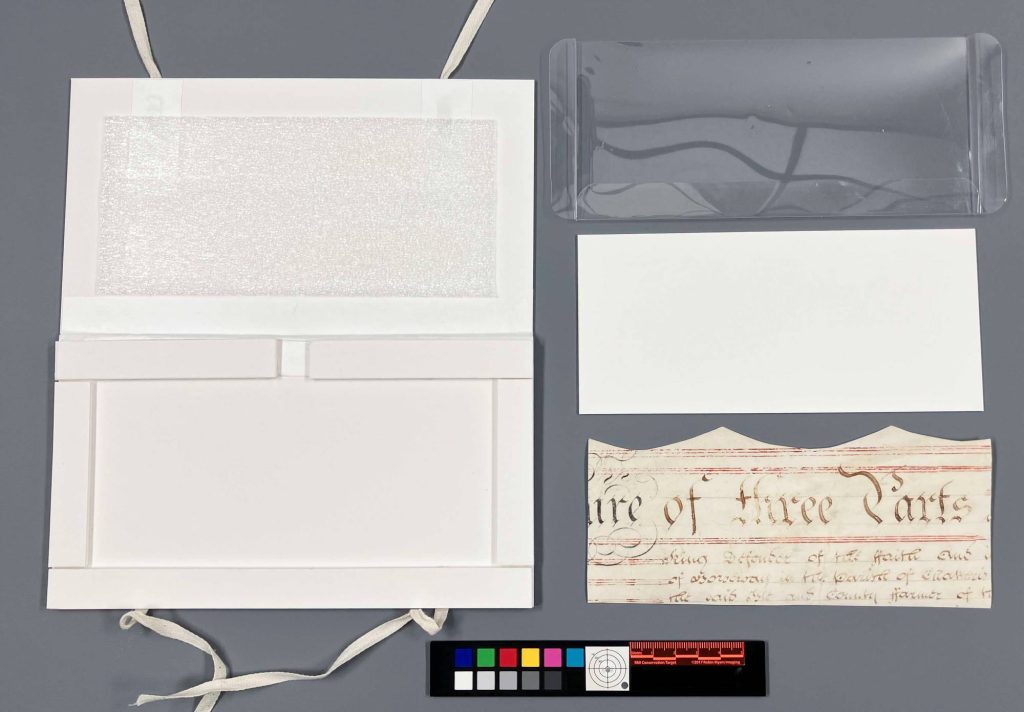
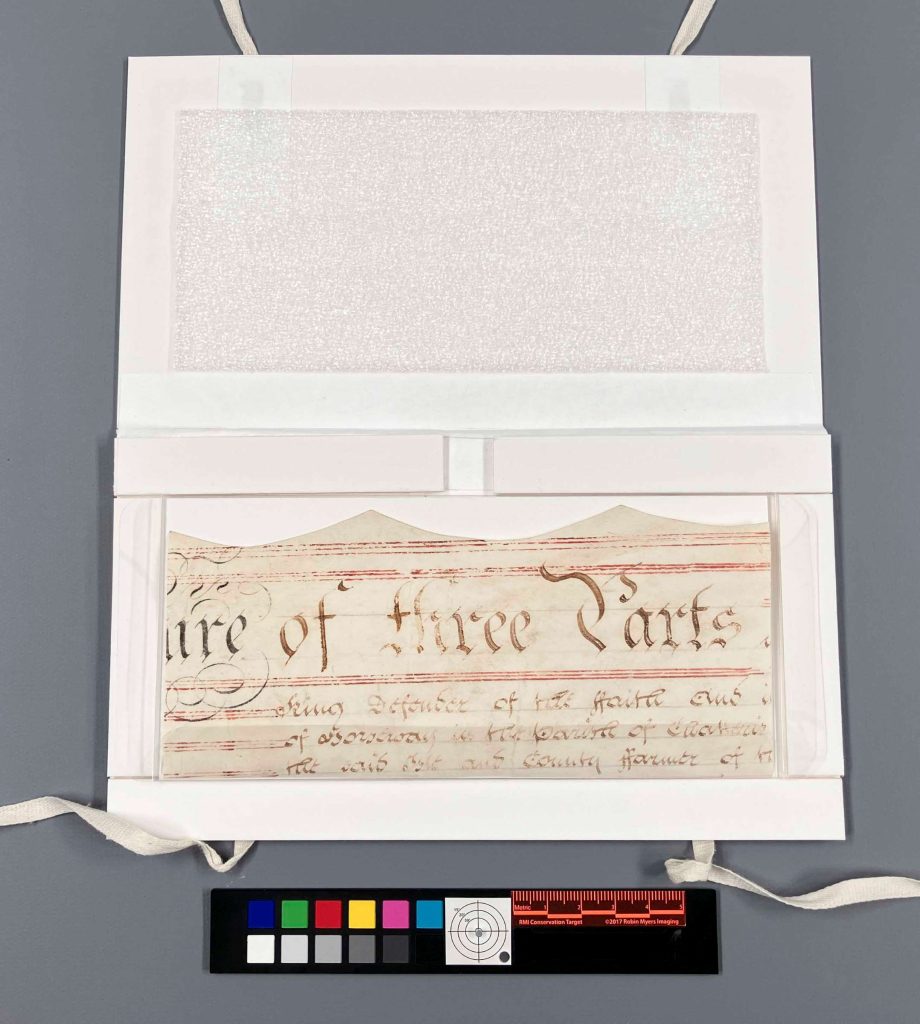
Small matting system, opened, with ethafoam on lid, mylar and mat board supports and small piece of a parchment document.
Small scaled model of the enclosure for each parchment document with the different components, including sink mat and polyester film sling.
Small sink mat model with a parchment document fragment inside.
Small scaled model created for the parchment documents.

The documents rest on polyester slings secured within sink mats and are held in place with cloth ties. The interior lids are lined with Ethafoam, providing gentle compression and helping to minimize movement caused by environmental fluctuations. The multi-leaf document required additional structural support through reinforced mat board construction. The three smaller documents were housed together in a corrugated clamshell enclosure. This housing balances long-term preservation with accessibility, allowing the documents to be safely handled for teaching and research.
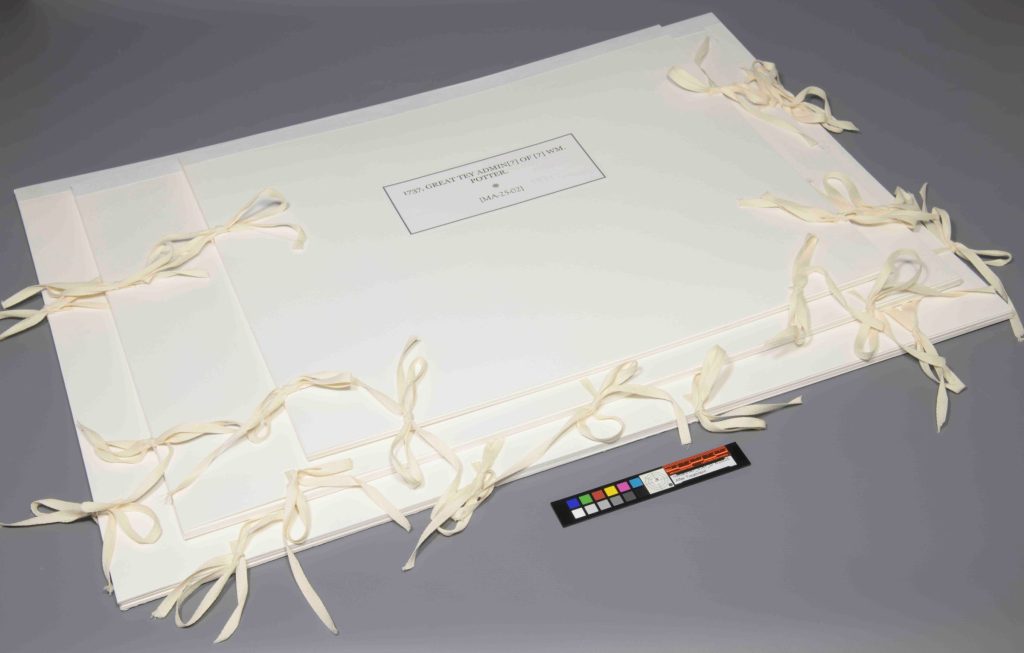
All four matting systems stacked on top of one another.
Each document housed in a custom matting system.

Final results

Raking light photography after treatment shows a clear reduction in creasing, along with a noticeable shift in how the documents behave physically. The parchment still carries evidence of its long folded history, as these materials tend to do, but it is no longer locked into those distortions. While not perfectly flat, the material is now stable, supported, and significantly less stressed along its former fold lines. Under raking light, what once appeared as sharp ridges and tension lines now reads as a softer, more coherent surface. It feels as though the parchment has settled back into itself after a long period of compression.

Perhaps the most satisfying change, though, is in handling. What began as awkward, resistant objects that required constant caution are now stable enough to be lifted, viewed, and studied with far more confidence. They remain delicate, but they are no longer unpredictable in the same way. There is a clear sense that they can finally move between storage, teaching, and research without the same level of hesitation at every step.

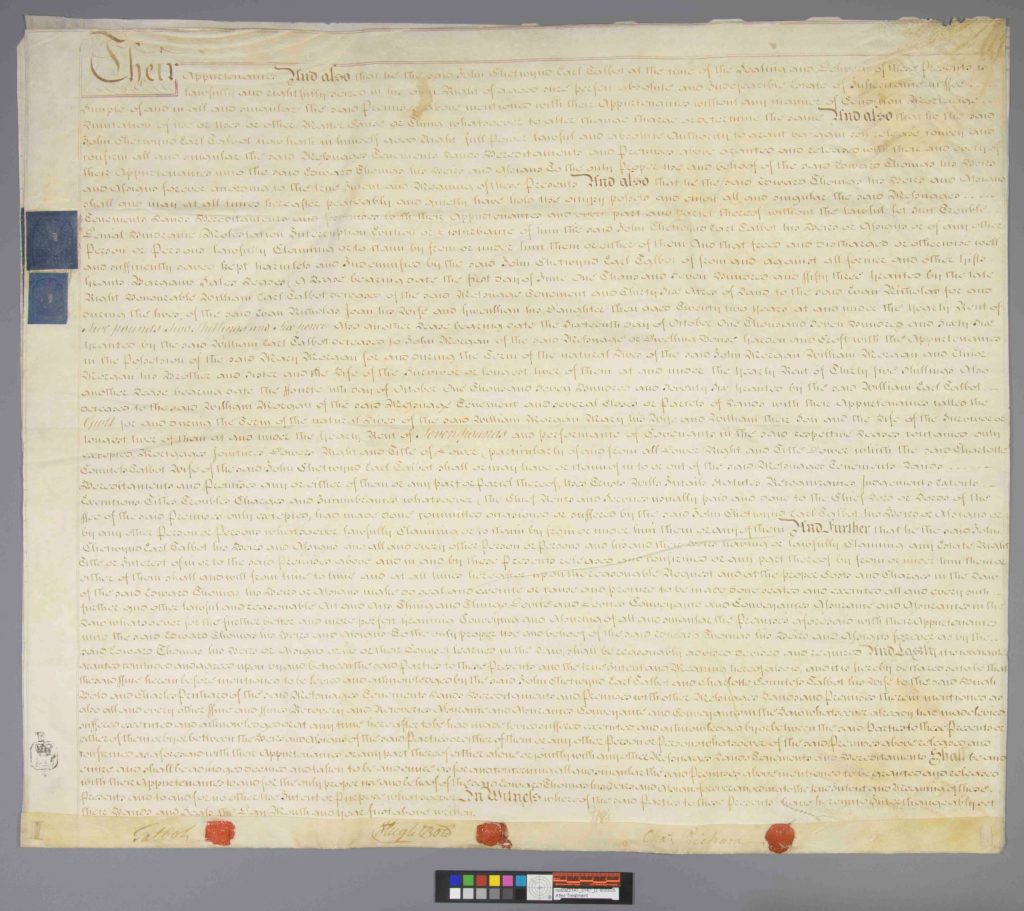
Overhead view of the multi-leaf parchment document after treatment in the matting system with a sink mat and polyester sling.
After Treatment – parchment document housed in a matting system with a polyester sling.

Catarina Figueirinhas – Assistant Conservator
Ovals and Zs

How often do we pay attention to the framed portraits of important people and historical figures that hang on the walls of our institutions? Perhaps we glance their way every now and again, perhaps we even contemplate these forgotten ghosts briefly; but how often does a piece with its own provenance, characters, and stories simply become part of the everyday background, and how do we approach preserving these items, so they are not lost to history?

Frame By Frame

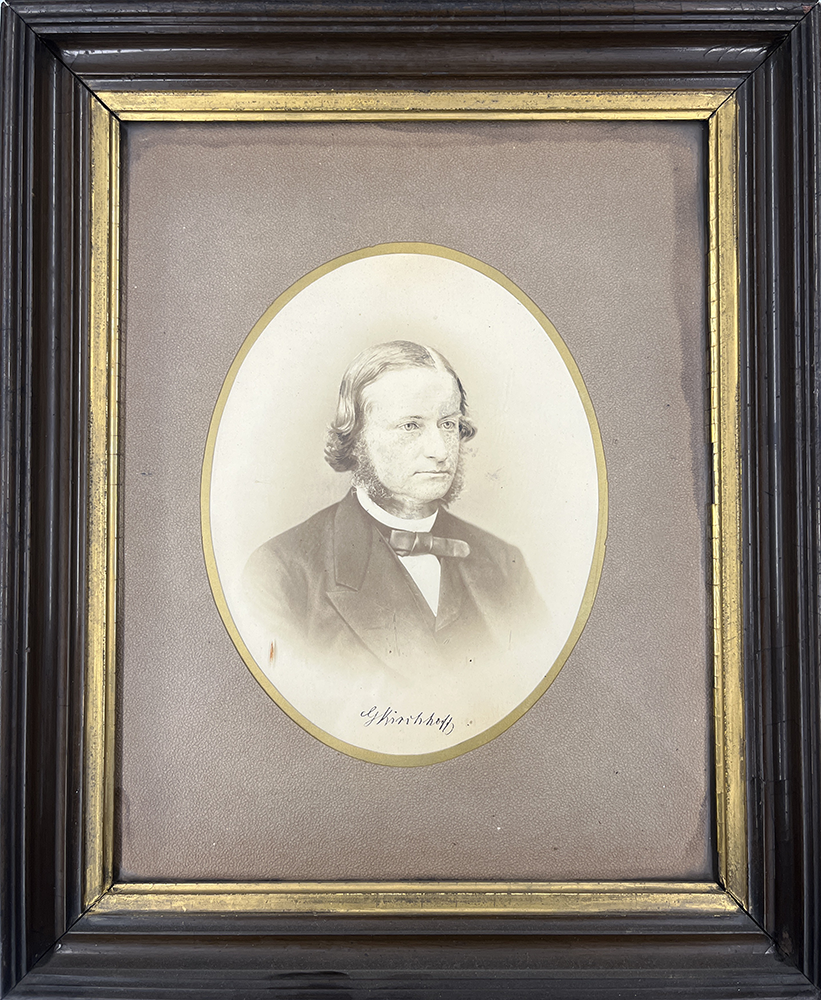
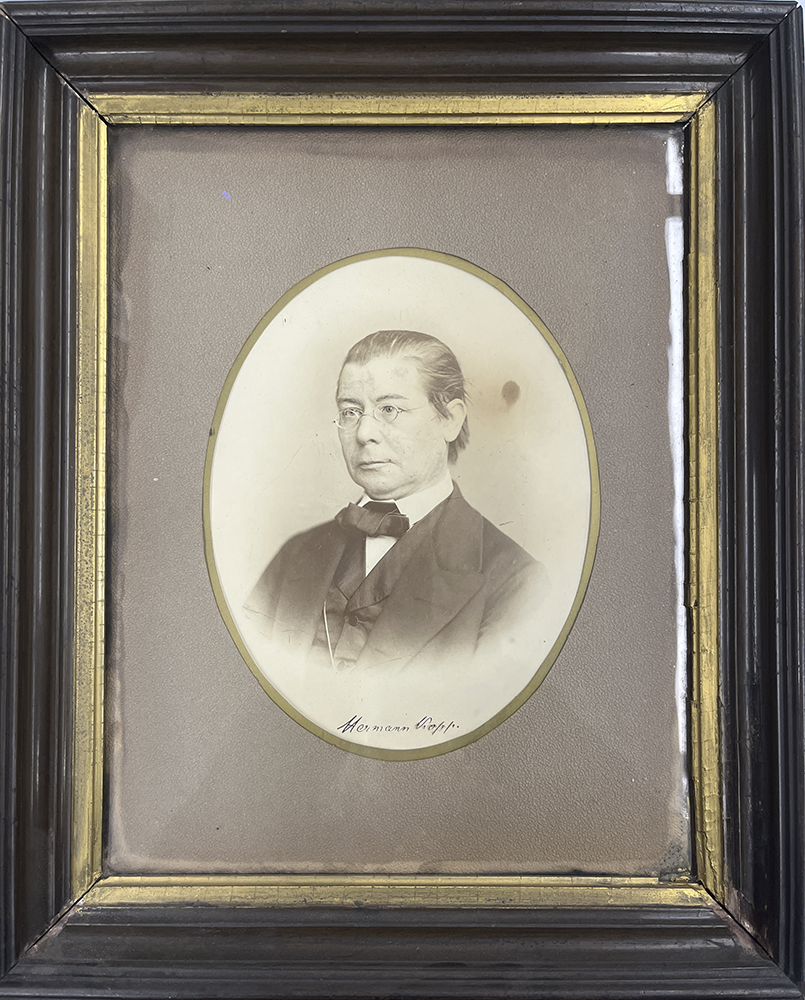
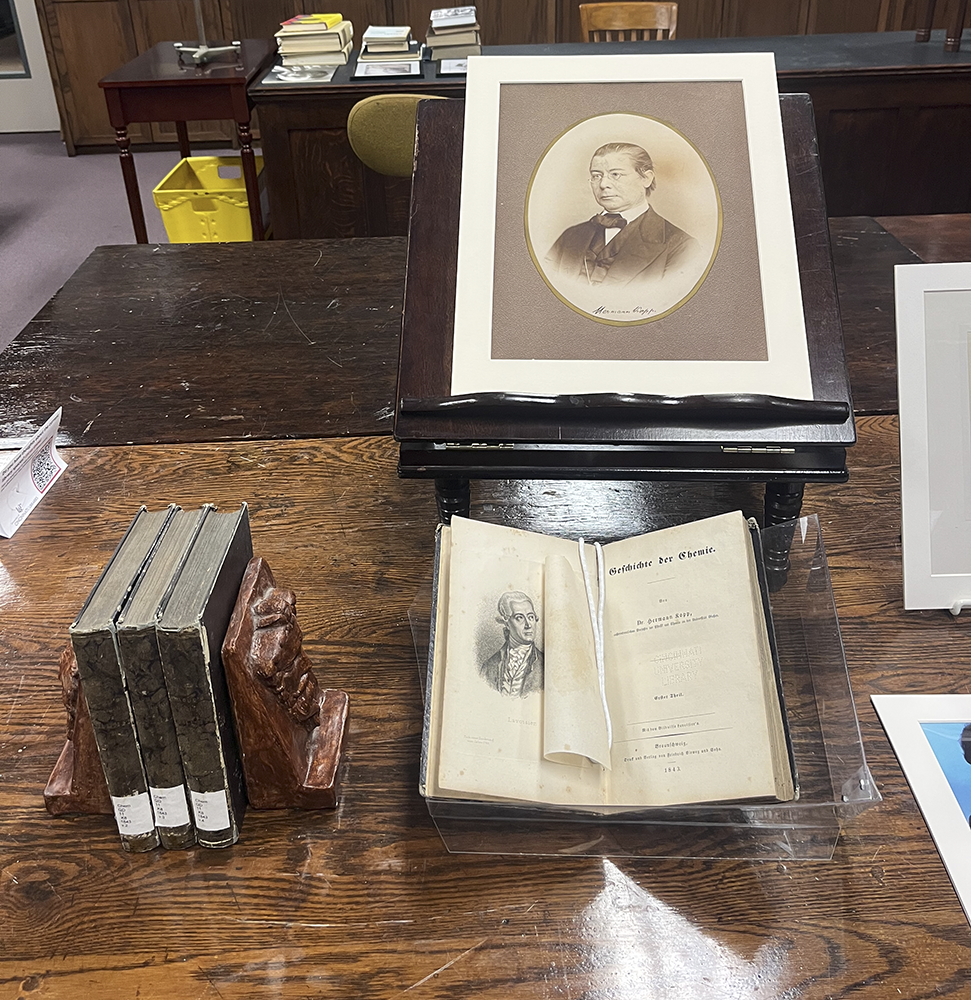
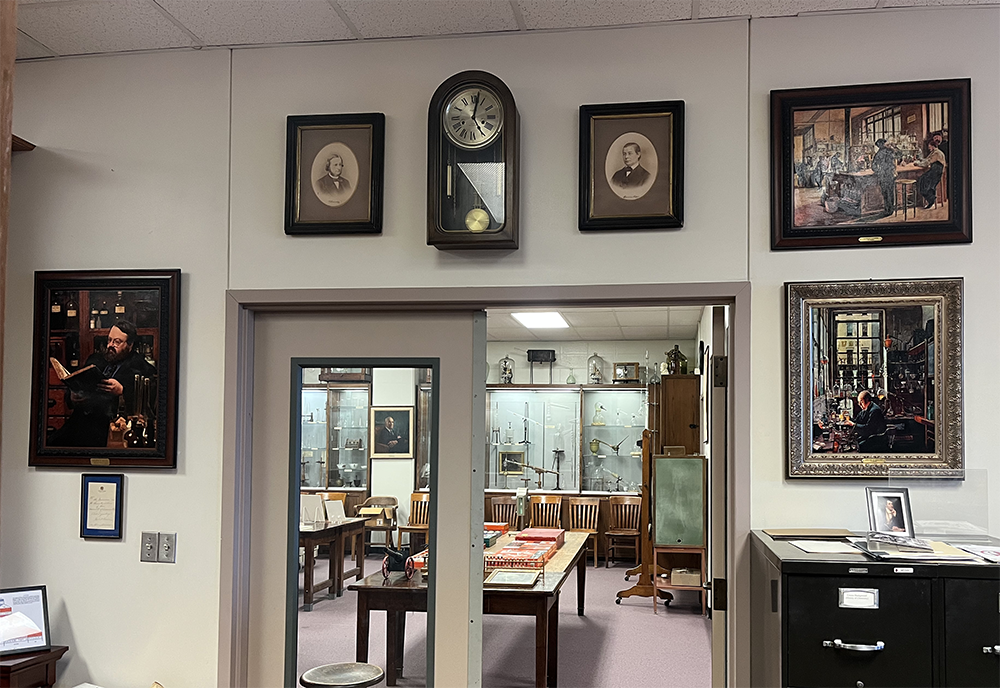
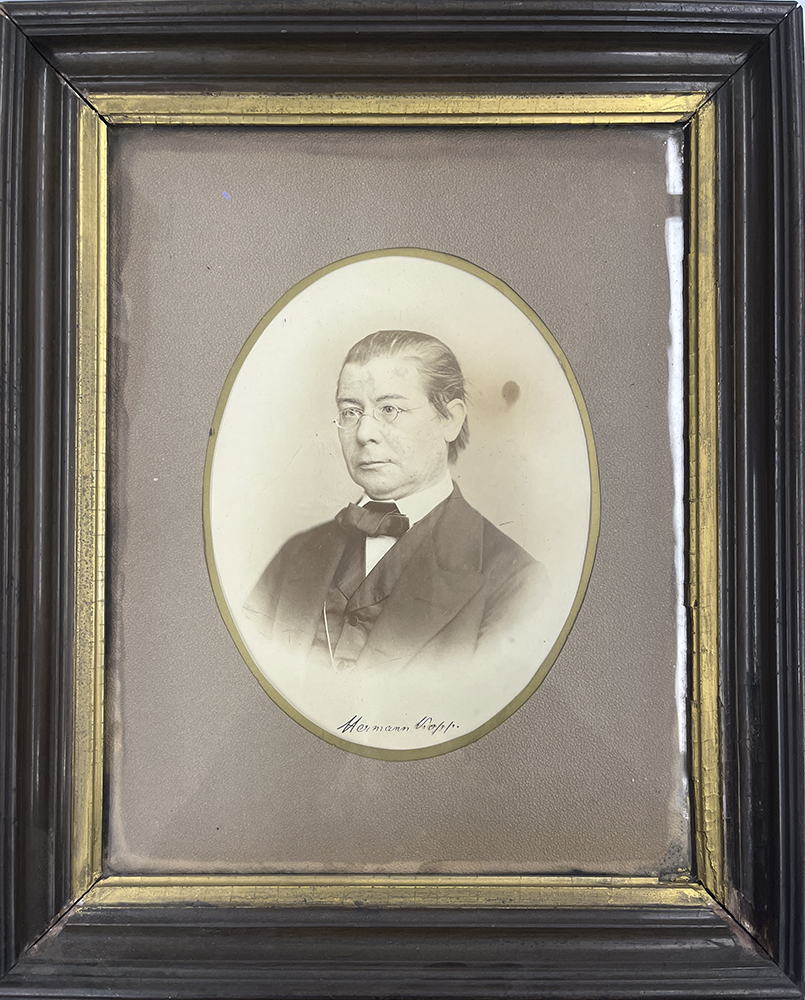
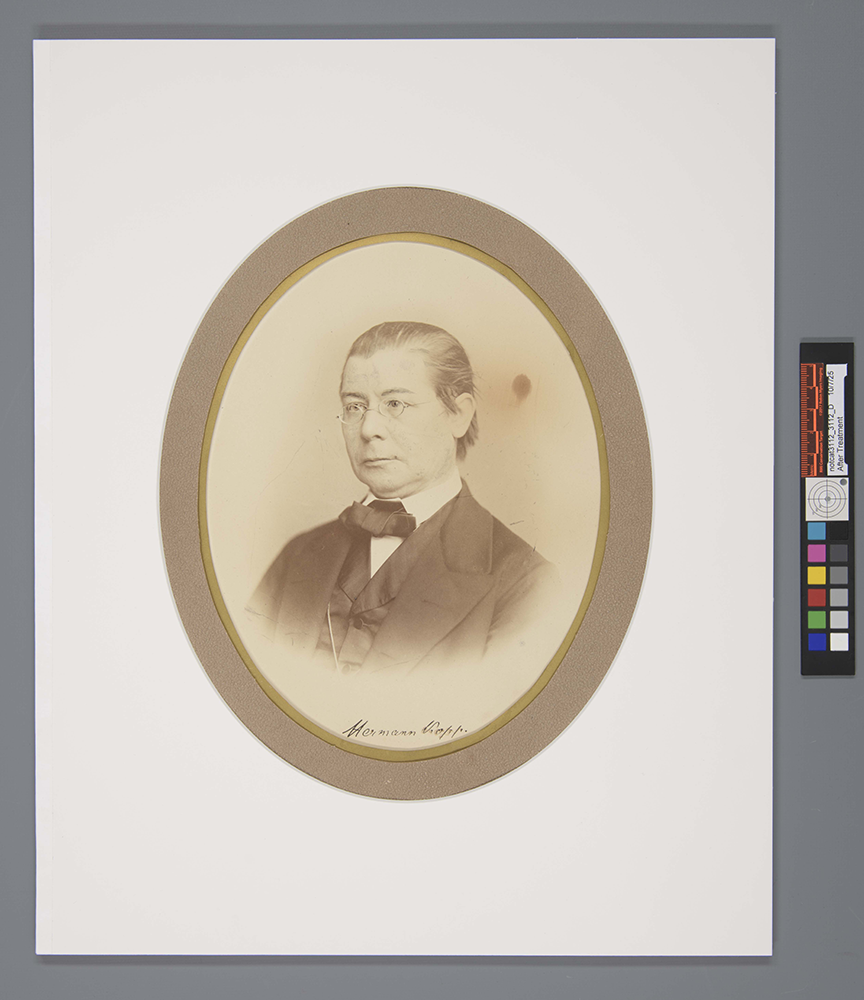
Recently I was assigned a framed portrait of German chemist and historian Hermann Kopp from the Oesper Collections in the History of Chemistry at the University of Cincinnati Libraries. It arrived with a similarly framed portrait of German physicist/mathematician Gustav Kirchhoff, both of which were gifted to early UC chemistry department chair Thomas Norton in 1875 upon completion of his PhD at the University of Heidelberg. They would later become part of the Oesper Collections, and have been, for some time now, hanging on the wall of the library section since the collection was moved there in 1998, according to librarian Mark Chalmers.

The Preservation Lab has received quite a few framed items from this collection as of late and the treatment/housing requested by the selectors has become a common one that we practice. It involves scanning the original and printing a high-quality surrogate image of the photograph or print which can then replace it inside the original frame. The original photograph/print can then be moved to a more archival storage option where it will be less susceptible to damage and degradation. A framed portrait of Marie Curie’s daughter, Irene Joliot-Curie with an inscription from Ralph Oesper received this treatment and storage solution.

The Kopp portrait however, proved to require more creativity than prior framed items, and gave me an opportunity to try out a more unique storage solution.

Kopp’s Portrait

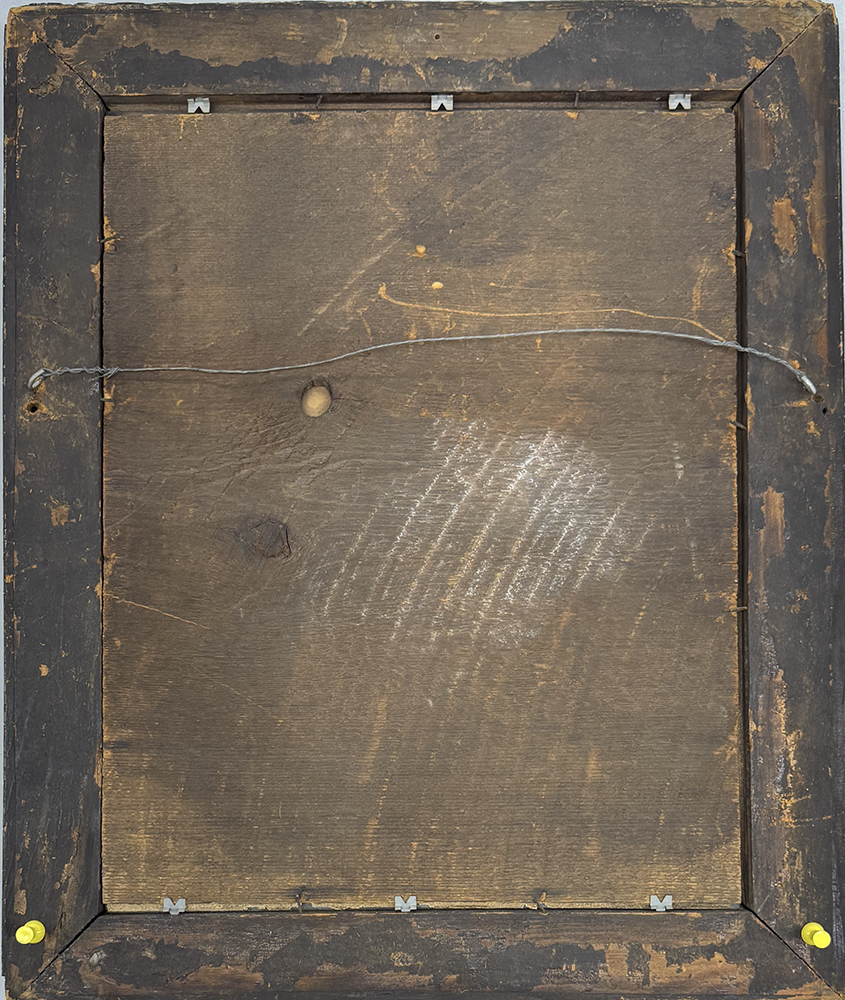
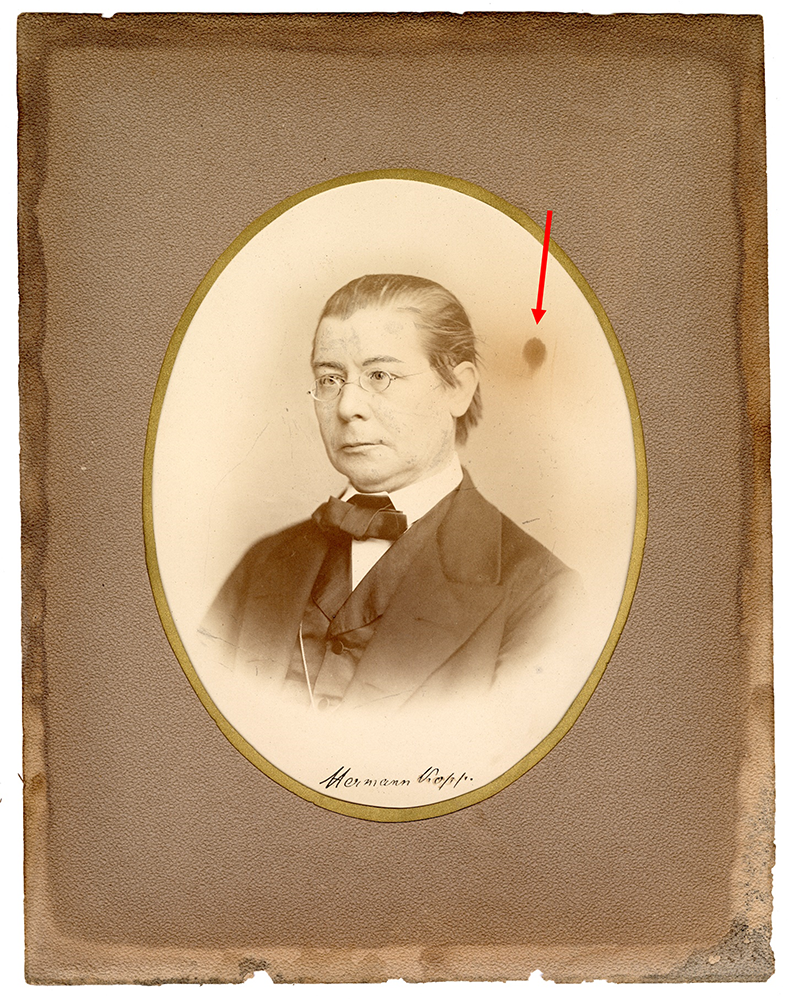
The portrait was framed under several layers. From the bottom up, they included: a beige backing mat which the (likely) albumen print photo of Kopp was attached to, a thin piece of paper featuring an oval-shaped window with a golden border, and a thick brown textured paper, also with an oval-shaped window. These had been secured into a brown varnished wooden frame with painted gold inlays and a solid wood backing board held in place with rusty nails and metal brackets.

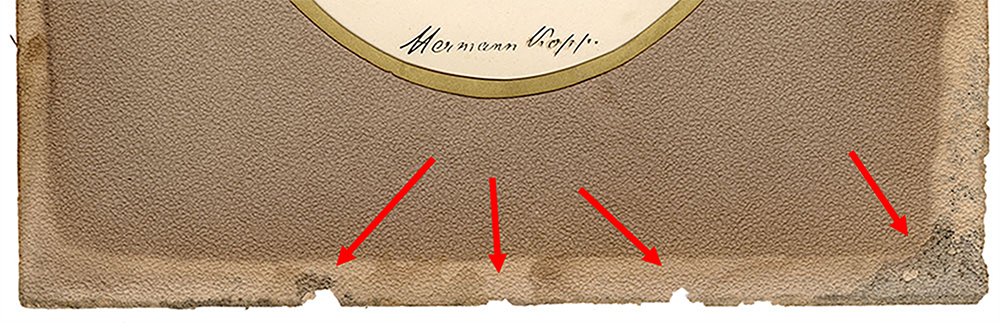
Unfortunately, just about everything outside of the photograph itself is in poor condition. The entire matting system is extremely acidic and brittle with pieces of the brown paper window flaking off around the edges. There is also evidence that it has suffered water damage in the past.

Bottom portion of a damaged mat with four red arrows pointing to areas of damage.
The portrait’s matting system is extremely acidic and brittle; areas where bits have flaked off can be seen. Evidence of water damage can also be seen in the lower right corner.

The Original Frame

Although the wooden frame the portrait was housed in for years is original and part of the object’s history, it is far from archival. With its varnished finish, rough wooden edges, and surface grime, it was likely doing more harm than good as far as the long-term preservation of Kopp’s portrait; it could not remain in this frame. The frame is, however, every bit as storied as the actual photograph.

Conditions such as those presented by this frame are a good example of why we often replace original items inside frames with surrogate images. This way, any potential damage or degradation caused by poor storage conditions will happen to a reproduction image opposed to the actual object.

The Surrogates

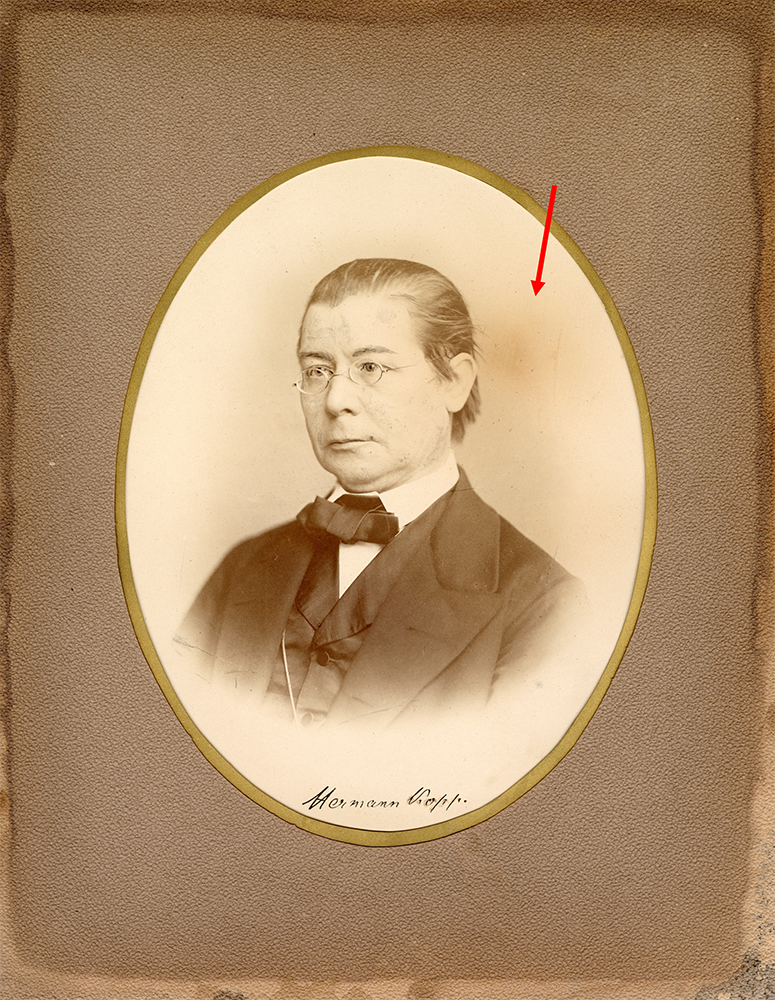
For this treatment, it was determined that two surrogates would be printed to be displayed in the Oesper Collection: one to take the place of Kopp’s original portrait inside the frame which could then be re-hung on the wall of the library, and the other to be added to a display in the museum section.

Jessica Ebert, Assistant Conservator at the Preservation Lab, and our go-to personnel for digital imaging, gently digitally retouched the image of Kopp, after consultation with the curator.

Storage Considerations

As with earlier framed items we have received from The Oesper Collections, it was decided a matting system was appropriate for safe storage of the unframed portrait and its included parts. However, the brittleness of the items and some uncertainty about how the photograph would react to environmental factors presented some unique challenges.

Although the mounting technique of placing them inside a polyester L-sleeve and mounting this with photo corners/strips would be easy and fast, there was some concern that humidity could enter the sleeve and cause damage to the photograph’s emulsion layer. Also, items mounted this way often need to flex and bend to a degree that these fragile materials likely could not afford.

The Paper Cradle with Z-folds

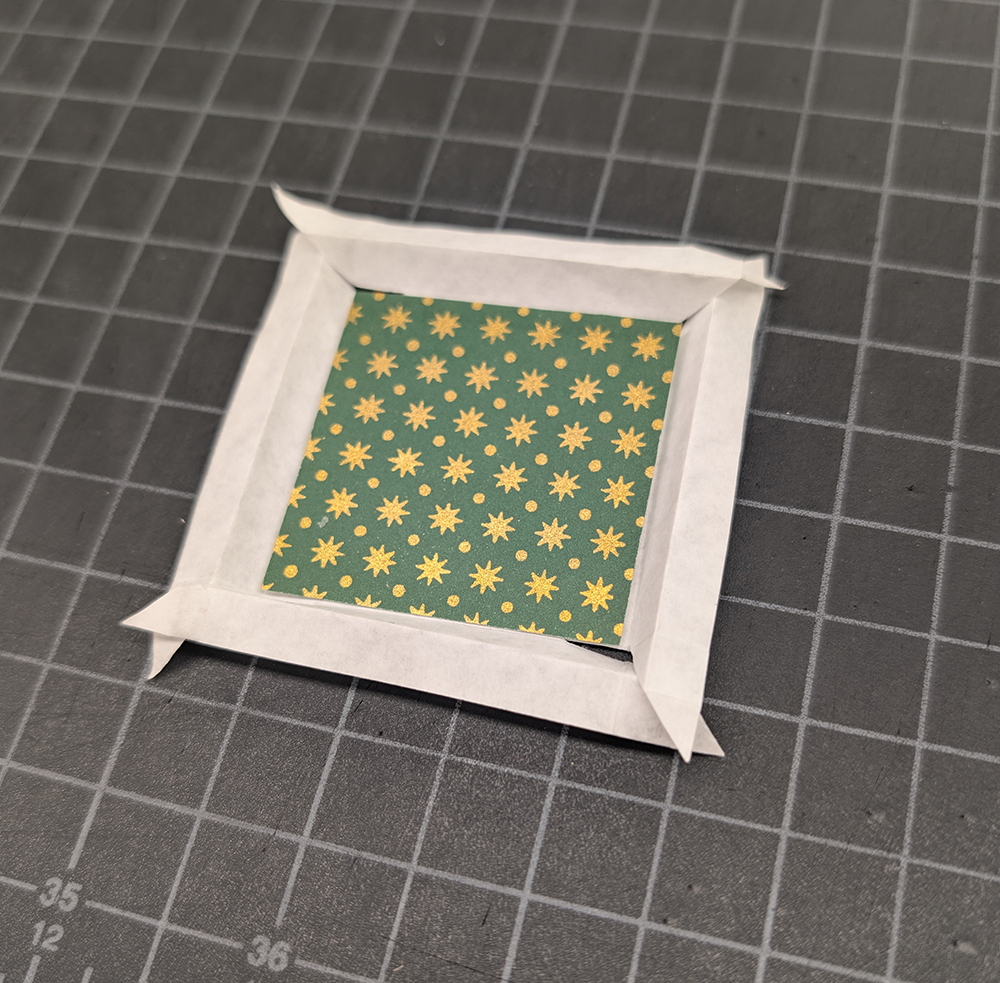
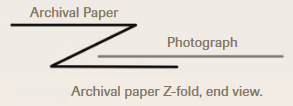
After considering these factors, Assistant Conservator Jessica Ebert suggested a paper cradle with z-folds. This mounting technique utilizes archival paper that is partially cut diagonally at each corner. Each edge of the paper is then folded over itself twice in opposite directions, creating a pocket for the edges of an object to rest gently inside.

Small piece of green and gold decorative paper with a paper folded around it.
A small model of a paper cradle after the cuts and folds have been made.
Illustration of a paper z-fold around a photograph.
Profile view of the pocket created when making the above folds; image from 2010 Art Conservator Tech Notes by Jennifer McGlinchy.

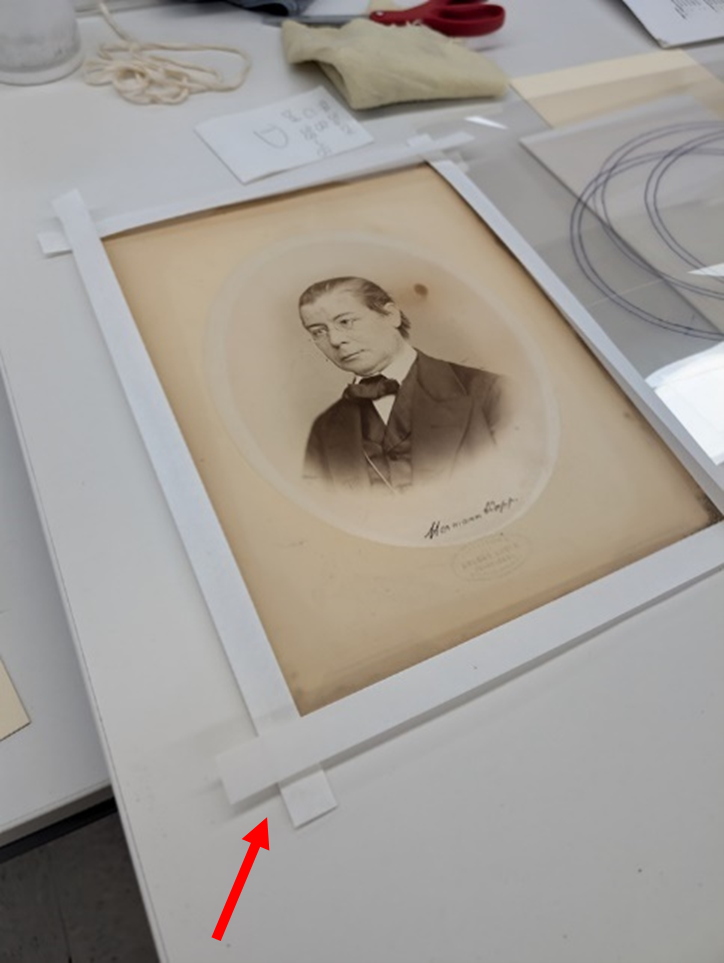
Once the cuts and folds have been made and the object is safely inside the cradle, the paper tabs extending off the corners of the cradle can then be mounted to a back mat using archival tape.

The photograph in a paper z-fold cradle with a red arrow pointing to the bottom left corner where the tabs of the cradle overlap.
Once cuts and folds are made, the cradle features two tabs at each corner; these are used to mount the cradle using archival tape.

The Package

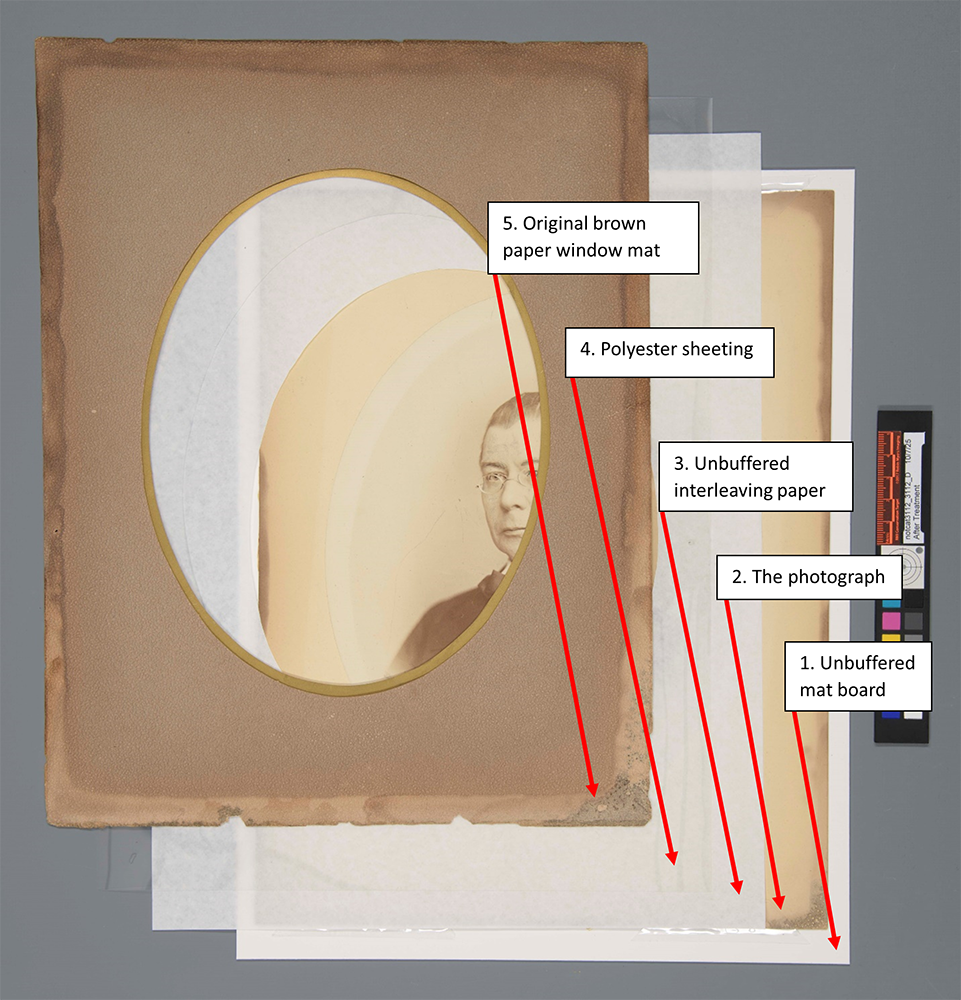
We wanted to store both the photograph and its original brown paper window mat together inside of the paper cradle, but the acidity of the brown paper was still a concern. We determined that several protective layers should be included to prevent any acid migration from the brown paper to the photograph. All the layers inside of the paper cradle, affectionately referred to as “the package”, are as follows, starting from the bottom up:

  1. A piece of mat board to provide rigidity to the package.
    • This will prevent any potential bending of the extremely brittle materials which could easily lead to damage. It was cut to be slightly larger than the rest of the package, allowing for small micro movements of the brown paper window mat, hopefully preventing its brittle edges from becoming damaged inside the creases of the cradle.
  2. The photograph itself.
    • The photograph and its original back mat were mounted to the unbuffered mat board piece described in the previous layer using edge strips.
  3. A piece of unbuffered interleaving paper with an oval-shaped window, allowing the portrait to still be viewed.
    • This layer was added because the polyester sheeting mentioned in the next layer has a sharp edge around its window. The interleaving paper protects the emulsion layer of the photograph from scratches and other abrasions.
  4. A piece of polyester sheeting, also with an oval-shaped window, allowing the portrait to still be viewed.
    • This layer adds a bit of rigidity to the original brown paper window mat. This will further help prevent the acidic brown paper from bending and breaking.
  5. The original brown paper window mat
Image depicting the layers of the package, with red arrows indicating the mat board layer, the photograph, unbuffered interleaving paper, polyester film, and the original brown paper window.
The individual layers of the “package” to be stored inside the paper cradle.

The Sink Mat

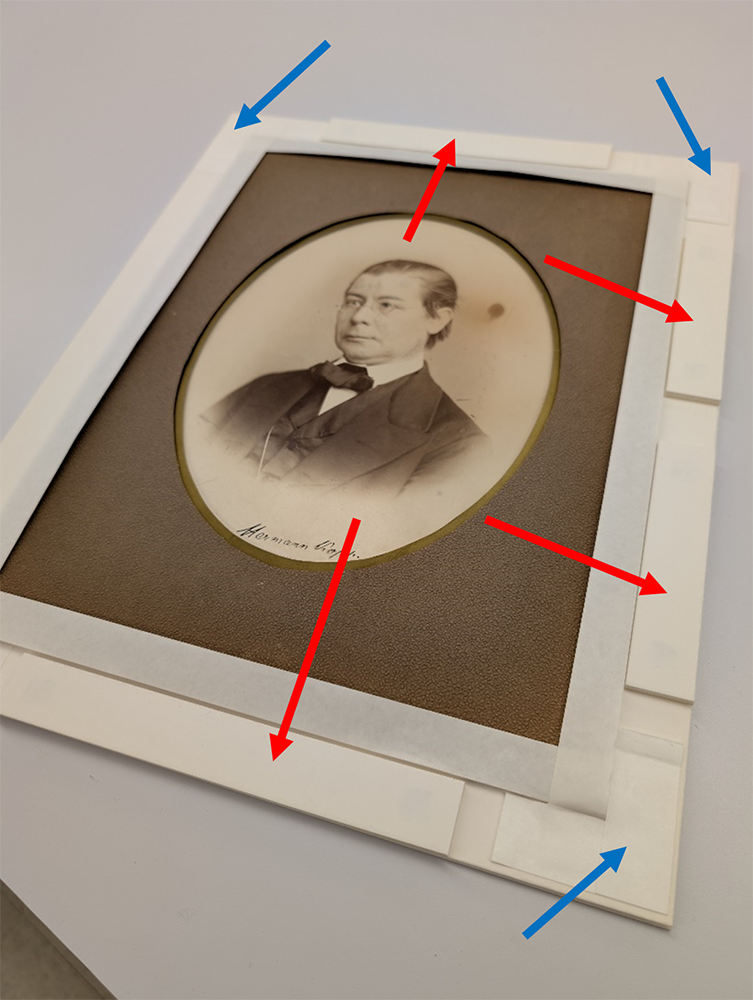
Now that the portrait/package was safely inside its paper cradle, I could begin working on the matting system. As is typically the case with any item with a significant amount of thickness, I planned on building a sink mat. However, when constructing this sink mat, I had to allocate space around the perimeter of the object when attaching the mat board spacers so that the paper cradle’s tabs had space to be taped down; this contrasts with a typical sink mat in which the spacers are typically placed around the entire perimeter.

Image of the photograph in the sink mat with red arrows pointing to the sink mat elements along the right edge and bottom and blue arrows pointing to the tape holding the tabs of the paper cradle in place at the corners.
Although the perimeter is still built up around the object with mat board (indicated with the red arrows), space had to be allocated to allow the tabs of the paper cradle to be attached using archival tape (indicated with the blue arrows).

Cutting Ovals

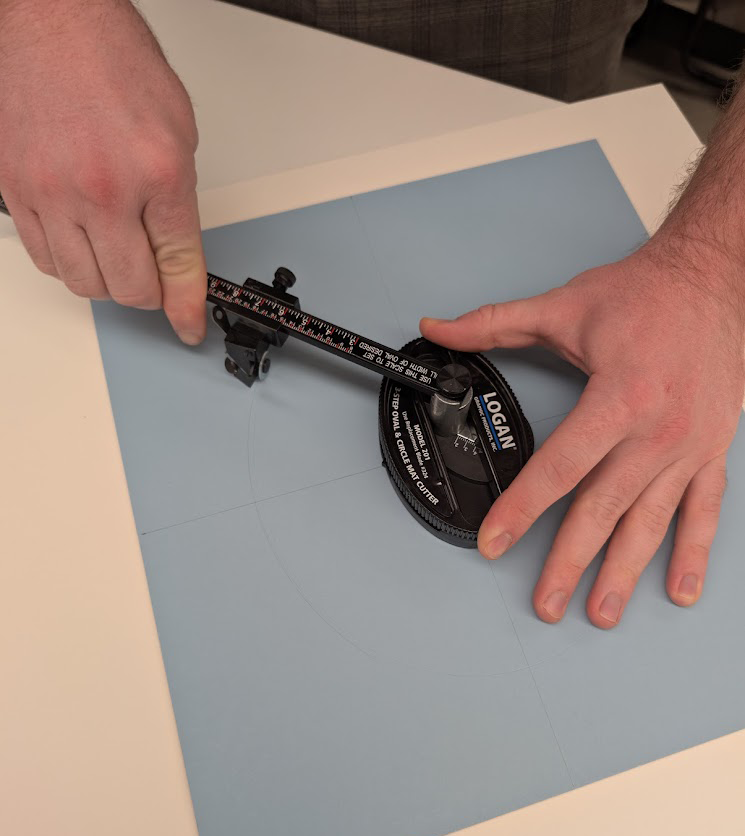
For the new window of the matting system, Assistant Conservator Catarina Figueirinhas suggested that cutting the window in the shape of an oval would be appropriate as the original brown paper window mat had an oval window, and the photograph itself was oval-shaped. After a bit of research, we discovered a moderately-priced (around $65 on Amazon) adjustable mat board cutter that could cut ovals at a beveled angle: The Model 201 Oval & Circle Mat Cutter from Logan.

Two hands hold a compass-like mat cutter to cut a circle in a blue piece of mat board.
The Logan Model 201 in action; one hand holds the base steady while the other guides the arm with an attached blade around the center point.

After watching a very helpful YouTube video I felt ready to give the Logan Cutter a try. I found it easy to use after a little practice and was satisfied with the results.

The Completed Matting System

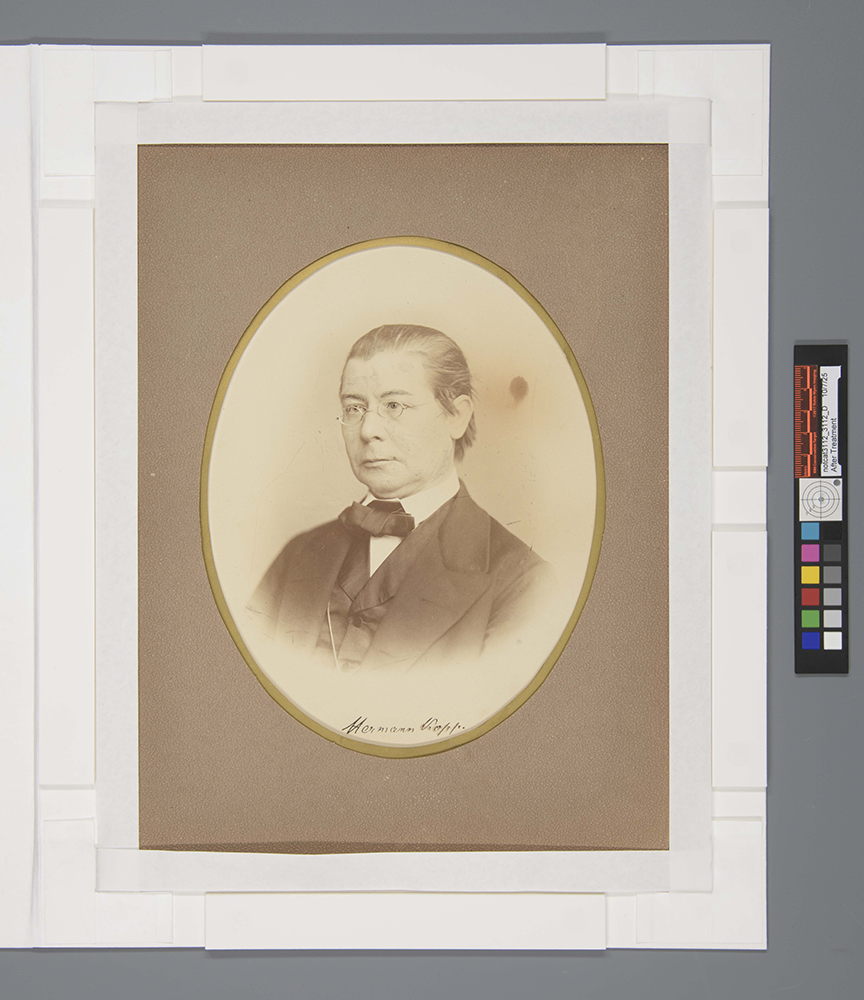
Once the sink mat spacers were added, the paper cradle was taped down, and the oval window mat was attached, the matting system was complete.

As Kopp’s actual portrait inside its new matting system is not going to be displayed any time soon, I also constructed a tuxedo box for long-term storage. This will help further protect it, especially from any light damage.

Final Thoughts

The display surrogates, however, can currently be viewed and contemplated by anyone who tours the Oesper Collection. Sometimes I like to think about how the work that we do at the Preservation Lab is becoming part of the items we treat’s history. Just as this portrait has crossed an ocean, passed through the hands of Thomas Norton, Ralph Oesper and multiple UC Chemistry department heads, hung on that cold wall of the chemistry library in 521 Rieveschl Hall for countless aspiring chemists to contemplate, and finally ended up under the stewardship of current UC librarian Mark Chalmers, it was briefly in my possession. As stewards of cultural heritage, we can only hope that the time these objects spend in our care can extend these histories indefinitely.

Historical References Provided by Mark Chalmers:

  • Cincinnati Chemists: Assorted Papers on the History of the Cincinnati Chemical Community by William B. Jensen
  • Robert Bunsen’s Sweet Tooth: Bunseniana in the Oesper Collections by William B. Jensen

Image and Other Supplemental References:

Matt McCoy — Senior Library Conservation Specialist

How many magnets is too many magnets?!

Recently Jessica and I started working on a series of special collection items from UC Libraries’ DAAP Library. These were recent acquisitions specifically bought to be used as a teaching collection within the DAAP Library. Most items are small prints and single manuscript leaves that need to be matted for exhibition and prepared for handling during class. We have been working on these in small batches since it is a much larger collection that keeps growing.

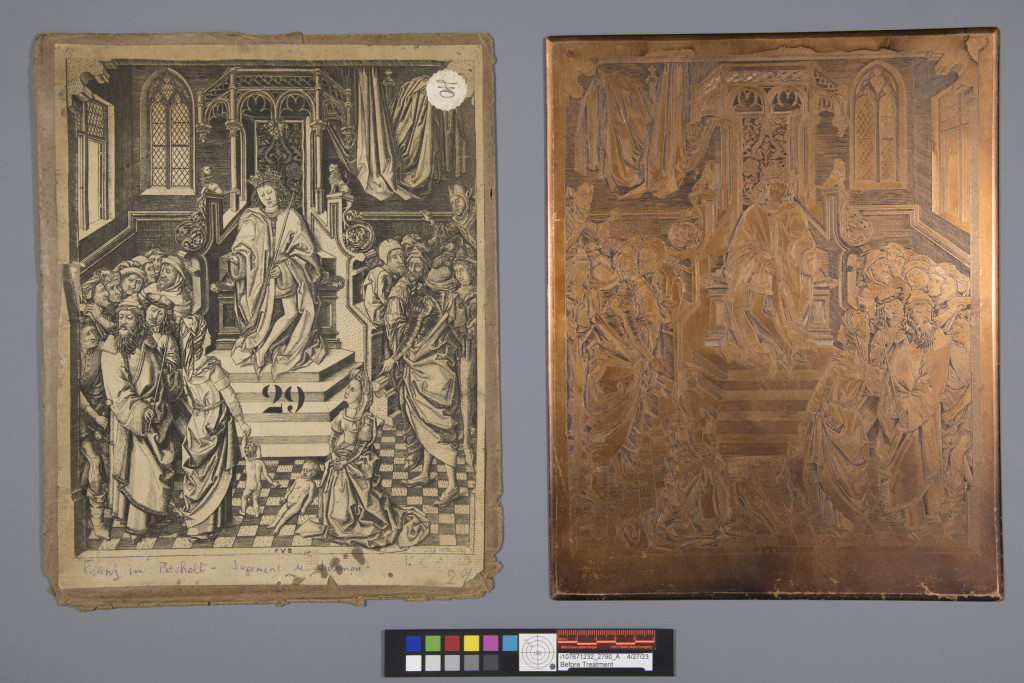
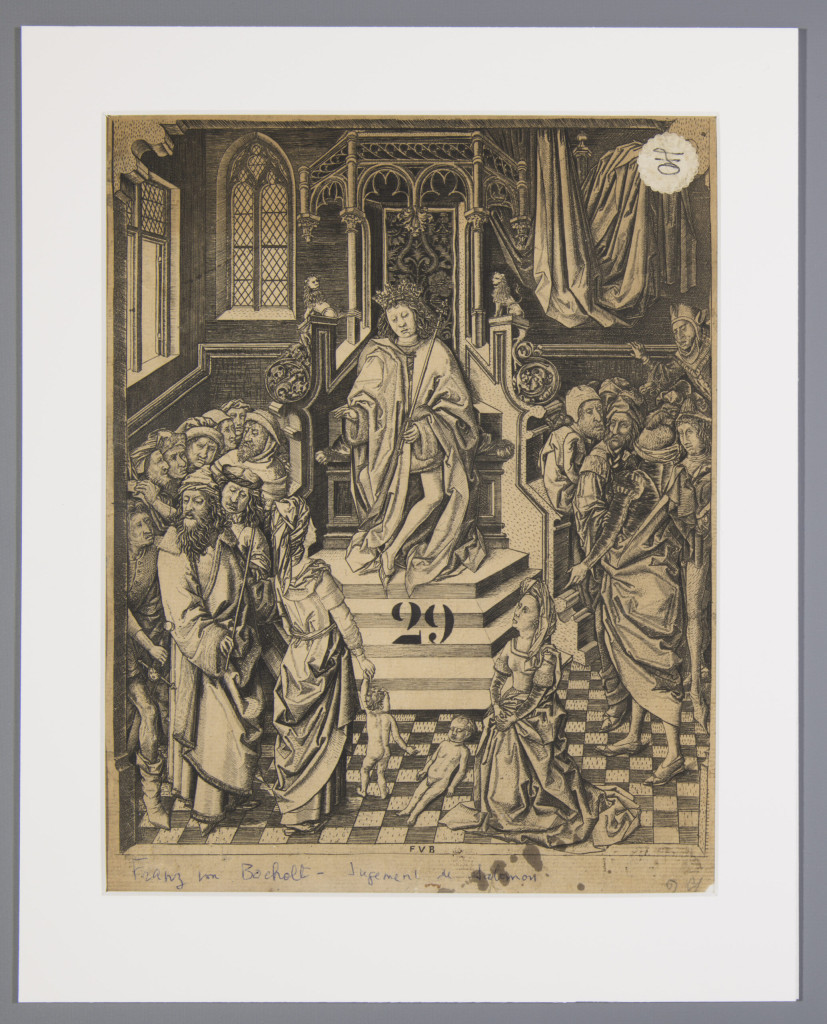
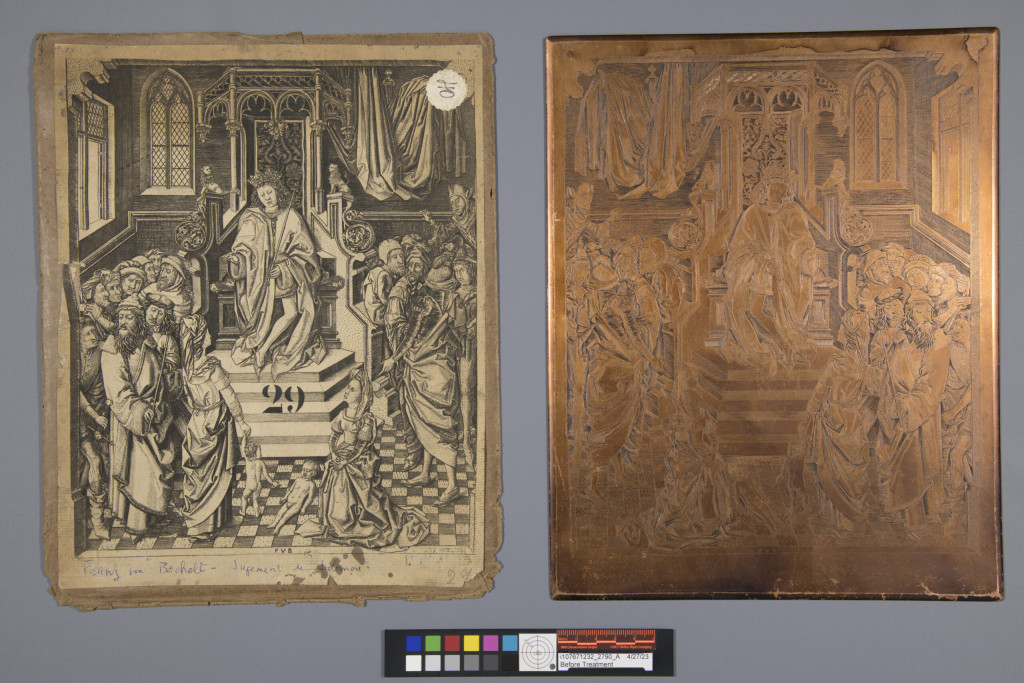
Most of the items we have received so far have been very straightforward matting projects, however we encountered one that was puzzling and fun to work on. We received this item: a proof print accompanied by its very heavy, copper engraving plate. The print was adhered to a paper brown envelope with no information and the copper plate was also unhoused.

Image of print on the left and the copper plate on the right, with a photography target below
Proof print (left) and engraving plate (right) before treatment and housing.

The curator of the collection wanted both items to be housed together and housed in a way that would allow students to touch the items, and also be able to use them for exhibits.  We decided that both items would be matted individually, and then housed together in a thin corrugated clamshell box. The most challenging part would be to create a matting system that was strong enough to secure the very heavy copper plate and elegant enough to be used for exhibition.

The print itself received minor treatment, with the backing envelope being removed and the print housed in a polyester L-sleeve mounted with photo corners.

An image of the matted print
Print housed in a polyester L-sleeve and matted with photo corners.

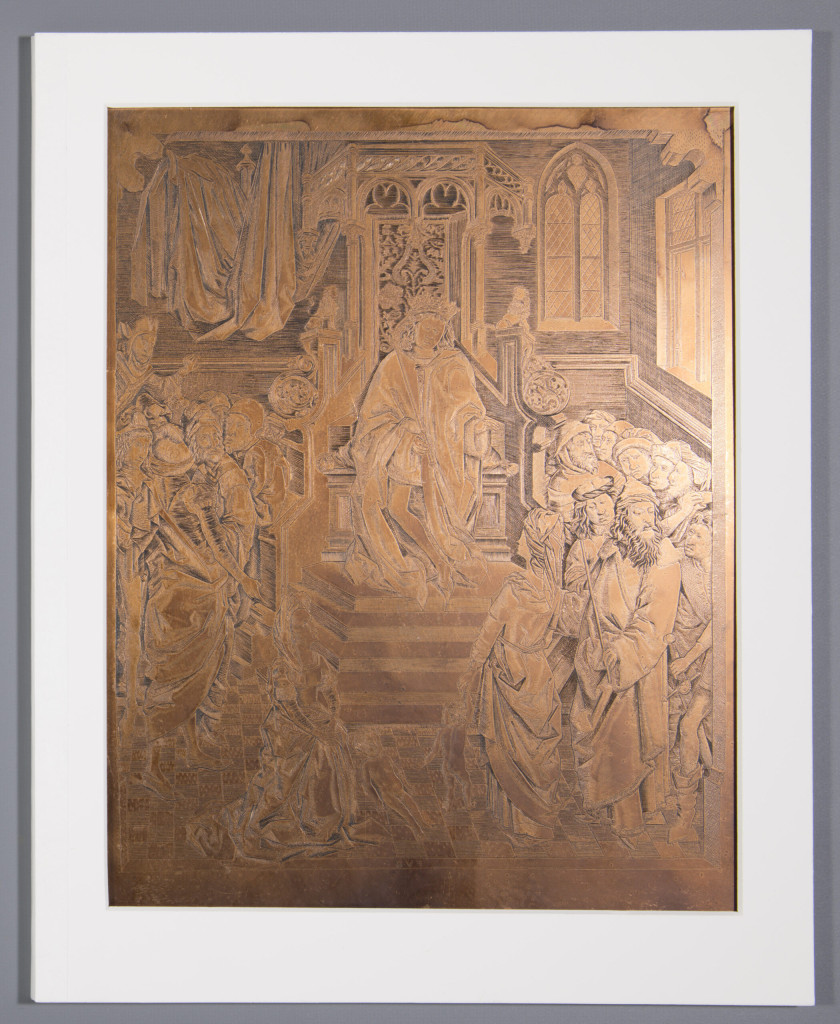
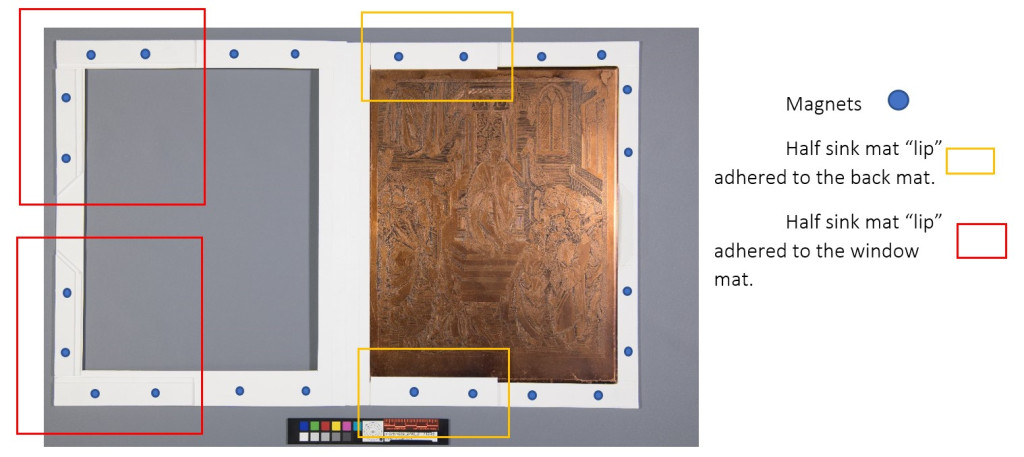
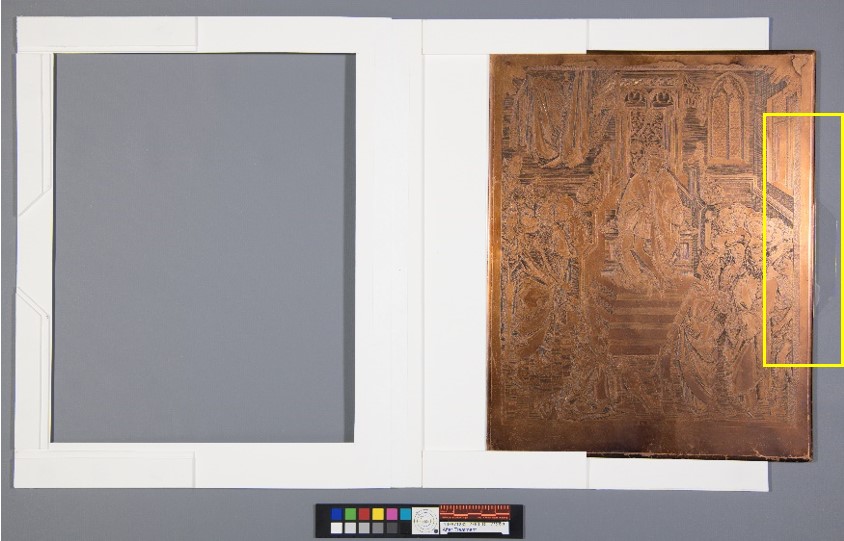
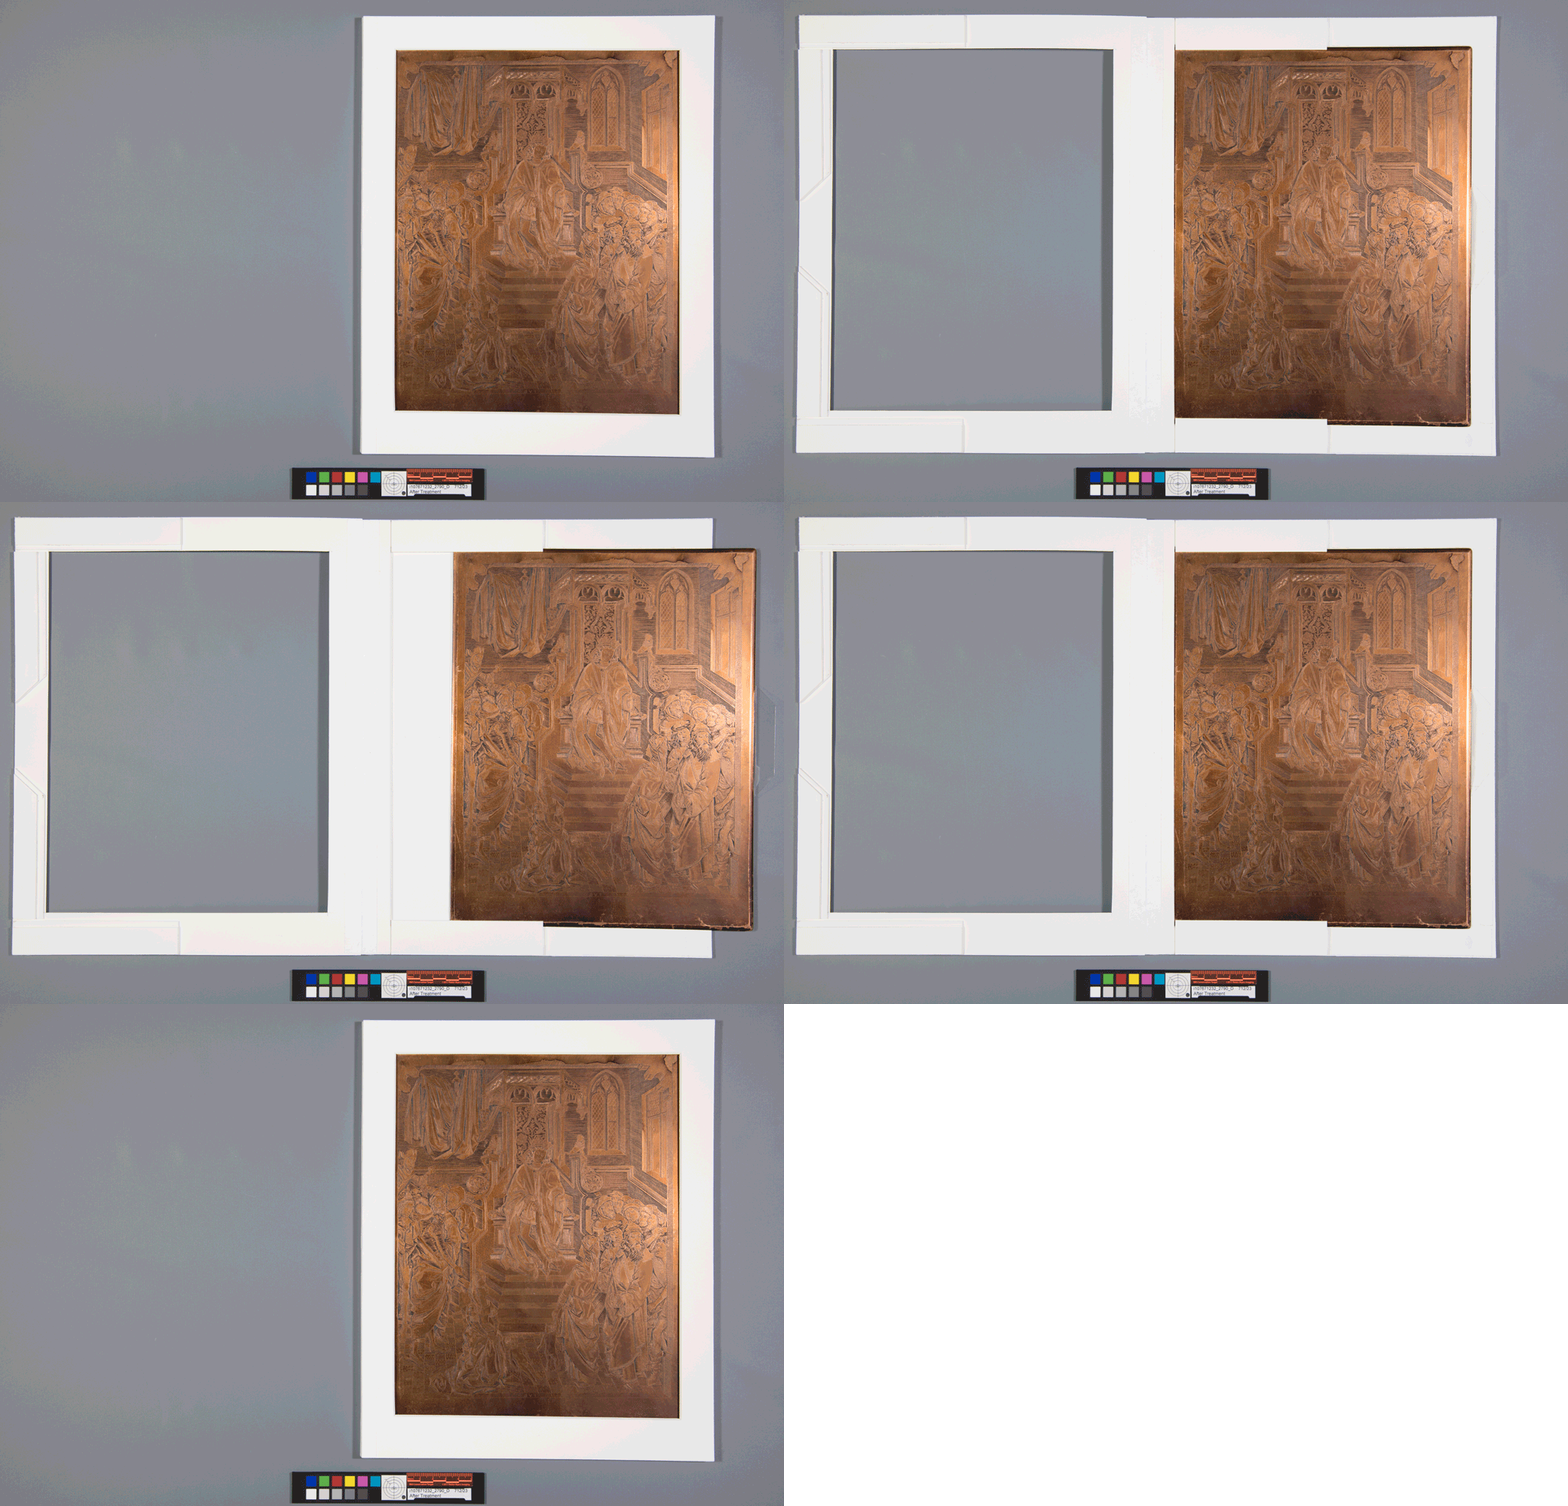
With the engraving plate, I needed to figure out how to create a matting system that was strong enough to hold the copper plate in place, especially if used for an exhibit where it may be propped at a slight angle. After considering some options, I created a sink mat that would secure the plate halfway, and then the rest of the sink mat would be adhered to the window mat so the copper plate, resting on a polyester tray, could be pulled out of the mat easily. How would I keep the matting system closed? ….with magnets, lots of magnets! For this project I used 24 rare earth magnets.

Image of the matted copper plate
Copper engraving plate housed in a specialty sink mat with magnetic closures.
Diagram of the magnet locations in the sink mat
Matting system for the copper plate – a sink mat, half attached to the back mat and half attached to the window mat, all secured closed with magnets.
Copper plate partially removed from the matting system with a box highlighting the location of the polyester film tray
Copper plate slightly removed from the matting system by the polyester film tray.

This was a fun project to work on. After using 24 magnets and breaking a few in the process, the copper plate was securely housed in the sink mat, while also able to be propped up for exhibition and handled for teaching.

How many magnets is too many magnets?!
The matting system in action!

Catarina Figueirinhas [UCL] – Assistant Conservator
Conservation photography by Jessica Ebert