It’s amazing the different ways books can tell us stories. There’s the obvious: the words that are written on the page and create the story the author wanted to tell. But there’s also what lies beneath the surface — the wear and tear of the book, how it was bound, what materials were used to make it. There’s the outright story a book was meant to share, but there are also context clues, and deeper ways we can dive into the history of a book.
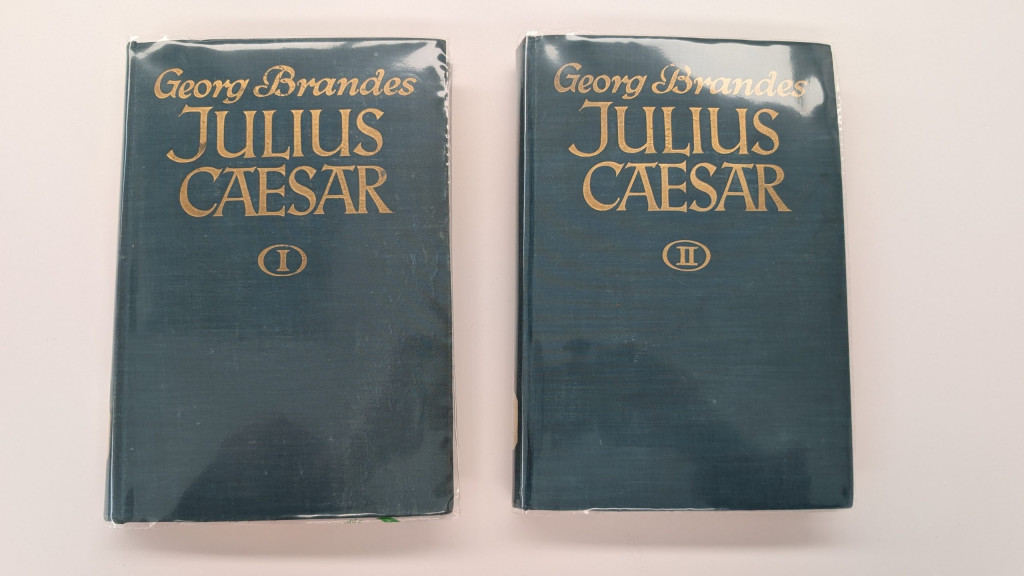
Sometimes, a book just outrightly tells its story through notes left by previous owners. A handwritten message about where it was bought, a book plate of whose library it came from, or an inscription with notable information about damage to the tome are all ways prior owners can document what the book has been through. This latter suggestion is the case for a two-volume set of Cajus Julius Caesar by Georg Brandes.
Pictured: volumes I and II of Cajus Julius Caesar.
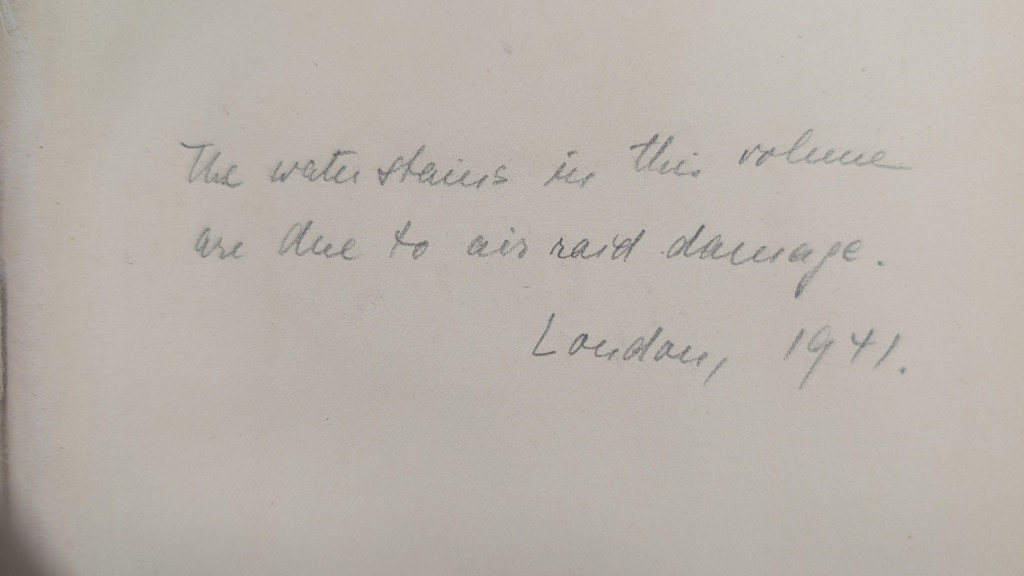
These books were published in 1925 by the Erich Reiss Verlag publishing house. On the fly leaf of both of these volumes is a handwritten inscription which reads “The water stains in this volume are due to air raid damage. London, 1941.” In graphite. What a big journey for two books, from Berlin, Germany, to London, England, and then to Cincinnati, Ohio!
Pictured: inscription in Julius Caesar Volume I.Pictured: inscriptions in Julius Caesar Vol. I and IIPictured above: signs of water damage on the book.
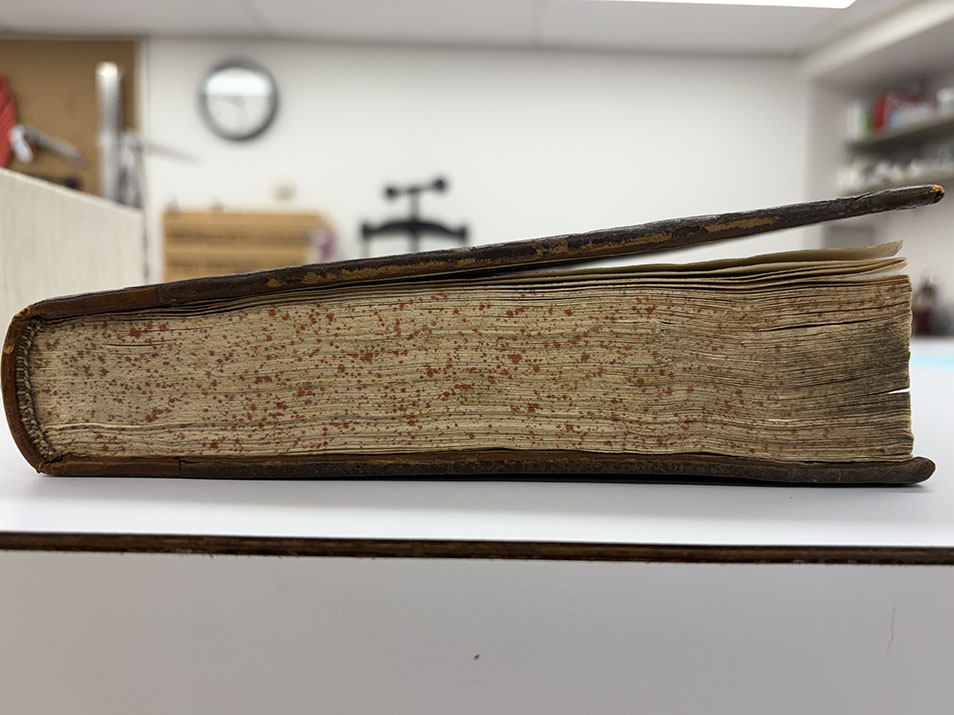
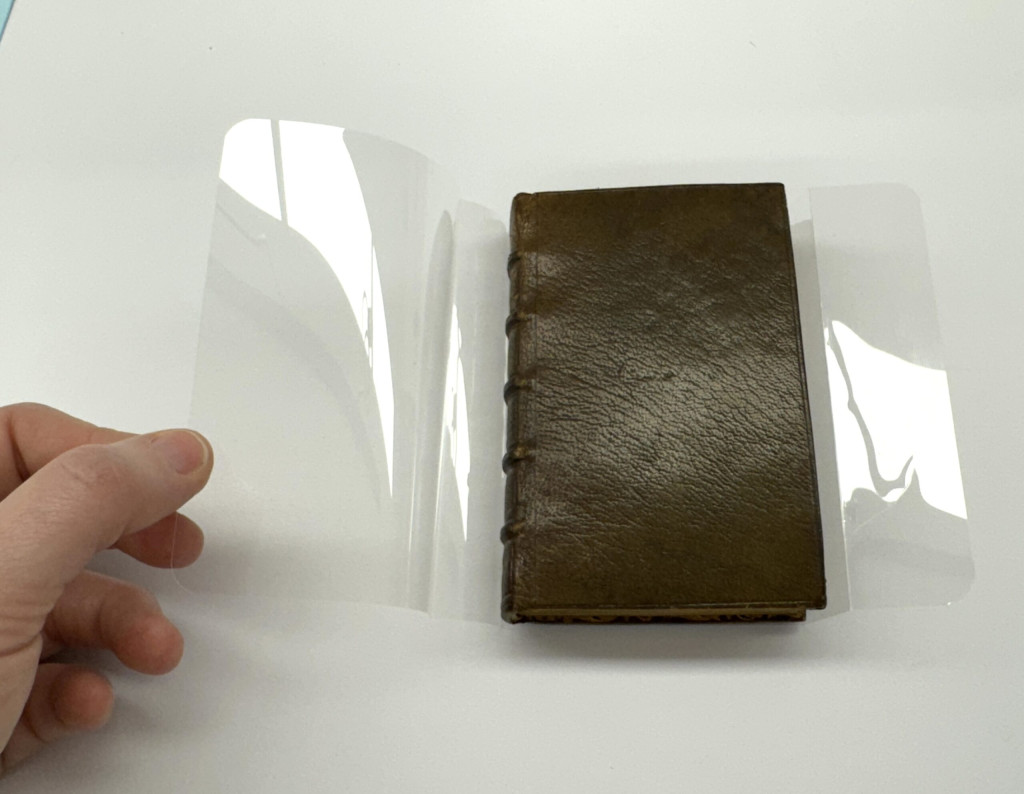
The water damage to the books is there but it isn’t too drastic. There is some obvious staining and cockling to the pages, as well as some warping of the covers. These books were treated with v hinges on the front and back fly leaves to prevent further separation of the cover from the text block and were also put in Colibri covers to help keep them protected on the shelves and during use.
Pictured: both volumes of Julius Caeser being treated with v hinges.
These books needed minimal treatment, and then will return to their home at the Classics library. With some care from the preservation lab, these two volumes can continue to tell their story for years to come.
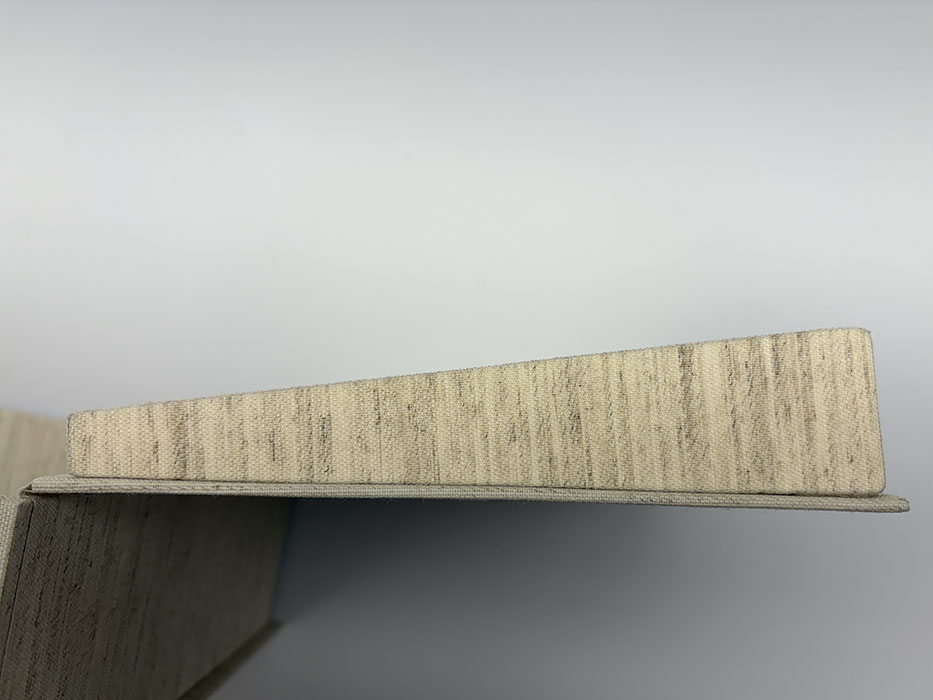
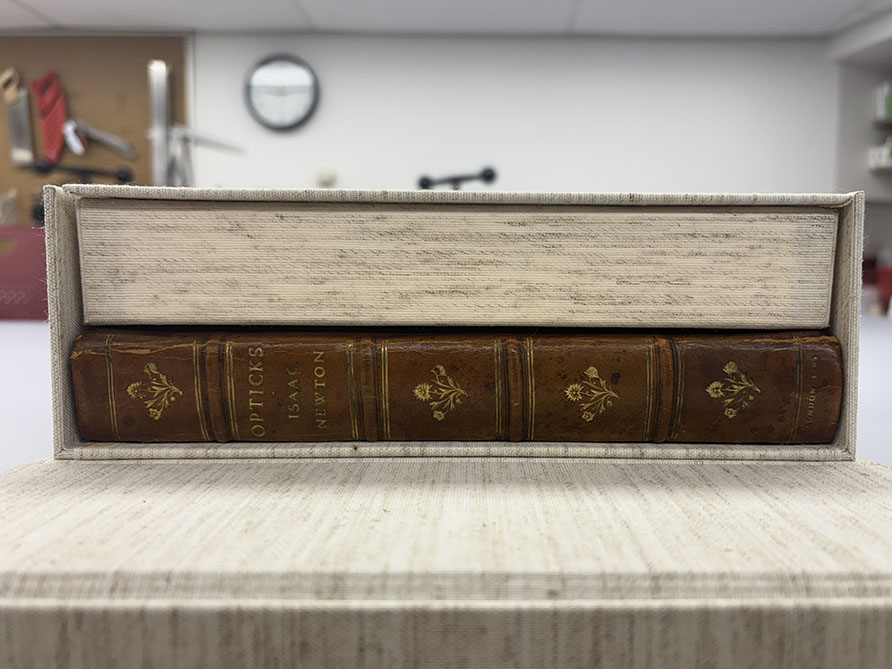
This is a lovely leather-bound volume that came to us in need of a cloth-covered clamshell with some gentle compression. Unfortunately, it has a bit of an odd shape, meaning we had to solve the problem of the open space in the enclosure.
Figure 1. The problem: a wedge-shaped volume
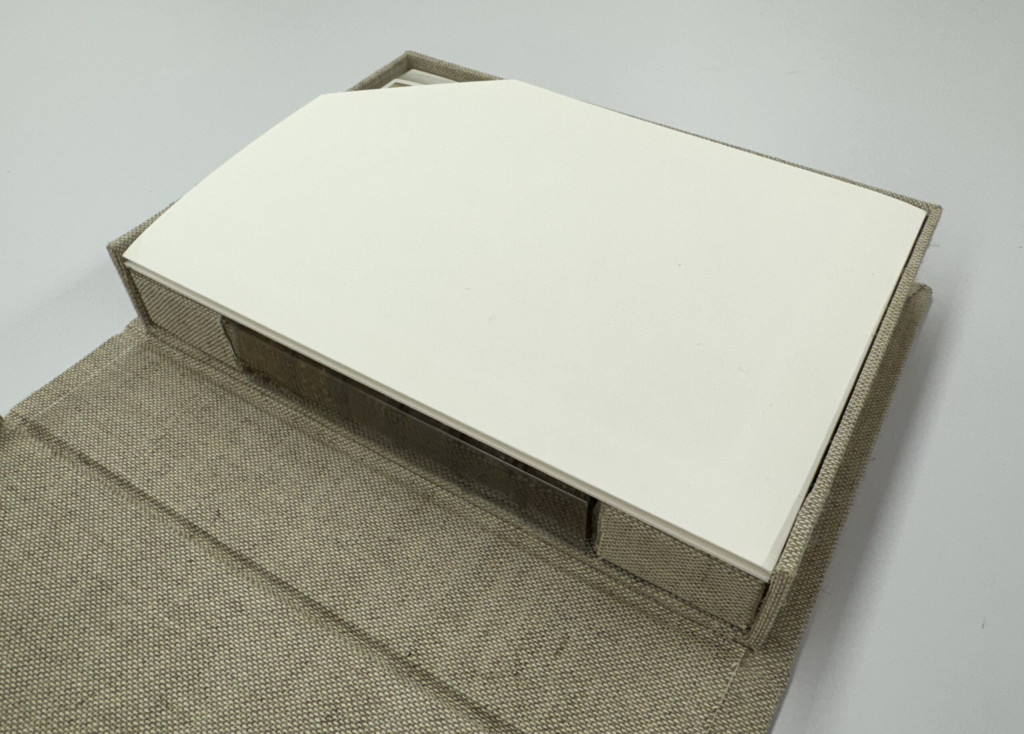
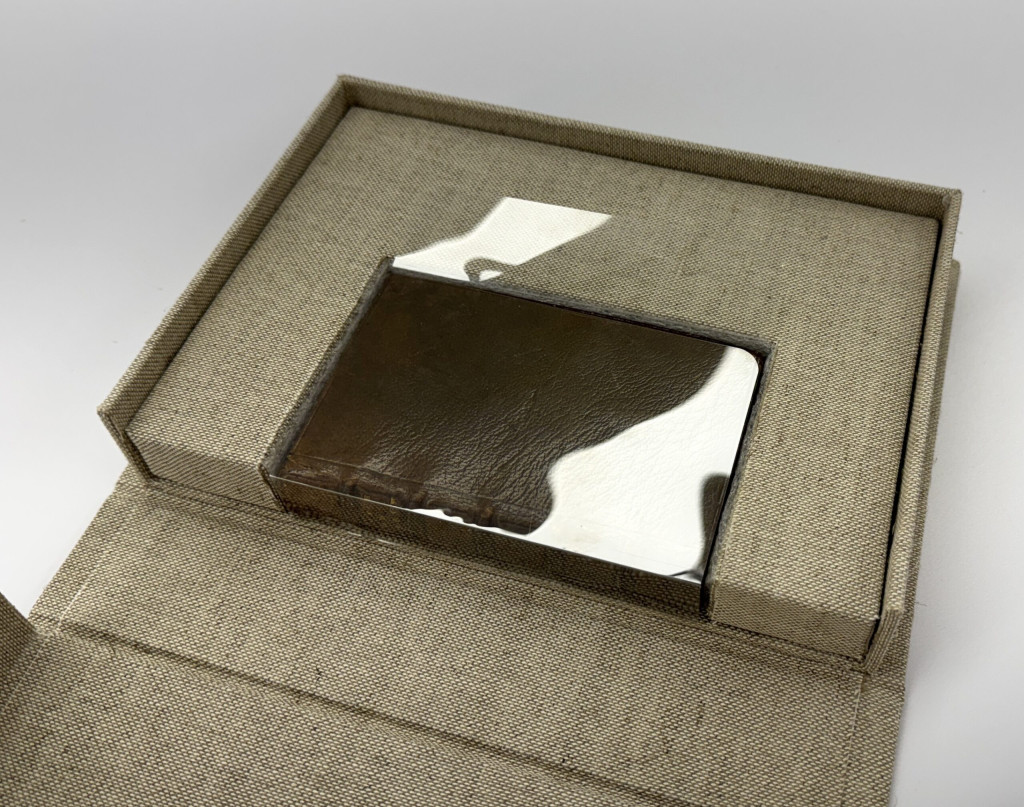
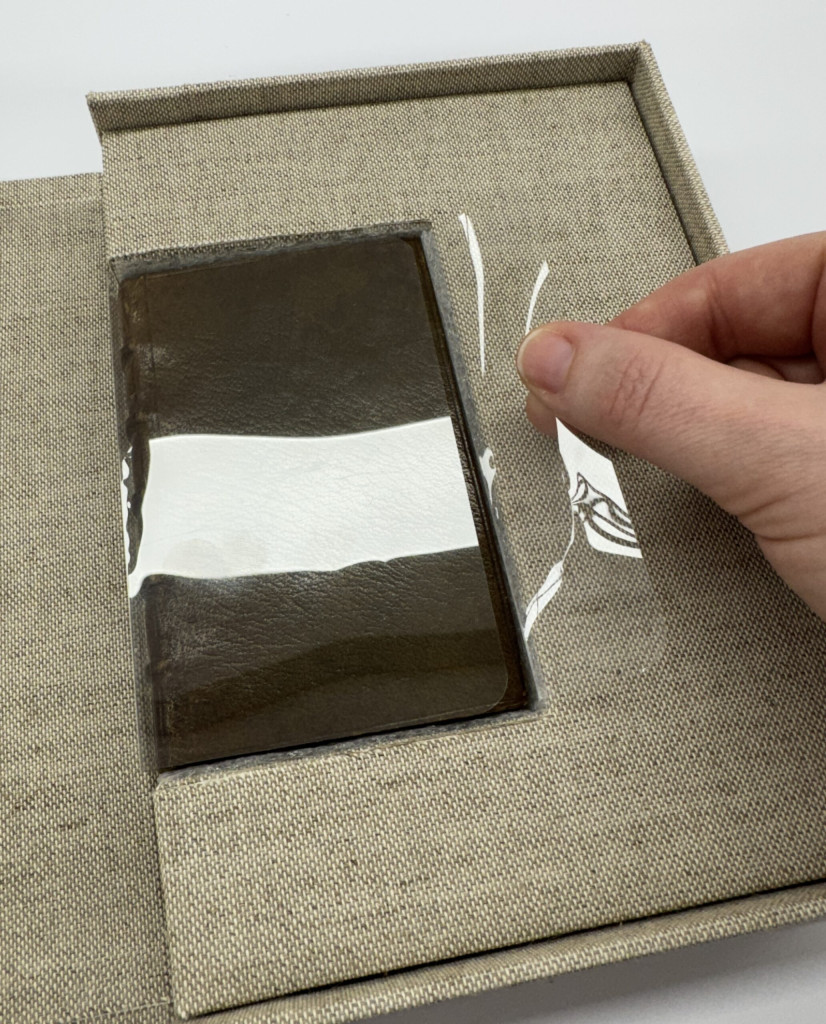
Our solution: a wedge to secure the volume and spread the pressure of the compression. We opted for mat board as opposed to book board, both to keep the enclosure from getting to heavy and to give the wedge a little bit of flex.
Thanks to a little math and a little mat board, this volume will be safe and secure and protected from temperature and humidity changes in its home on the shelf!
Figure 2. The solution: a cloth-covered wedge to spread the compression and fill the empty space.
Figure 3. The completed wedge. A perfect fit!
Hyacinth Tucker – Conservation Technician and Bindery Processor
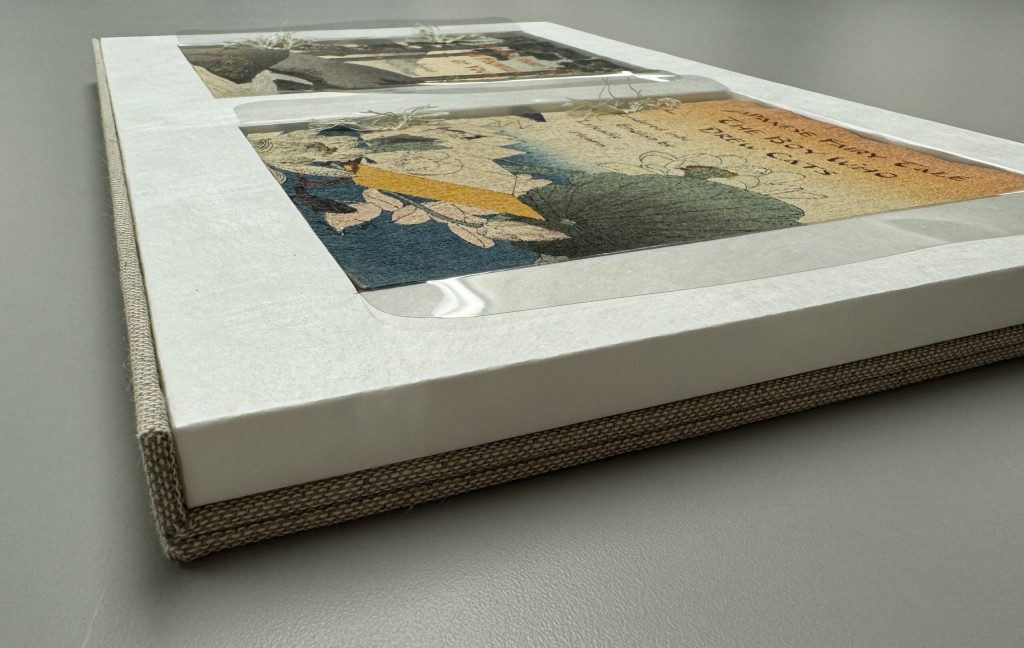
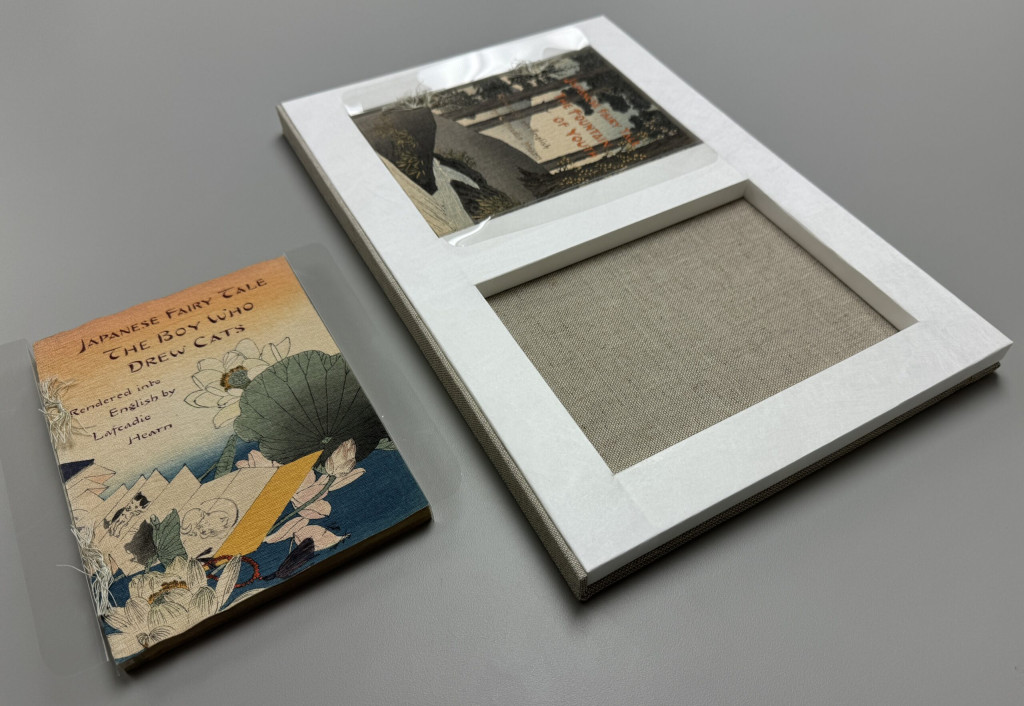
I recently created a cloth covered clamshell enclosure for this small leather volume from the Cincinnati & Hamilton County Public Library. The volume has eight full color miniatures which received surrogate photography. The surrogates were printed to roughly 5×7 inches, making them substantially larger than the text, so an insert was created within the cloth clamshell to house the smaller volume.
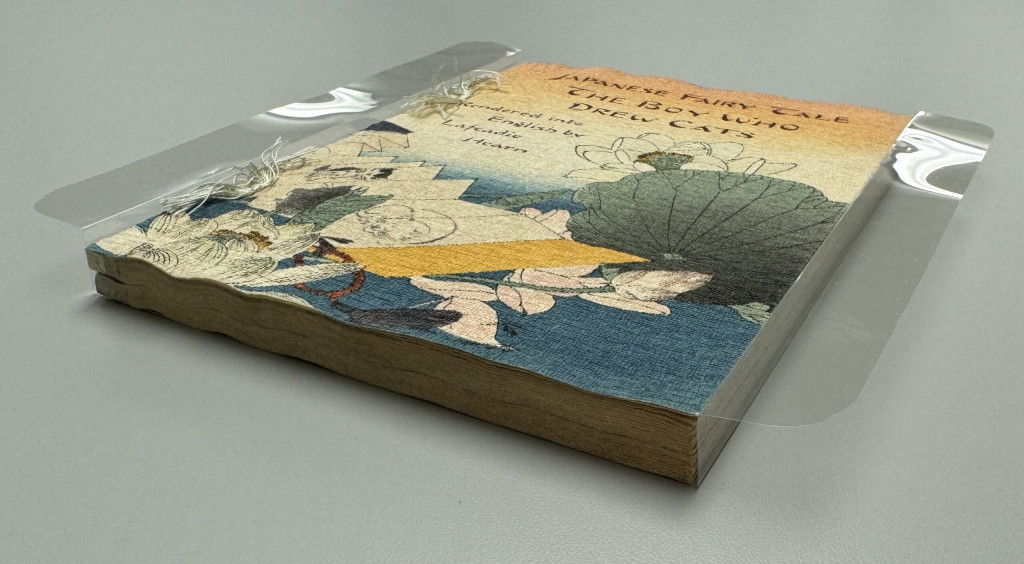
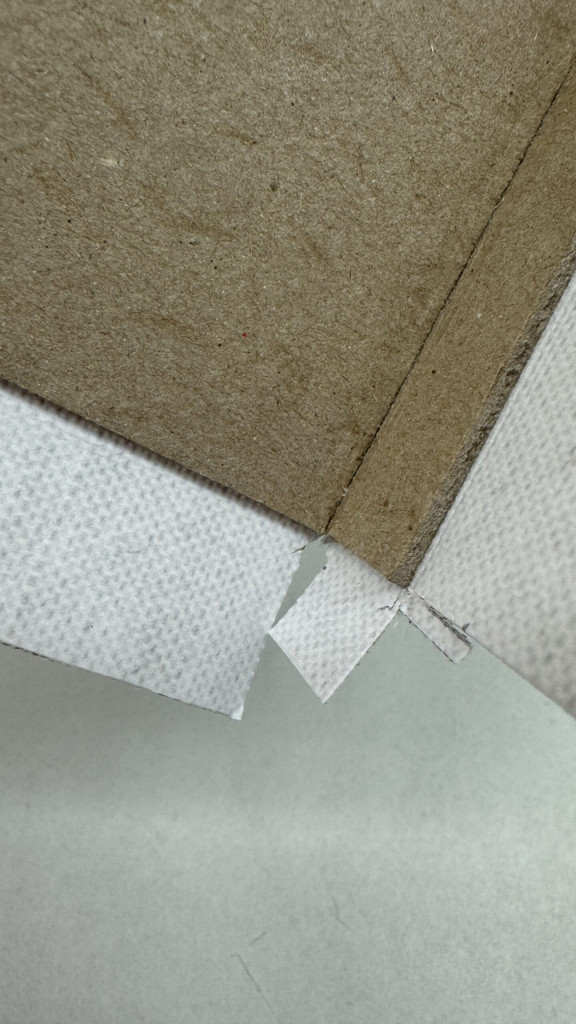
Interior tray of the cloth clamshell enclosure with the surrogates placed on top of the small leather volume housed within the custom insert.To build up the enclosure to the size of the surrogates, an insert was created using archival corrugated board covered in Cotlin bookcloth. I lined the portion of the insert where the volume would rest with thin Ethafoam sheeting, so the fragile leather edges wouldn’t be abraded.To aid in lifting the volume from the enclosure I created a partial polyester wrapper of sorts. Part jacket, part sling. A faux jacket-sling hybrid, if you will?A closer look at the polyester creation, with rounded corners.
Overall, I think it’s a quick and easy solution that could be beneficial in future situations where a simple modification of an existing enclosure is needed, but space within the enclosure is at a premium.
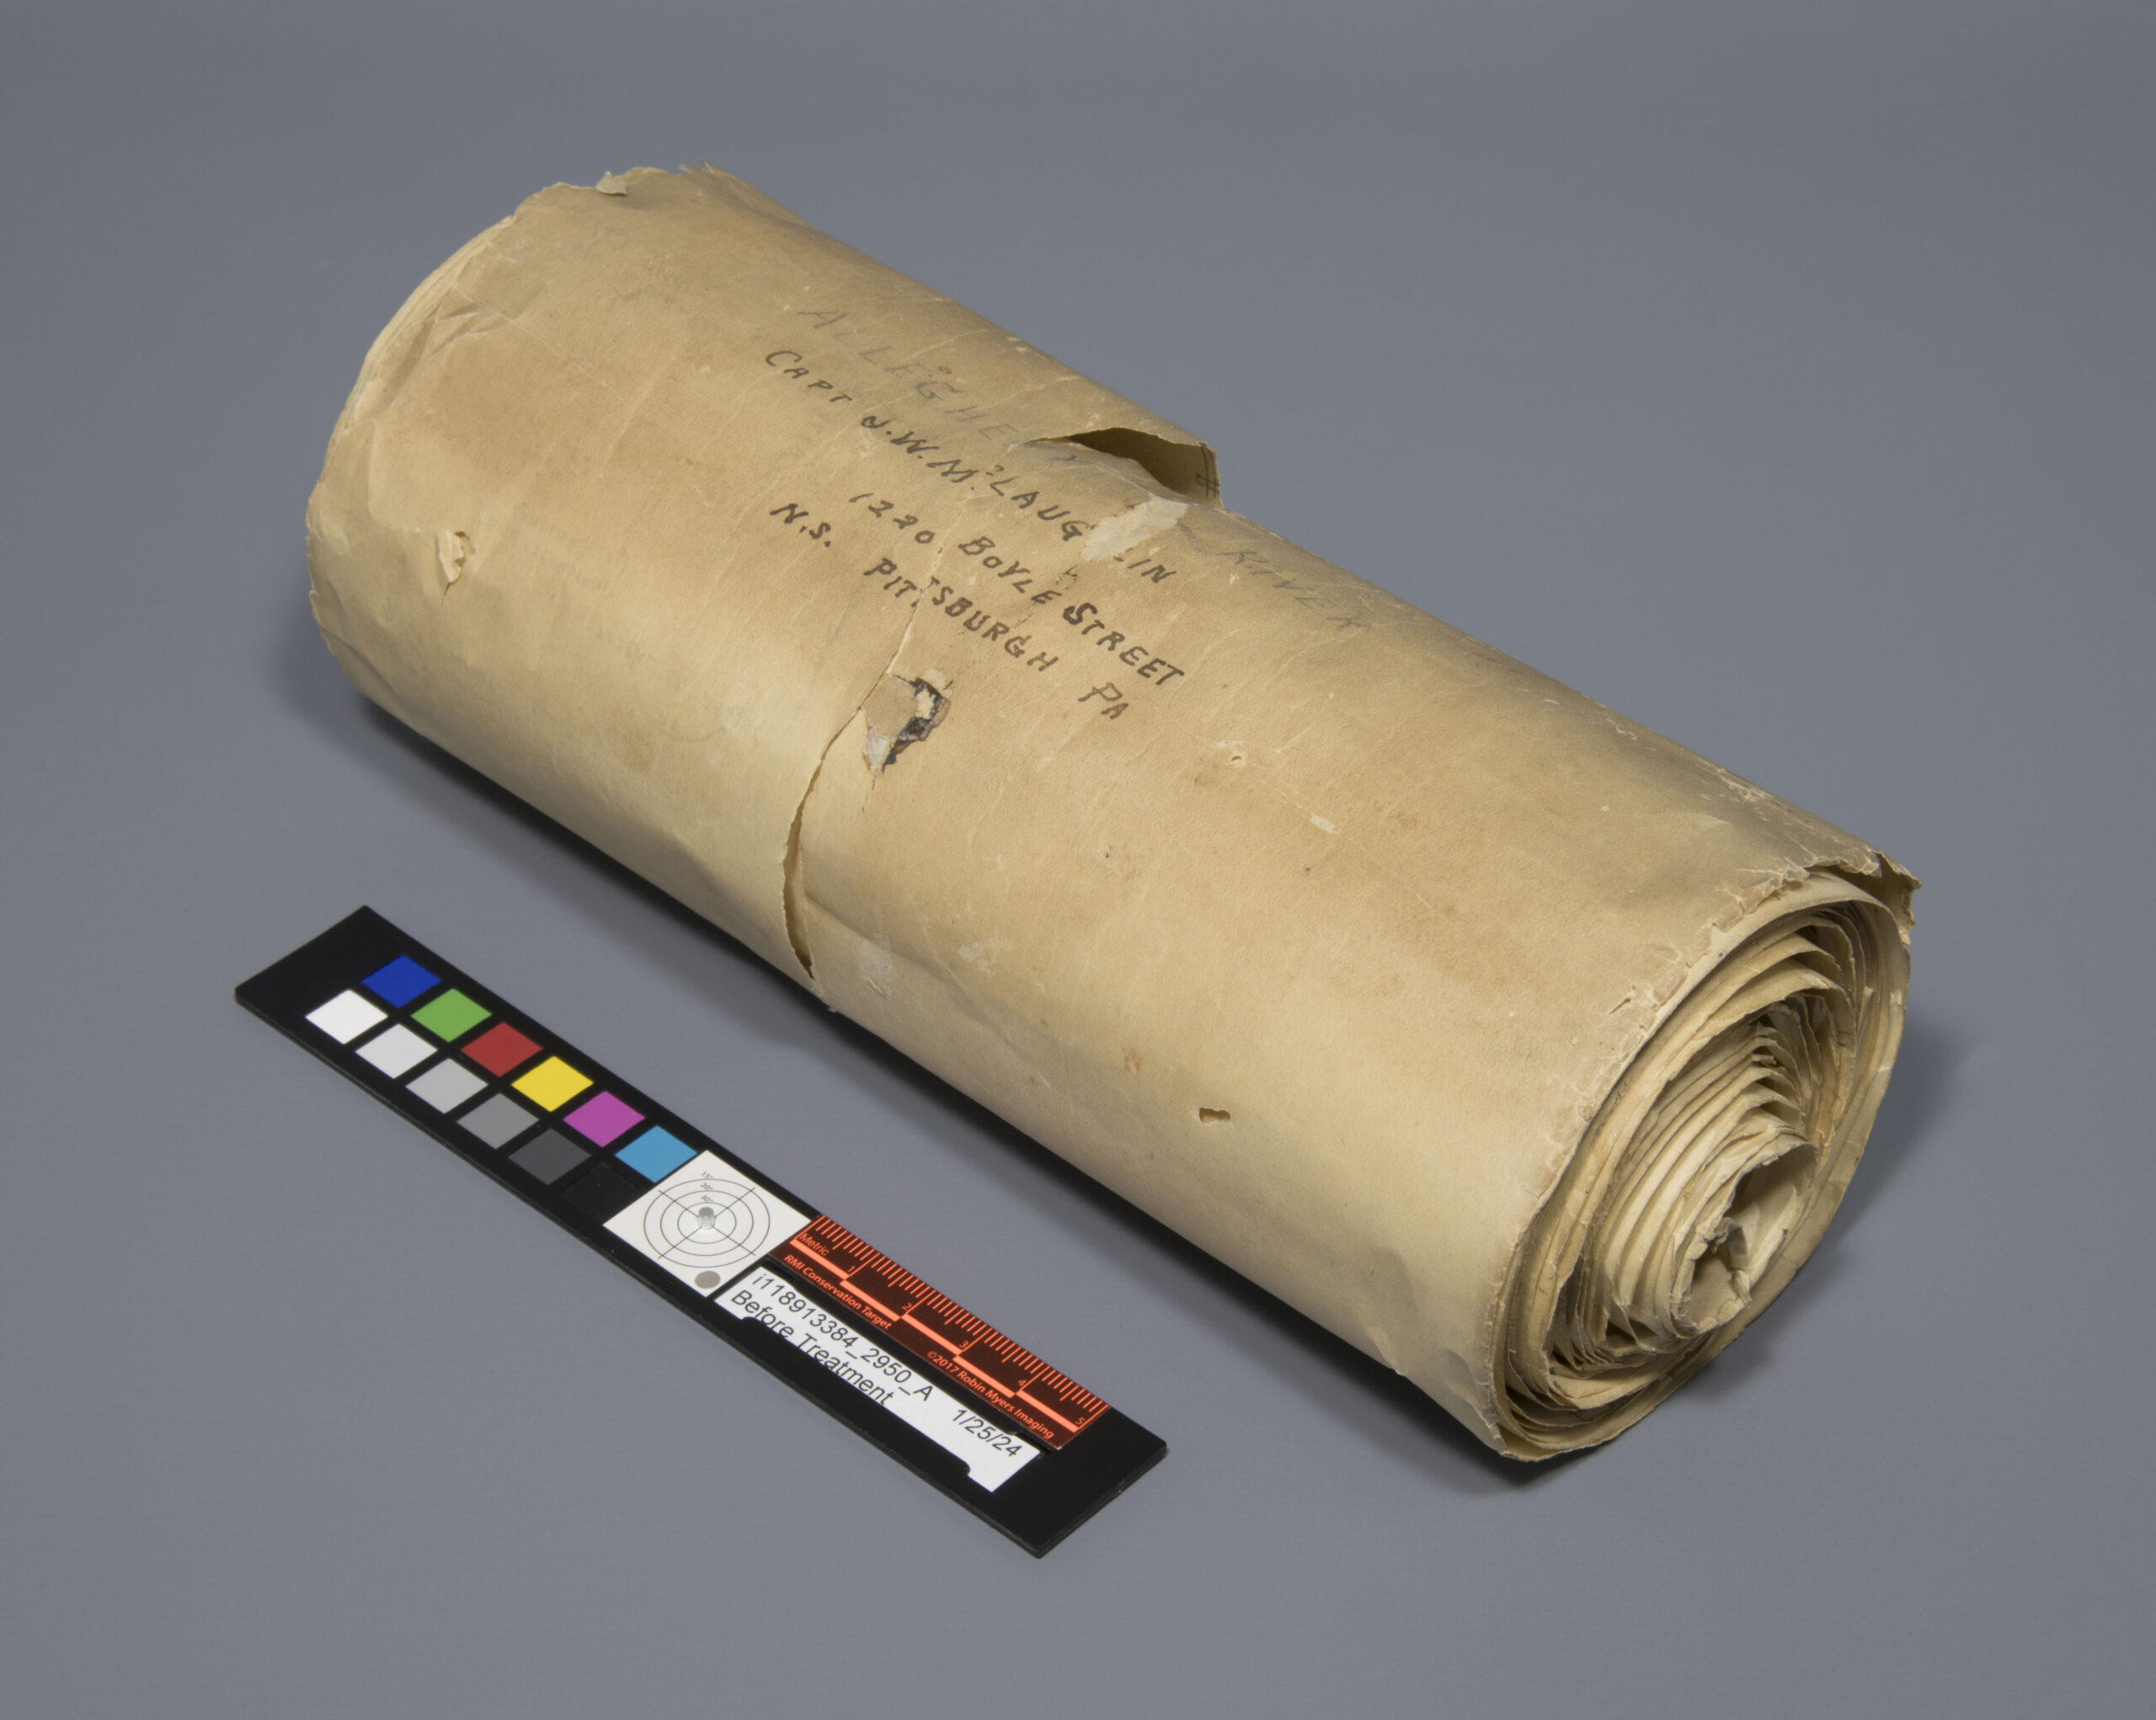
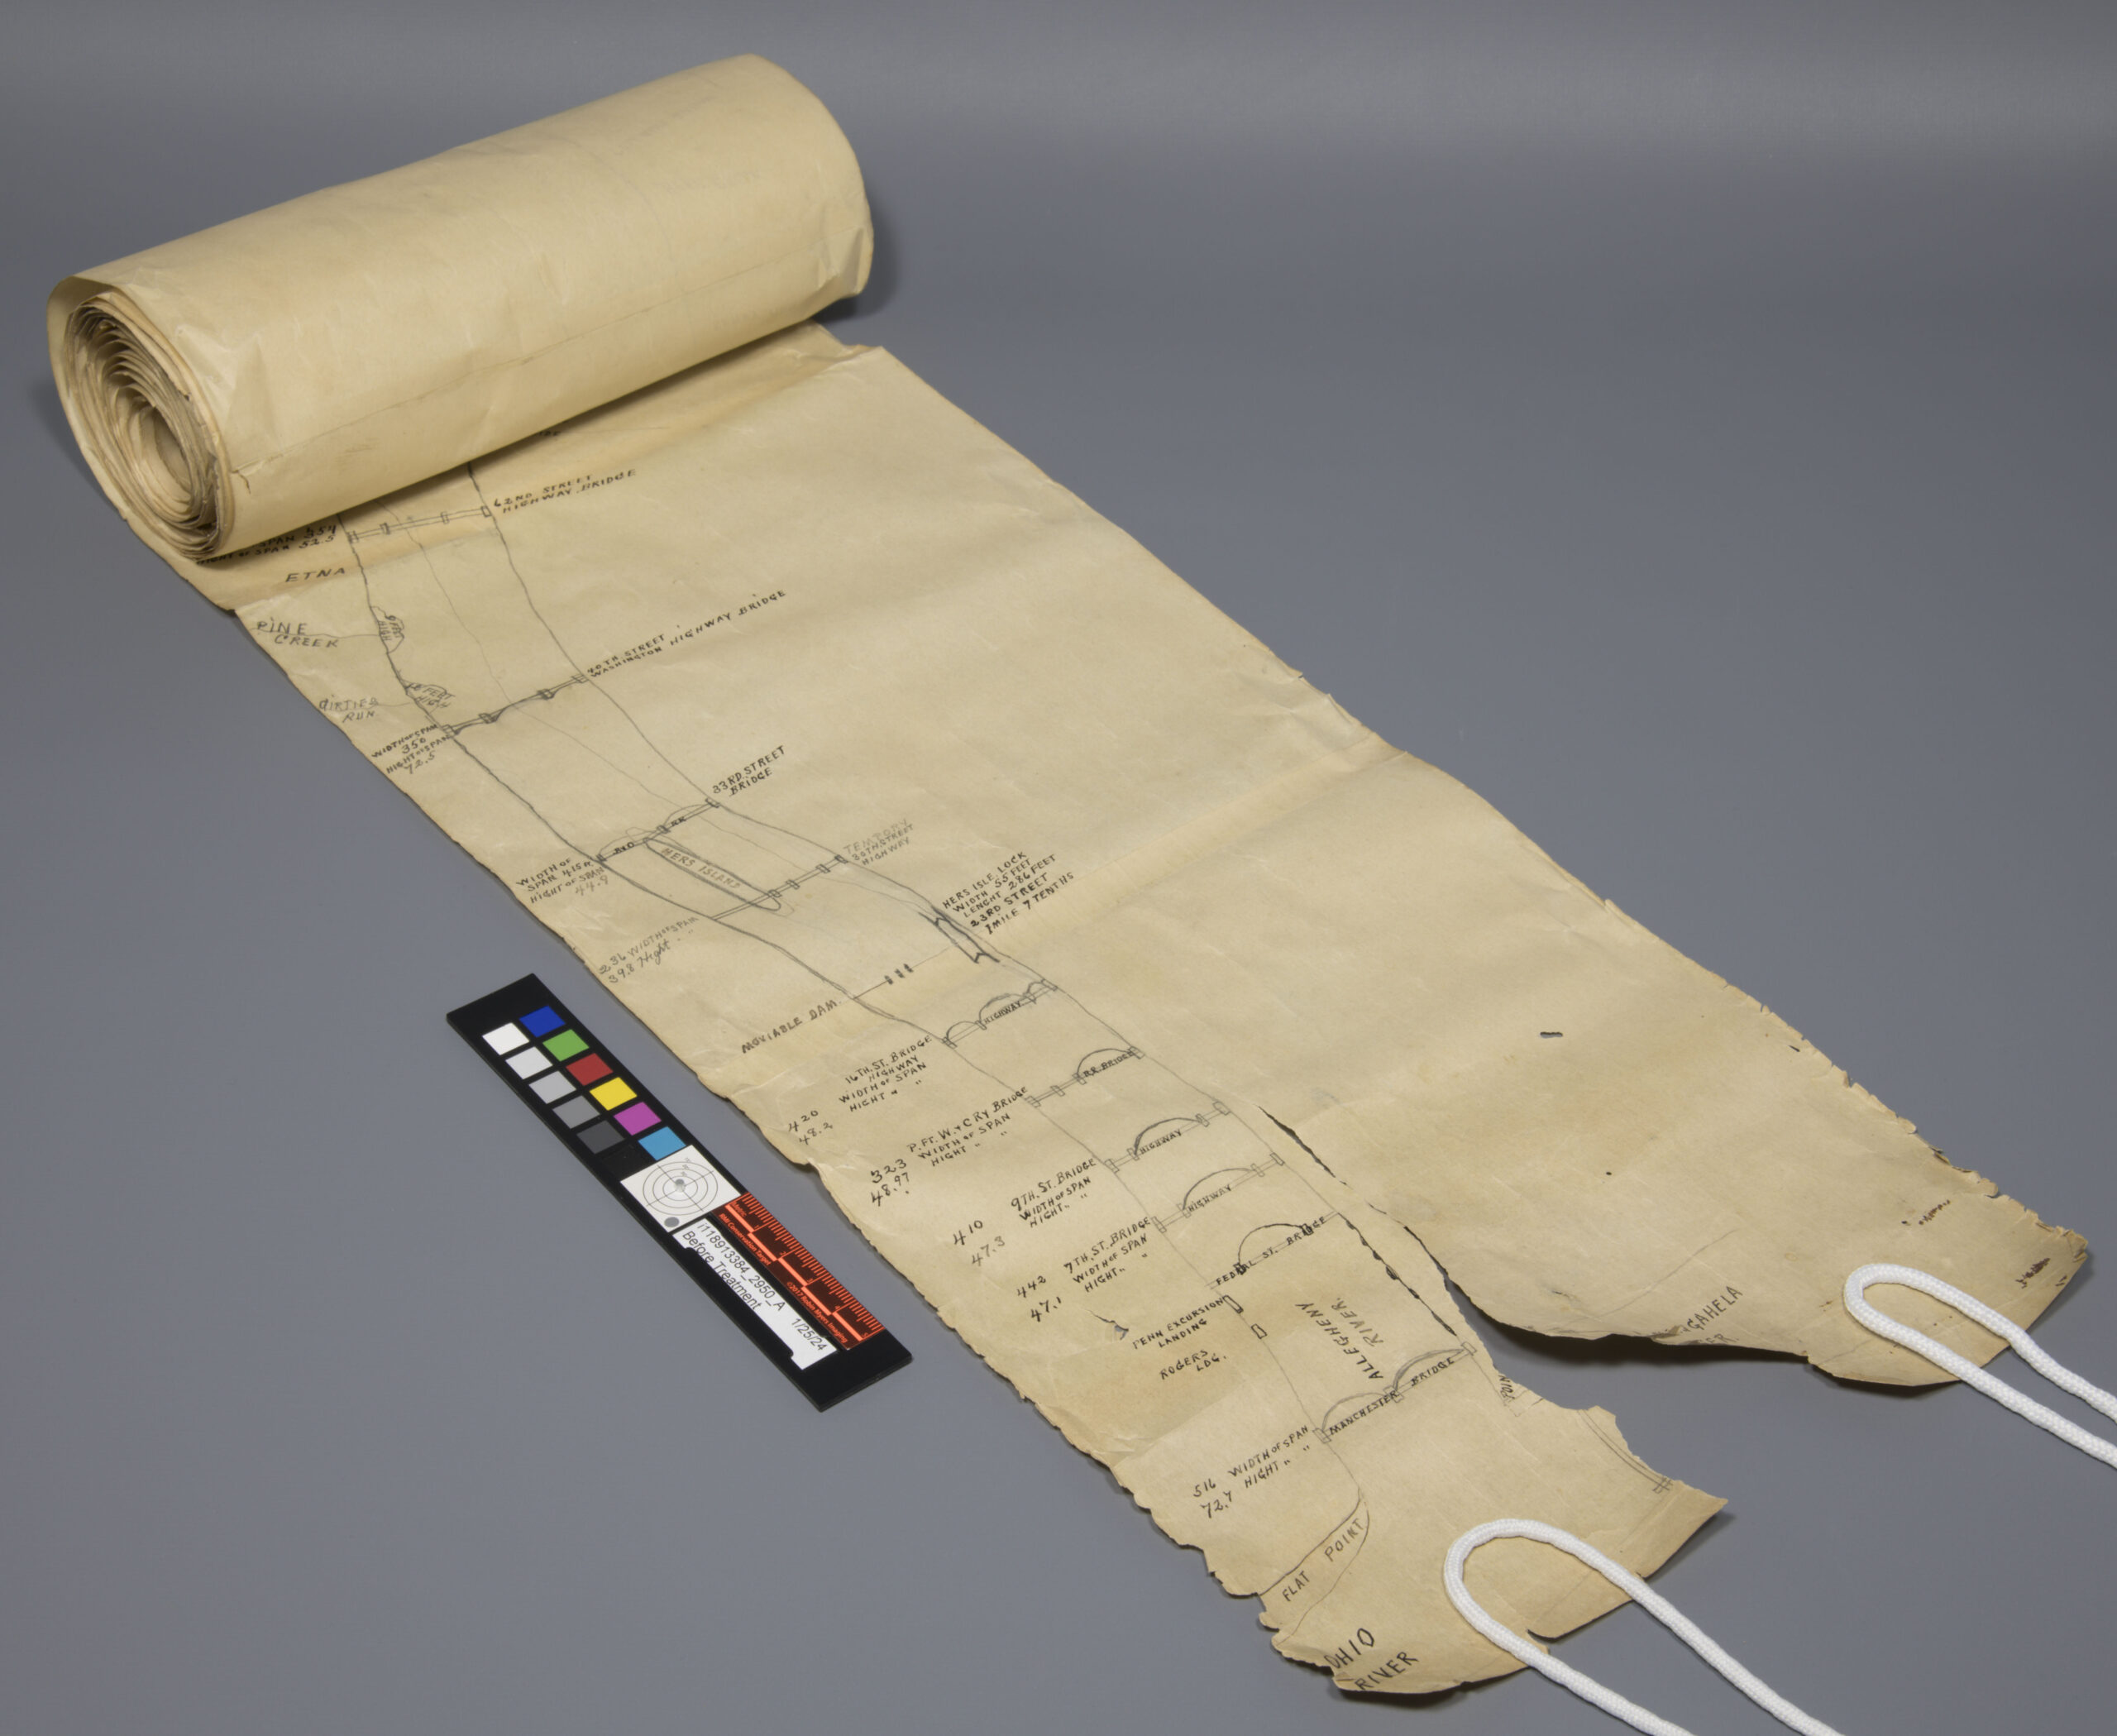
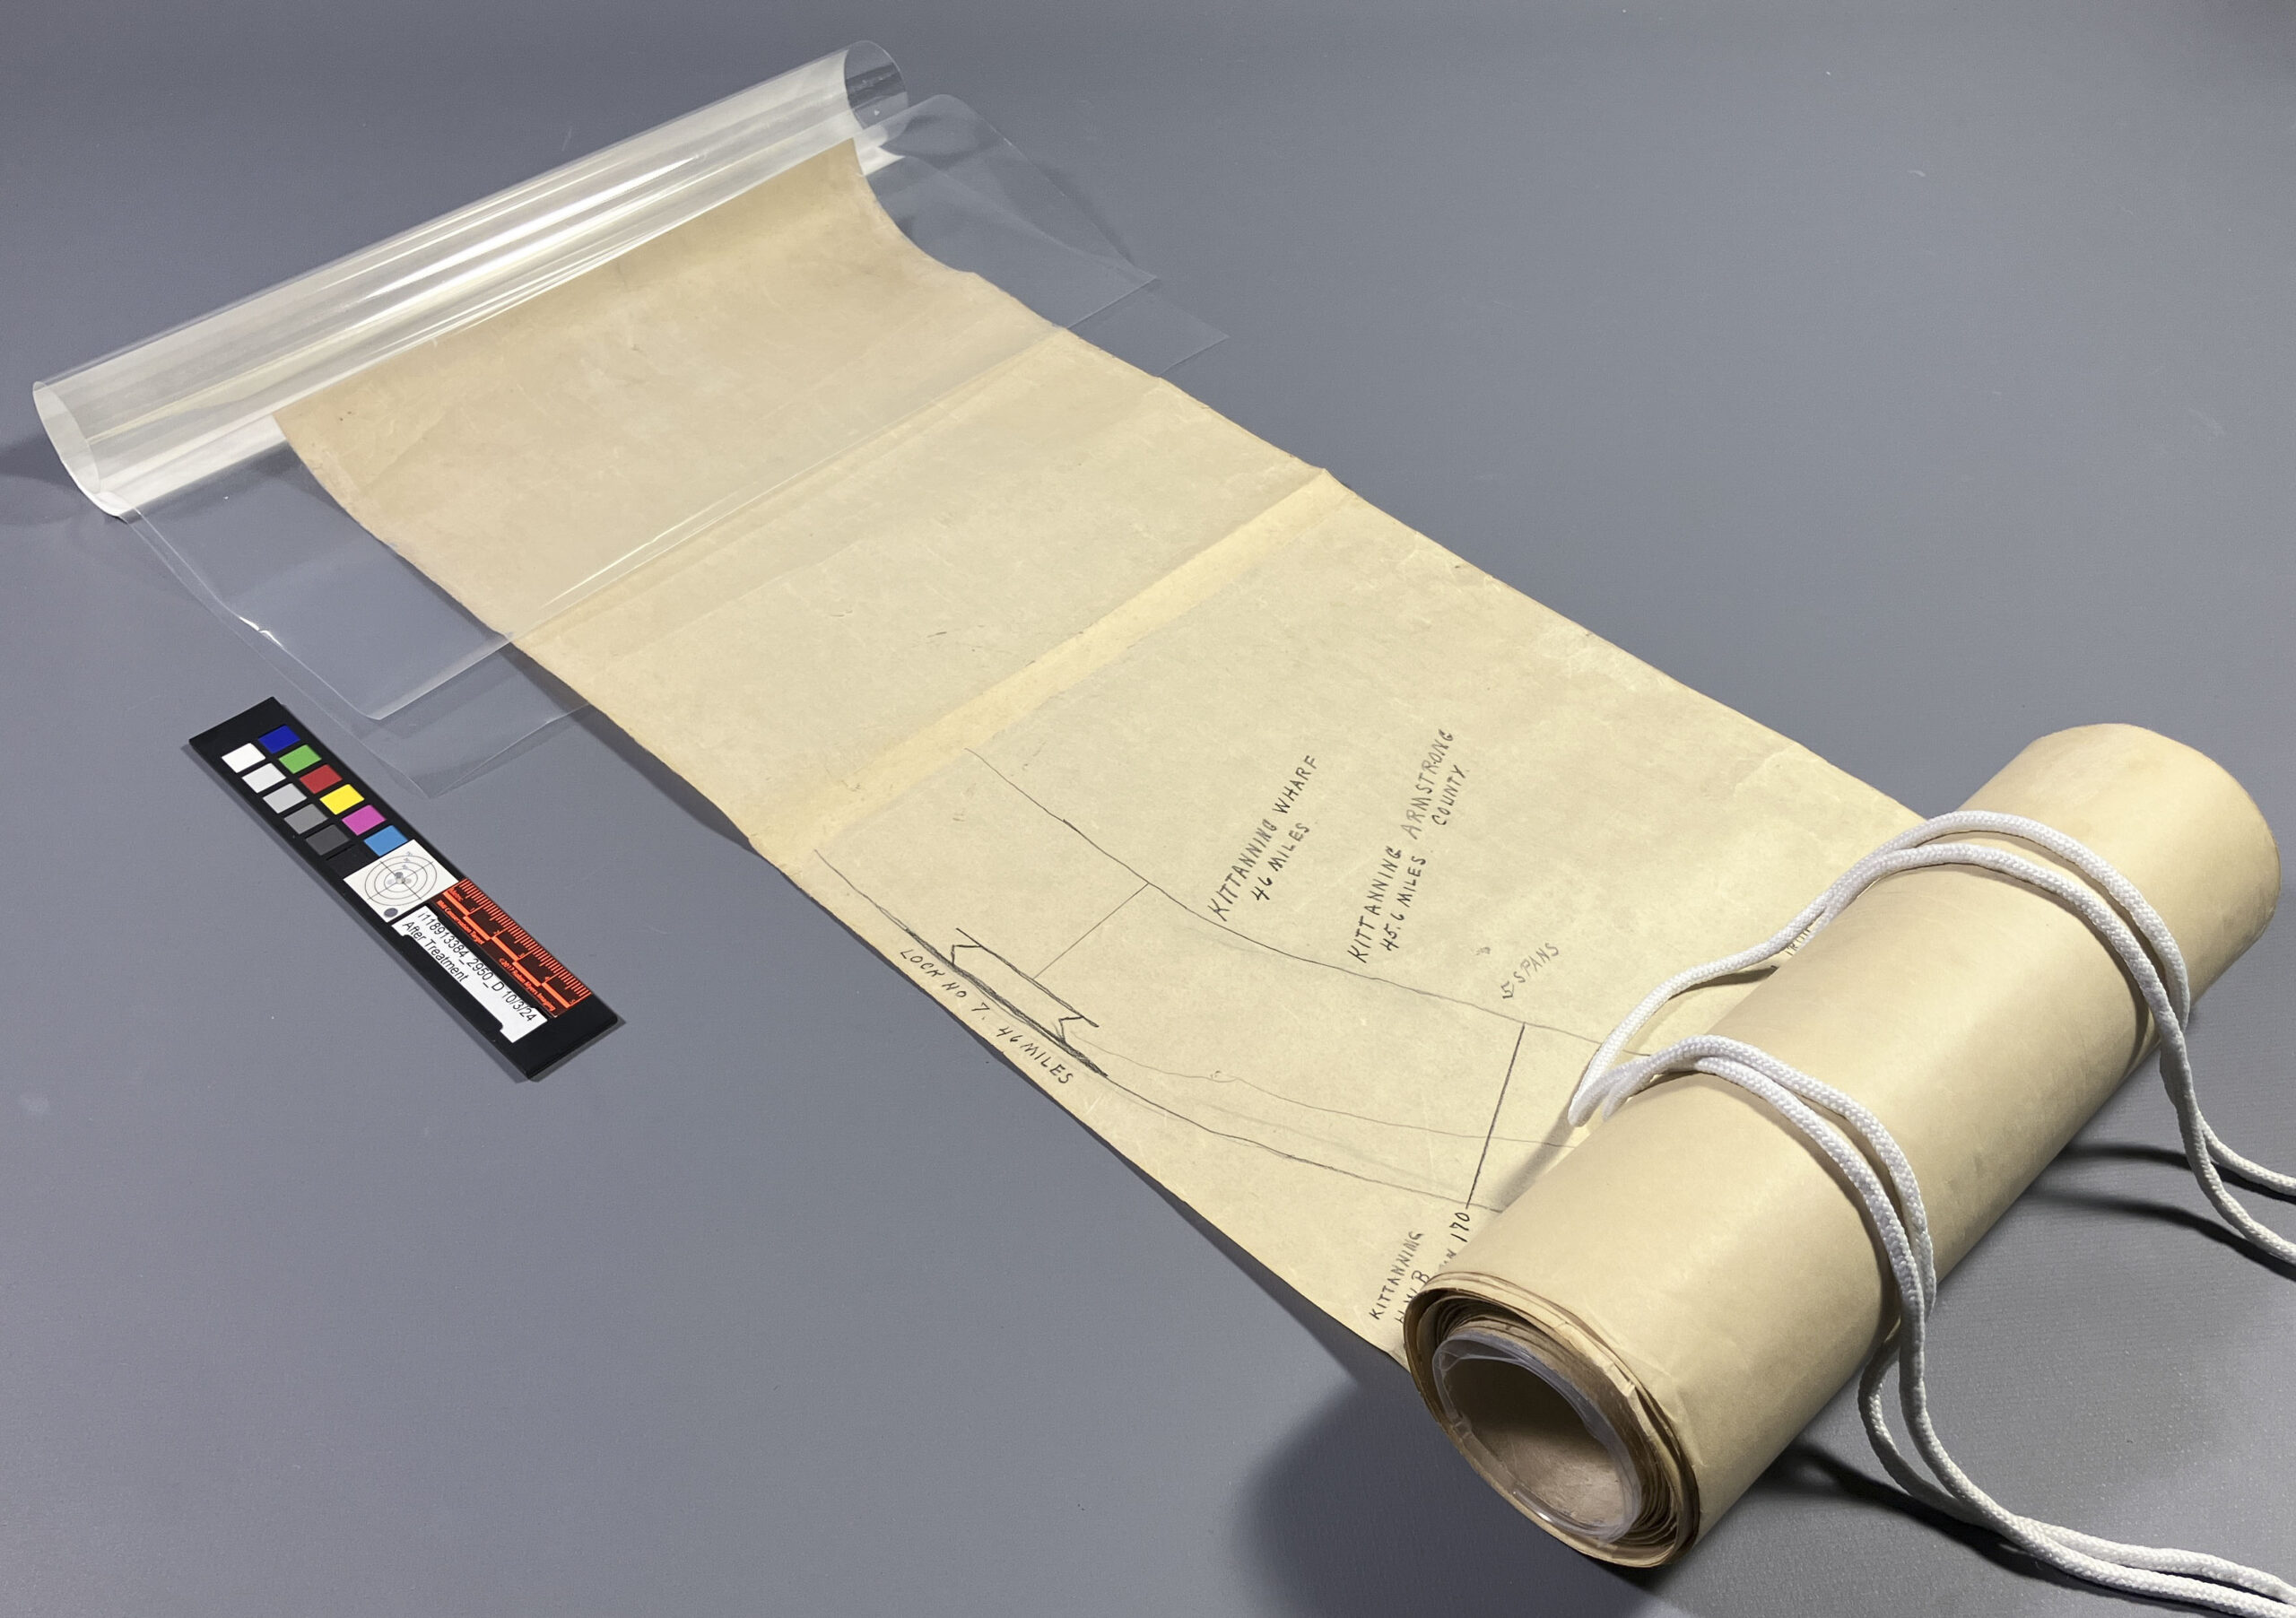
Back in October of 2024, we received something slightly more unusual from the Cincinnati and Hamilton County Public Library, a 15-foot-long, hand-drawn rolled map of the Allegheny River. Yes, fifteen feet. This map was created by joining smaller sheets edge-to-edge, forming one continuous scroll that looked more like a treasure map than your typical library item.
A dilemma quickly followed, how do I create a housing solution that’s safe and functional, but won’t turn future handling into a logistical nightmare? Like many libraries, they didn’t have a 15-foot shelf just waiting for this (because who does?), so storing it flat was out. Storing it rolled became our only real option. The enclosure needed to be secure and protective for the map, and ideally, easy and elegant to display when needed.
First things first, some stabilization treatment. Before tackling the housing design, the scroll underwent conservation treatment to mend small tears and fill losses, particularly at the “beginning” and “end” (depending on which direction you follow the river). Once stabilized, it was ready for some housing trials.
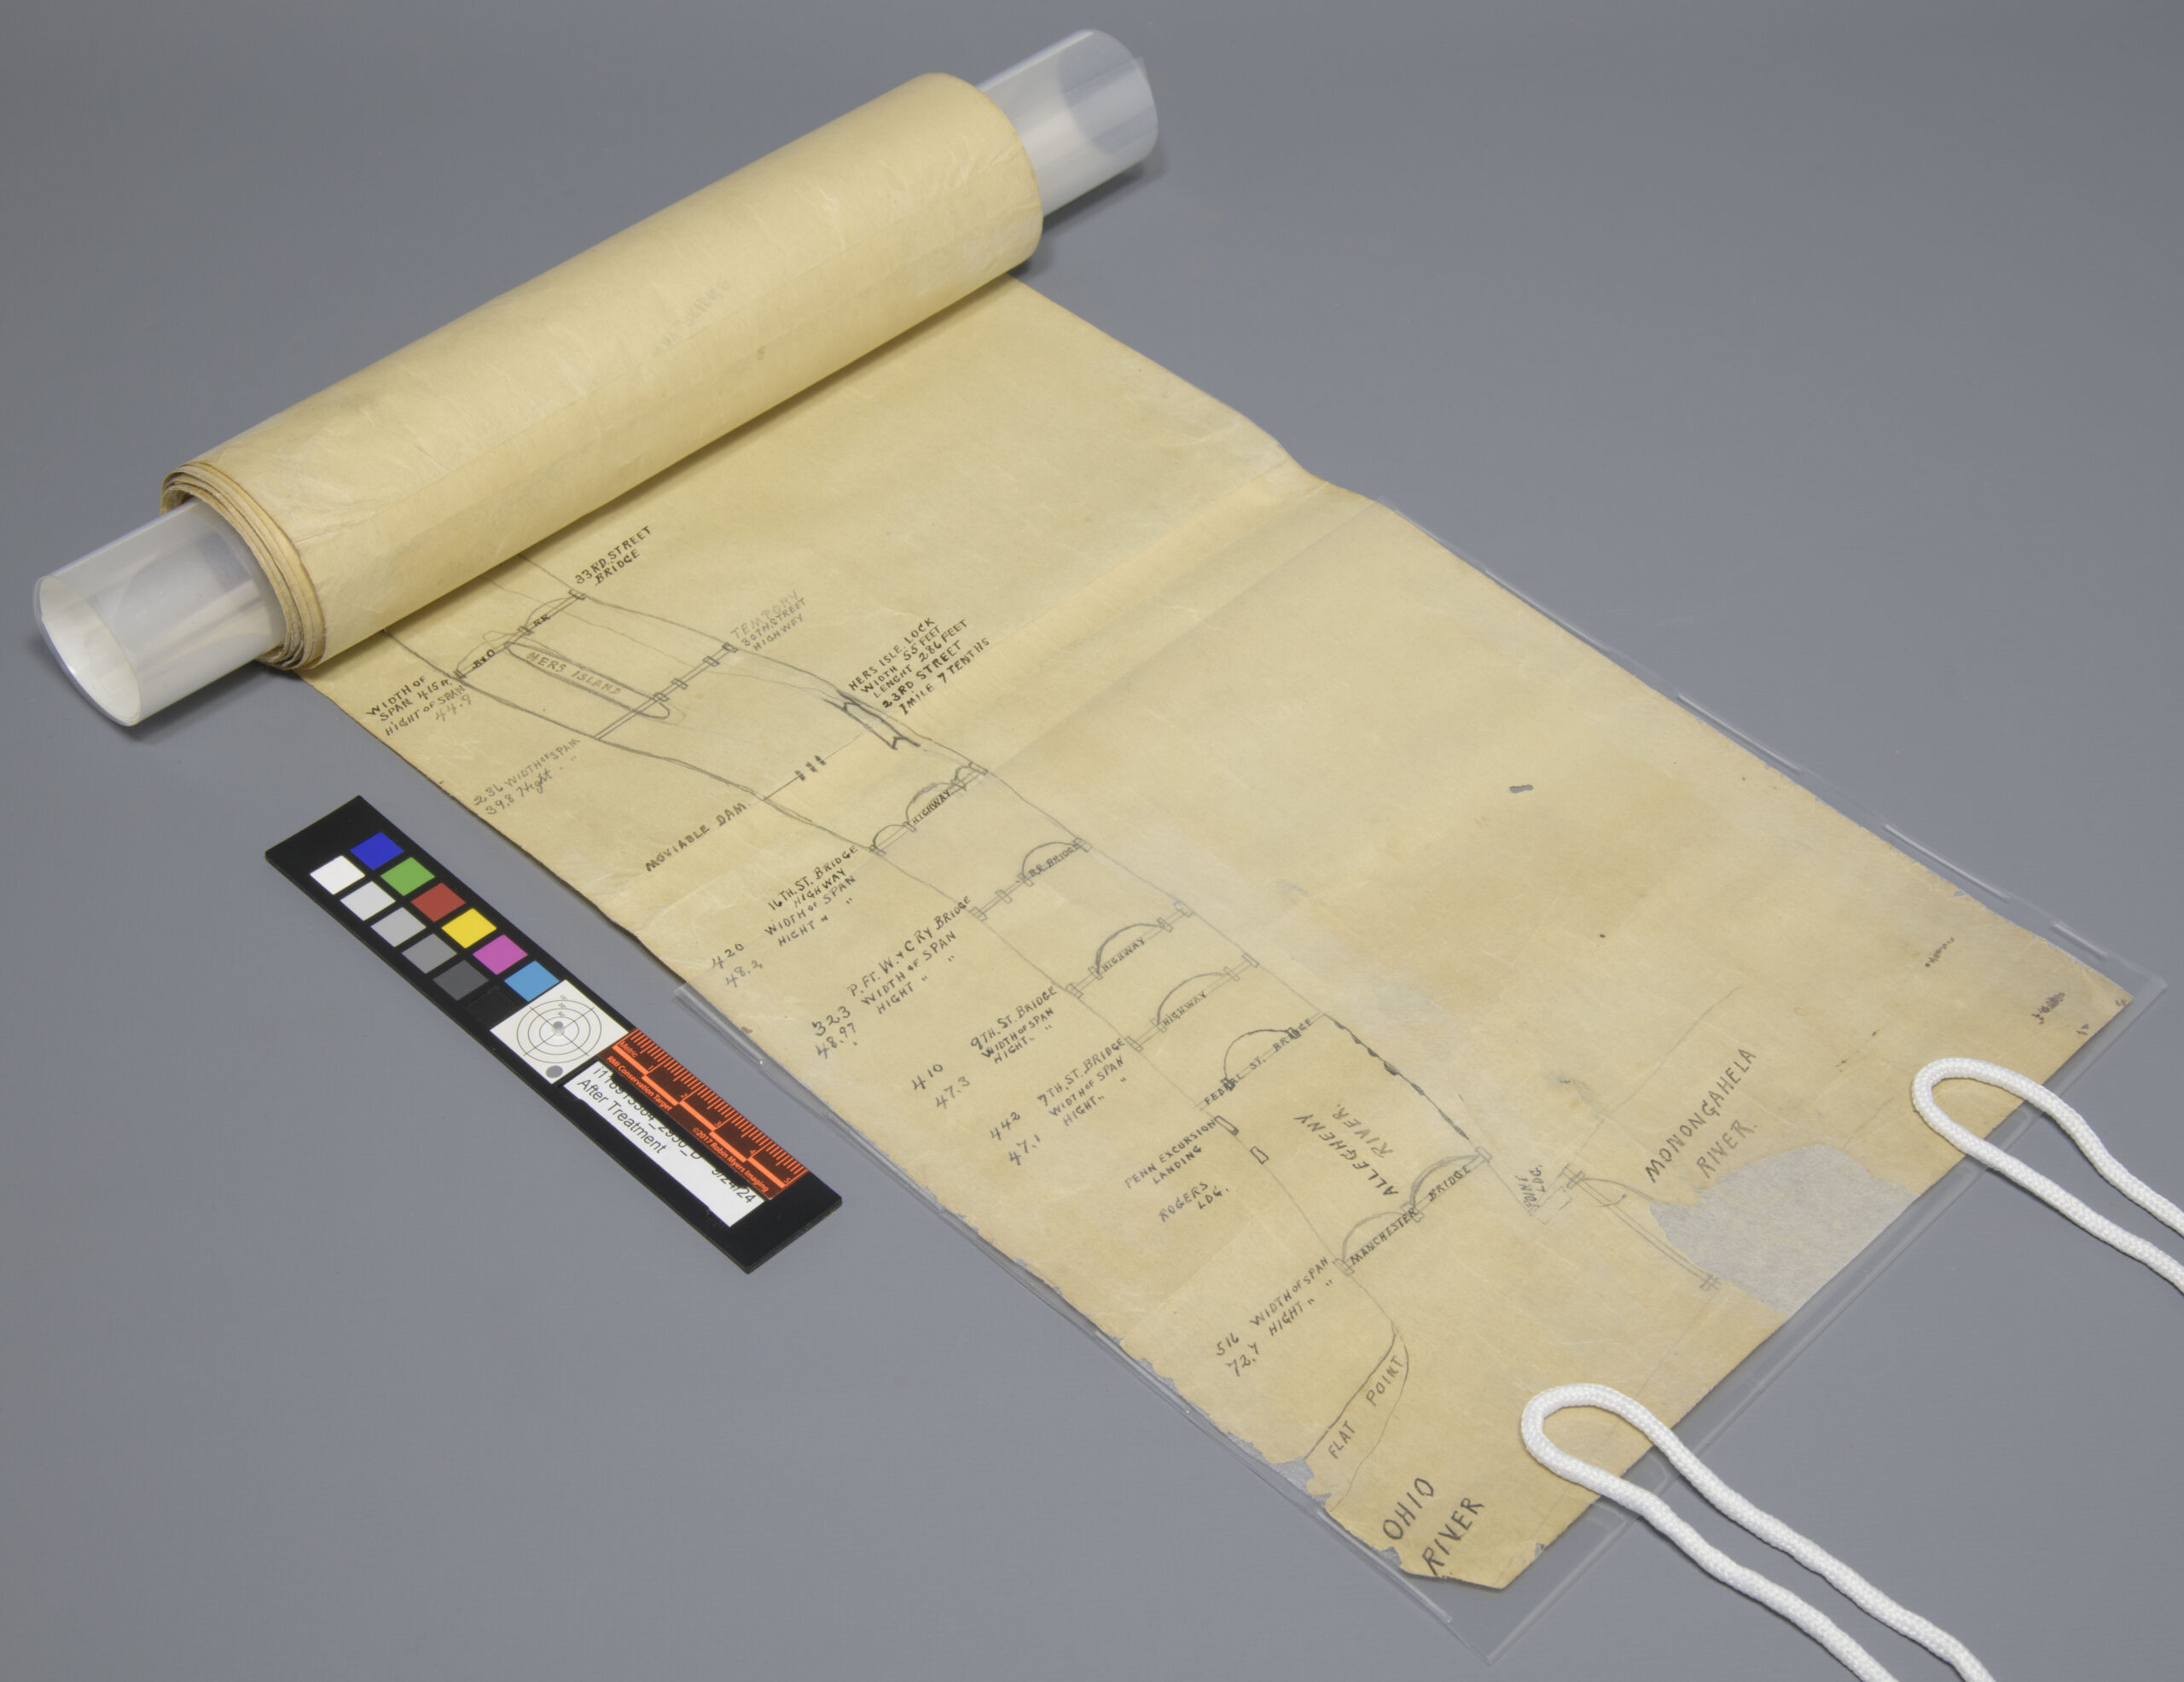
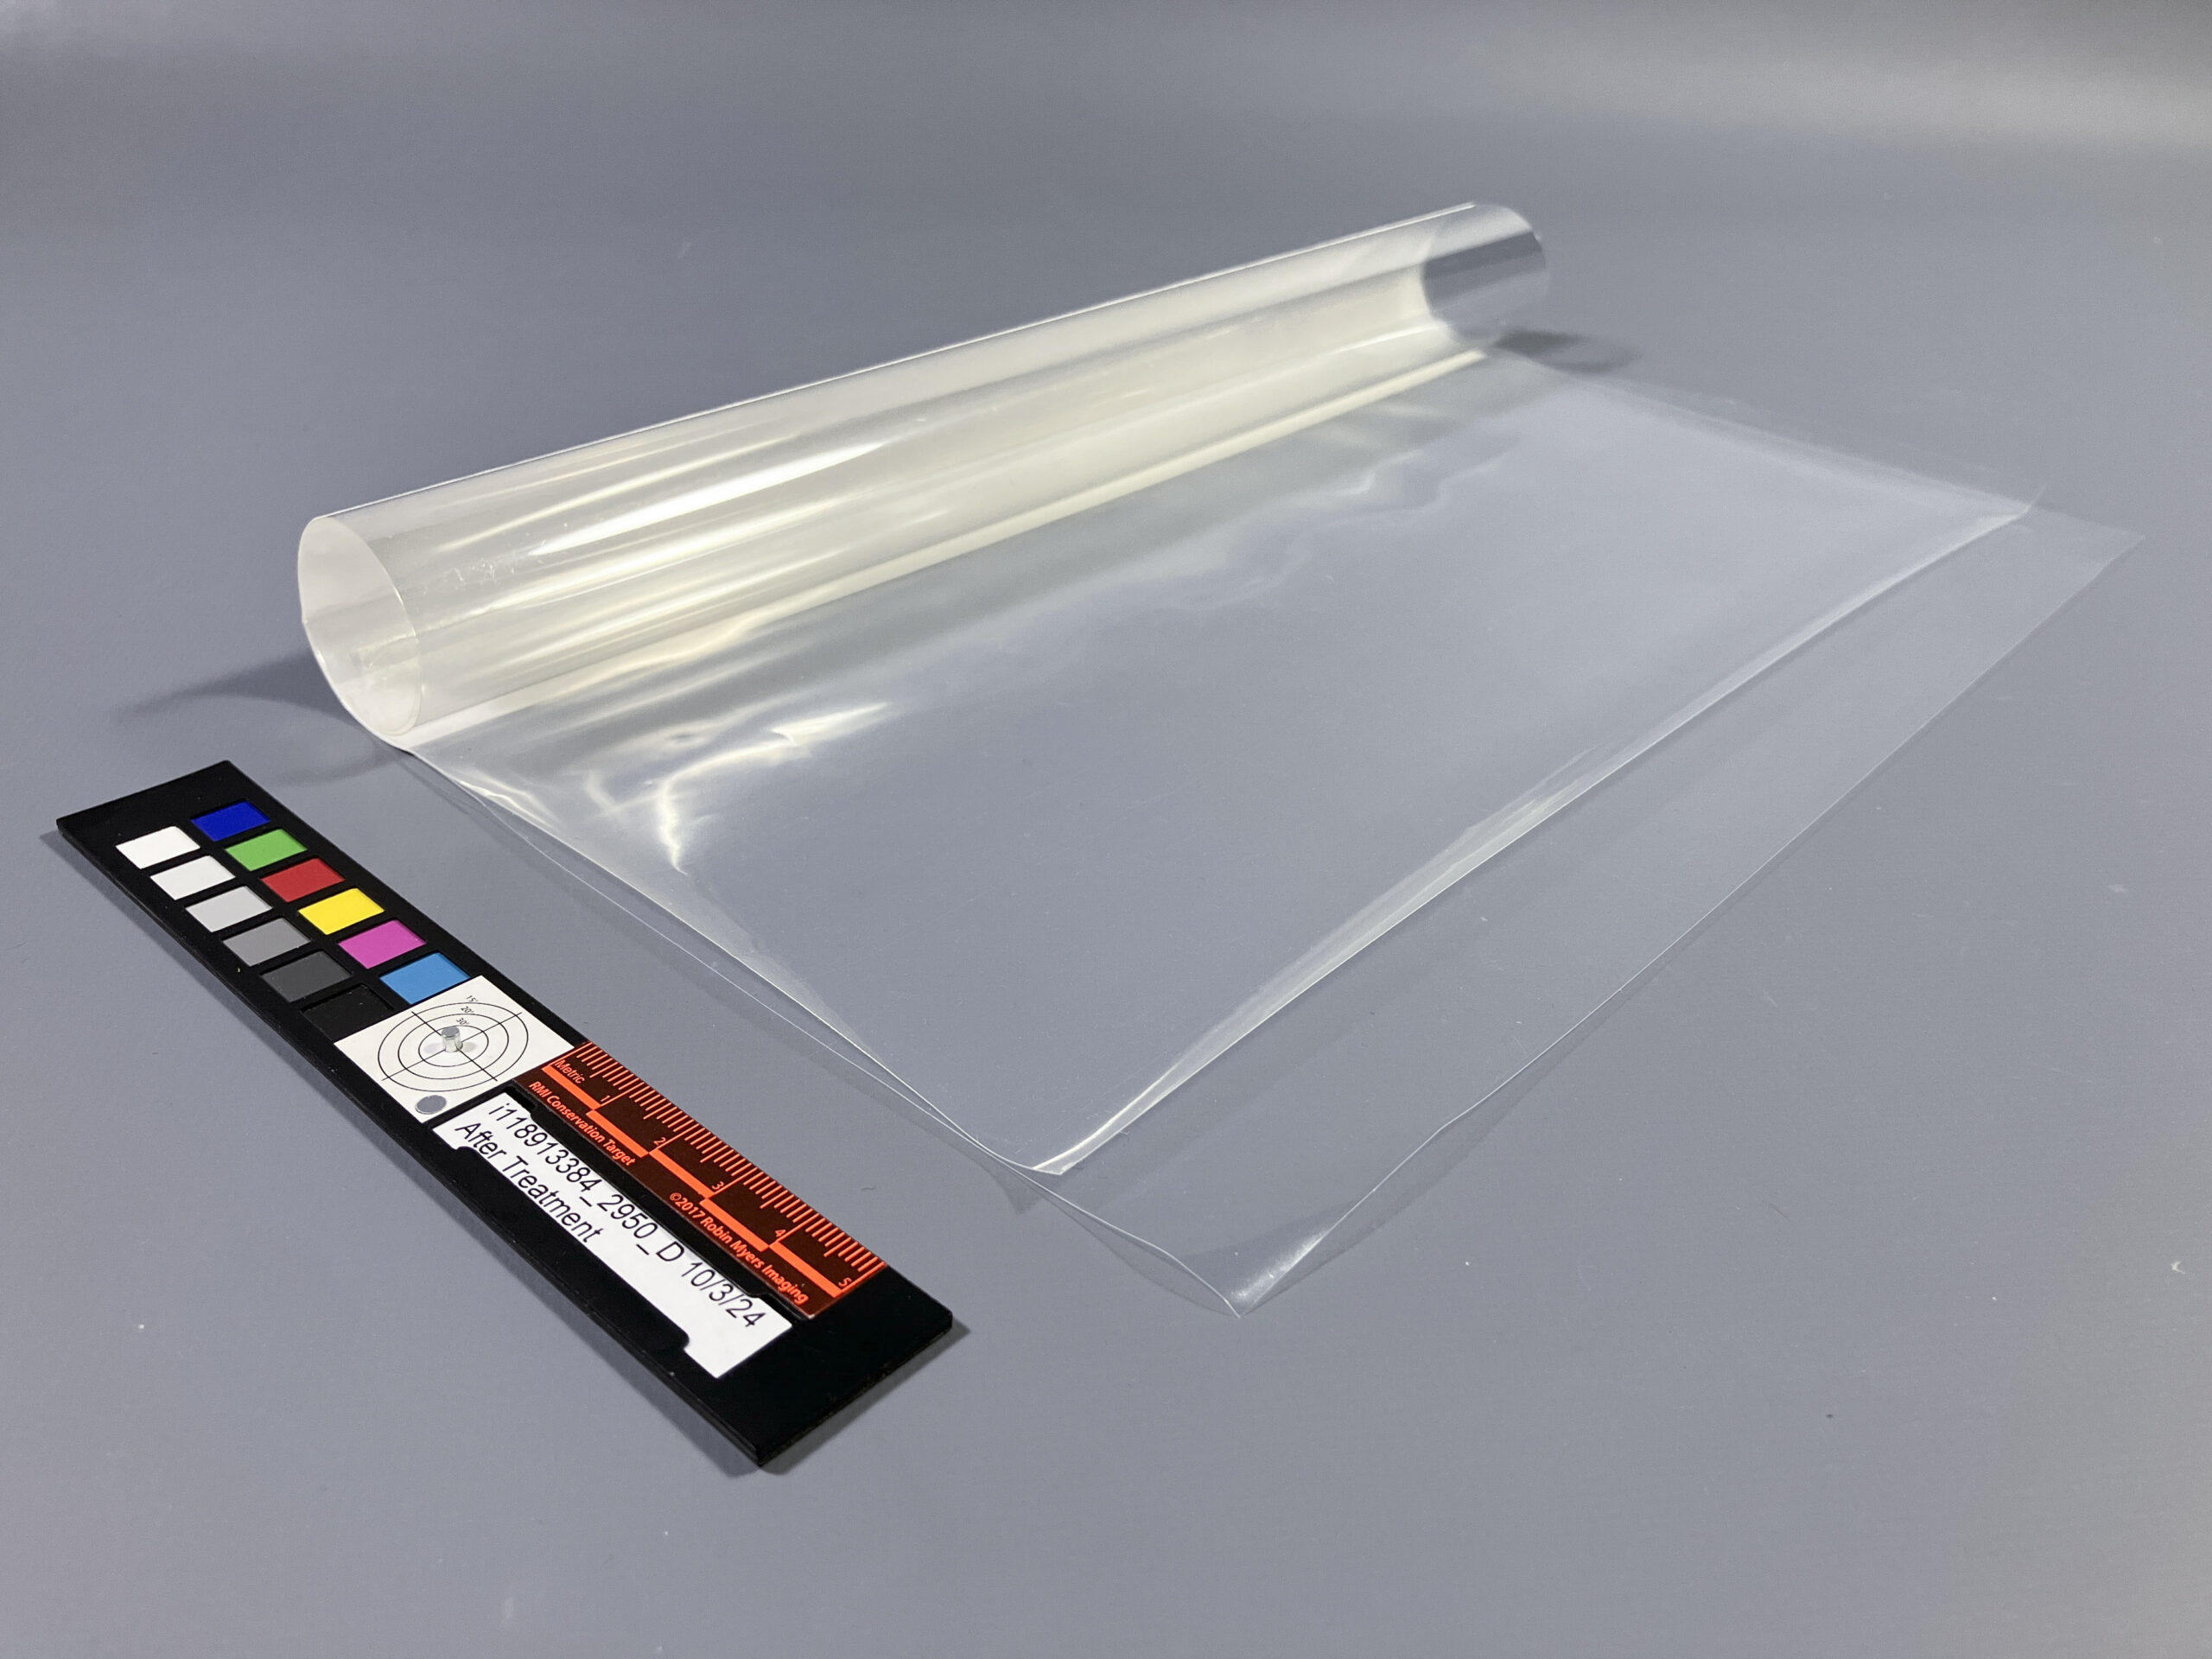
Before Treatment – Large loss and tear at one end.After Treatment – Large loss repaired and map rolled around the polyester cylinder core.
While researching solutions online, I stumbled upon a fantastic blog post by J.M. Iacchei from the Cornell University Library Conservation Lab (link here). Their approach to scroll housing was clever, practical and elegant, and it just gave me the spark I needed to create our own version.
Here is how we rolled:
A support core – To give the scroll structure while rolling, I created a polyester cylinder core with a polyethylene sling. The sling supports one end of the scroll as it begins to wrap around the core, providing gentle guidance and protection as you start to roll the map. The map can be easily inserted into the sling to begin rolling.
Polyester cylinder core with a polyethylene sling to secure one end of the map.The end can be easily inserted into the sling and supported as the map is rolled around the polyester core.
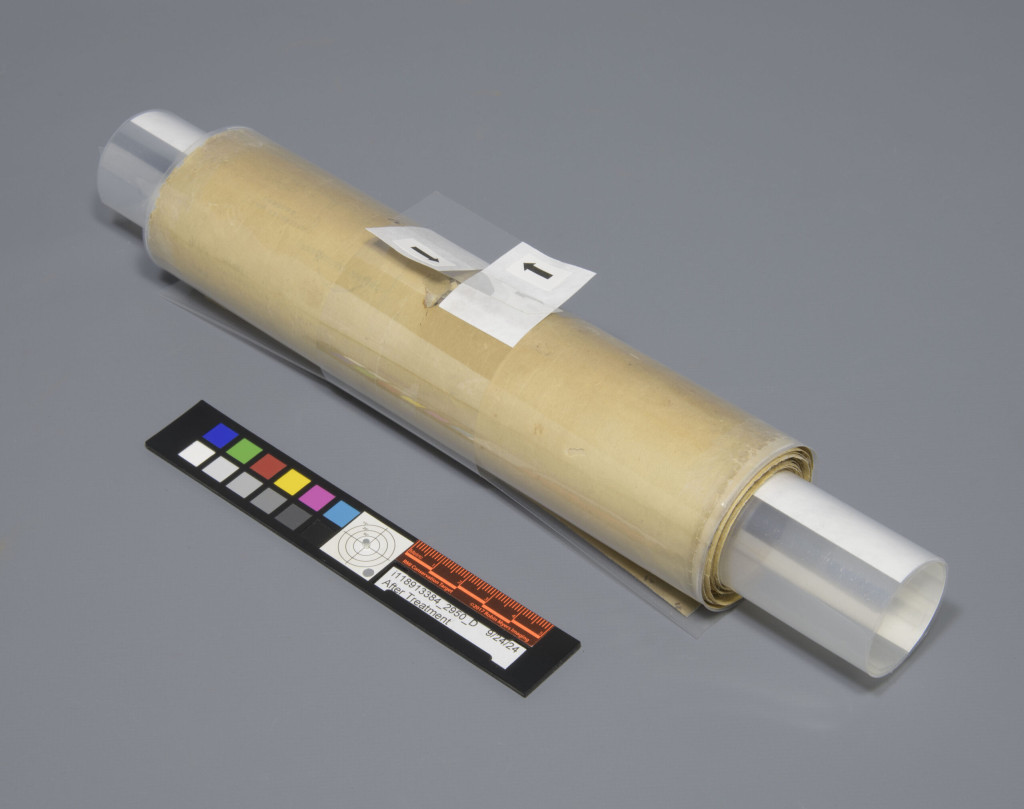
Protection of the ends – The opposite end of the scroll was placed into a soft, transparent polyethylene pocket. It’s flexible, unobtrusive, and doesn’t need to be removed, even during after treatment photography.
The other end of the map is protected with a polyethylene pocket that is flexible and offers support to the fragile end of the map.
Keep it rolled – Once fully rolled, the scroll was secured with a polyester belly band. The polyethylene pocket helped protect the scroll surface from any abrasion caused by the belly band.
The rolled map is secured with a polyester belly band.
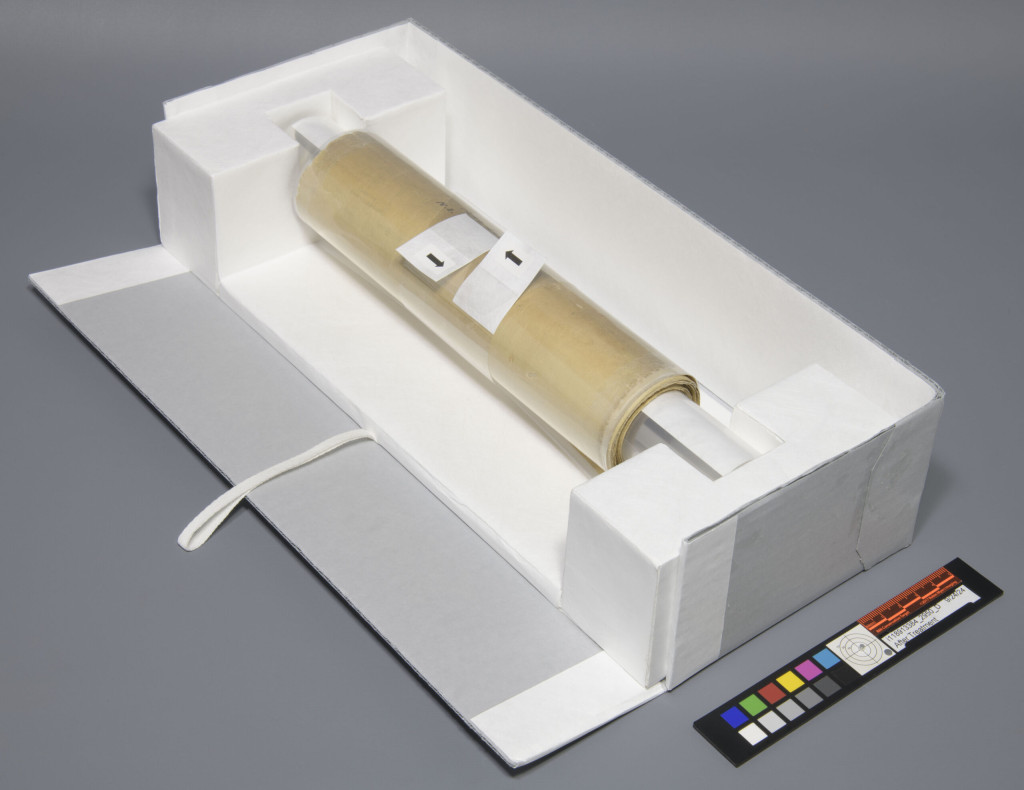
Display ready? – For display,I built a removable tray that cradles the rolled scroll without letting it rest directly on a surface. This tray doubles as a mini display platform, so the scroll can be partially unrolled and supported during handling and exhibit. Functional and elegant.
Display tray that offers support to the rolled map for long term storage.
I also tested a few other methods along the way, like supporting the entire scroll in a single 15-foot polyester sheet or sandwiching it between two. But the seams where the map’s original sheets were joined caused additional creases with those solutions. In the end, supporting the scroll in its entirety just wasn’t viable, so I pivoted to protecting the ends and letting the core do the heavy lifting.
Also: cutting two 15-foot-long sheets of Mylar by hand? Let’s just say I don’t recommend it… and I definitely don’t miss it.
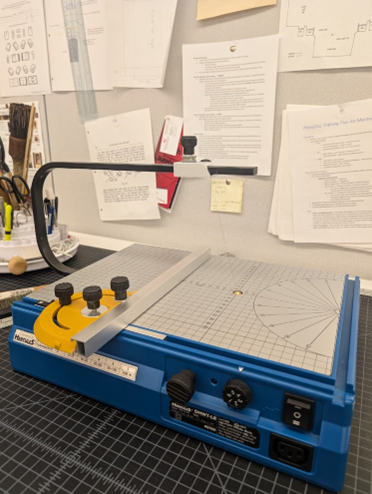
A housing treatment that I have recently taken on led me to getting some hands-on experience with one of the newer tools to arrive at the lab: The Hercules Cordless-Battery Operated Hot Wire Table from Hercules Cutters.
Figure 1: The Hercules Cordless-Battery Operated Hot Wire Table
The Difficulties of Cutting Foam
We have typically performed foam cutting at the lab using either a hand-held blade like an Olfa or scalpel, a board shear, or in some cases a hand-held saw. While these methods can be somewhat satisfactory, they are none without their limitations. Cuts with a hand-held blade often look sloppy, especially if the foam needs to be stacked; the compressible nature of foam makes it very difficult to make accurately measured cuts this way, and the inaccuracies become glaringly obvious when trying to stack multiple seemingly same sized pieces for thick fills inside an enclosure (something I often need to achieve!).
Figure 2: The minor inaccuracies of hand-cut foam become obvious when the pieces are stacked. Notice the unevenness along the edge of this stack of Plastazote foam. Plastazote, as well as a thinner foam called Volara, are among the most commonly used foams we utilize at The Preservation Lab.
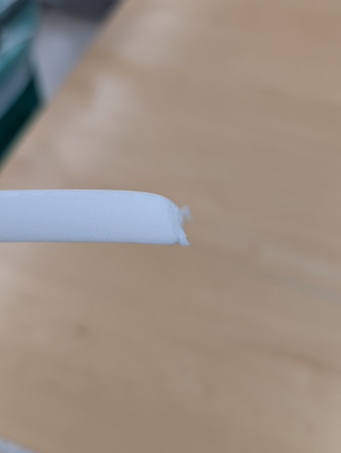
A board shear is quick and offers a measuring guide to provide accurately measured cuts, but the edges where the blade slices through the foam often end up rounded or otherwise distorted.
Figure 3: The downward cutting motion of a board shear can often leave the edge of foam looking rounded or otherwise distorted, as can be seen on this piece of Plastazote.
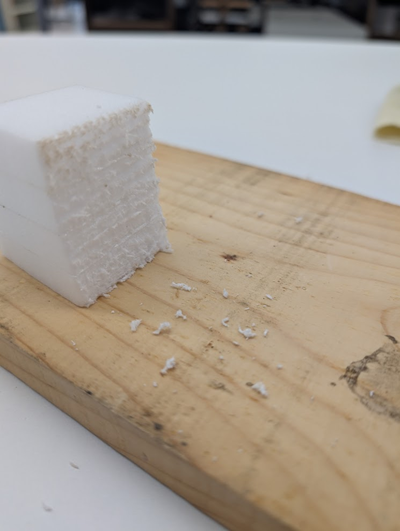
Finally, cuts with a saw can leave a mess and the teeth can leave a sloppy looking edge on the foam.
Figure 4: This stack of Plastazote was cut with a saw. A saw’s teeth can leave a very messy edge when cutting through foam.
The Hercules Foam Cutter: Basic Features and Operation
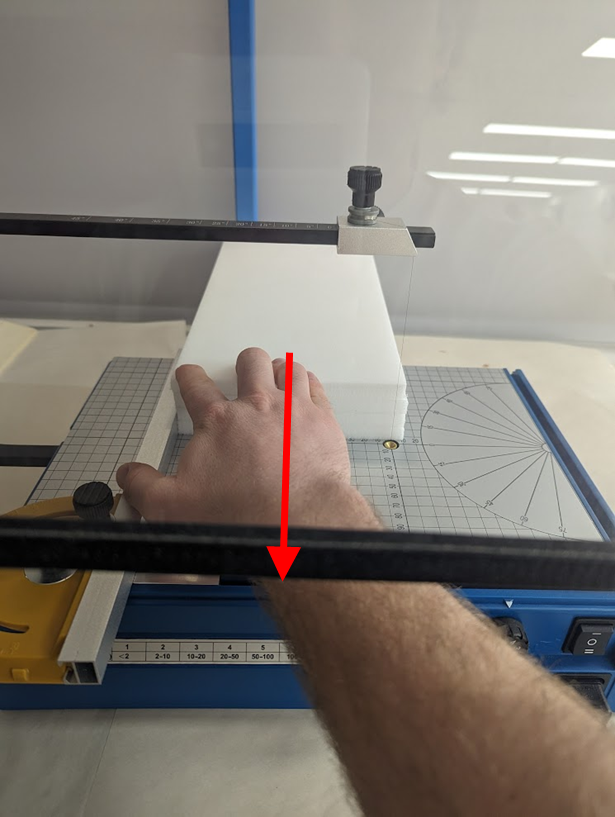
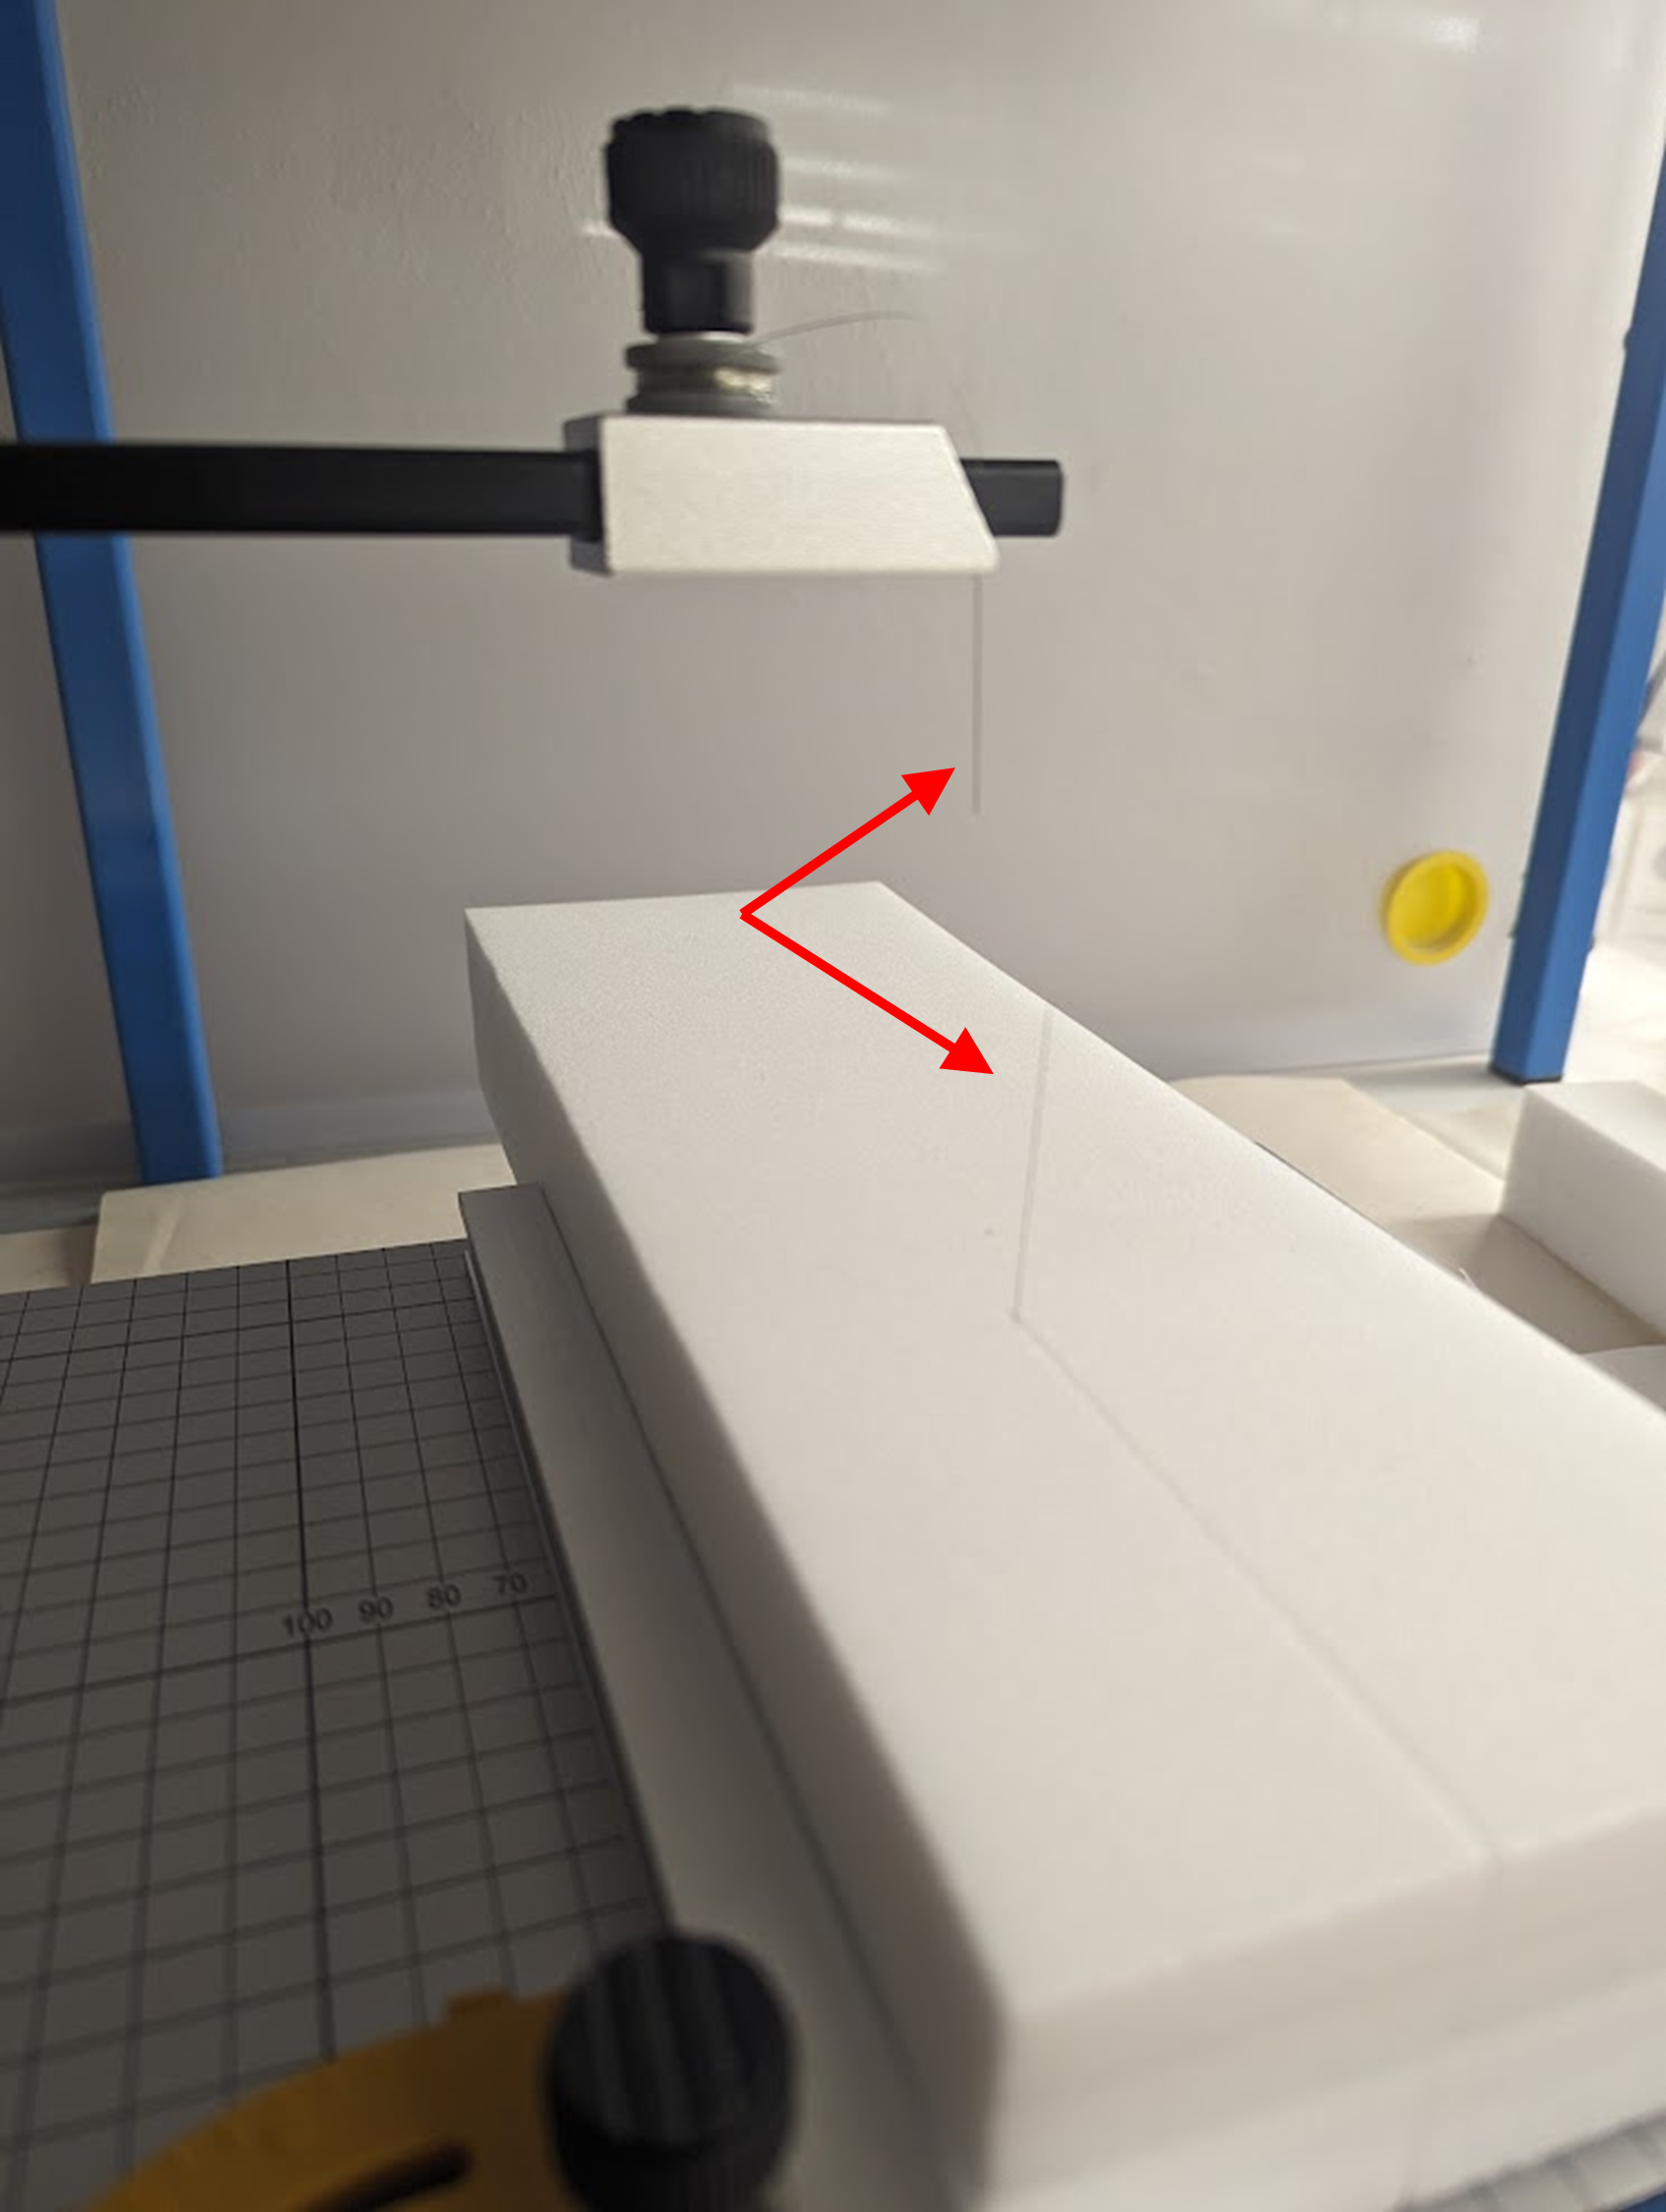
The Hercules foam cutter uses a different approach. It heats up a filament wire that is pulled taught vertically through the device. While the wire it hot, foam is drawn through the wire to accurately and cleanly (with a little practice) slice through it.
Figure 5: A stack of Plastazote is pulled through the hot filament wire to make a clean cut.
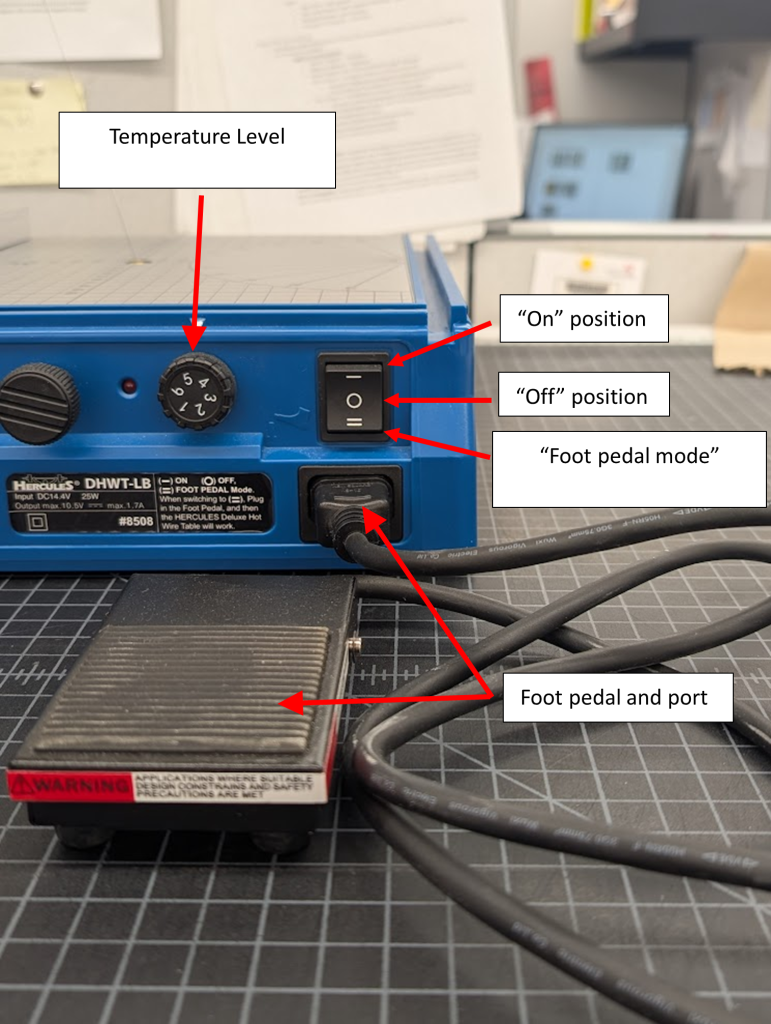
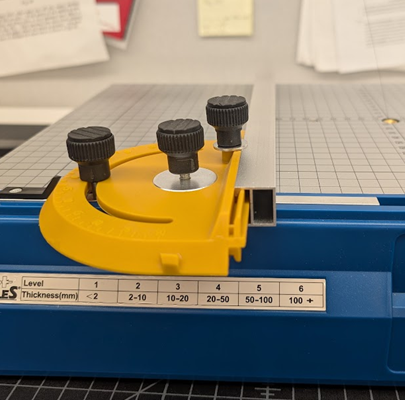
The heat can be engaged in one of two ways: with the power switch turned to “On” mode, the wire stays hot until it is turned off; when the switch is set to “Foot pedal mode”, the wire only heats up while the included foot pedal is pressed. There is an adjustment knob allowing the user to control the temperature of the wire. In general, after experimenting a bit it seems that the thicker the foam, the hotter the wire needs to be.
Figure 6: The Hercules Cutter’s heat controls.
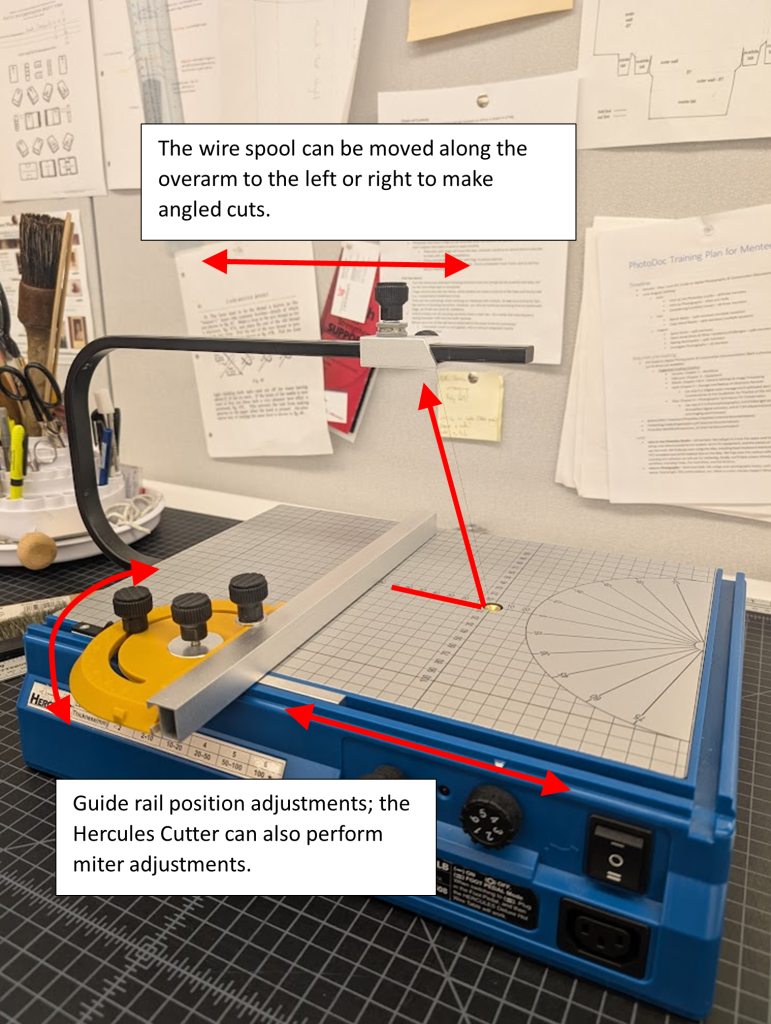
The cutter includes an adjustable guide rail to aid in accurate cutting. The position of the spool that holds the wire is also adjustable, allowing for angled cuts to be made.
Figure 7: Cutting position adjustments of the Hercules Cutter.
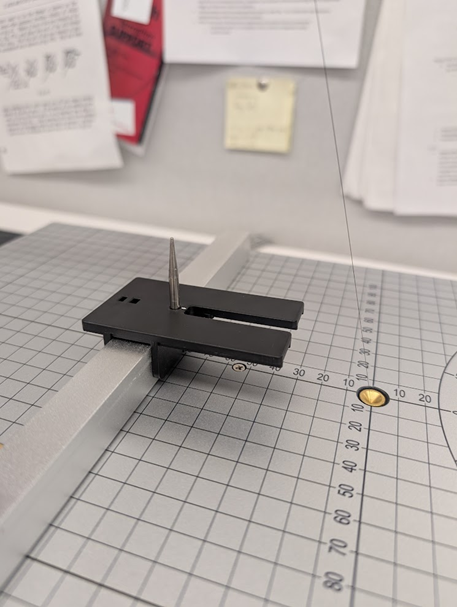
Finally, there is an attachment that can be placed onto the guide rail allowing for circular cuts to be made.
Figure 8: The circle cutting attachment: the foam piece is impaled by the point of the attachment at the center point of the desired circle. The distance from the point to the wire will be the circles radius. Once the attachment is in position for the desired size of circle, the foam piece is rotated as the wire cuts through the foam until a complete circle is made.
Advantages
The Hercules Foam Cutter’s ability to cut stacked pieces of foam is by far my favorite and the most practical of its uses in my opinion. As previously mentioned, cutting inaccuracies become very noticeable when trying to stack multiple same sized pre-cut pieces of foam. With the Hercules Cutter, the foam pieces can be stacked/attached to each other before hand, and then cut to a uniform size. I was pleased to discover that the heated wire doesn’t seem to have any trouble cutting through multiple layers of foam that have been adhered together using double-sided tape and/or PVA. With a bit of practice, I was able to achieve neat, uniform chunks of foam that were several layers thick. I have found, however, that when cutting foam adhered together using double sided tape it is important to be mindful of where your points of adhesion are inside the stack of foam. It is possible to end up with a stack of foam that doesn’t have any tape holding it together after cutting.
Figure 9: A cleanly cut chunk of Plastazote 4 layers thick. Notice that the section that was cut off has fallen apart due to not having any double-sided tape in this section. Fortunately, this is not the piece I needed from this cut!
Also remember that the thicker the foam, the hotter the wire needs to be. There is a decal attached to the cutter with heat setting recommendations based on how thick the foam is, but the instructions (and also myself) recommend doing a few test cuts with scrap foam first to see what works, as different types of foam will respond differently to various heat settings. It shouldn’t require much pressure from the user to push the foam piece through the wire, and too much pressure will cause the wire to bend or even break; if this happens, the wire isn’t hot enough!
Figure 10: It is difficult to see as the wire is so thin, but it has snapped. The wire wasn’t hot enough and I had to apply too much pressure to pass this stack of Plastazote through it. Fortunately, there was plenty of wire remaining on the spool, and it was easily threaded back into its port.
I found the foot pedal to be a beneficial feature as well. Some types of cuts require the user to adjust their hand position mid-cut, and it is helpful to have the option to stop the flow of heat into the wire if such an adjustment needs to be made. The wire both heats and cools down almost instantaneously, which is also a nice touch.
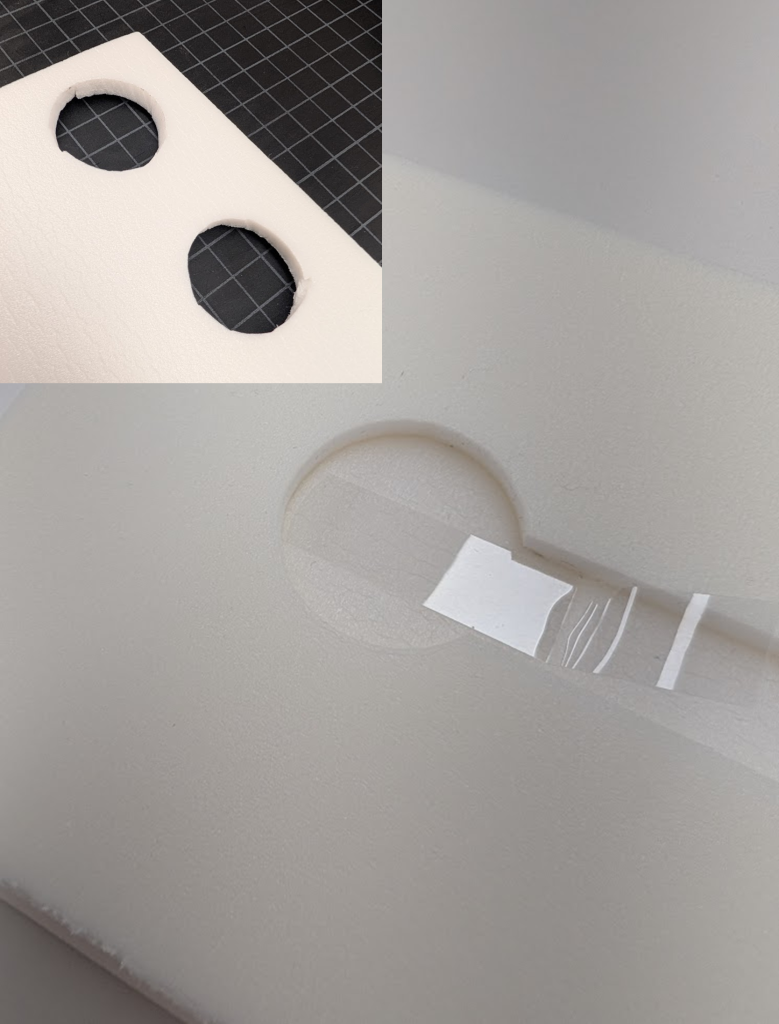
Finally, the circle cutting attachment proved to be useful during a recent housing treatment. I needed to create a compartment in a piece of foam to store a commemorative medallion, and my attempts to cut a circle using a hand-held blade did not look good. I was very pleased with the results I achieved using the attachment, although it took several attempts to get my circle to have the correct diameter.
Figure 11: A circle cut into Volara foam using the circle cutting attachment with my previous attempts to make the cut by hand using a scalpal in the corner of the image.
Drawbacks
It should be noted that many components of the Hercules Cutter are made of plastic. While this makes it lightweight and portable, it causes some problems. The guide rail feels rather cheap, and even with all the screws secured tightly, the rail still has the potential to wiggle around a bit. This can make getting accurate cuts difficult. I did find that cuts still look better using the rail than doing them free hand, though.
Figure 12: Most of the components of the adjustable guide rail are made of plastic, giving them the potential to move slightly during use, even when tightly screwed down.
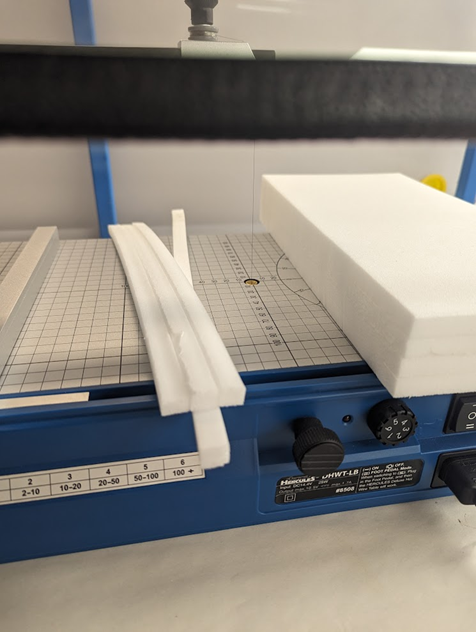
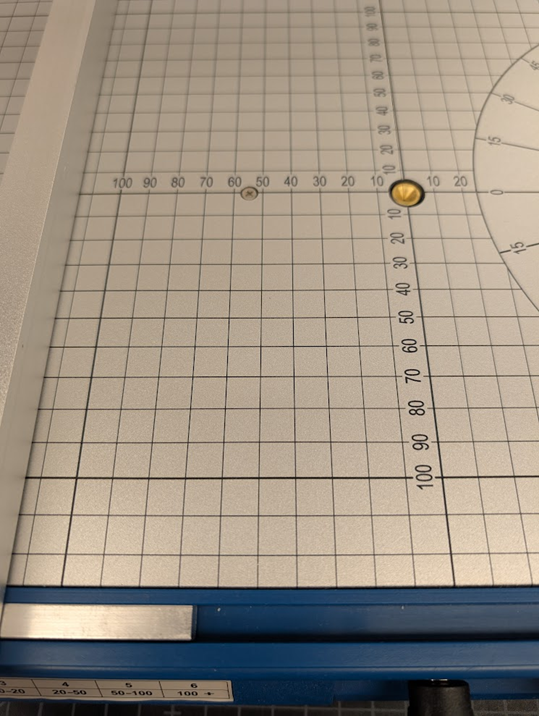
Another issue I had with the cutter lies in its cutting platform. There is centimeter grid on it for measuring/setting the guide rail which is a nice idea; however, I feel it would have been much more helpful to have millimeters indicated somewhere like board shears often do, as precision cuts rarely fall exactly on nice round centimeter measurements. The user is forced into one of three solutions: 1) measuring the foam and adding a tick mark to it, which is not as easy and one would think as foam isn’t very easy to make discreet marks in; 2) using a ruler or other measuring device to set the guide rail, which defeats the purpose of the cutting surface containing a measuring grid to begin with; 3) eyeballing the correct measurement between the grid marks. This parred with the already wobbly nature of the guide rail makes it somewhat challenging to make precision cuts.
Figure 13: Although the numbers represent millimeters, the grid lines on the cutting platform appear only every centimeter.
Finally, as the Hercules Cutter operates through a wire essentially melting foam, it can produce a somewhat unpleasant burnt-plastic smell while in use. It is recommended to use under a fume hood, outside, or in another well-ventilated area if possible.
Final Thoughts
As with all other methods of cutting foam, the Hercules Foam Cutter is not perfect. For making simple cuts in a single layer of foam, I still find using a board shear to be my preferred method; it is quick, easy, and the rounded edges left by the blade don’t bother me much if it is only a single layer of foam. However, the Hercules Cutter has become the default tool I use to cut stacked foam and to make circular cuts. It has been a fun tool to test out, and it is always possible that more practical uses for it will arise as I continue to make more custom and specialized enclosures.
Matt McCoy — Senior Library Conservation Specialist
When a collection of Egyptian mummy bandage fragments at the Cincinnati and Hamilton County Public Library was found in an area used to store uncatalogued flat materials, the lab was asked to play a role in providing better stewardship.
Click the links below to jump to the following posts:
History – Historical information provided about the Egyptian inscriptions
Treatment – How the materials were treated after learning about their content
Storage Solutions – Individual solutions for separated fragments as well as storage as a collection
Conservation Treatment Consultations
Being a primarily book, paper, and photograph conservator, working on textiles comes up only intermittently as minor stabilization or housing. When these projects do arise, I tend to consult immediately with a textile conservator. This project was no different. Generously, Obie from the Cincinnati Art Museum kindly visited the lab to look at the fragments with me in person.
Initial Treatment Idea
Before consulting with Obie, my initial plan was to cut the overall board and separate the individual fragments. Once separated, I thought I might hinge the fragments to a backboard inside a sink matting system. I had briefly corresponded with a textile conservator at the MFA Boston who is familiar with ancient textiles and she confirmed this would be a sufficient option.
Testing
However, with Obie present, together we tested the solubility of the adhesives and likelihood of removing the fragments from the acidic board for better storage. Surprisingly, we determined removal was possible with the smallest amount of moisture!
Being familiar with backing removals and conserving degraded cloth covers (and now encouraged after having Obie’s support) I next went beyond spot testing and decided to perform a test treatment on one of the fragments to remove the backing board… with the caveat that I would stop at any point if I felt uncomfortable. Should I ever feel out of my element at any step, or have concerns that removing the textiles from the backing would not keep them intact, I knew I could always pivot to my initial solution of storing the mounted parts in mats.
Treatment
My new plan was now to first reduce the acidic backing board layer by layer. Once the backing was removed, I would assess if it was appropriate to remove the brown paper lining. (While my test treatment was performed on only one of the smaller fragments, images below are pulled from the actual treatment for better illustration).
Low and behold on my first fragment, treatment proceeded without a hitch.
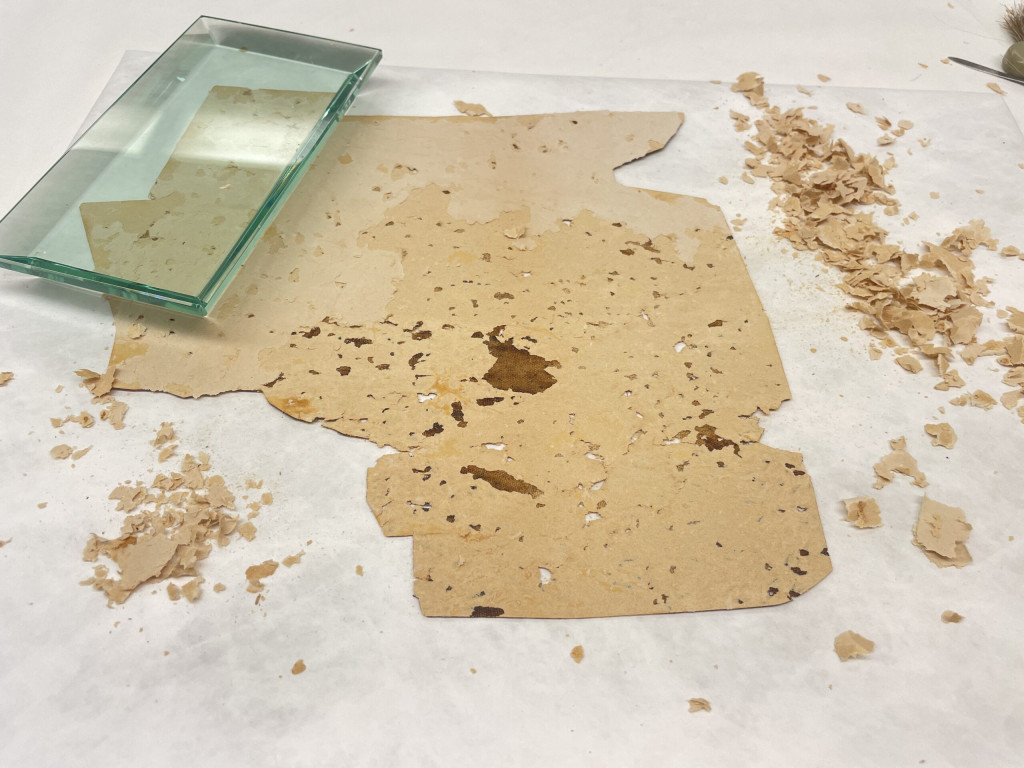
The board was removed slowly, layer by layer. The fragment was kept planar to prevent mechanical damage to the textile.
Before I knew it, it felt as though I was performing a regular backing removal on a photograph or document and soon found myself down to the final brown paper layer.
After removing multiple layers of board, the brown paper lining was revealed. Some areas of the brown paper were no longer adhered to the textile and readily released during mechanical removal while other areas remained more firmly attached.
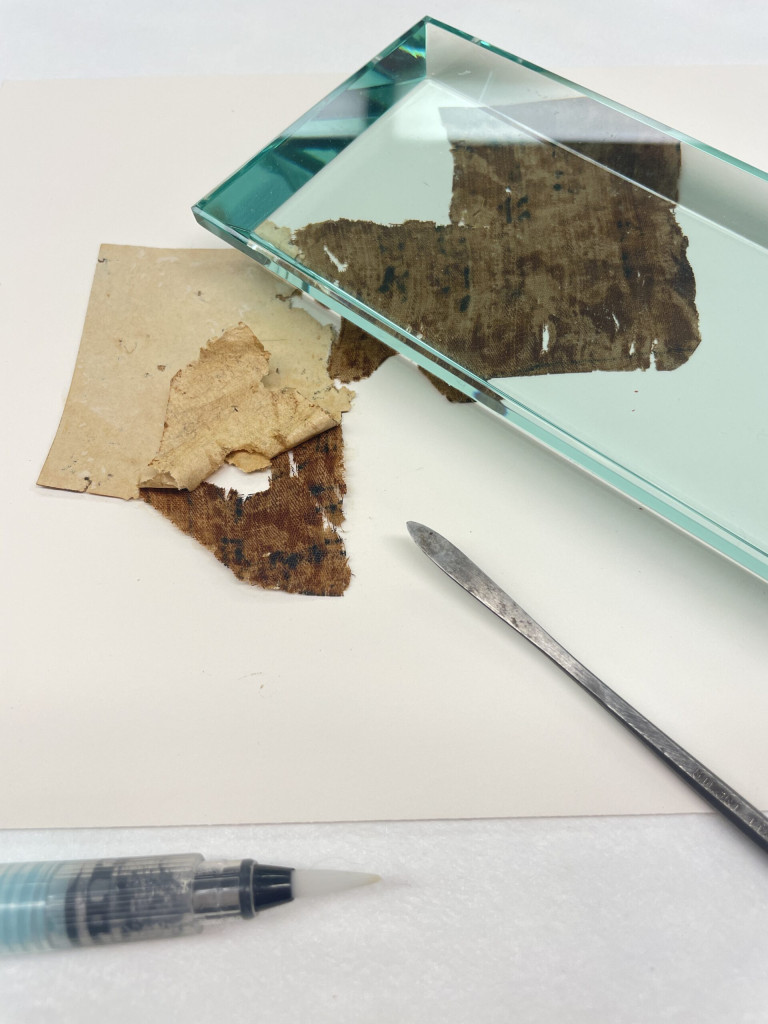
At this point, with the backing and lining parts removed as much as possible, I decided to test a corner of the paper backing with light moisture. To my surprise, the paper backing adhesive quickly reactivated, the lining lifted with little effort, and the humidification strengthened the fibers of the linen fragment. All of this eased fears the fragments might fracture during final treatment steps. Proceeding with treatment felt obtainable.
The final step was releasing the brown paper lining with moisture from a water pen and lifting the lining with spatulas.
With this new turn of events, I realized, if I ventured so far as to remove both the mounted board AND the paper backing, I’d need a new storage solution.
I halted treatment and went back to the drawing board to research storage enclosures (click here to jump to my post on storage solutions). Once I felt confident in selecting a method of storage for the loose textiles, I resumed treatment to remove the brown lining paper and proceeded with treatment on the rest of the fragments.
This is a time-lapse video showing how the brown paper lining was removed in stages. Localized humidification was applied from the back while mechanically separating the paper from the textile with spatulas.
Before Treatment
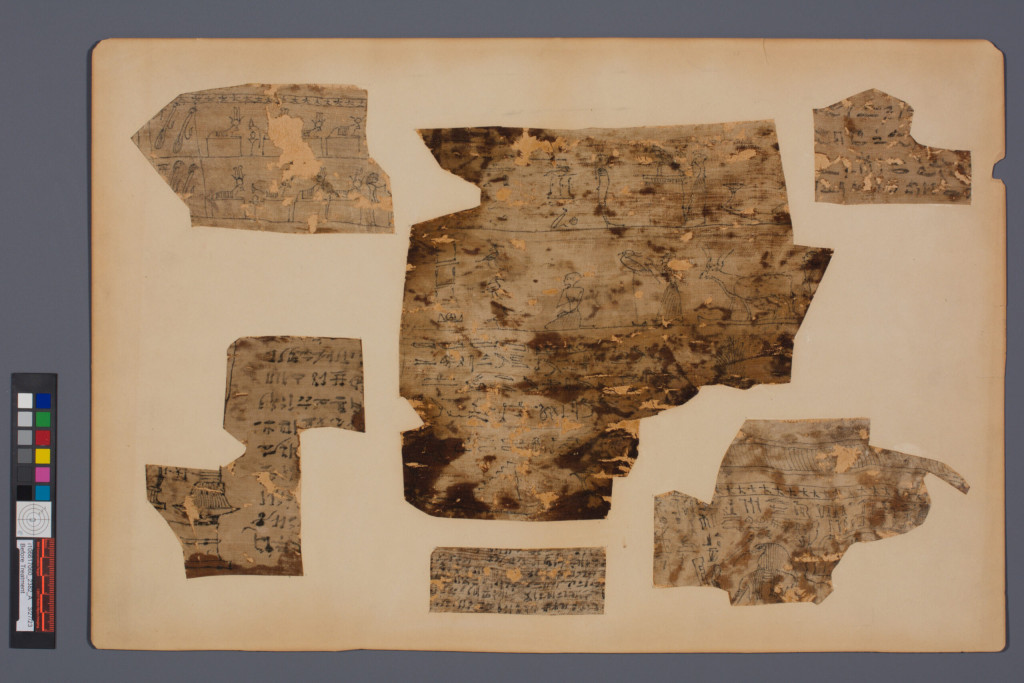
Collection is mounted to an acidic board with two of the fragments oriented upside down.
Normal Illumination, Before Treatment
After Treatment
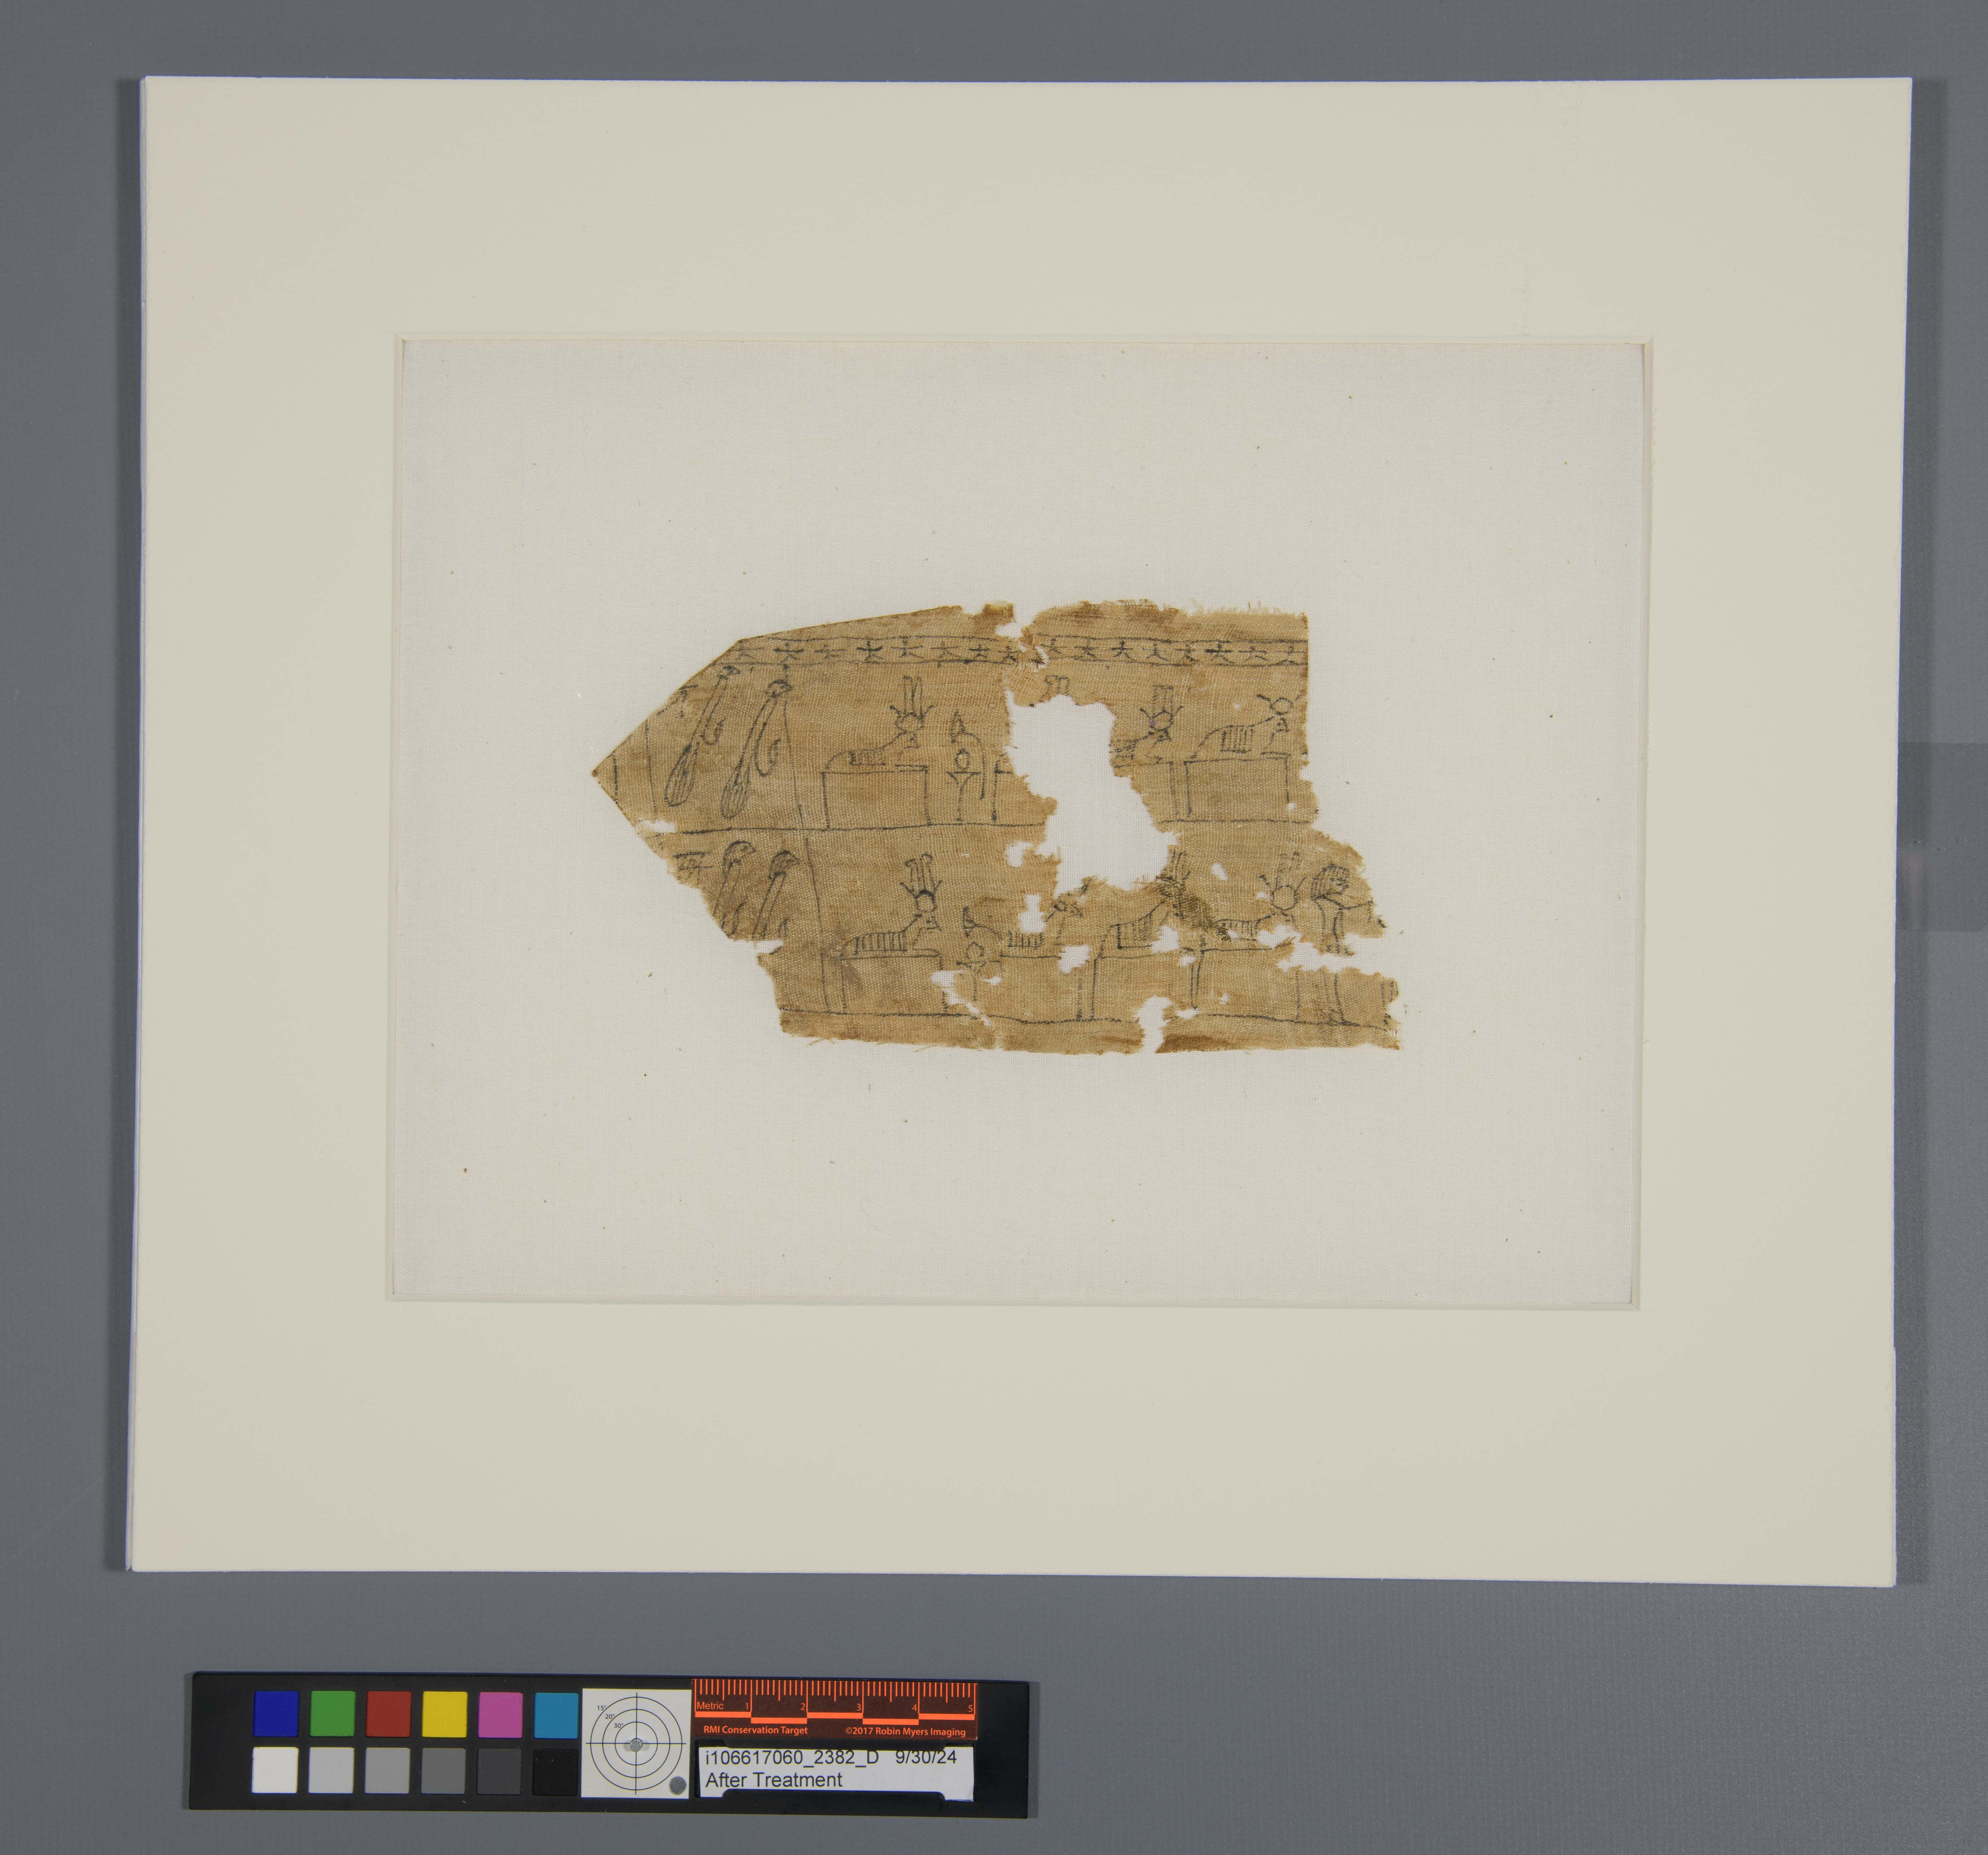
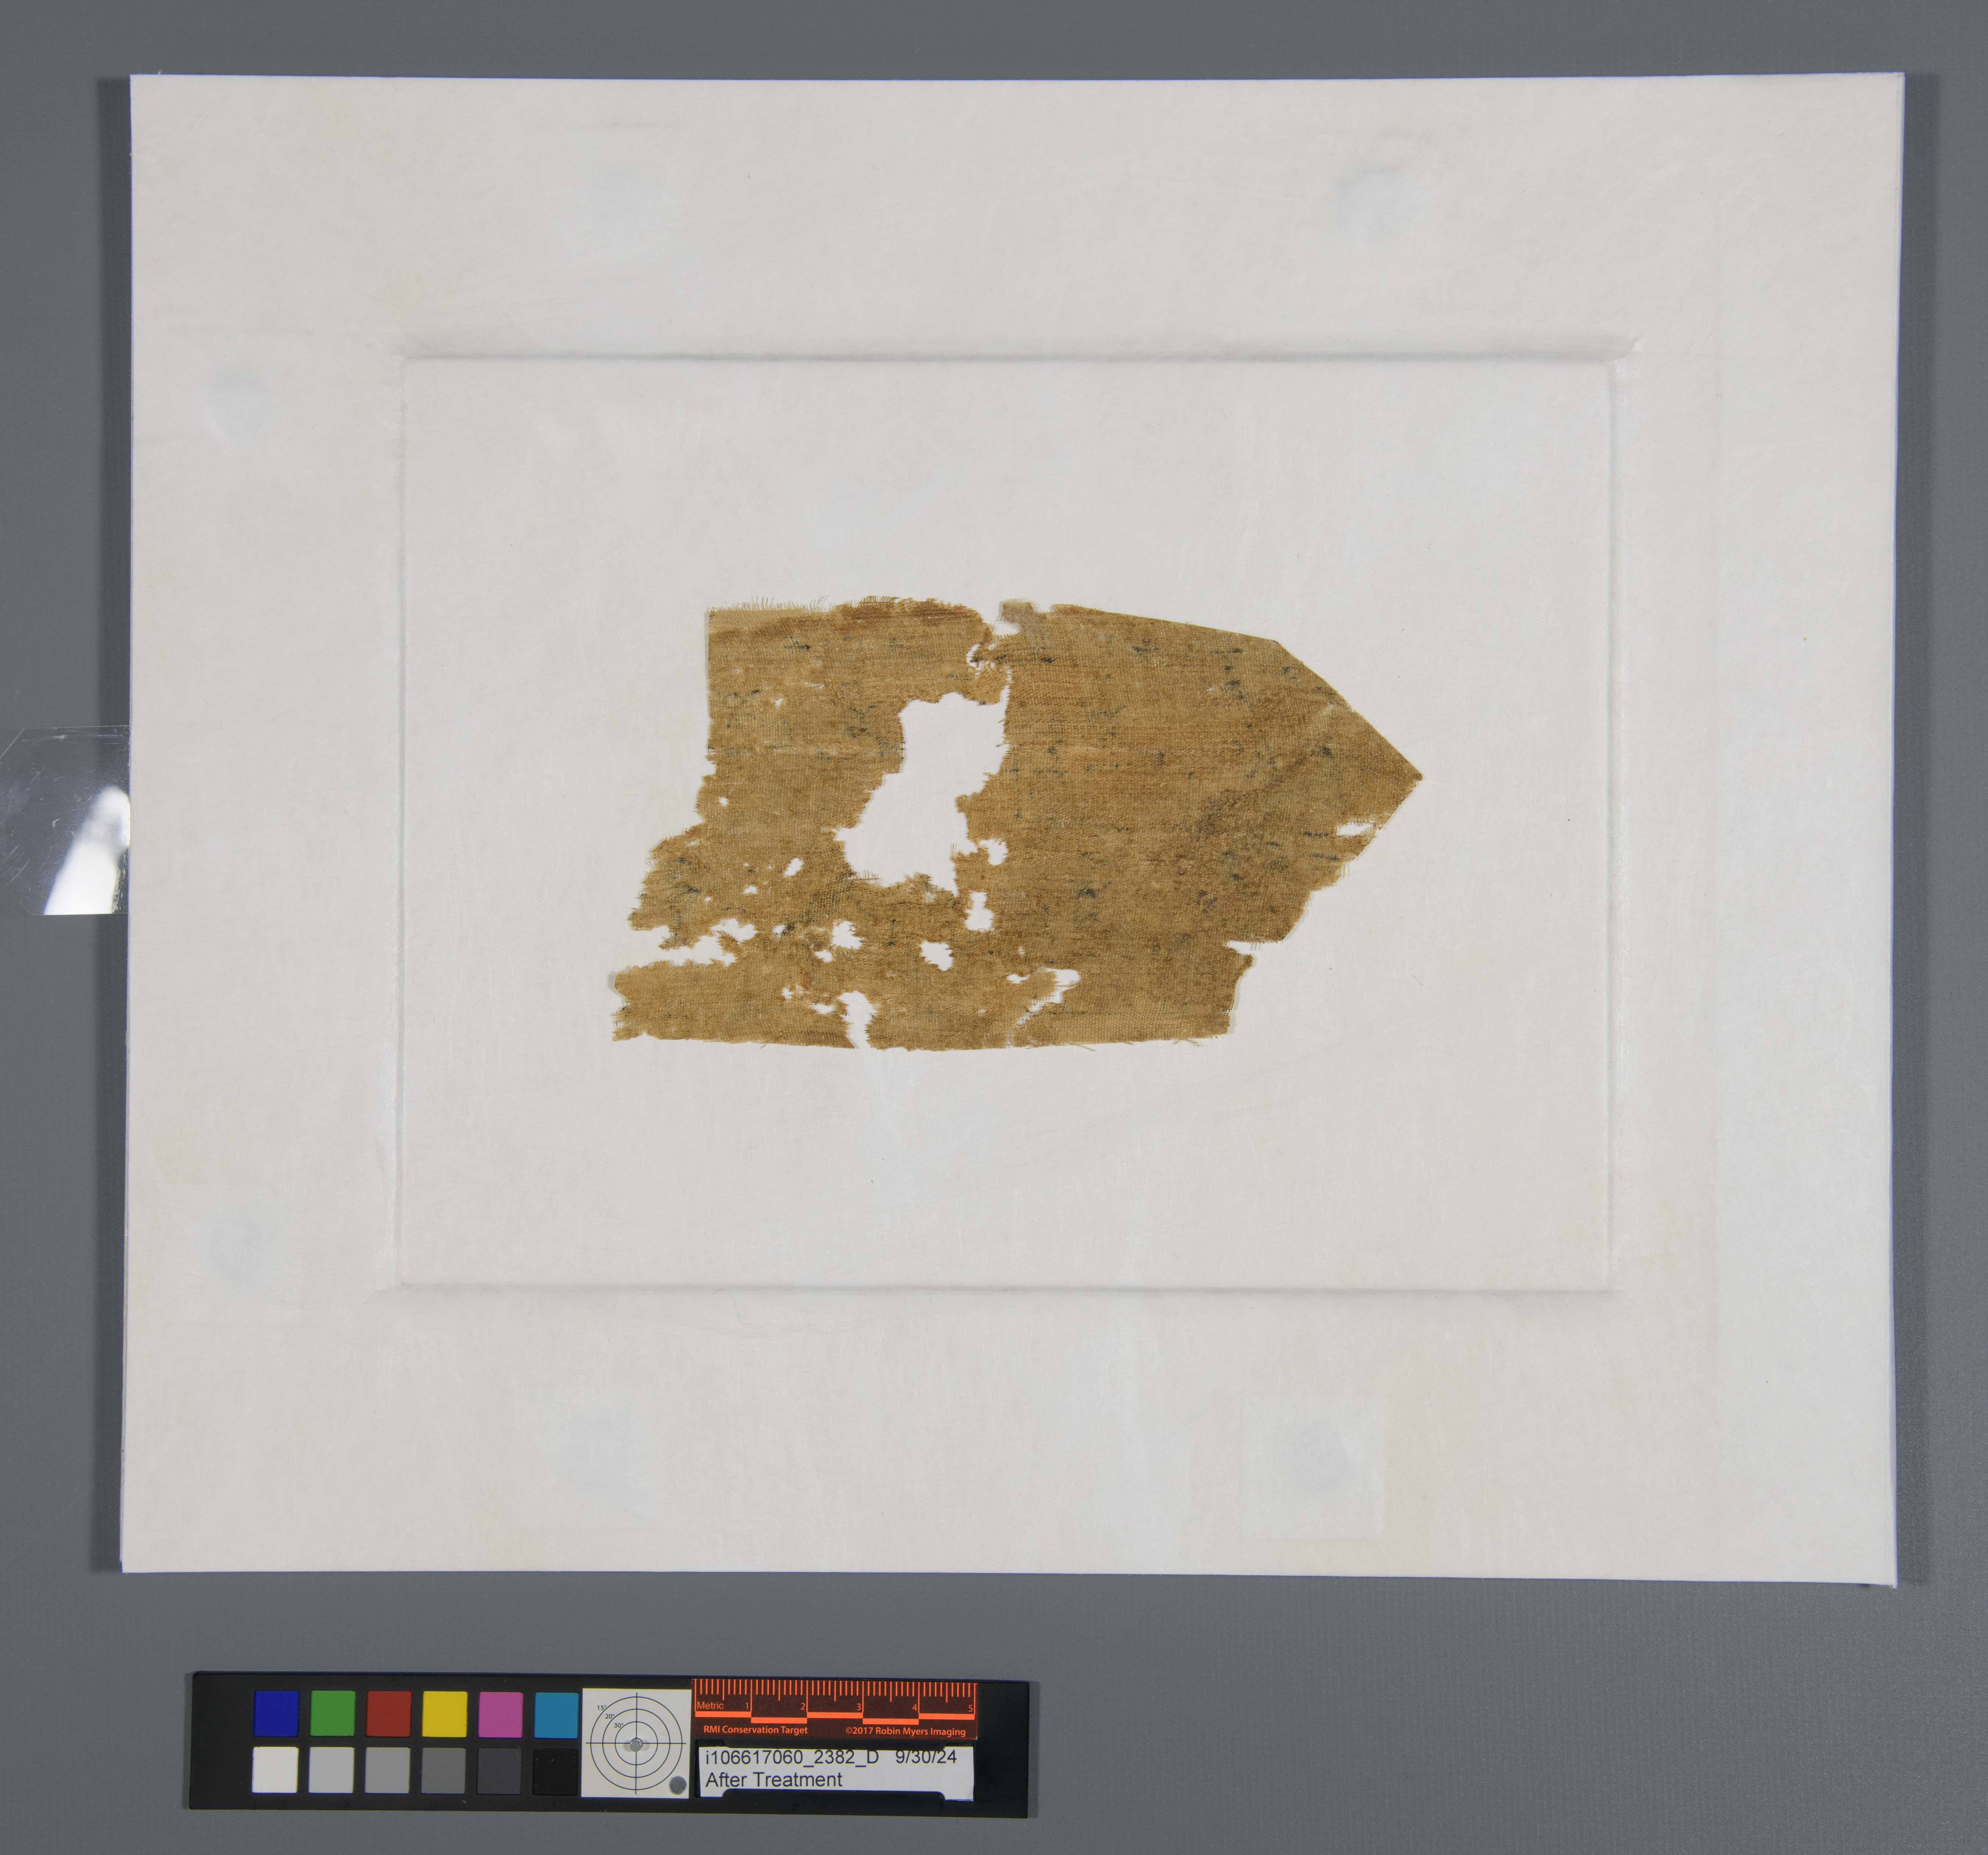
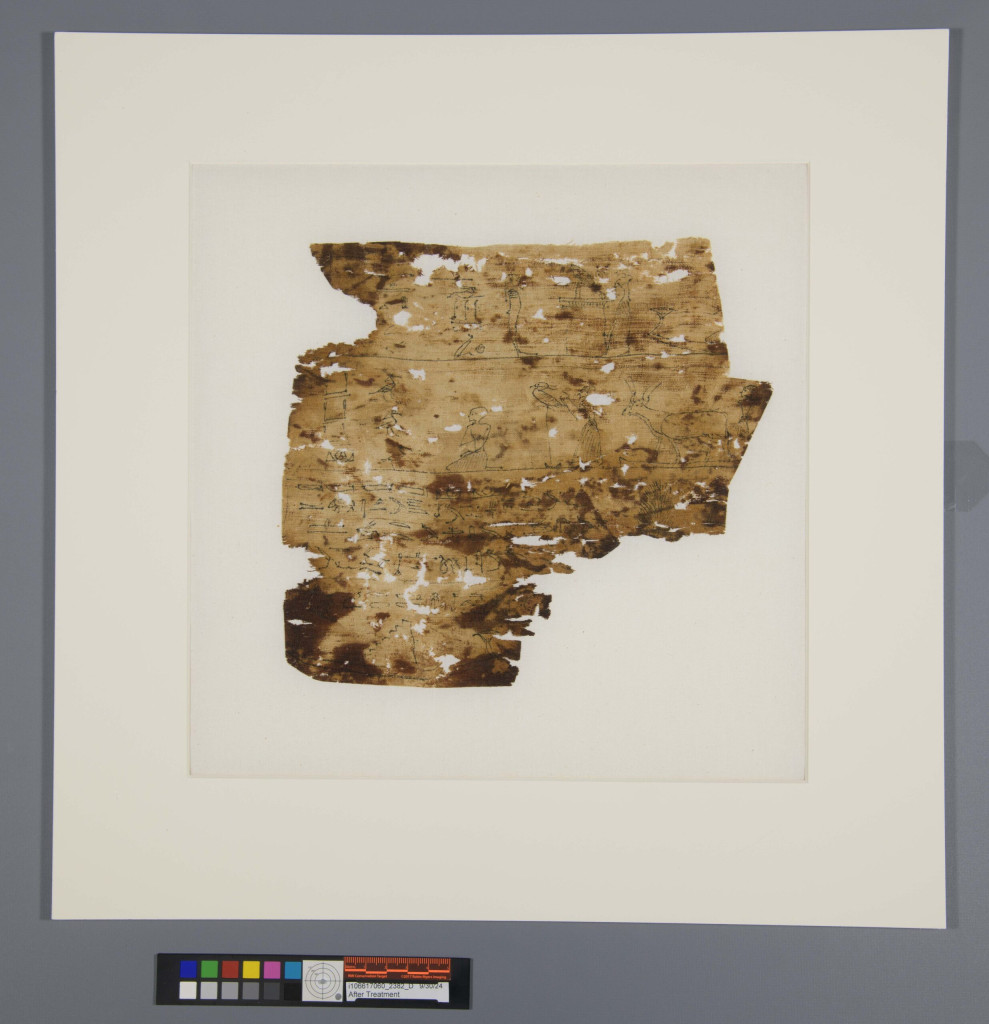
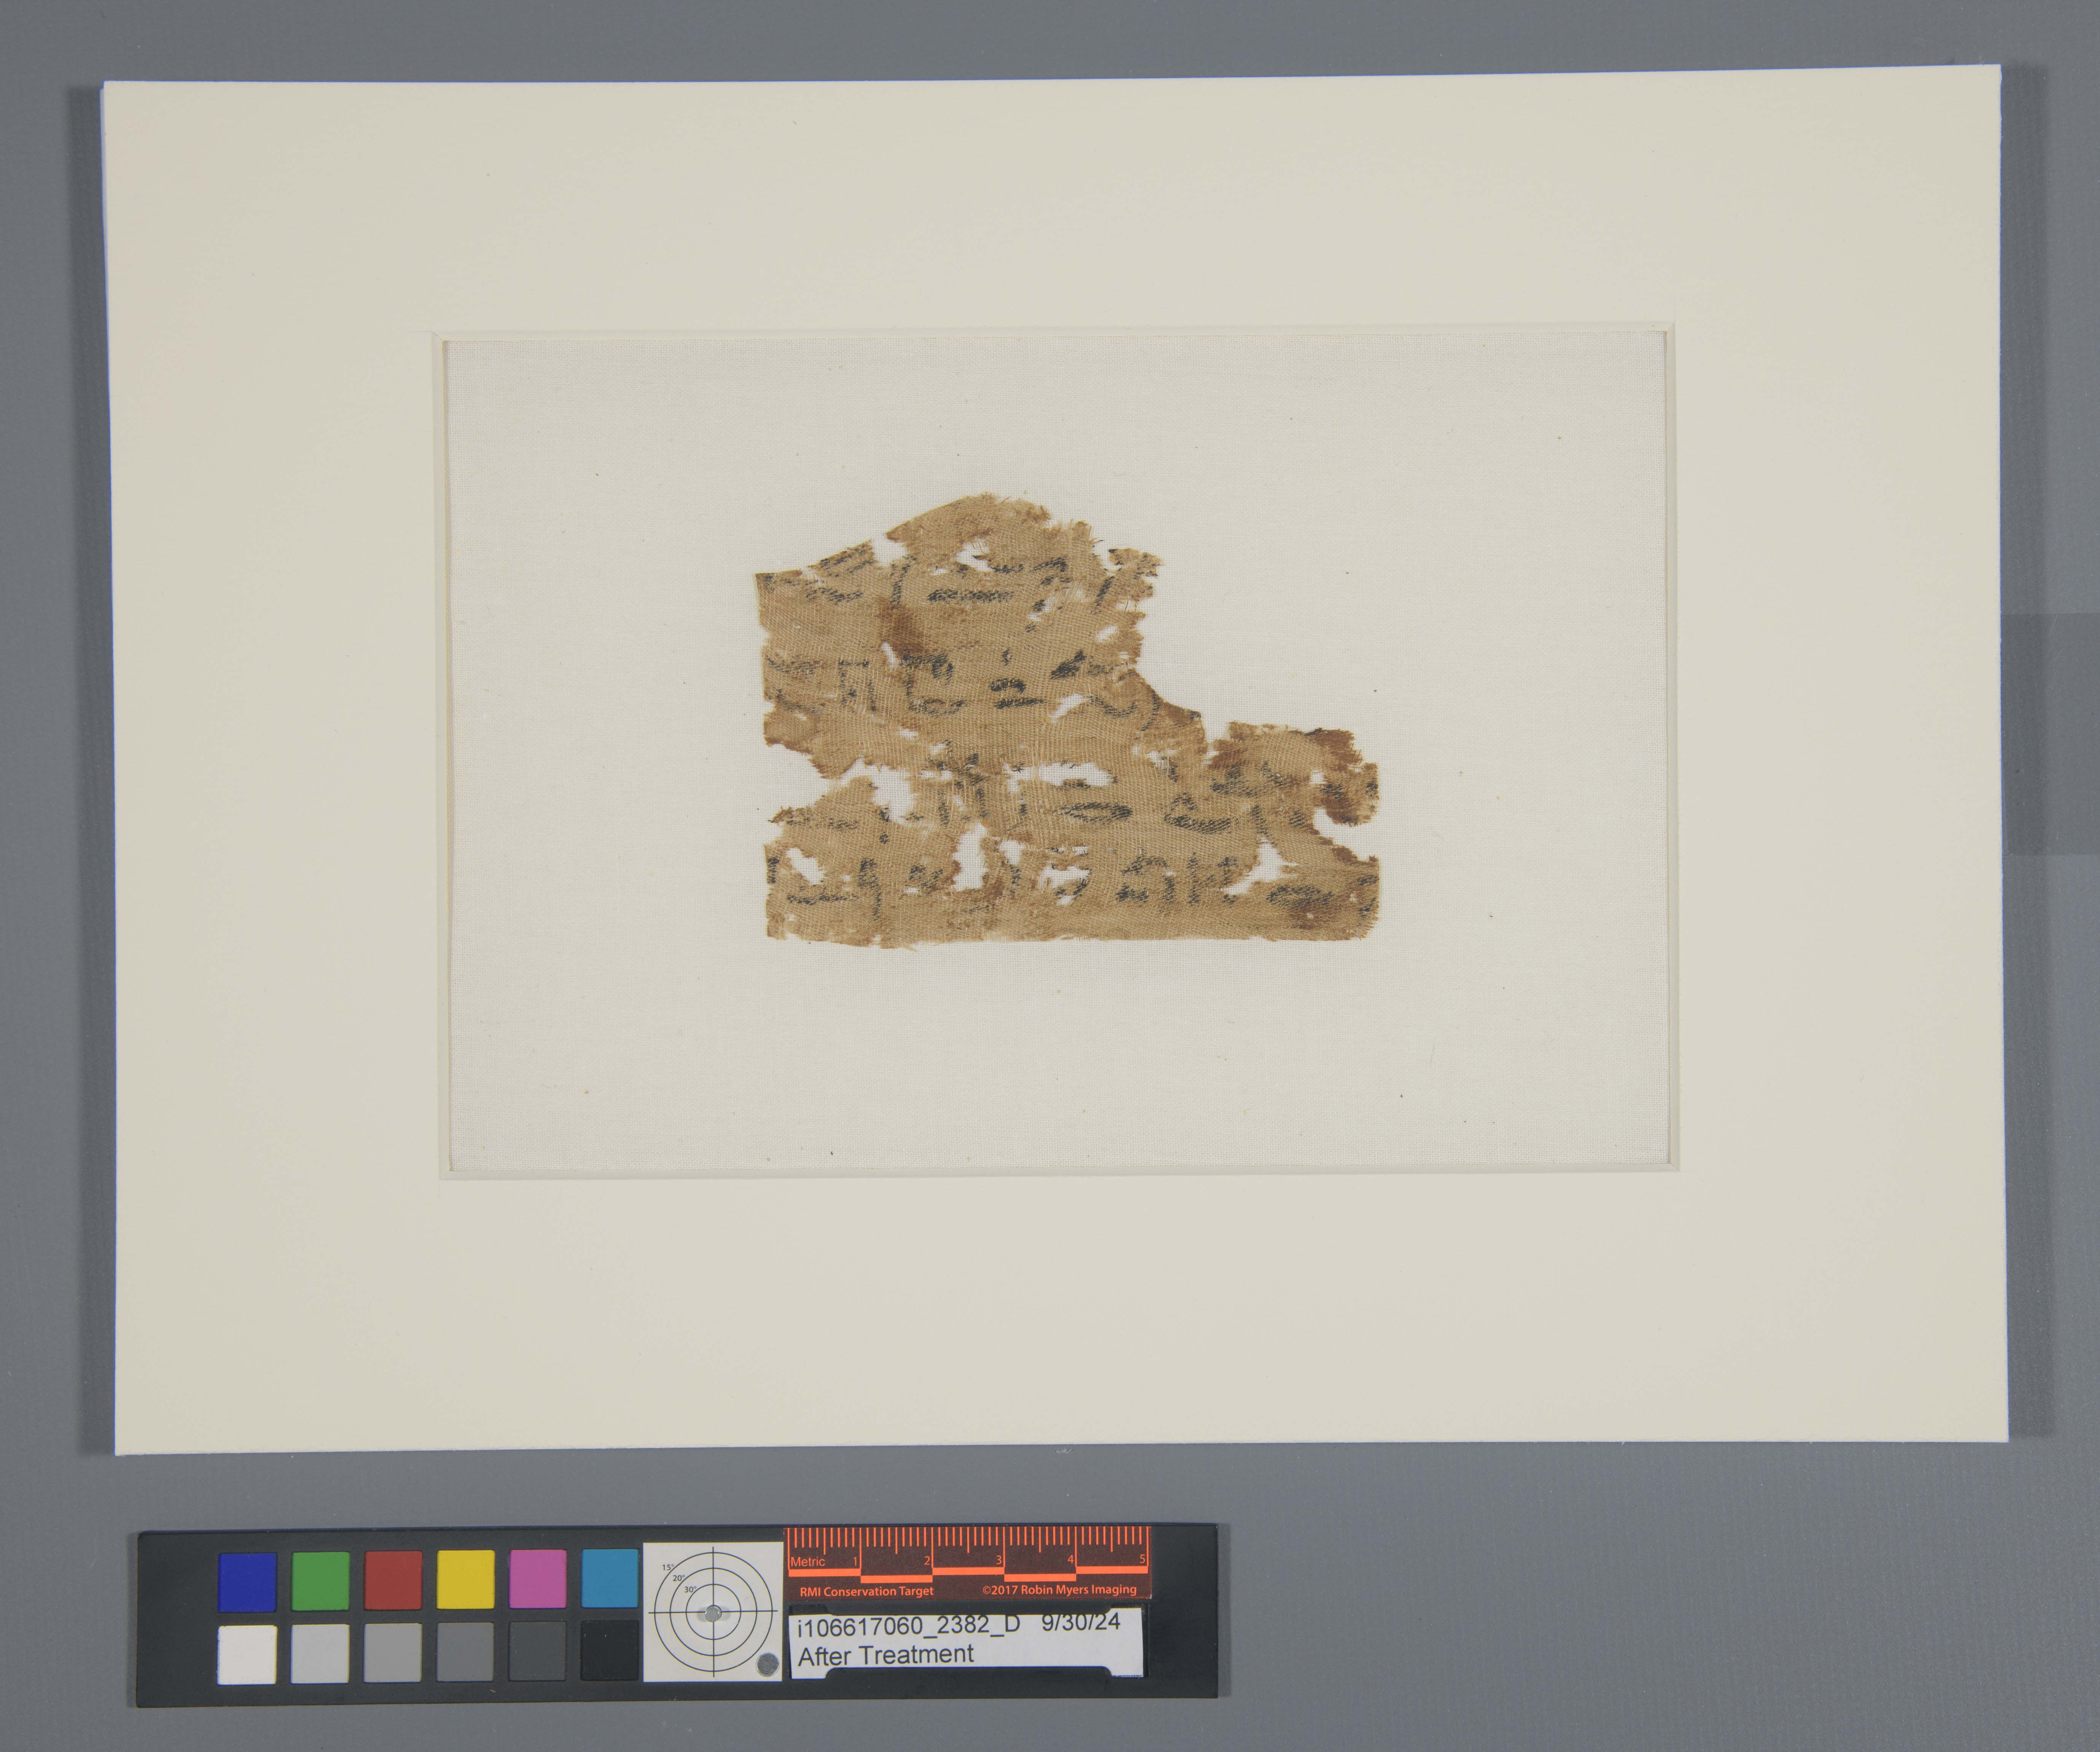
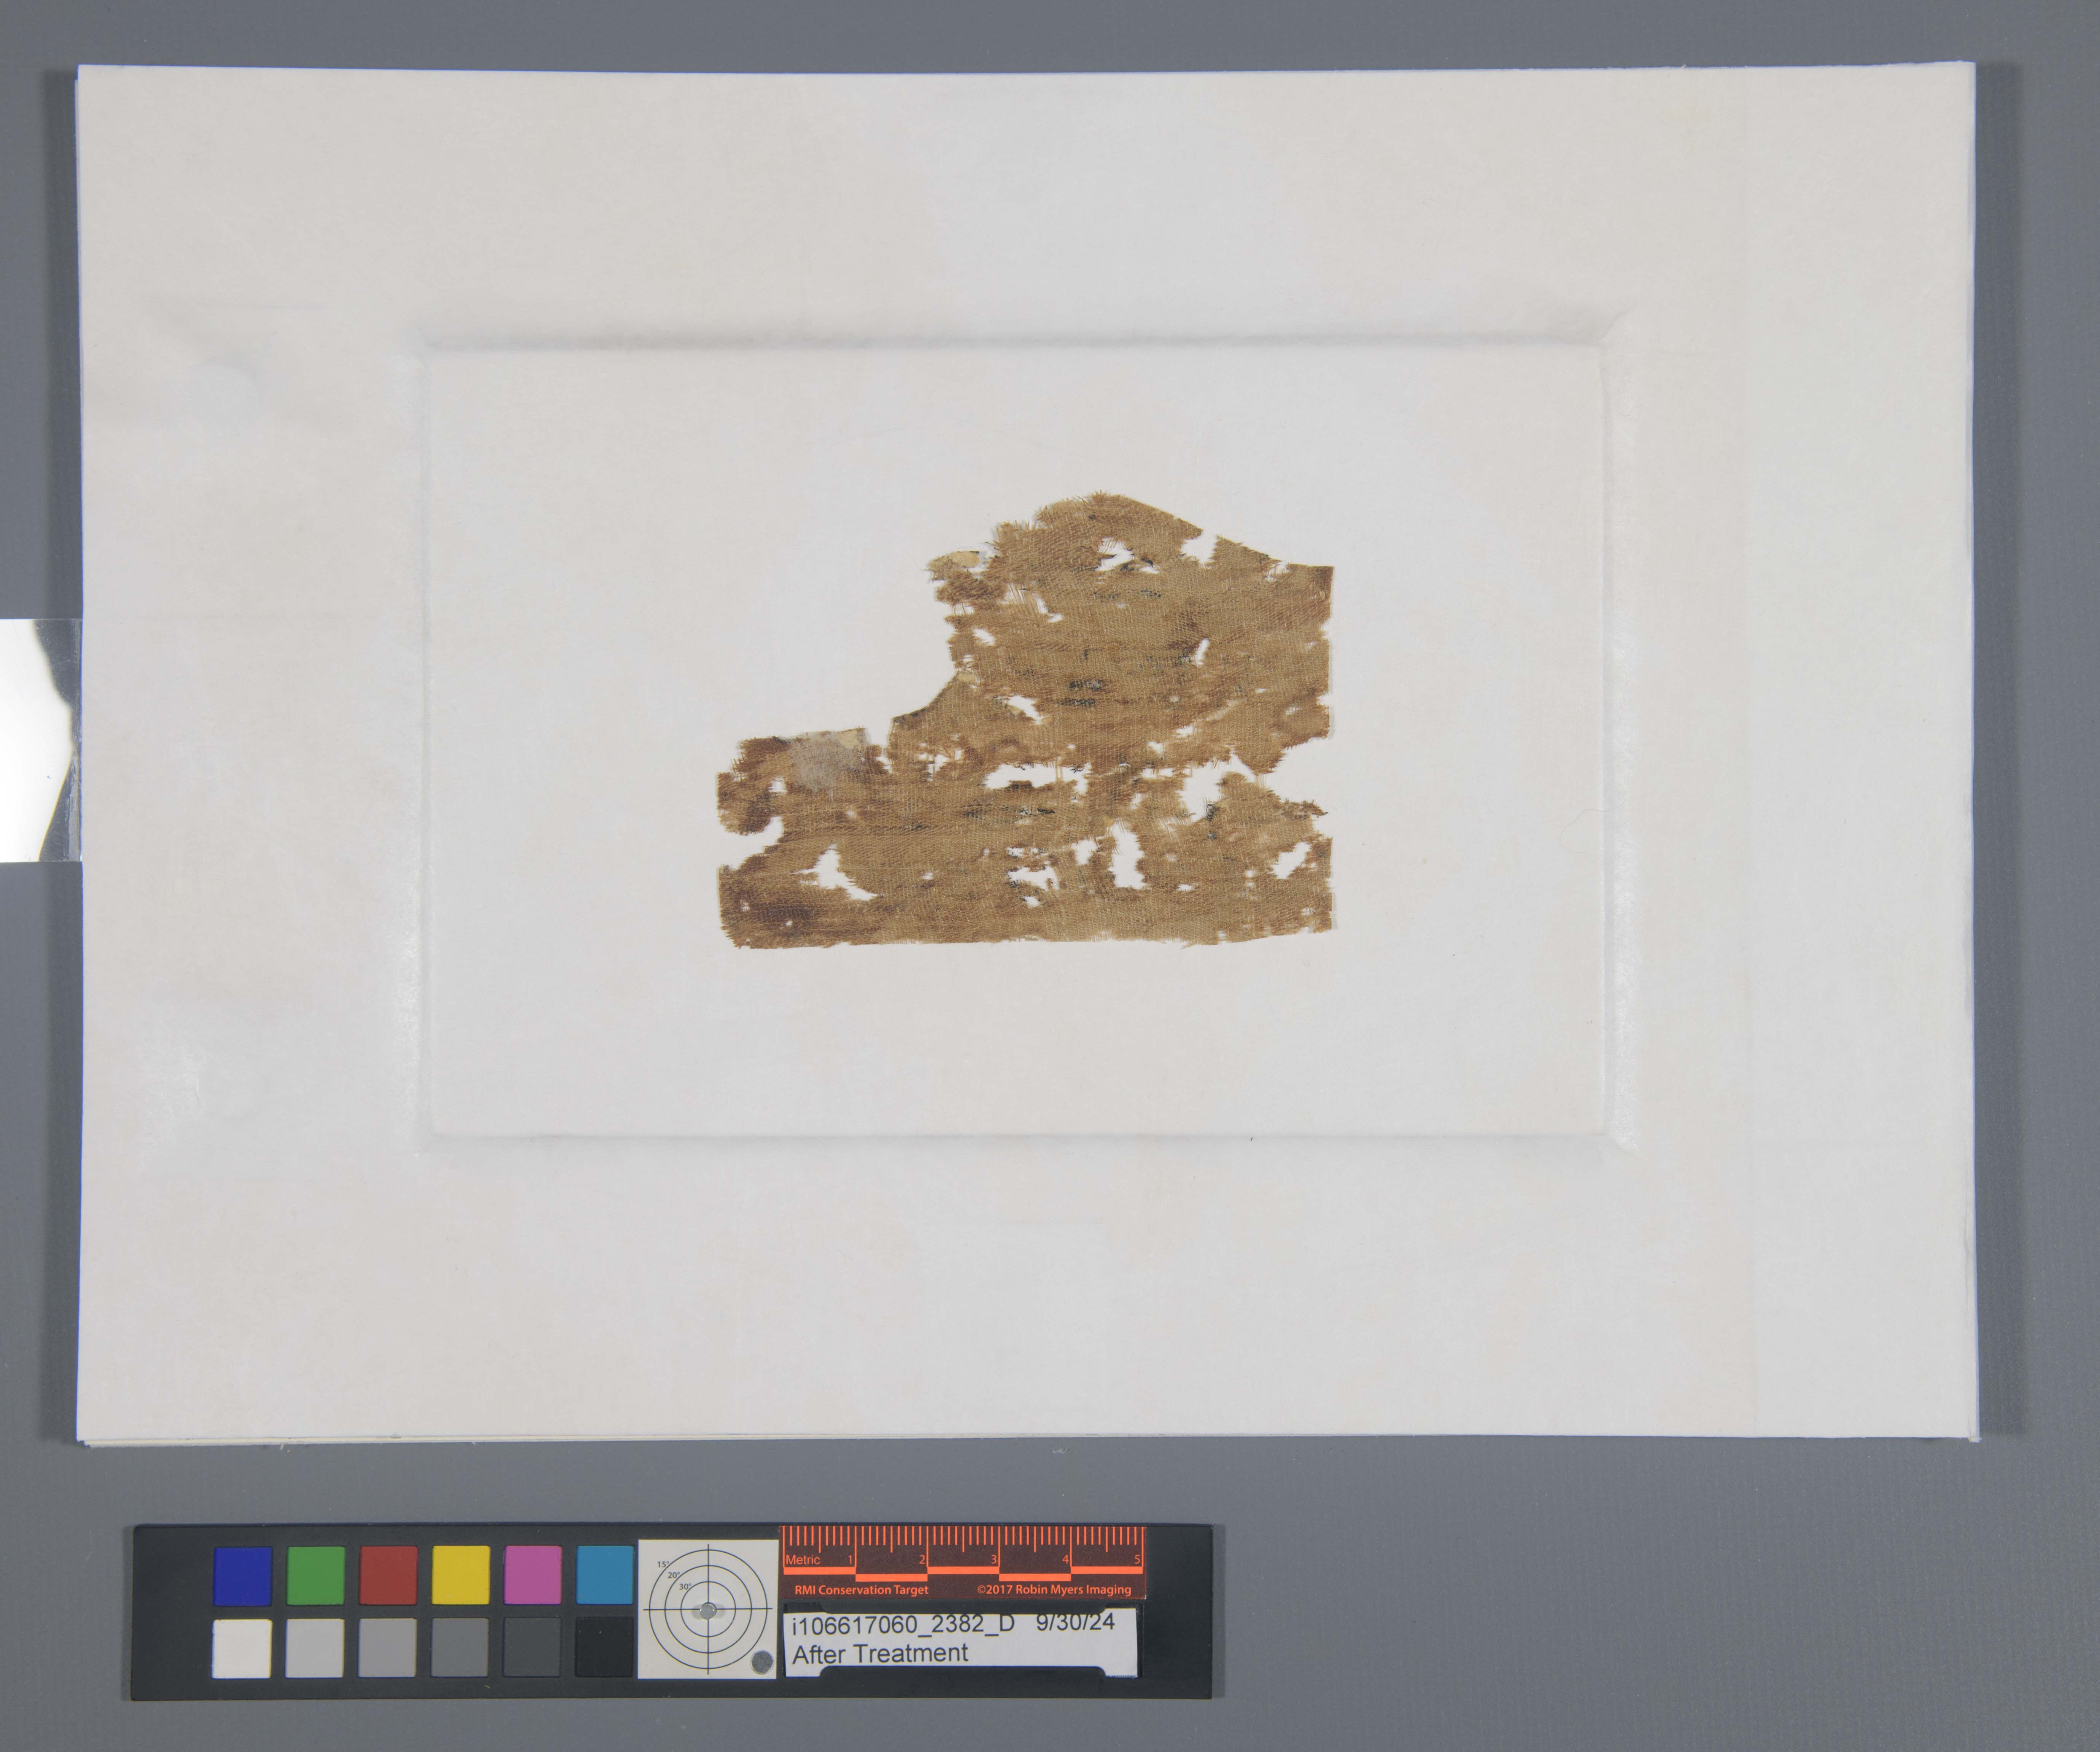
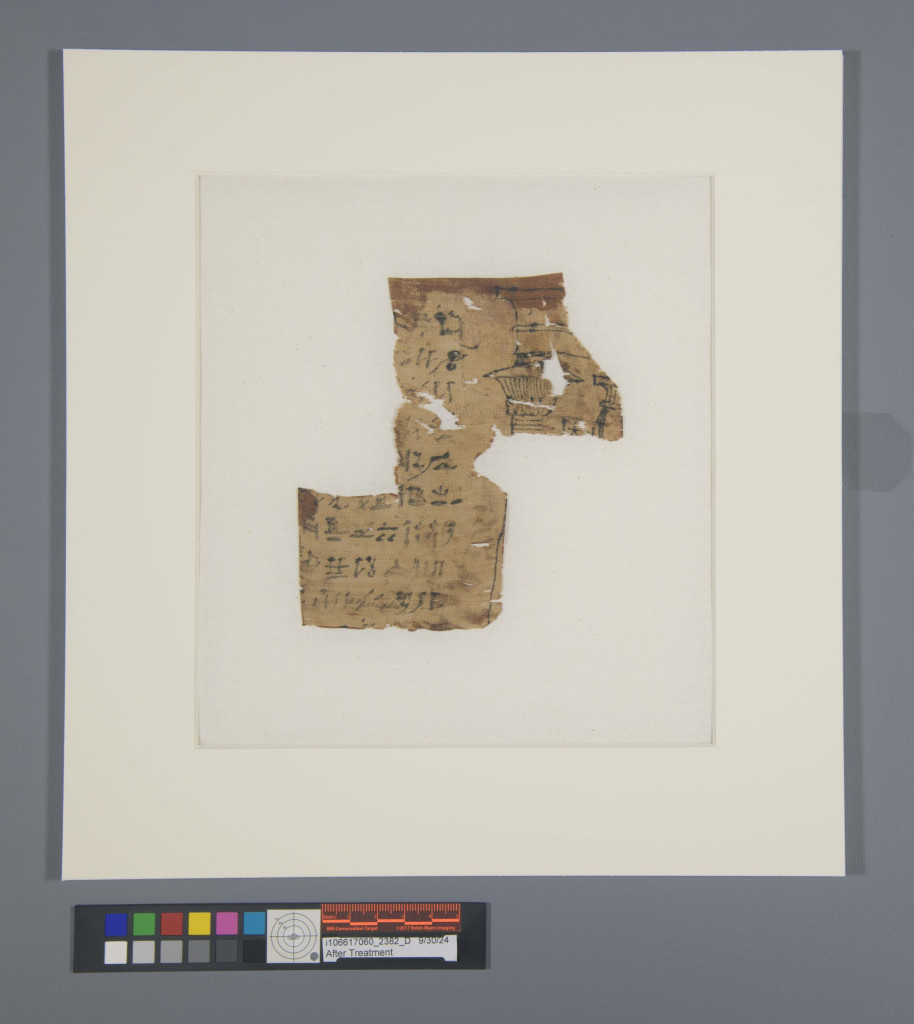
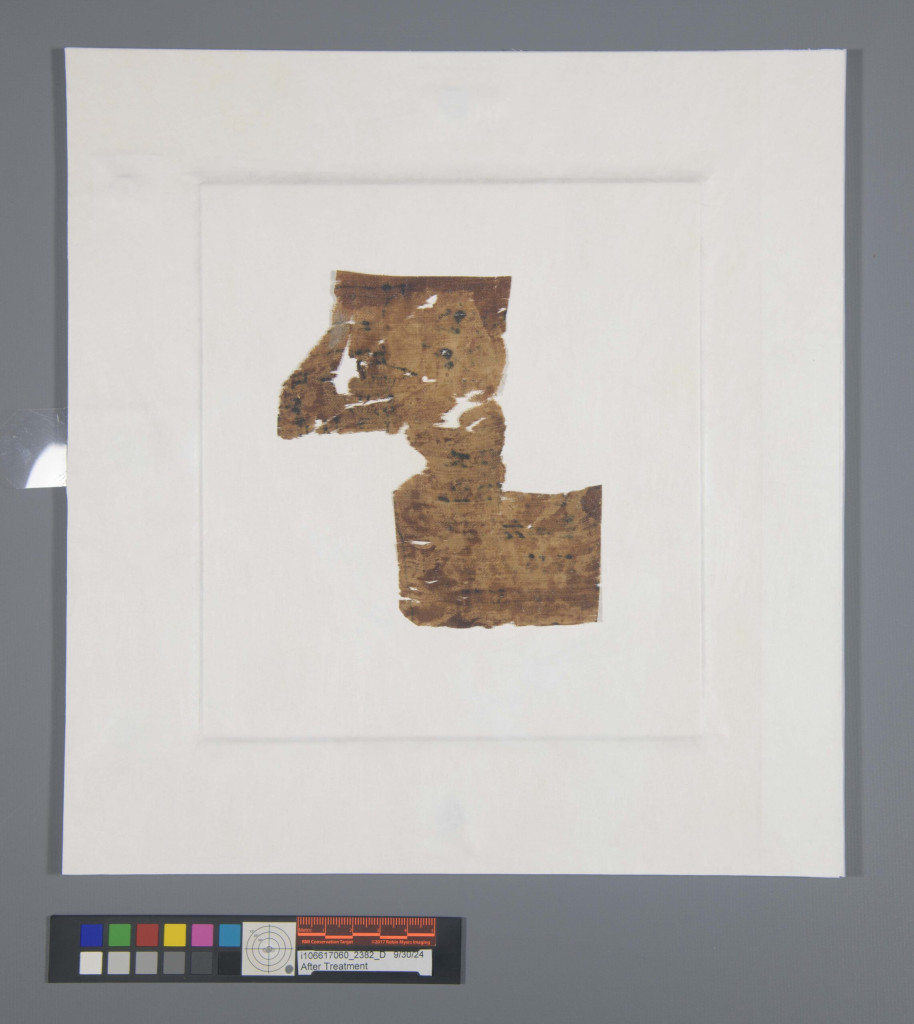
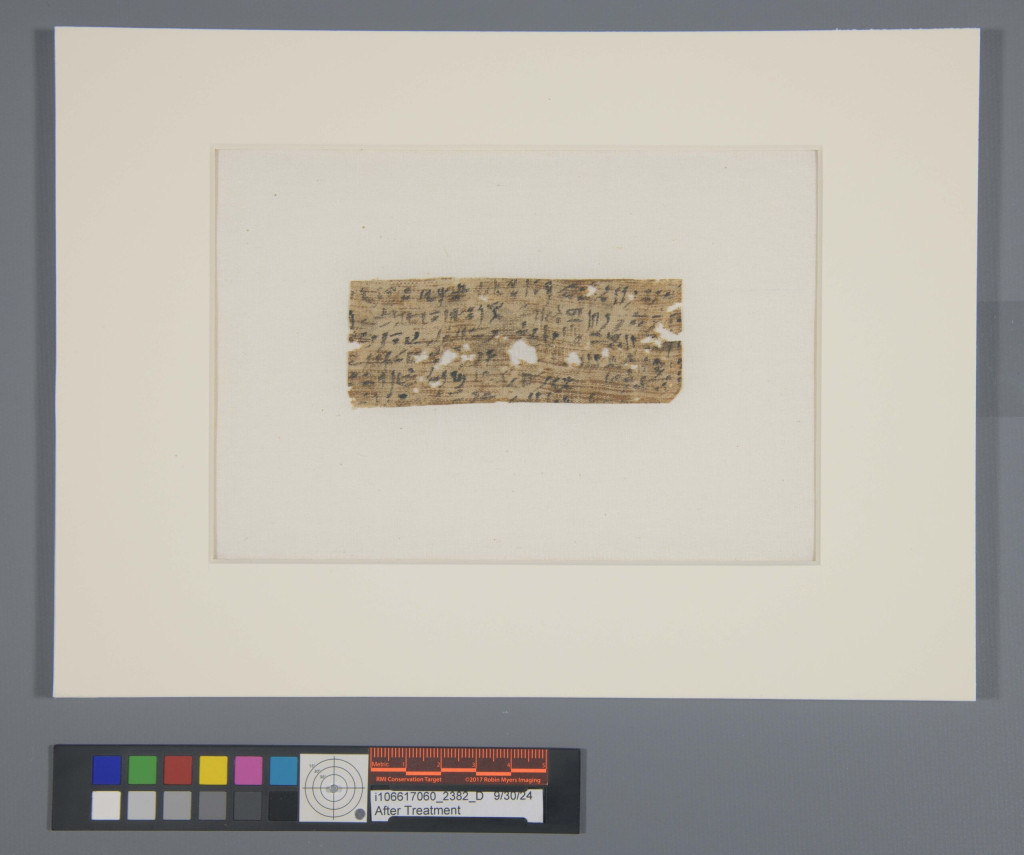
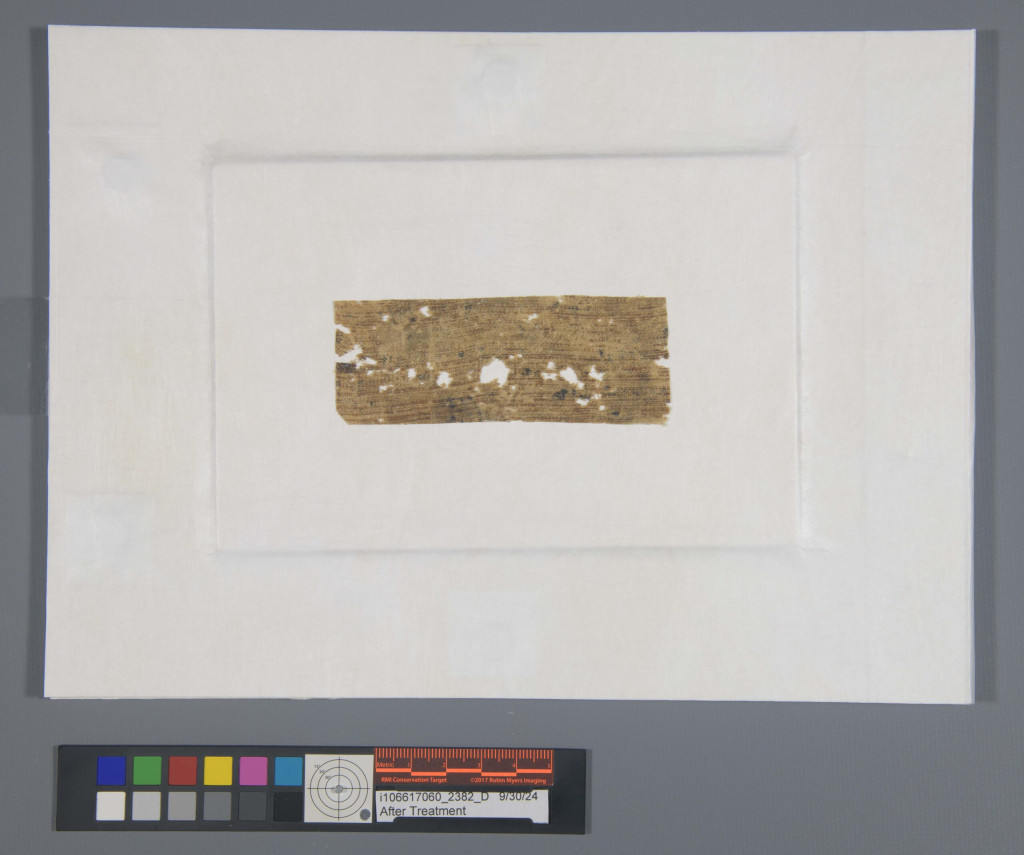
Fragments are stored individually in storage solutions that double as long-term housing. The enclosures facilitate handling as well as display. Being stored individually, the fragments are able to be grouped as necessary by their context.
When a collection of Egyptian mummy bandage fragments at the Cincinnati and Hamilton County Public Library was found in an area used to store uncatalogued flat materials, the lab was asked to play a role in providing better stewardship.
Click the links below to jump to the following posts:
History – Historical information provided about the Egyptian inscriptions
Treatment – How the materials were treated after learning about their content
Storage Solutions – Individual solutions for separated fragments as well as storage as a collection
Learning About the Collection
Before coming to the lab, the library knew little about the fragments. So first and foremost, I reached out to a handful of scholars to see if I could glean any information. I soon found myself engulfed in a journey of discovery with each colleague leading me to a new reference, sharing a collective wealth of knowledge.
History
With generous information provided by colleagues, the library learned the following about the fragments (fragment measurements below are with height and width at the widest points):
Normal Illumination
Raking Illumination
Ultraviolet Fluorescence
Infrared Radiation
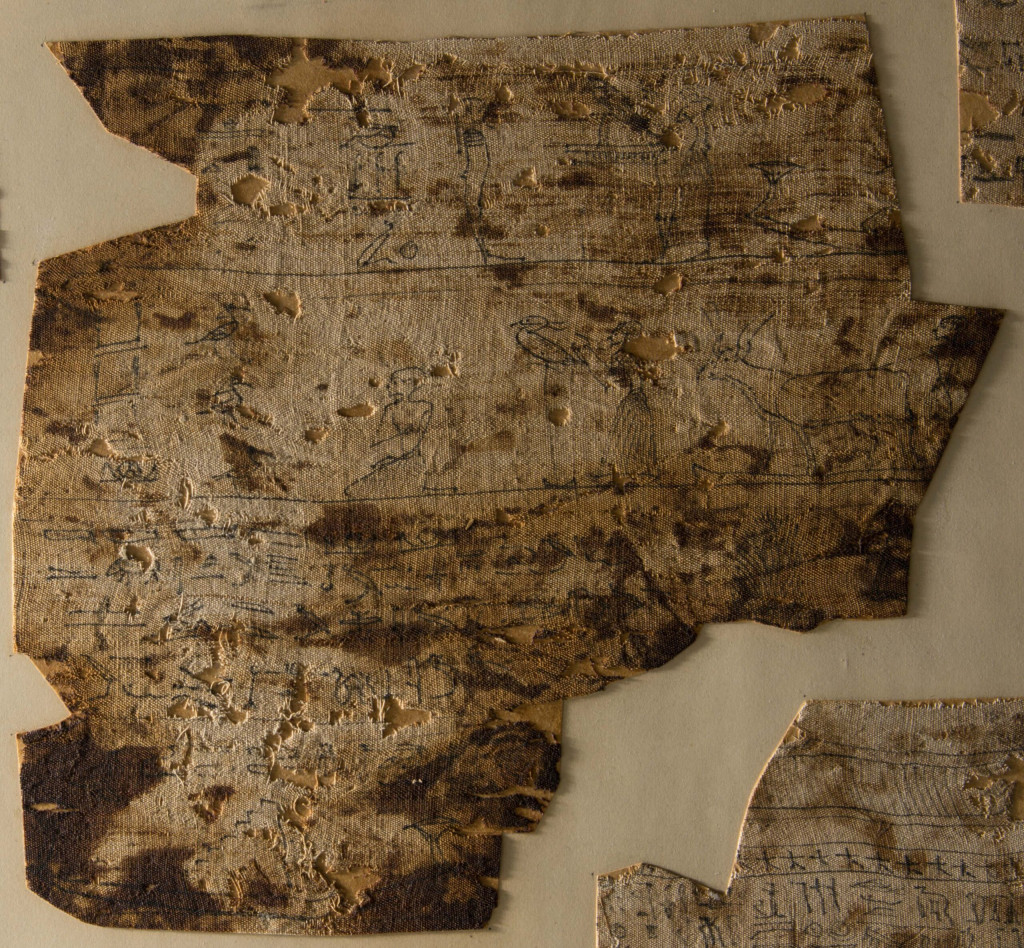
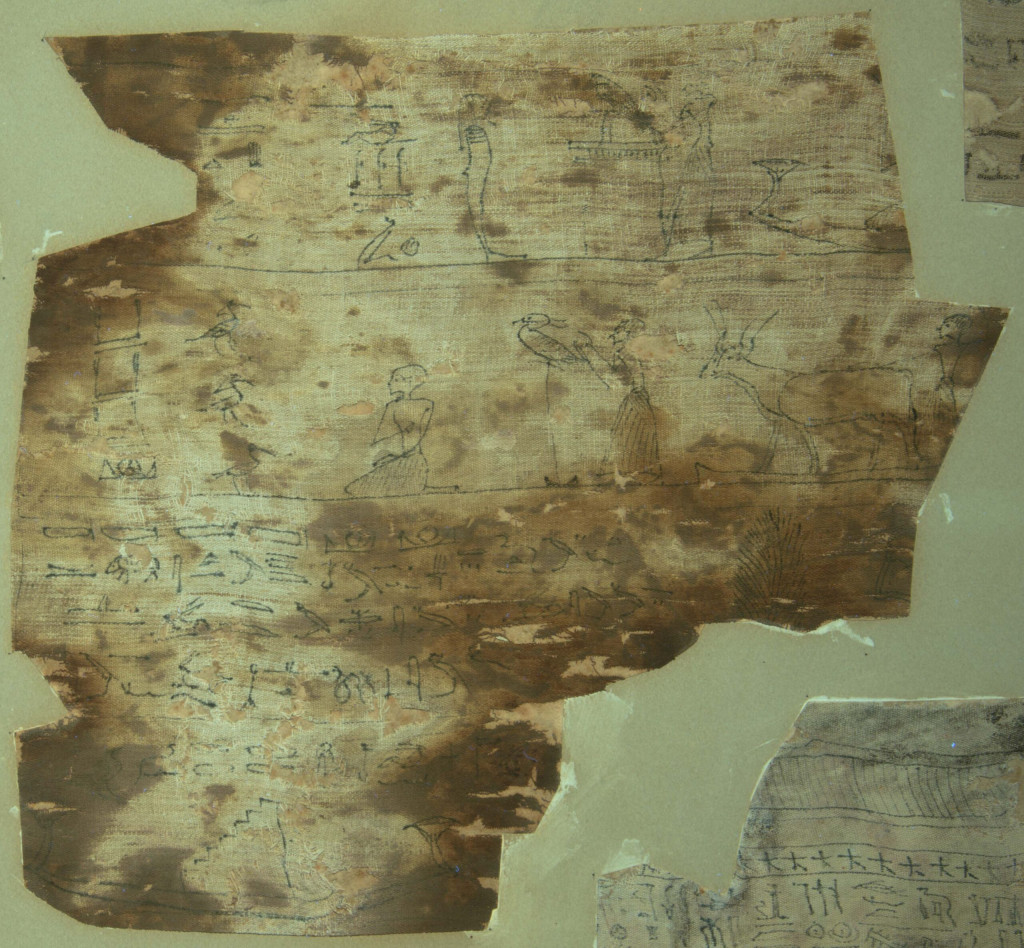
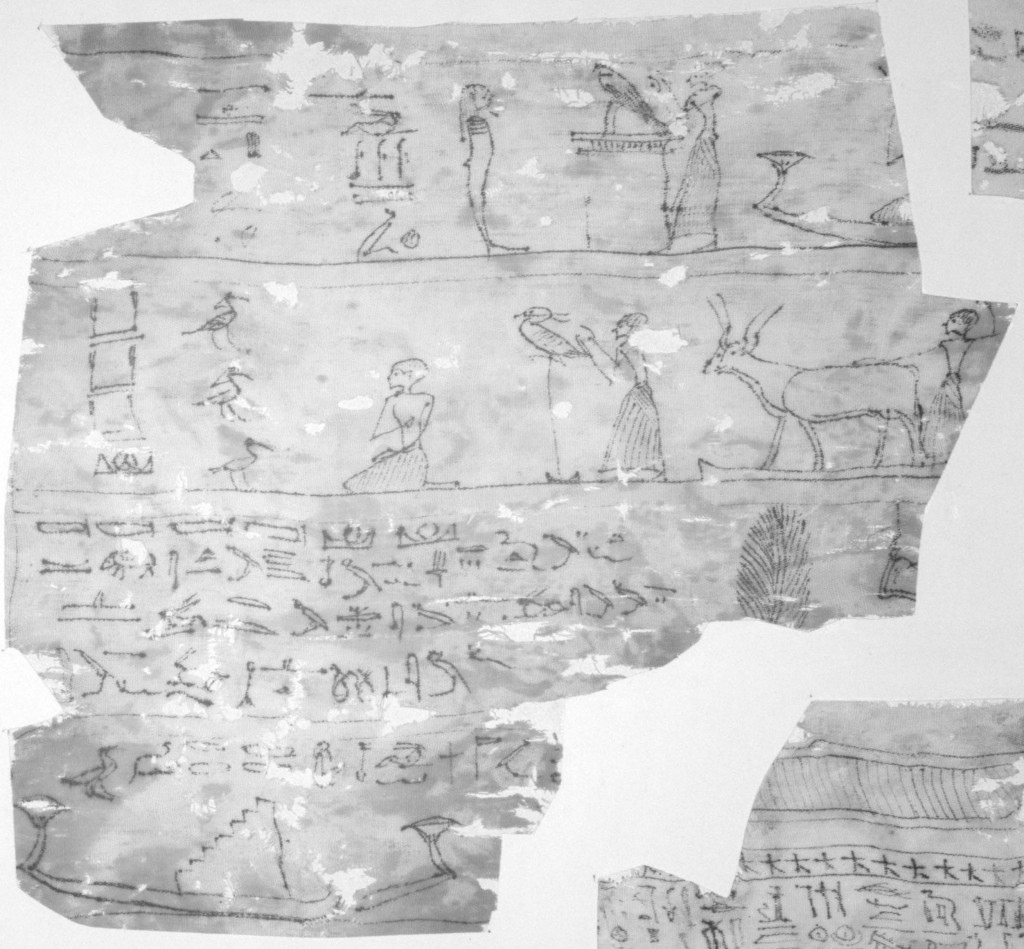
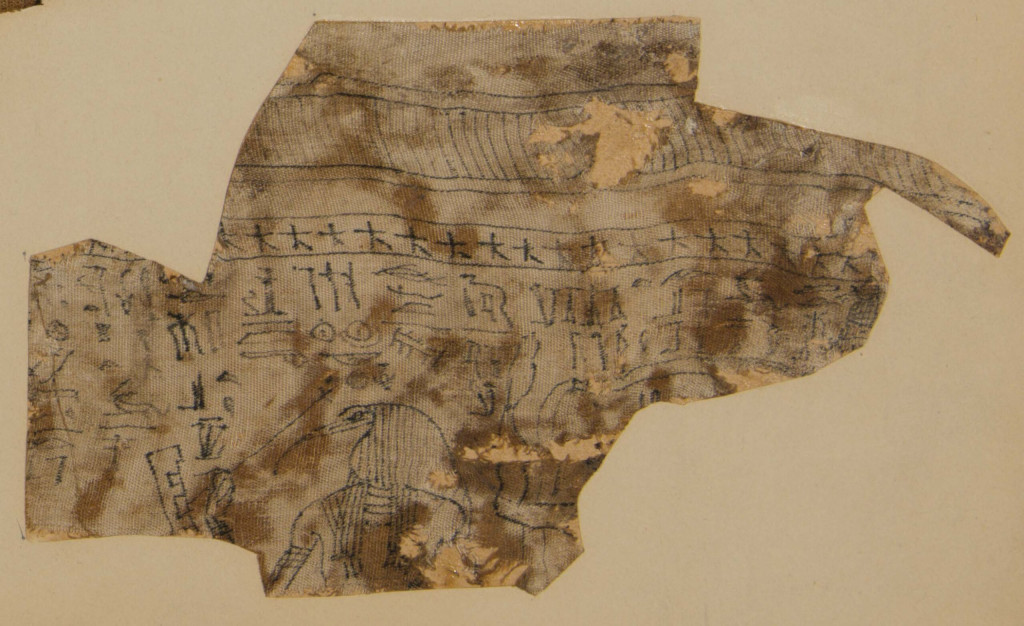
This is the center fragment. It contains Hieroglyphic script, measuring 21 x 23 cm. It’s part of a 3-piece set that belonged to a priest called Wennofer. The large scene in the middle belongs to Book of the Dead Spell 110 showing the deceased doing various things in the netherworld.
Normal Illumination
Raking Illumination
Ultraviolet Fluorescence
Infrared Radiation
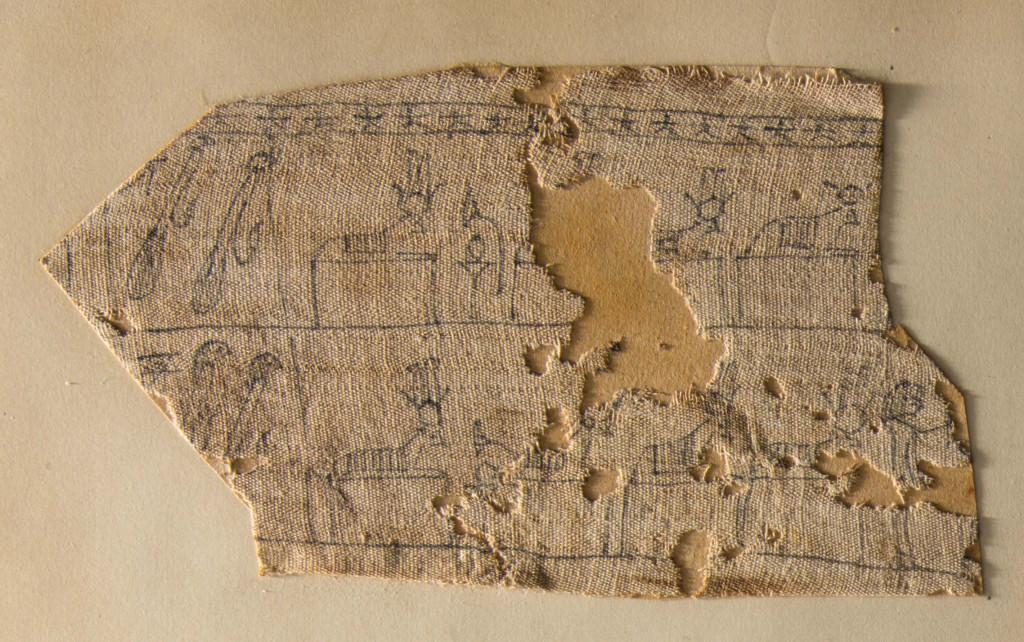
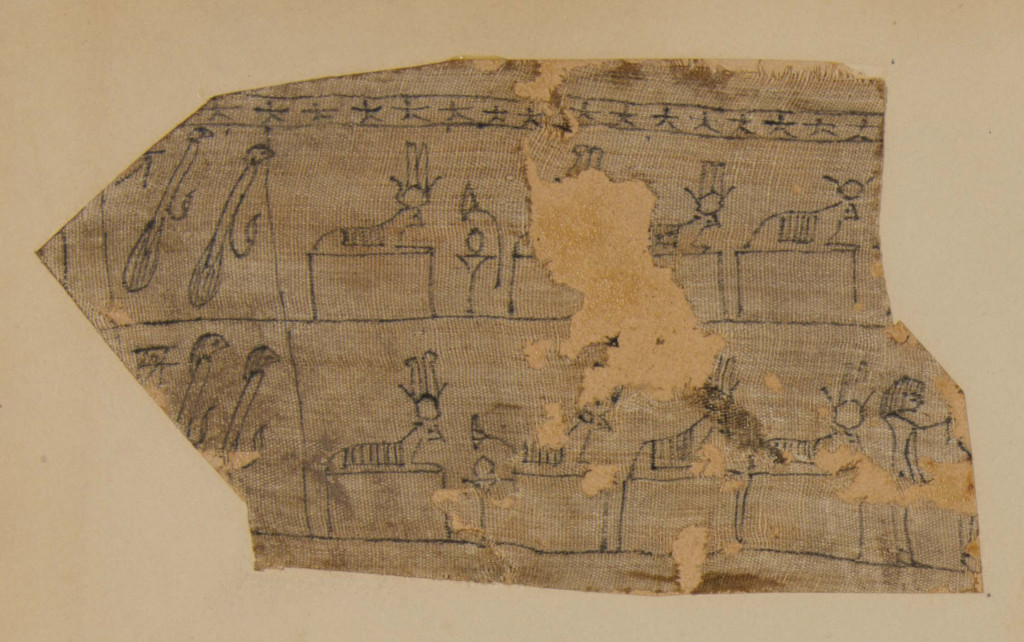
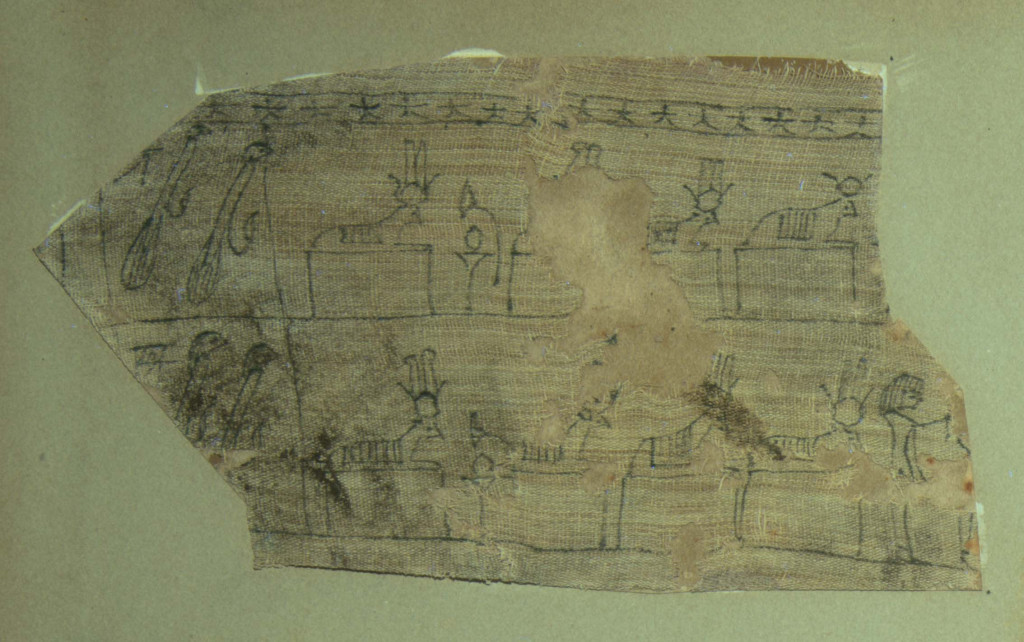
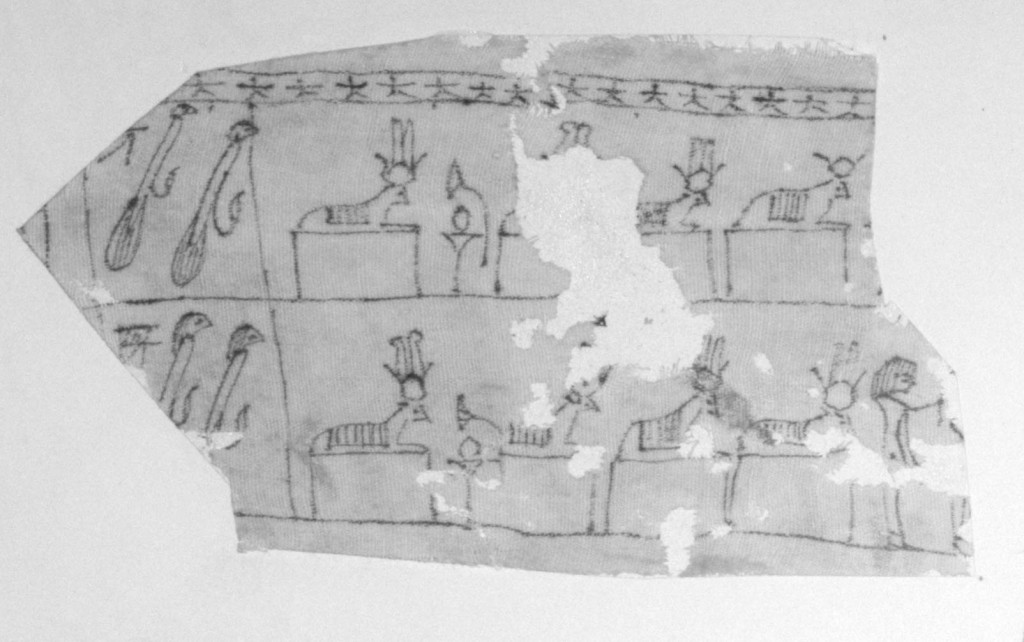
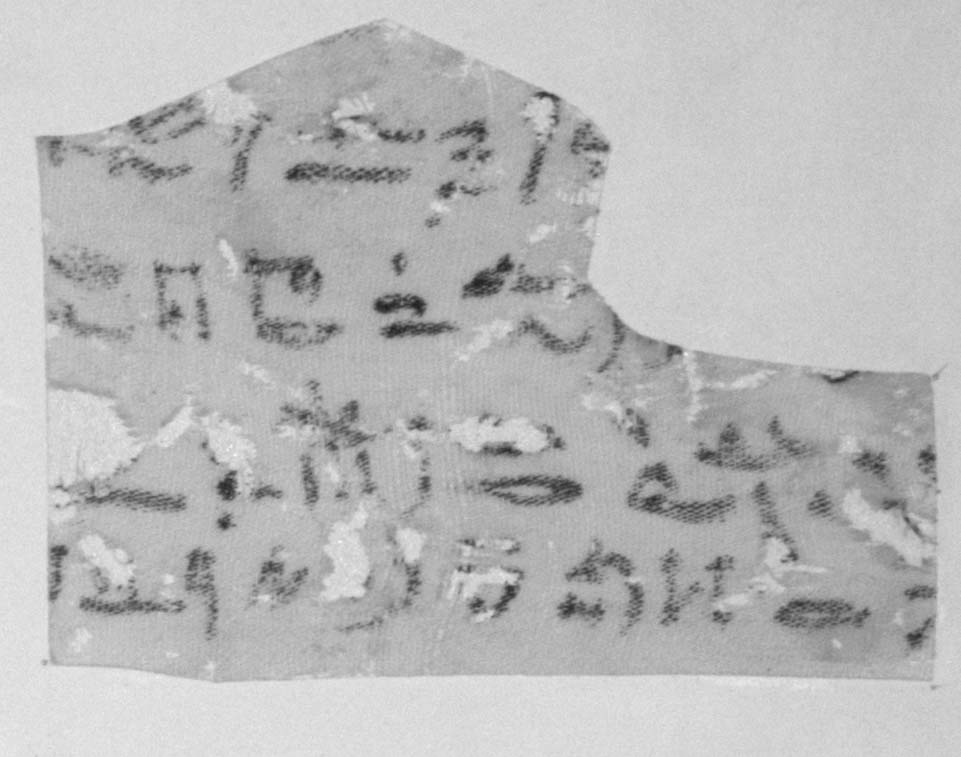
This is the upper left fragment. It measures 8 x 14 cm. Script contains images and no preserved text. This is part of the 3-piece set that also belonged to a priest called Wennofer. Images belong to the vignette of Book of the Dead Spell 148. “For making provision for a spirit in the realm of the dead” this spell provides the names of the Bull of Heaven and his seven cows, providing an eternal supply of food and beer.
Normal Illumination
Raking Illumination
Ultraviolet Fluorescence
Infrared Radiation
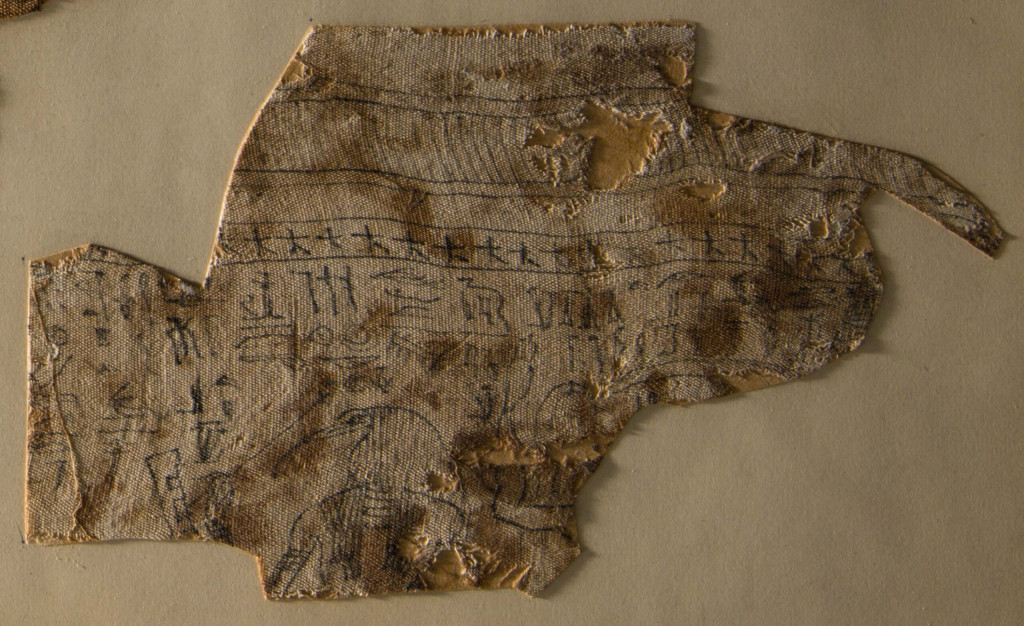
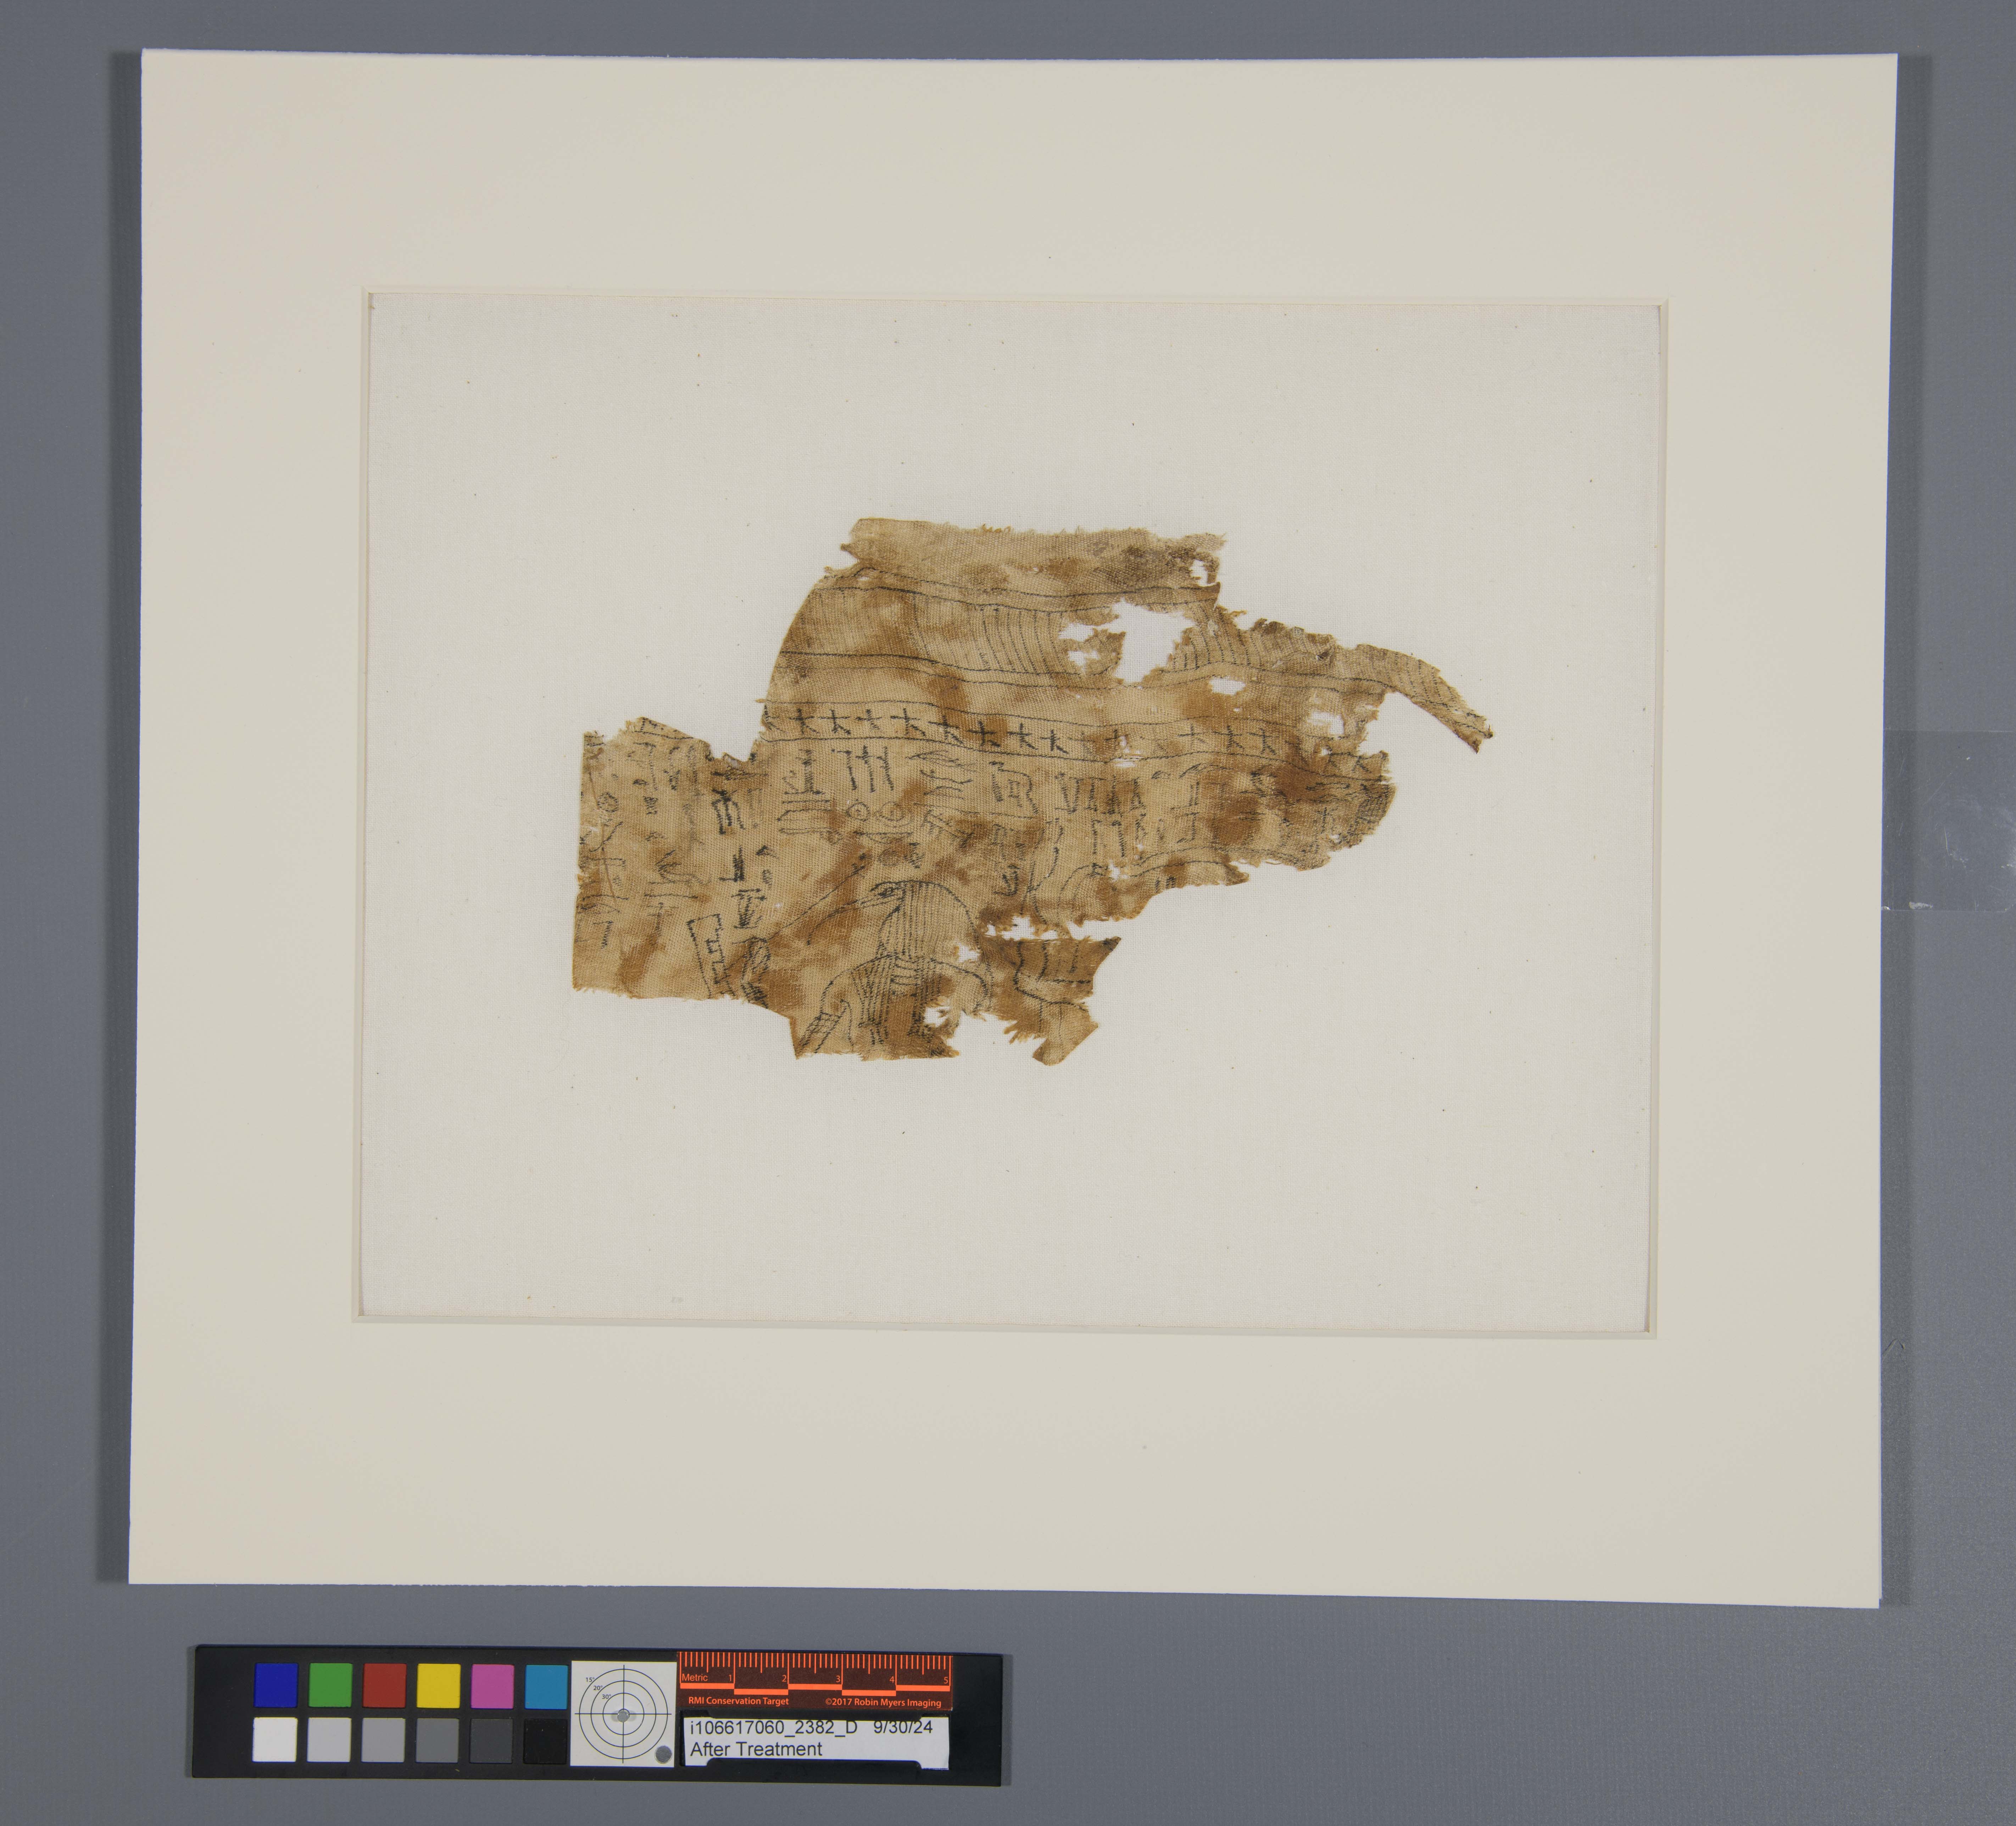
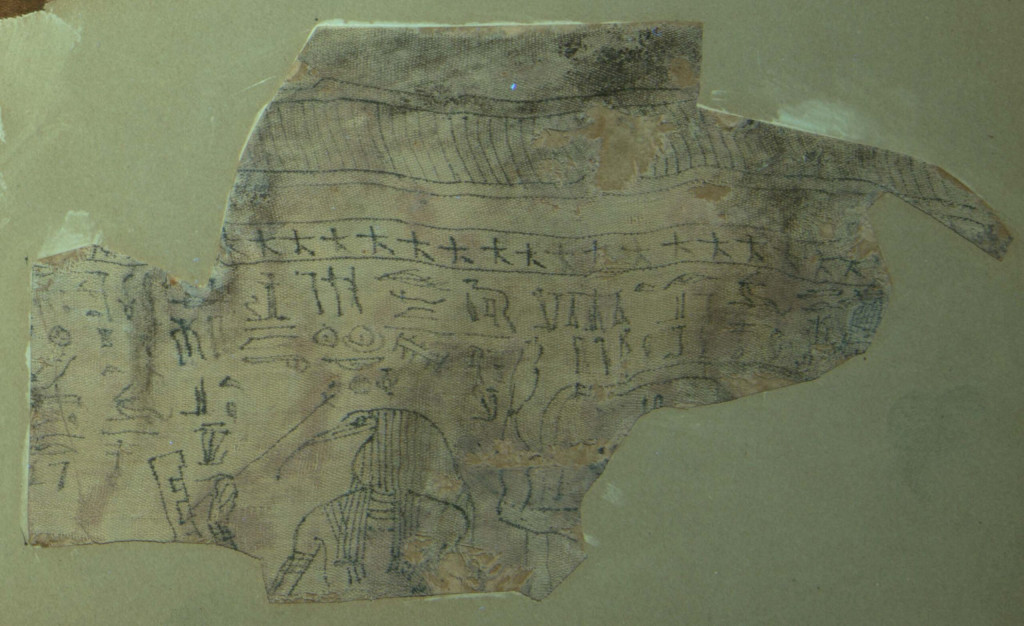
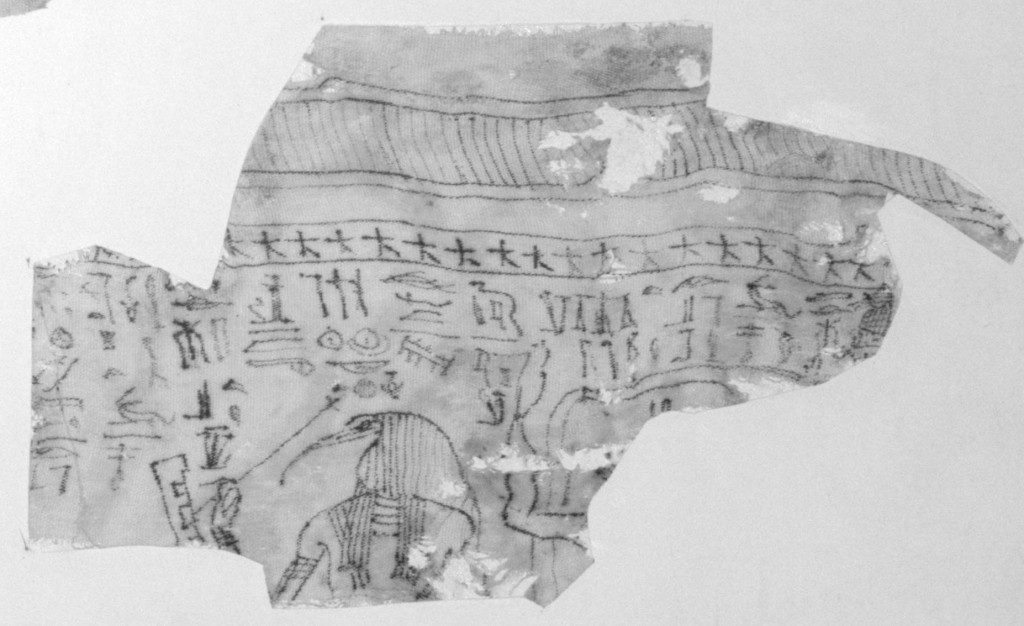
This is the bottom right fragment. It contains Hieroglyphic writing and measures approximately 10 x 17 cm, containing a Thoth god image. It’s the final part of the 3-piece set that belonged to a priest called Wennofer. Preserved images are part of the vignette of Book of the Dead Spell 125, the so-called judgement scene.
Normal Illumination
Raking Illumination
Ultraviolet Fluorescence
Infrared Illumination
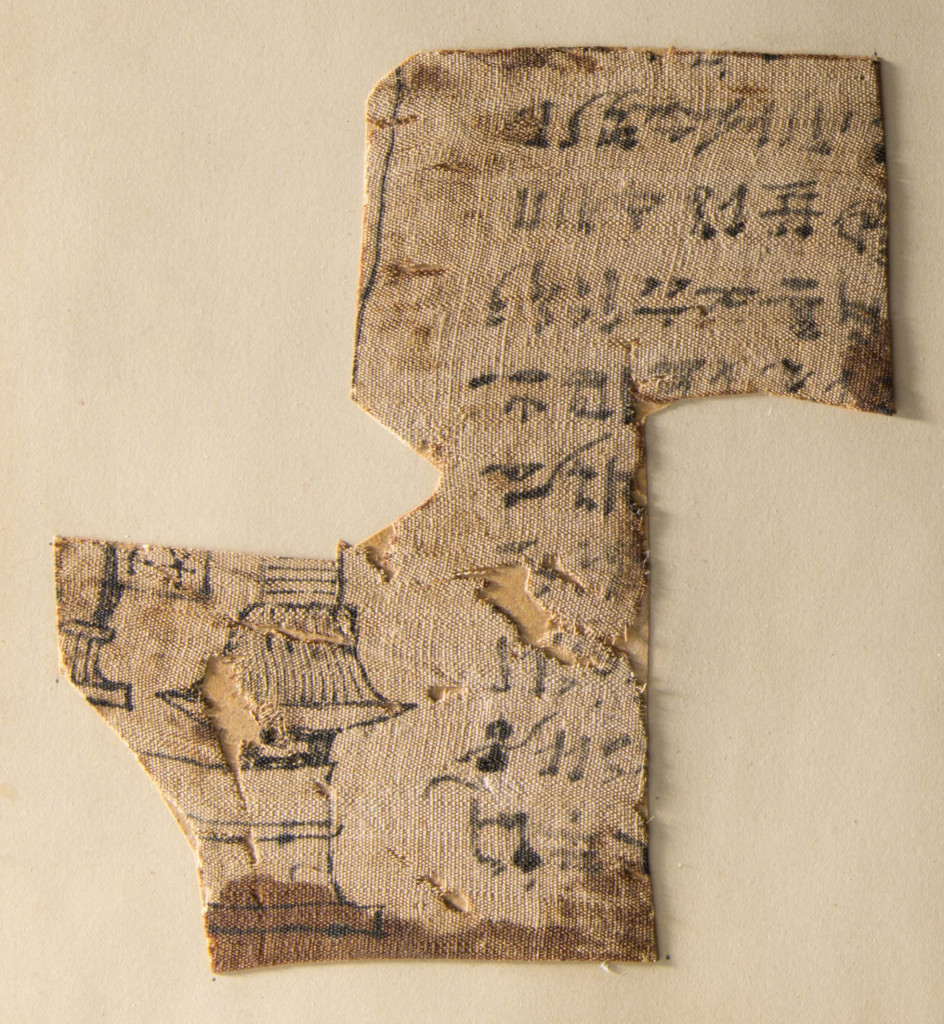
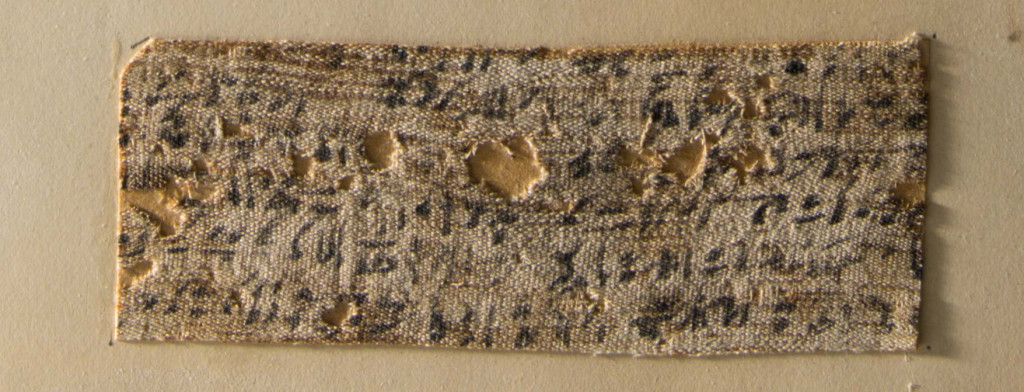
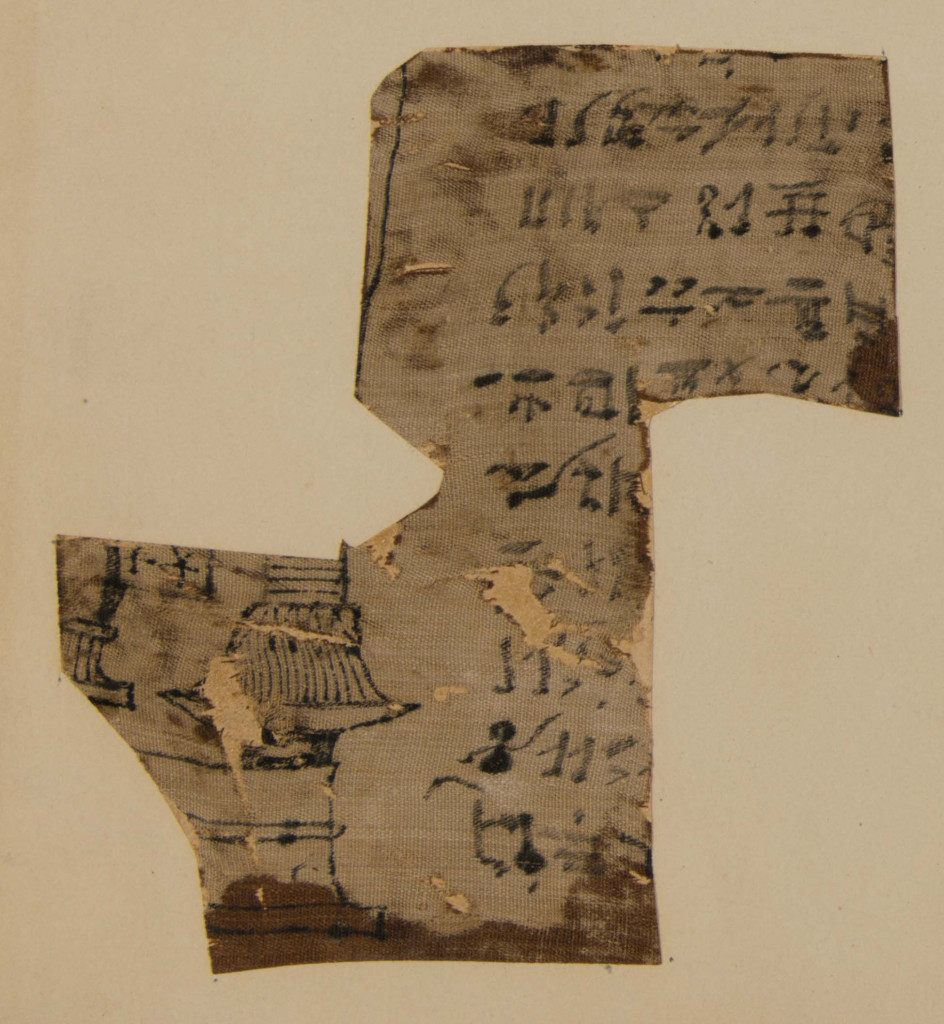
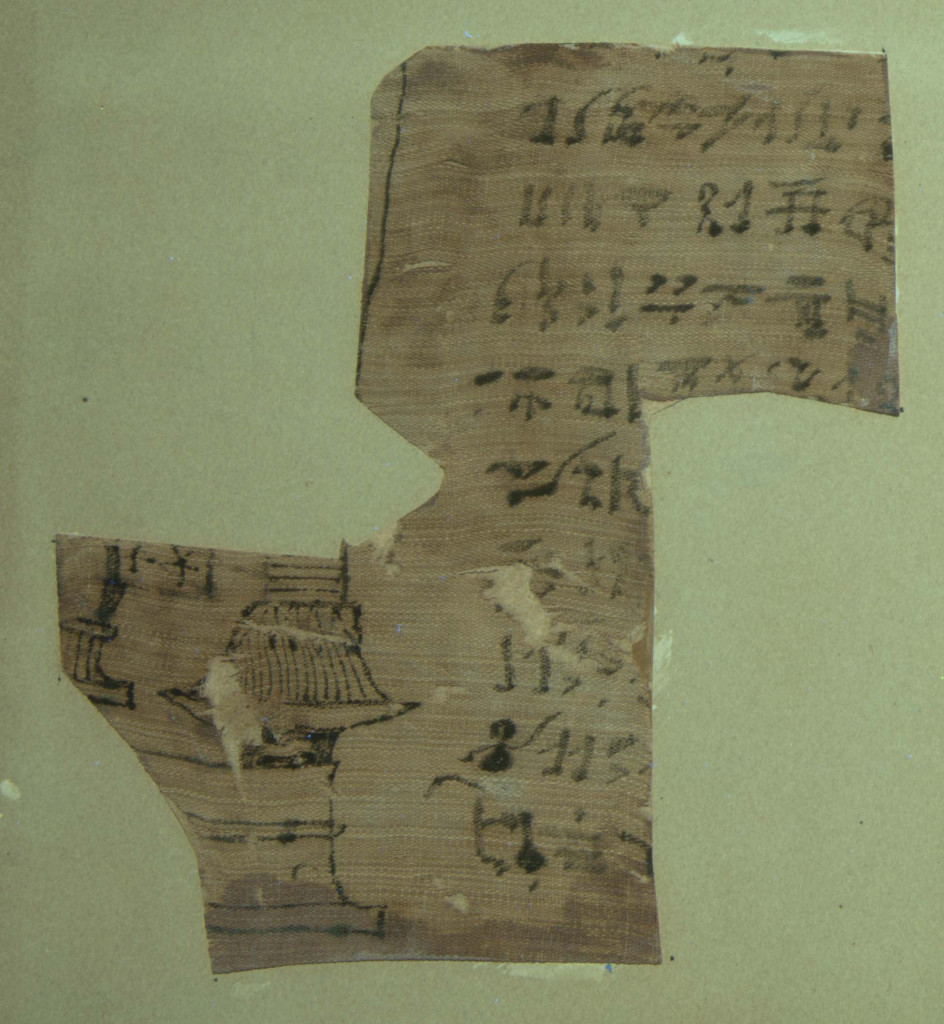
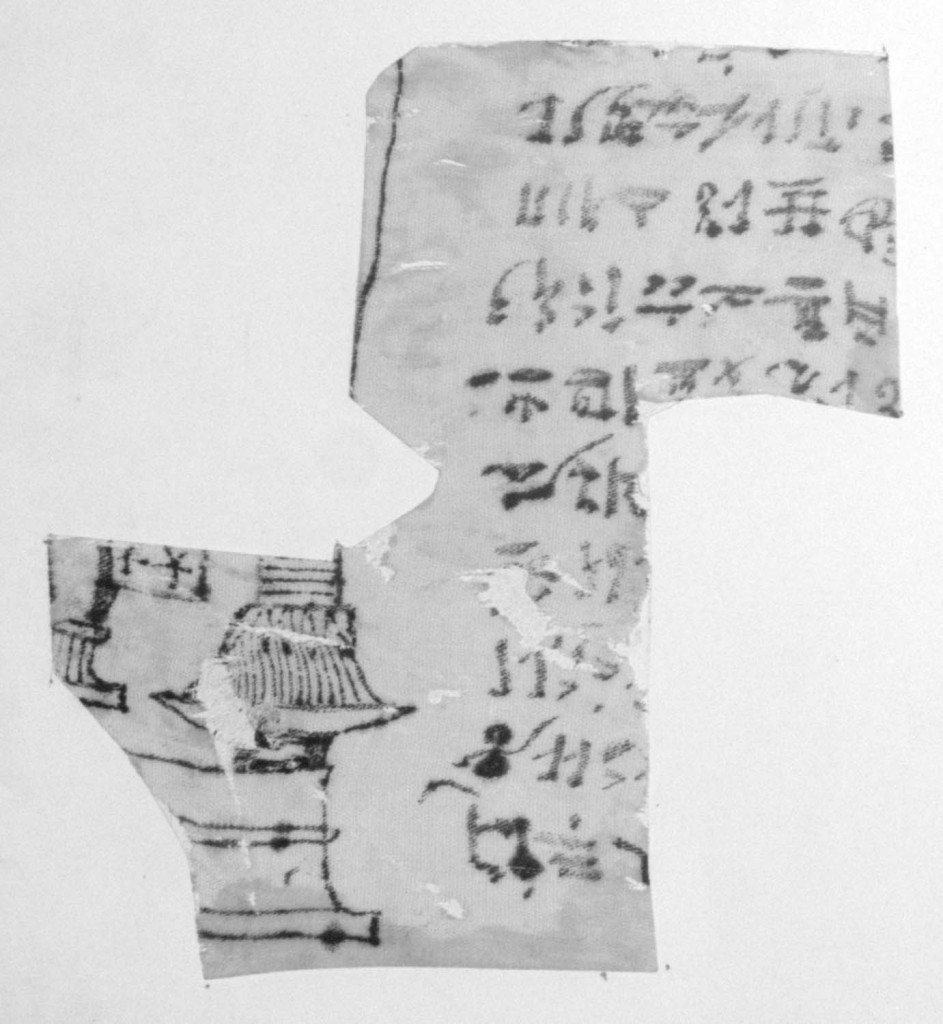
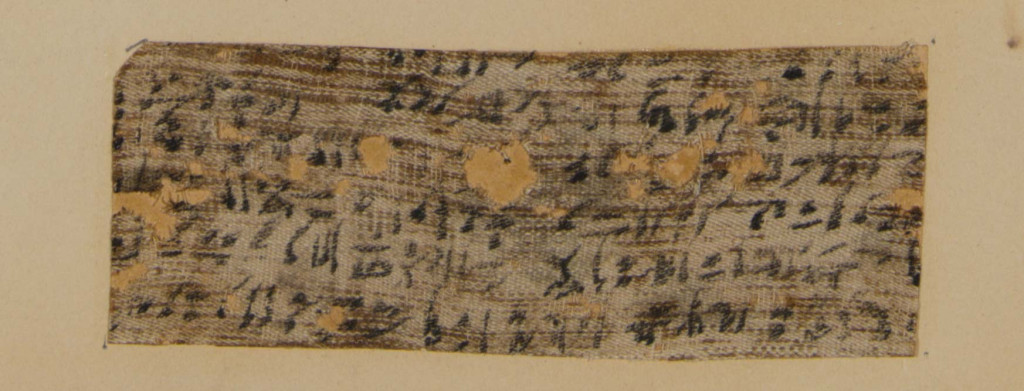
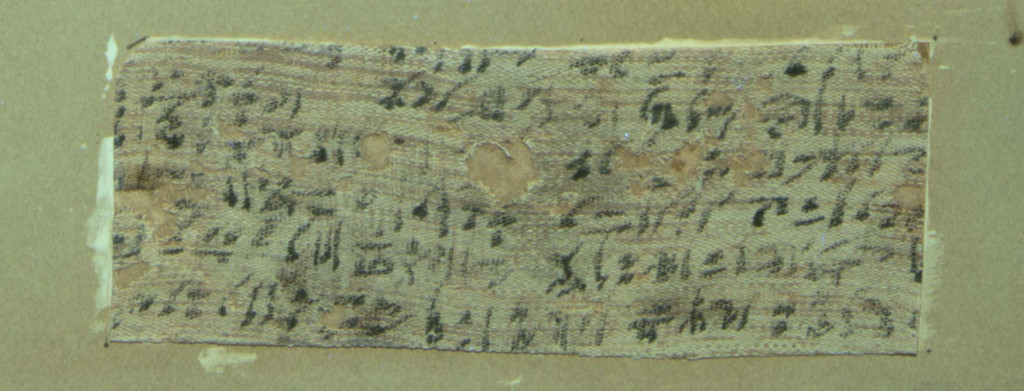
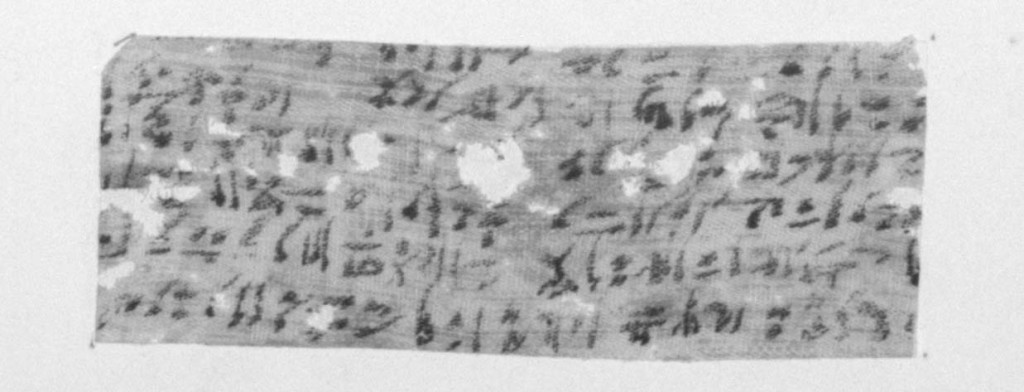
This is the bottom left fragment containing Hieratic script, however it is oriented upside down. It measures approximately 13 x 12 cm. There isn’t an owner’s name preserved so we’re unsure if it belongs with any other fragments in this collection. Images contain a shrine column, sections of Book of the Dead Spells 125 and 126, as well as traces of the vignette belonging to Book of the Dead Spell 125.
Normal Illumination
Raking Illumination
Ultraviolet Fluorescence
Infrared Radiation
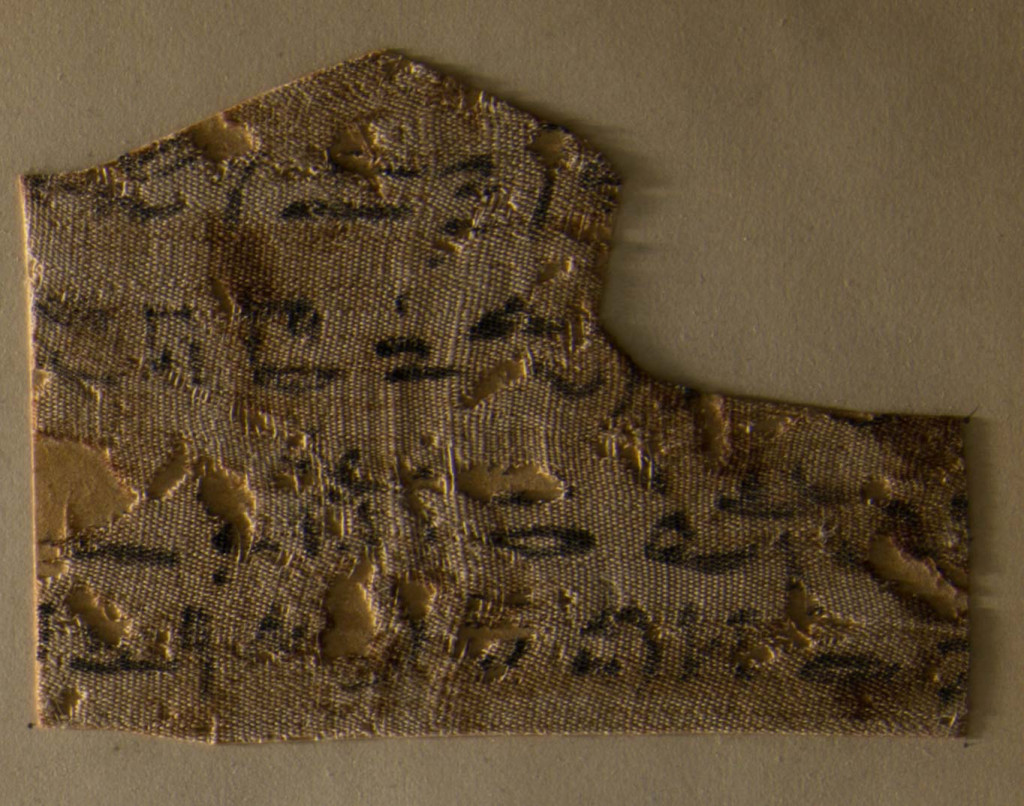
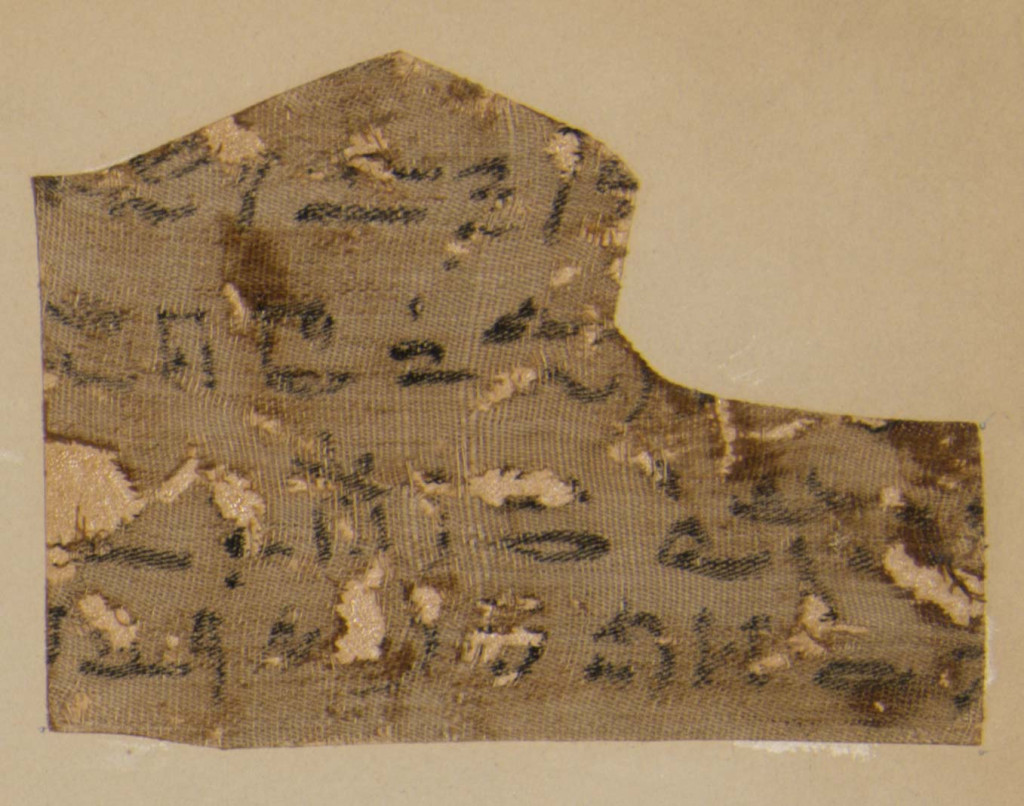
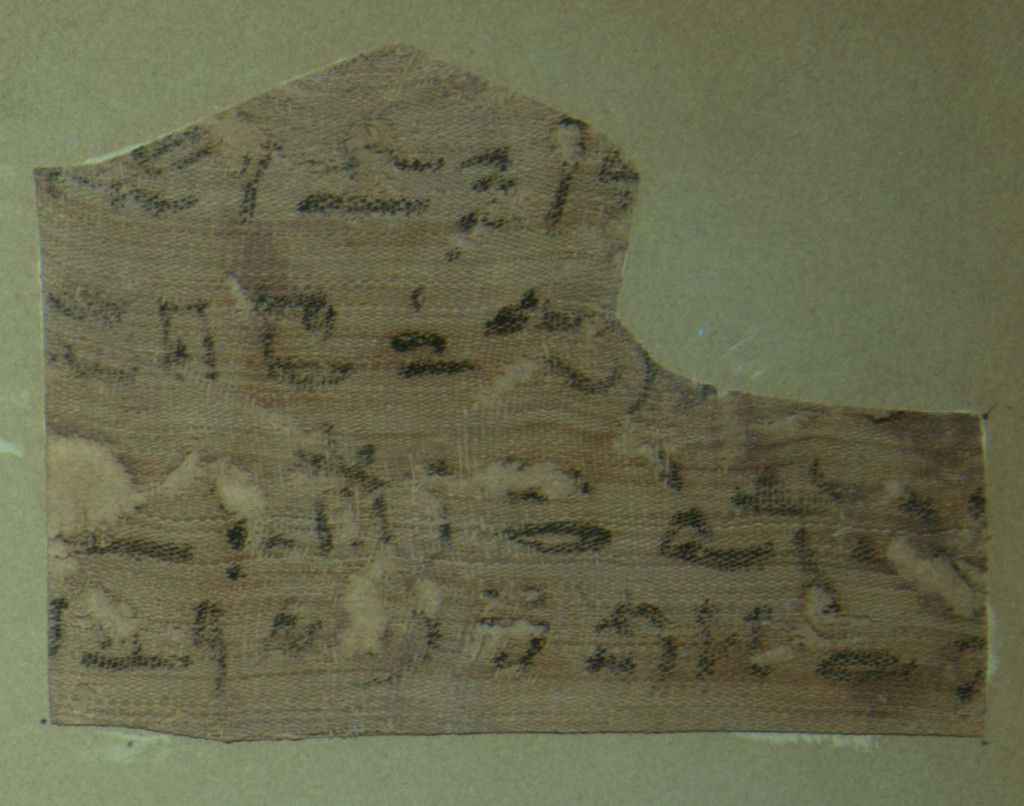
This is the upper right hieratic fragment with Hieratic script. It measures approximately 9 x 7 cm. There is no owner’s name preserved.
Normal Illumination
Raking Illumination
Ultraviolet Fluorescence
Infrared Illumination
This is the bottom center hieratic fragment measuring 4 x 10 cm, also with no owner’s name preserved and oriented upside down.
Further Reading
Check out this essayfor Glencairn Museum News by Dr. Jennifer Houser Wegner to learn more about burial practices and in particular, funerary texts, such as the Book of the Dead.
To learn about how the fragments were treated in preparation for long-term storage, check out the third post of the four-part series: The Treatment
If you missed the earlier installment, you can jump to previous post using the links below (or even skip to the final post on storage):
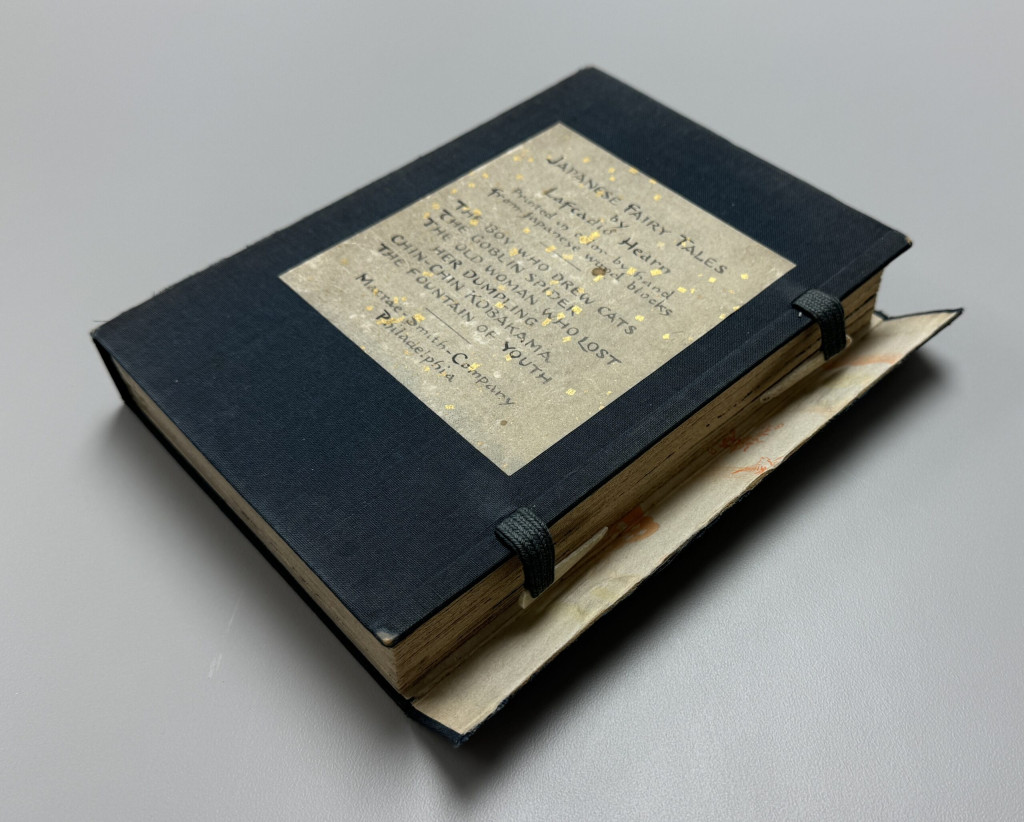
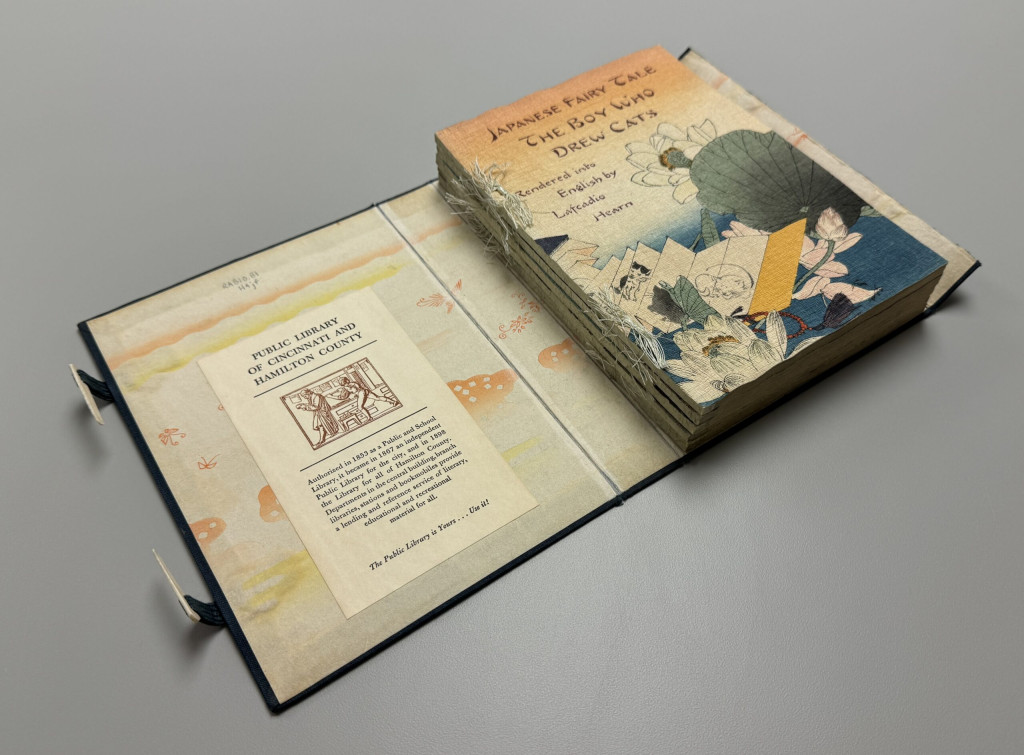
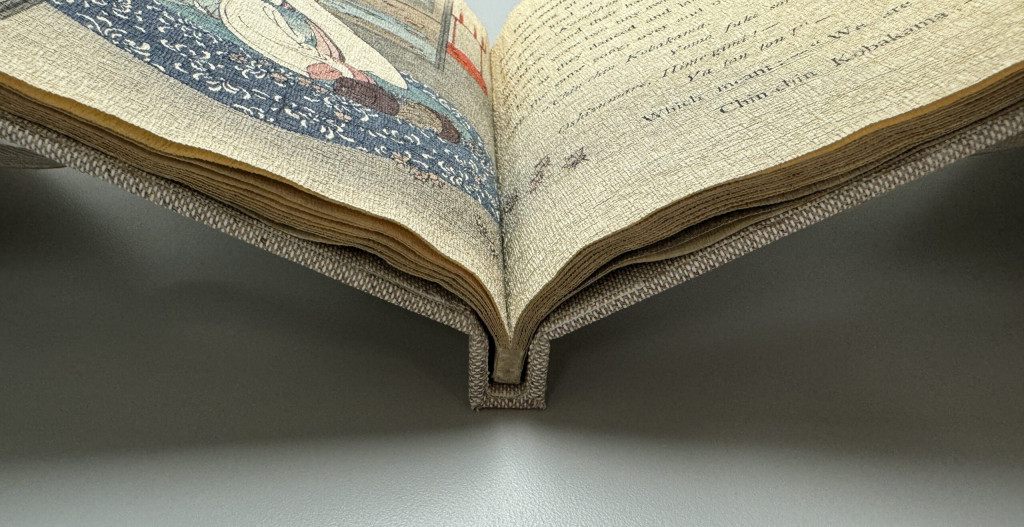
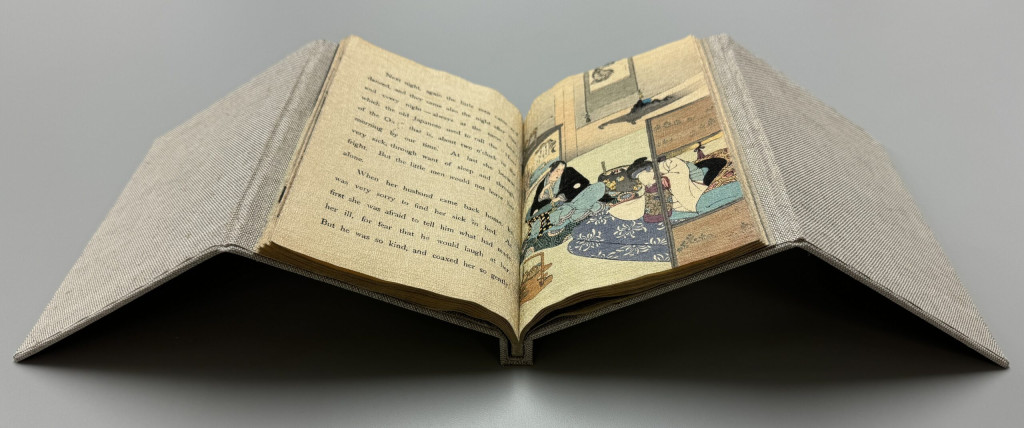
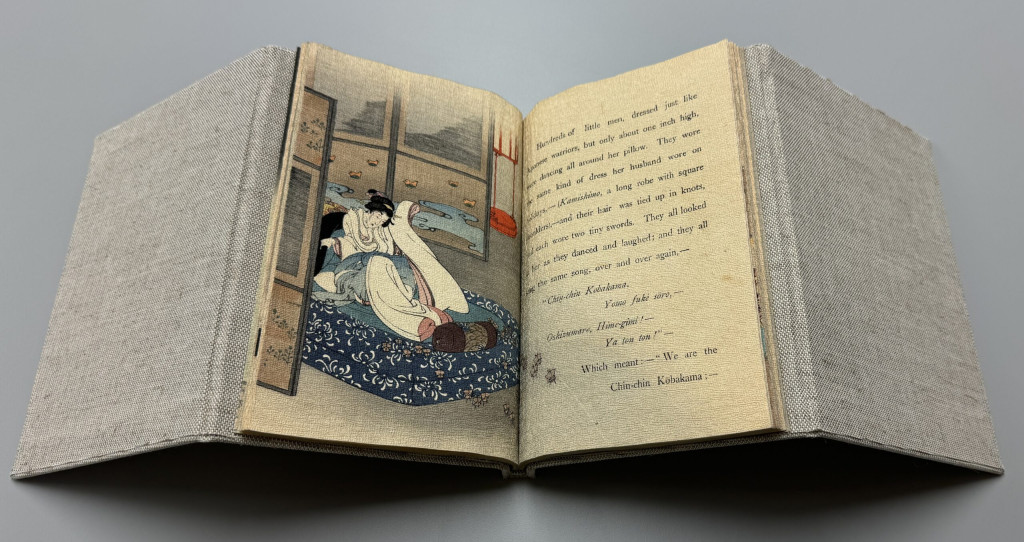
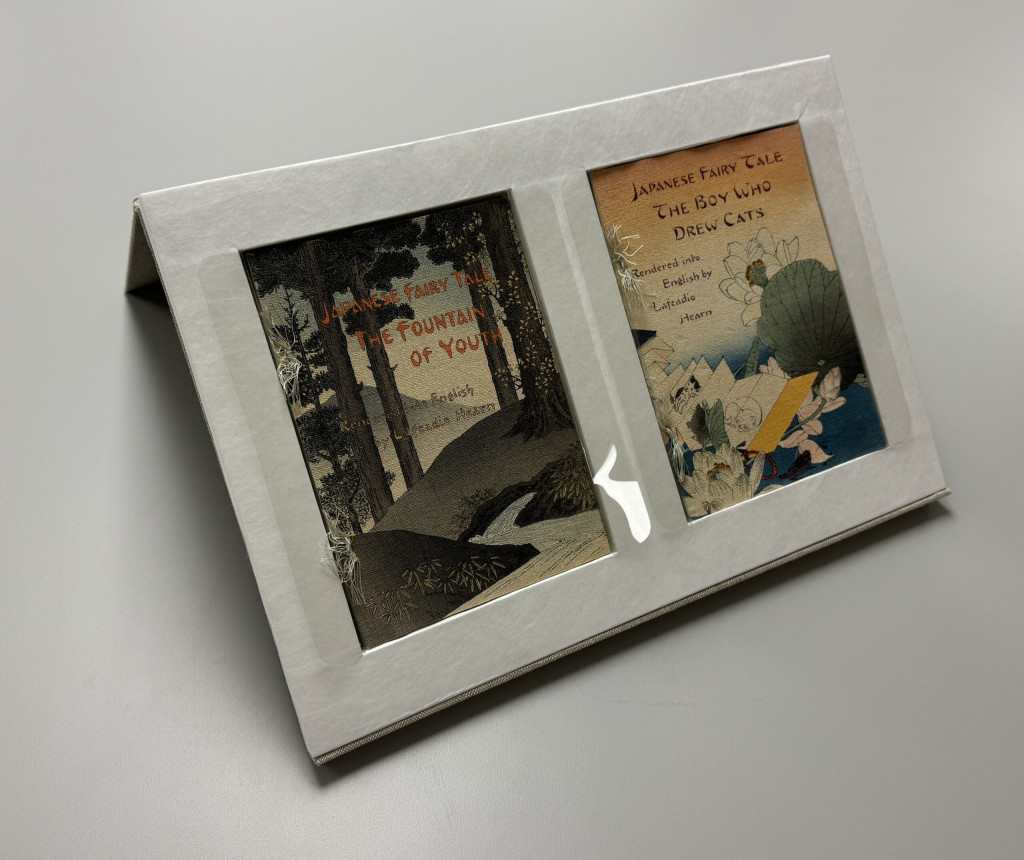
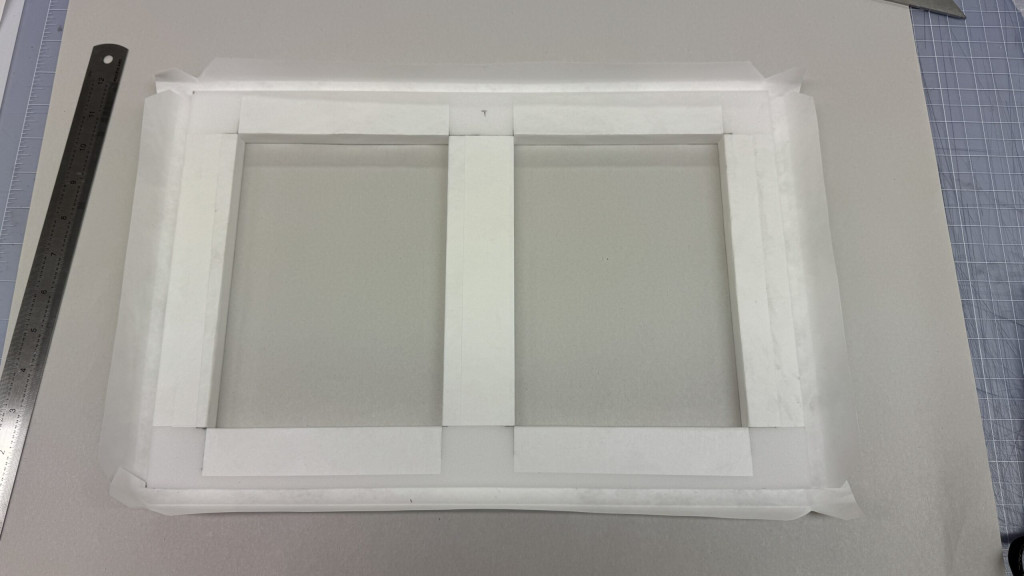
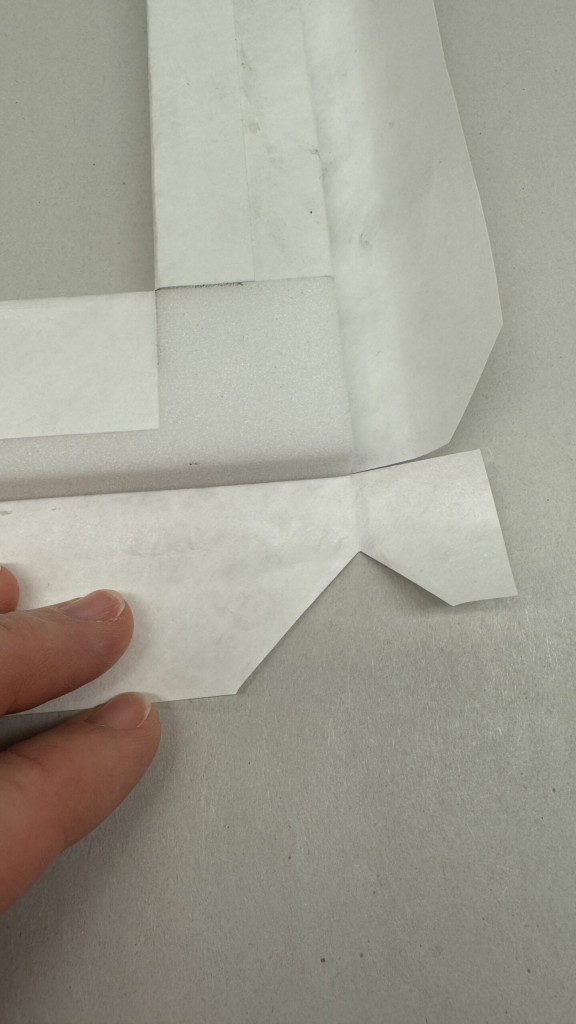
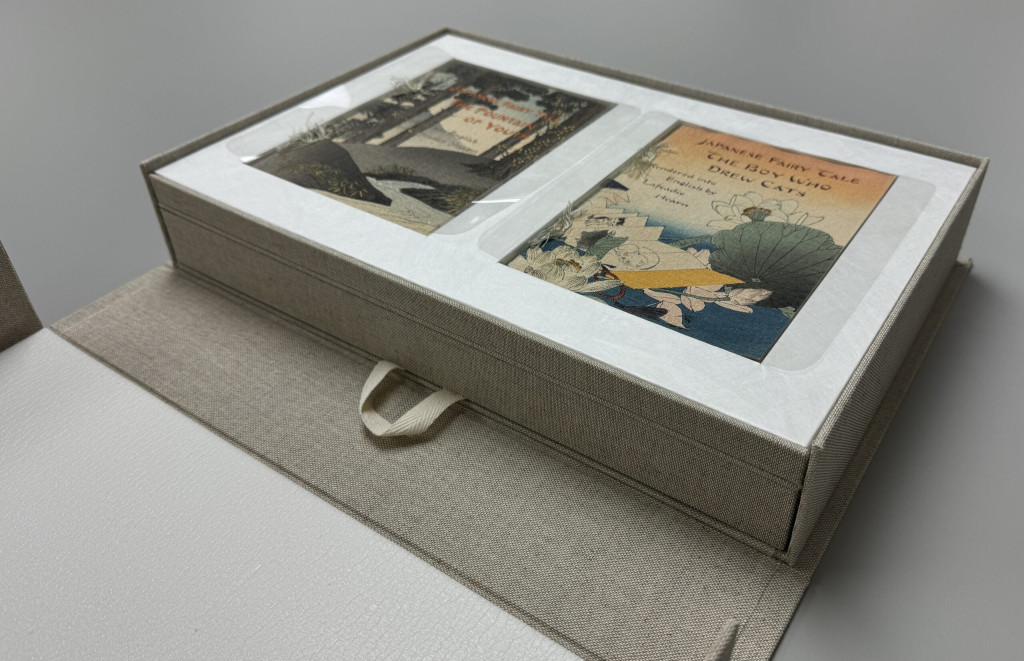
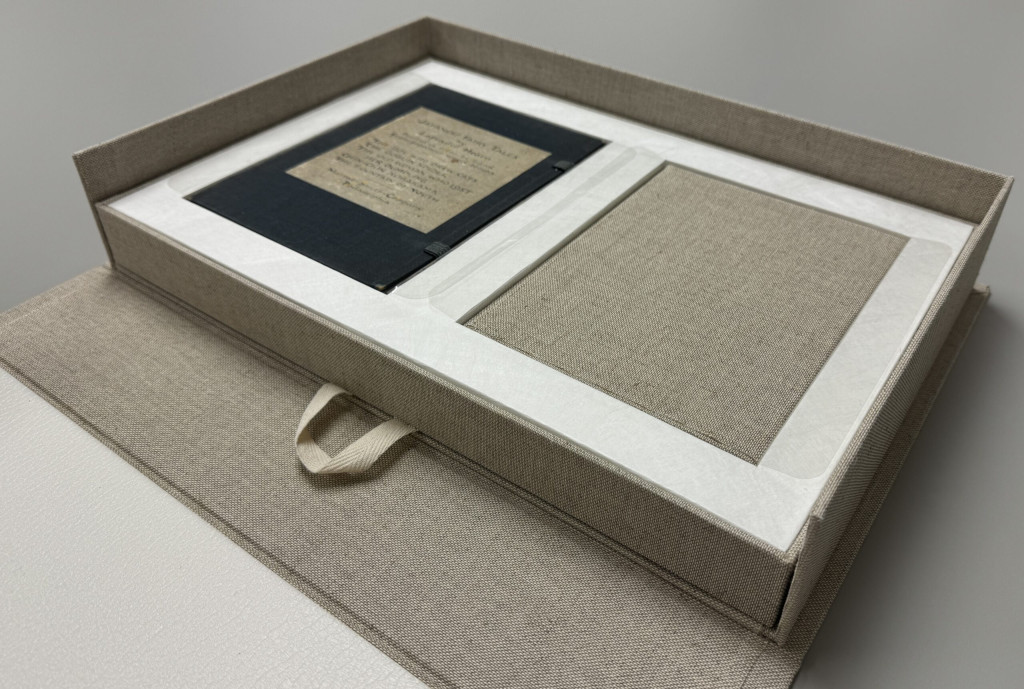
This set of Japanese side-sewn, crepe paper bindings, or Chirimen-bon, came to the Preservation Lab housed in their damaged traditional Japanese wraparound case, known as a maru chitsu. The set belongs to the Cincinnati and Hamilton County Public Library, which has an extensive Lafcadio Hearn collection. This collection of volumes was printed by Hasegawa Takejirō, a Japanese publisher who specialized in books written in European languages on Japanese subjects. The Japanese Fairy Tale Series was one of the more popular series, beginning with six volumes in 1885; though this later collection only has five volumes of fairy tales. Lacadio Hearn was one of the foreign translators employed by T. Hasegawa.
Original enclosureFive volumes withing the original enclosure (pictured after treatment)
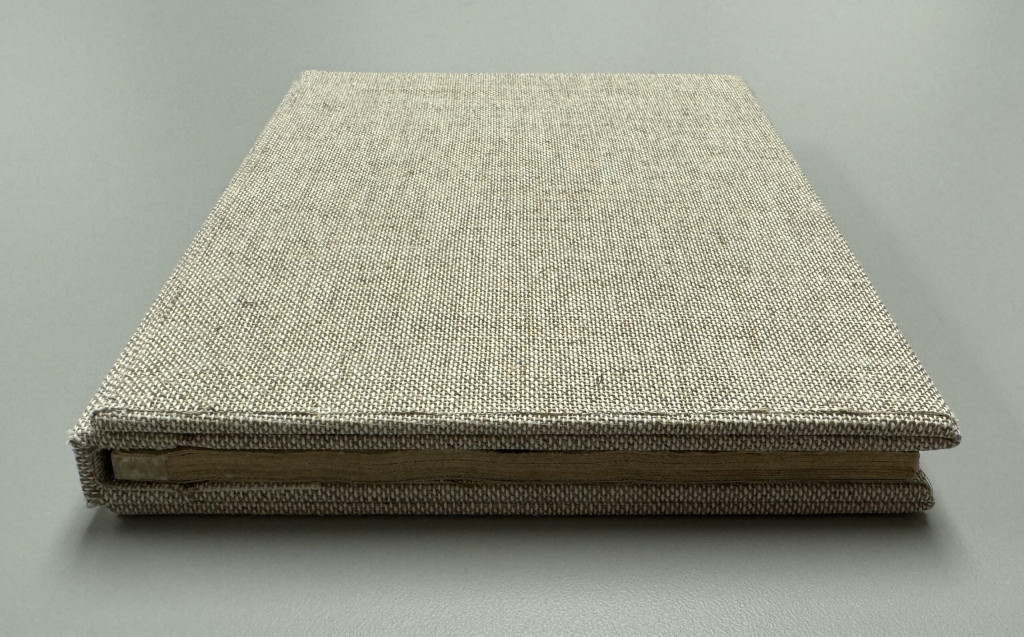
Due to the high profile nature of Lafcadio Hearn for the library and the beauty of the bindings, the collection is often shown during tours and used for display, however, the crepe paper volumes, while in excellent condition, are extremely floppy, and they are also side-sewn, both factors make them difficult to handle and display. The original enclosure is also very fragile and damaged, and susceptible to further damage if used as an enclosure moving forward. For all these reasons, the curators wanted an enclosure that would not only store the collection long-term, but could also be used for display.
This proved to be a challenge, but a fun one. I started by making a couple of sketches and then a couple of models…
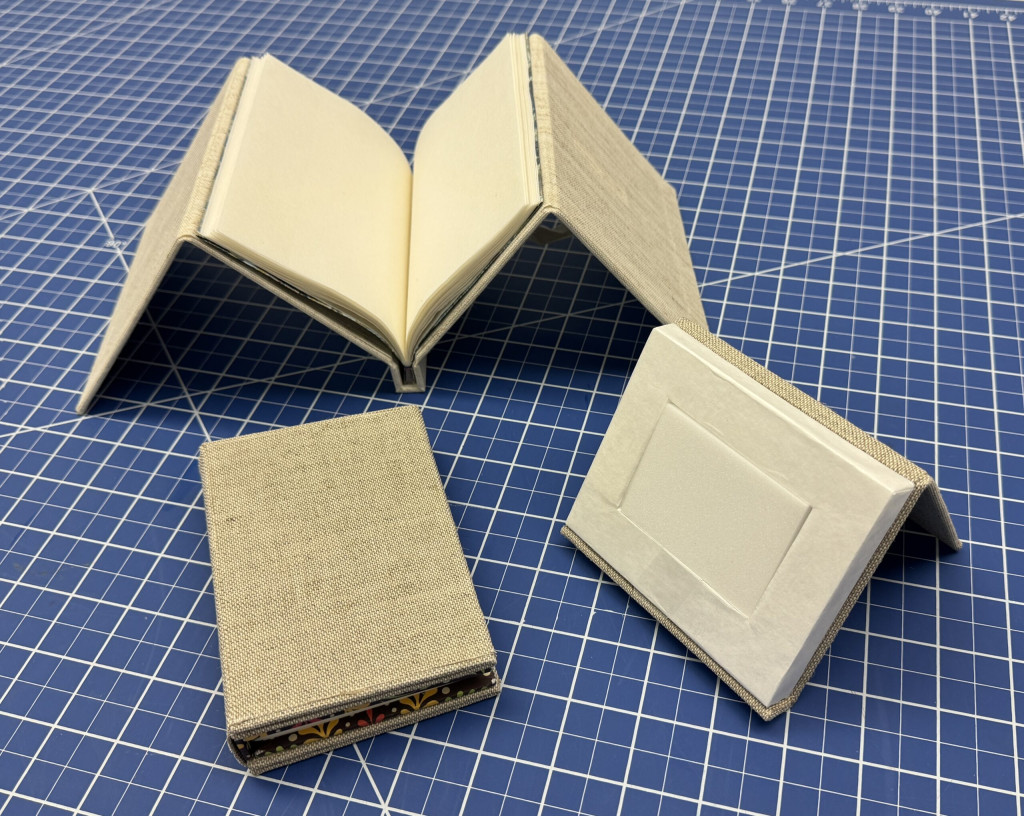
Models – two types of collapsible cradles and one model of the display tray/stand
For the models, I had two main focuses: 1) a collapsible cradle that would house and display one of the volumes, and 2) a display component that would act as a tray or level within the enclosure and house the remaining four volumes, in two stacks of two, side by side.
I will always advocate for making a model if you are trying to work through a new enclosure or adjust an existing enclosure or display piece, like a cradle. For example, I knew that a normal collapsible cradle wasn’t going to fit the bill for these volumes. Instead, I was going to need a stiff, squared off spine piece built into the cradle to help support the bindings’ spines.
One of the main areas I had to troubleshoot was the display tray, which would house the four remaining volumes. I knew I wanted to create a stand that would basically replicate one side of a collapsible cradle and have a 1/2 inch Plastazote foam insert, which happened to nestle the thickness of two volumes perfectly, that was covered in Tyvek. But I had concerns about gravity and reliability of PVA to hold the foam insert in place overtime. And I wasn’t happy with my initial ideas of how to remove the volumes (and also the original enclosure and collapsible cradle) from the insert(s), which consisted of a tab underneath the volume. It created friction that would ultimately cause damage to the actual volumes.
Ultimately, I am extremely happy with what I came up with. I think it functions very well, and checks all the boxes it needed to check. Safe, secure storage. Elegant display. User-friendly.
Display stand openDisplay stand closed. A lip was added to support the foam insert overtimeDisplay stand closed with one set of volumes removedPolyester slings were created as a solution for removing items safely and easily from the enclosure
The display stand includes a cloth tape inserted into the boards to keep it from opening too far, a foam insert covered in Tyvek, a lip to support the foam insert overtime, and two polyester film slings to aid in removing the volumes from the foam insert. The polyester slings proved to be an excellent solution for removing all the elements from the enclosure safely and easily.
For those interested in how some of the components were constructed, here are some in-progress images…
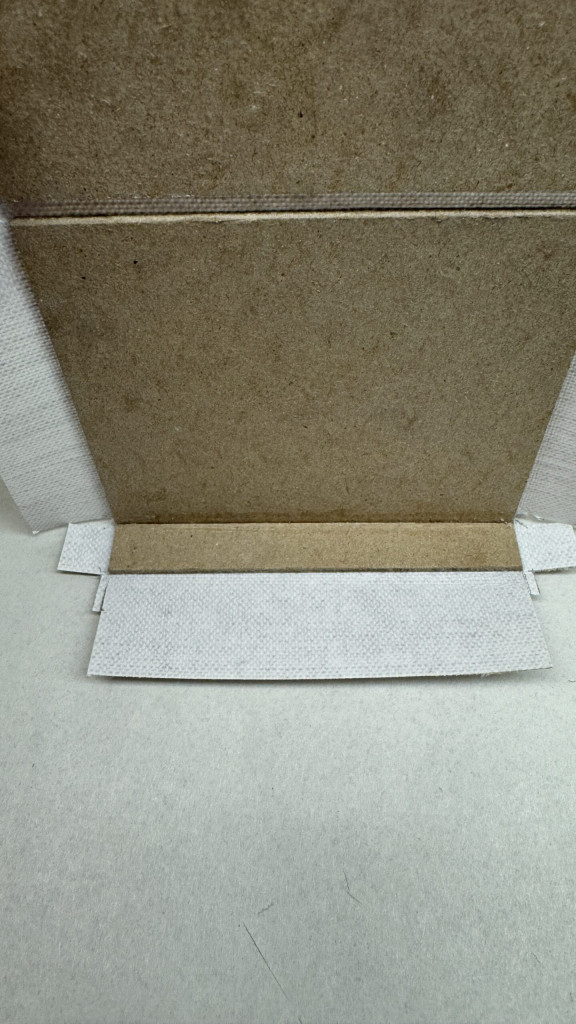
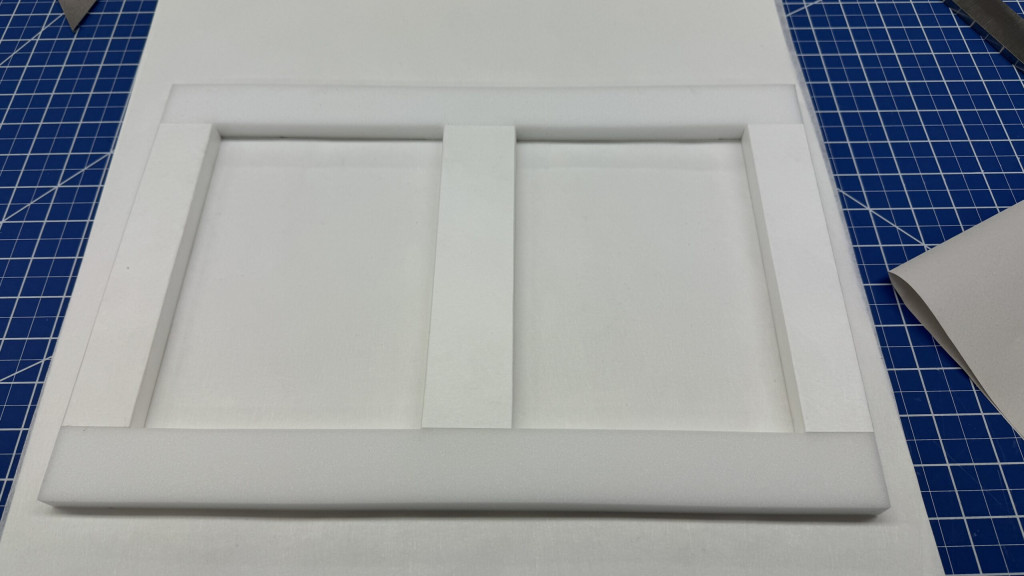
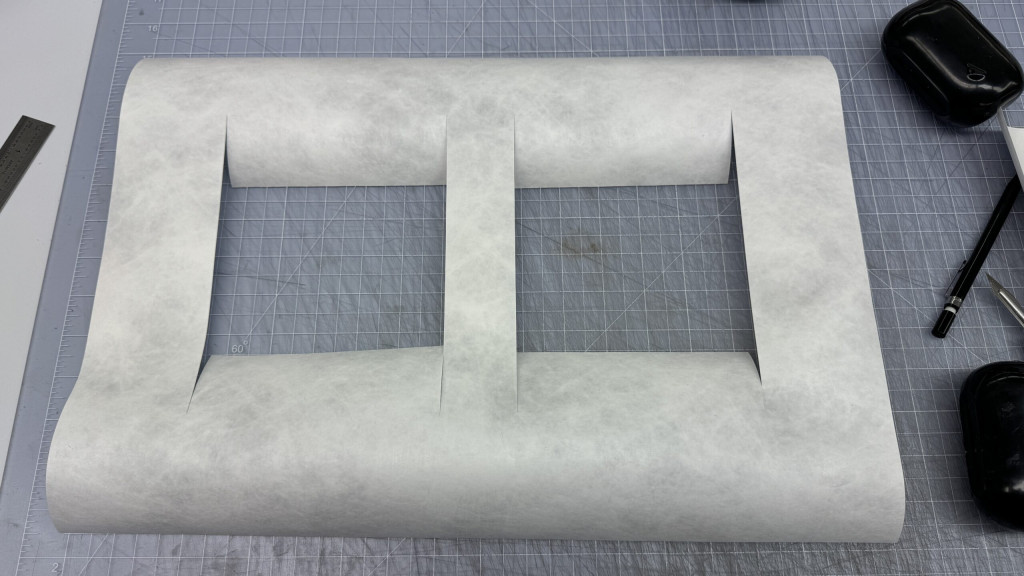
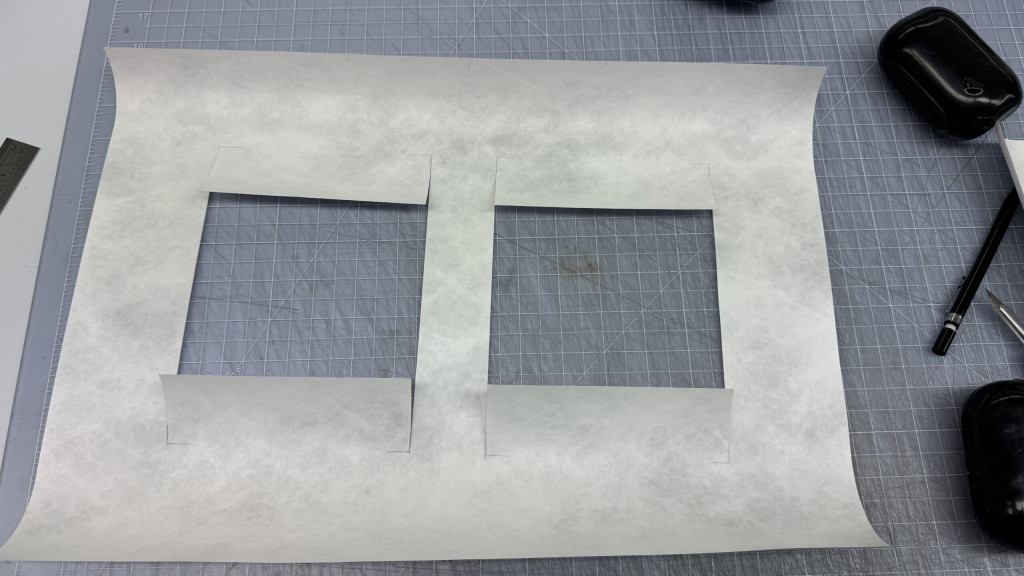
Detail of the turn-in for the display stand lip; cut similarly to how we cut our clamshell enclosure tray turn-insDetail of the turn-in for the display stand lip; cut similarly to how we cut our clamshell enclosure tray turn-insFoam insert, vertical panels covered in Tyvek firstTyvek sheet cut in preparation for attaching to foamTyvek sheet cut in preparation for attaching to foamTyvek attached to the front of the foam pieceTyvek turn-ins cut
Because of the way the trays/components of the enclosure are constructed, they are actually interchangeable. So if the “lower tray” with the original enclosure and collapsible cradle ends up on top of the display tray/stand, that’s not an issue at all. And there is a 1/4 inch Volara foam piece adhered to the outer tray of the clamshell enclosure, so whatever items are on top will be cushioned by soft foam in the enclosure.
Get a full tour of the enclosure by watching our reel on Instagram:
One of my favorite aspects of working for the Preservation Lab is the problem solving required to reach our clients’ goals. Whether performing treatments, building housings, or installing displays, we frequently find ourselves thinking outside the box to come up with custom solutions to unique problems.
FotoFocus
The problem solving aspect of the job was in full force with a recent display request from Art and Special Collections Reference Librarian, Sara Williams, for CHPL’s (Cincinnati and Hamilton County Public Library’s) participation in FotoFocus 2024 this Fall.
For those unfamiliar, FotoFocus is a biennial “month-long celebration of photography and lens-based art that unites artists, curators, and educators from around the world” (as described by the FotoFocus website). This year’s event was FotoFocus’ seventh iteration and encompassed 107 projects at 86 participating venues across Greater Cincinnati, Dayton, Columbus, and Northern Kentucky.
The Display Request
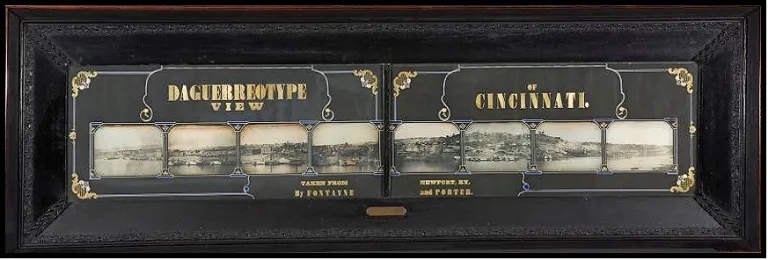
The theme for FotoFocus 2024 was Backstories, which focused on hidden stories within photographs that are not initially obvious. With this theme in mind, Sara Williams came up with the idea of highlighting stories hidden within one of CHPL’s most highly prized collection items: the 1848 Fontayne and Porter Panorama Daguerreotype. (For more information about this historic photograph, its preservation, and daguerreotypes in general, an earlier blog post I wrote on the subject can be foundhere.)
1848 Fontayne and Porter 8 full-plate panorama daguerreotype
To convey this idea, Sara requested that the exhibit contain surrogate images attached to the back of the display cases, with images popping out at varying degrees of depth, highlighting the idea that each subsequent image is zoomed in closer, just as the story within the images become more in-depth.
Constructing a Prototype
I am still relatively new to the world of conservation, and even newer to that of display installation. When confronted with a task I am unfamiliar with such as this request, I like to think about what needs to be achieved, and then brainstorm how it can be achieved practically using stock materials we have in the lab. I did not yet have the specs on the display cases or the sizes of the specific images, but Sara gave me several printed foam board images like what would be used in the display to run tests with. Most importantly, I knew the two following bits of information:
The display needed images attached to a cloth-covered wall within the display case.
The images needed the ability to be mounted at custom depths from the cloth-covered wall.
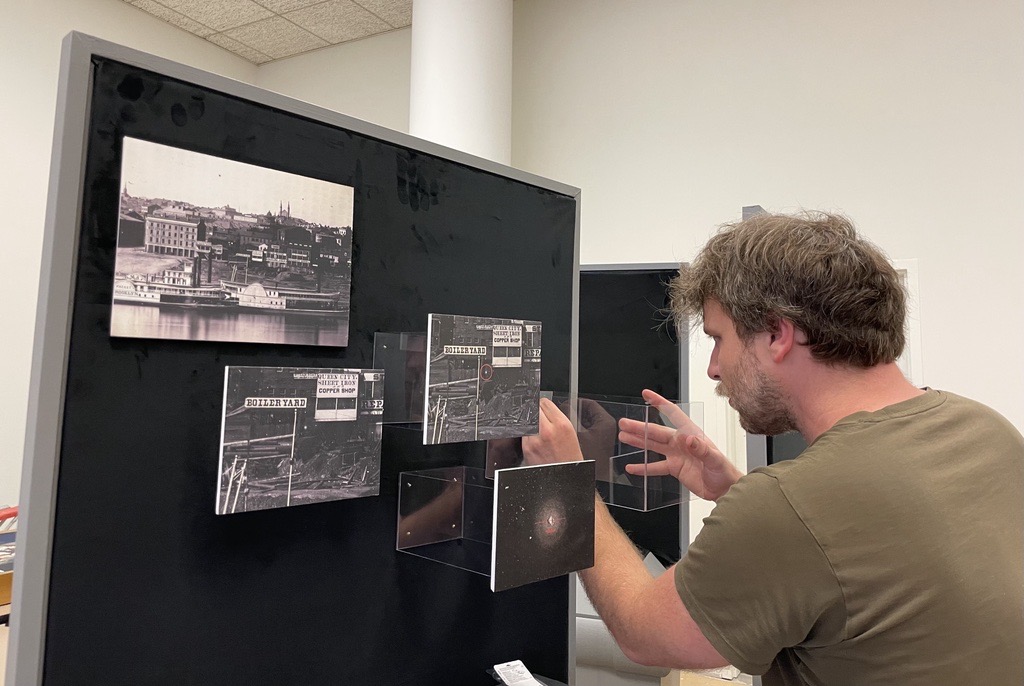
After some brainstorming with our head conservator, Ashleigh Ferguson Schieszer, we decided to try using Vivak to “pop out” the images at various depths.
Vivak is a copolyester plastic that can be easily bent into various shapes, yet retains its shape once creased. It is also clear, making it useful for displays due to its ability to blend into backgrounds and not detract from the featured objects.
We also decided to use our cubicle walls as a test site until we could get our hands on the actual cases, since attaching a support mount to a cloth covered wall was a unique challenge for us.
First Prototype
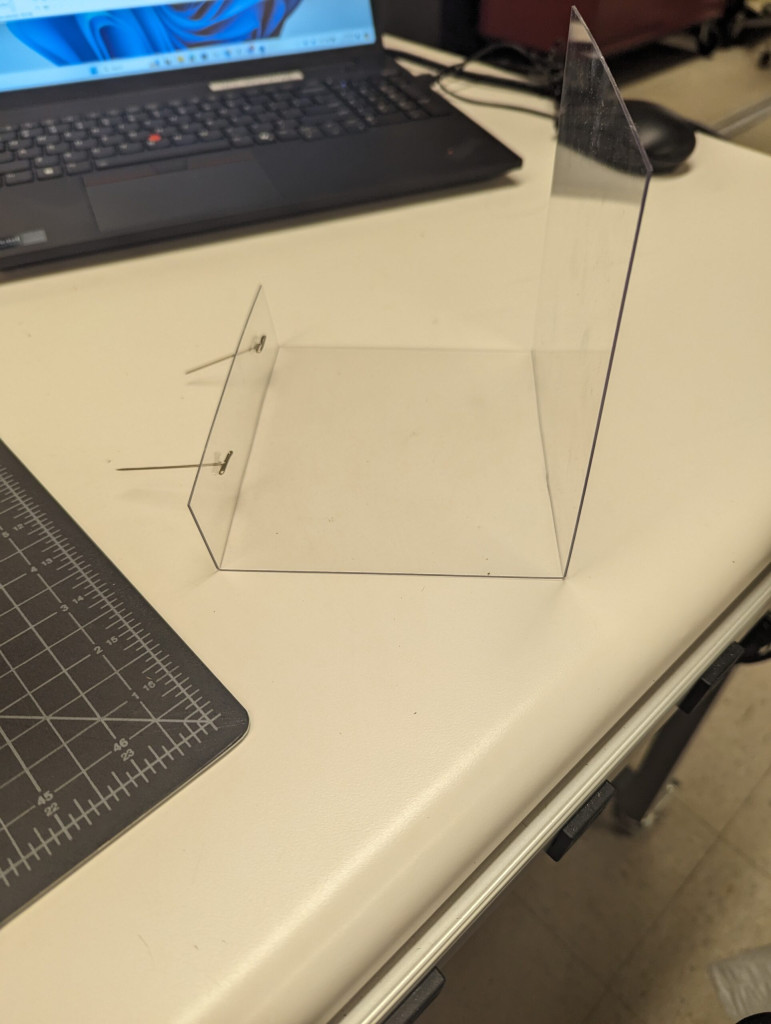
First Vivak Support prototype
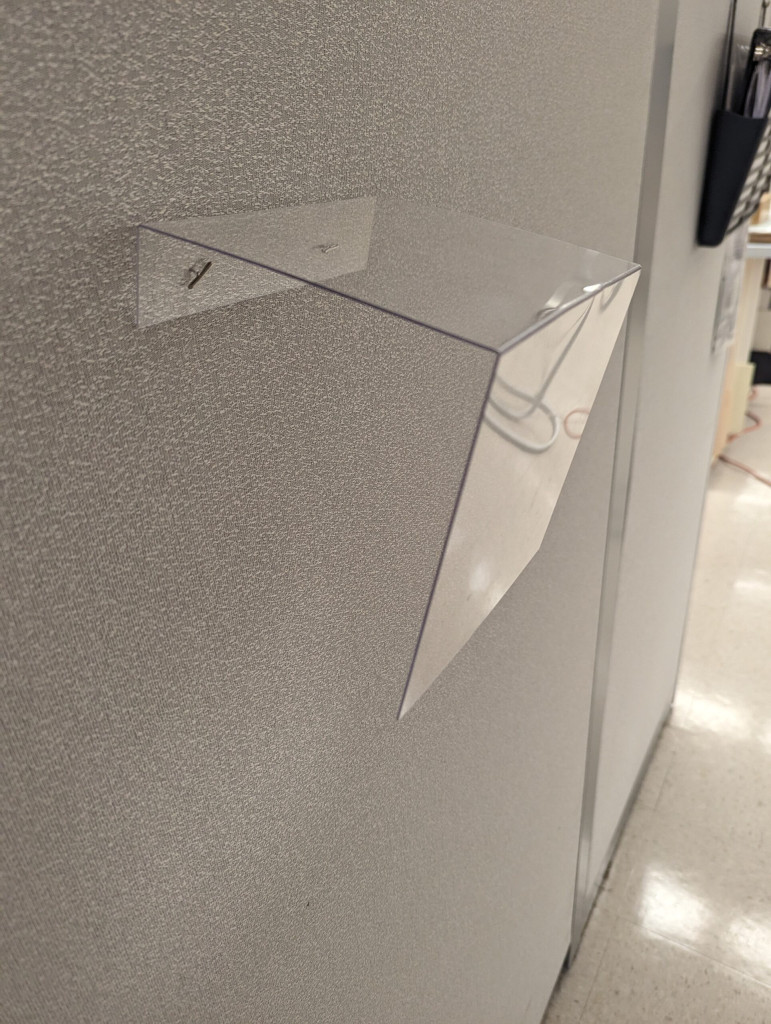
Attached to wall with two pins along top
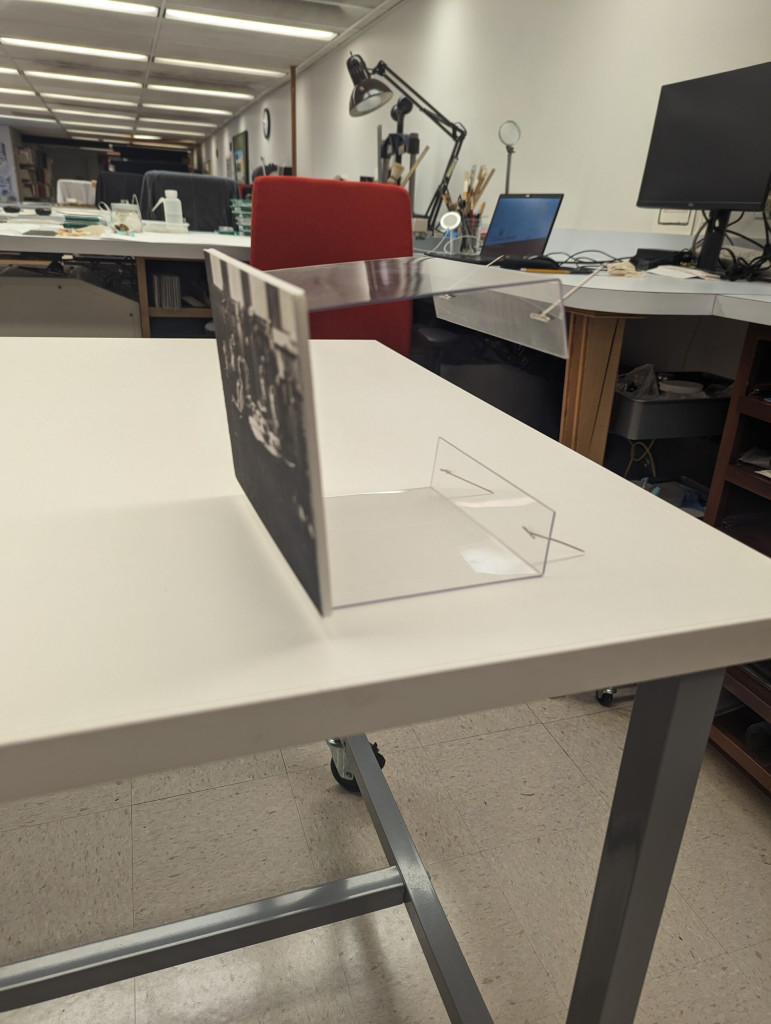
I constructed the first prototype by creasing a small sheet of Vivak twice into a “J” shape. I poked two holes in the smaller lip of the “J” so that I could use pins to secure it to the cloth-covered wall, with the image adhered to the larger lip.
This was moderately successful. These would be easy to construct and the pins held the support’s weight. But I was concerned about the Vivak bowing under the weight of the images, especially for the ones that were to be at the furthest depth from the cloth-covered wall, as it was already wanting to sag without an attached image under its own weight.
Second Prototype
I made the second prototype into a “C” shape, so that there were two lips that could be pinned to the cloth-covered wall. My hope was that this would add more stability and reduce the potential sagging. This was certainly an improvement, but it still felt unstable, and I felt the Vivak pieces that needed to be longer still might sag.
Support with added base to combat sagging
“C” shape with added backing strip
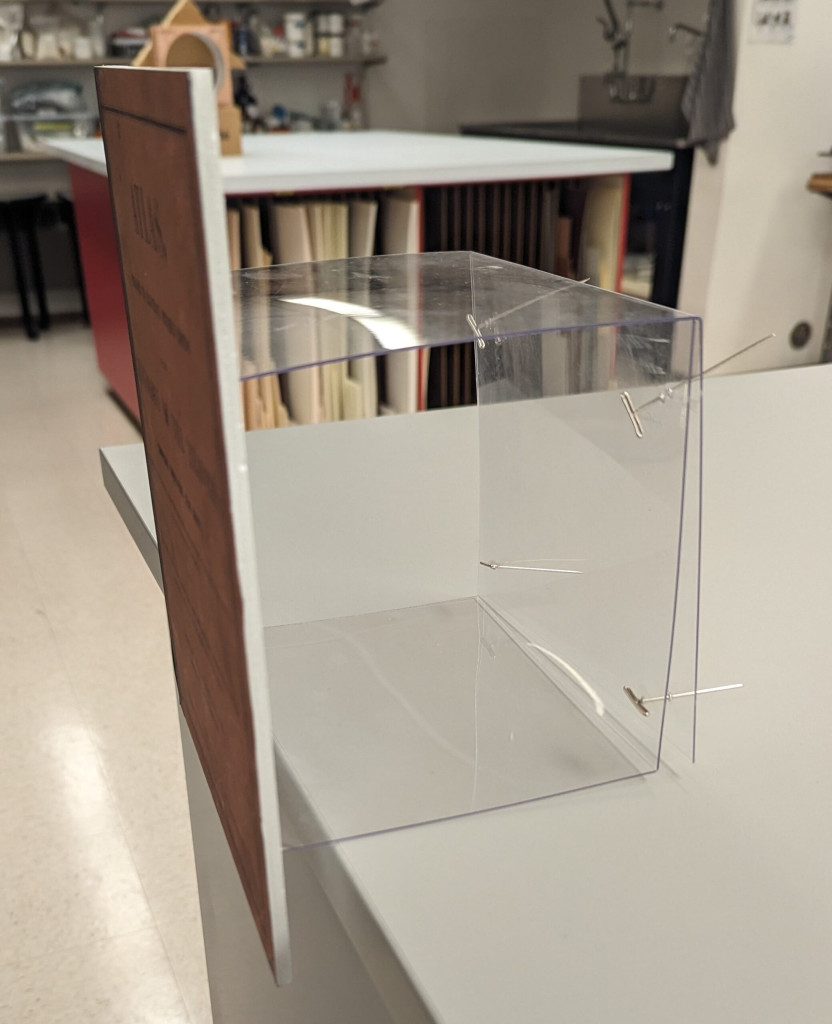
I next added an additional support piece of Vivak along the back of this prototype so that the pins would penetrate it as well as the two lips, adding even more stability. This yielded the most favorable result so far, yet I felt like the process could be streamlined.
I wanted the “pop-outs” to be contained to one piece of Vivak, so for the final prototype so I extended the two lips of the “C” so that they overlapped each other making a square shape.
Final Prototype
Final prototype with overlapping Vivak strips
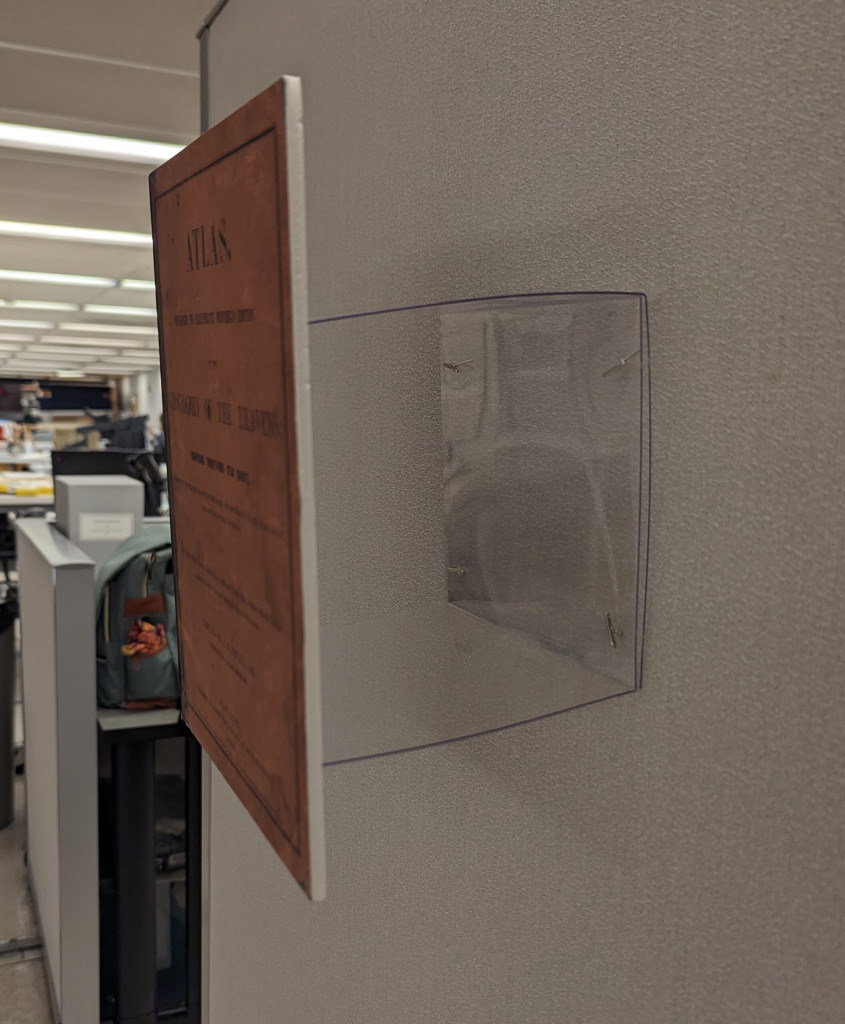
Attached to wall with Vivak folds at top and bottom – still showed propensity to sag
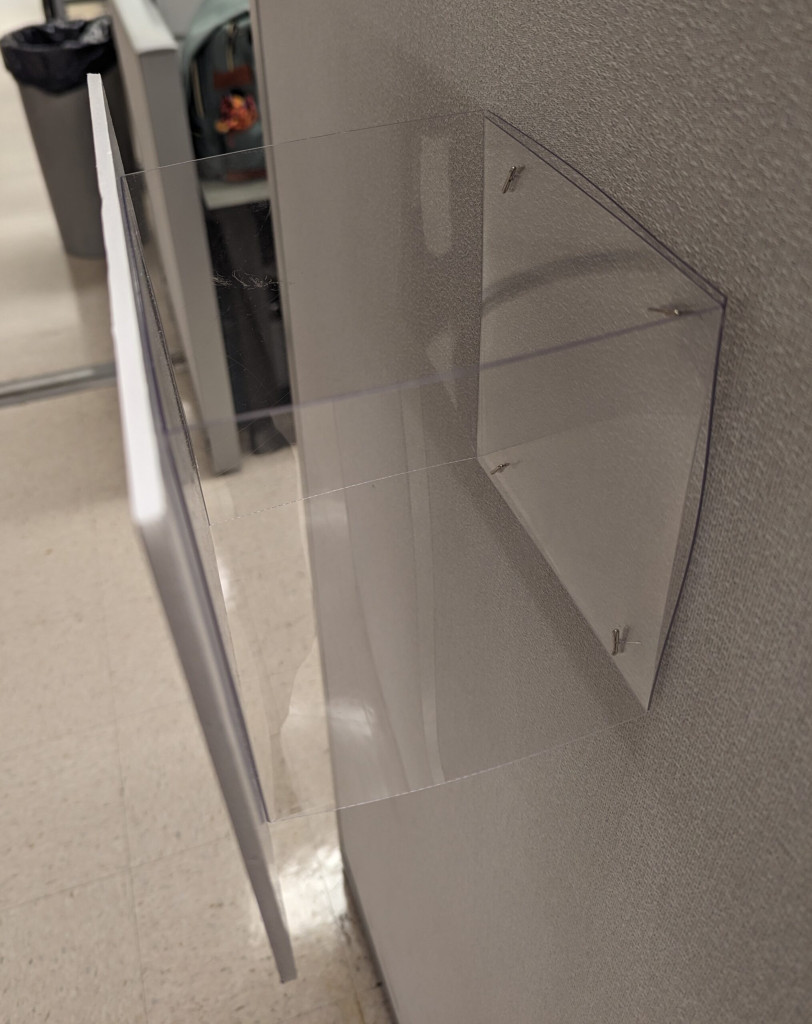
Attached to wall with folds along sides – this eliminated the tendency to sag!
The final prototype gave the stability of the second prototype but was easier to produce as only one piece of Vivak needed to be cut. After constructing this successful variation, I had the idea to rotate the “pop-out” 90 degrees so that the creased section of the Vivak would be vertical rather than horizontal, eliminating any tendency for it to sag from these creases outward.
Installation
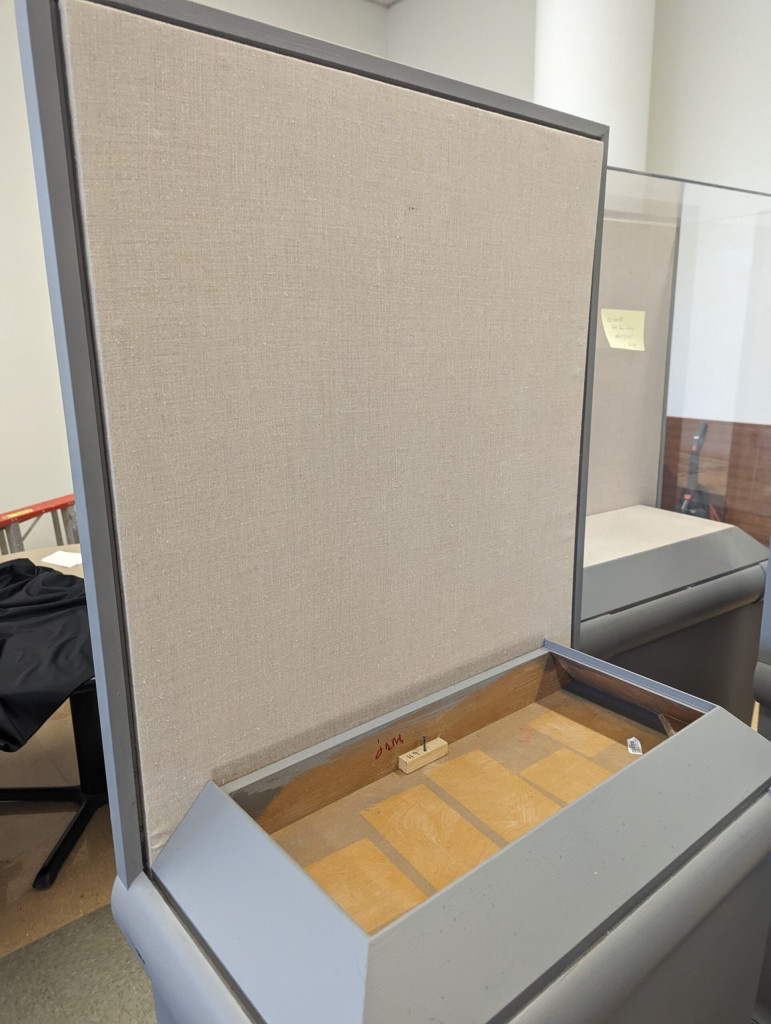
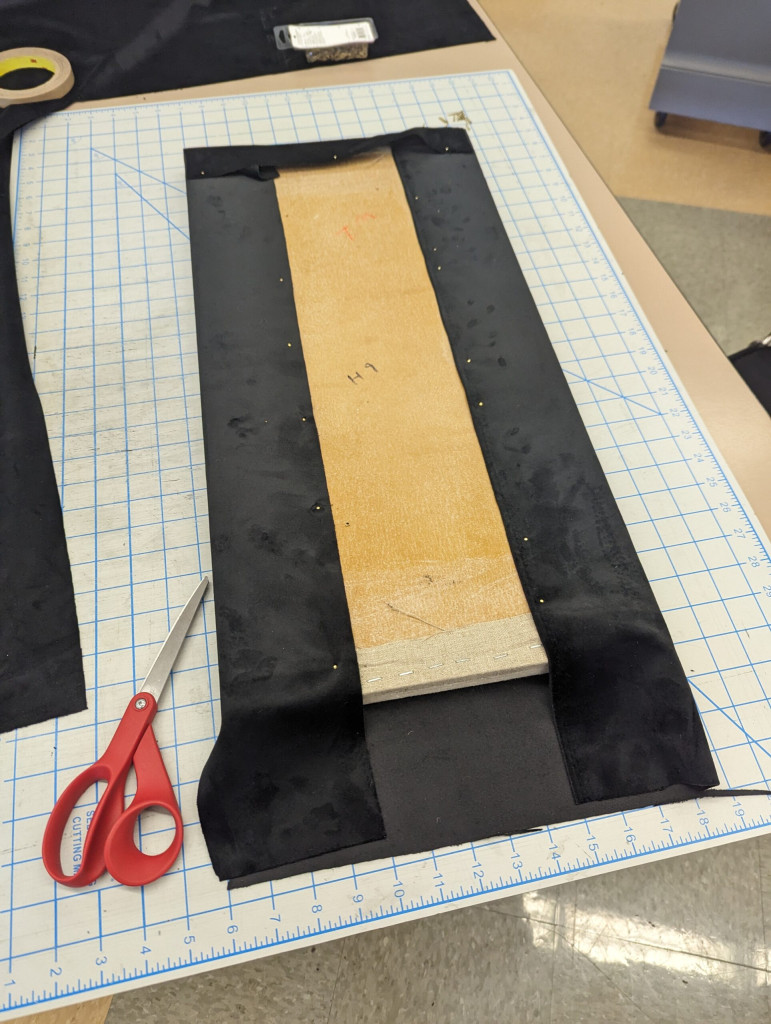
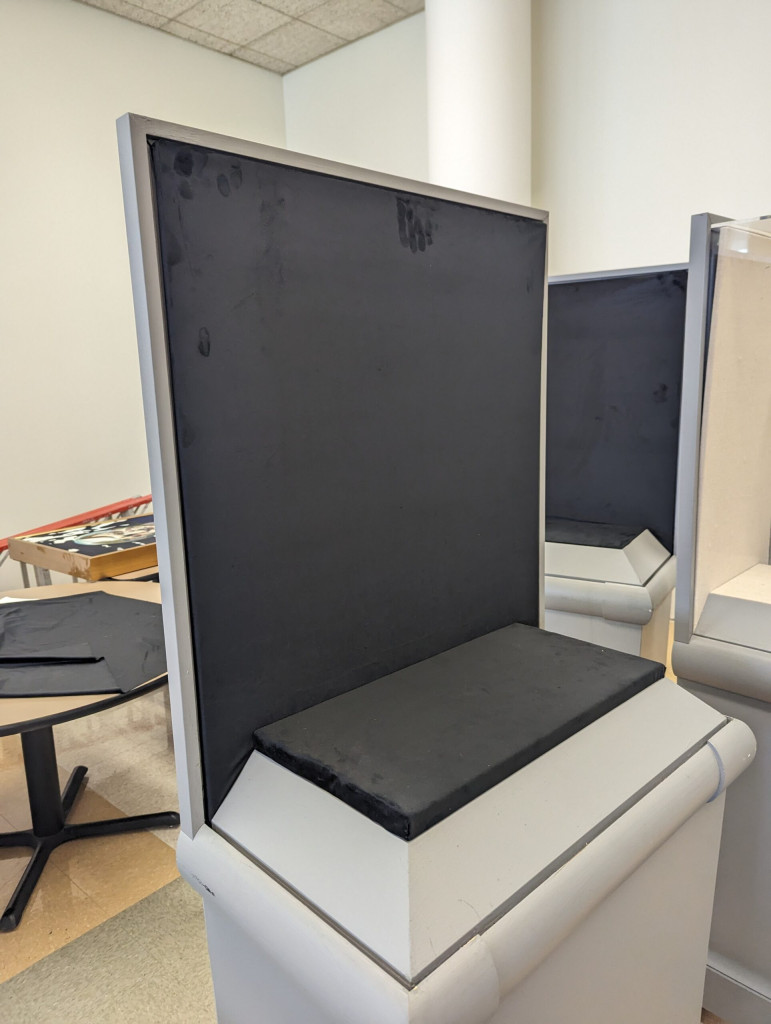
Sara had also requested that both the cloth-covered wall and base of the display be covered in black velvet to give the display a cleaner look, as the existing cloth had seen better days. This was accomplished by removing the boards, cutting enough velvet so they could be wrapped and completely covered on its exposed side, and then secured on their hidden underside using a staple gun.
The case before modifications, during deconstruction
The walls and base of the case were recovered with black polyester velvet
The case reconstructed after recovering
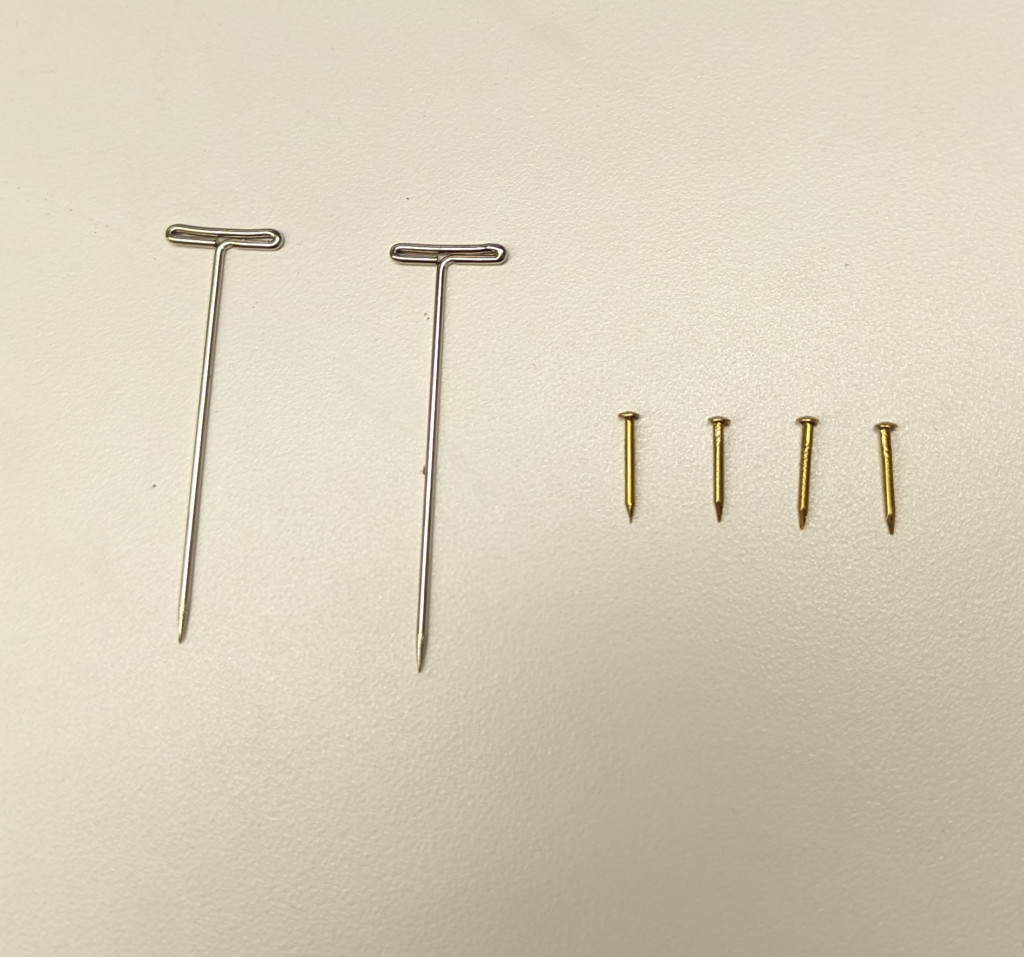
I had initially planned on using large “T”-shaped pins to fix the “pop-outs” to the cloth-covered wall, as they were abundant in the lab, and I felt the length of them would yield a stronger hold. However, upon attempting to test the prototype on the actual display case, it was discovered that the wall I assumed was cloth-covered foam was cloth-covered wood. As the “T”-shaped pins were long and not very sturdy, they would be extremely difficult to hammer into the wood.
I ended up using small ½” brass escutcheon pins. They are low profile and would be relatively easy to hammer into cloth-covered wood. I punctured 4 pilot holes through the overlapping “C” lips so the pins could hold the Vivak together, and then individual pins were hammered through the holes into the cloth-covered wood.
Long T-pins compared to the shorter escutcheon pins
The shorter pins were the perfect length to nail into the thin display case wall
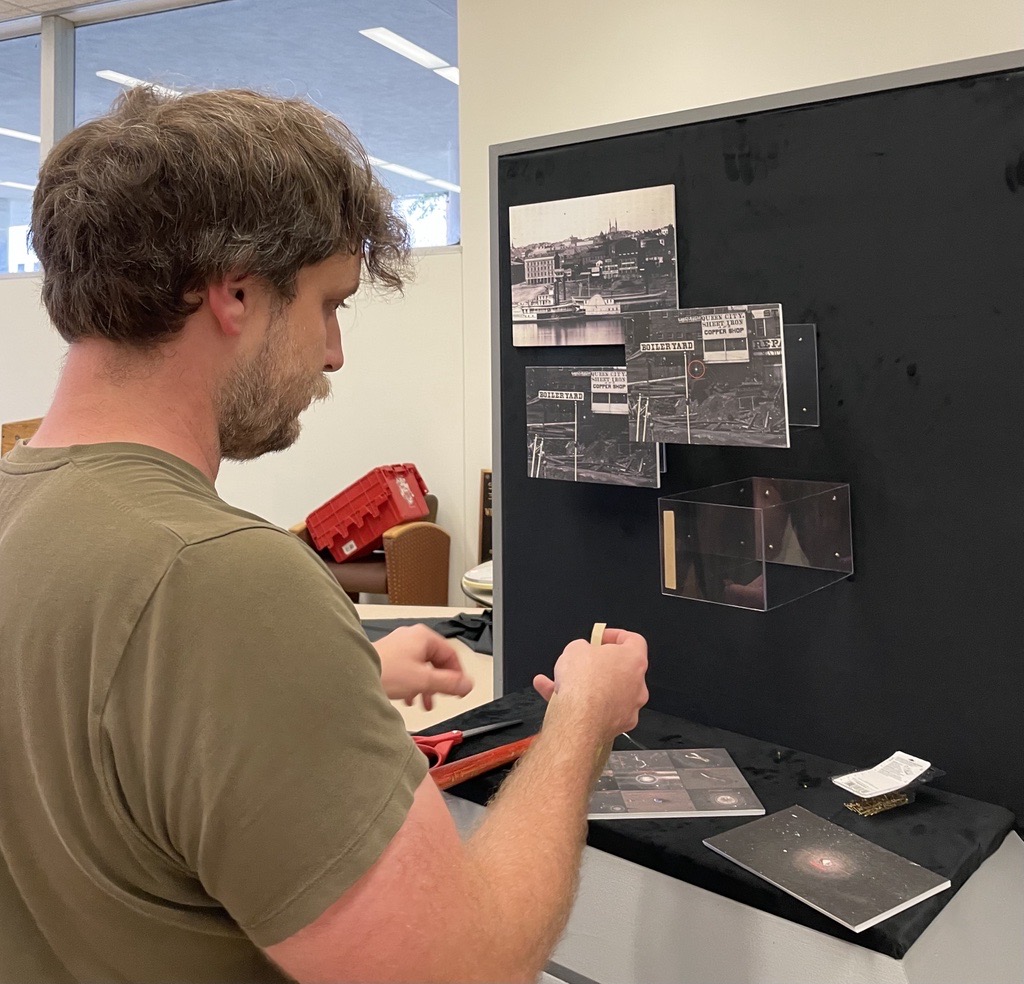
Once the velvet was installed and the “pop-outs” were secured to the freshly velvet-covered boards, the images could be adhered directly to the Vivak using double stick tape, as they were surrogate images printed onto foam board.
Nailing the Vivak support to the display case wall
3M 415 double stick tape was used to adhere the surrogate images to the Vivak supports
The Display During Installation
Once the cases were modified with the black velvet polyester and the Vivak supports were nailed into place, the bases were ready for Sara to add additional components underneath.
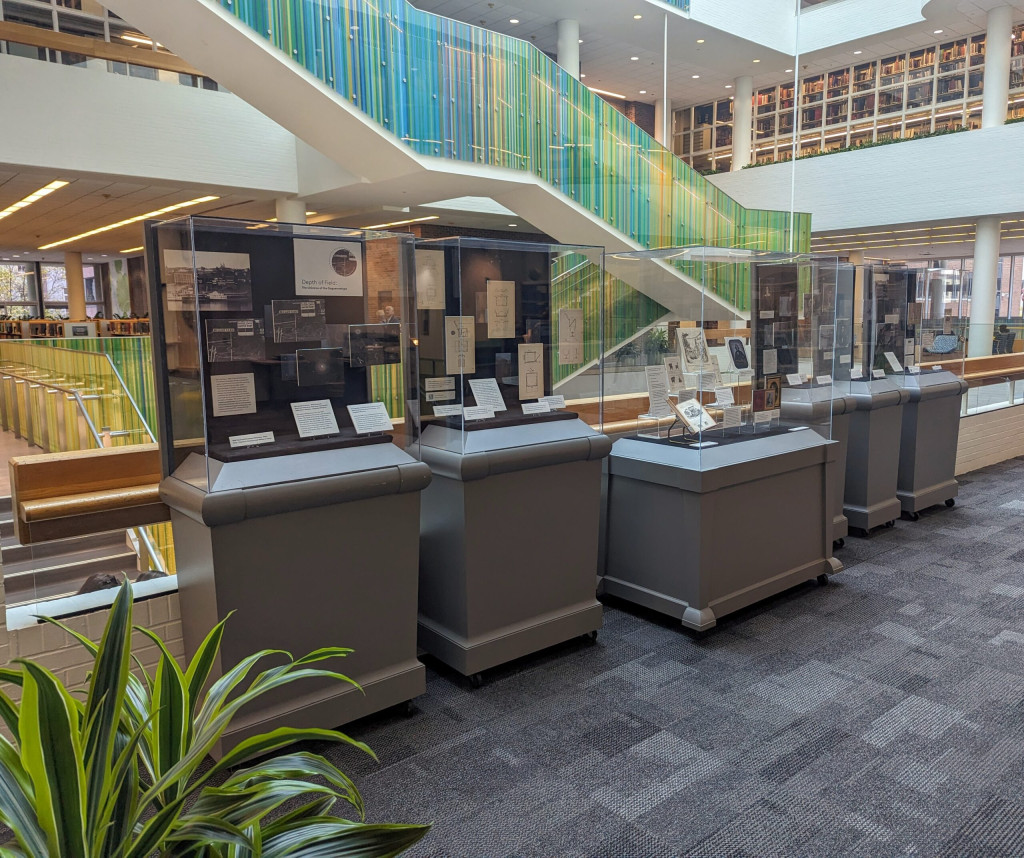
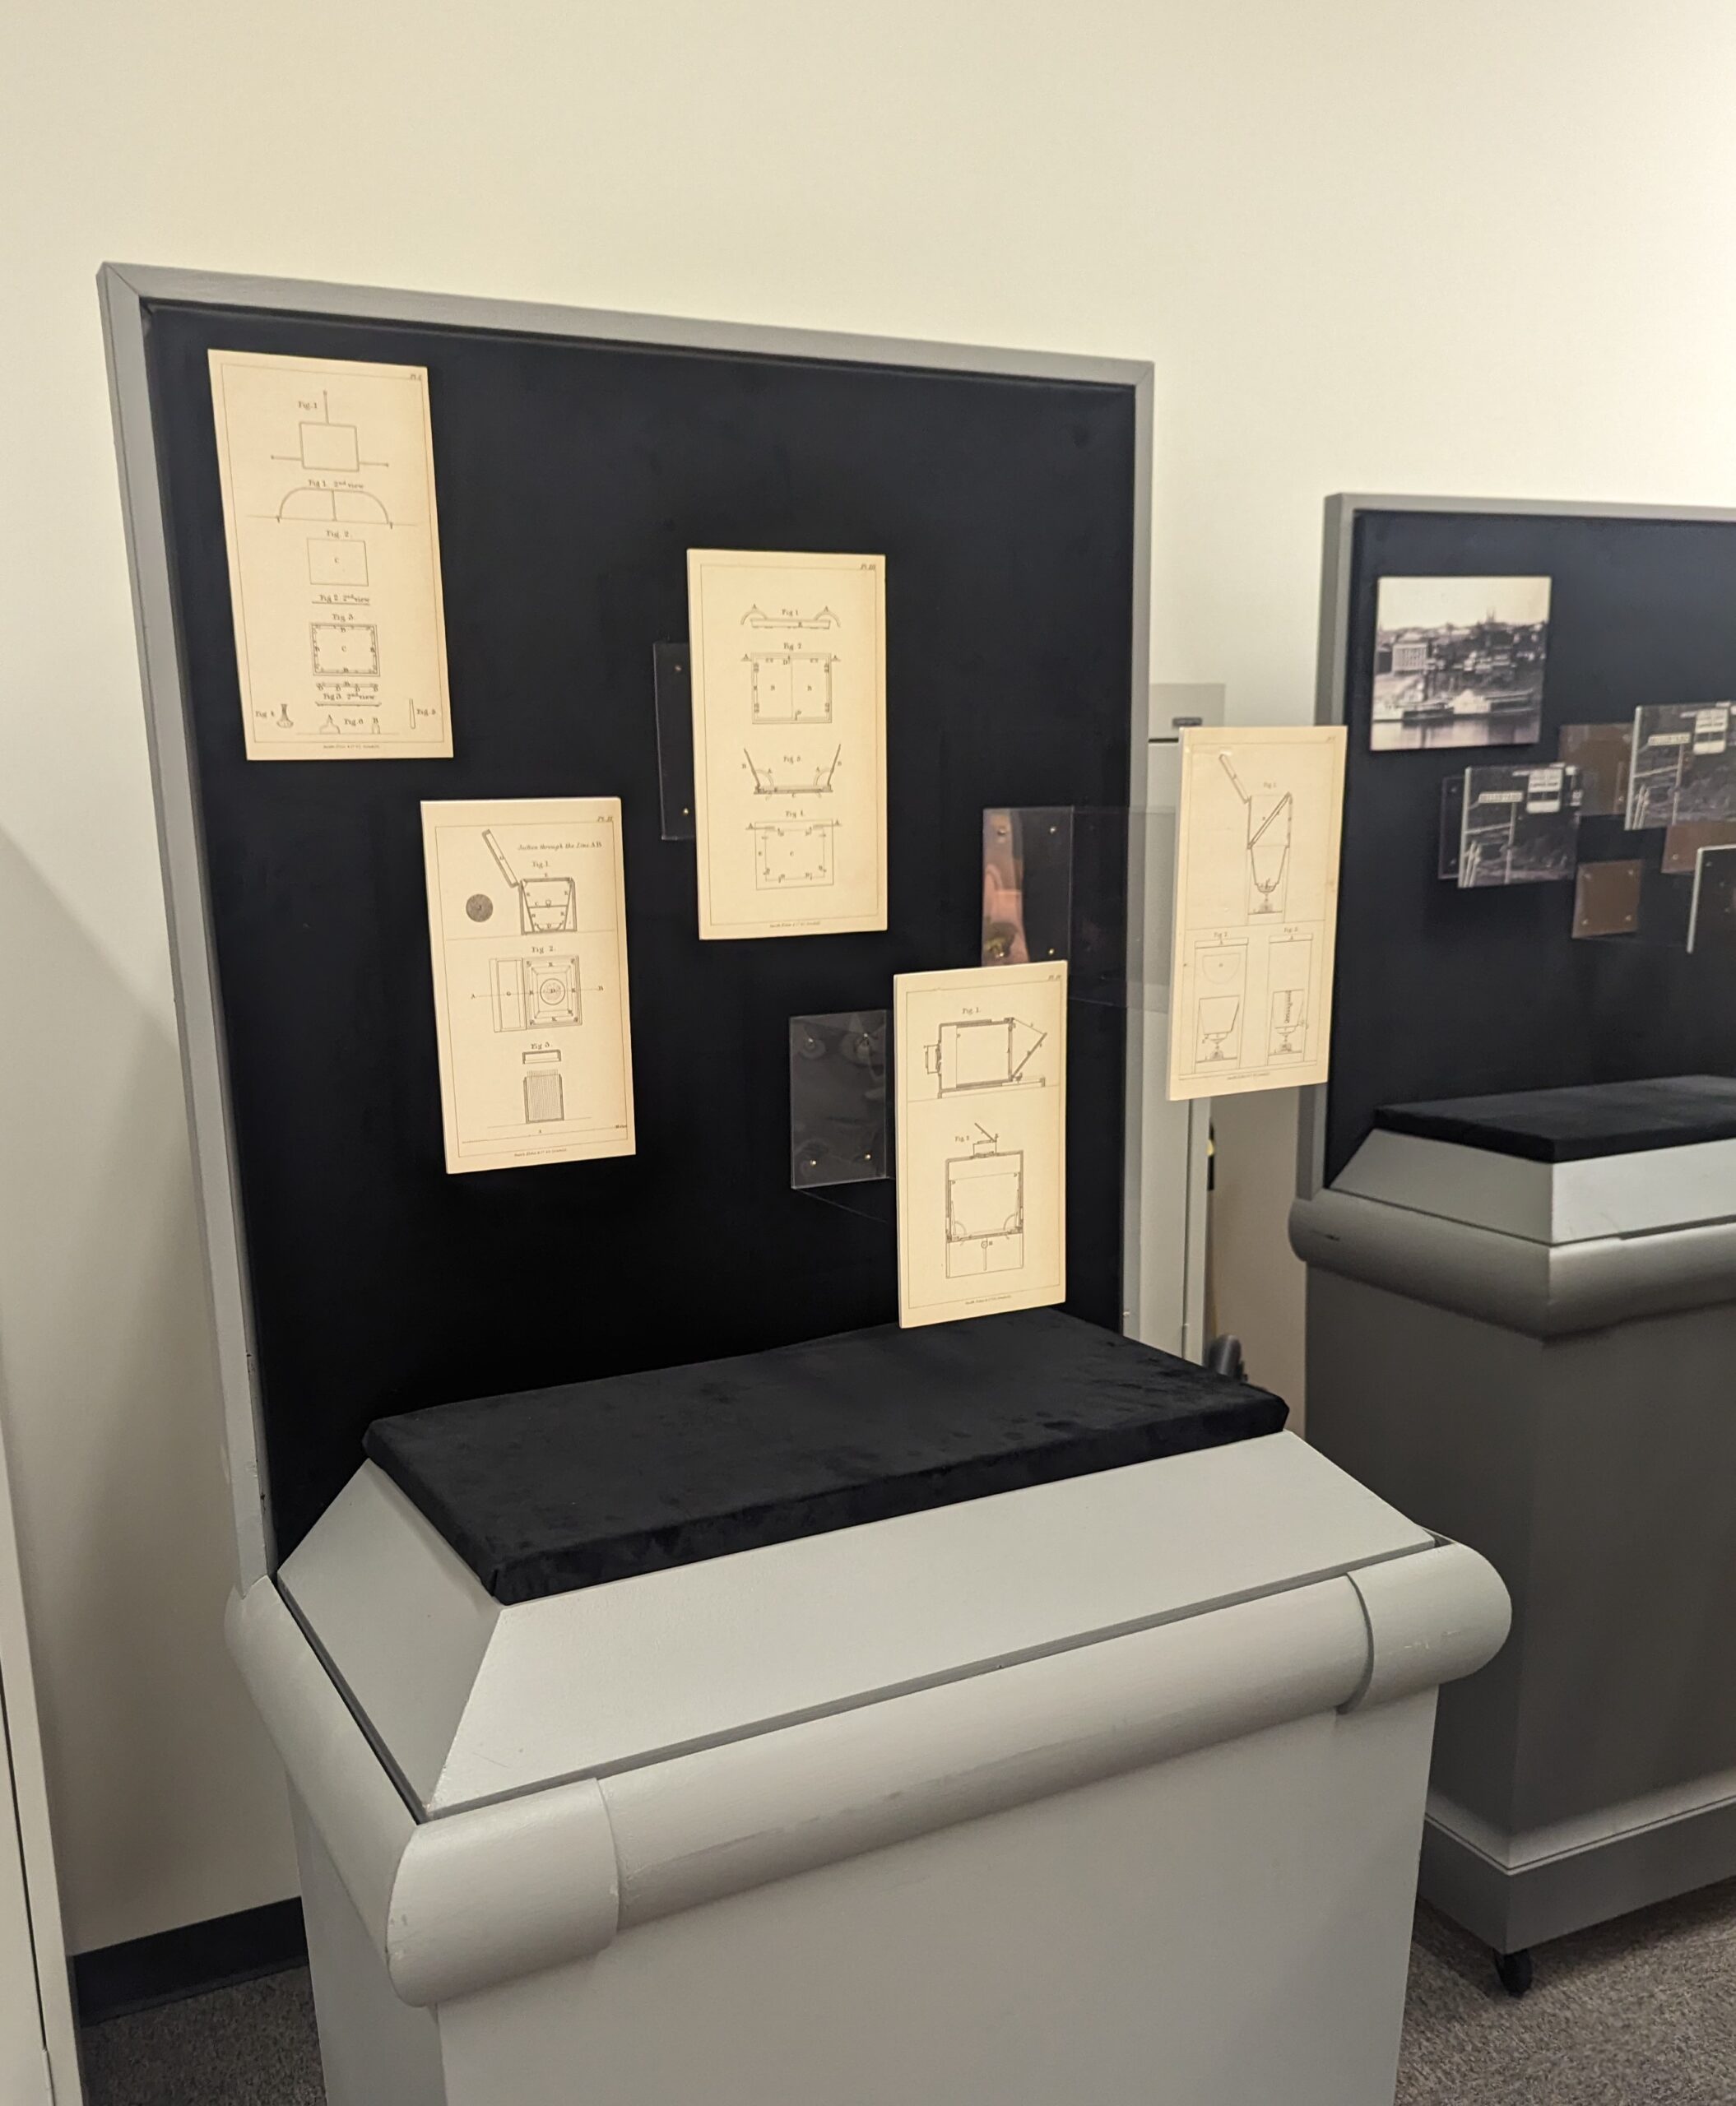
View at an angle showing the varying depths of field
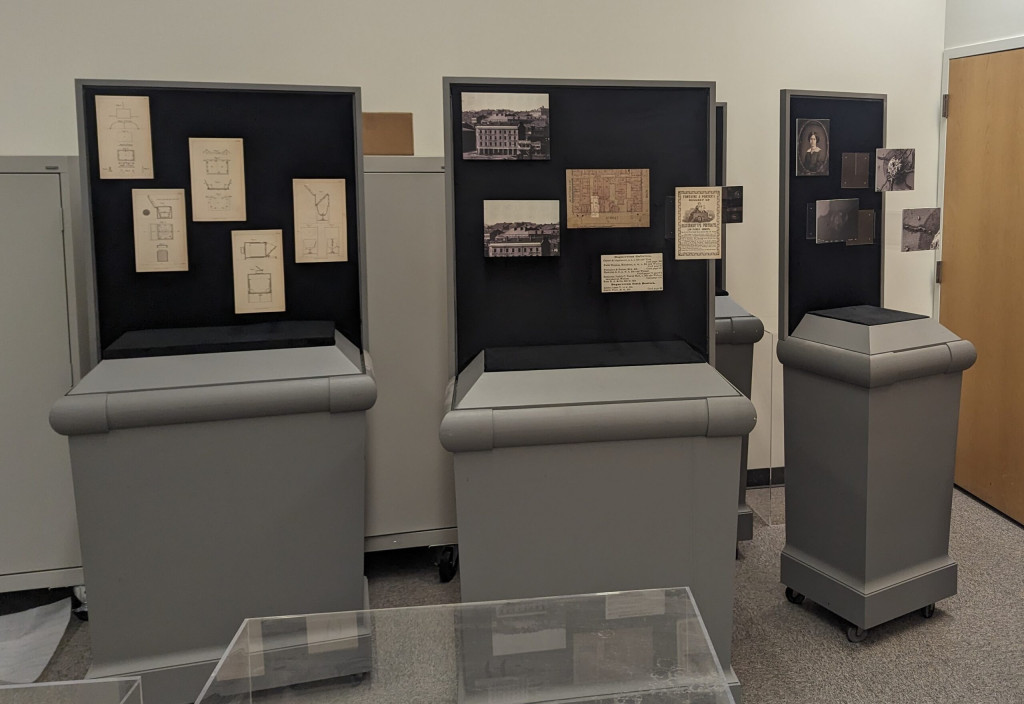
Three cases ready for final touches by Sara Williams
After Installation
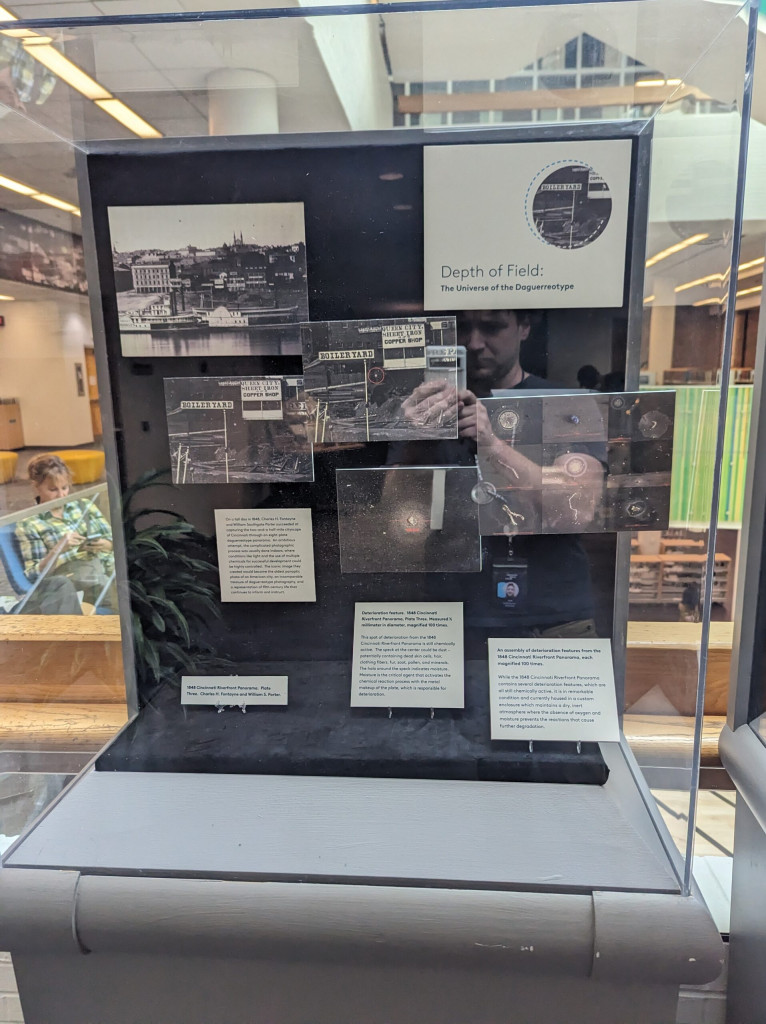
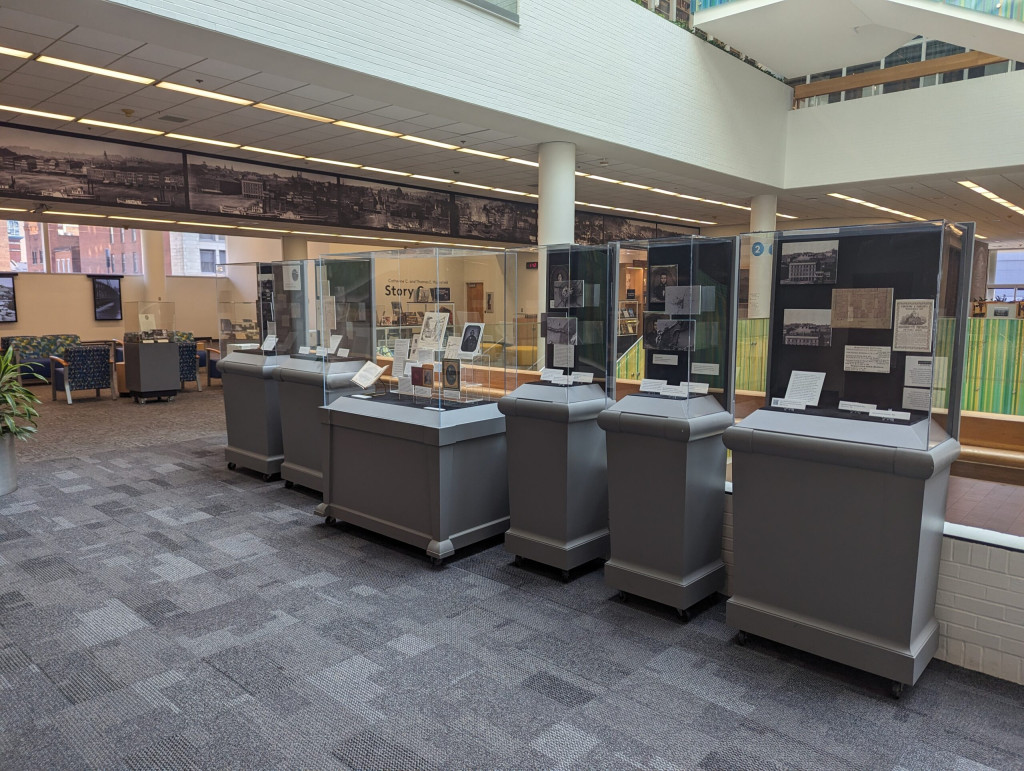
The completed display, entitled Depth of Field: The Universe of the Daguerreotypewent live on September 24, and was located on the 2nd floor of the South building at the Downtown Main branch of CHPL through November 1st. Sara Williams curated a wonderful series of images, featuring supplemental newspaper articles, city directories, images shot through a microscopic lens, and more to highlight both the scientific and human stories that are contained within this iconic Daguerreotype.
Captions describe:
The astonishing achievement of how the photographic images were captured outdoors when normally, daguerreotypes are produced indoors to control the complicated process.
How moisture and dust caused deterioration specks which are shown under 100x magnification and routinely monitored.
The panorama’s unique anoxic custom enclosure, where the absence of oxygen prevents further degradation.
Although the display is no longer viewable, its primary subject still is. The 1848 Fontayne and Porter Panorama Daguerreotype can currently be viewed in the Cincinnati Room of CHPL’s Downtown Main branch along with other fantastic displays curated by Sara. Be sure to check them out and be on the lookout for the return of FotoFocus in 2026!
View of the exhibit after installation next to the Story Center
Otto Ege (1888-1951) was a real-life figure known for his involvement in the dispersal of medieval manuscripts. Whether he is considered a villain or a hero depends on the perspective and context in which his actions are viewed.
Ege was a book dealer and collector who gained notoriety for breaking apart medieval manuscripts and selling individual leaves or pages to collectors and institutions. He would disassemble bound illuminated manuscripts and sell them as separate pieces or as a collection of works, thereby dispersing the original works.
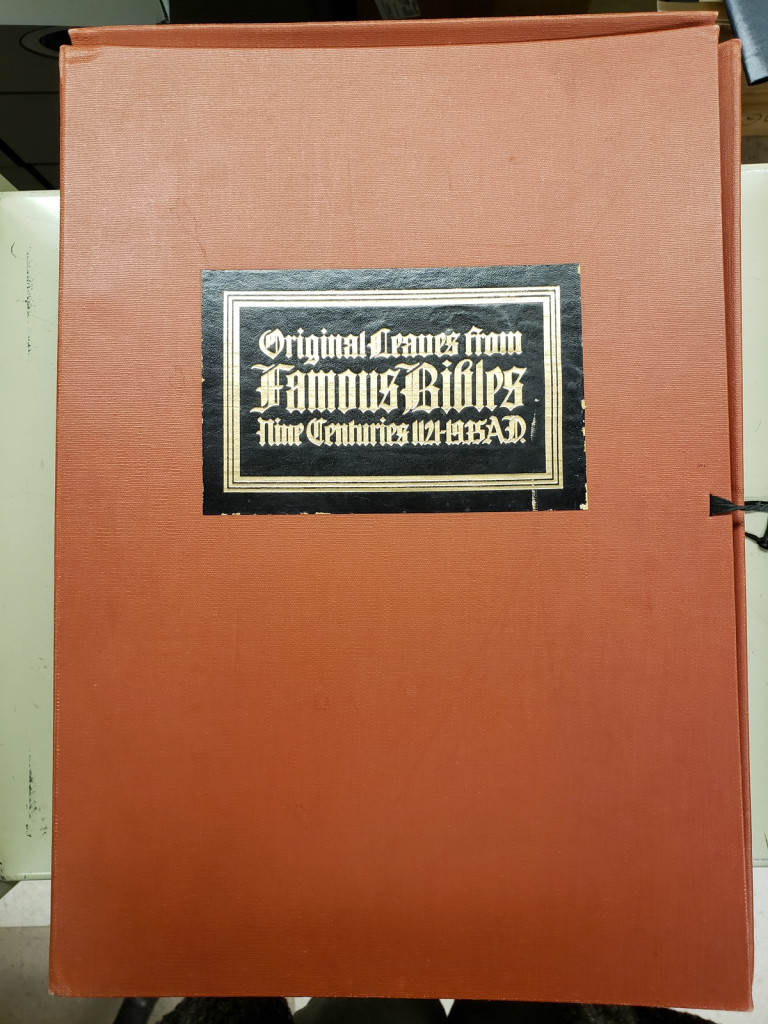
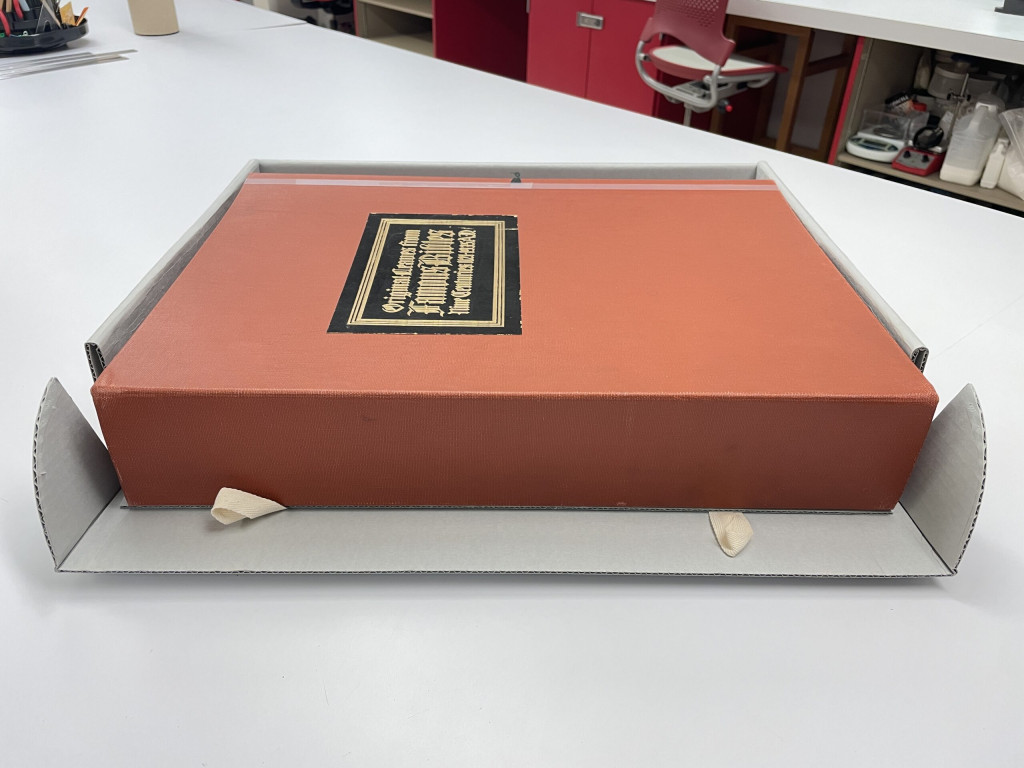
Original portfolio case
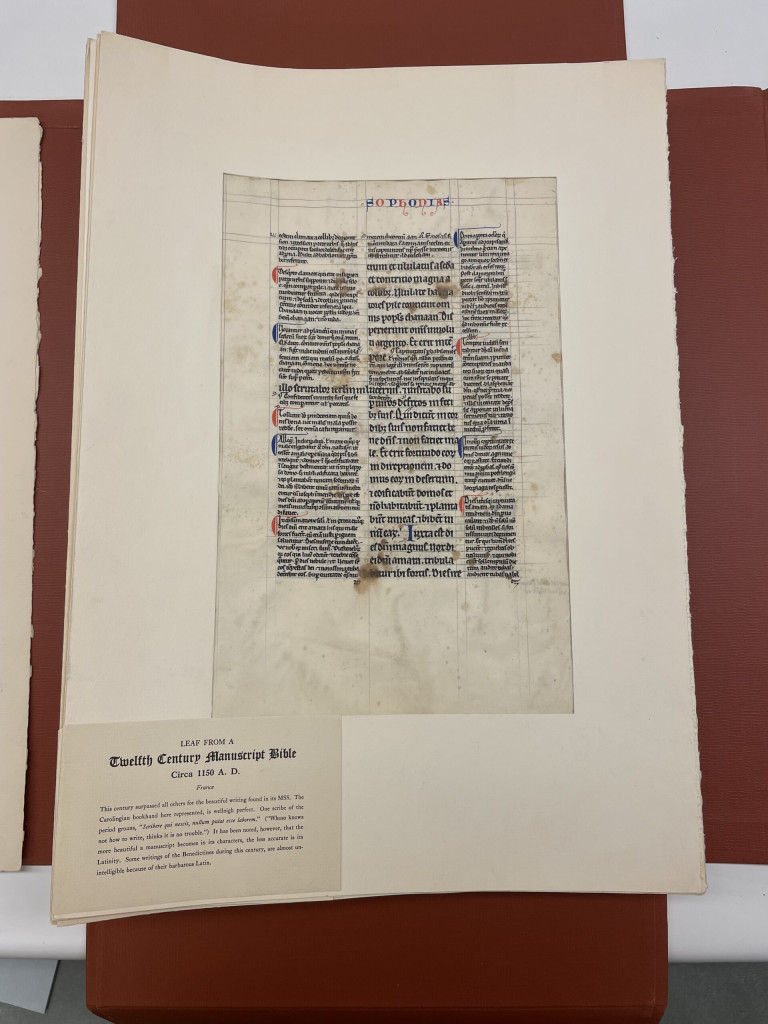
Leaf from 12th century manuscript bible
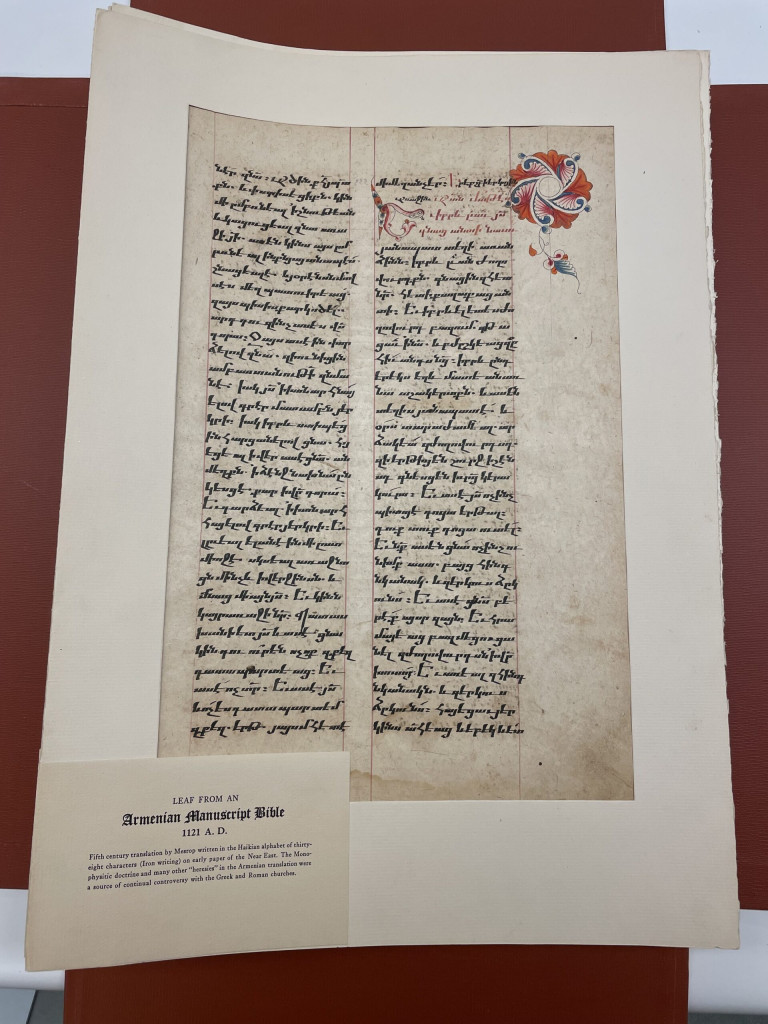
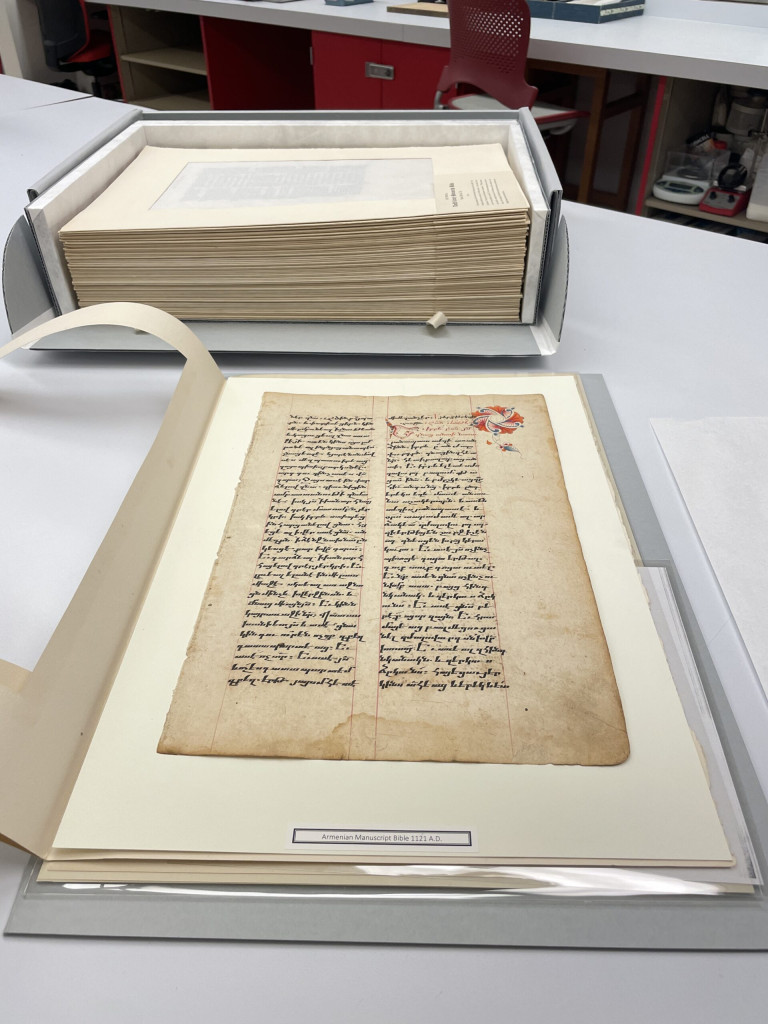
Leaf from 12th century Armenian bible
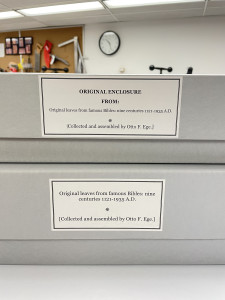
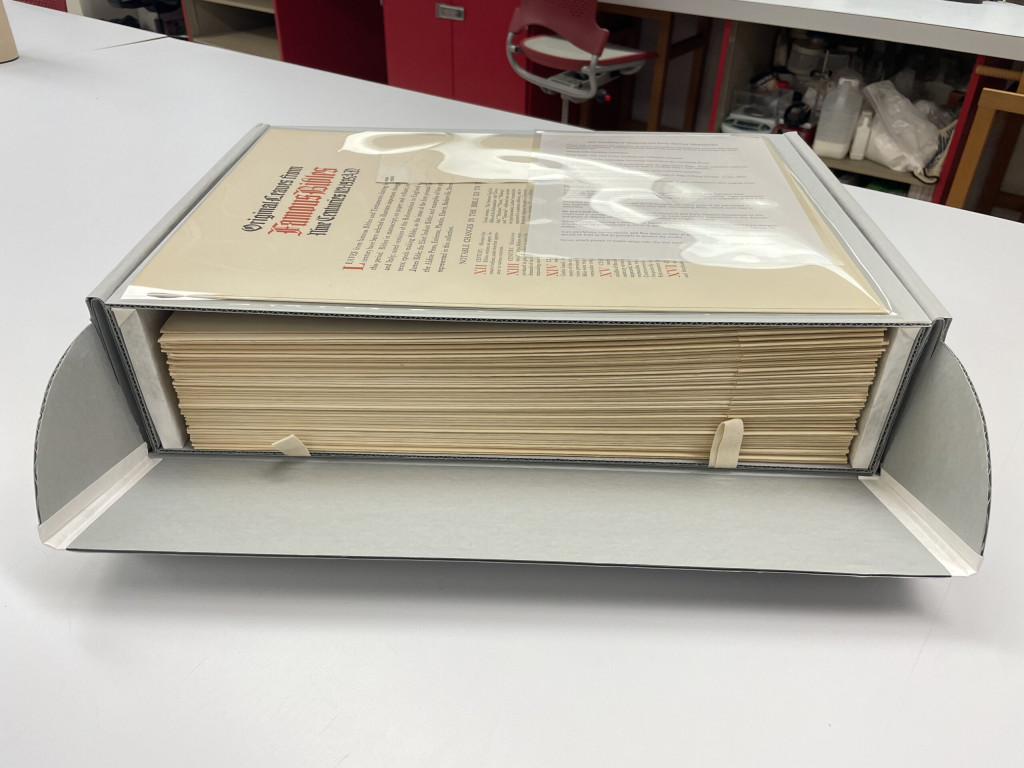
This is one of four Otto F. Ege collections owned by the Cincinnati and Hamilton County Public Library before treatment. It is titled Original Leaves from Famous Bibles, Nine Centuries 1121-1935 AD (call number R090 ffB582). It came to the lab for better long term storage.
Villain
From the perspective of some scholars and conservators, Ege’s actions are viewed as unethical today. By breaking up unique historic manuscripts, he caused irreparable damage to the cultural, historical, and scholarly heritage they represented. The dispersal of these manuscripts makes it challenging for researchers to study them as cohesive and complete works, leading to a loss of valuable historical information and artistic context.
Hero
On the other hand, some might argue that Ege’s actions had positive effects. By selling individual leaves, he made rare and exquisite artworks more accessible to a broader audience, including institutions and collectors who might not have been able to afford an entire manuscript. This enabled more people to appreciate the beauty and artistry of these ancient texts.
Conclusion
Otto Ege’s legacy is a complex one, and opinions about him vary widely. However, it is essential to note that Ege’s actions occurred in a different time when the appreciation for medieval manuscripts as complete works of art was not as prevalent as it is today. Modern views on preservation and the importance of maintaining cultural heritage have evolved significantly. Ultimately, his actions highlight the ethical and moral dilemmas surrounding cultural heritage and the need for responsible stewardship of historically significant artifacts.
Treatment and Storage of the Public Library’s Collections
The Public Library owns four collections by Ege. Each have been receiving treatment to better improve their long-term storage. After the smaller collections received successful treatment, this larger collection followed suite.
Treatment
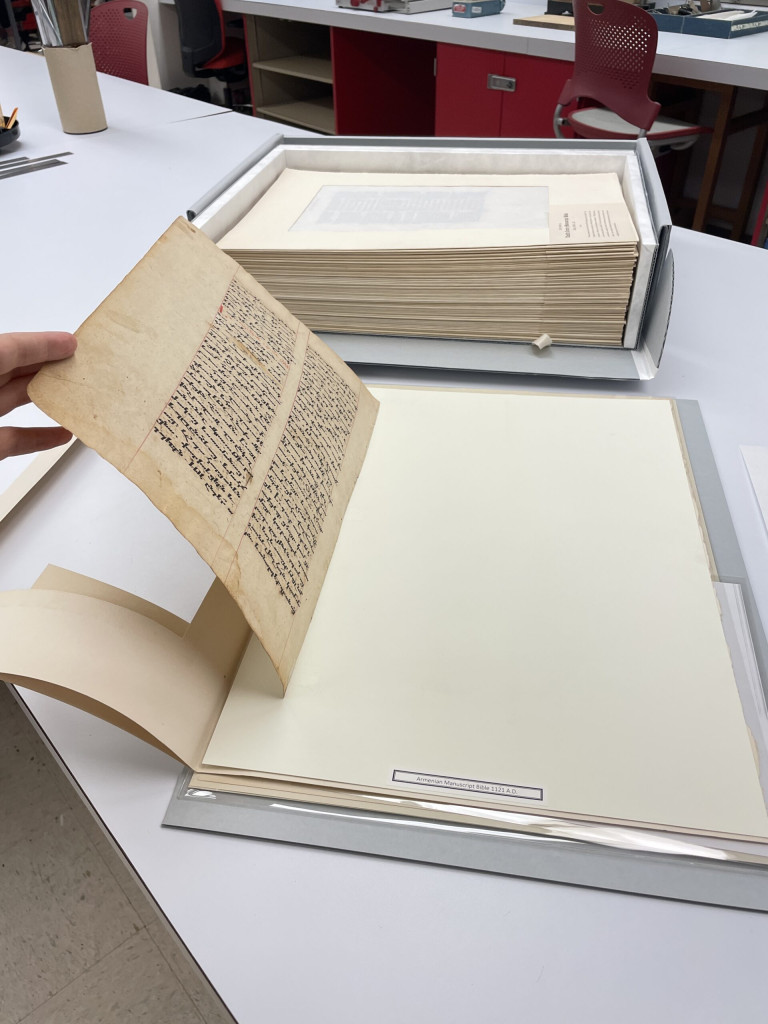
In their original format, the manuscript leaves were hinged to floppy paper folders with windows cut out for viewing. The original hinges were thick cloth, and in many cases, no longer functioning as the hinges became stuck in place. This prevented viewing the backs of the materials. The flexible folders overtime became U-shaped and were in need of supports to keep materials planar, especially during handling.
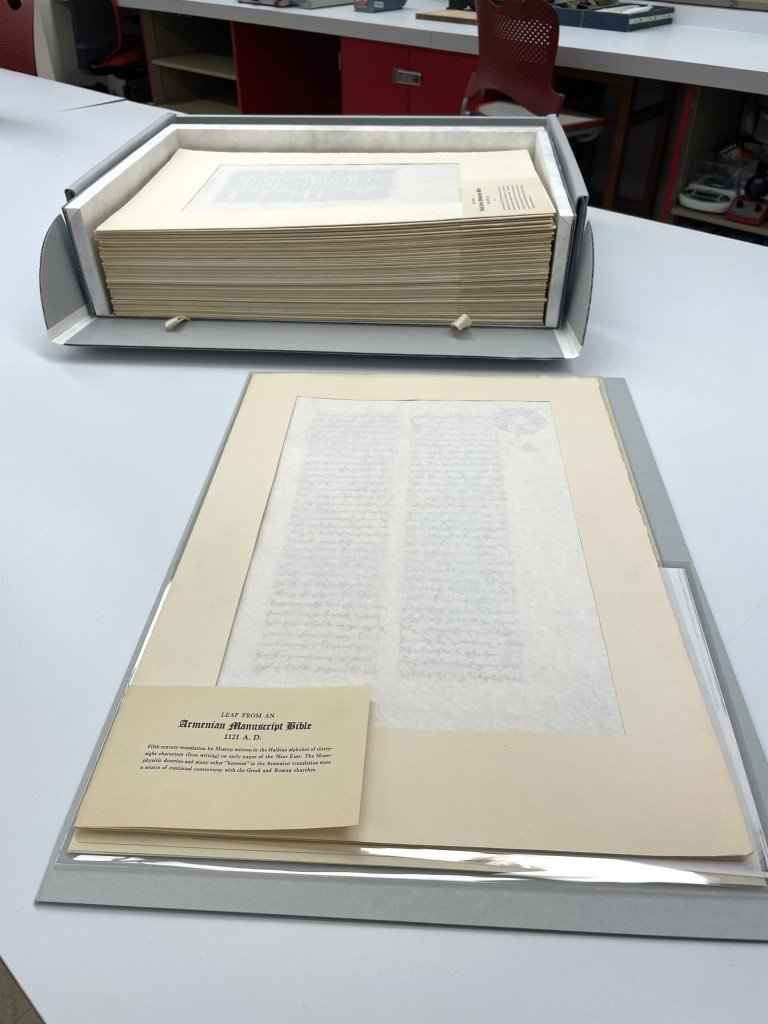
Individual leaves were unmounted from the original paper folders and re-hinged with kozo tissue and wheat starch paste onto archival 2 ply mat board supports. The mat board supports were then placed within the paper folders. Unbuffered interleaving tissue was then added between the manuscript and the folder window for long term storage to prevent the edges of the window from catching or rubbing onto the objects.
Armenian manuscript hinged to 2ply mat board support, stored within the original paper folder
The backs are now viewable!
Interleaving tissue protects the face of the manuscripts from rubbing along the edges of the windows
Storage
While other collections were retained within their original enclosures with a protective chemise, this portfolio was acidic and deformed with broken ties, so two new corrugated banker’s boxes were created to retain the original enclosure and store the manuscripts separately.
Additional Resources
The Public Library also owns Ege collections titled Fifty Original Leaves from Medieval Manuscript Western Europe: XII‐XVI century (call number R096.1 ffF469), Fifteen original oriental manuscript leaves of six centuries (call number 096.1 ffF469f), and Original Leaves from Famous Books, Eight Centuries 1240 A.D. – 1923 A.D. (call number R094 ff069).
The collection Fifty Original Leaves from Medieval Manuscripts is digitized and is available online in the digital library.
There are also multiple copies of the printed pamphlet by Otto Ege titled Pre‐Alphabet days. Interestingly, Genealogy and Local History own two copies in different formats. One copy is a cased‐in hardback with a single sewn gathering while the other copy is a single gathering pamphlet sewn into a paper case. Both pamphlets are original formats that would have been offered to buyers at different price points!
If you’re interested in further treatment details, check out our treatment reports on the Digital Resource Commons by searching for Otto Ege.
Ashleigh Ferguson Schieszer [CHPL] – Special Collections Conservator, Lab Manager
The Preservation Lab at UC Blog uses Accessibility Checker to monitor our website's accessibility.