How often do we pay attention to the framed portraits of important people and historical figures that hang on the walls of our institutions? Perhaps we glance their way every now and again, perhaps we even contemplate these forgotten ghosts briefly; but how often does a piece with its own provenance, characters, and stories simply become part of the everyday background, and how do we approach preserving these items, so they are not lost to history?
Frame By Frame
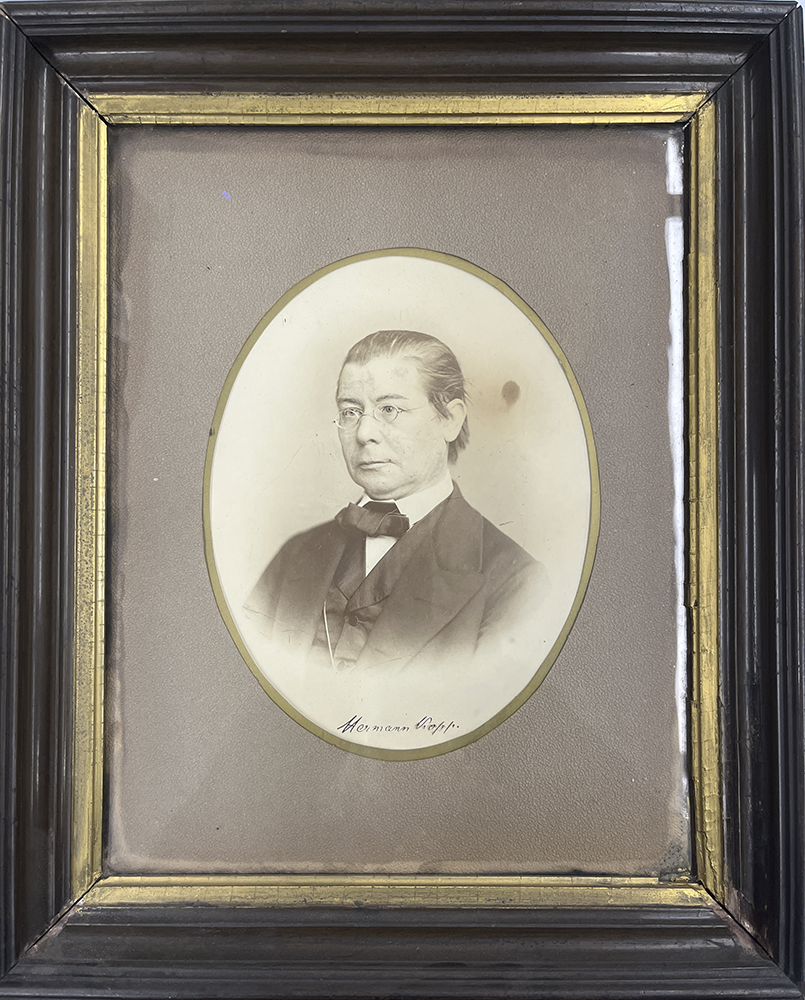
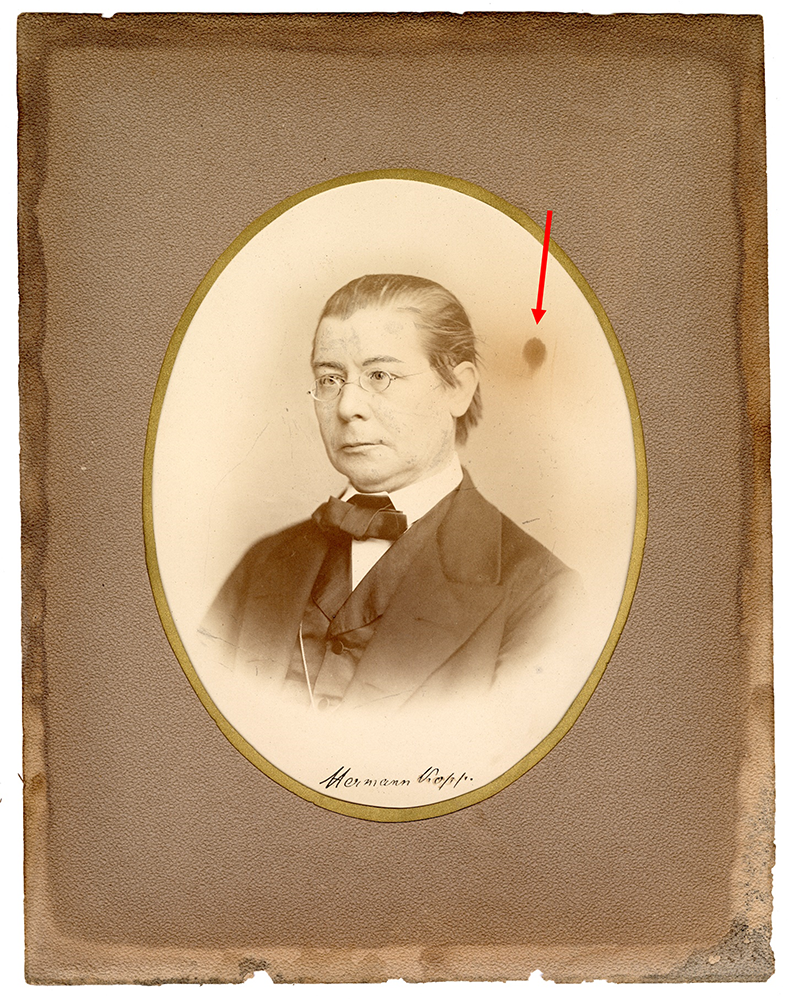
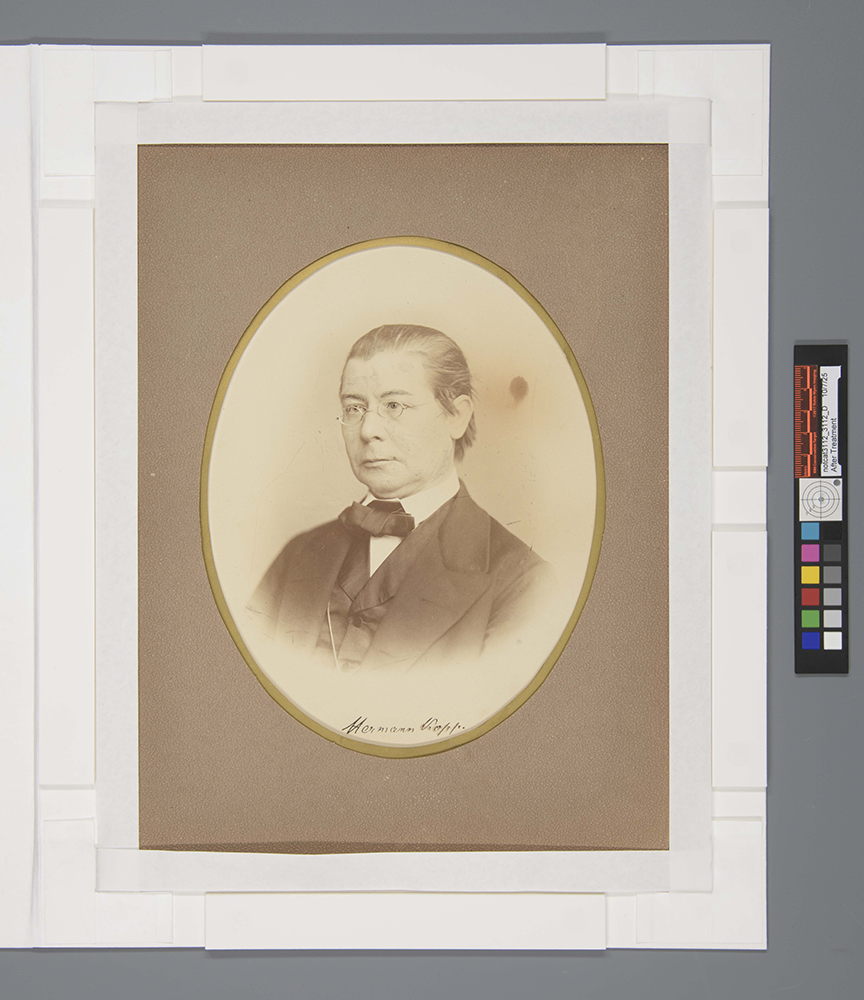
Recently I was assigned a framed portrait of German chemist and historian Hermann Kopp from the Oesper Collections in the History of Chemistry at the University of Cincinnati Libraries. It arrived with a similarly framed portrait of German physicist/mathematician Gustav Kirchhoff, both of which were gifted to early UC chemistry department chair Thomas Norton in 1875 upon completion of his PhD at the University of Heidelberg. They would later become part of the Oesper Collections, and have been, for some time now, hanging on the wall of the library section since the collection was moved there in 1998, according to librarian Mark Chalmers.

Hermann Kopp, before treatment
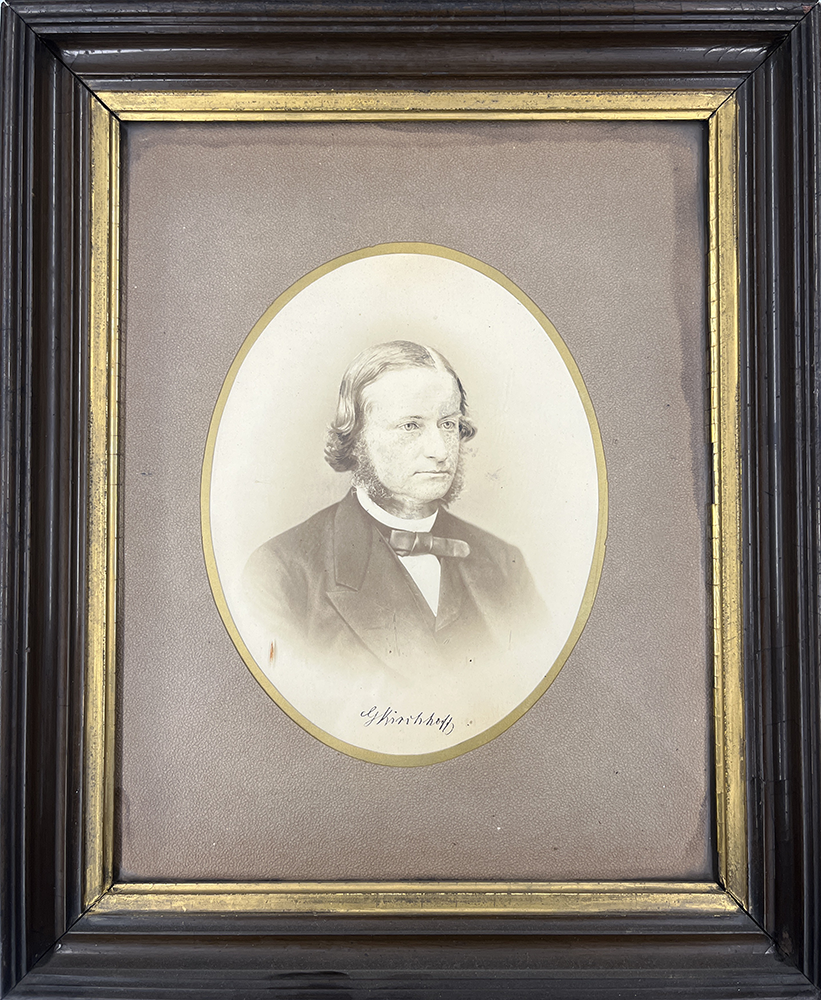
mathematician Gustav Kirchhoff, before treatment
The Preservation Lab has received quite a few framed items from this collection as of late and the treatment/housing requested by the selectors has become a common one that we practice. It involves scanning the original and printing a high-quality surrogate image of the photograph or print which can then replace it inside the original frame. The original photograph/print can then be moved to a more archival storage option where it will be less susceptible to damage and degradation. A framed portrait of Marie Curie’s daughter, Irene Joliot-Curie with an inscription from Ralph Oesper received this treatment and storage solution.
The Kopp portrait however, proved to require more creativity than prior framed items, and gave me an opportunity to try out a more unique storage solution.
Kopp’s Portrait
The portrait was framed under several layers. From the bottom up, they included: a beige backing mat which the (likely) albumen print photo of Kopp was attached to, a thin piece of paper featuring an oval-shaped window with a golden border, and a thick brown textured paper, also with an oval-shaped window. These had been secured into a brown varnished wooden frame with painted gold inlays and a solid wood backing board held in place with rusty nails and metal brackets.
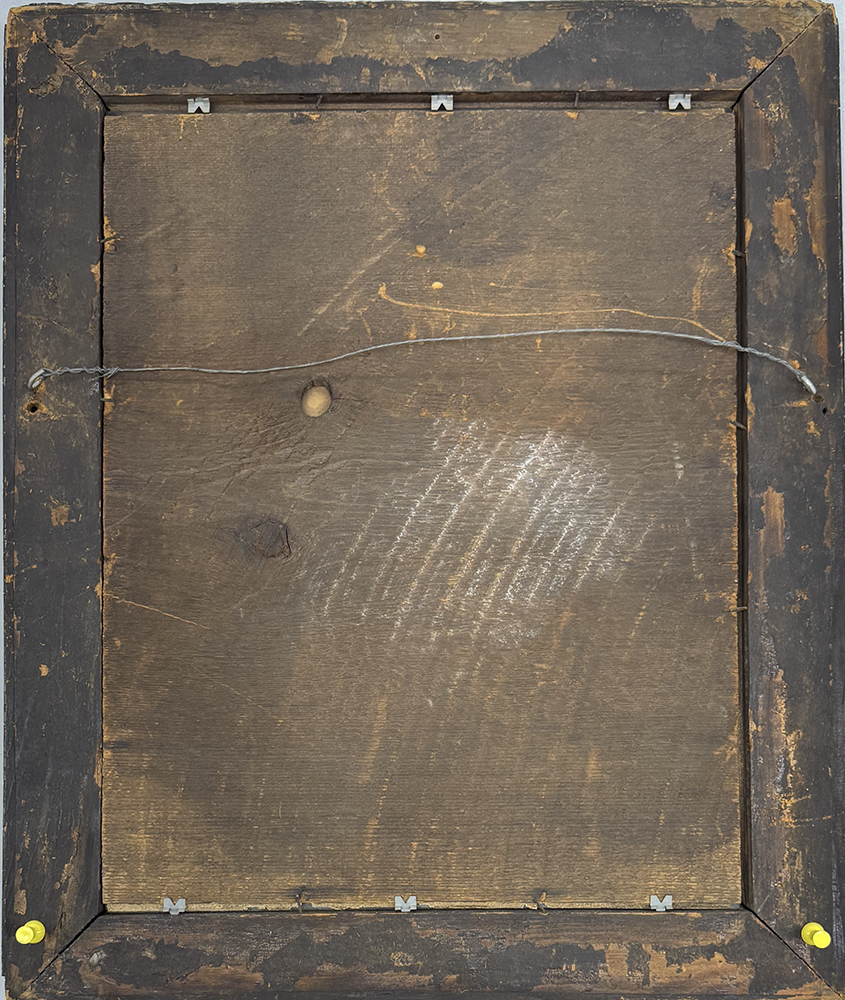
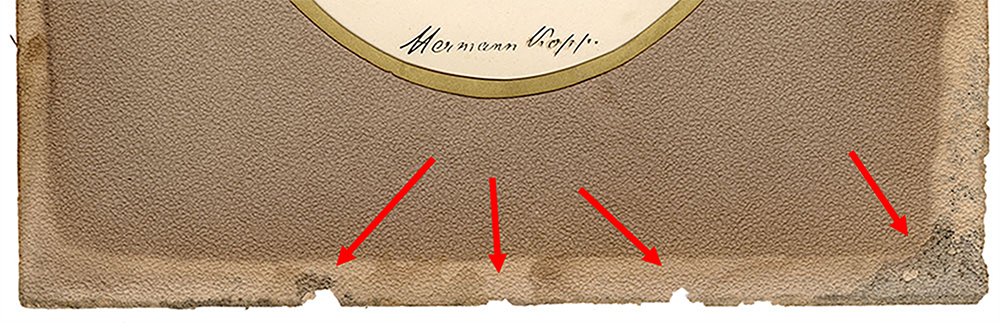
Unfortunately, just about everything outside of the photograph itself is in poor condition. The entire matting system is extremely acidic and brittle with pieces of the brown paper window flaking off around the edges. There is also evidence that it has suffered water damage in the past.
The Original Frame
Although the wooden frame the portrait was housed in for years is original and part of the object’s history, it is far from archival. With its varnished finish, rough wooden edges, and surface grime, it was likely doing more harm than good as far as the long-term preservation of Kopp’s portrait; it could not remain in this frame. The frame is, however, every bit as storied as the actual photograph.
Conditions such as those presented by this frame are a good example of why we often replace original items inside frames with surrogate images. This way, any potential damage or degradation caused by poor storage conditions will happen to a reproduction image opposed to the actual object.
The Surrogates
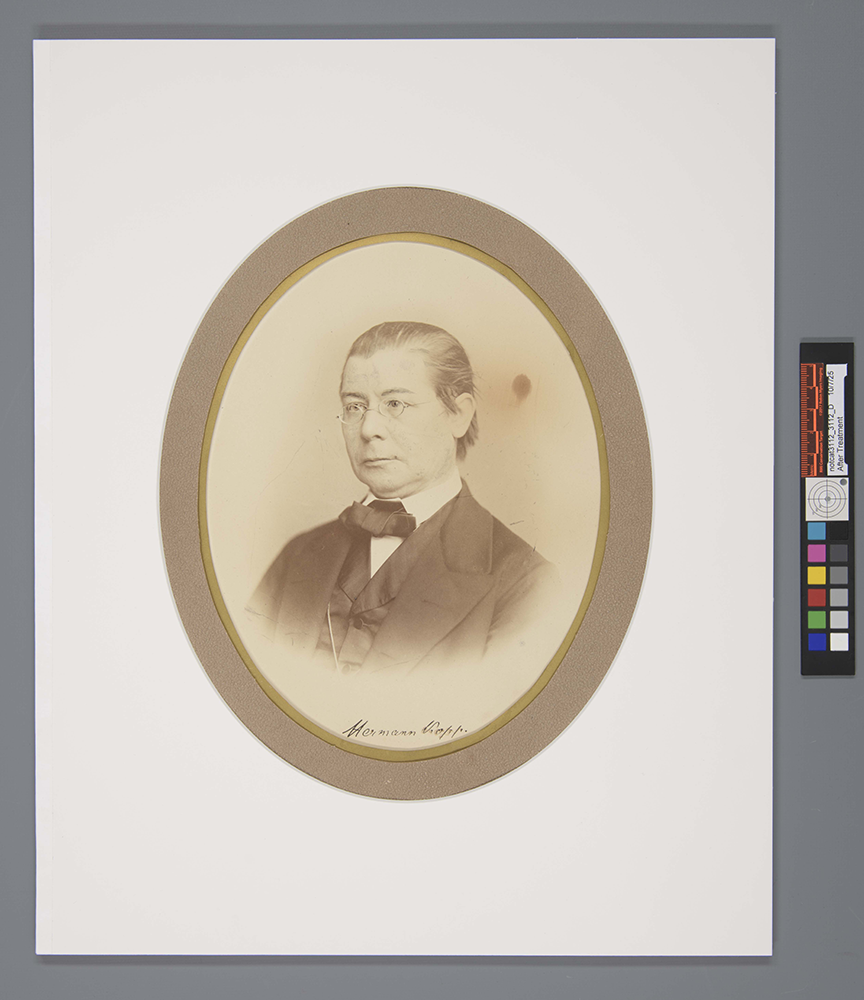
For this treatment, it was determined that two surrogates would be printed to be displayed in the Oesper Collection: one to take the place of Kopp’s original portrait inside the frame which could then be re-hung on the wall of the library, and the other to be added to a display in the museum section.
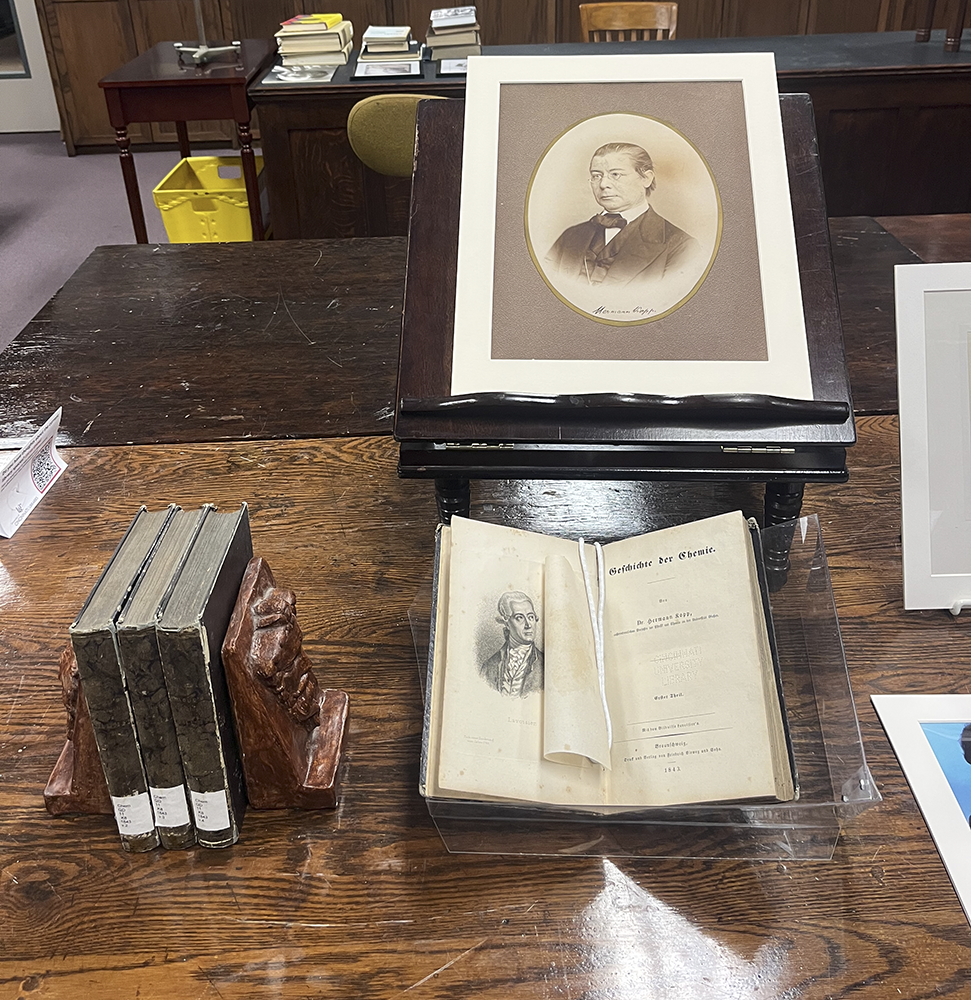
display in the museum section of the Oesper
Collections alongside Kopp’s four-volume series
Geschichte der Chemi (1843-1847), courtesy of Mark Chalmers.
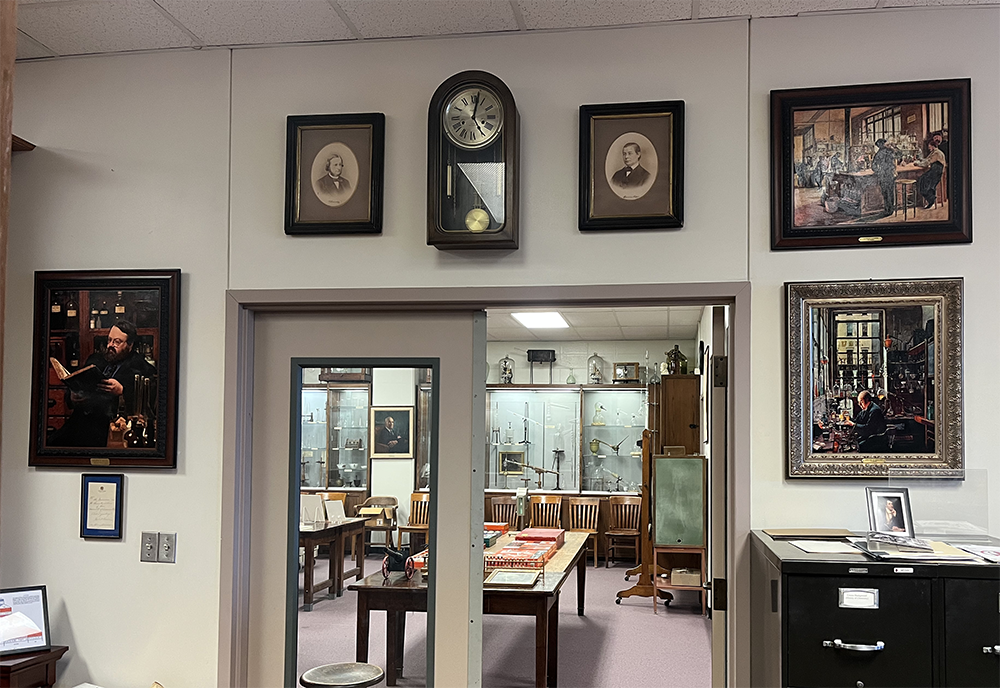
re-hung on the wall of the Oesper Collections library,
Courtesy of Mark Chalmers.
Jessica Ebert, Assistant Conservator at the Preservation Lab, and our go-to personnel for digital imaging, gently digitally retouched the image of Kopp, after consultation with the curator.

Storage Considerations
As with earlier framed items we have received from The Oesper Collections, it was decided a matting system was appropriate for safe storage of the unframed portrait and its included parts. However, the brittleness of the items and some uncertainty about how the photograph would react to environmental factors presented some unique challenges.
Although the mounting technique of placing them inside a polyester L-sleeve and mounting this with photo corners/strips would be easy and fast, there was some concern that humidity could enter the sleeve and cause damage to the photograph’s emulsion layer. Also, items mounted this way often need to flex and bend to a degree that these fragile materials likely could not afford.
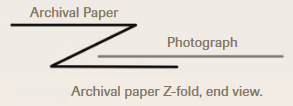
The Paper Cradle with Z-folds
After considering these factors, Assistant Conservator Jessica Ebert suggested a paper cradle with z-folds. This mounting technique utilizes archival paper that is partially cut diagonally at each corner. Each edge of the paper is then folded over itself twice in opposite directions, creating a pocket for the edges of an object to rest gently inside.
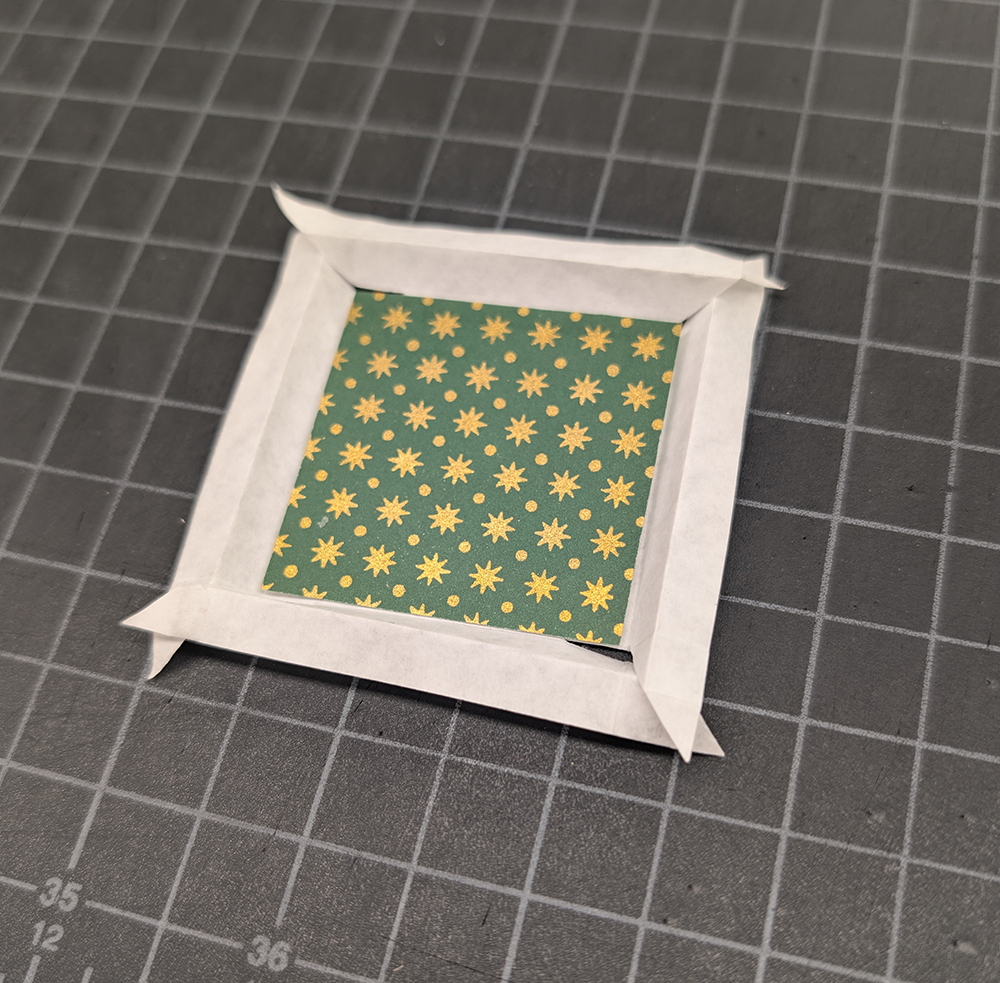
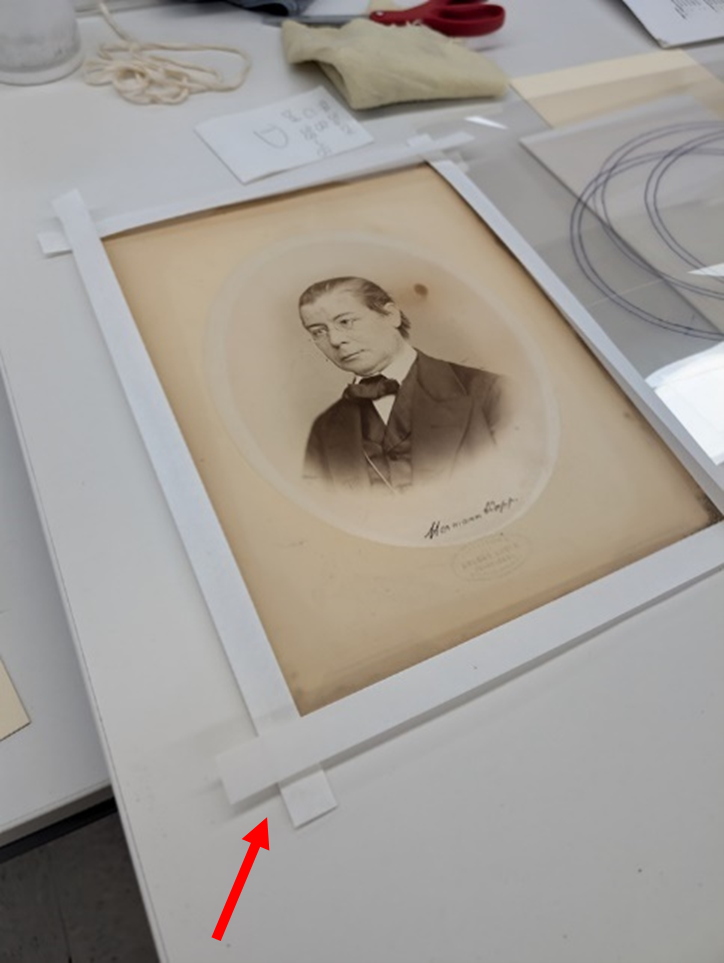
Once the cuts and folds have been made and the object is safely inside the cradle, the paper tabs extending off the corners of the cradle can then be mounted to a back mat using archival tape.
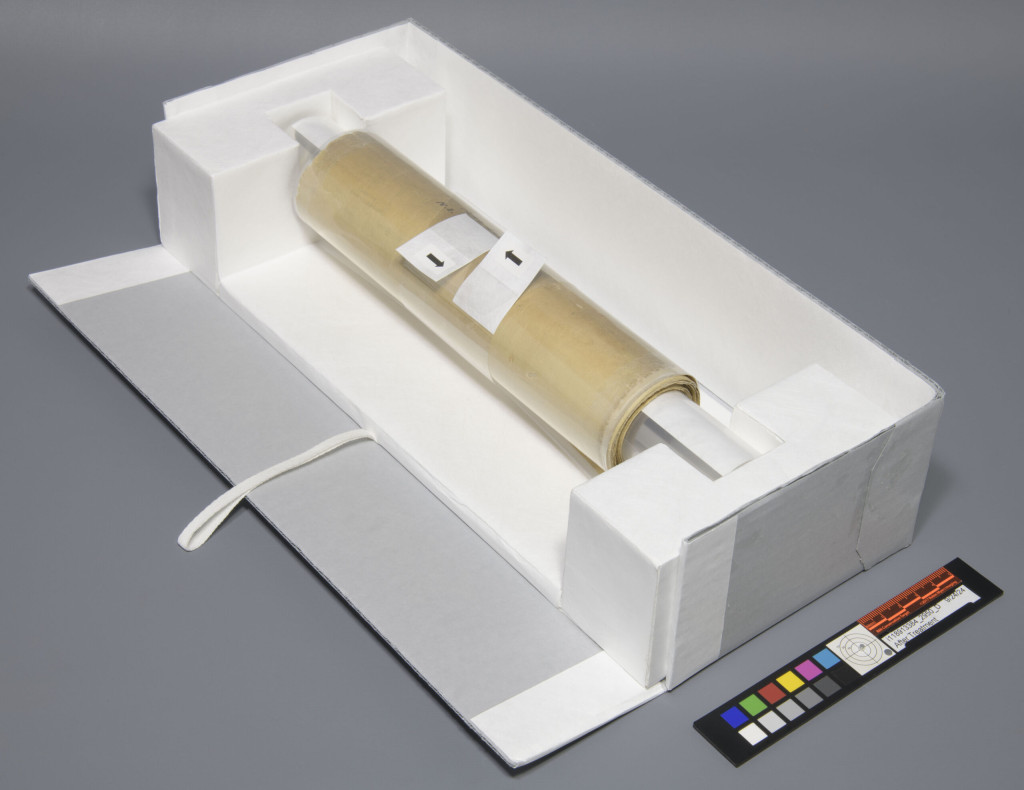
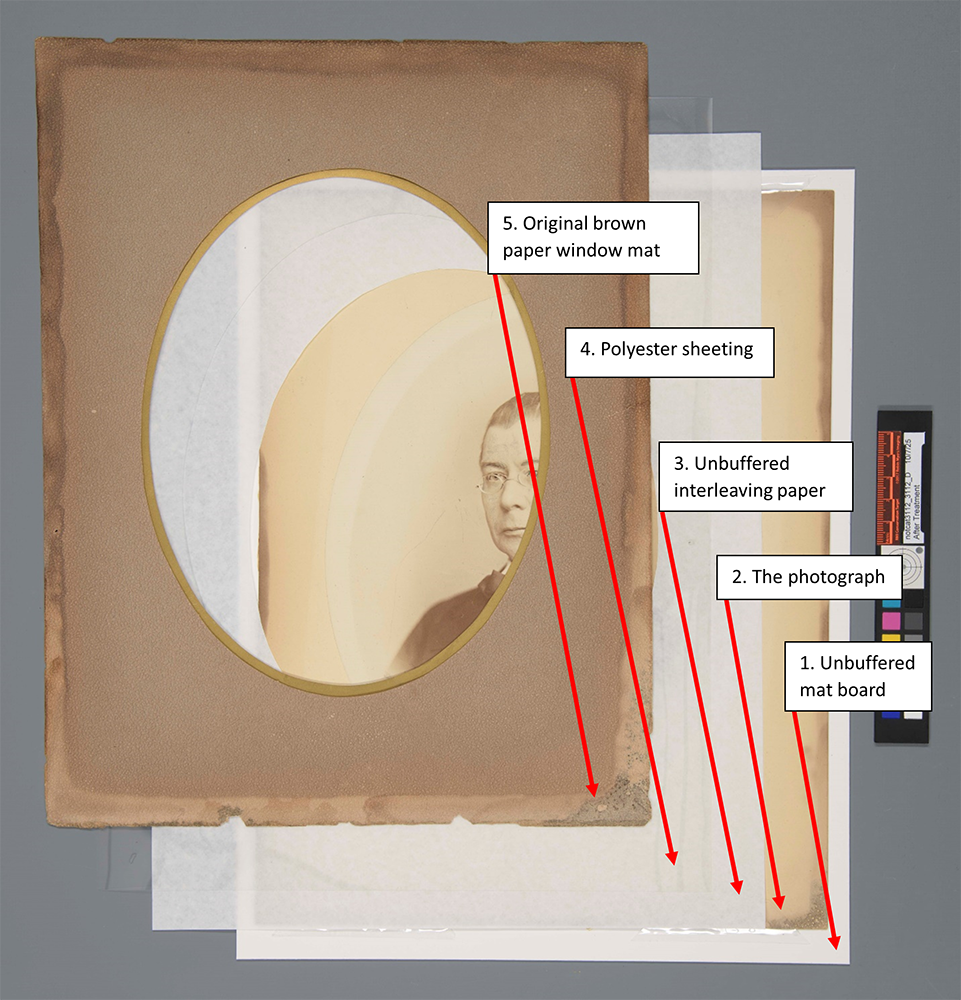
The Package
We wanted to store both the photograph and its original brown paper window mat together inside of the paper cradle, but the acidity of the brown paper was still a concern. We determined that several protective layers should be included to prevent any acid migration from the brown paper to the photograph. All the layers inside of the paper cradle, affectionately referred to as “the package”, are as follows, starting from the bottom up:
- A piece of mat board to provide rigidity to the package.
- This will prevent any potential bending of the extremely brittle materials which could easily lead to damage. It was cut to be slightly larger than the rest of the package, allowing for small micro movements of the brown paper window mat, hopefully preventing its brittle edges from becoming damaged inside the creases of the cradle.
- The photograph itself.
- The photograph and its original back mat were mounted to the unbuffered mat board piece described in the previous layer using edge strips.
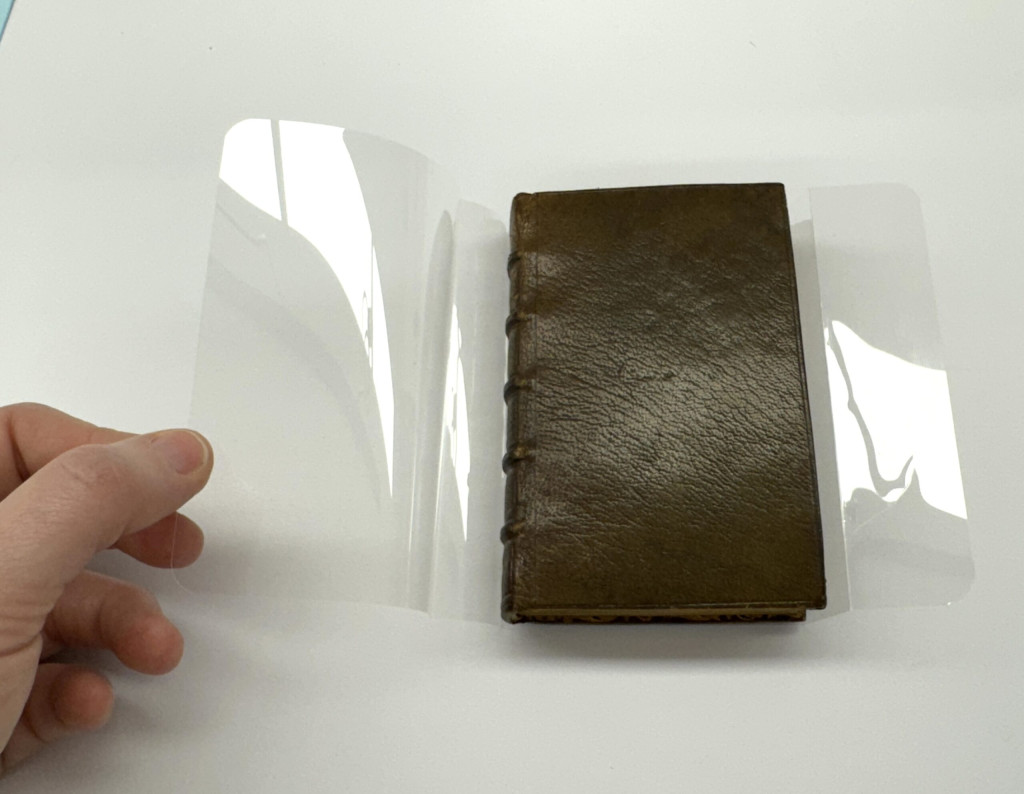
- A piece of unbuffered interleaving paper with an oval-shaped window, allowing the portrait to still be viewed.
- This layer was added because the polyester sheeting mentioned in the next layer has a sharp edge around its window. The interleaving paper protects the emulsion layer of the photograph from scratches and other abrasions.
- A piece of polyester sheeting, also with an oval-shaped window, allowing the portrait to still be viewed.
- This layer adds a bit of rigidity to the original brown paper window mat. This will further help prevent the acidic brown paper from bending and breaking.
- The original brown paper window mat
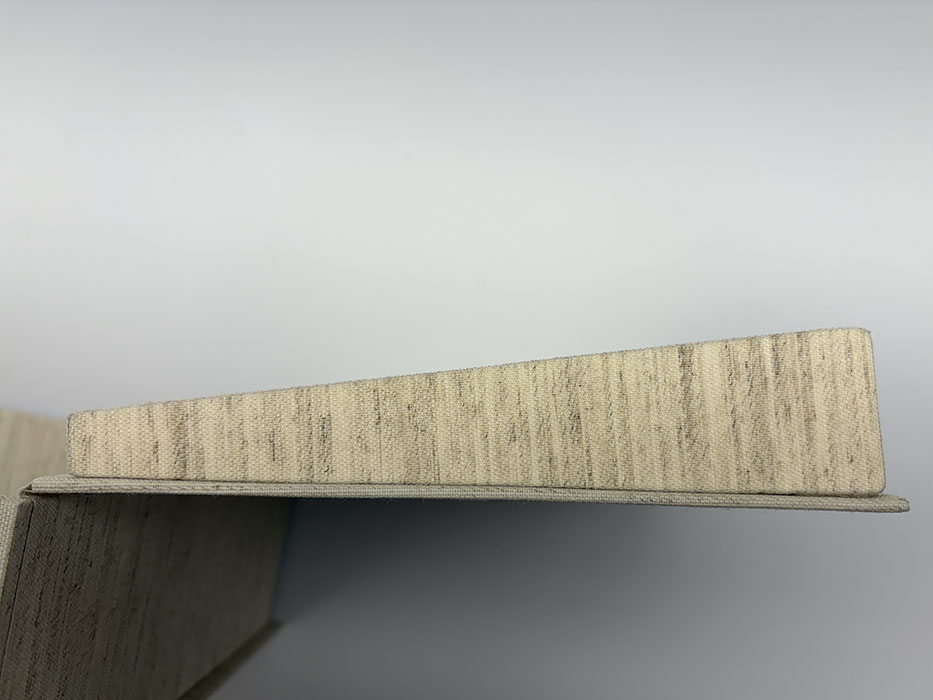
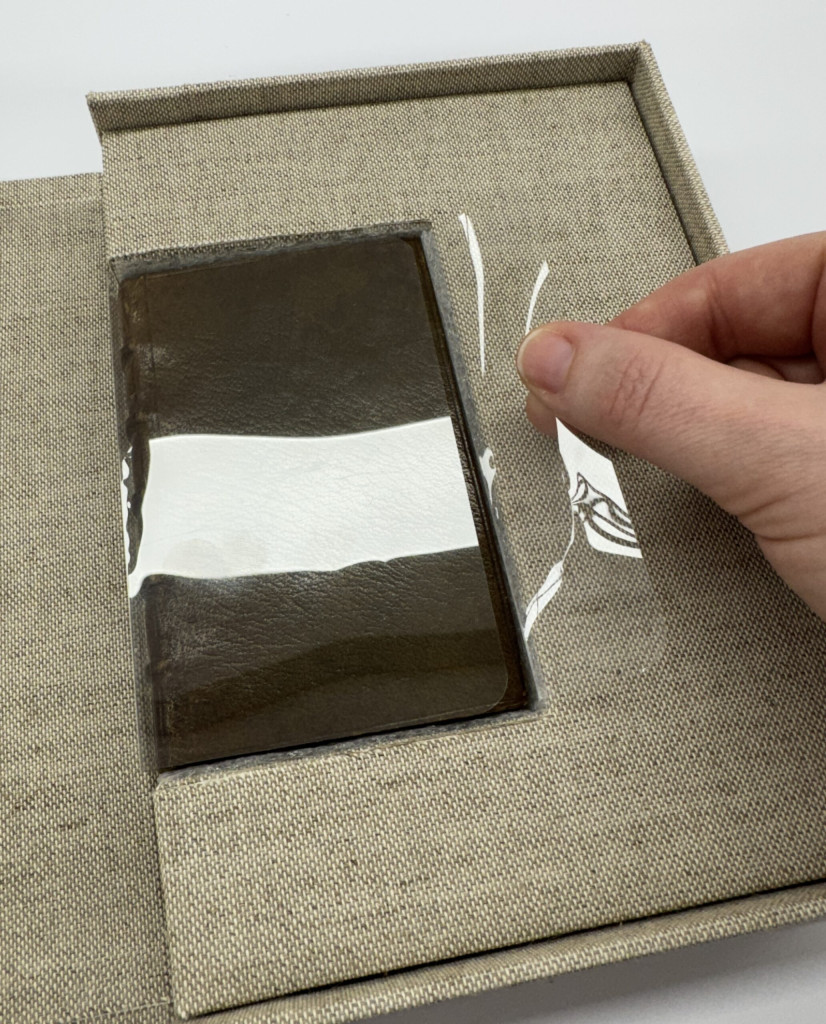
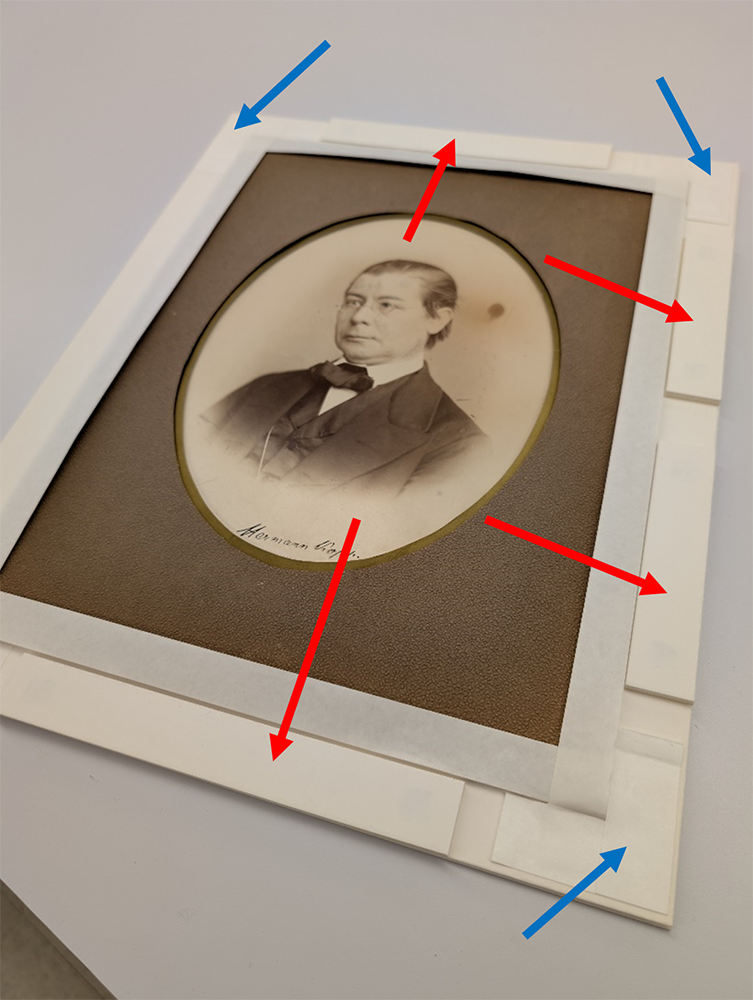
The Sink Mat
Now that the portrait/package was safely inside its paper cradle, I could begin working on the matting system. As is typically the case with any item with a significant amount of thickness, I planned on building a sink mat. However, when constructing this sink mat, I had to allocate space around the perimeter of the object when attaching the mat board spacers so that the paper cradle’s tabs had space to be taped down; this contrasts with a typical sink mat in which the spacers are typically placed around the entire perimeter.
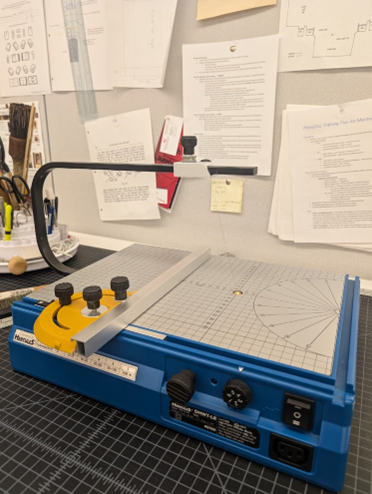
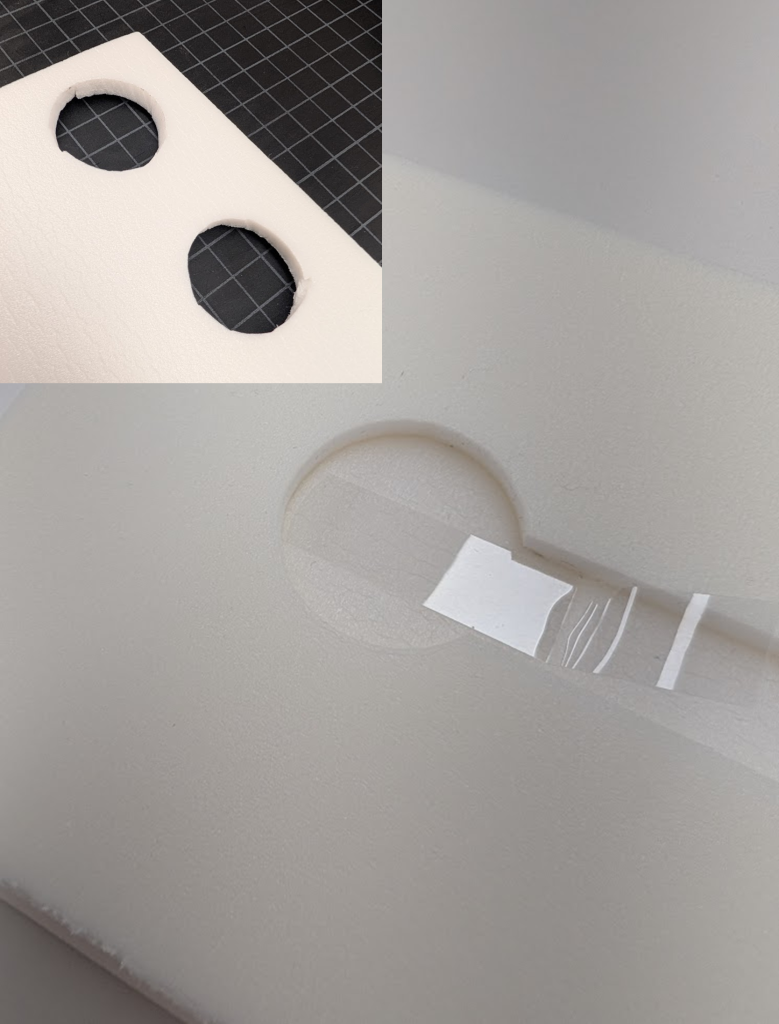
Cutting Ovals
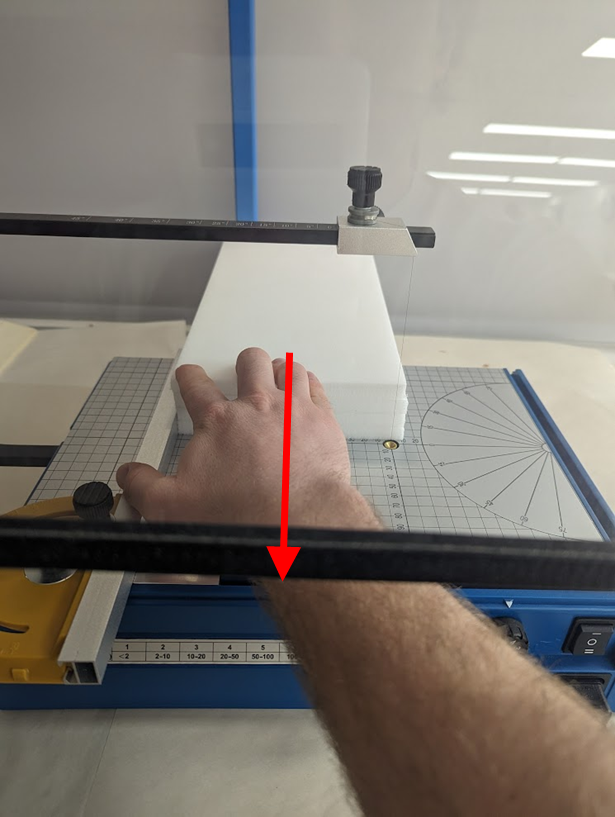
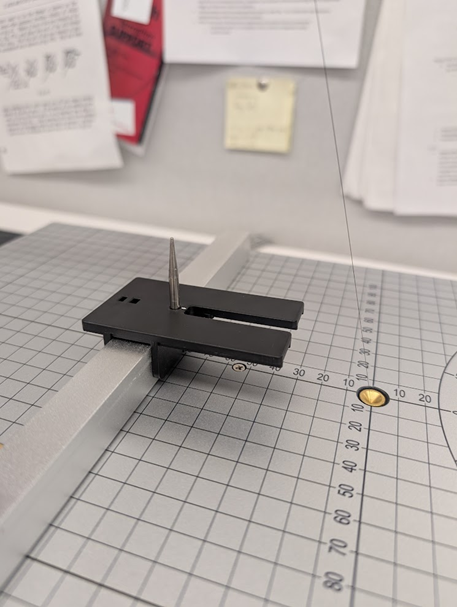
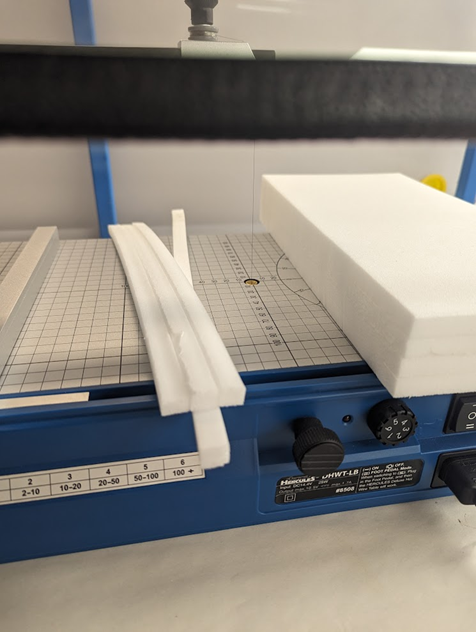
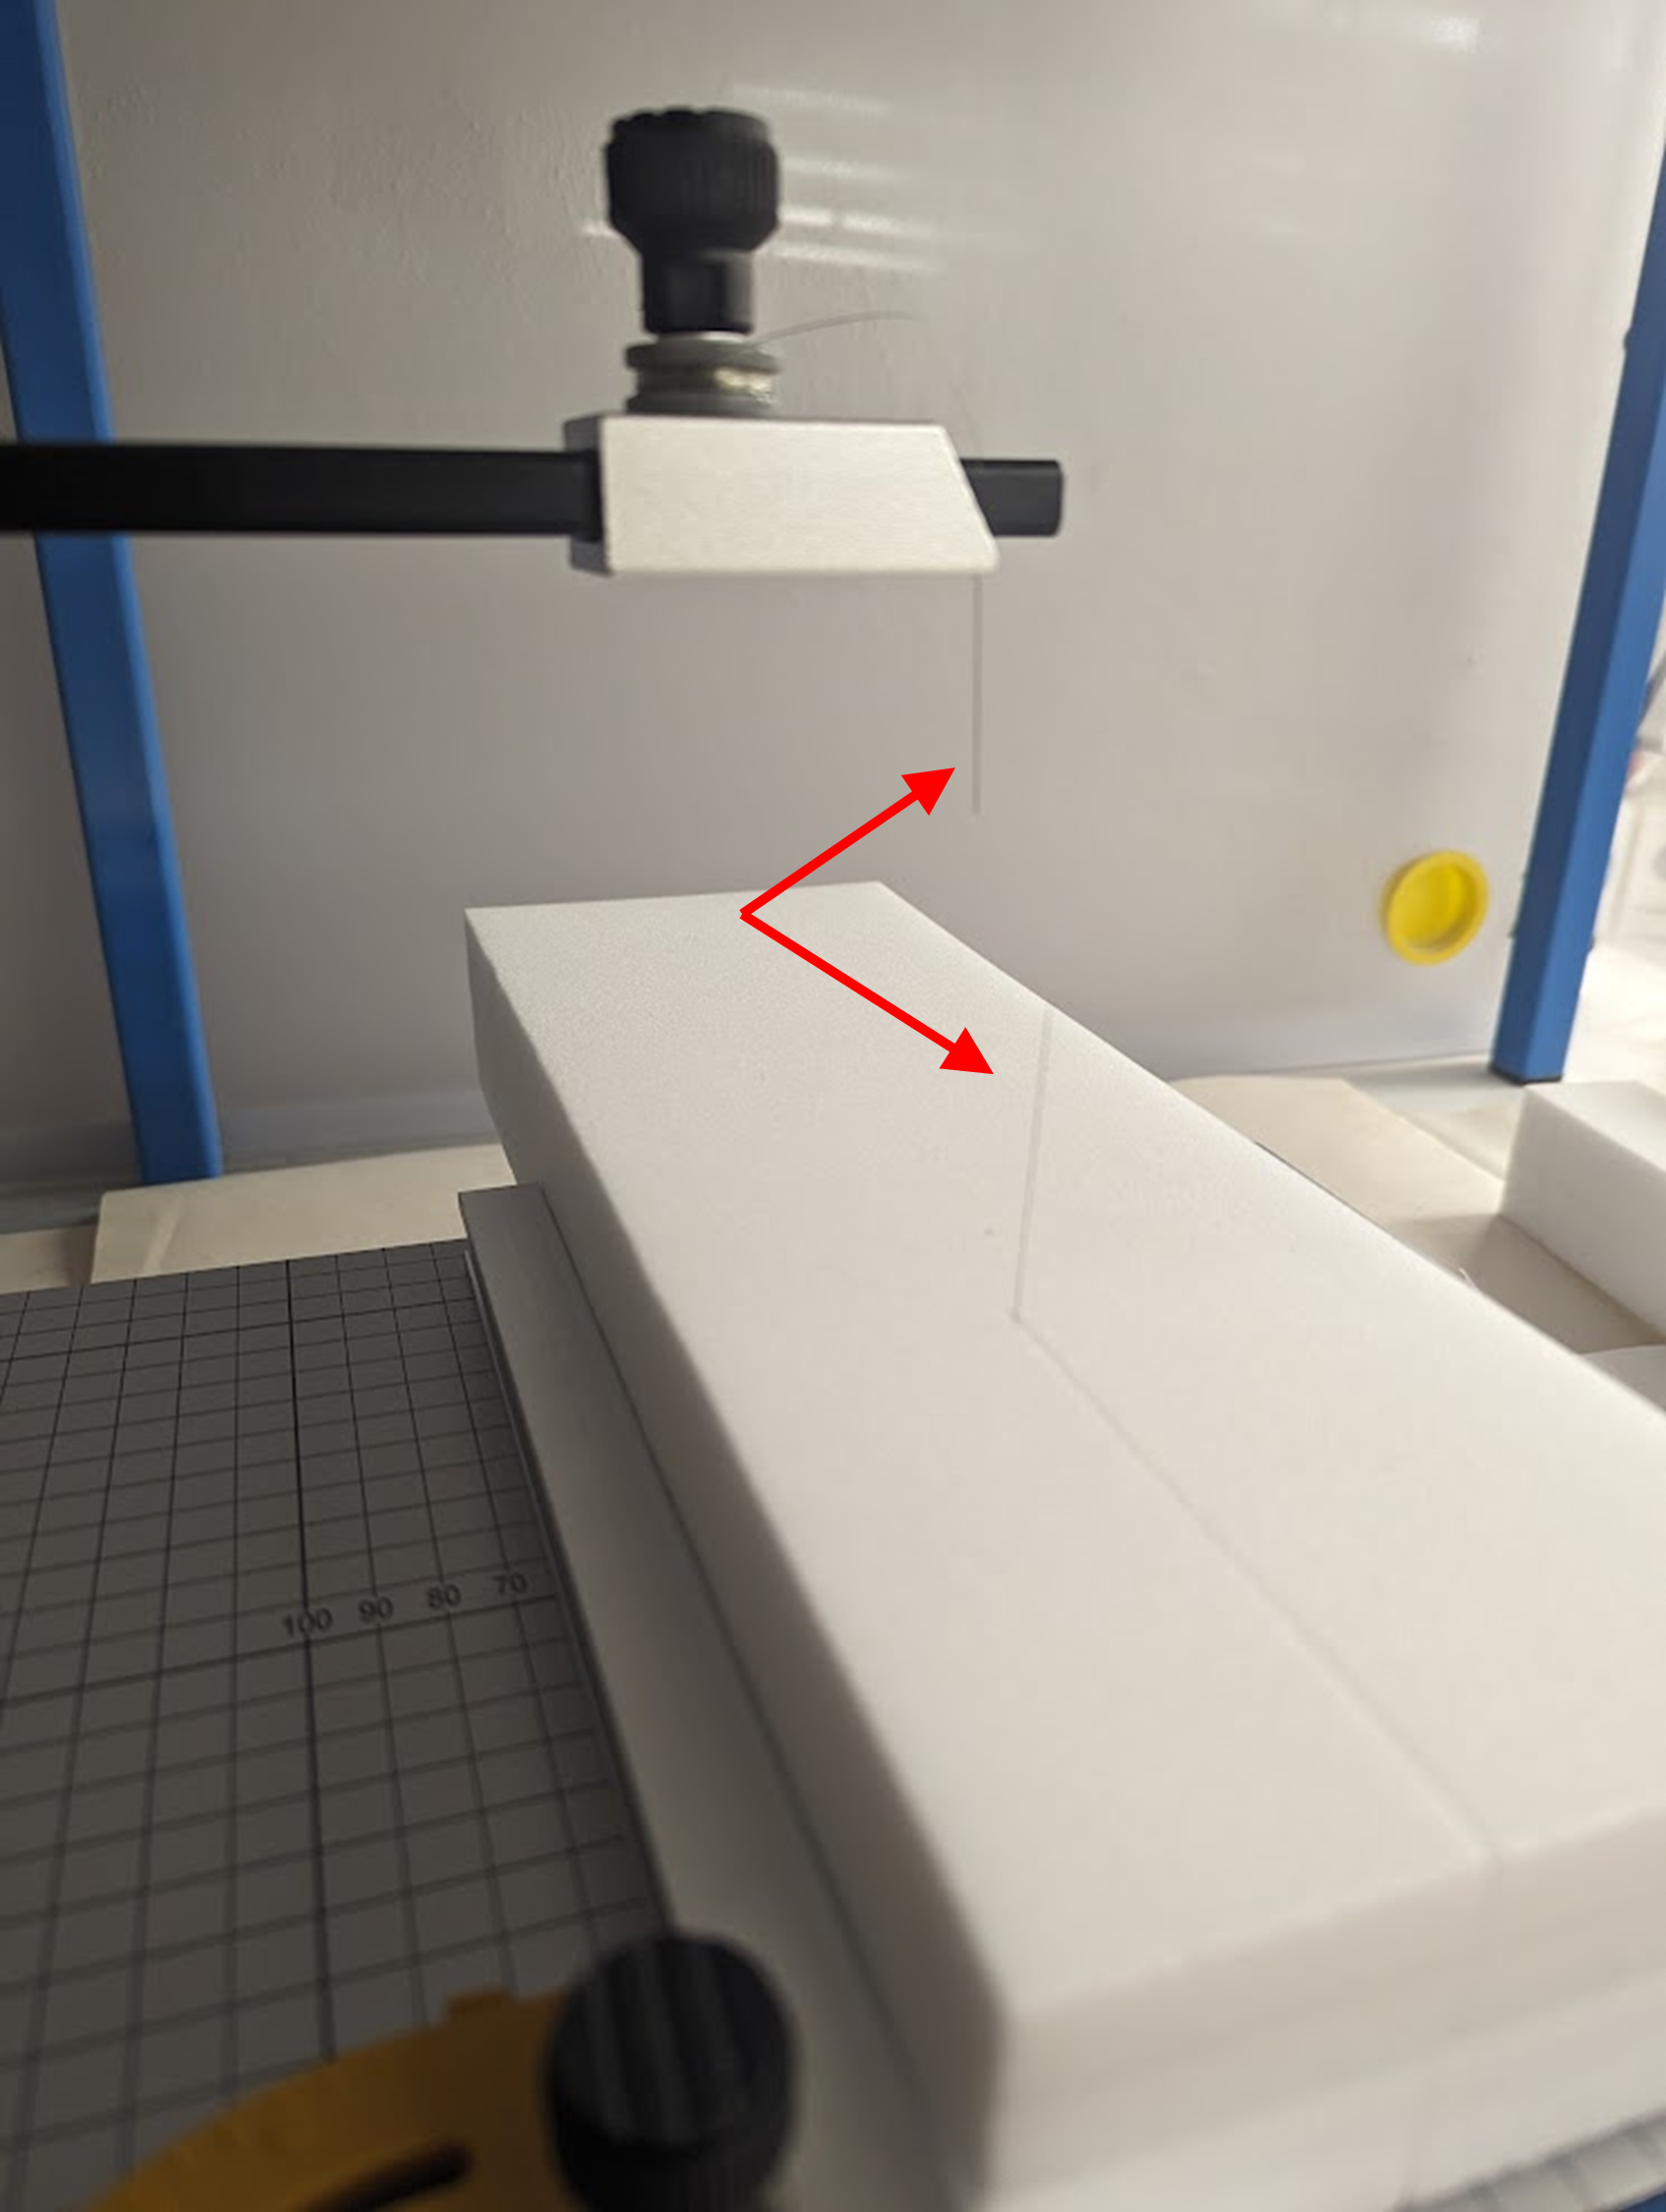
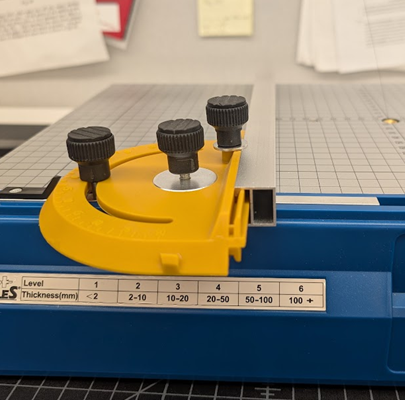
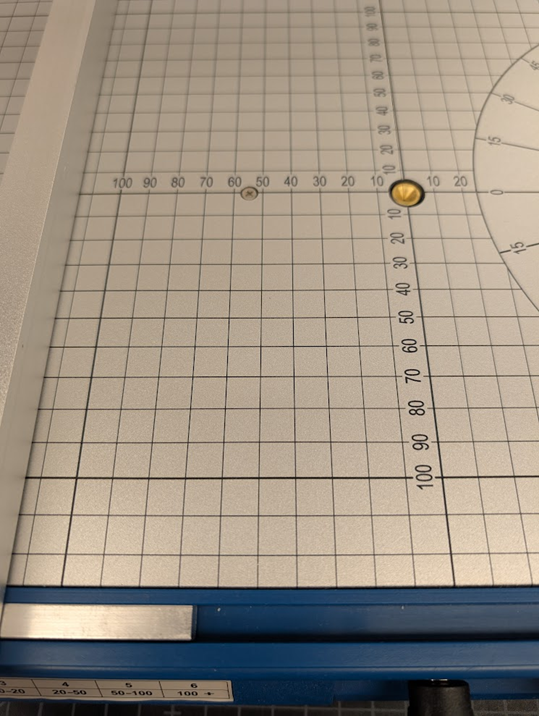
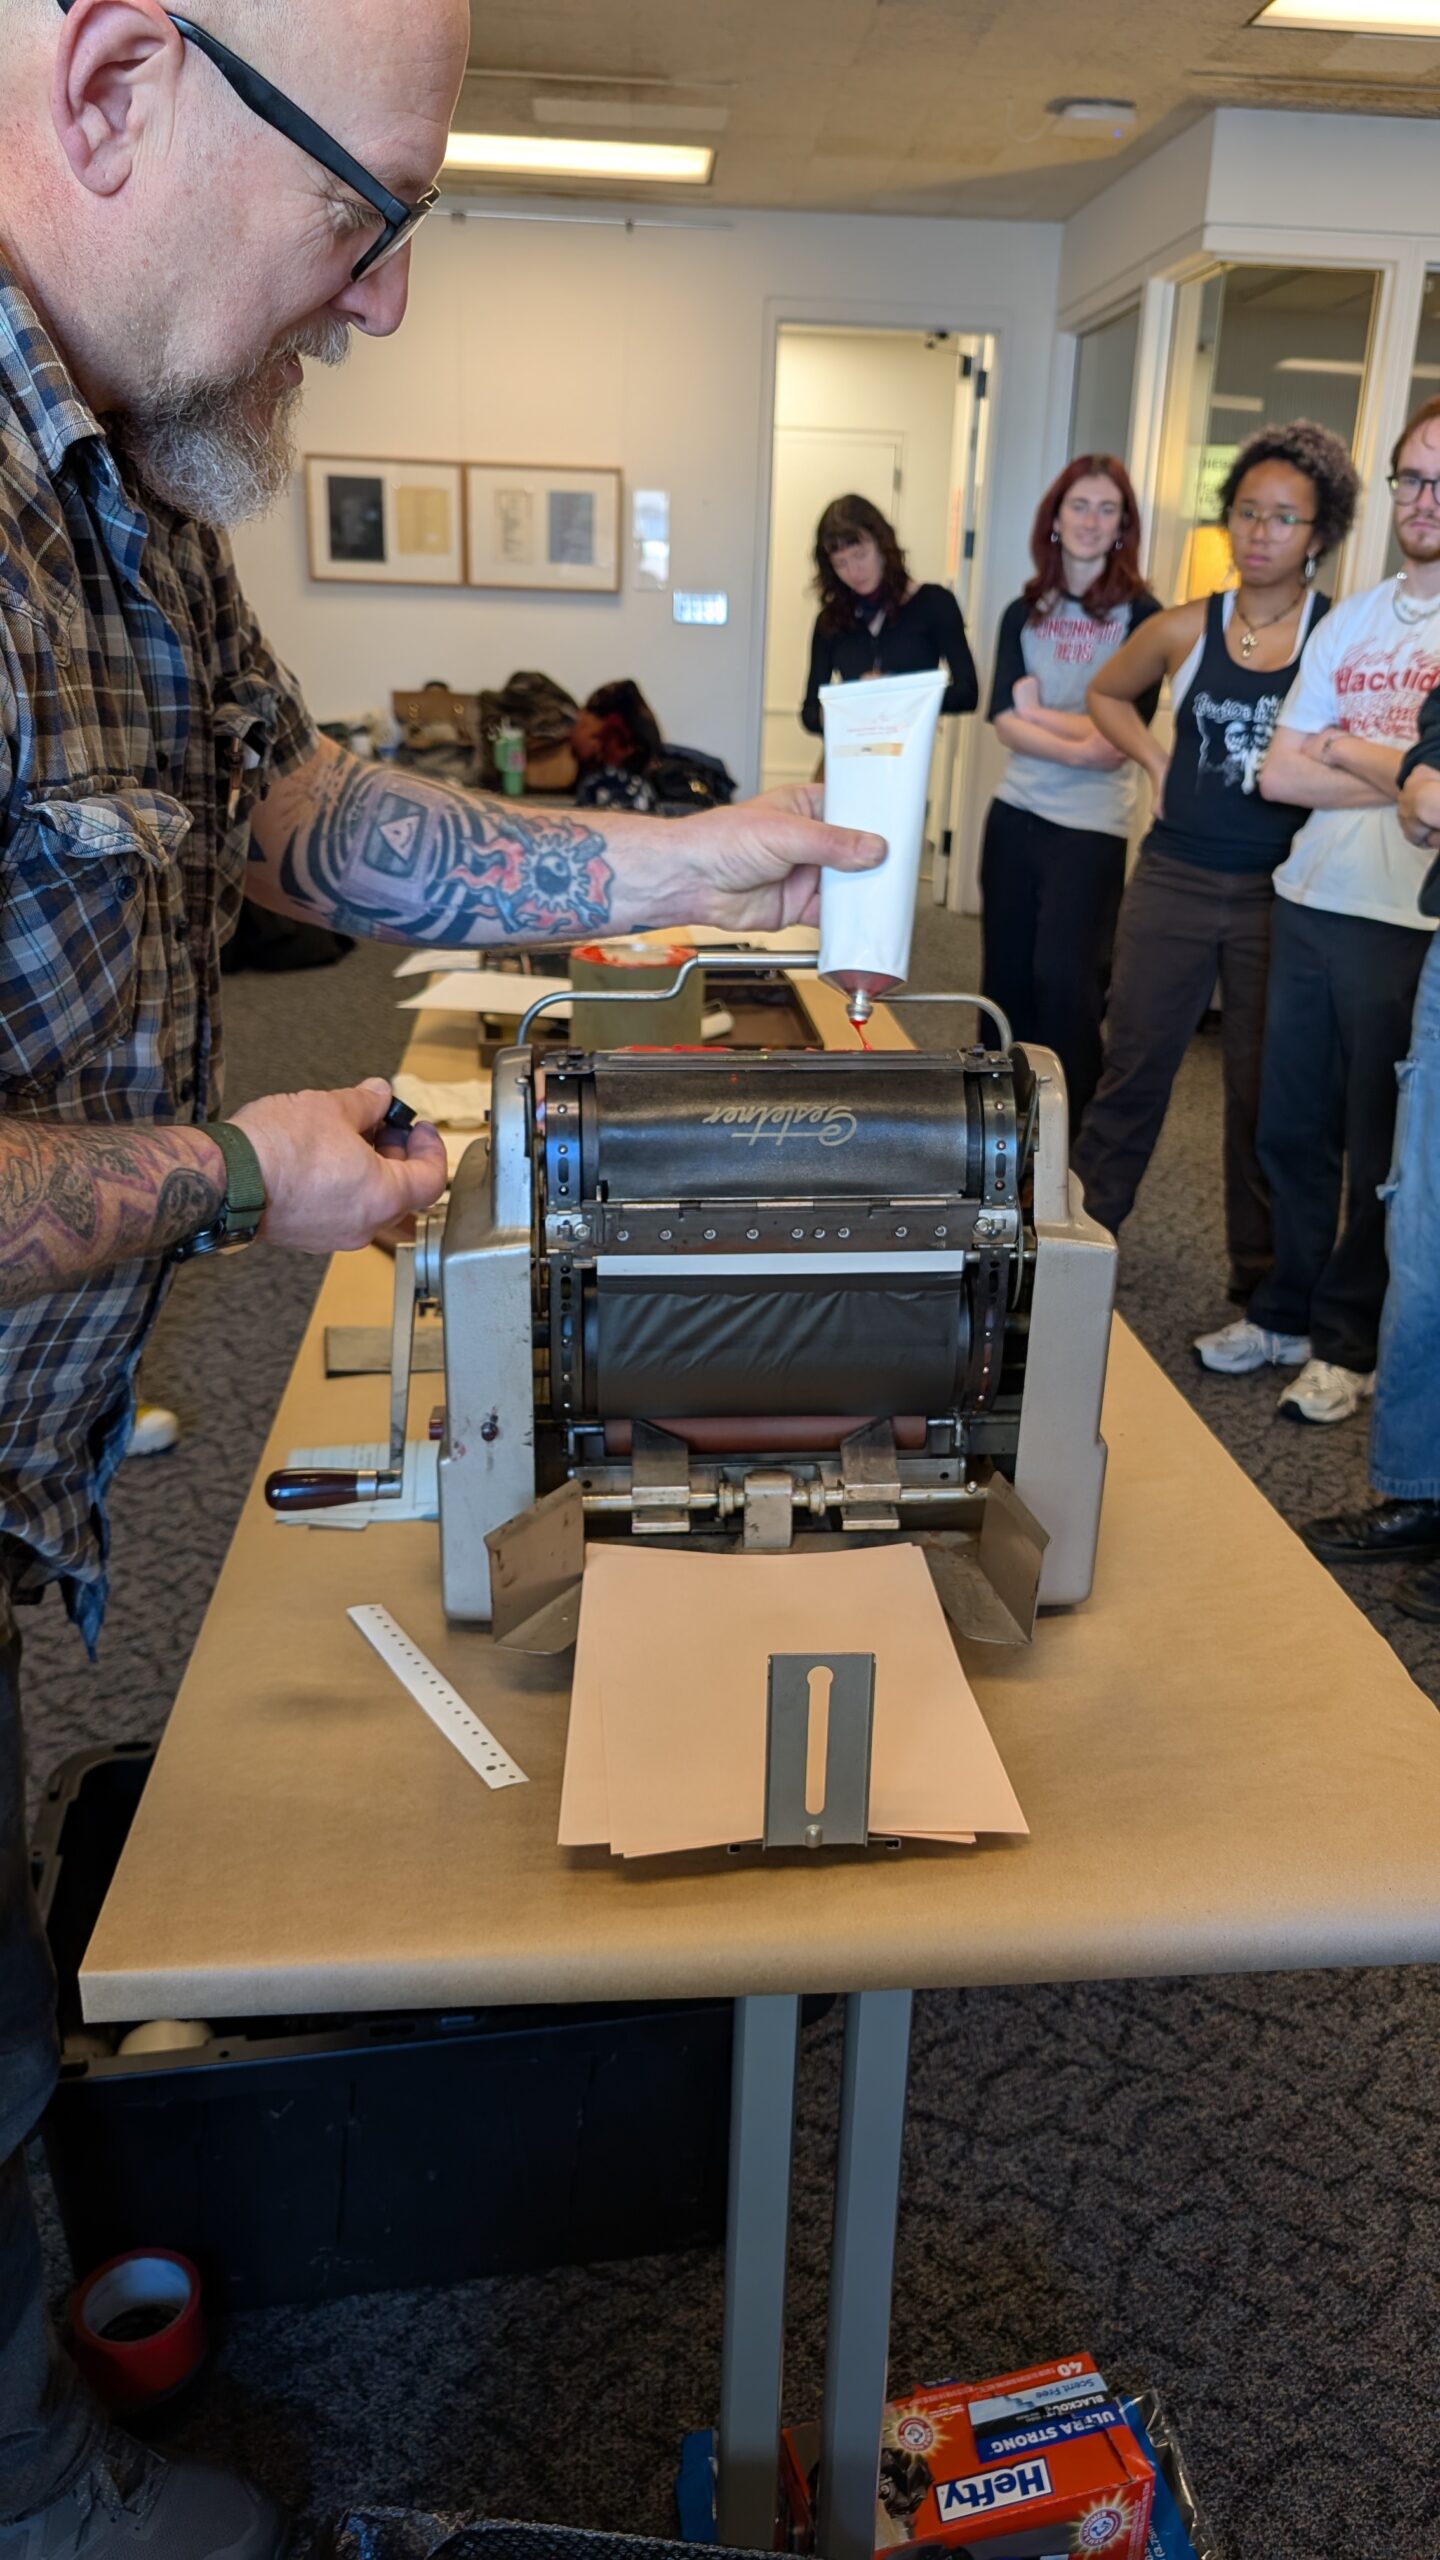
For the new window of the matting system, Assistant Conservator Catarina Figueirinhas suggested that cutting the window in the shape of an oval would be appropriate as the original brown paper window mat had an oval window, and the photograph itself was oval-shaped. After a bit of research, we discovered a moderately-priced (around $65 on Amazon) adjustable mat board cutter that could cut ovals at a beveled angle: The Model 201 Oval & Circle Mat Cutter from Logan.
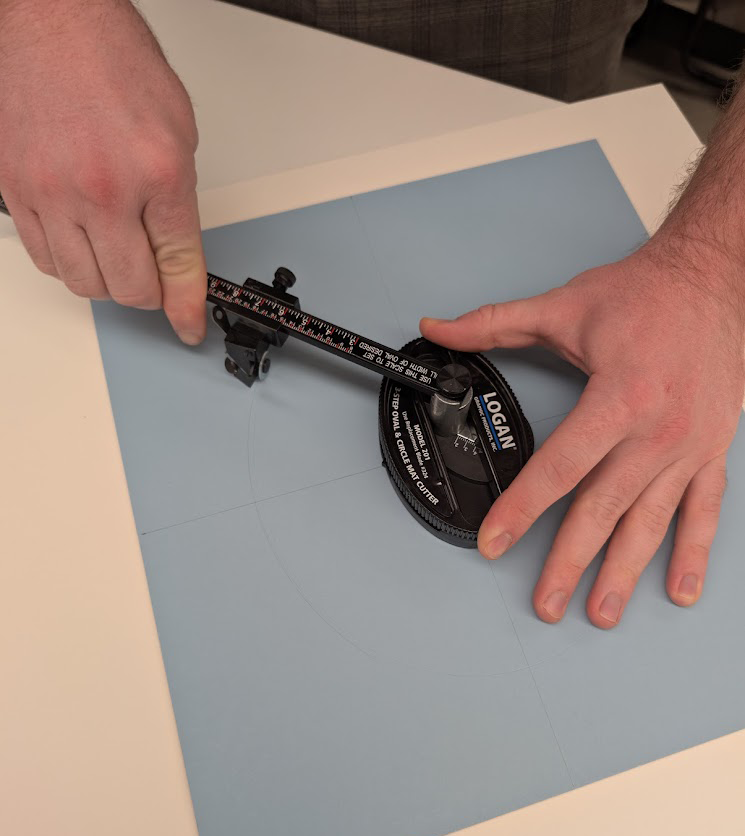
After watching a very helpful YouTube video I felt ready to give the Logan Cutter a try. I found it easy to use after a little practice and was satisfied with the results.
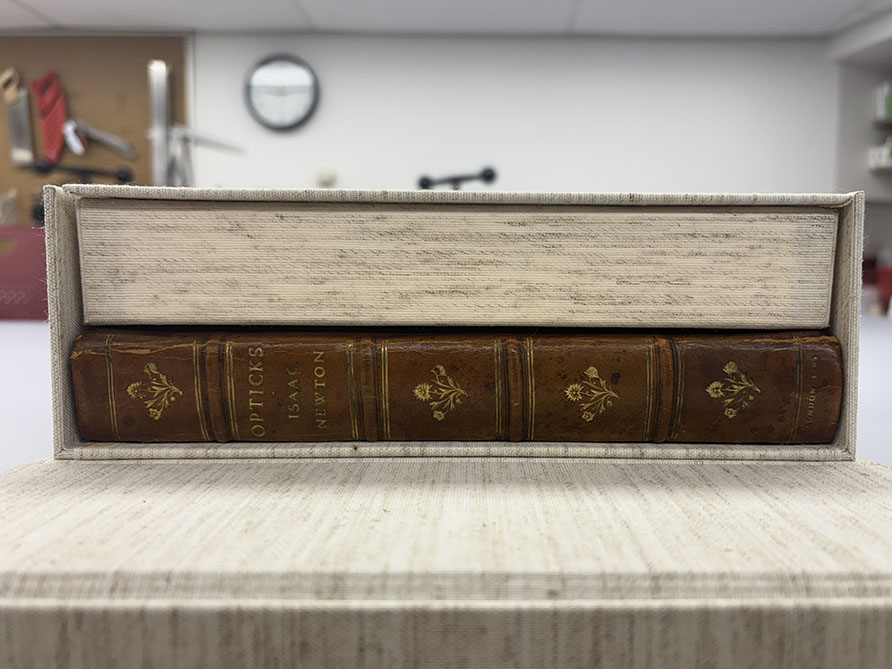
The Completed Matting System
Once the sink mat spacers were added, the paper cradle was taped down, and the oval window mat was attached, the matting system was complete.
seen inside its mounted paper cradle.
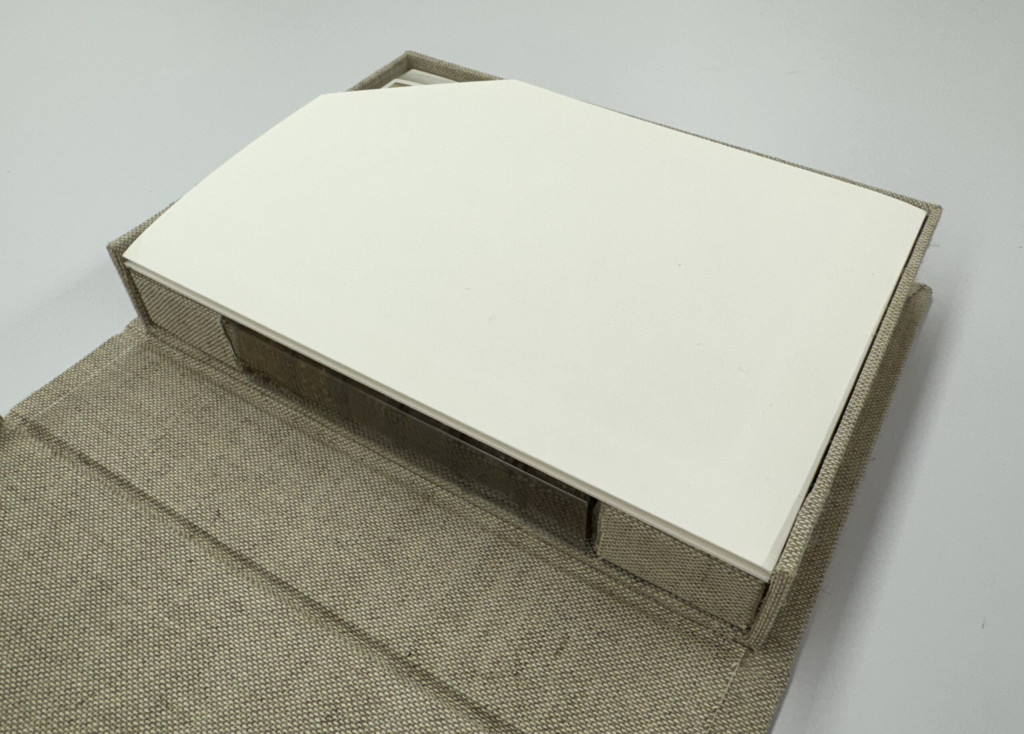
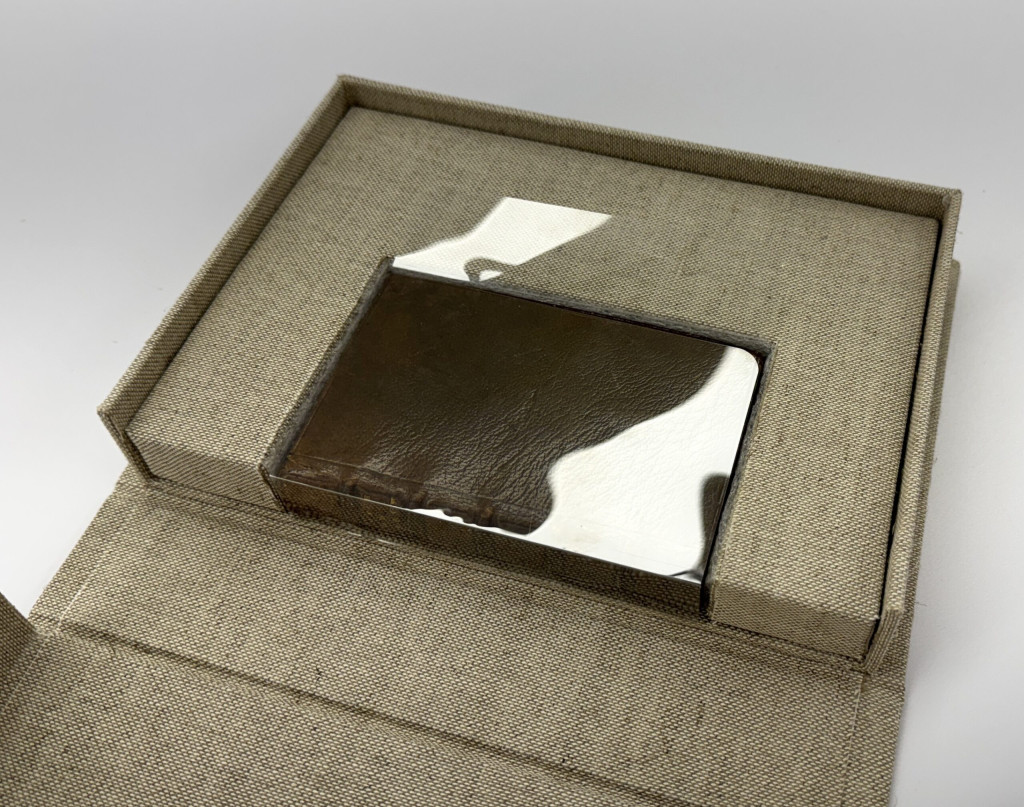
As Kopp’s actual portrait inside its new matting system is not going to be displayed any time soon, I also constructed a tuxedo box for long-term storage. This will help further protect it, especially from any light damage.
Final Thoughts
The display surrogates, however, can currently be viewed and contemplated by anyone who tours the Oesper Collection. Sometimes I like to think about how the work that we do at the Preservation Lab is becoming part of the items we treat’s history. Just as this portrait has crossed an ocean, passed through the hands of Thomas Norton, Ralph Oesper and multiple UC Chemistry department heads, hung on that cold wall of the chemistry library in 521 Rieveschl Hall for countless aspiring chemists to contemplate, and finally ended up under the stewardship of current UC librarian Mark Chalmers, it was briefly in my possession. As stewards of cultural heritage, we can only hope that the time these objects spend in our care can extend these histories indefinitely.
Historical References Provided by Mark Chalmers:
- Cincinnati Chemists: Assorted Papers on the History of the Cincinnati Chemical Community by William B. Jensen
- Robert Bunsen’s Sweet Tooth: Bunseniana in the Oesper Collections by William B. Jensen
Image and Other Supplemental References:
- 2010 Art Conservator Tech Notes by Jennifer McGlinchy
- Logan Oval & Circle Cutter video
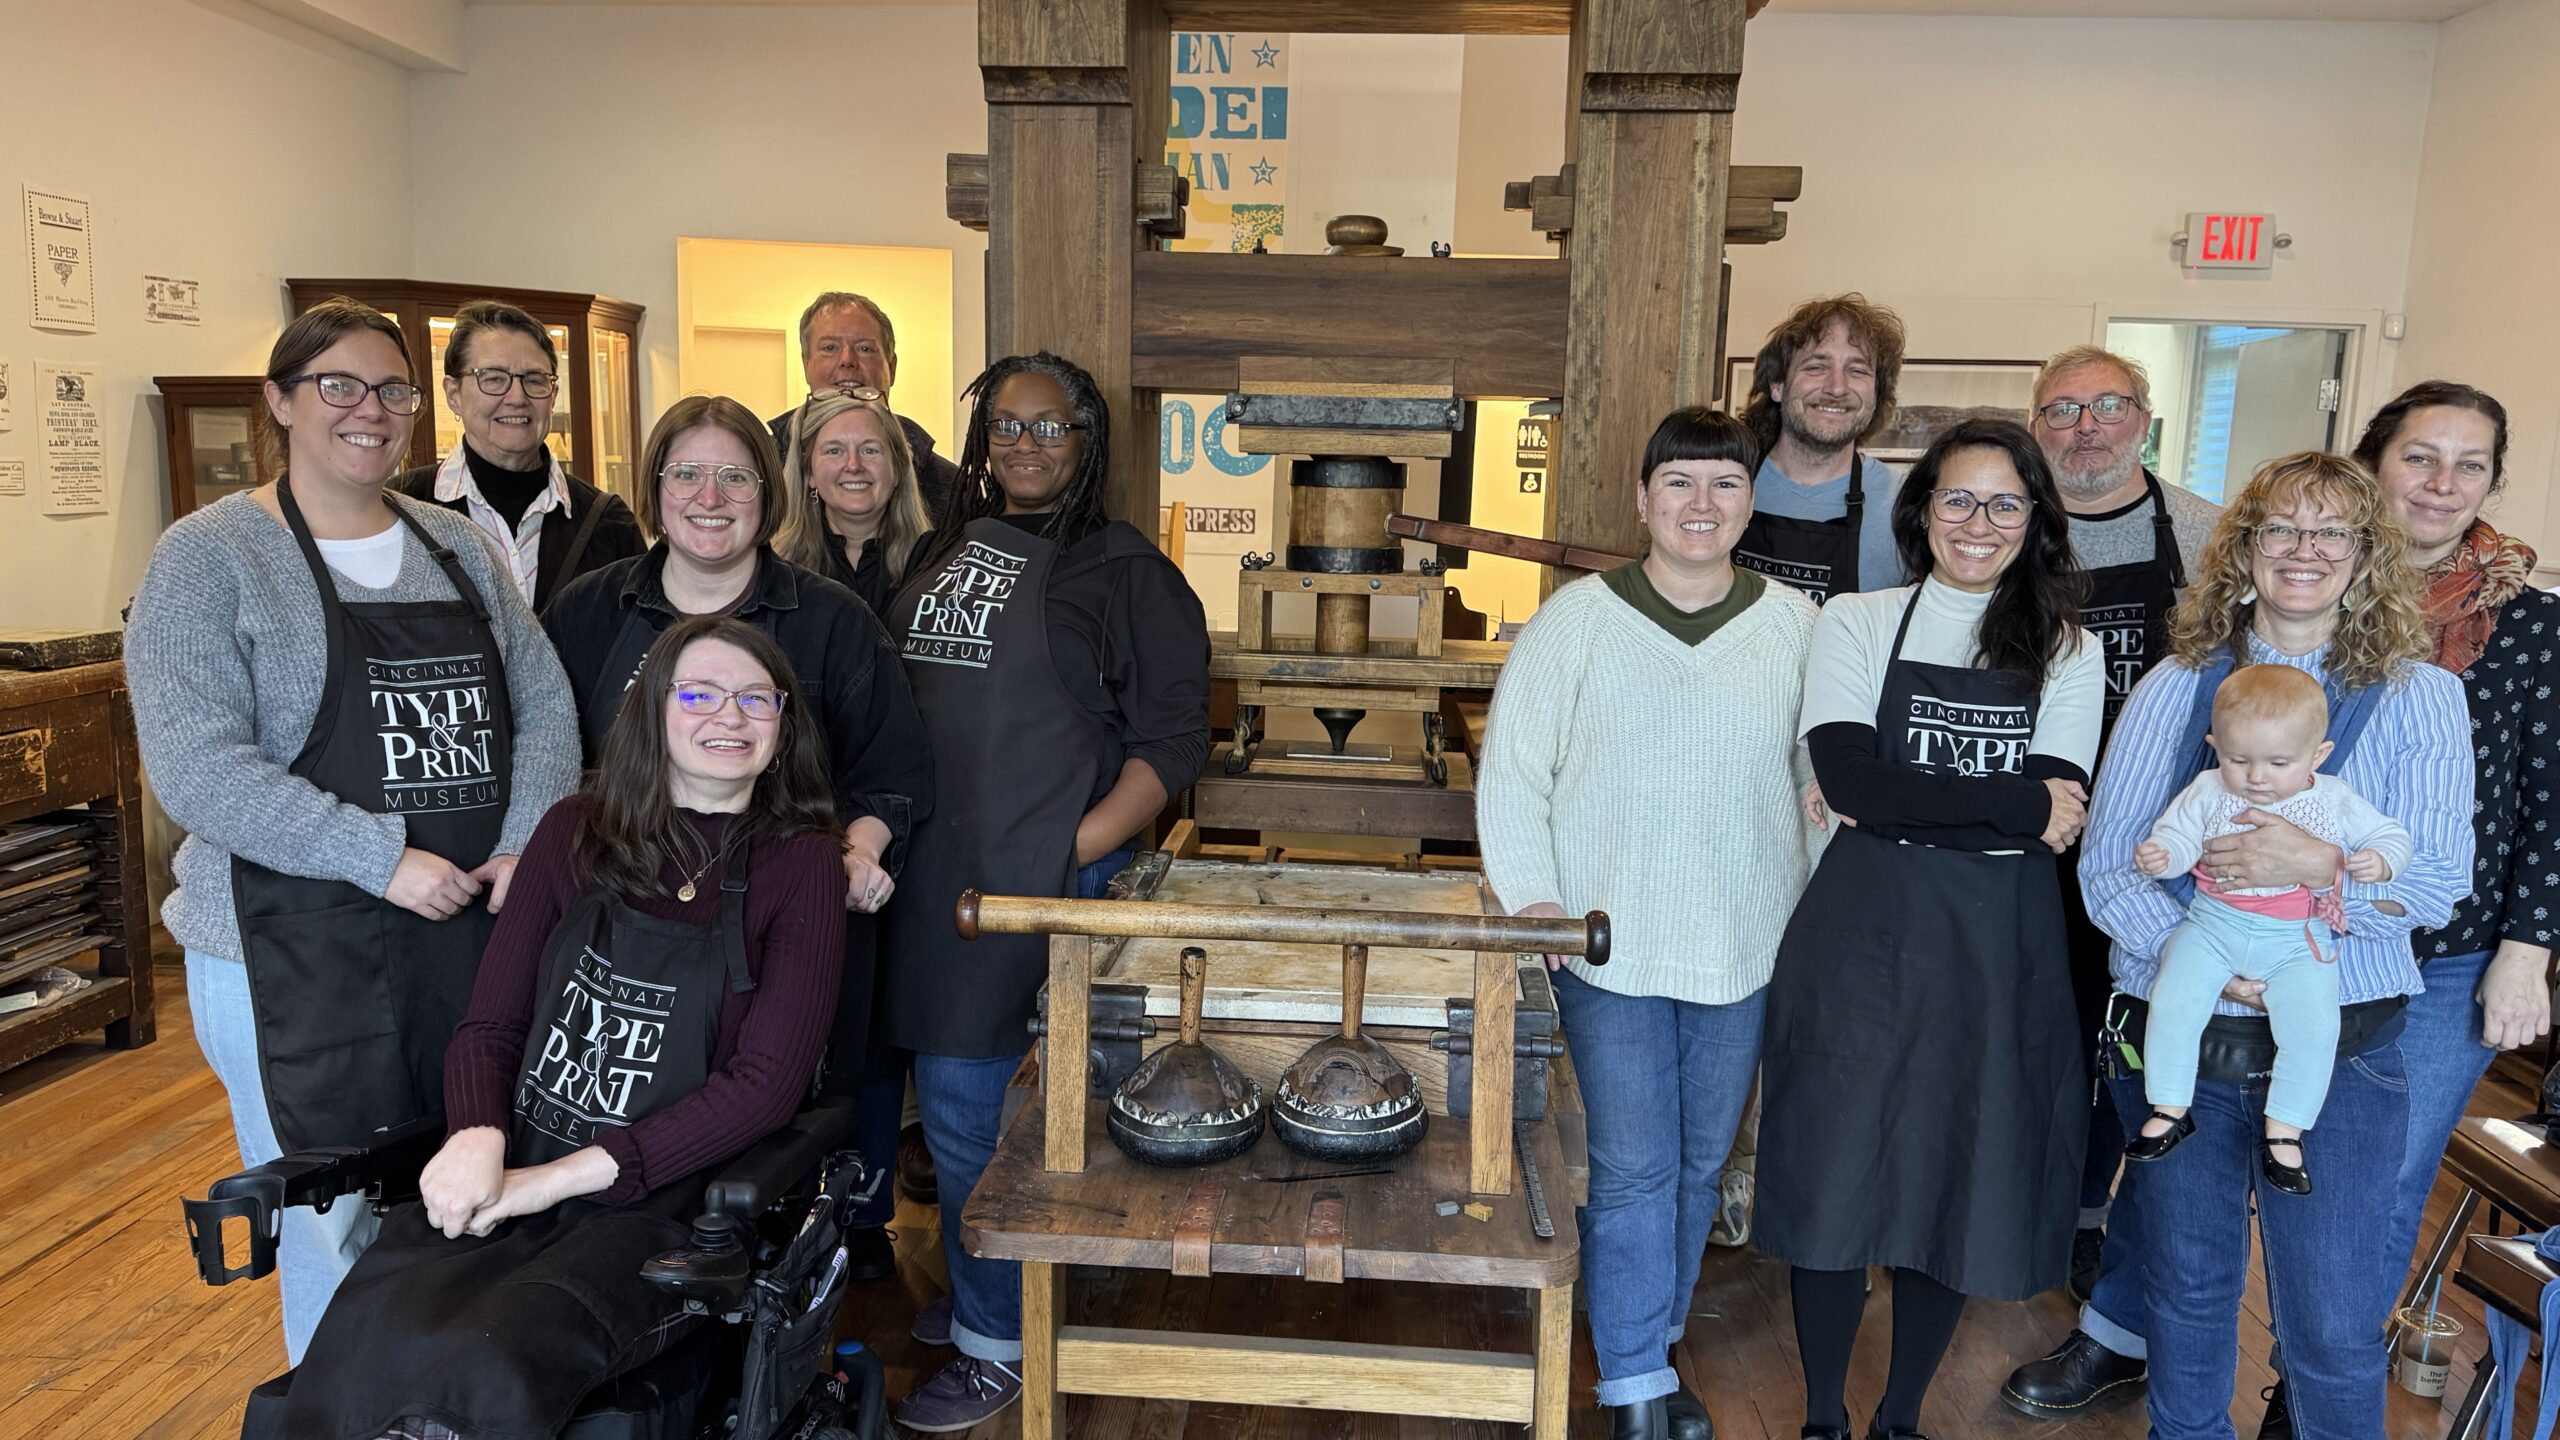
Matt McCoy — Senior Library Conservation Specialist